Picture in Picture video making is a handy feature that allows you to watch a video in a resizable window while doing other things on your device. Having been born in the age of dynamic visual storytelling, Picture in Picture (PIP) video editing has quickly become an essential item in the arsenal of creators. Picture-in-picture video editing can take your content from average to advanced in minutes. We will go through how PiP works on Android, iOS, Windows, and Mac, and with this guide, you'll learn how to enable PiP and edit PiP videos.
In this article
Part 1: What Is Picture-In-Picture Video (PiP) And Its Benefits?
The video editing effect of Picture-in-picture (PIP) is the display of one video over another in a more petite frame. Usually, the leading video plays while the more petite video (overlay) alongside it is played simultaneously in one corner of the screen. It is used mainly in tutorials, gaming videos, reactions, interviews, or any situation where the main content is to run. In contrast, the more petite video gives additional commentary or visuals.
Benefits:
- Enhanced Engagement: With PIP, viewers won't be distracted by a second visual element, as both constitute one combined image.
- Multitasking: Viewers can stream different kinds of content simultaneously. For instance, they can have the video in the background along with a tutorial or presentation overlay.
- Improved Communication: Pipe, or PIP, works well for tutorials, presentations, and online meetings as it shows the main content and the speaker's face, making it easy to convey messages.
- Professional Aesthetic: PIP is used to enhance videos during interviews, product demos, and many news broadcasts by adding additional angles or context.
- Efficient Use of Screen Space: PIP (Picture in Picture) overlays videos, maximizing screen real estate, especially for multi-information pieces that don't need a two-screen view.
The benefits are such that PIP is a great tool for providing dynamic and engaging video content. We will use Filmora as an example tool for detailed guides on how to make picture in picture videos on all devices.
Filmora for Mobile Filmora for Mobile Filmora for Mobile Filmora for Mobile Filmora for Mobile
Edit Videos on Your Mobile Phone with 1-Click!
- • Powerful Brand New AI Features.
- • User-friendly video editing for beginners.
- • Full-featured video editing for professional.
Part 2: Picture-in-Picture Video on Mobile (Step-by-step Guide)
How to Make PIP Video On Android
Wondershare Filmora for mobile lets you easily create a Picture in Picture (PIP) video on your Android device. In this guide, you'll learn how to overlay one video or image on another using Filmora's user interface.
Step1Install the Filmora App
You can download the Filmora app from the Google Play Store. Once you've installed it on your Android device, open the app.
Step2Start a New Project
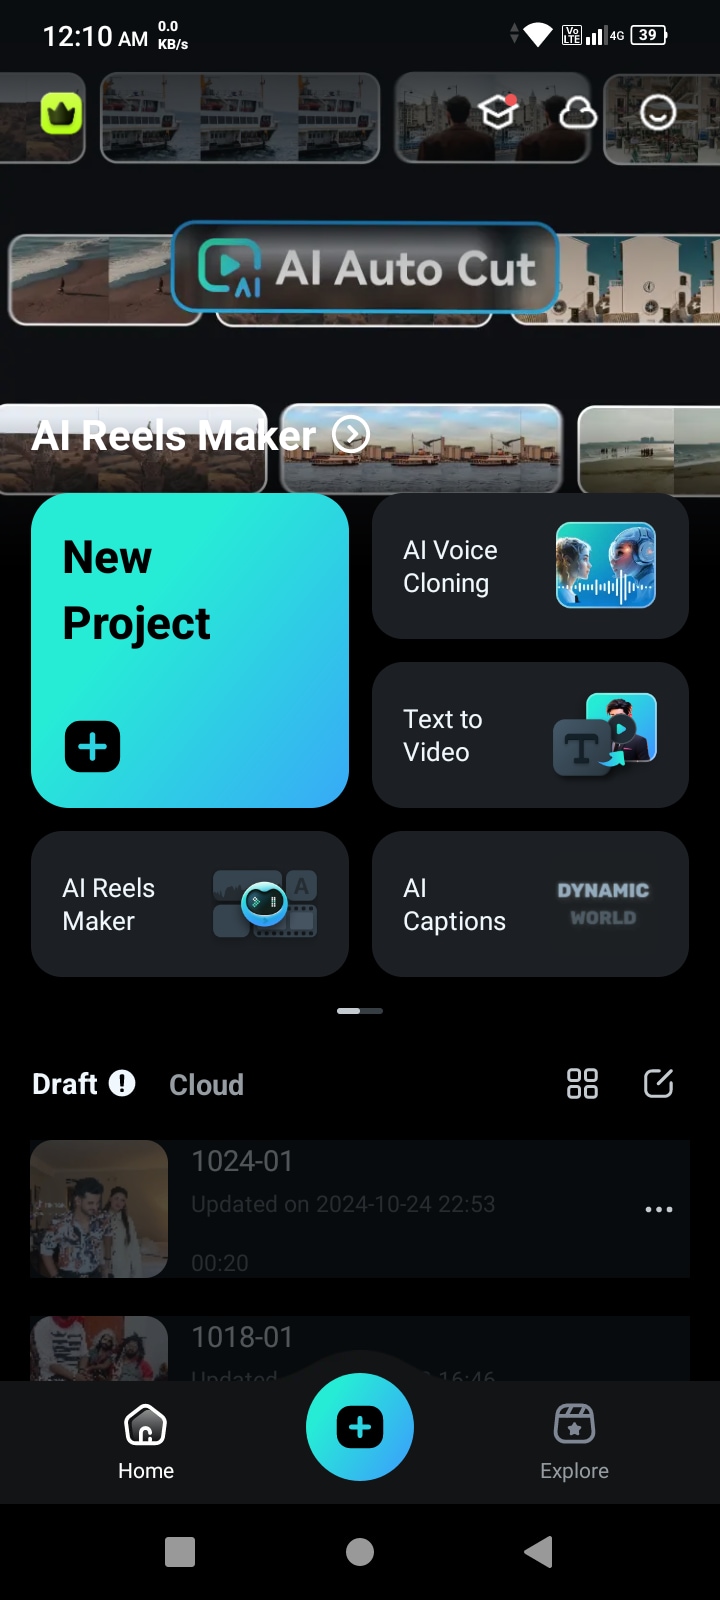
Head to the app and tap Create New Video. Choose the main video from your gallery or other media sources to use as your background.
Step3Add Media
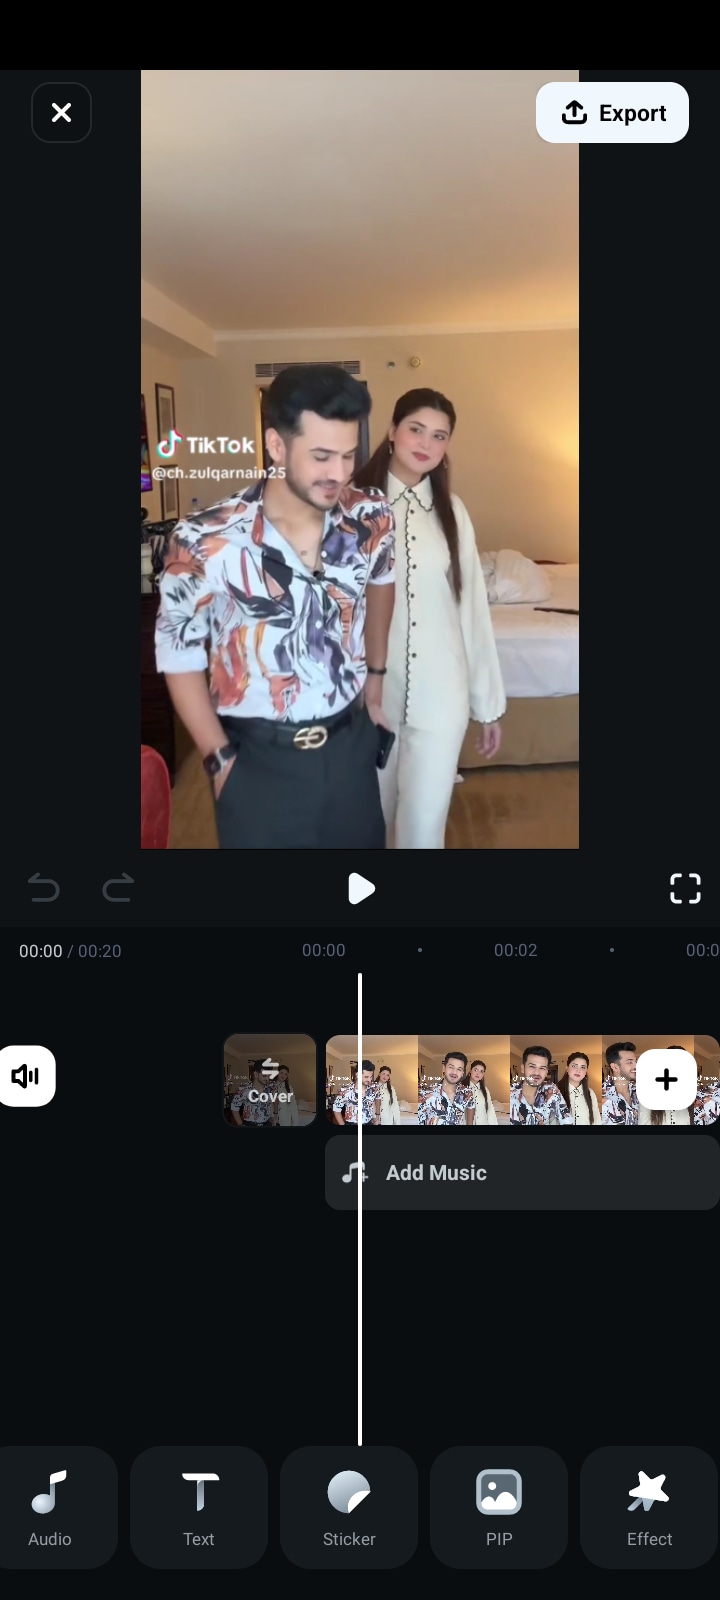
Once your main video has loaded, tap on Overlay or PIP in the editing menu.
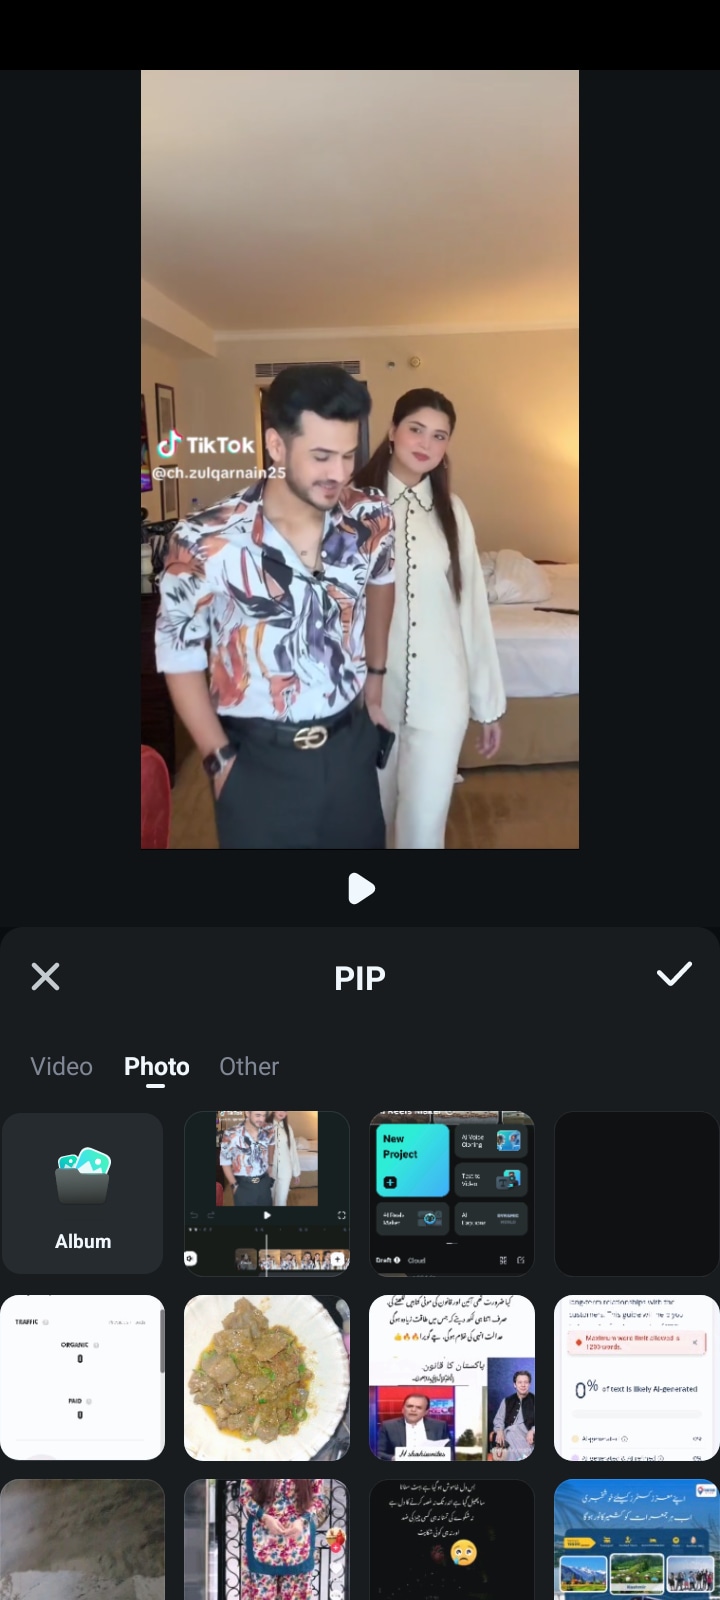
Then, choose the secondary video or image you want overlaid (small, windowed on top of the main video).
Step4Adjust the PIP Window
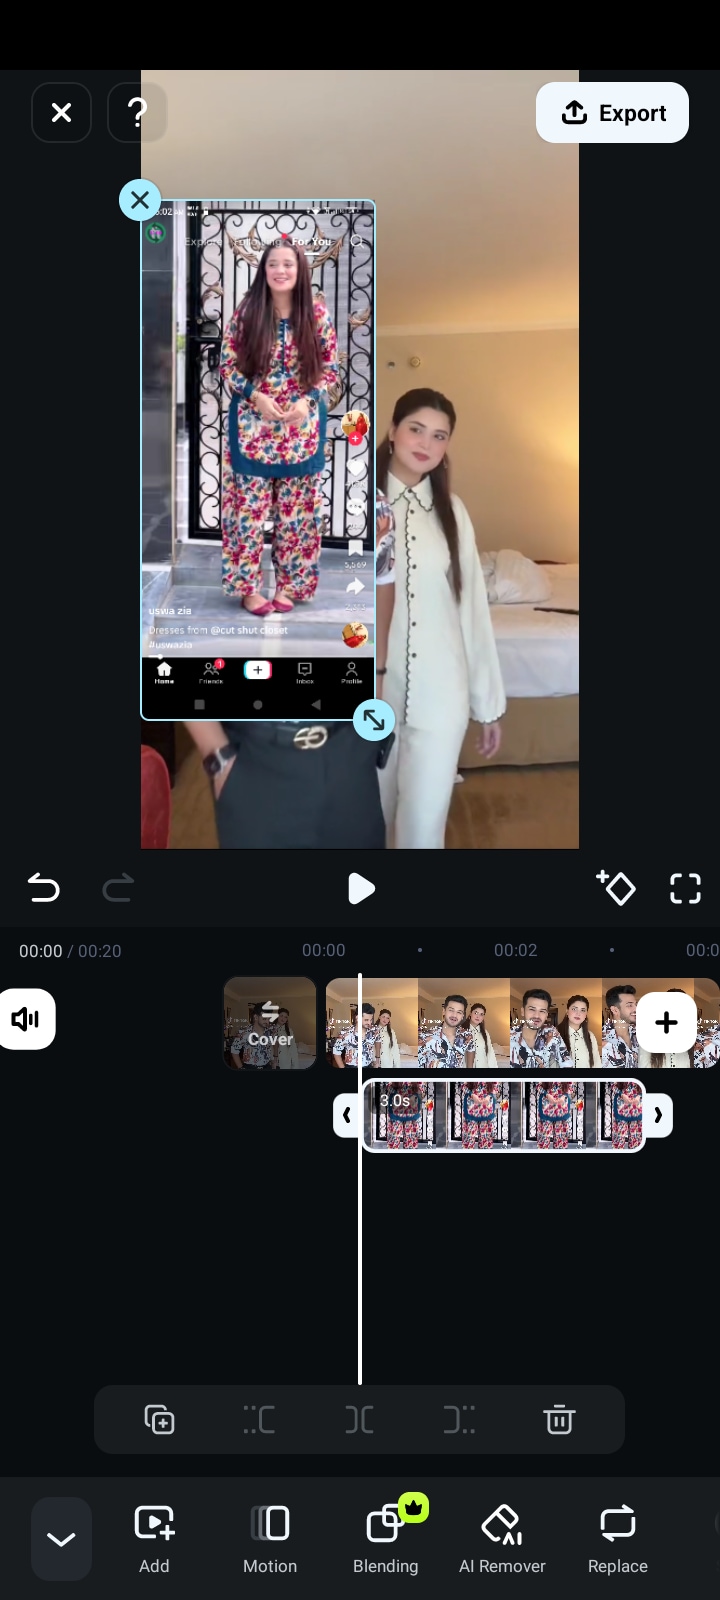
When adding the secondary media, you can resize, position, and change the length of the PIP window. Pinch gestures will help you resize it and pull it to your best spot on the screen without interfering with the main video content.
Step5Customize the PIP Effects
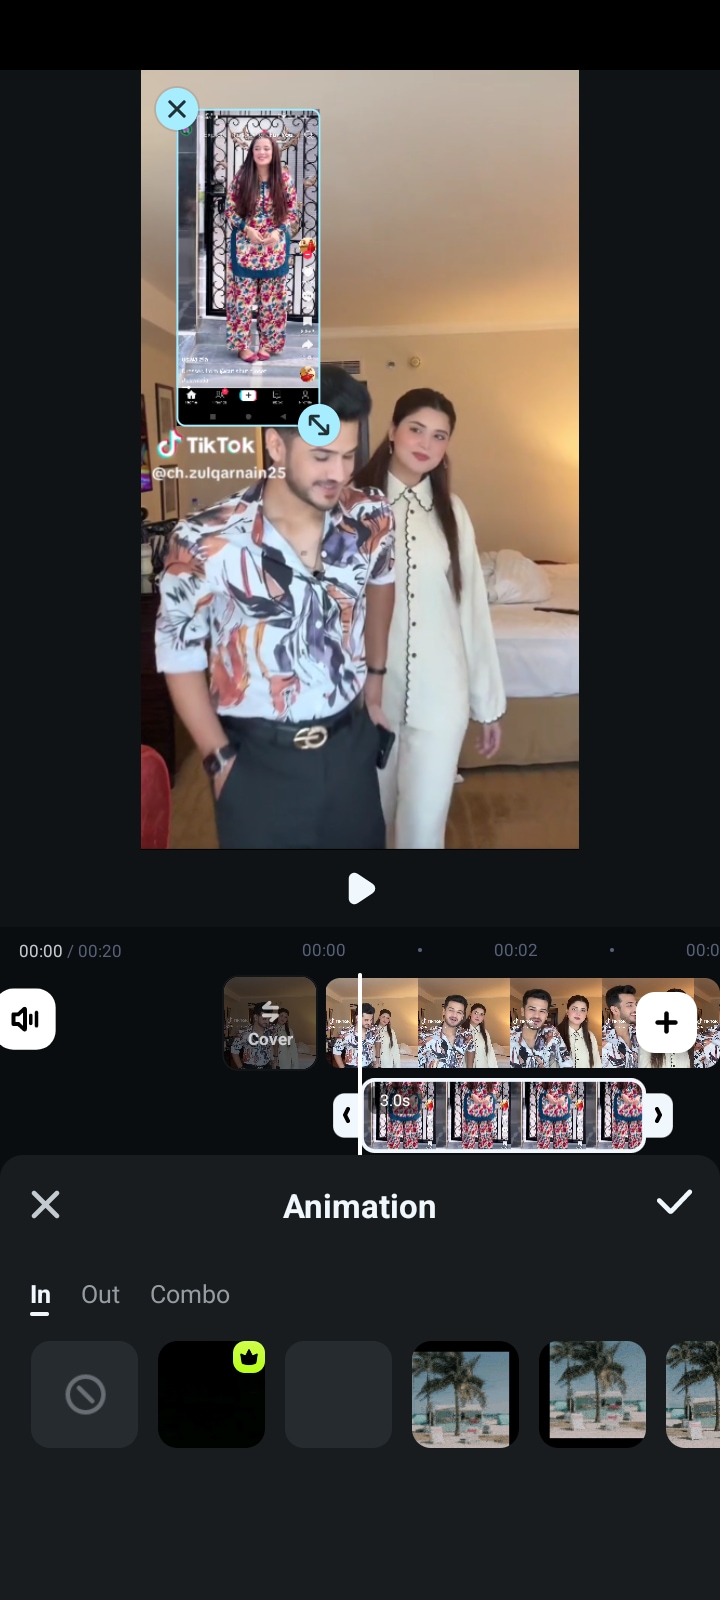
With Filmora, you can also customize your PIP window further. You can give it a border or change its shape, add animations to make it move smoothly during transitions, or tweak the opacity or filters to make the PIP window merge into the main video as if it were not there.
Step6Preview Your PIP Video
When everything is adjusted, hit Preview to see your video. If you don't like the position and effects of the PIP window, you can manually adjust them by returning to editing tools.
Step7Export and Save your PIP Video
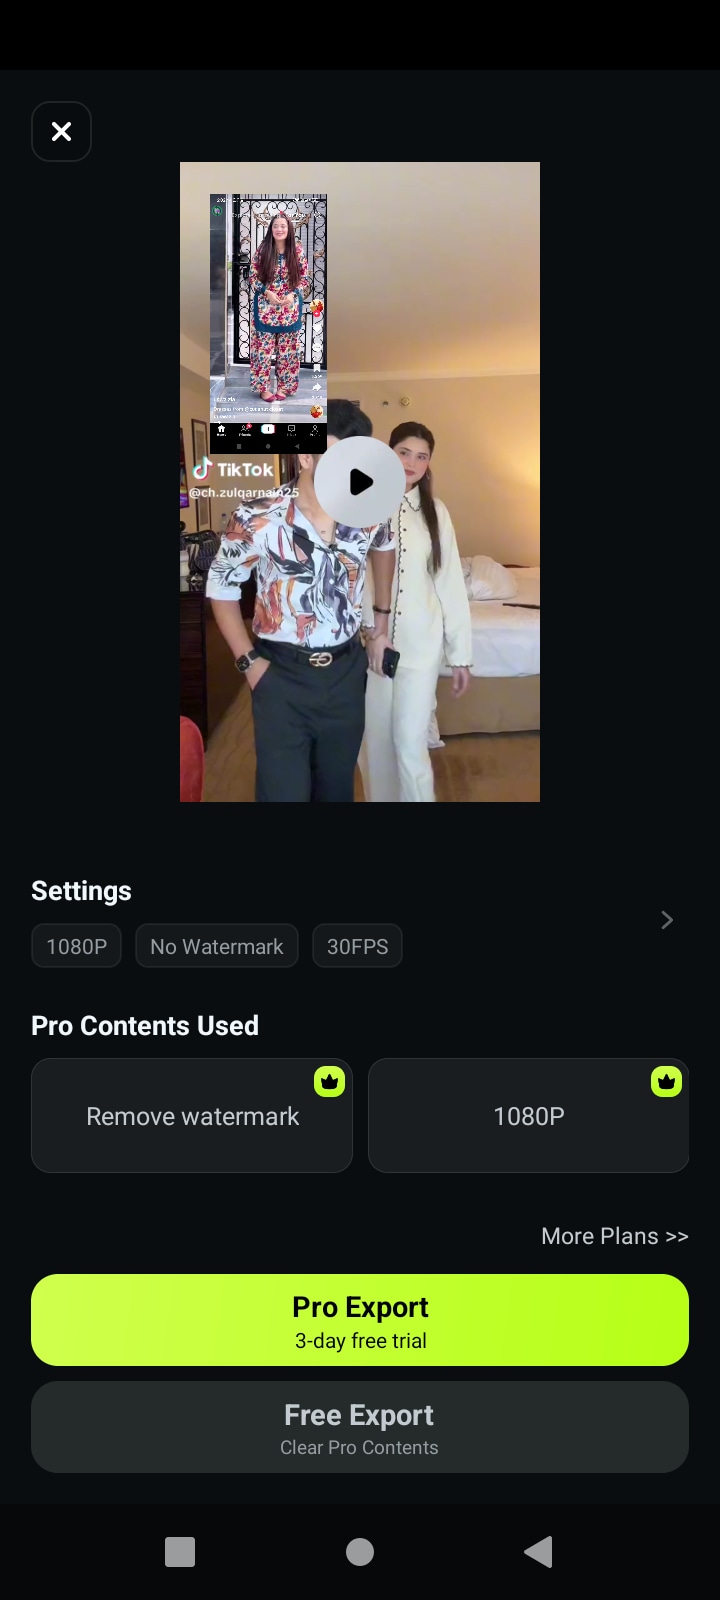
Once you are finished, tap Export. Select the resolution and frames per second you want the video, then save it to your device or share it directly to your social media channels, like YouTube or Instagram.
How to Make PIP Video On iOS (iPhone/iPad)
Step1Download Filmora Mobile App for iphone
The first step is to get the Filmora app from the apple store if you haven't, and install it on your device.
Step2Import Your Video
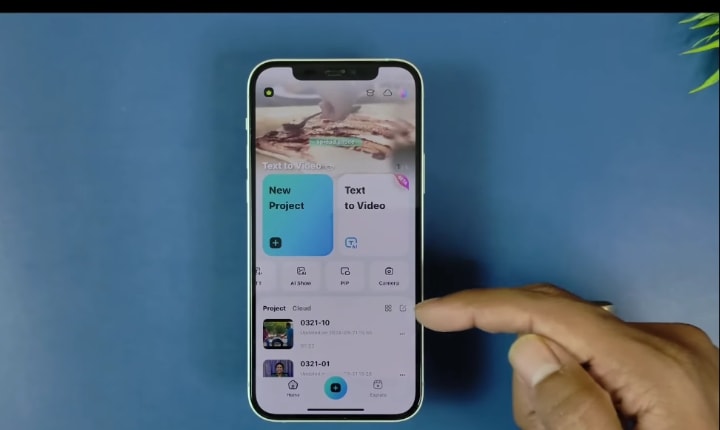
After this, launch the program and select the option "New Project".
Step3Add overlays
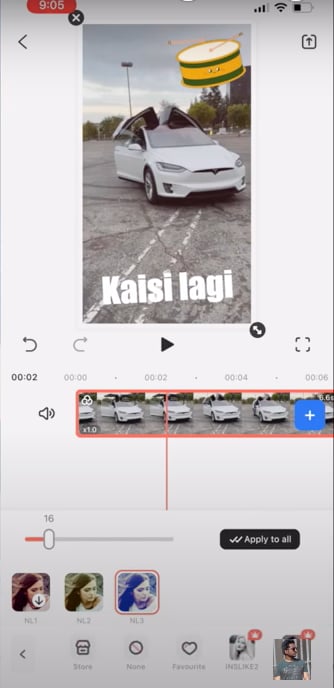
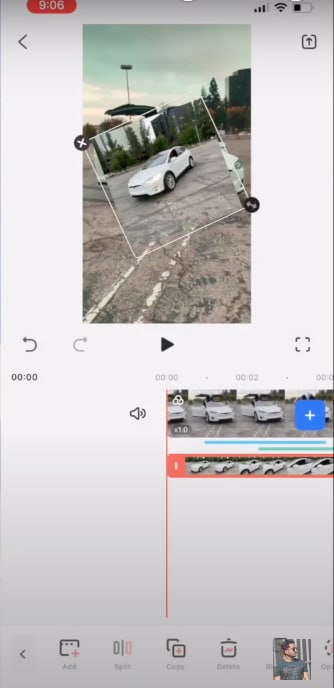
With the PIP option, you can have the overlay, meaning you can import a video that will be displayed on top of the original video.
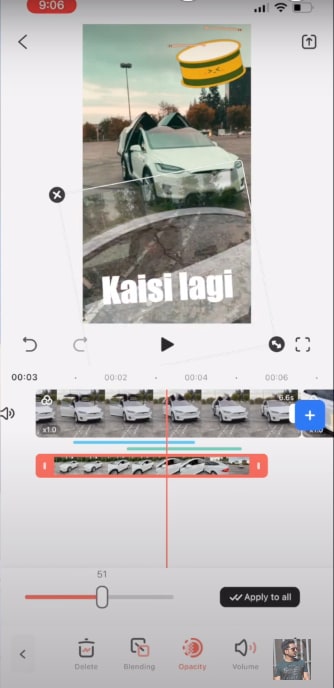
The overlay video can be adjusted to be more or less opaque so that the main video remains visible.
Step4Export and Share
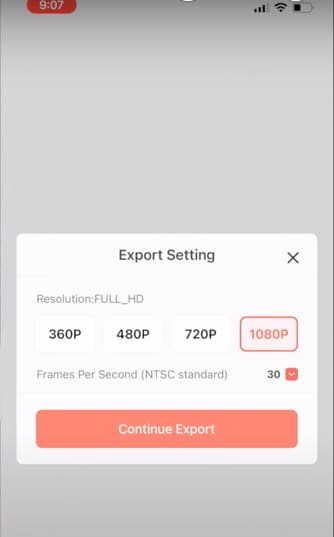
When you are done editing, you export the PIP movie with whatever frame rate and resolution you want. You can then export the PIP video and share it on social media websites such as Instagram or TikTok, straight.
- Superb video stabilization with low distortion.
- Vast video/audio effects and creative assets.
- Powerful AI for effortless content creation.
- Intuitive, professional yet beginner-friendly.
- Works on Mac, Windows, iOS, and Android.

Part 3: Picture-in-Picture (PiP) on Desktop (Step-by-step Guide)
How to Create Picture in Picture on Windows PC
To create PiP videos on the Windows platform, you need to consider using a video editing tool like Wondershare Filmora that makes the process simple with easy drag and drop functionality. Here's how to create a PiP video in Filmora:
Step1Open Filmora and make a new project
Launch Filmora on your PC. Click on the New project link on the software's home page. You may set the aspect ratio and projection settings depending on the requirements you may set.
Step2Import Media Files
Select and import files from the computer, camera or any other connected device. Always click and drag the videos or images you wish to add to the media library.
Step3Embed the Background Video into the Timeline
At the bottom of the screen you will find the Media Library where you drag a main background video to the timeline. The base video for PIP effect will be this one.
Step4Overlay (PIP) Video or Image
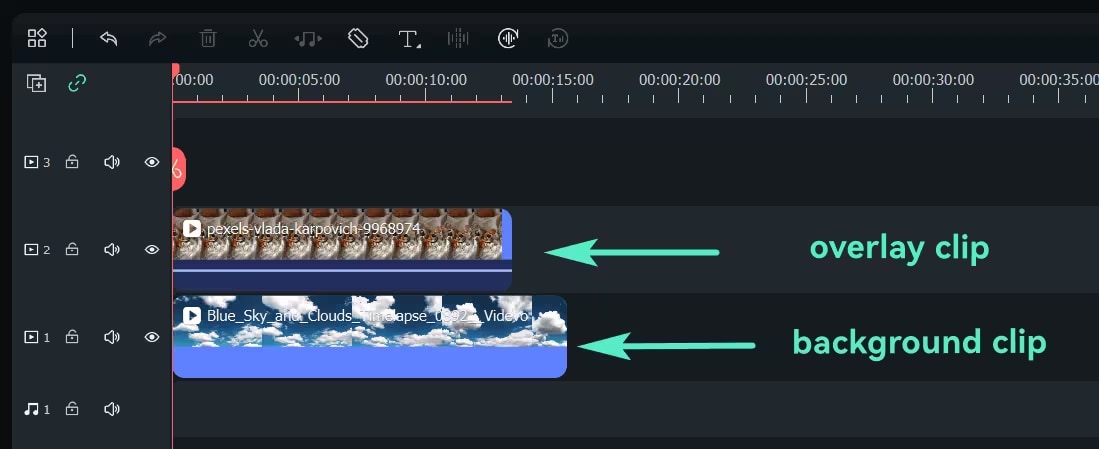
Choose the small, overlayed video you want to play with the media. Drag this video or image from the Media Library to any other video track and position this video above the background video in the timeline.
Step5Adjust the Size and Position of the PIP Overlay
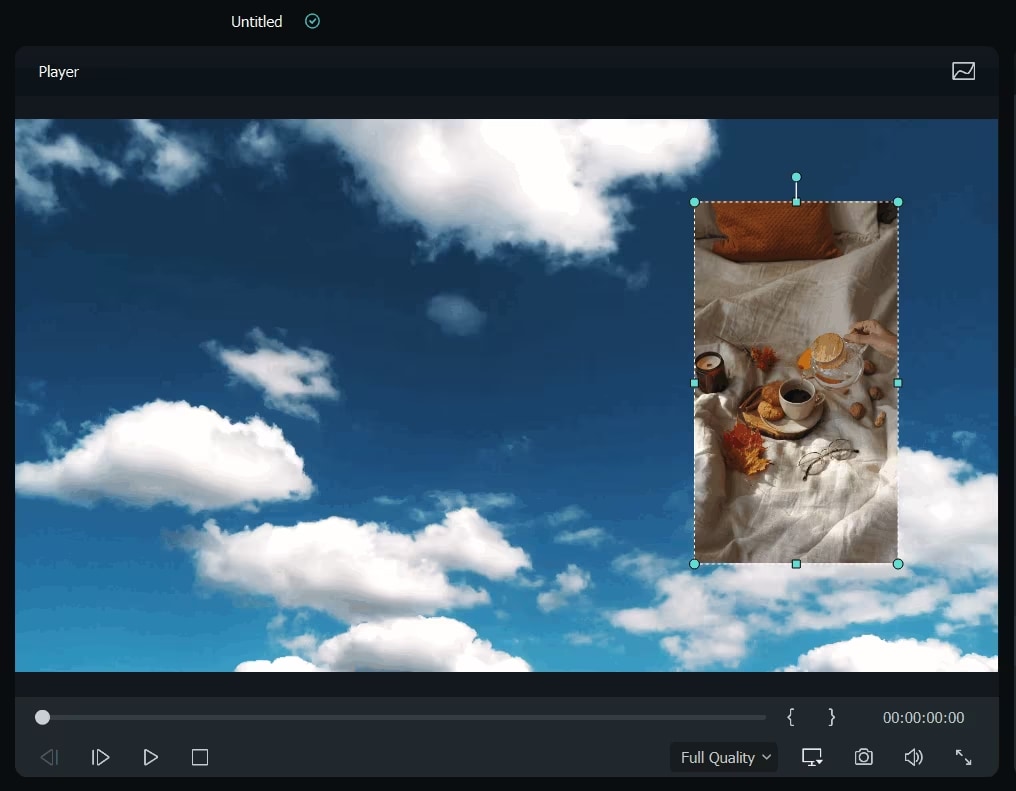
Click on the overlay clip in the timeline to select it. In the Preview Window, resize the overlay by dragging its corners and move it to your desired position on the screen (e.g., top-right corner).
Step6Adjust Blending Mode
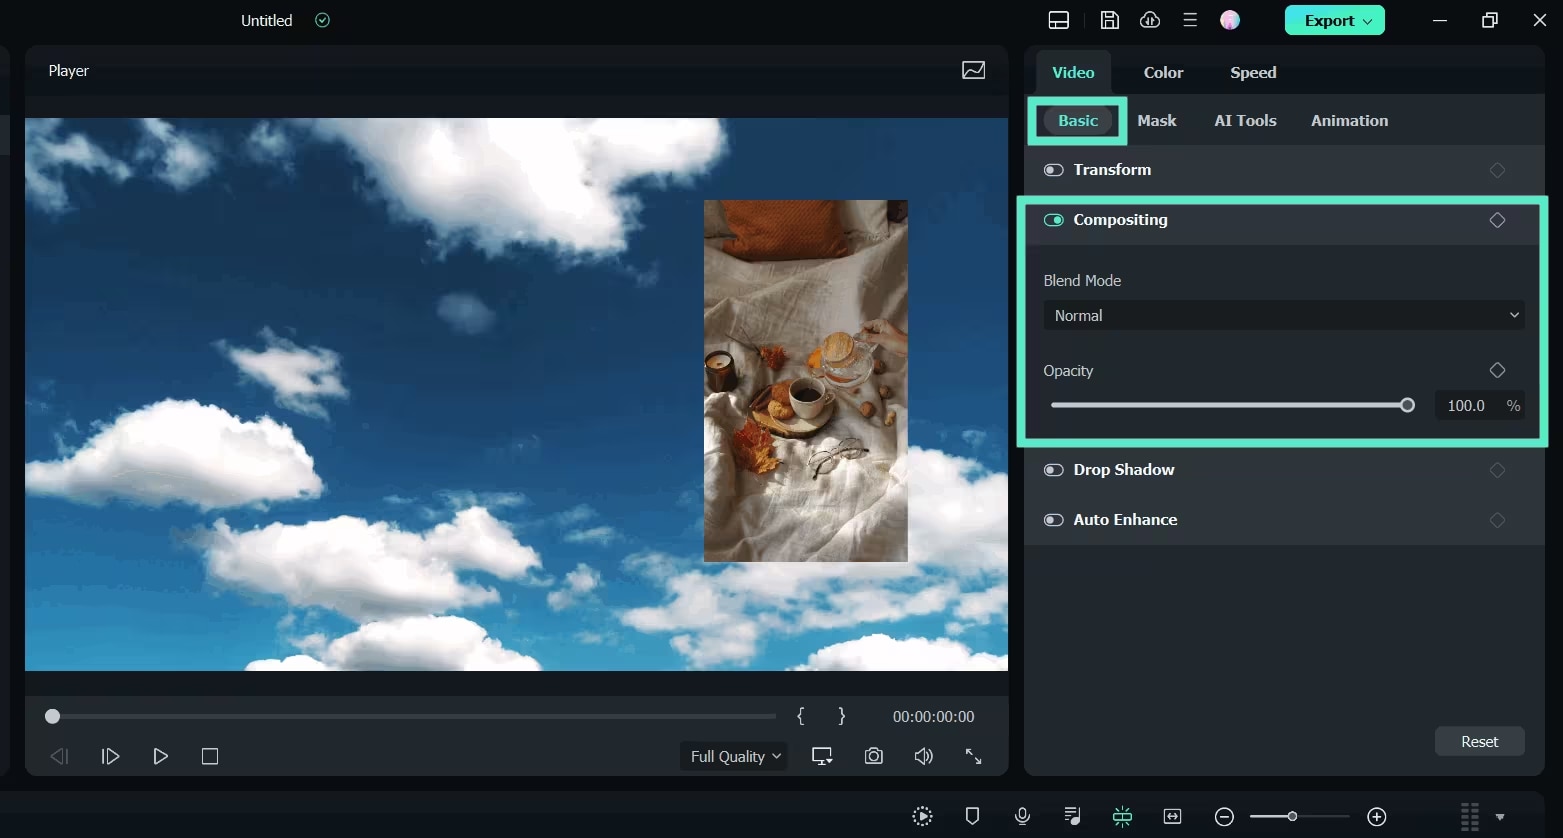
For advanced effects, select the PIP video, go to the Basic tab in the Video Edit Panel, and scroll down to the Compositing field. Choose a blend mode (e.g., multiply, screen) and adjust the opacity to get your desired look.
Step7Change PIP Shape with Mask
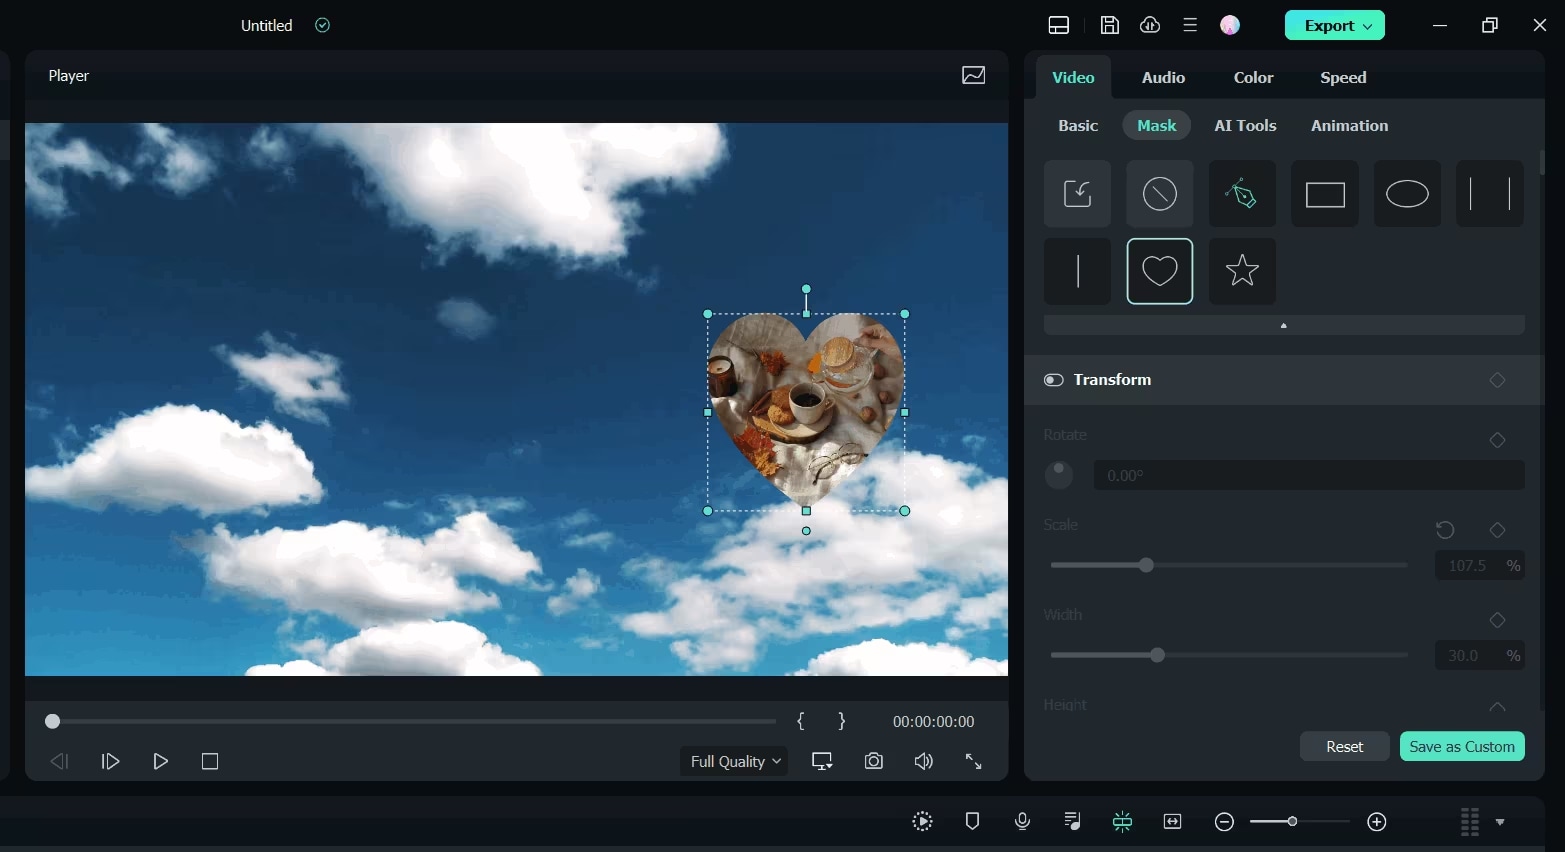
To change the shape of the PIP video, go to the Mask tab and apply a preset mask. You can also import custom masks or add keyframing for dynamic mask effects.
Step8Add Animation and Motion
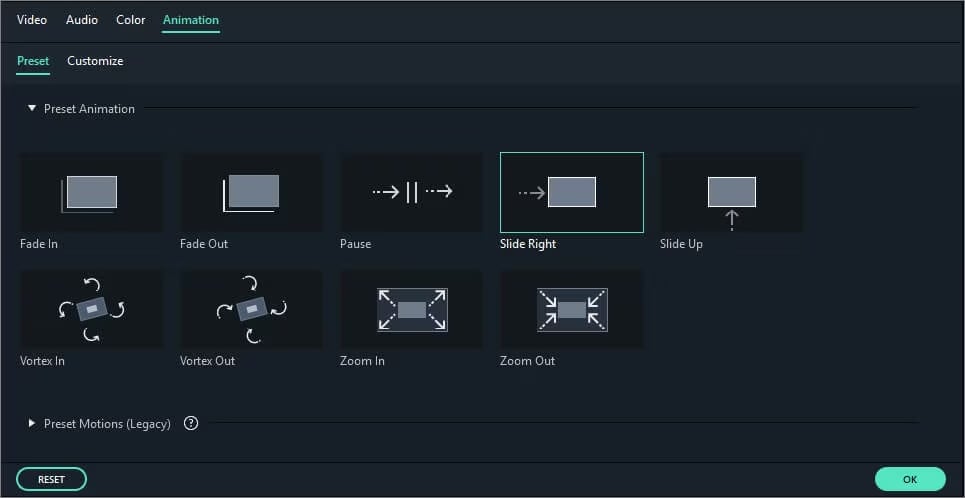
Double-click the PIP video in the timeline and switch to the Animation tab. Choose from Filmora's motion presets or animations, and apply them by double-clicking or right-clicking on the desired effect.
Step9Preview the PIP Video
Press the Play button in the Preview Window to review how the PIP effect looks. Make any necessary adjustments to the size, position, or timing of the overlay.
Step10Export the PIP Video
When you're satisfied with the result, click the Export button in the top toolbar. Choose the format, adjust the resolution, and save the video to your preferred location on your computer.
You've successfully created a PIP effect using Filmora on your PC.
Filmora makes PiP video editing straightforward, allowing users to create professional PiP effects with minimal effort.
How to Create Picture-in-Picture (PiP) on Mac
Step1Launch Filmora and Import Videos
Launch Filmora software into your Mac and create a new project.
To achieve the PIP effect, you need to import two video clips into which you want to work. Take both clips and drag them into the media library to make them ready for editing.
Step2Add Videos to the Timeline
You want to draw your main video into the first video track of your video editing program on your timeline. Then, slide the main video above the overlay video (the video which will be shown on top), placing the overlay video in the second video track.
Step3Dynamically reposition and resize Overlay Video
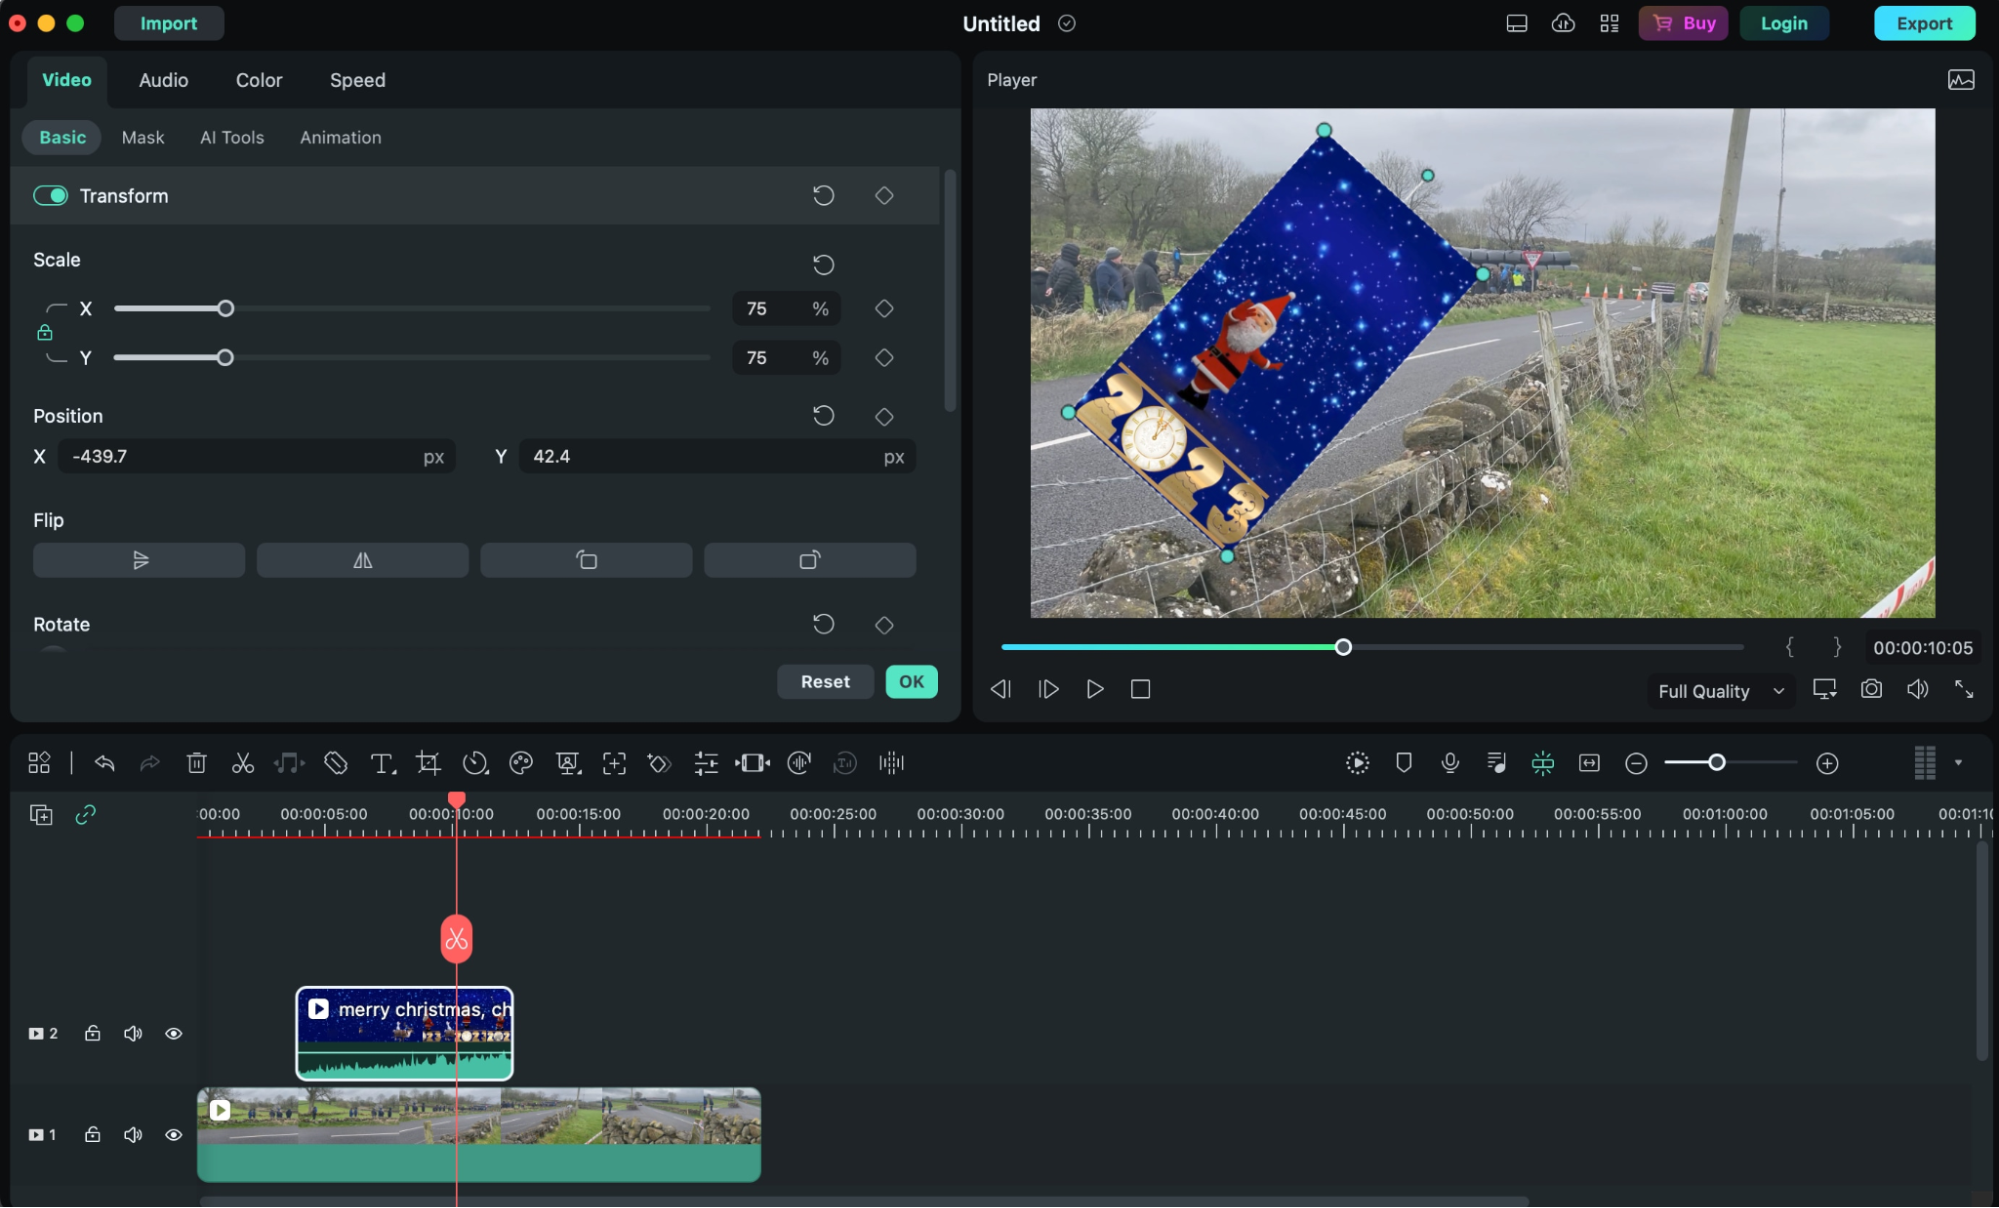
Click on the overlay video in the timeline two times and go to it. Select the overlay video in the preview window and play and move or resize it. You can resize it or post it anywhere on the preview window you want by clicking its border and moving that border.
Step4Customize Overlay Video
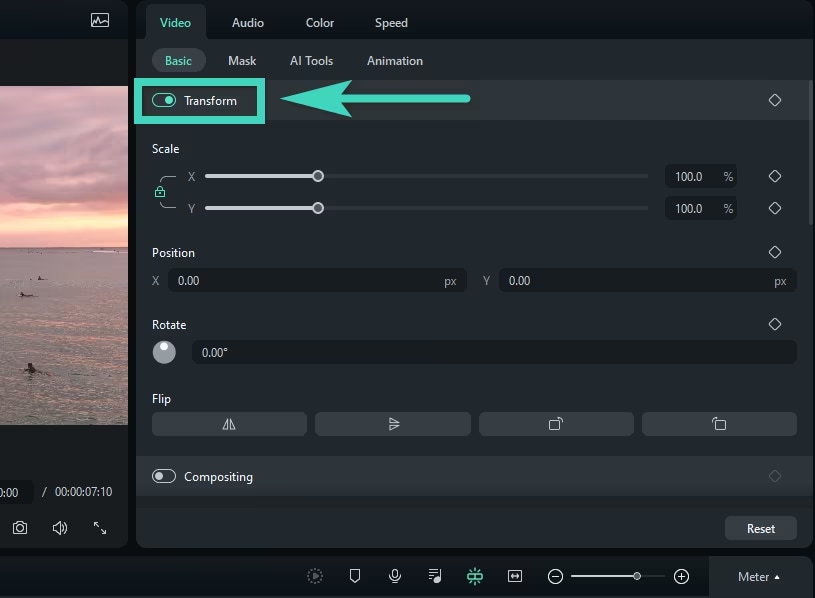
The strip of options on the left has everything that you can edit on it. In Transform, you can rotate, mirror, zoom in or out, or even move your overlay video around.
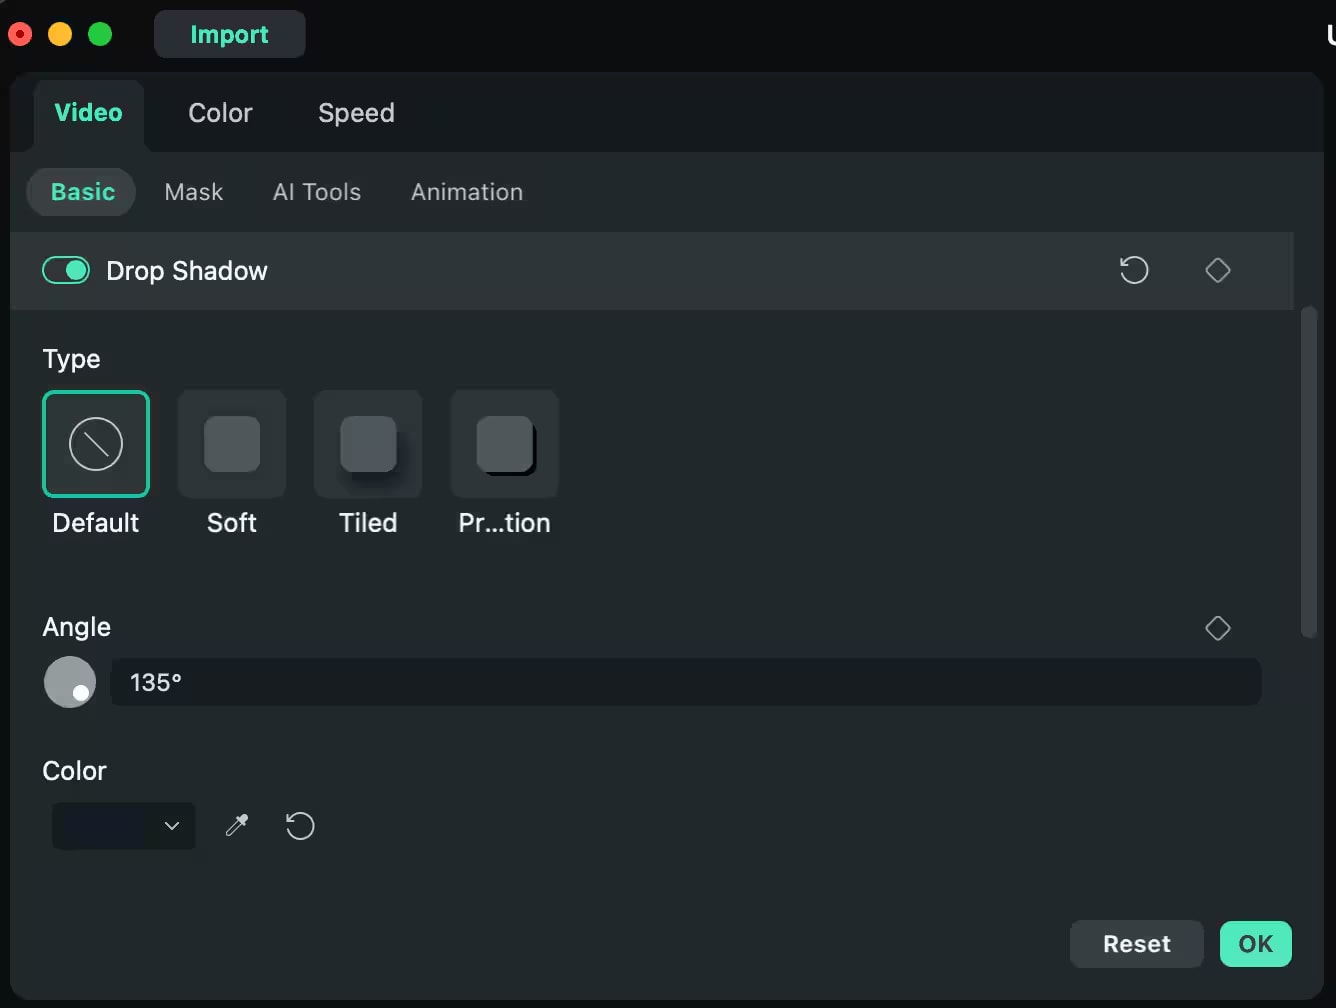
Lastly, in the Compositing part, mix mode and track alpha to achieve a mix between video and its overlay part. Additionally, to the overlay video you can also add a Drop Shadow that you can control the distance, blur, opacity and direction of.
Step5Apply Green Screen (Optional)
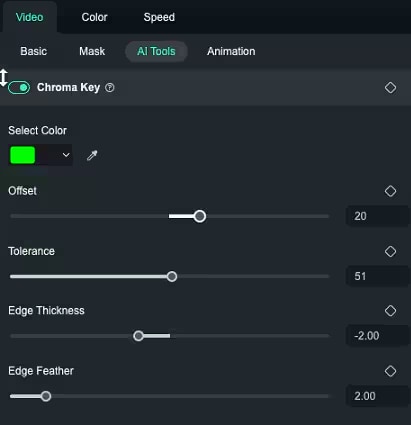
The idea is that if you have a green background and your overlay video as well, you can set this as Green Screen to get now the green background from your video. Change the color, increase the tolerance, reduce the edge thickness and change the alpha channel until this overlay video is no longer green screened and can blend perfectly with the main video.
Step6Add Motion Tracking (Optional)

On the right side, go to AI Tools and turn on "Motion Tracking". Filmora allows you to Motion Tracking a certain object of the main video so that you can overlay the video and let it follow this object. If you just want the overlay to be active in the frame part and slide inside this part, this is a nice option.
Step7Preview and Export
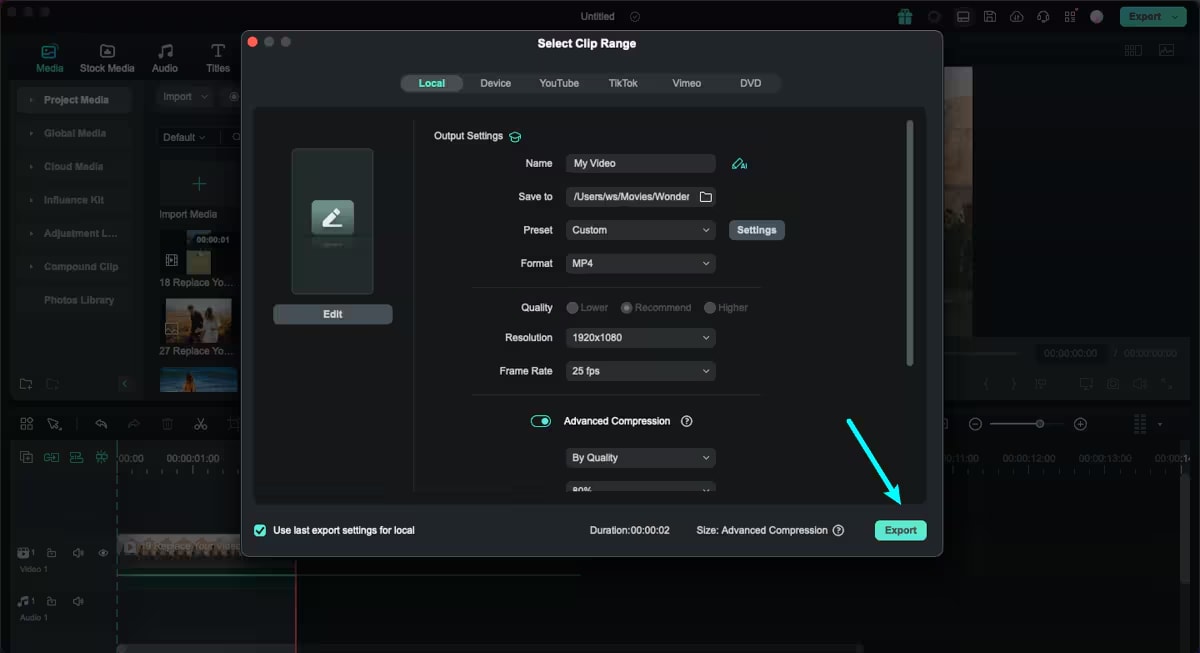
After all this has been done, head back and watch that video again to make sure everything has been okay. Following this, you get to select the format you prefer the video to be in before you should click on the Export button.
However, if you follow these steps you can relatively easily create a high quality PIP video with Filmora on your Mac.
Why do we recommend Filmora for PIP Video creation?
Filmora for mobile and PC has many features due to which we recommend you to use it for PIP effect creation. Some of them are below:
- Multiple PiP Layers: Filmora helps you stack several PiP videos in order to create complex, multiple layered effects without having to leave the app.
- Built-In Templates: Choose from a range of PiP templates and make a professional look in minutes.
- Instant Keyframe Animation: Transitioning your PiP windows to Filmora's easy keyframe controls is a close walk in the park.
- Dynamic Motion Effects: When combined with your content, Filmora's PiP motion effects make pretty smooth transitions to your video.
- High-Quality Export Options: HD and 4K PiP videos for YouTube and social media that are exportable.
- Audio Sync and Balancing Tools: It synchronizes PiP audio with volume levels of PiP audio to main content sync.
- Color and Brightness Adjustments: Be color and brightness independent from the main video on PiP layers.
- Flexible Screen Positioning: If you have a style video that you prefer attaching to it then the PiP window size and location is very easy to adjust.
Conclusion
Whether it's on Android, iOS, Windows or Mac, Picture-in-Picture enables you to multiplex well while viewing videos. Built into mobile devices are PiP for apps like YouTube; for desktop users, Filmora is a great way to create custom PIP; Enjoy content no matter where you are without having to leave your tasks using PIP!


 100% Security Verified | No Subscription Required | No Malware


