


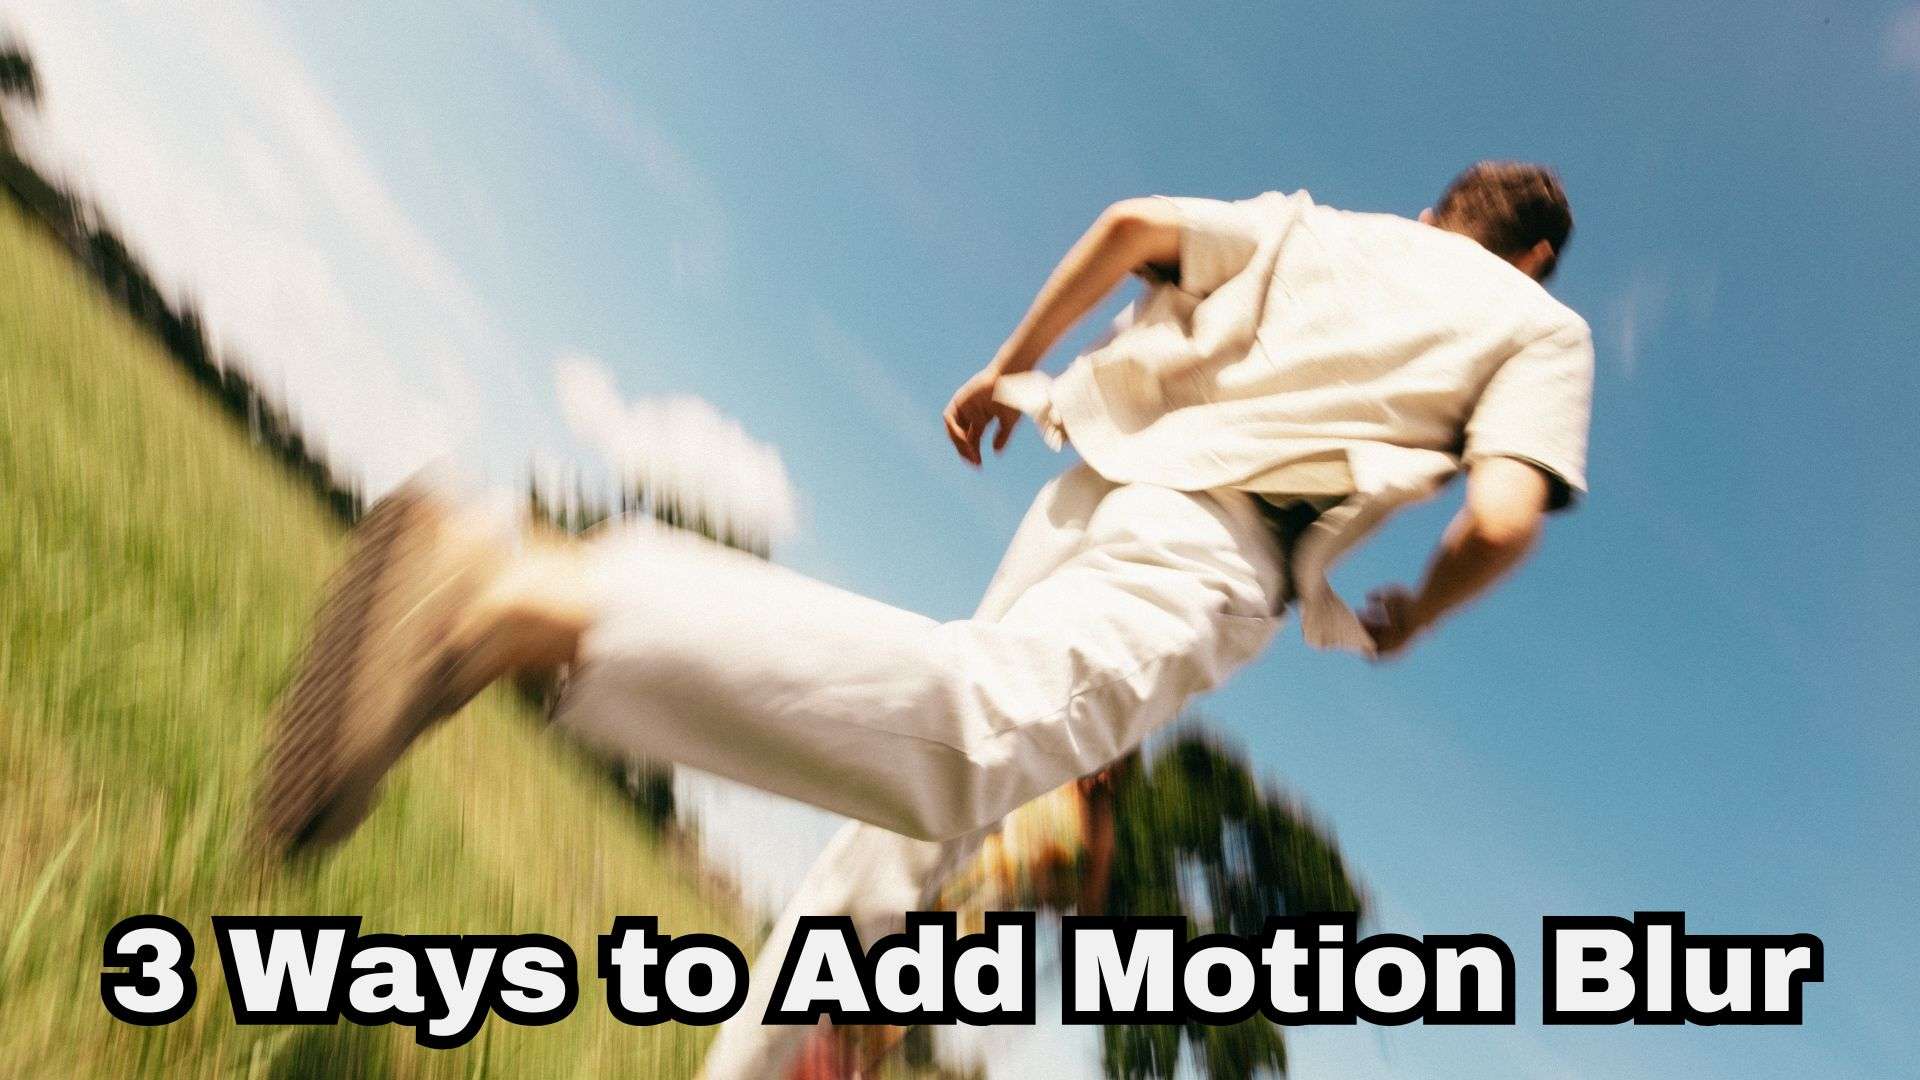
A motion blur video can make fast movement look smoother, more natural, and closer to what we see in real-world footage. Without enough blur, a quick pan, zoom, or animated title can look strangely sharp from one frame to the next.
And to achieve that, you can create motion blur for video while recording by changing your camera settings, or add it later during editing when you need more control. We'll look at how motion blur in video works and show you three practical ways to create it using camera tricks, smart desktop software, and quick online tools.
Part 1. Motion Blur in Video
When an object zips across the screen faster than a camera's shutter can freeze it, the movement streaks across several frames. That streak is motion blur on video.
And here’s the thing: in both photography and videography, motion blur can be captured naturally to create or highlight a movement effect. But you can also add motion blur to video in post-production using editing software to imitate that smear.
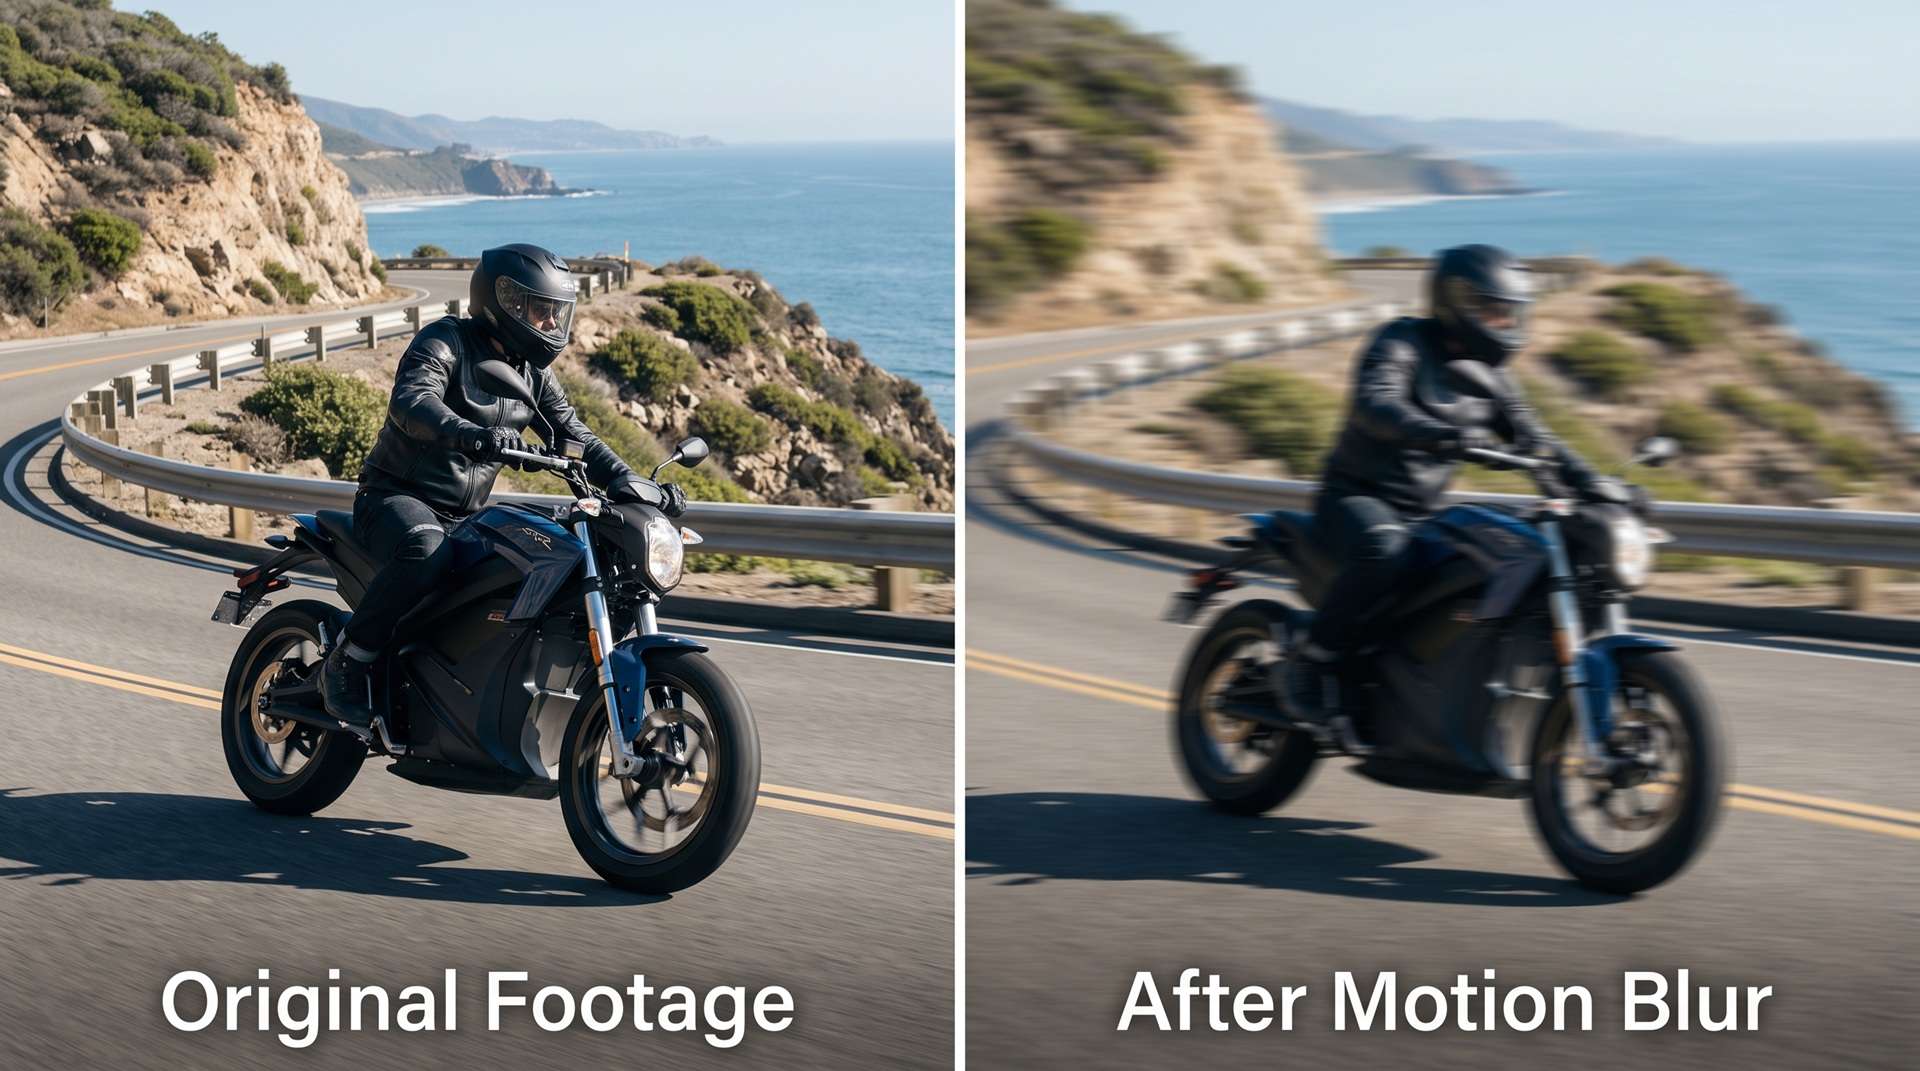
Motion Blur vs. Other Blur Effects
Not every blur is meant to make movement look more natural. Some blur effects are designed to soften details, create depth, or produce a stylized zoom or spin. Editors mix these up all the time, so here's how they compare:
| Effects | Main Purpose | Best Used For |
| Motion Blur | Mimics realistic movement velocity | Fast action, speed ramps, and moving keyframes |
| Gaussian Blur | Evenly softens detail across an entire area | Obscuring backgrounds, hiding sensitive info, or soft glows |
| Directional Blur | Smears pixels strictly along a fixed angle | Simulated zoom passes or stylized speed lines |
| Radial Blur | Blurs outward from a central point in a circle or zoom | High-speed tunnel shots or dramatic impact moments |
|
Show More
Show Less
|
||
Now that you know what sets it apart, let's look at how you can add motion blur to video naturally inside your camera before even opening an editing app.
Part 2. How to Capture Motion Blur in a Video Using Shutter Speed
You don't always need a motion blur adder video tool. If you know you'll want natural-looking blur before you start filming, you can create it directly in the camera.
The main control to understand is shutter speed. In video, shutter speed determines how long each frame is exposed to light. A longer exposure allows moving subjects to travel farther during that exposure, producing more visible blur.
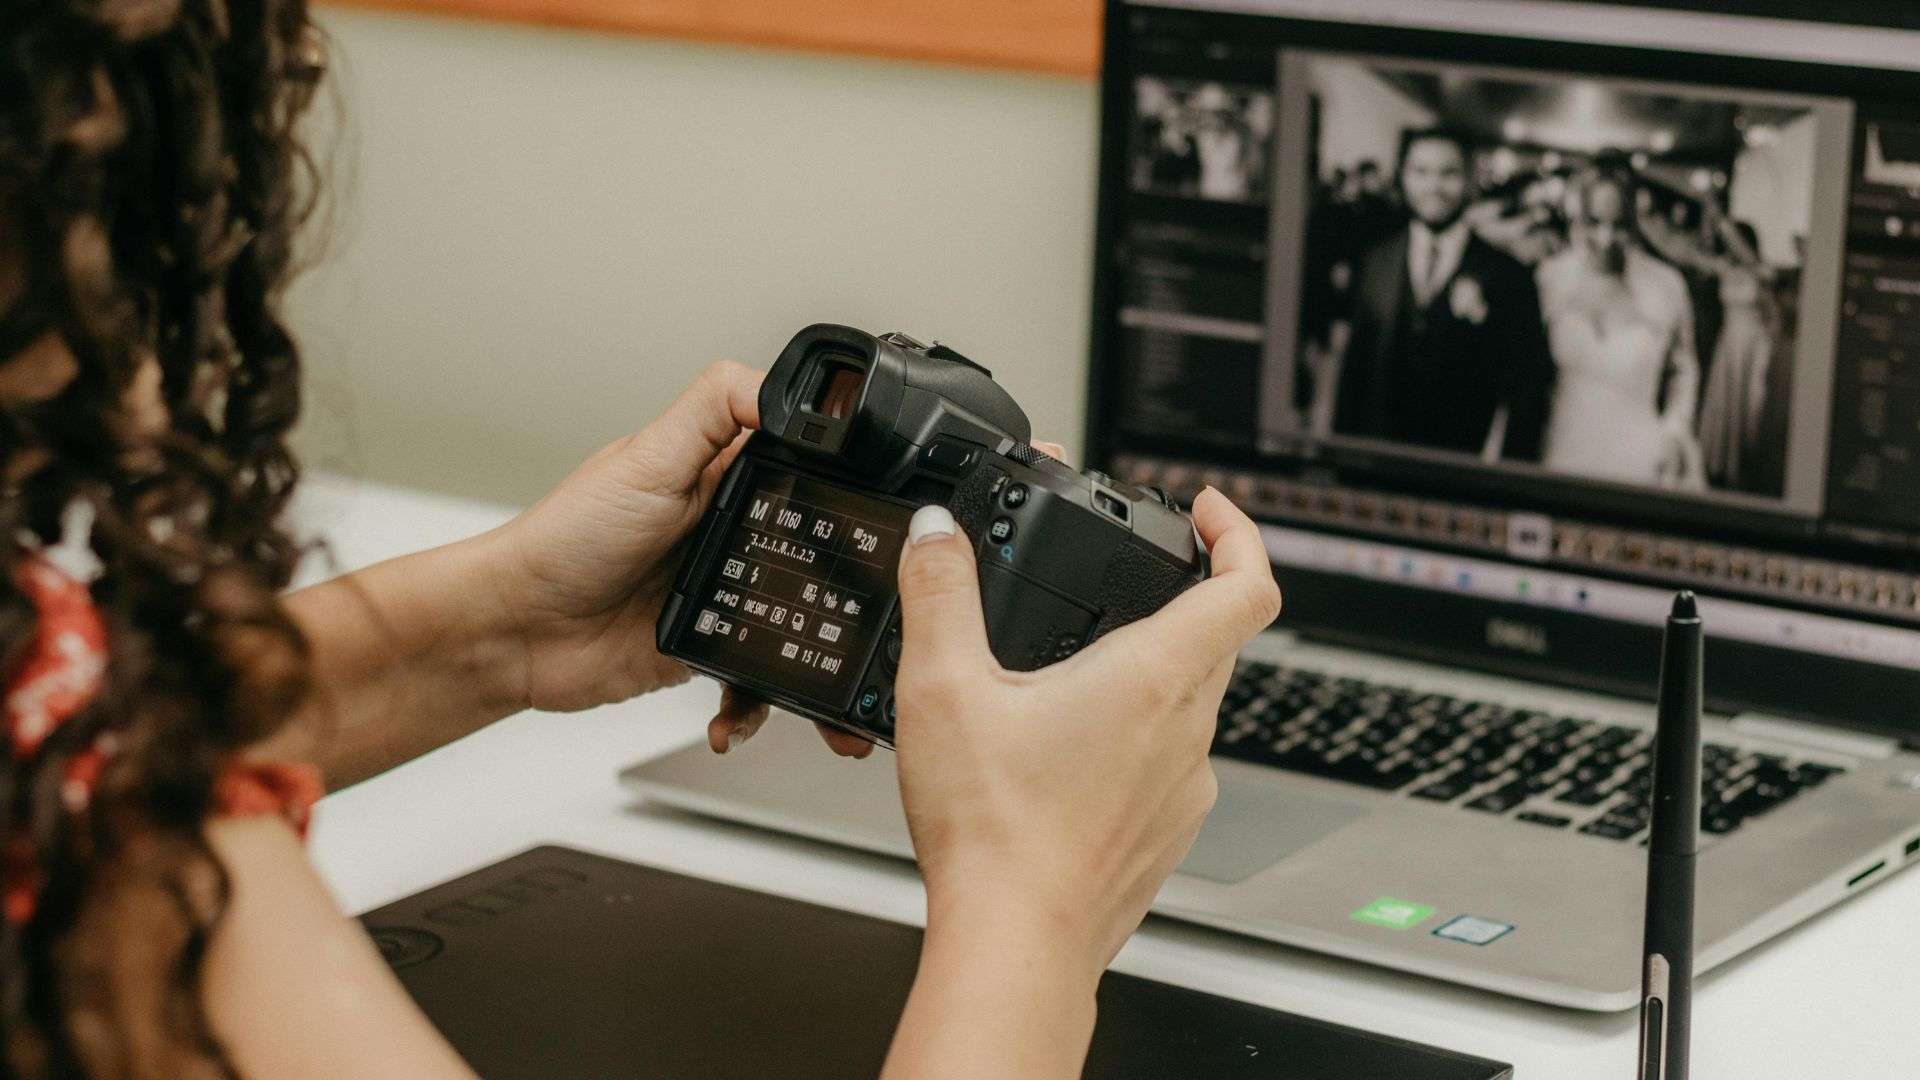
In-Camera Settings for Motion Blur
- The 180-Degree Rule: Set your shutter speed to double your frame rate for natural motion blur.
- Slow Shutter / Heavy Blur: Drop your shutter speed even lower (such as 1/15s or slower) to create an artistic, heavy trail of motion blur when you pan or move the camera.
- Manage Exposure: Slow shutter speeds let in a lot of light, which can overexpose your video. Use a high aperture (higher f-number) or attach a Neutral Density (ND) filter to your camera lens to block excess light.
To understand this better, here's a quick cheat sheet for the 180-degree rule:
| Frame Rate | Approx. Shutter Speed | Result |
| 24 fps | 1/48s (or 1/50s) | Classic cinematic feel |
| 30 fps | 1/60s | Natural, everyday video look |
| 60 fps | 1/120s | Smooth motion, blur is subtler |
Part 3. How to Add Motion Blur to a Video in Filmora
Sometimes the footage is already recorded, and the movement simply doesn't have enough blur. Other times, you're animating a photo, title, logo, sticker, or graphic and the movement looks too sharp; post-production is where you fix it.
And for post-production editing, there’s no better solution than Wondershare Filmora. Filmora motion blur gives you complete control over motion trails, whether you want to apply clip-level blurs or add natural movement trails to keyframed text, graphics, and elements.
There are three primary ways to handle motion blur in Filmora:
- Keyframe Motion Blur: Calculates motion trails strictly based on keyframe displacement (position, scale, or rotation changes). Perfect for animated titles and logos.
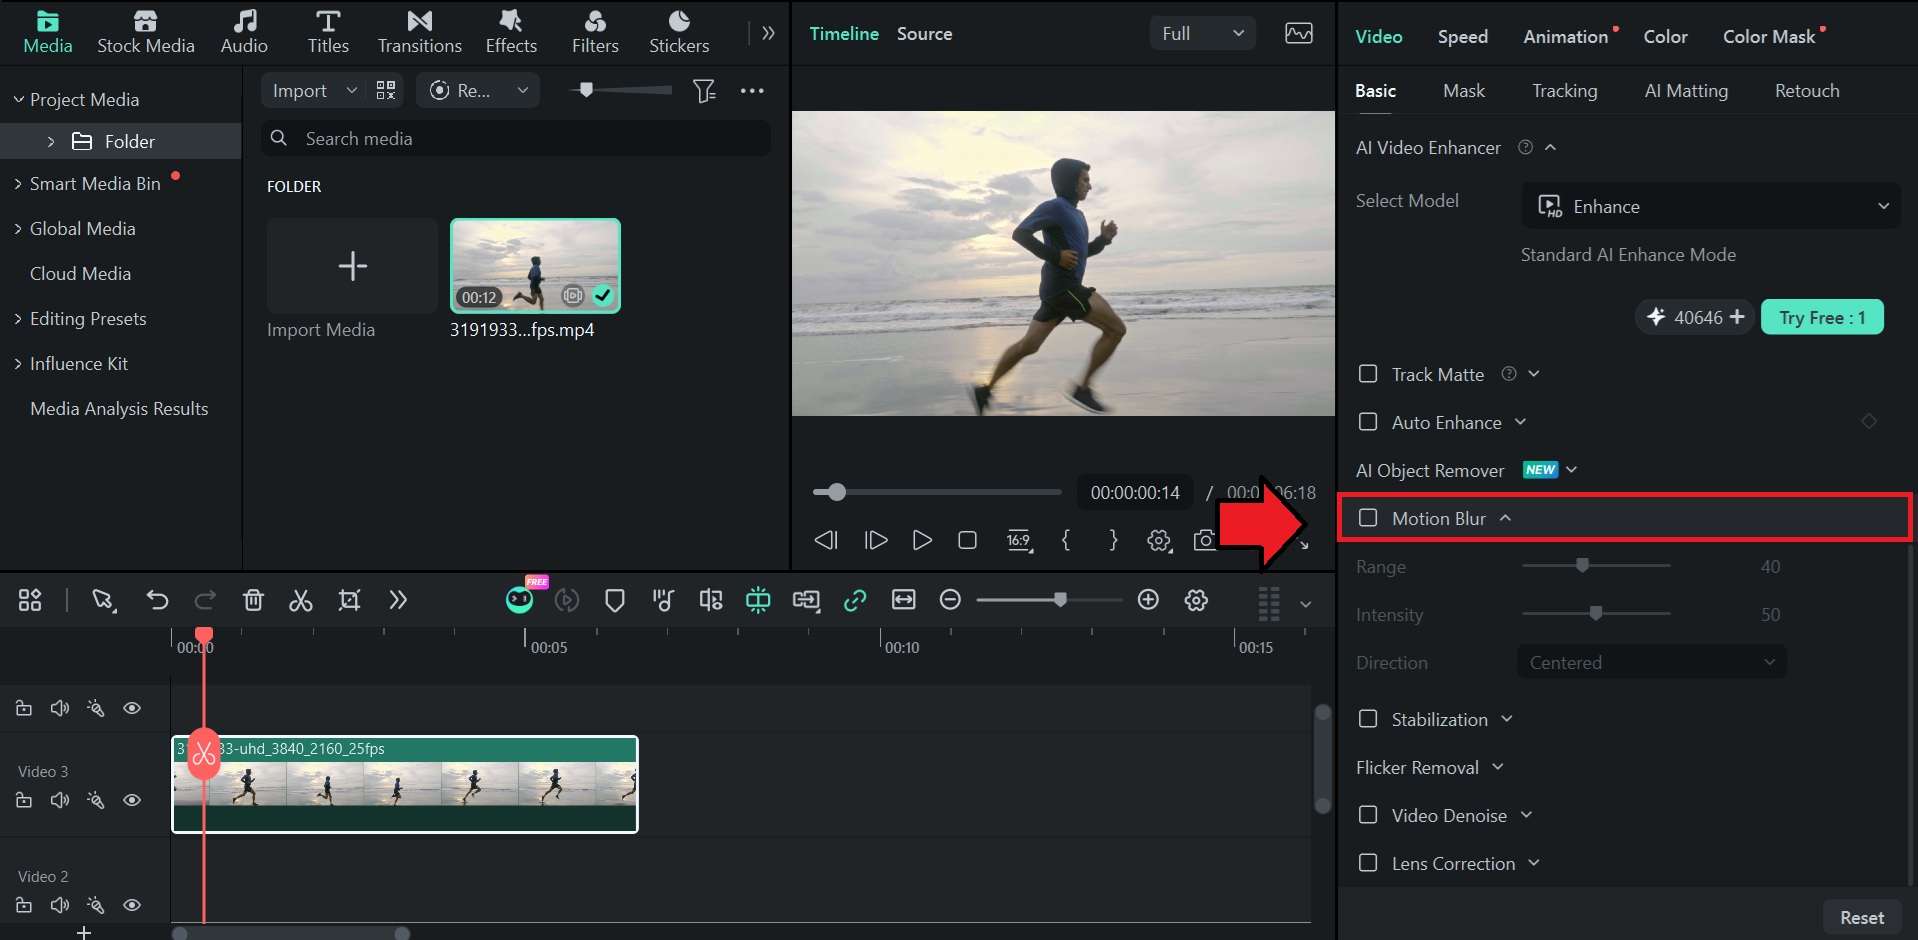
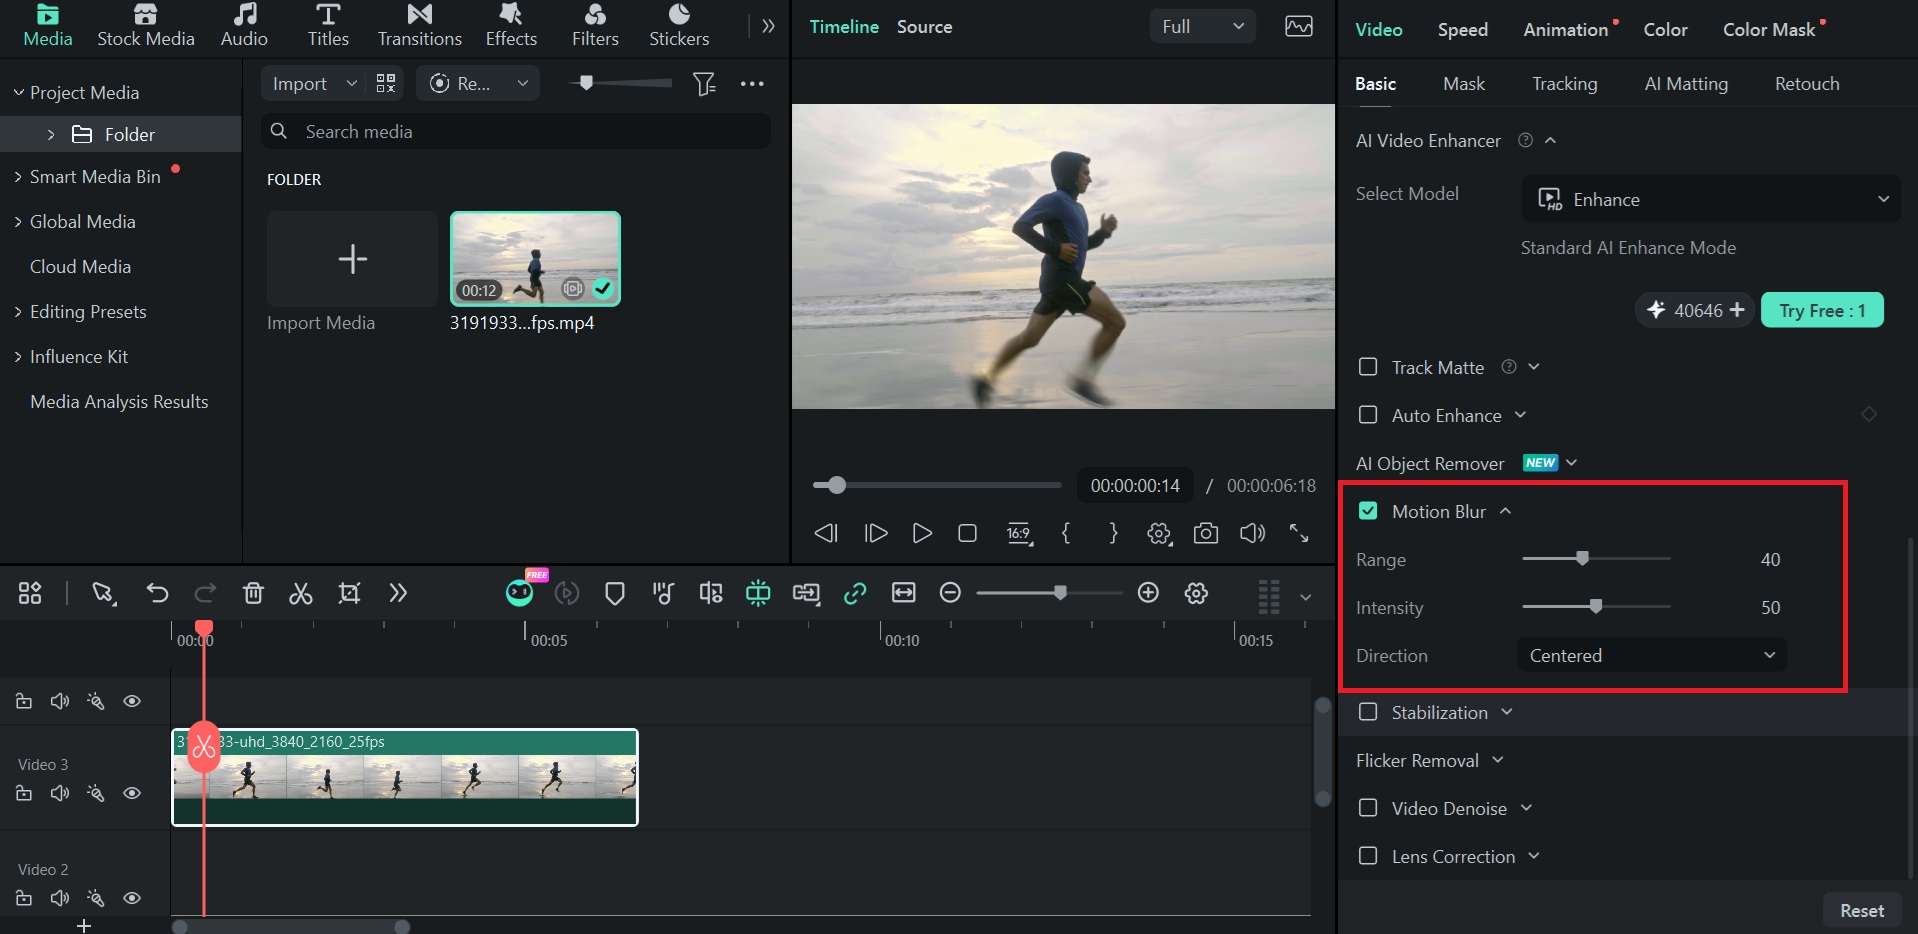
- Motion Blur: Applies smart motion blur to the entire video frame or clip, ideal for fast camera pans, drone footage, and speed ramping.
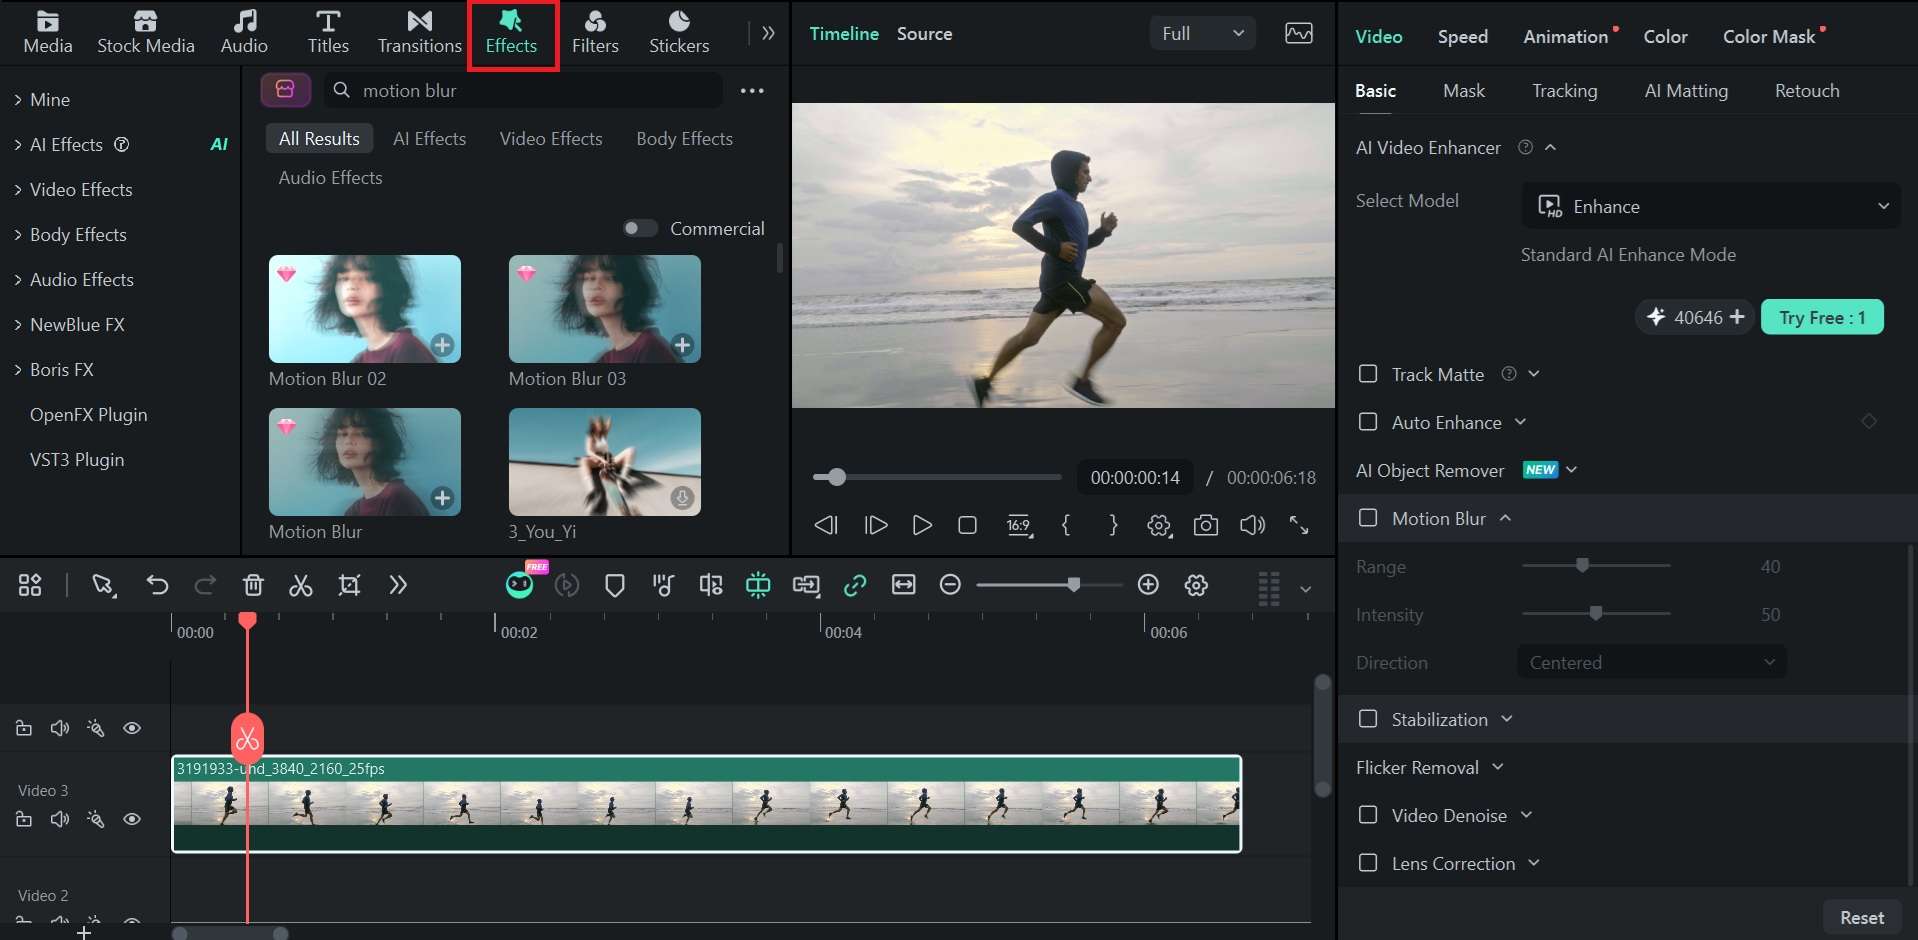
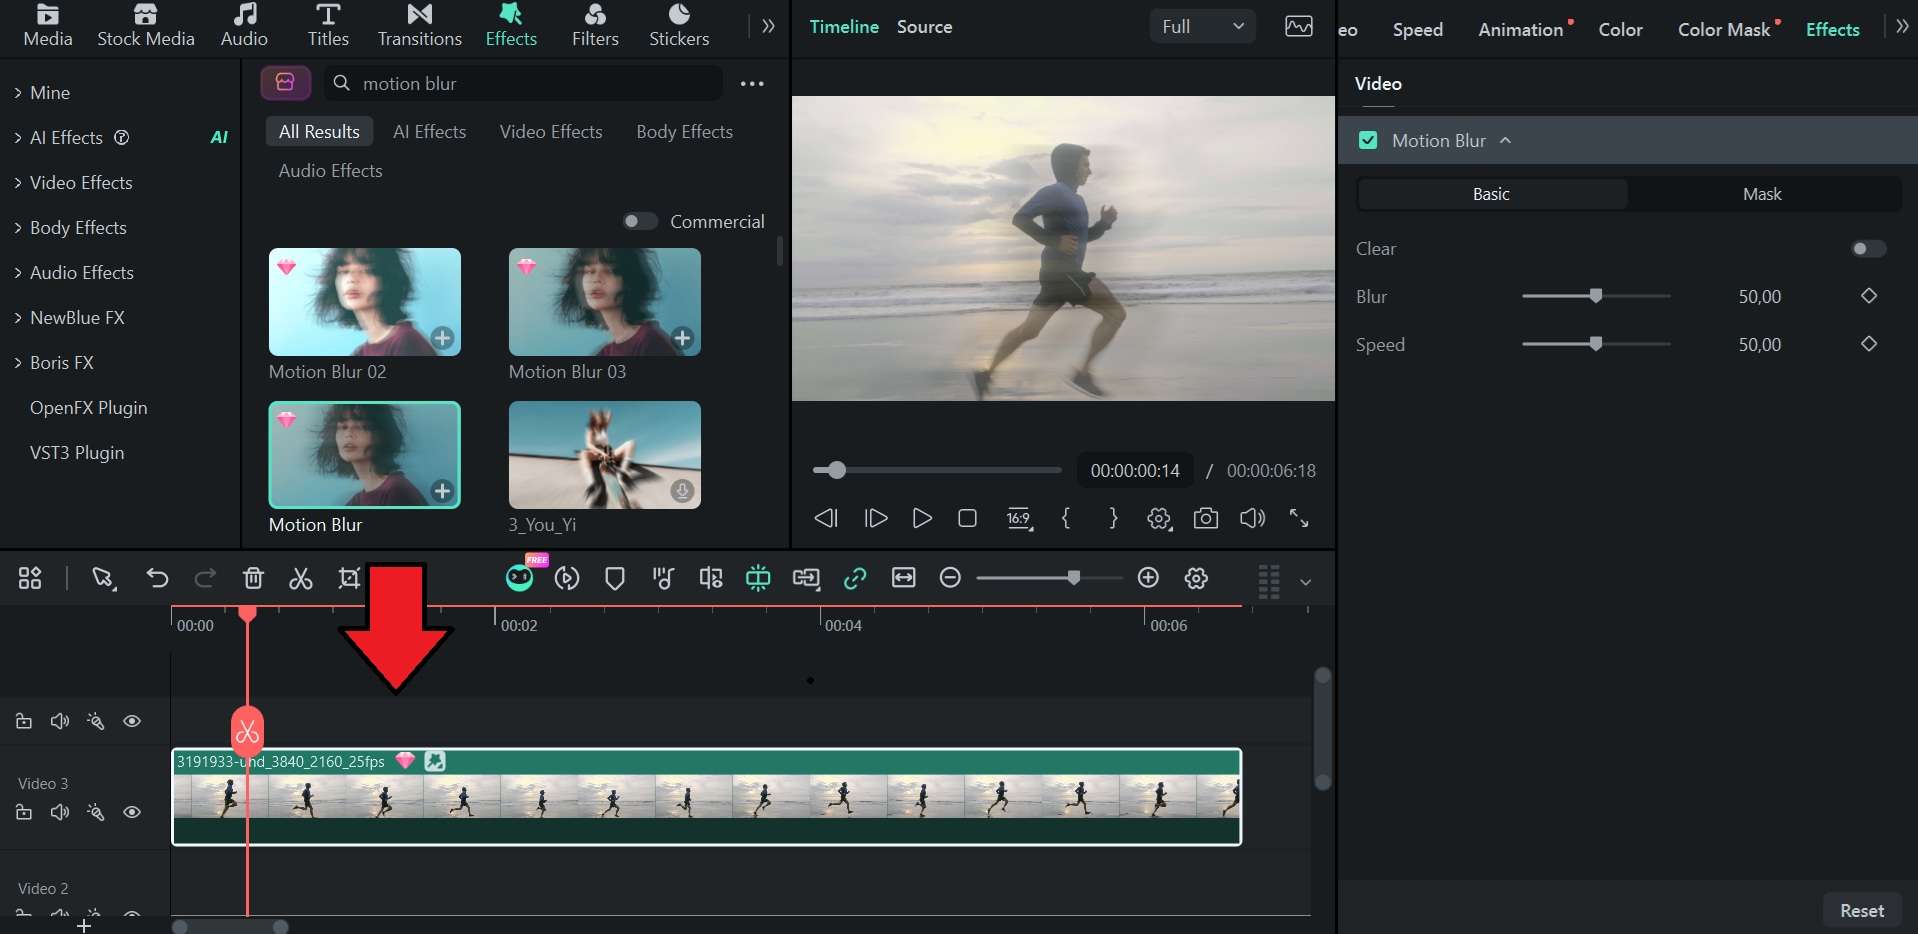
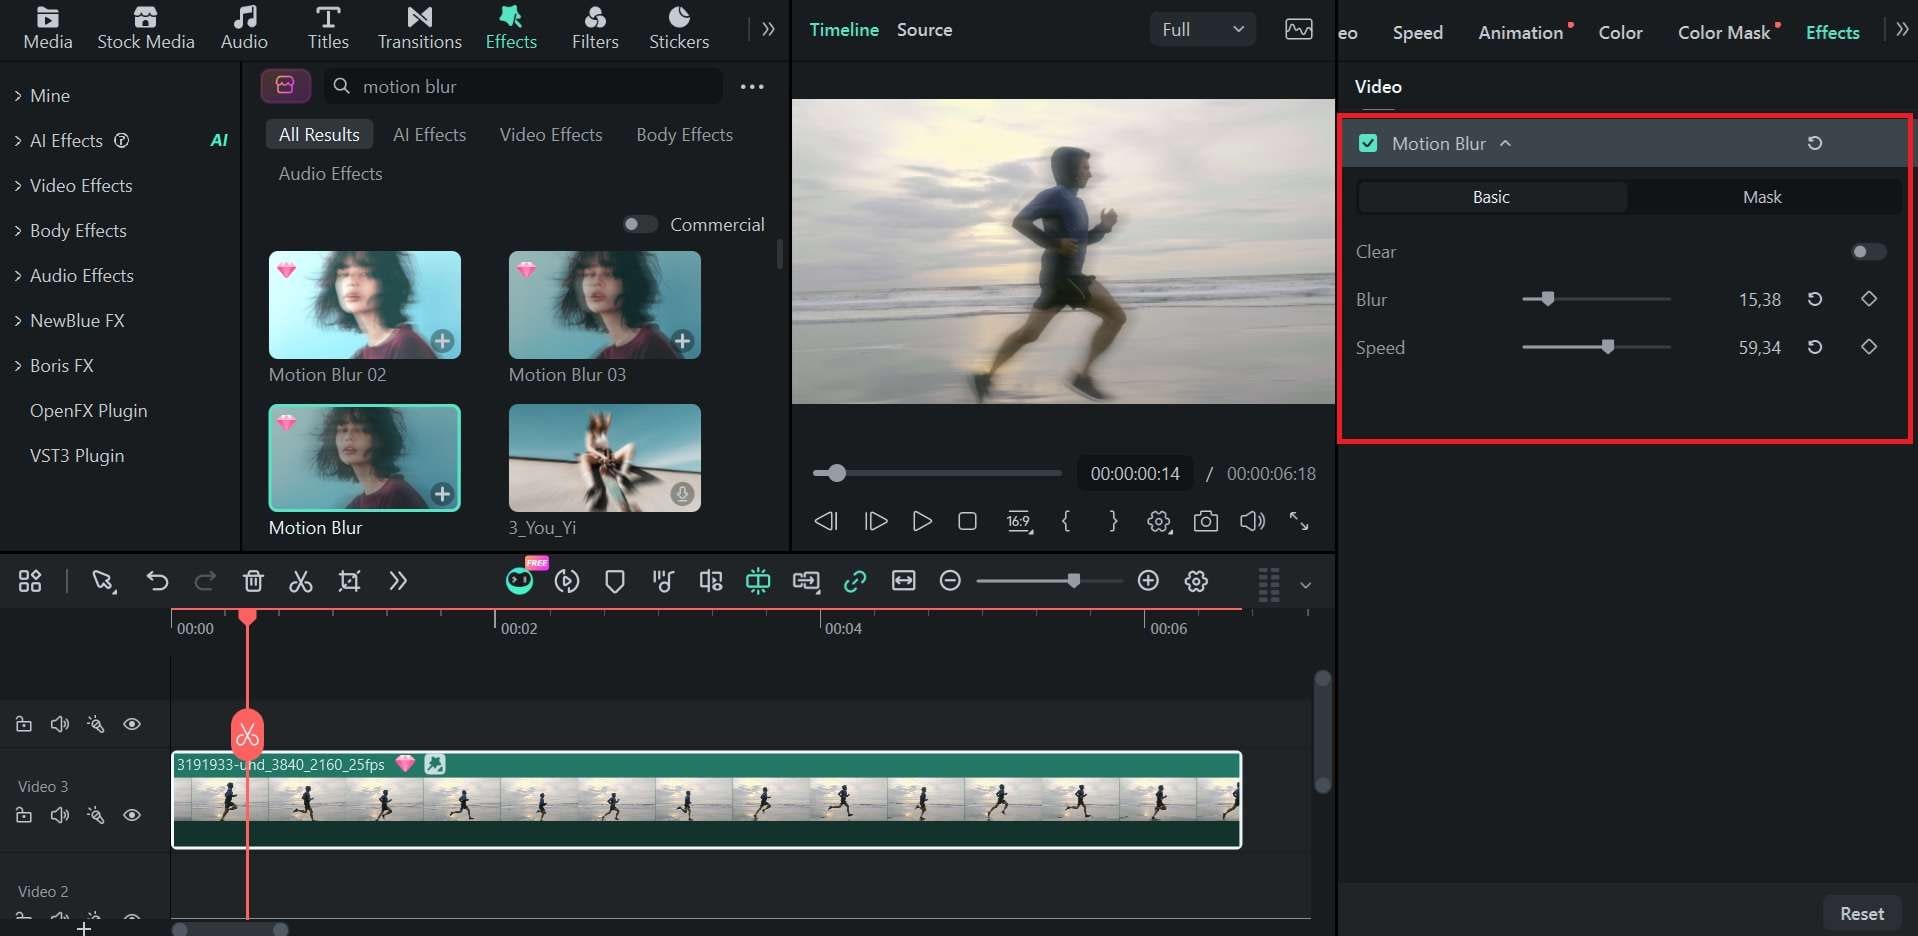
- Motion Blur Effects: Uses motion-blur particles and overlays from the Effects library to add a sense of speed and movement to the entire clip. These effects are useful when you want to create a more stylized motion-blur look without setting up keyframes.
Method 1: Keyframe Motion Blur
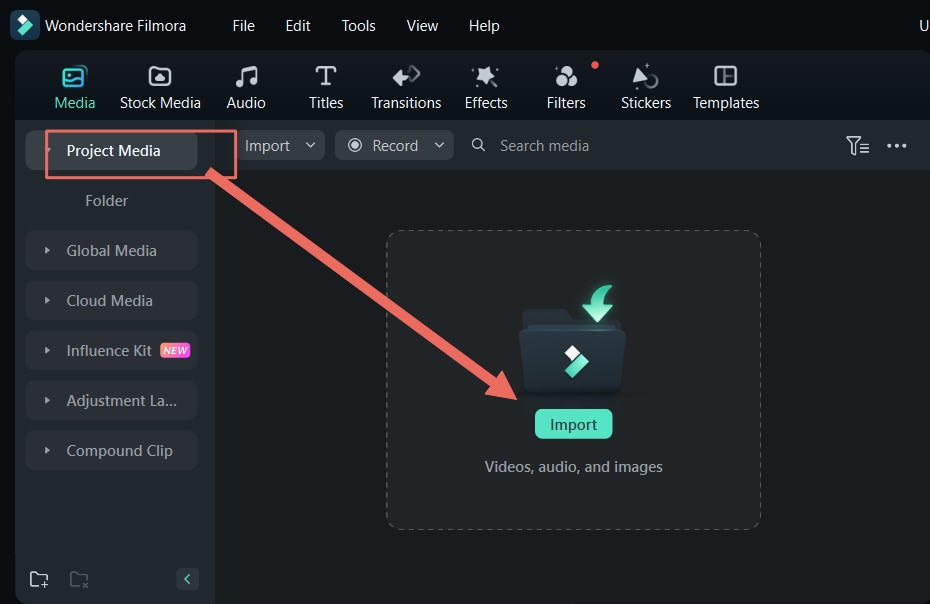
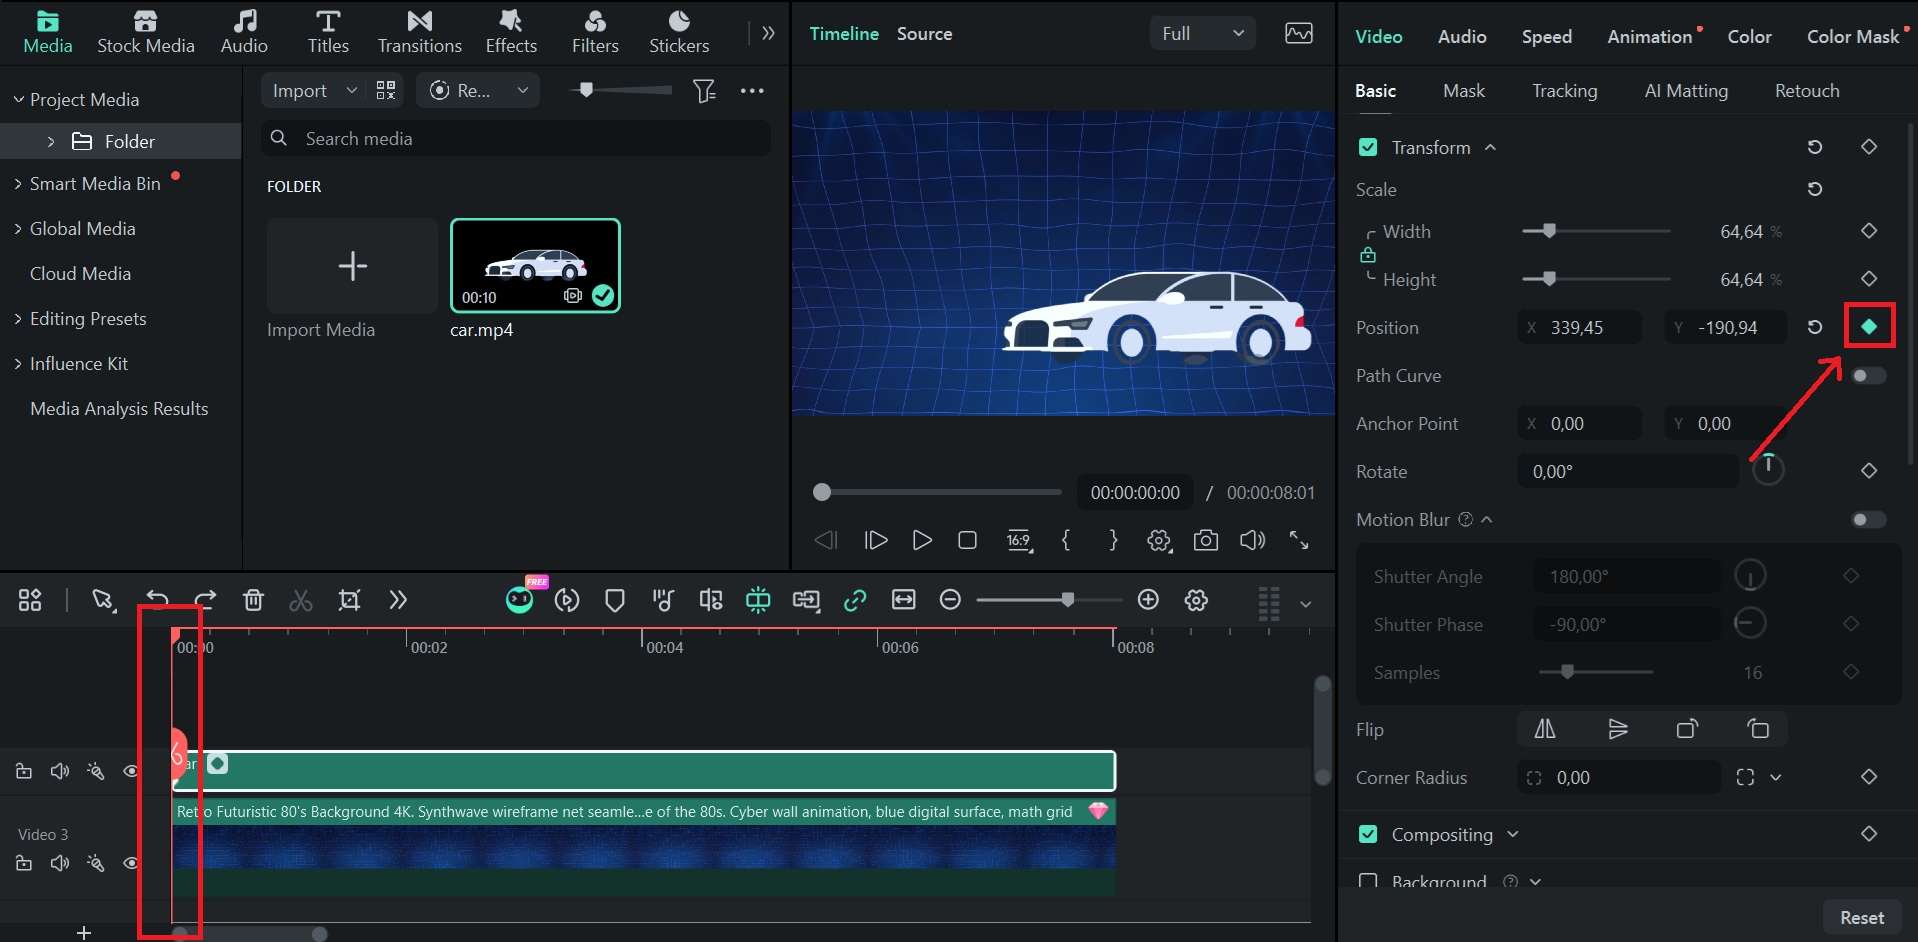
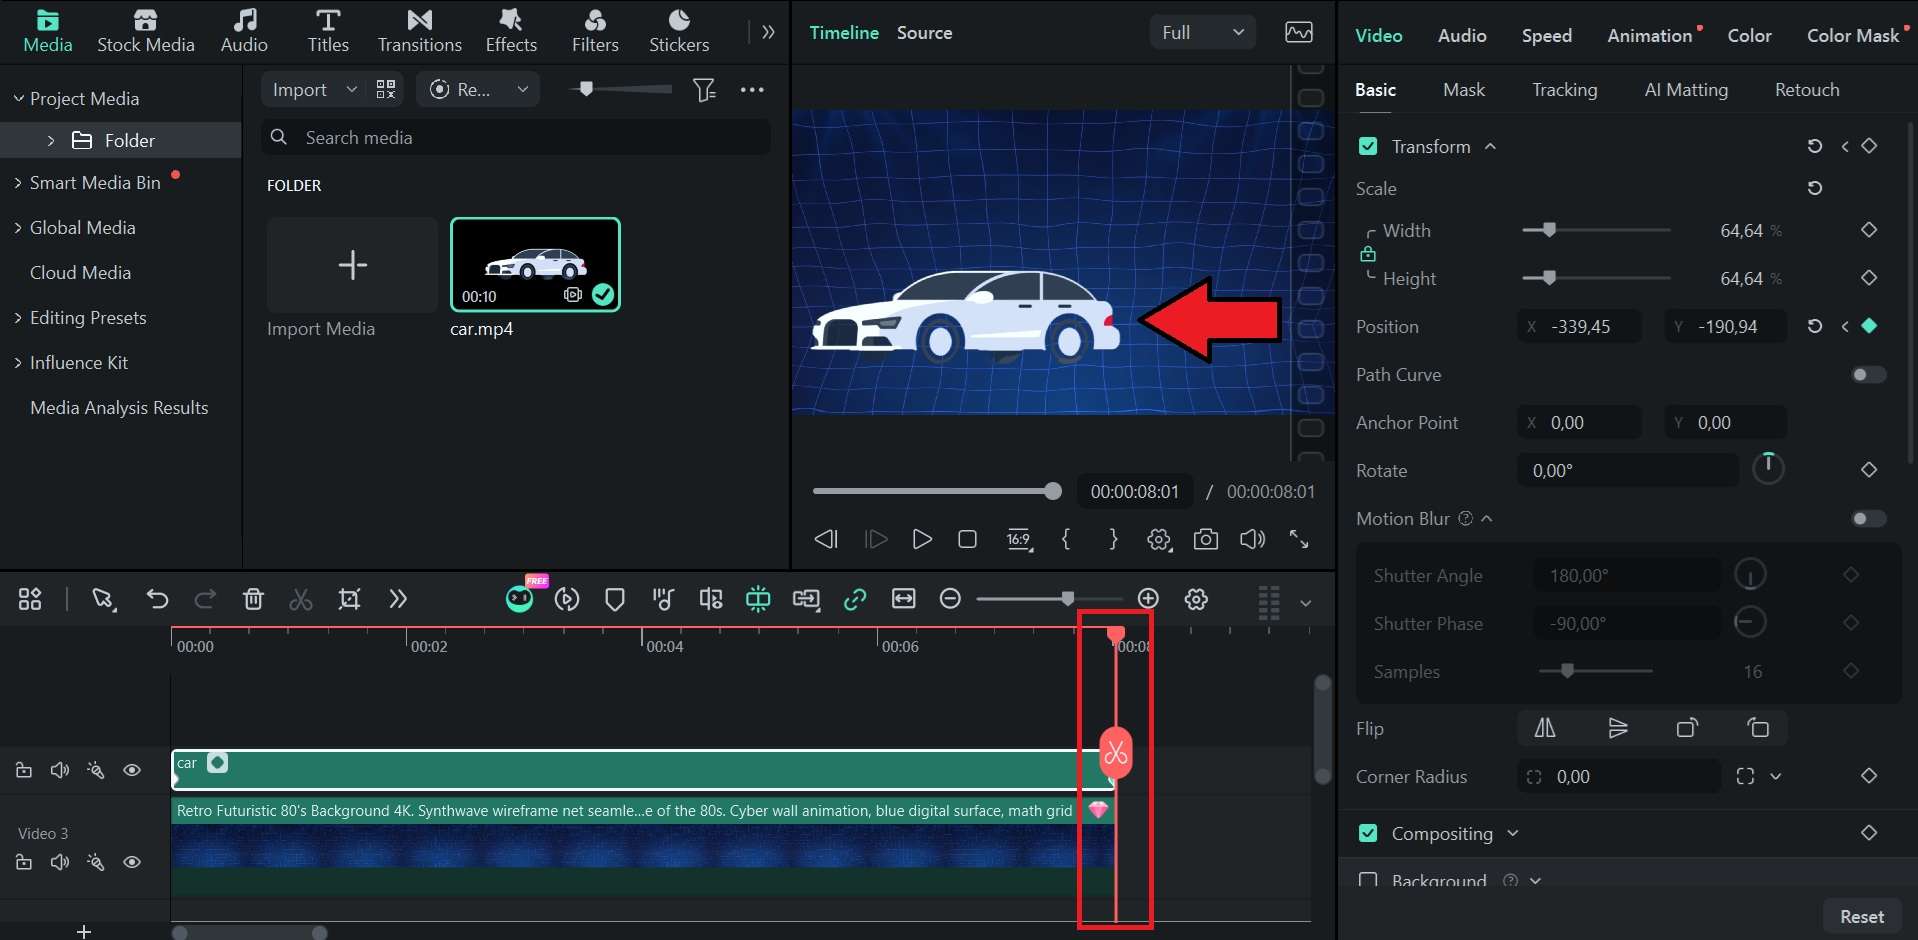
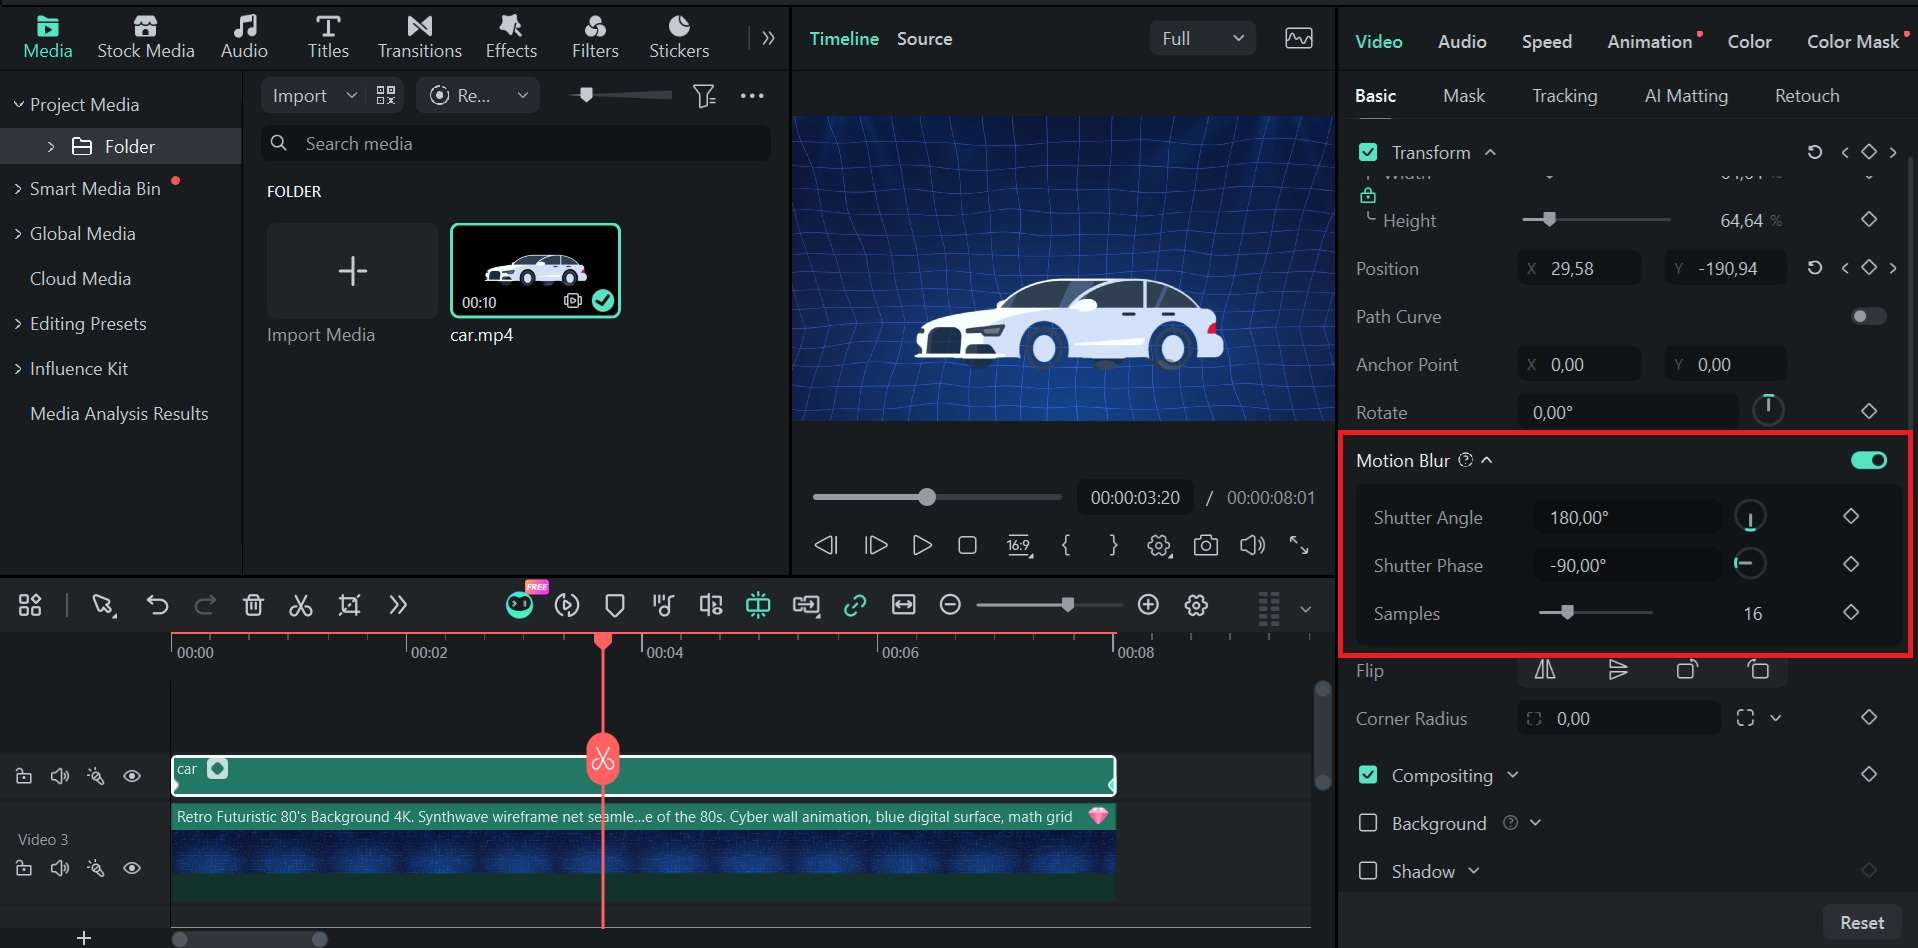
Method 2: One-click Motion Blur
Method 3: Apply Motion Blur Effects
 Secure Download
Part 4. How to Add Motion Blur to a Video Online
As you can see, motion blur Filmora workflows are varied and effective. But sometimes you just need a quick blur on one clip and don't want to open a full editor. In that case, you can add motion blur to videos online. Thankfully, there are a few web apps that offer convenient ways to add video motion blur online.
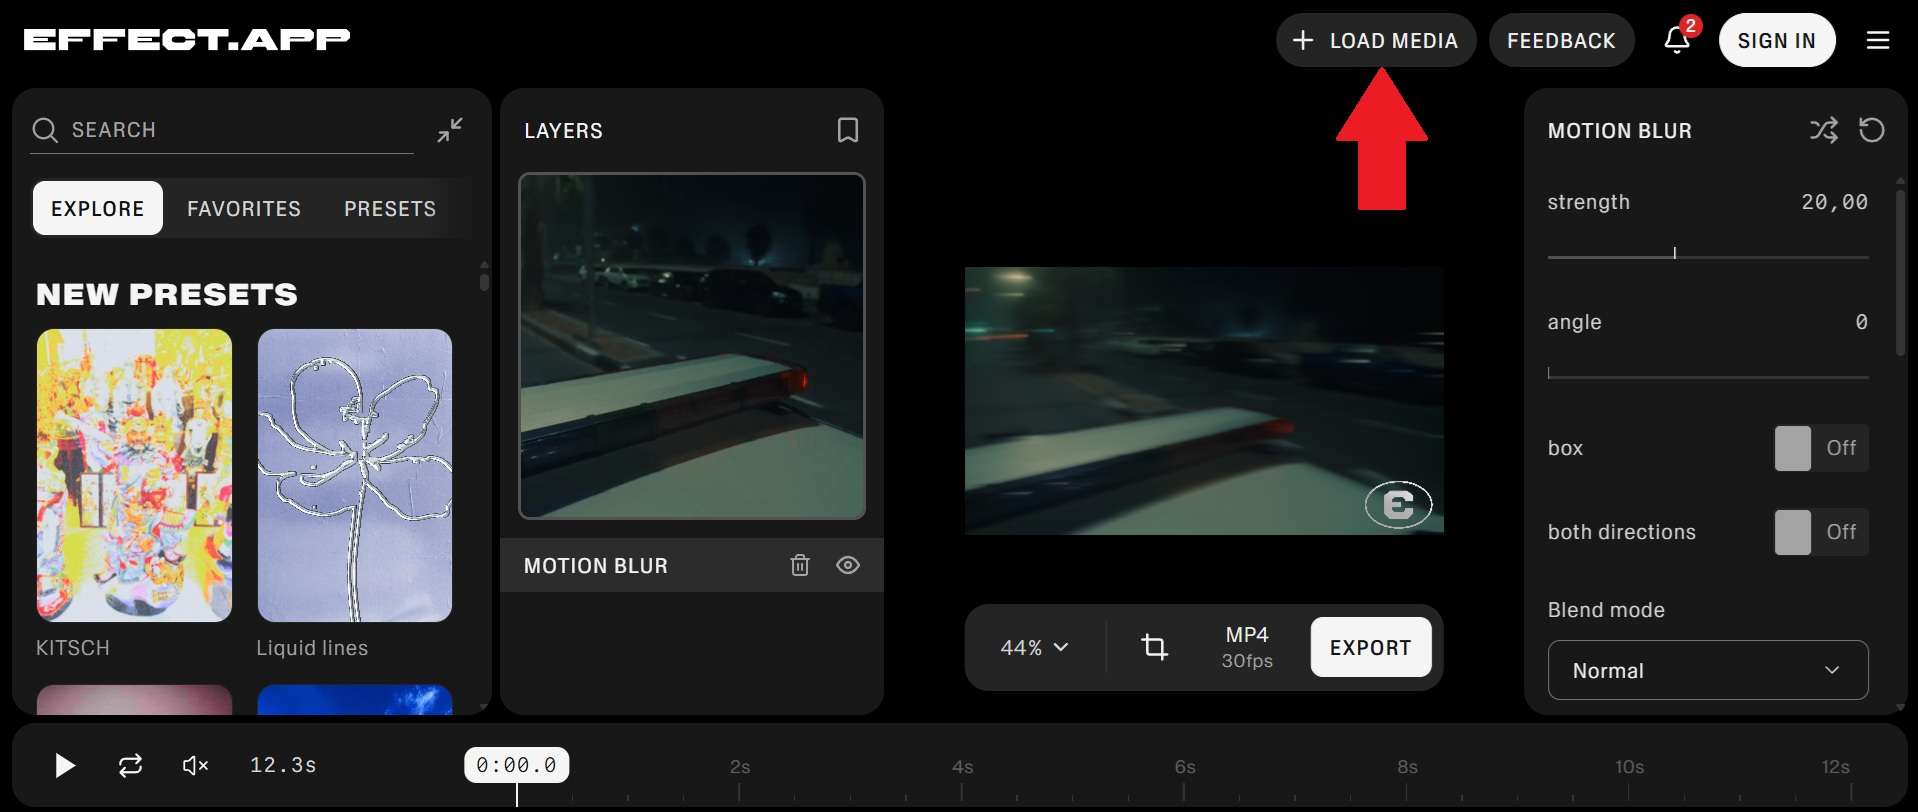
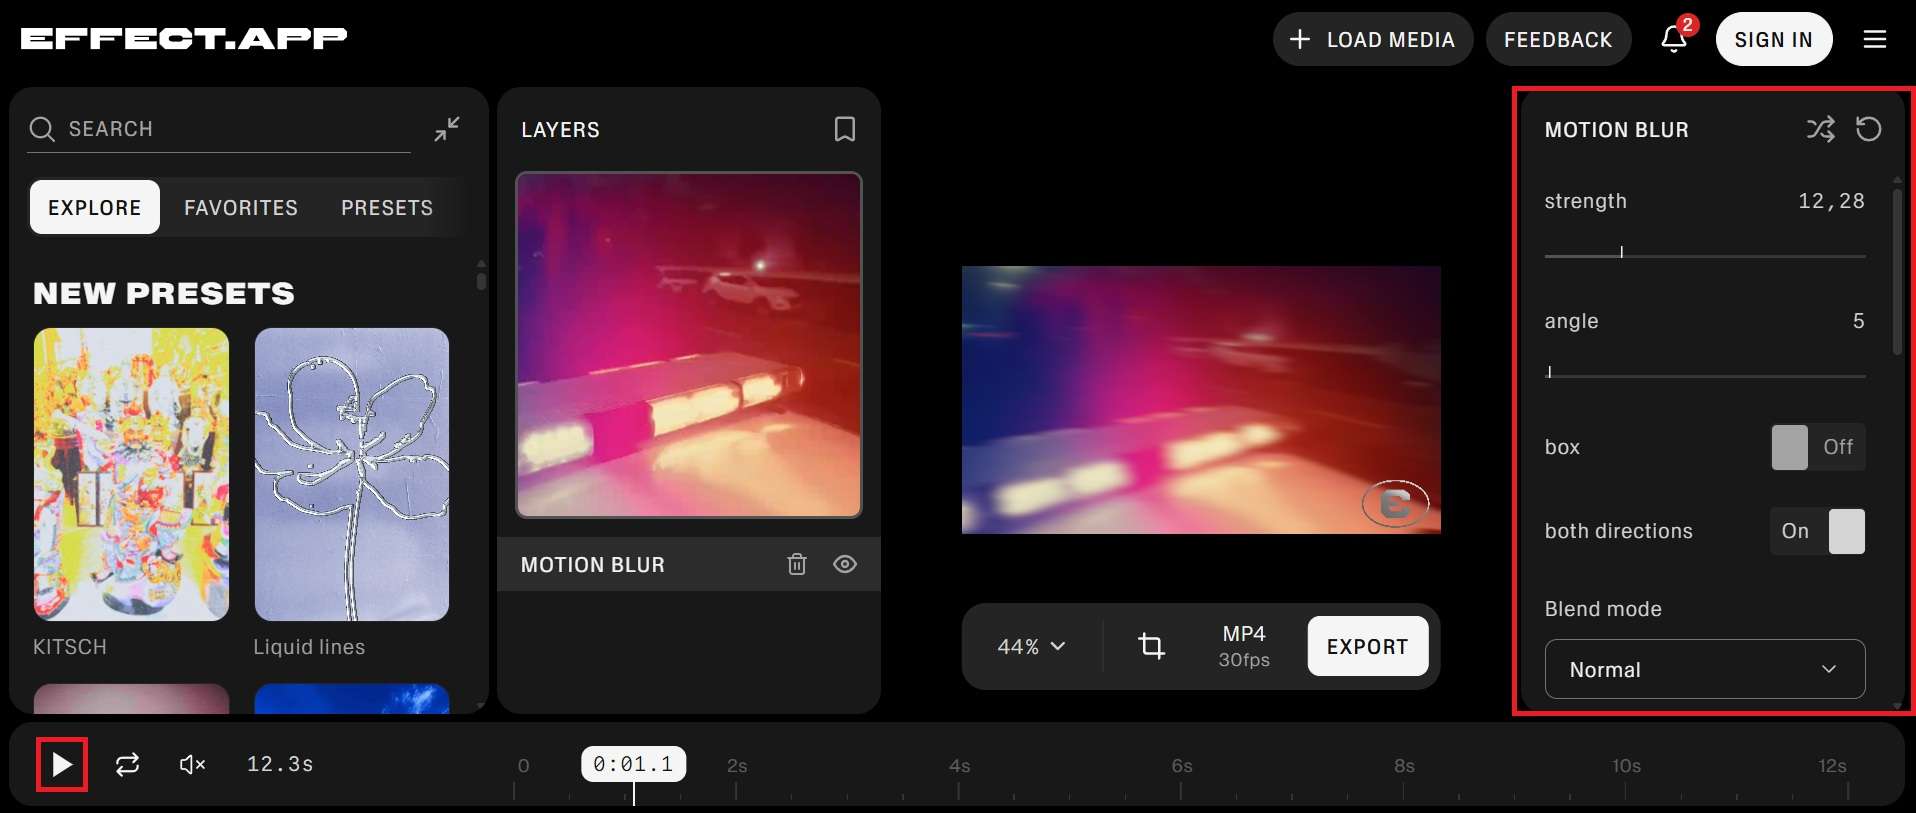
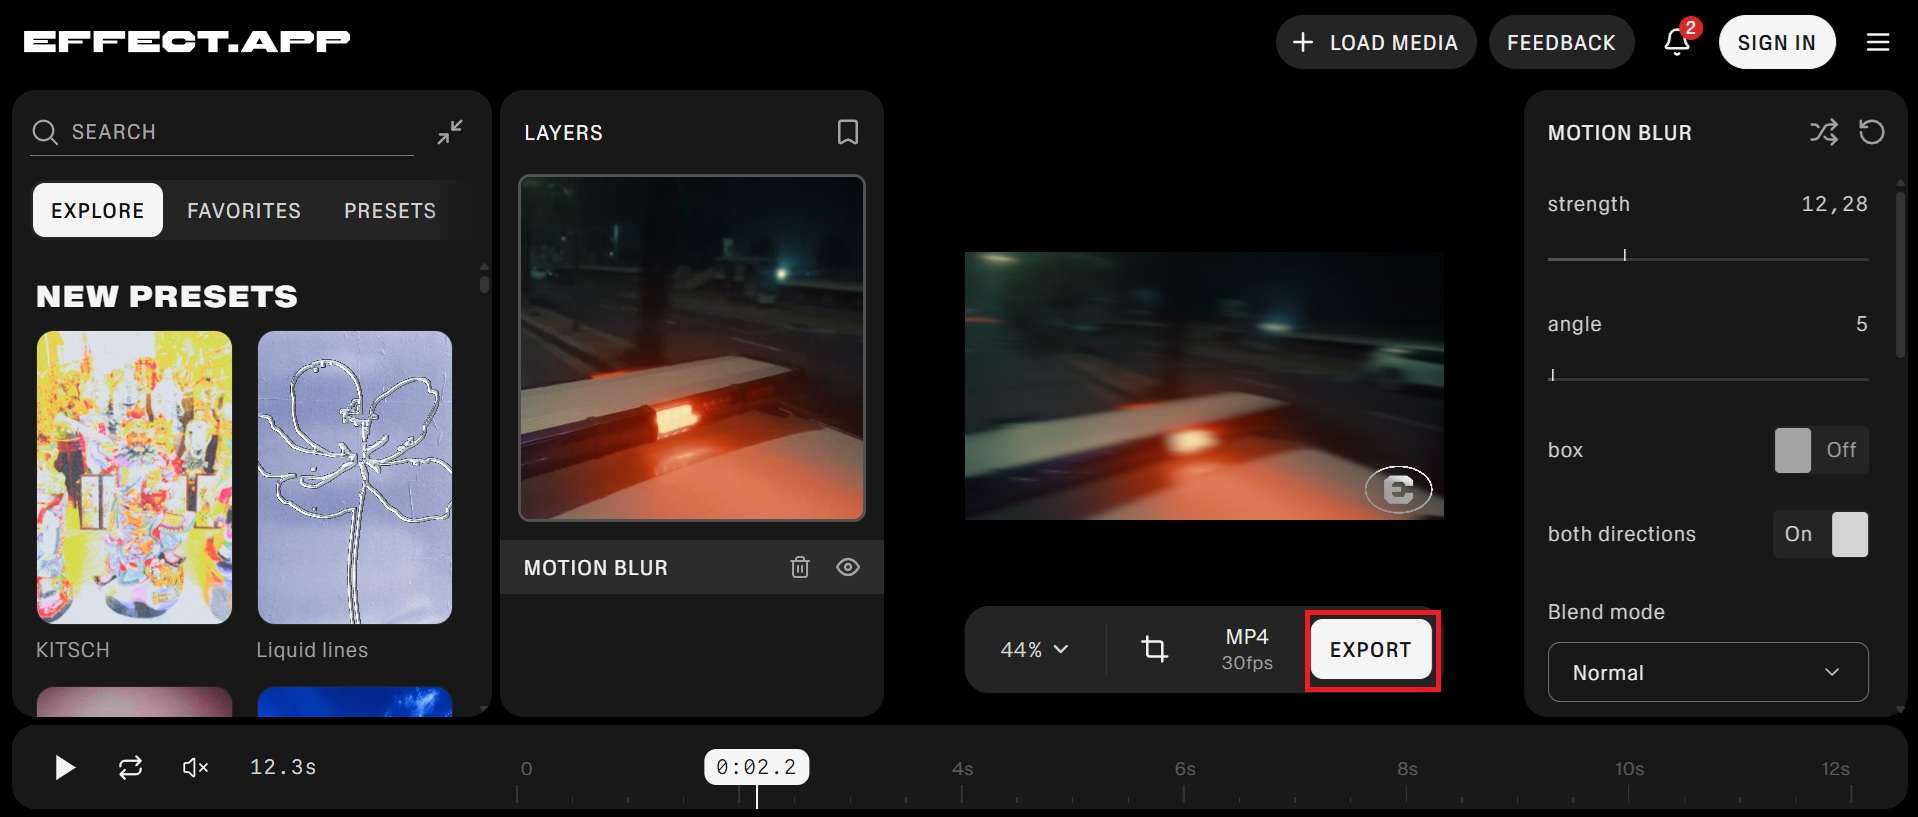
One option is Effect.app's Motion Blur effect, which works with both images and videos and lets you create directional motion trails directly in the browser.

But remember, online tools give you fewer controls than a proper editor like Filmora. For example, follow the steps below to learn how to add motion blur to video online for free.
Part 5. Tips for Using Motion Blur on a Video
Motion blur in video can make it much smoother, but more blur isn't automatically better. The best result usually comes from making the effect fit the movement instead of covering everything in a giant smear.
To keep your edits looking clean and professional, keep these guidelines in mind:
- Match Motion Blur to the Movement: Blur should follow the way things actually move. A subject sliding left to right needs a horizontal trail. If the direction is off, the eye catches it instantly, even if viewers can't say why.
- Avoid Overusing Motion Blur: It's tempting to crank everything up, but heavy blur turns details into mush. Start low, preview, and only add more if the movement still feels stiff.
- Consider Frame Rate and Shutter Speed: Always adjust your blur intensity based on your sequence output frame rate. For a natural starting point, the 180-degree shutter rule is useful.
- Use Direction and Timing Carefully: Blur only shows up while something is moving, so your animation speed matters. So, make sure the blur angle strictly matches the trajectory of your moving subject.
Conclusion
Adding motion blur to video is the quiet trick that makes video feel smooth instead of stiff. You can capture it in-camera with the right shutter speed, or add it after the fact in an editor or an online tool.
For most projects, Filmora’s motion blur workflow is the easiest all-in-one option. You can use the original Motion Blur feature for fast footage, or use keyframe motion blur to give titles, stickers, and animations a natural trail.
FAQs
-
Why does my video look too blurry when I add motion blur?
The blur may simply be too strong for the amount of movement in the shot. Try reducing the blur intensity, range, or shutter angle depending on the tool you're using. -
Can motion blur be added to only part of a video?
Yes! In Filmora, you can apply keyframe motion blur strictly to specific animated objects (like text or logos) while keeping the background sharp. Alternatively, you can slice a clip on the timeline and apply frame-level motion blur only to the fast-action segment. -
What is the difference between camera motion blur and object motion blur?
Camera motion blur occurs across the entire frame when the camera itself moves quickly (like during a fast pan or drone shot). Object motion blur only affects a specific subject or graphic element moving within a static or slow-moving frame.
