Simple video tutorials to get you started.
Creative techniques for filming and editing.


Silence Detection can scan and remove silent pauses from your videos automatically, saving you editing time and keeping your viewers engaged.
Silence Detection only works with clips that have audio. To automatically detect and delete silent pauses in a clip you need to:
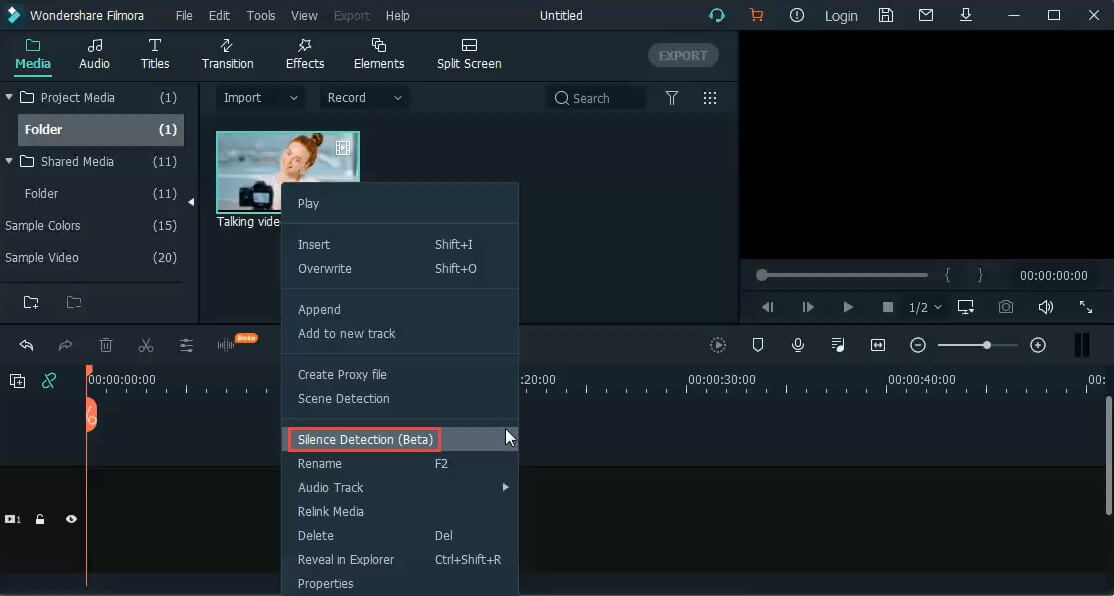
1. Right-click on the video in your media library and select the Silence Detection option.
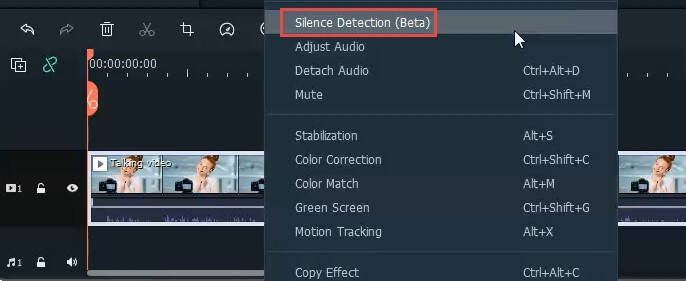
2. Add the video to your timeline, then right-click on it and select Silence Detection.
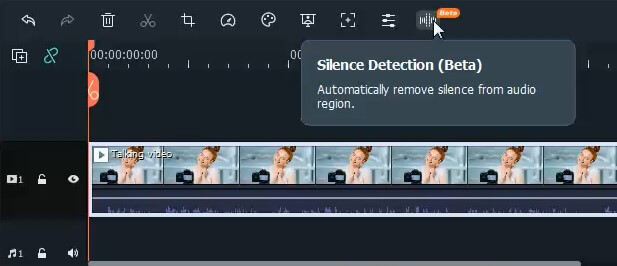
3. Add the video to your timeline and tap on the Silence Detection button on the toolbar.
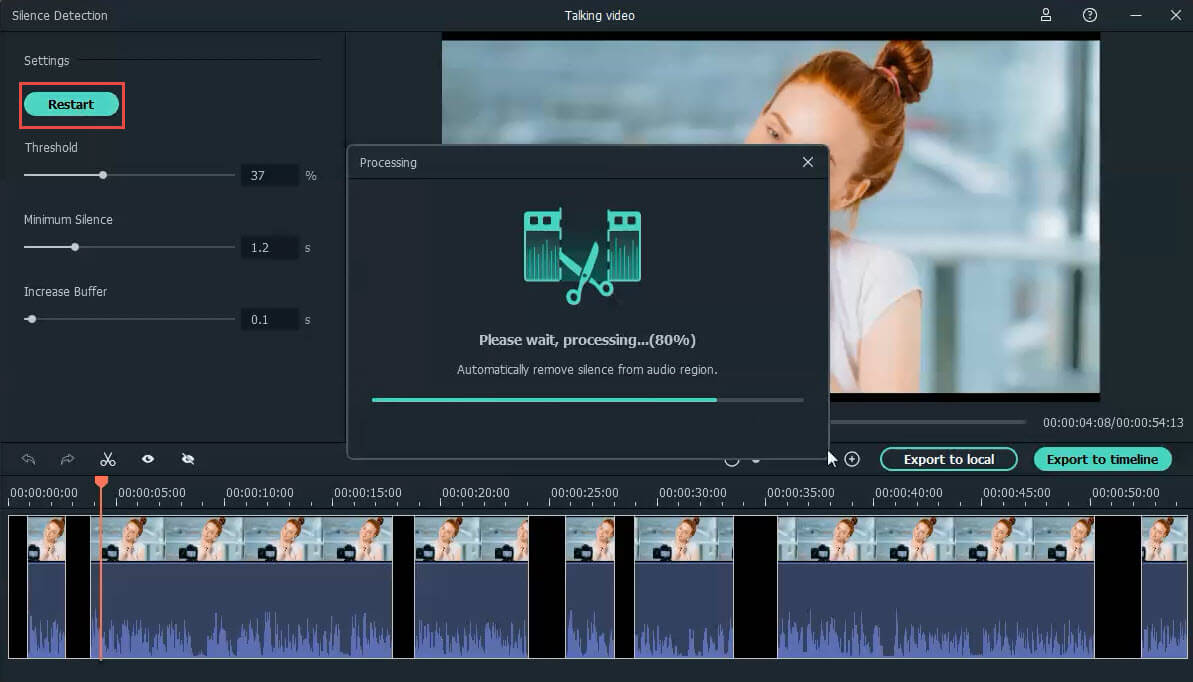
The clip will be imported to the Silence Detection window. There you can adjust three parameters for silence detection:
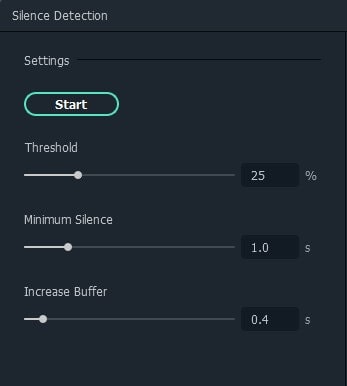
After you set the detection parameters, click Start to initiate the automatic silence detection sequence. You will see two different things in the timeline:


You can play the video to verify that all silent parts will be skipped (deleted) automatically. If you are not satisfied with the result, you can adjust the three audio parameters above, and click Restart to re-analyze and delete the silent parts.
Once your clip is ready, you can choose to export it to a local folder or to your Filmora Timeline to keep on editing.
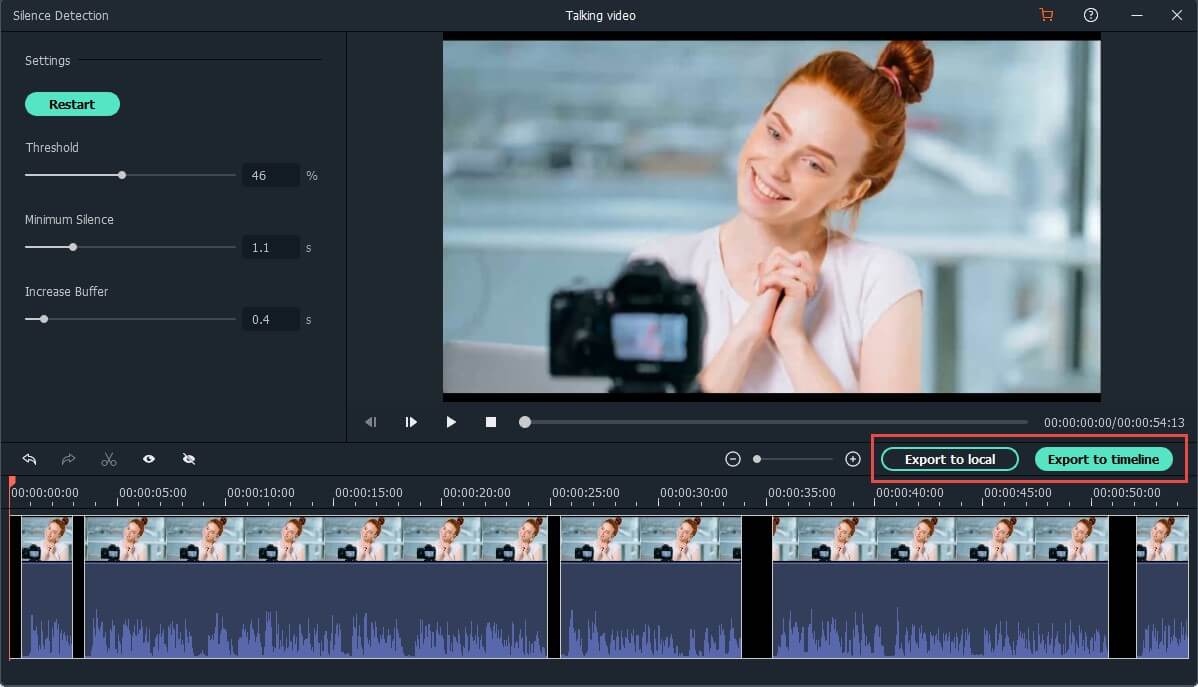
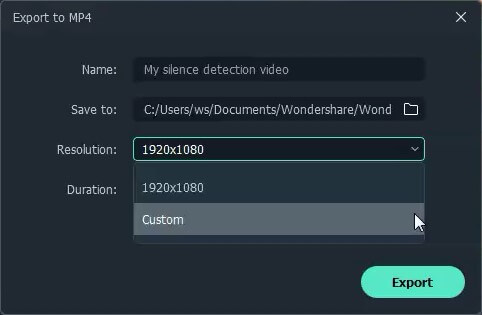
Click on ‘Export to local’, to get a .mp4 file without all the silent and low-sounding segments.
You can name the video, select the local folder, or adjust the resolution as you want.
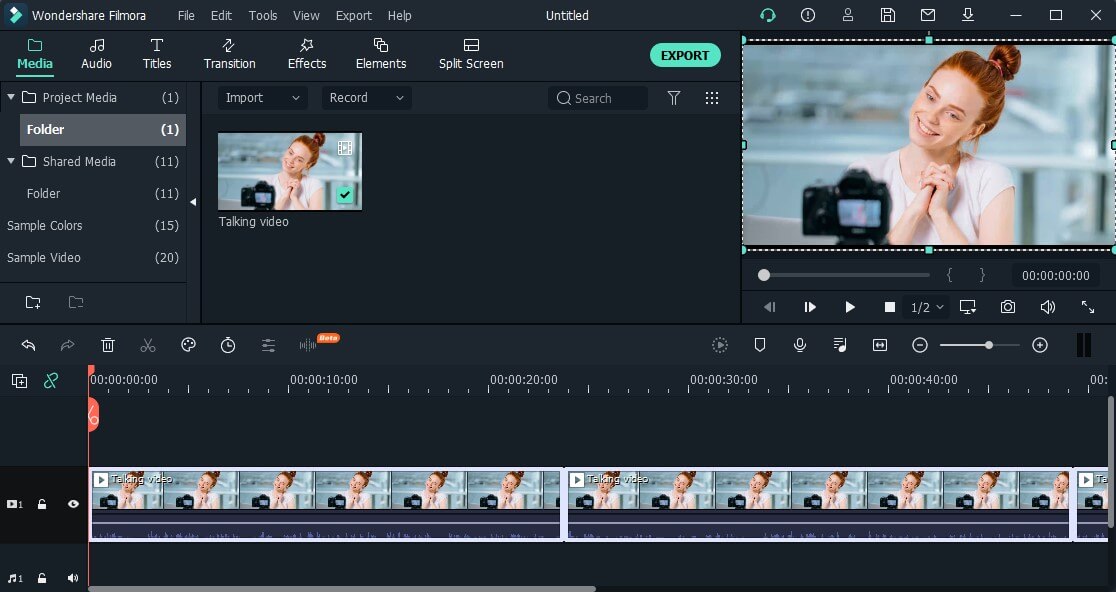
Click ‘Export to timeline’ to export the clip without silent segments to the Filmora timeline for you to keep on editing.
Yes, if you feel like extending or shortening silences in certain parts of your video, you can adjust or change the visible and invisible areas on the Silence Detection timeline before exporting the clip by trimming the clip with the Scissors icon or tapping in the eye icons to make clips visible or invisible.
Filmora has upgraded hum and wind denoise to bring your audio quality to the next level. You can double click the audio timeline and you’ll see options like below:

Denoise option includes Normal Denoise, Hum Removal and Wind Removal. Enable the denoise option and adjust the hum removal level as you need.
