Do you often edit portrait videos? Are you trying to make a unique portrait video or cool YouTube thumbnail by putting text behind your subject? Don’t struggle when trying to figure out how to separate the portrait and background in a video. The newly added AI Portrait feature in Filmora can do it for you!
With the help of Artificial Intelligence technology, it can automatically detect the portrait in videos and remove the background quickly. You don’t need to use the green screen or chroma key anymore. Moreover, you can even add borders, glitches, pixelated, and noise effects to make your video stand out. All this is done with five exclusive AI Portrait filters released with Filmora for Mac V10.4.
In this guide, we’ll show how to apply these filters to your portrait videos.
Note: The AI Portrait filters work best for videos with a single portrait facing the camera straight on. Multiple subjects, fast movements, and backlights may affect the result of the AI Portrait feature.
To apply the AI Portrait filters in Filmora, follow the steps below.
First, you need to import a portrait video into the timeline.

Get to the Effects section and click on AI Portrait, then you’ll see five AI Portrait filters there. They are Human Border, Human Glitch, Human Noise, Human Pixelate, and Human Segmentation.

Click the download icon in the top right of the filter to download it, and then click the filter to view the effect in the preview window.
If you are satisfied with the effect, drag the filter to the timeline to apply it.

At this time, the following window will pop up if you are using the free trial version of Filmora since these AI Portrait filters are included in the membership benefits. You will have two options: click the Purchase button to upgrade to Pro immediately, or click Try It to continue.
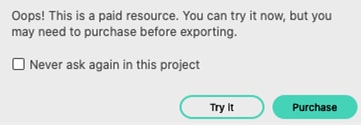
Note: If you want to export videos with the applied AI Portrait filters, you need to use Filmora's paid version.
In this case, click Try It, play the video and check the result.
You can add multiple AI Portrait filters to your video by dragging and dropping them to the timeline.
After applying the filter, you can also adjust the settings of the AI Portrait effect to get better results.
Different AI Portrait effects have different settings. You can double-click the clip in the timeline and scroll down to Video Effects, check the settings of the filter. Let’s take Human Glitch for example:

If you are not satisfied with the settings, you can choose to restore them by clicking the Restore icon next to the values.
Once all the editing is done, click the Export button, and you will see a pop-up window as shown below.

As we said before, to export videos with the applied AI Portrait filters, you need to pick up a plan of Filmora and pay for it. If you don’t want to buy it now, you can also choose to directly remove the AI Portrait filters and export the video by clicking “Remove and Export”, or select “Re-edit” to return to the timeline and remove them manually.
To remove the AI Portrait filters, just uncheck the effect option under Video Effects, and they will be disabled automatically.
