The videos we capture aren't always ideal. More often than not, they have unwanted elements in the background, or the subject isn't in focus as the shot is too broad.
Enter cropping, an essential video editing trick that can emphasize the focus on your video's subject, remove unnecessary elements you may have caught, and fit the video for various social media platforms where you might want to share the clip.
For Mac users, the built-in iMovie app seamlessly handles this video editing aspect, and today's guide will explore this, so stay around to learn how to crop a video with iMovie.
In this article
How to Crop a Video in iMovie on Mac?
Learning how to crop a clip in iMovie can be a valuable skill. With that said, we'll kick things off with iMovie for macOS:
- Launch the iMovie app on your Mac, tap the Create New button, and choose a Movie project.

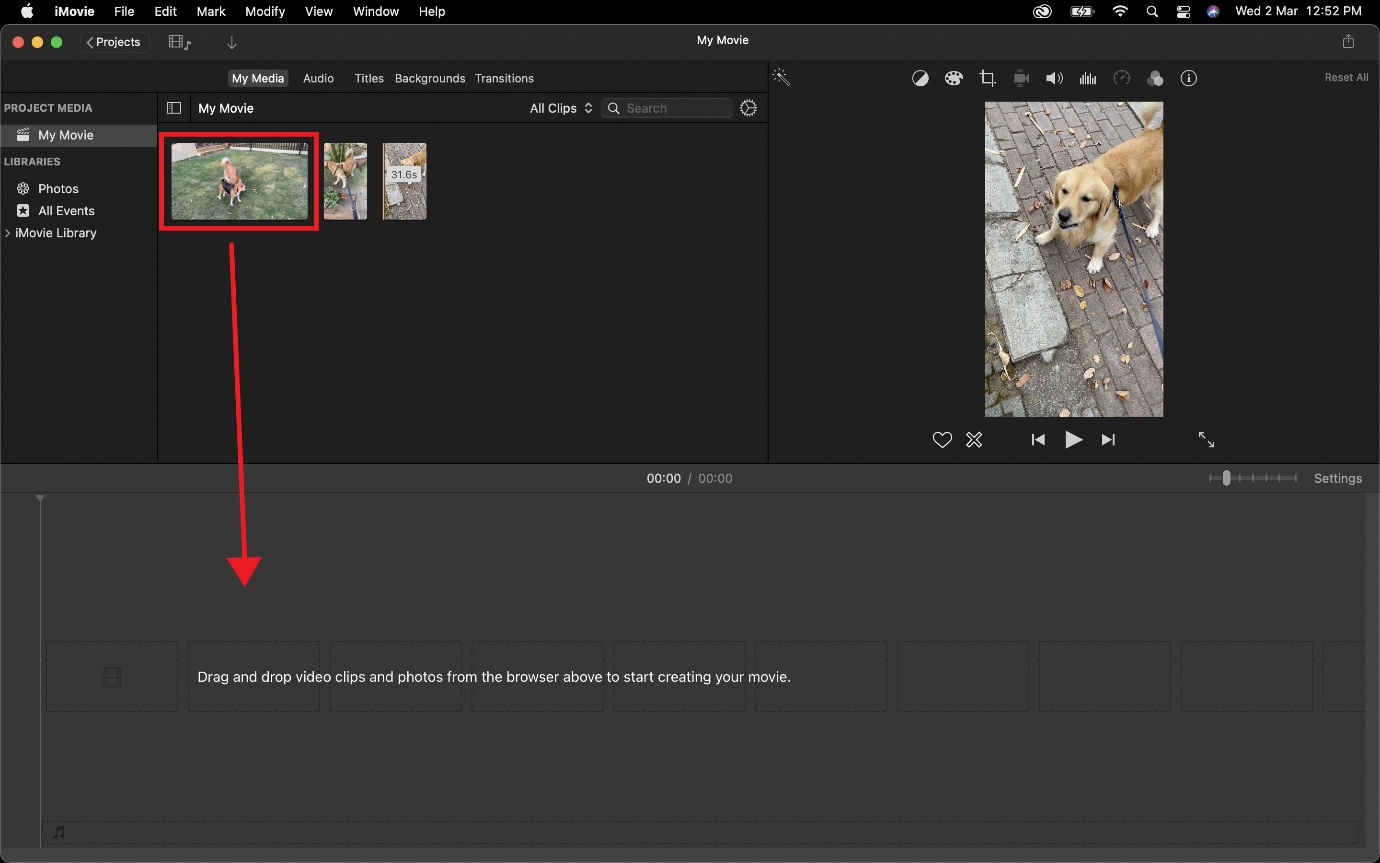
- Import a video and then drag and drop it from the My Media section into the app's Timeline.
- Tap the Crop button above the app's Player section.
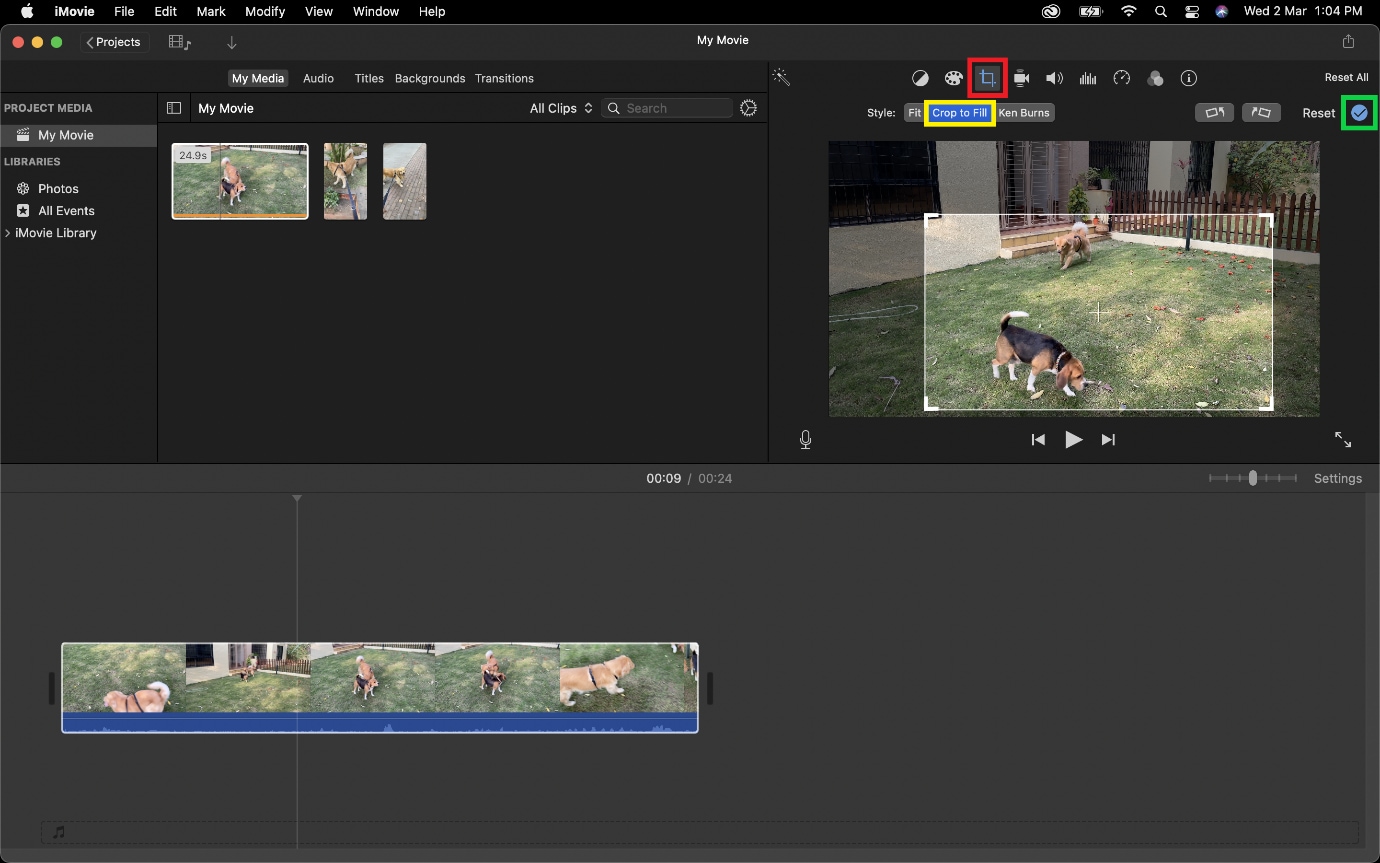
- Choose a Style and drag the edges to crop a movie in iMovie.
- Once satisfied, tap the Share icon in the top right and select Export File to save the video.
Adjusting the cropping area to keep the video's subject in focus or eliminating the background elements you don't want in the video will significantly enhance the visual appeal of your clip.
Can You Crop a Video in iMovie on iPhone and iPad?

Now that you know that it is able to crop a video in iMovie on a Mac, a lot of people may take it for granted that it can also crop videos on iPhone and iPad, but this is not the case. It only allows users to zoom in or out, and you can't adjust the aspect ratio or the resolution. If you want to know how to use it, here are the steps.
- Head to the App Store and look for the iMovie app.
- Install it on your iPhone and hit Open to launch the app.
- Swipe from the Start New Project area at the bottom and tap on Movie. This option will give you the most control over the editing process.
- Tap on a video to select it, and hit the Create Movie button at the bottom of the screen.
- To access iMovie's cropping options, tap the video in the Timeline to select it. After that, you'll see the Plus icon in the top right corner of your video.
- Click the Plus icon, then pinch to zoom and crop in iMovie on your iPhone.
Best Alternative To Crop Videos in iMovie – Wondershare Filmora
iMovie is a good video cropper for Mac users, and it blends with basic video editing features. However, if you want to make some advanced adjustments, or look for more video effects, and resources, and also want to know how to crop on Android or Windows, you may meet Wondershare Filmora.
It is a fully-fledged video-editing software with Windows, macOS, iOS, and Android apps, making it an indispensable cross-platform alternative to iMovie.
Unlike iMovie, Filmora's editing tools aren't limited to only the most essential options. The app has a rich library of features, such as motion tracking, playback speed adjustments, split screens, blur, freeze frames, and more.
Its extensive libraries of audio/video effects, transitions, and animations make it a far more compelling video editing solution than iMovie. In addition, the AI-enhanced features make your editing tasks a piece of cake, creating an app with vastly more options and functionality than Apple's native iMovie can offer.
How to Crop a Video in Filmora?
Wondershare Filmora has a remarkably straightforward interface that anyone can navigate, making the cropping process a breeze.
Here's how you can try it yourself:
- Launch Filmora on your Mac and click the New Project button.

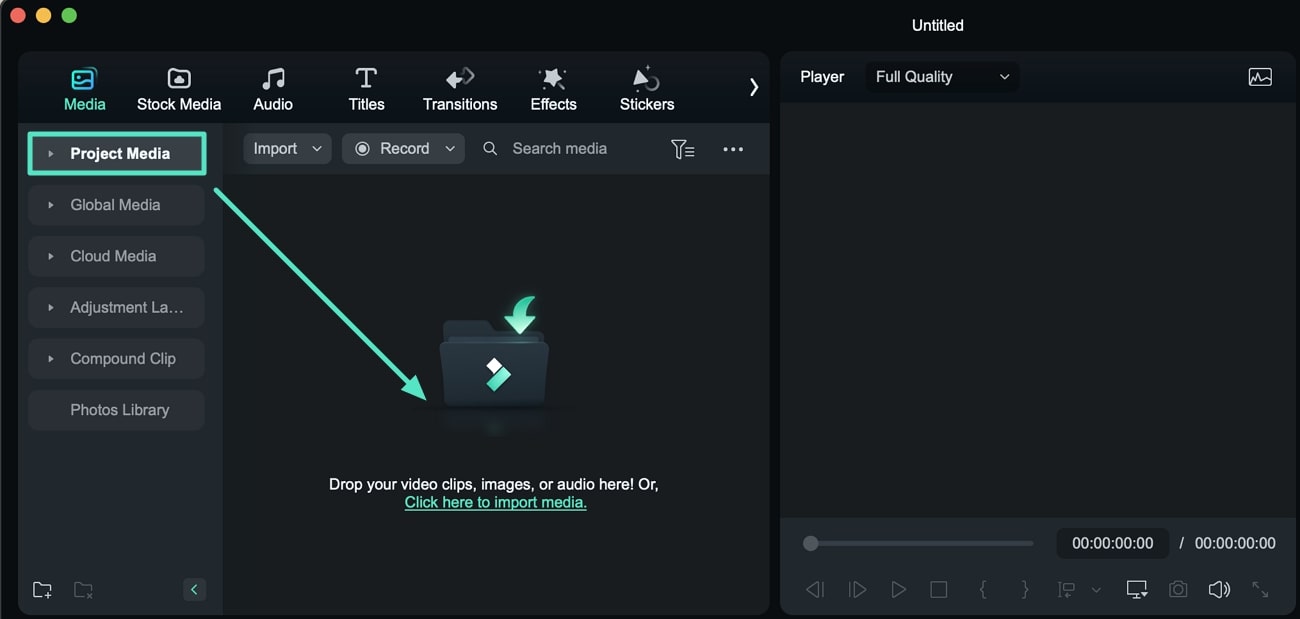
- Tap the "Click here to import media" option or drop a clip from the desktop into the app.
- Drag and drop the clip from the Media section into the Timeline below.
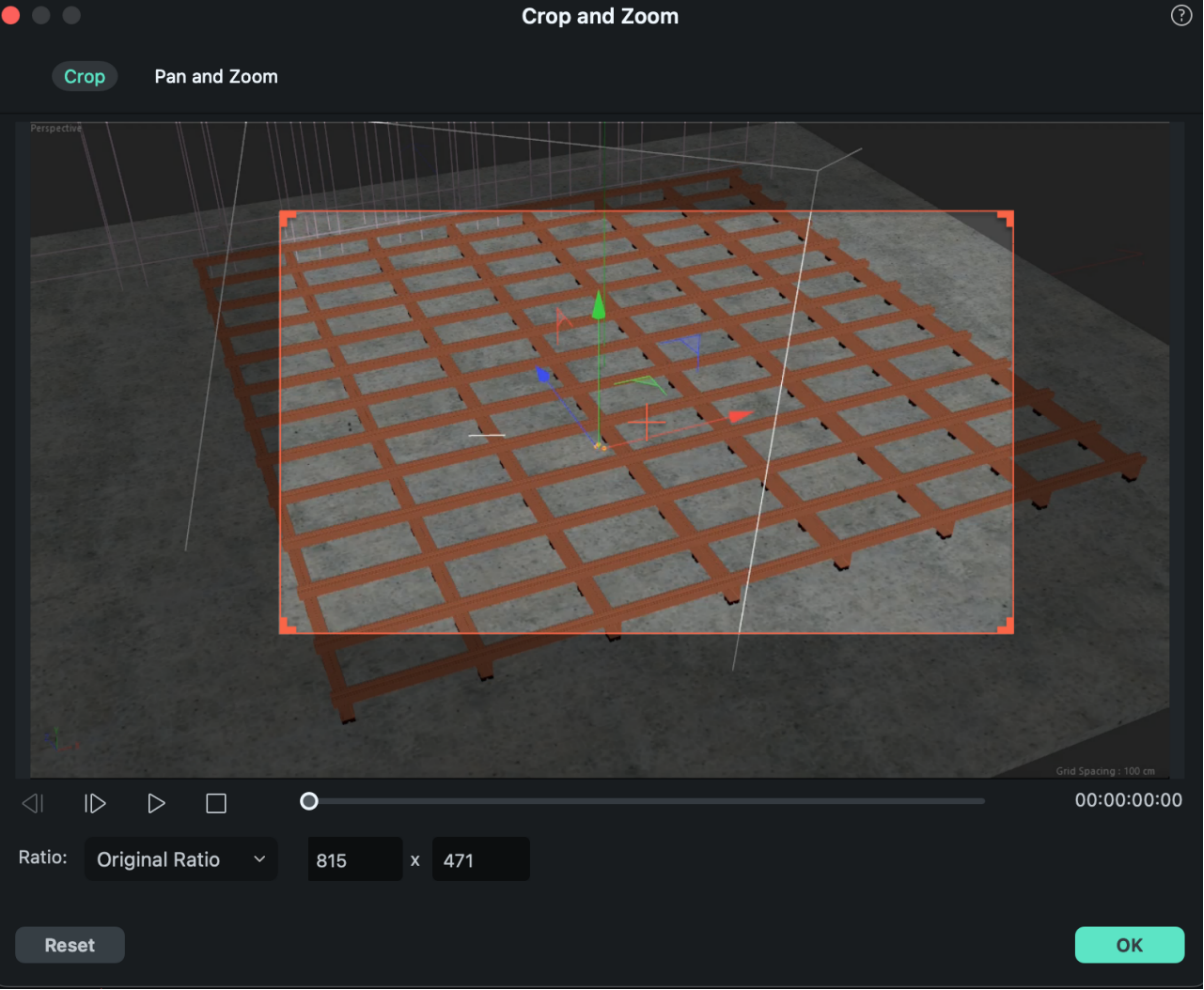
- Tap on the clip in the Timeline to select it, and then click the Crop button above it.
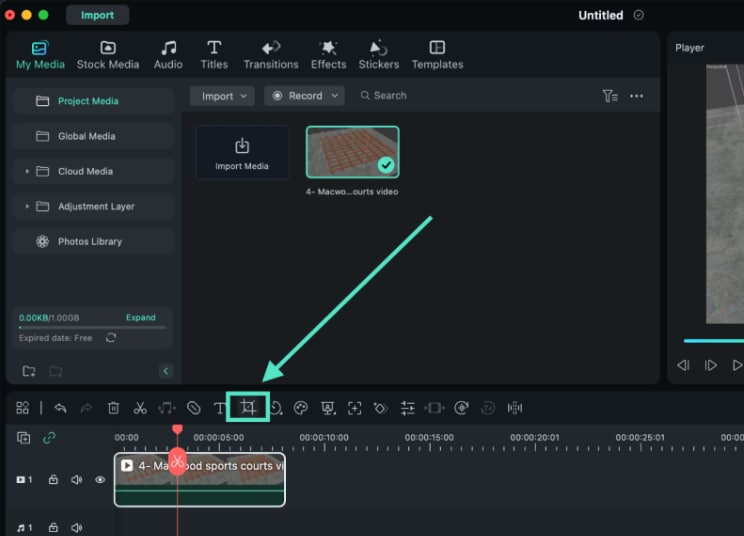
- Set a Ratio, enter the resolution, or manually crop a video by dragging the corner handles. Tap OK when you're done.
- Once done, tap the Export button.
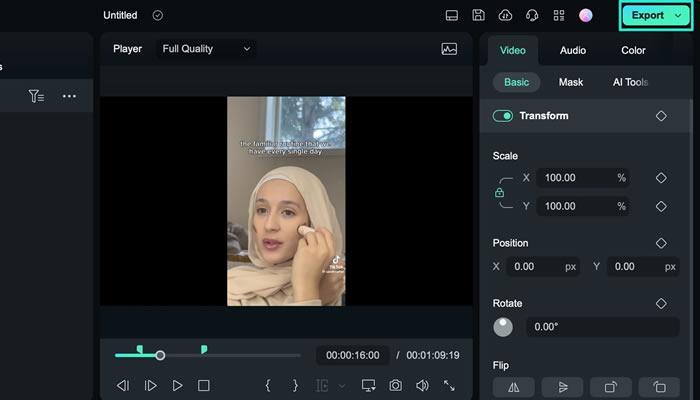
- Adjust the settings and save the cropped video to your device.

How to Crop Videos in Filmora on Phone?
Aside from cropping videos on Windows and Mac, Filmora also allows you to crop videos on Android and iPhone. Here are the simple steps.
- Download and install Filmora mobile on your phone.
Filmora for Mobile Filmora for Mobile Filmora for Mobile Filmora for Mobile Filmora for Mobile
Edit Videos on Your Mobile Phone with 1-Click!

- • Powerful Brand New AI Features.
- • User-friendly video editing for beginners.
- • Full-featured video editing for professionals.
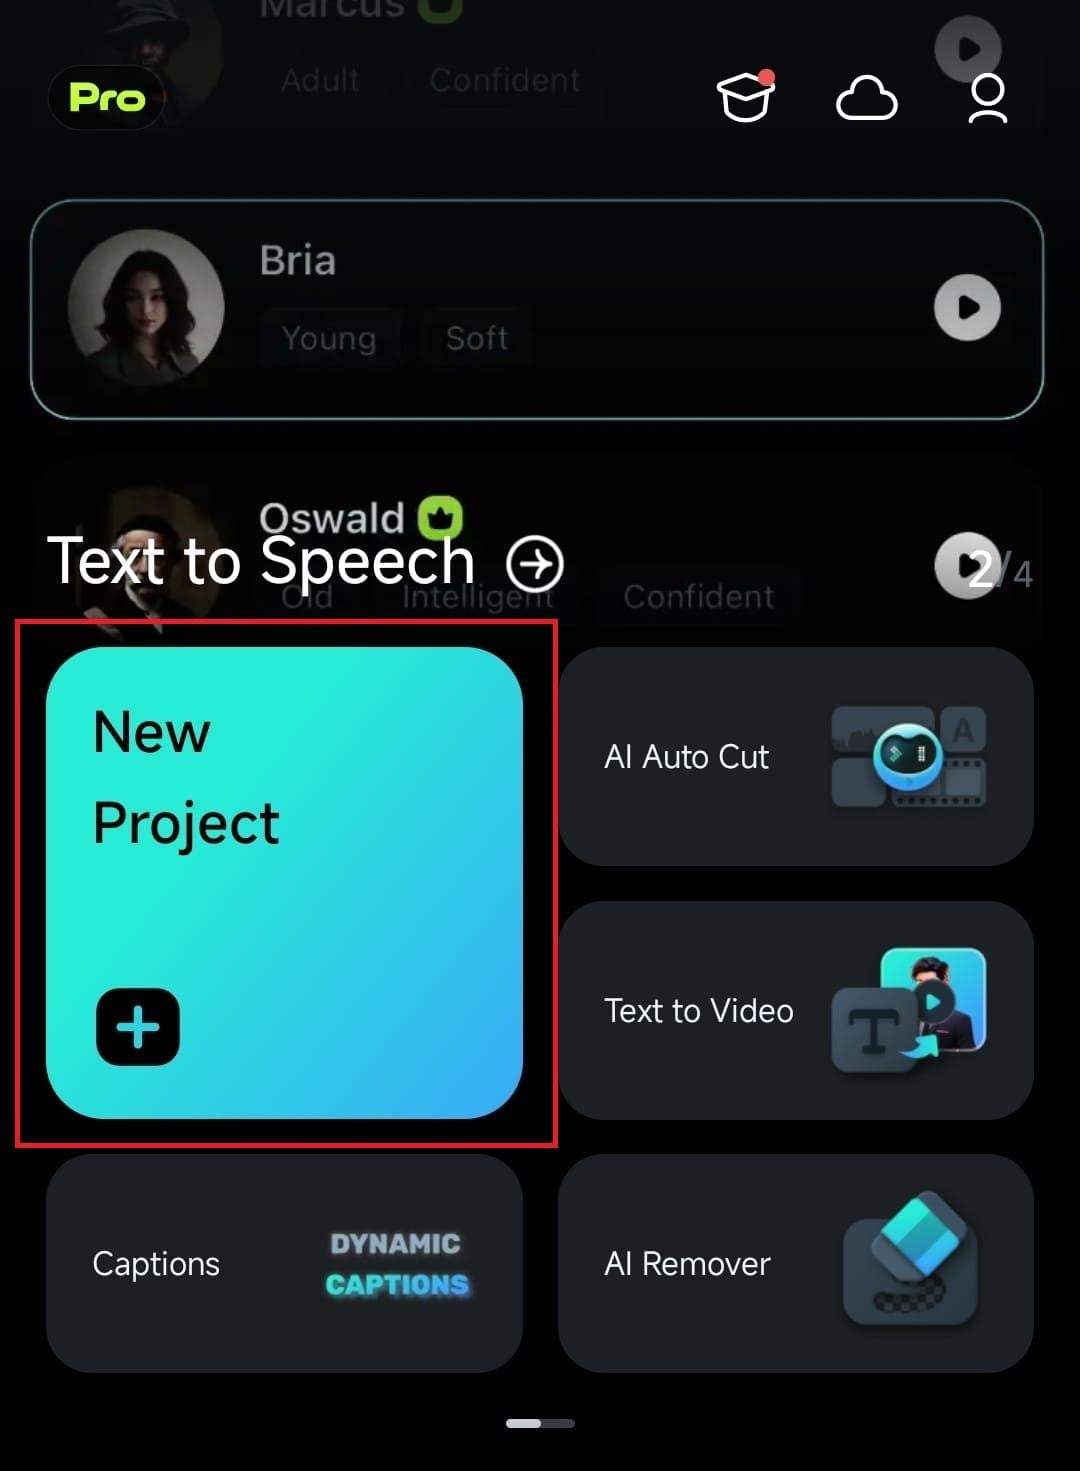
4,085,556 people have downloaded it - Click New Project, start a project, and upload your YouTube videos.
- Select the video on the timeline > click the trim button.

- Navigate to the cropping tool.

- Customizing the cropping area or using the preset aspect ratio to cropping YouTube videos.

- When ready, tap the Checkmark button at the top right and preview the video. Export to save it if you are satisfied.
If you also want to cut or edit the cropped videos, check the following video guide for more reference.
Conclusion
For Mac users, cropping videos in iMovie can be seamless. However, it's worth noting that it offers fewer features than professional video editing apps like Wondershare Filmora.
Unlike iMovie, Filmora's editing tools aren't limited, and its crop tool can do more than zoom. Furthermore, it is rich in resources and effects, with AI-enhanced features that make Filmora a better alternative to iMovie.


 100% Security Verified | No Subscription Required | No Malware


