Of the several new trends generating headlines, the Reverse Video is the one that has received the most amount attention. Before this, Instagram provided a function that allowed you to shoot a video and then reverse it to demonstrate the impact.
However, since Instagram has eliminated the ability to reverse video from Stories, Reels, and Posts, many users have inquired how to reverse video on Instagram. While there is no straightforward solution to this topic, we have a technique to integrate the Reverse Video Instagram for our readers. Without further ado, let's get started!
In this article
Part 1. How to Record Video in Reverse on Instagram?
When you play a video backwards, you will generate some unique effects with your video. Examples include making people walk backward, getting them to leap forward instead of forward, and dancing in reverse.
While many would also say that you can challenge the principles of science, whether it's releasing a microphone and seeing it fly up into your palm or filming a fountain in action and showing a replay of the water rising right up to the top of your display.
You can even make pets run backward and rainfall up instead of down. Many of the significant consumer video editing applications (such as Snapchat) have begun to follow the trend, and they are all doing it effortlessly!
Here's how you can record video in reverse on Instagram:
Step 1: If you want to create a video that plays in reverse mode, start by opening the Instagram Stories camera.
Step 2: Swipe through the available choices at the bottom of the display, such as Hands-Free, Boomerang, Live, etc., until you reach the Rewind recording mode, which looks like this as shown in the picture below.
Step 3: Click the Record button at the bottom of the display to create videos.
And there you have it – you've just recorded a video in reverse mode on Instagram!
Part 2. How to Reverse Video on Instagram Reels and Story on Desktop/Mobile?
Now that you know how reversing a video can create fun and engaging content for Instagram, it's time to explore how to do it using a reliable third-party tool. One of the most popular and user-friendly options is Wondershare Filmora, available on both desktop and mobile platforms.
Filmora provides a comprehensive editing suite that makes reversing videos a breeze. You can seamlessly import, edit, and export reversed videos in high quality, perfect for sharing on Instagram Reels or Stories. For mobile users, Filmora’s app on Android and iOS also supports reversing videos, making it convenient to create on-the-go content directly from your phone.
Below is a step-by-step guide for both desktop and mobile users on how to reverse videos for Instagram using Filmora.
a. Reverse Video on Instagram using Filmora on Wins/Mac
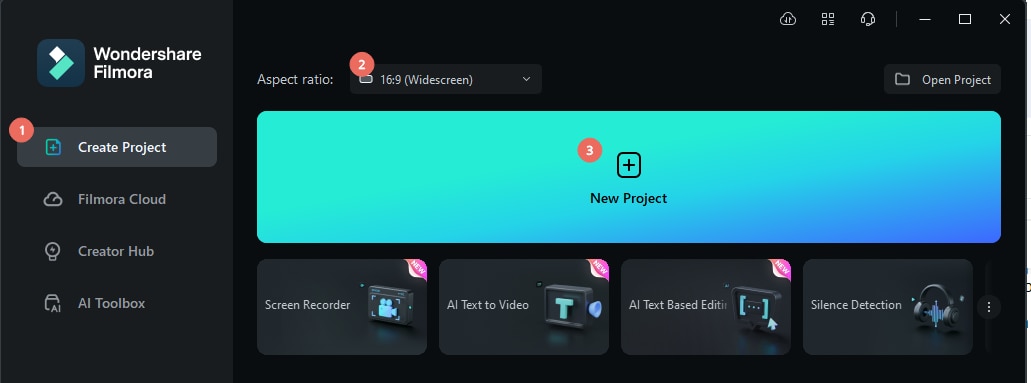
Step 1. Open Filmora and Start a New Project
Launch the Wondershare Filmora and select New Project from the startup window. Then, import your video into the timeline.
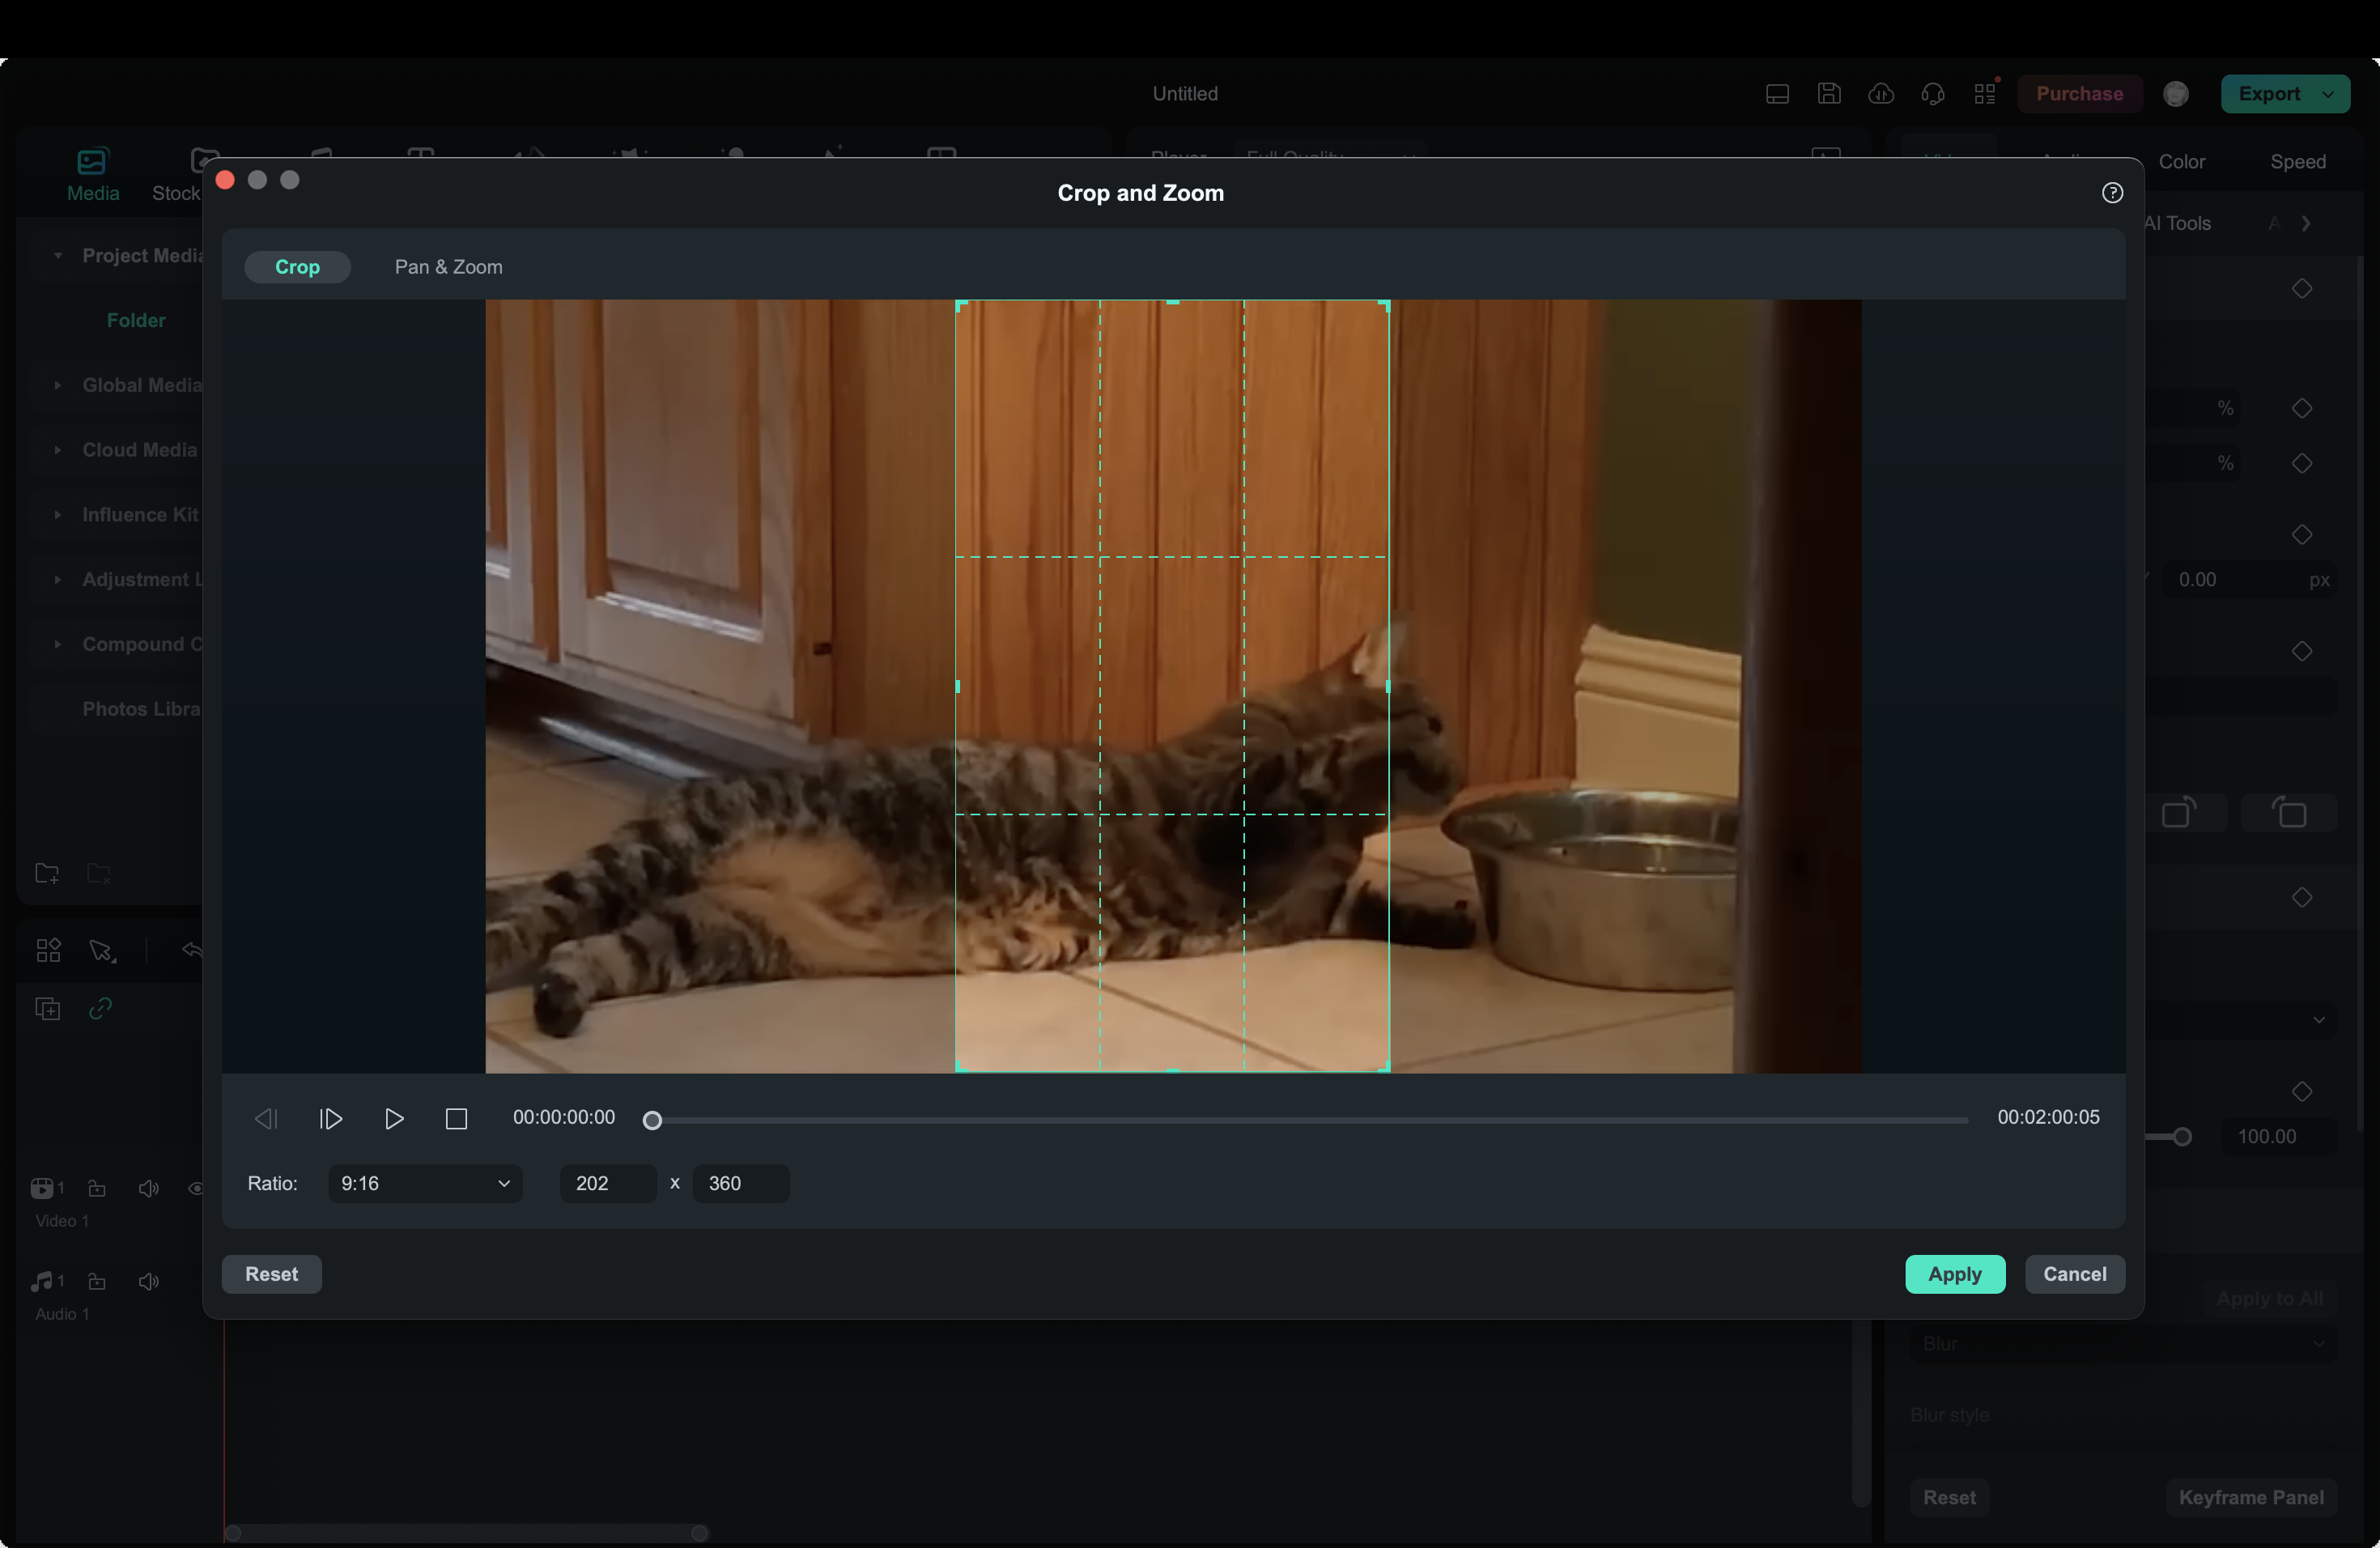
If you're creating content specifically for Instagram Reels or Stories, you may want to adjust the project aspect ratio to 9:16 (portrait) to match Instagram’s preferred formats. Right-click the video on the timeline and select “Crop and Zoom.” Change the ratio and adjust the area to your needs. Click Apply to save changes.
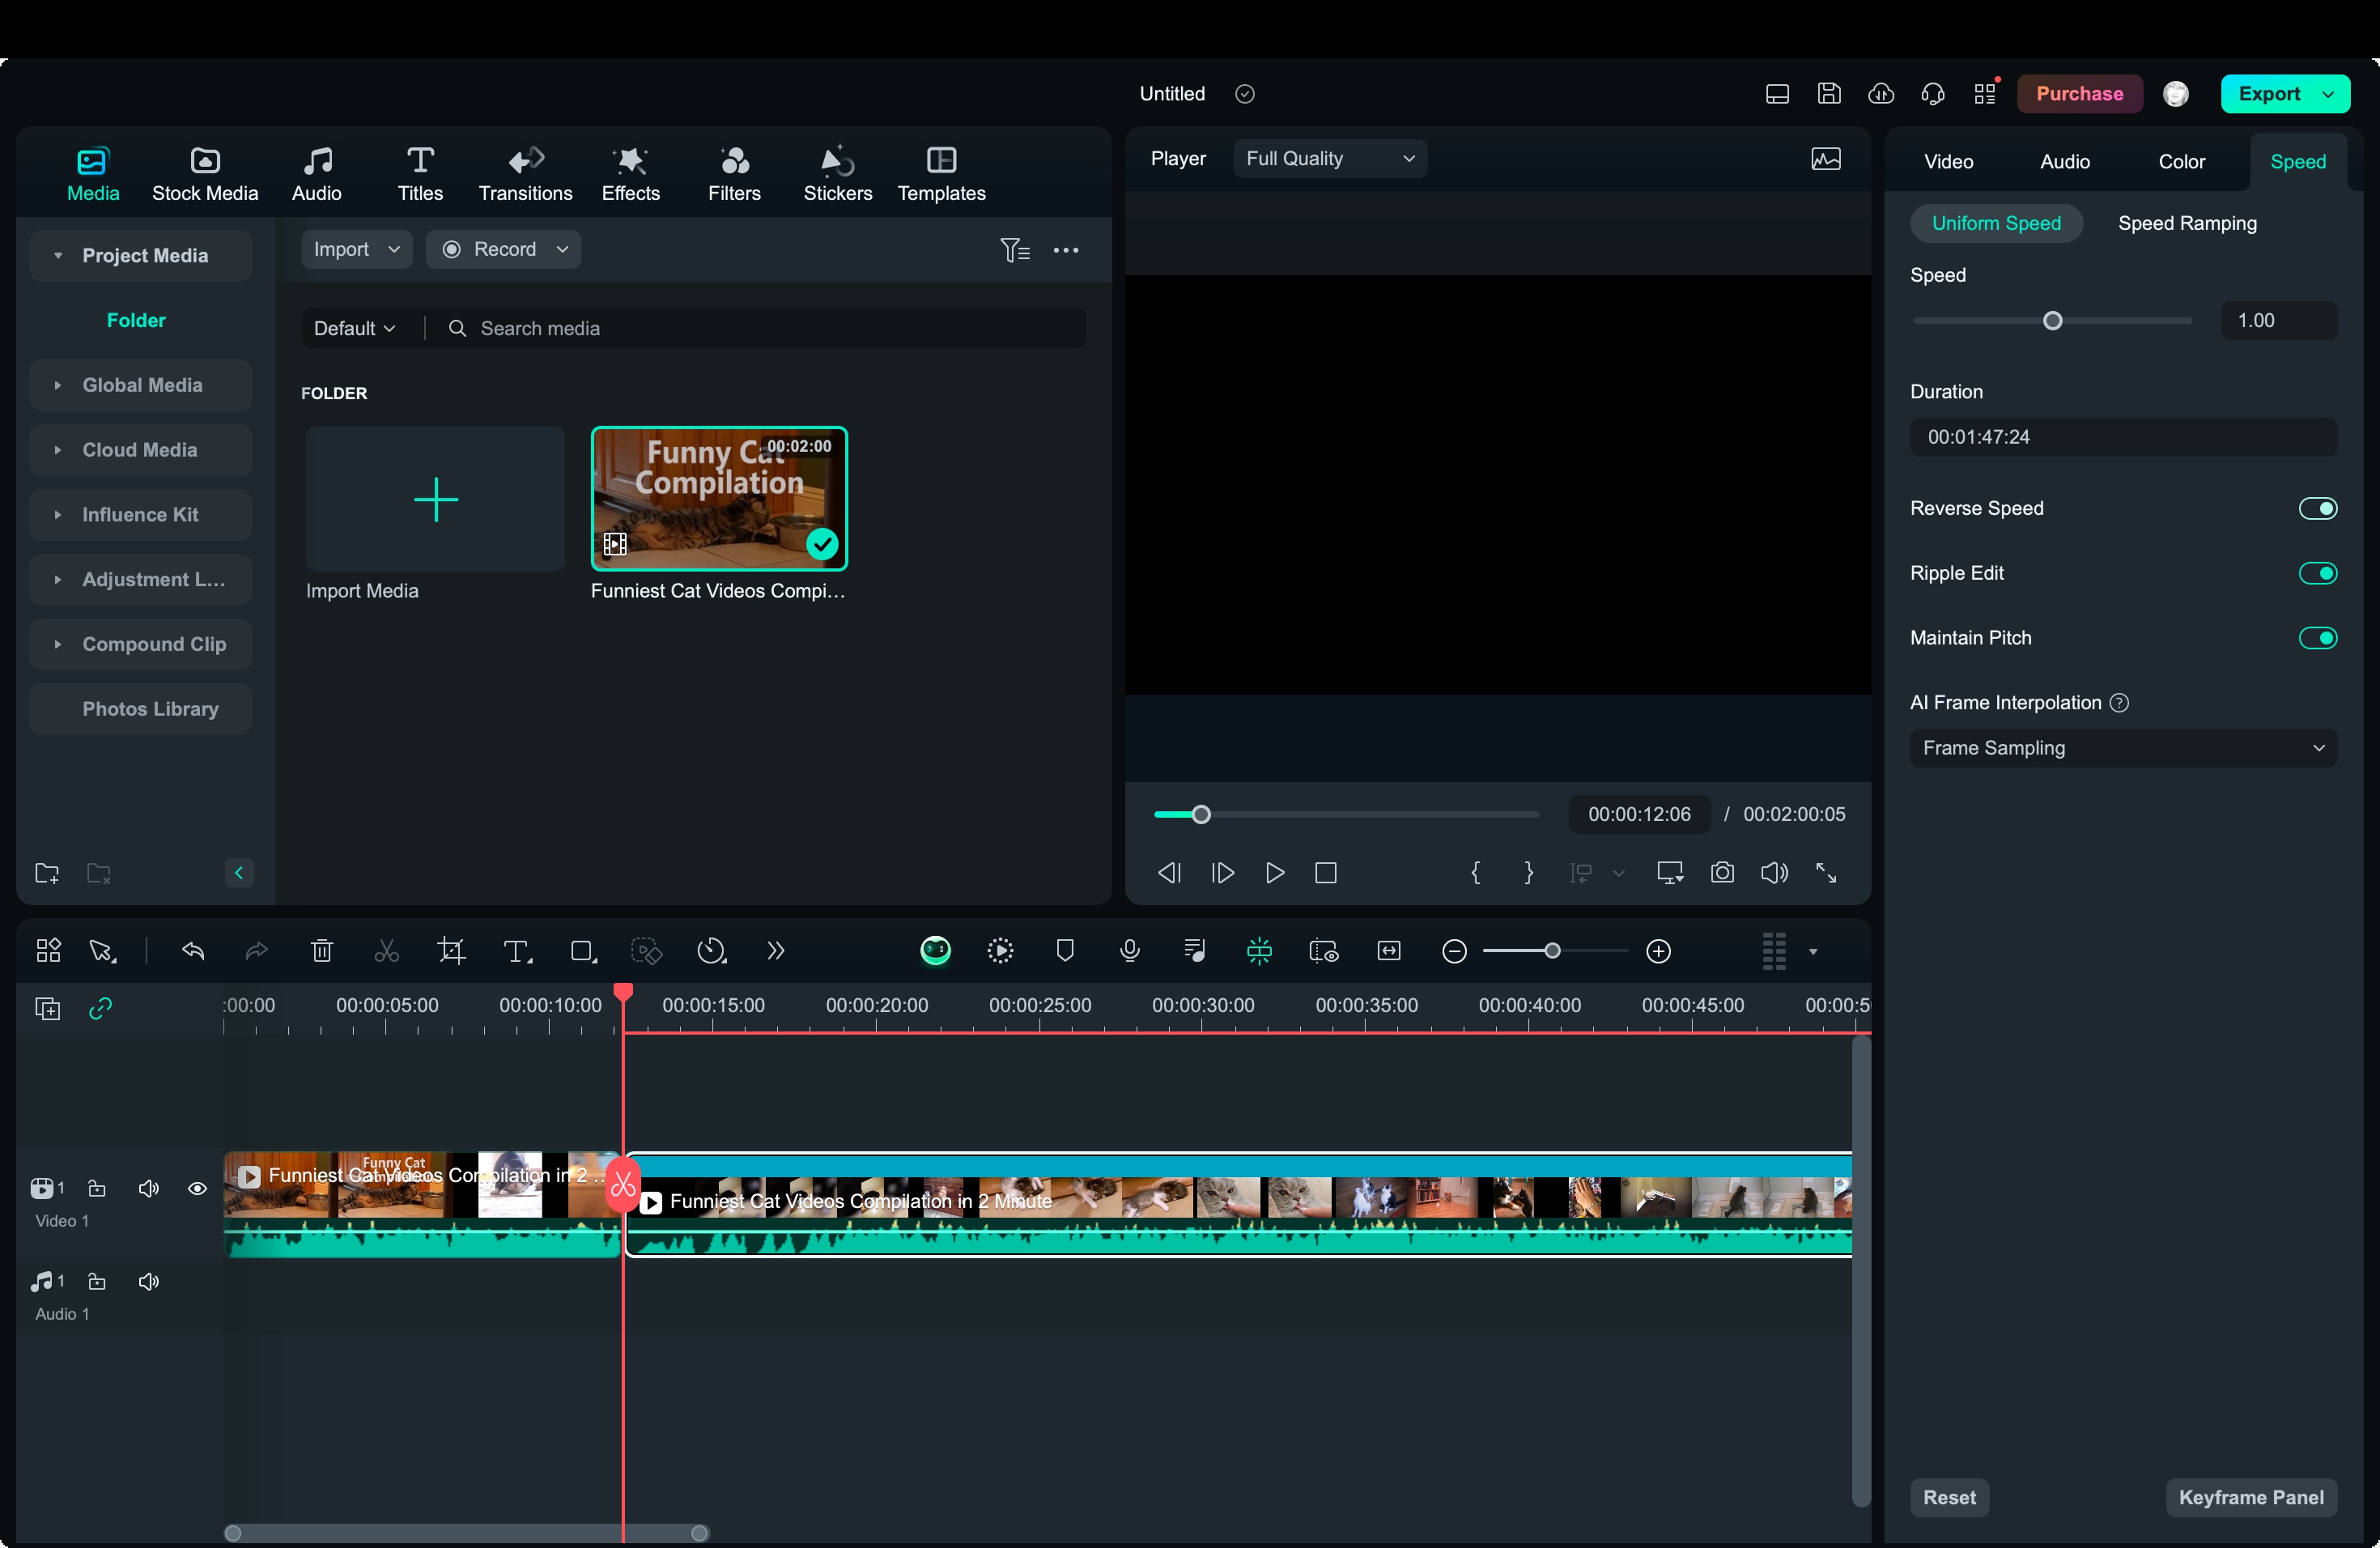
Step 2. Split the Video (Optional)
If you only want to reverse a specific part of your video, use Filmora’s split tool. To do this, select Split option or the scissor icon to divide the video into several segments.
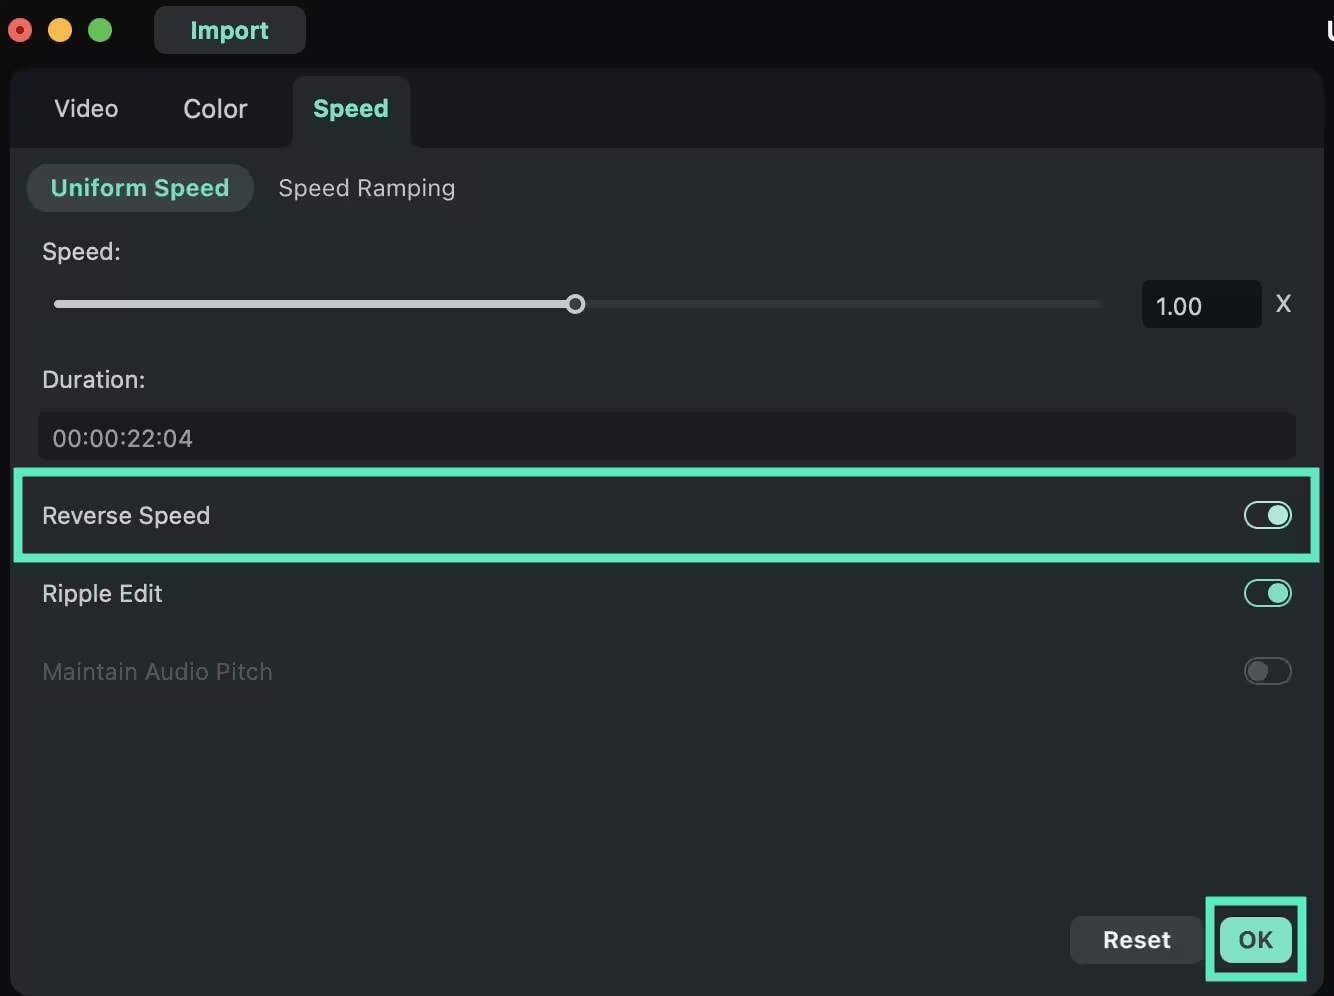
Step 3. Reverse Video
After splitting the video, select the clip you want to reverse. Then, navigate to the Speed tab on the right panel and enable Reverse. This will automatically reverse the video and you can preview the reversed segment in the Preview window.
Step 4. Polish Your Video
You can further customize your reversed video by adding filters or other effects. To mute distorted audio caused by the reverse effect, right-click on the clip and choose Detach Audio. This will separate the audio from your video, so you can delete the audio or replace it with new sound.
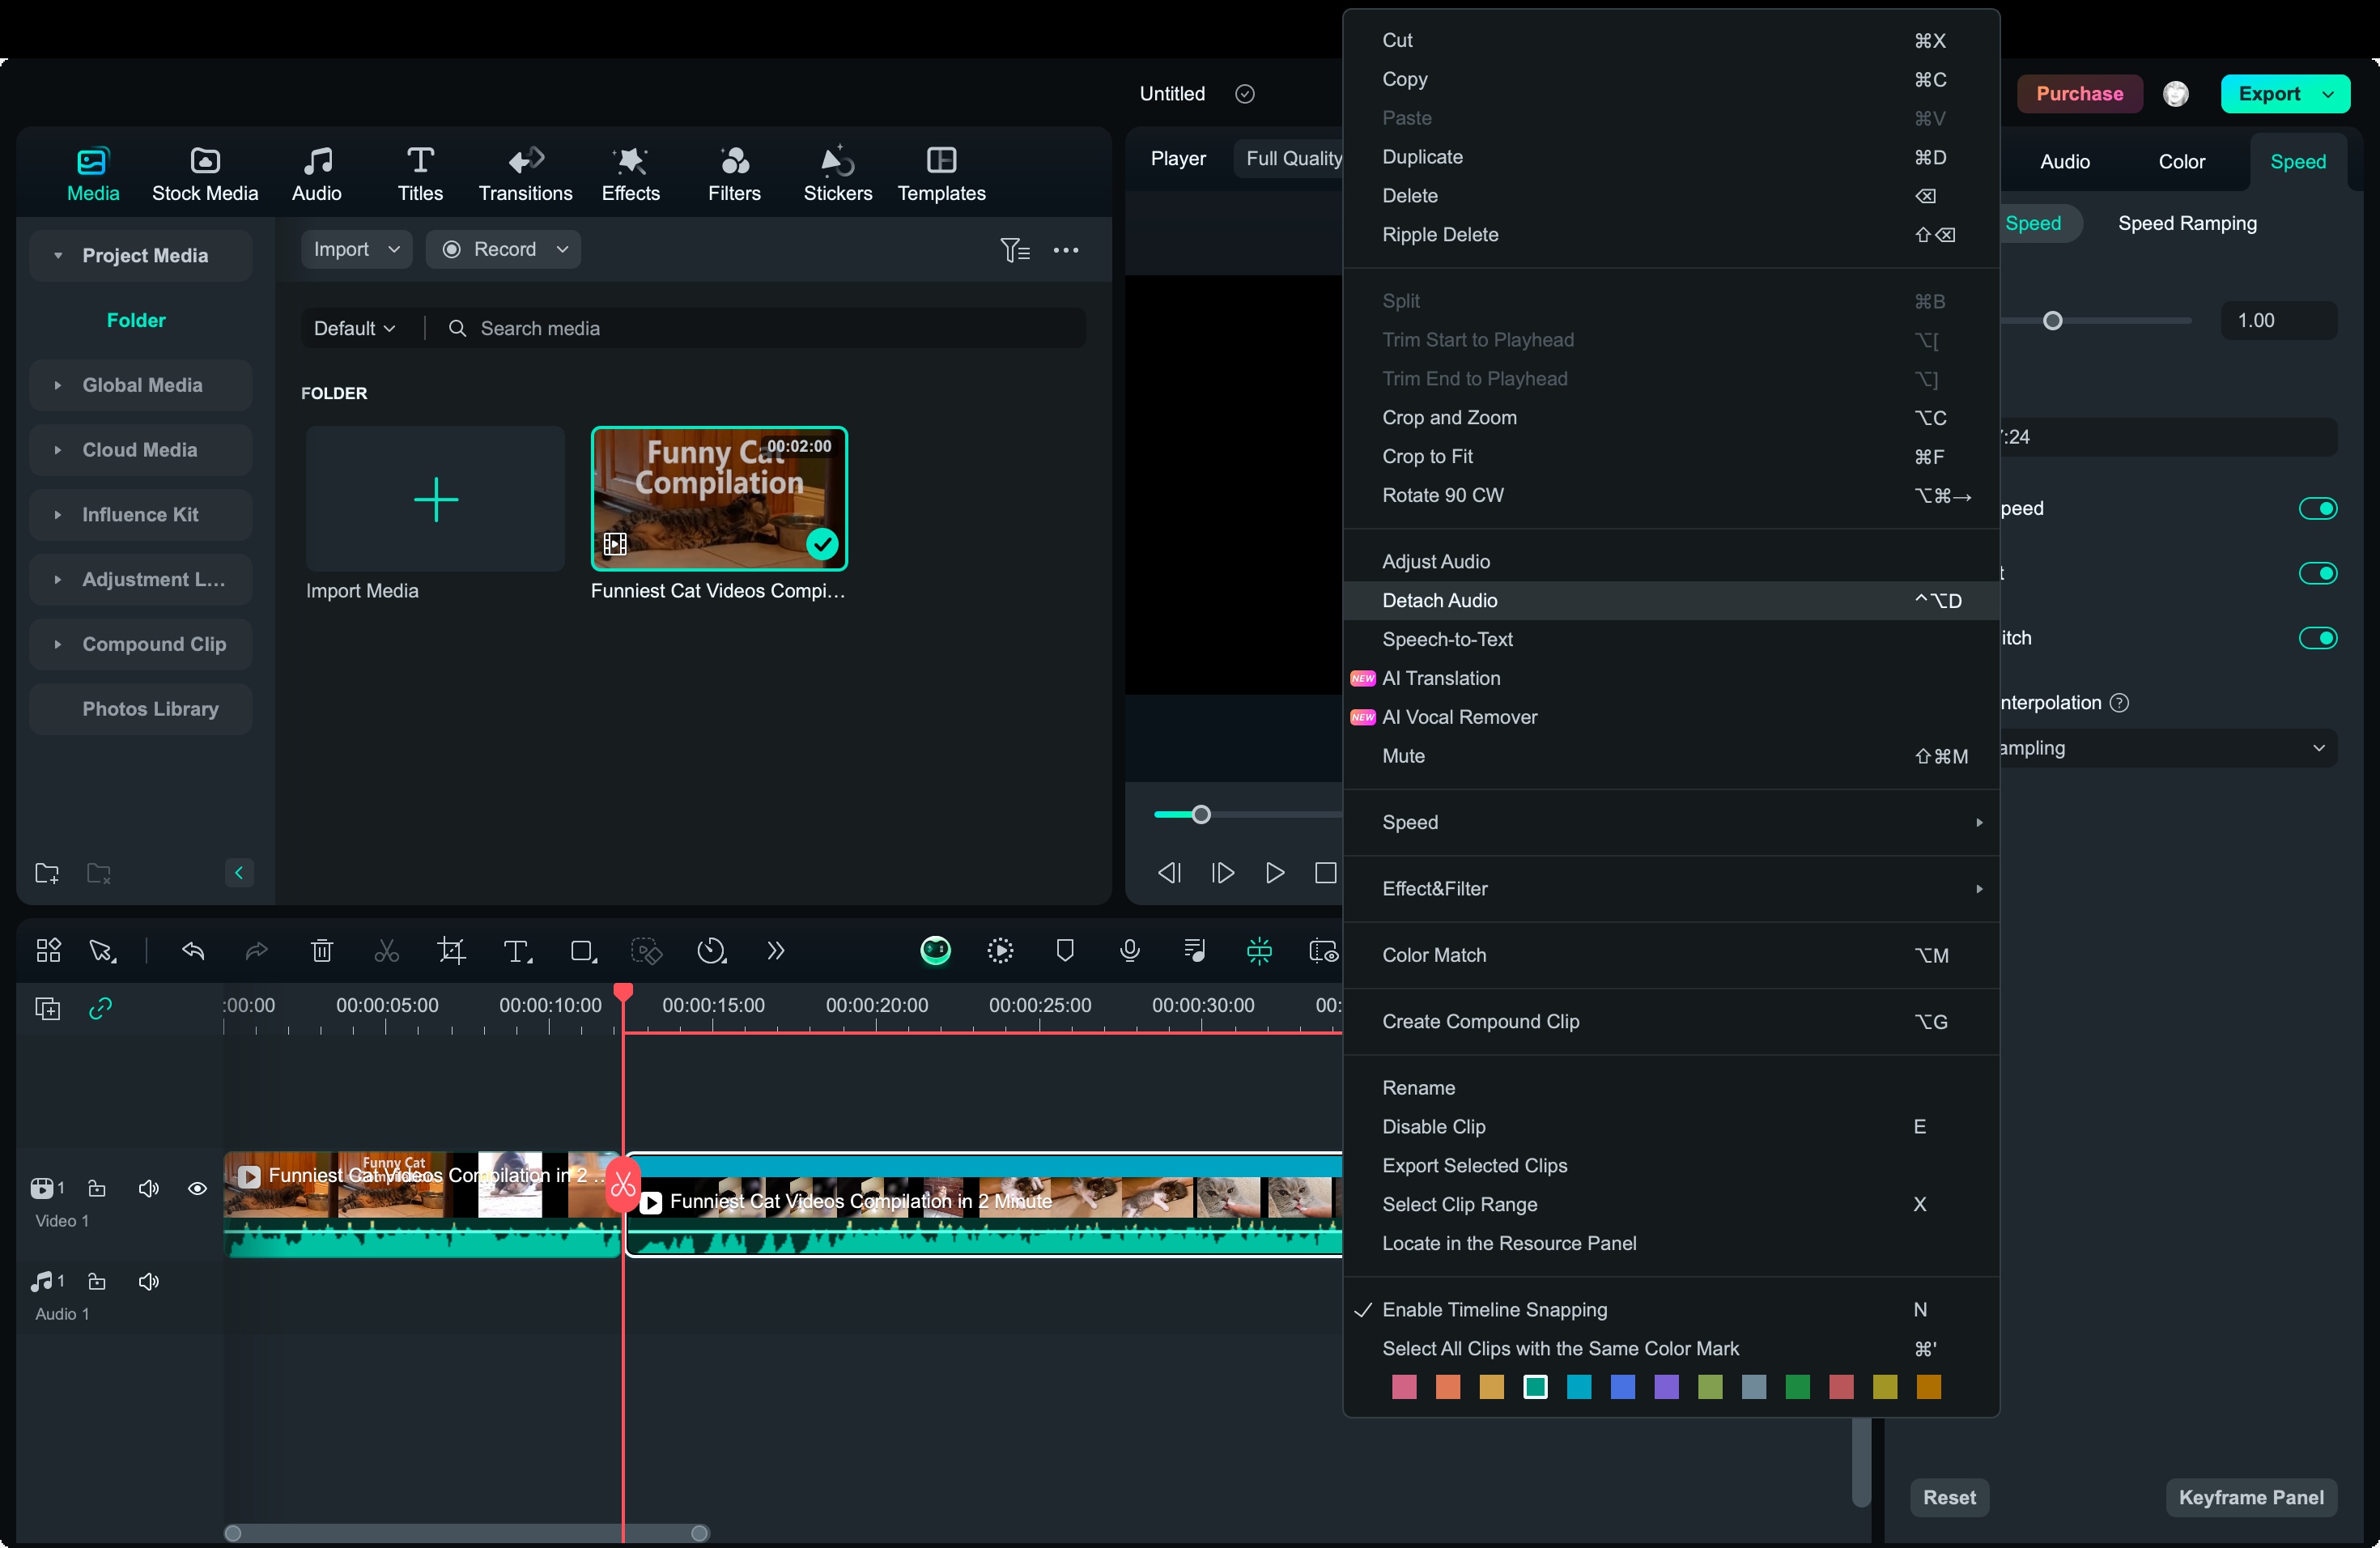
Step 5. Export and Share the Video
Once you're satisfied with the edits, click on the Export button. You can choose the file format (MP4 is ideal for Instagram) and save it to your device.
b. Reverse Video on Instagram using Filmora on Android/iOS
For mobile users, Filmora also provides a simple process to reverse videos directly on Android or iOS devices:
Step 1. Download and Open Filmora App
Filmora for Mobile
Edit Videos on Your Mobile Phone with 1-Click!
- • Powerful Brand New AI Features.
- • User-friendly video editing for beginners.
- • Full-featured video editing for professional.
 4.5/5 Excellent
Step 2. Select Your Video
Tap the "New Project" button and select the video from your phone that you want to reverse.
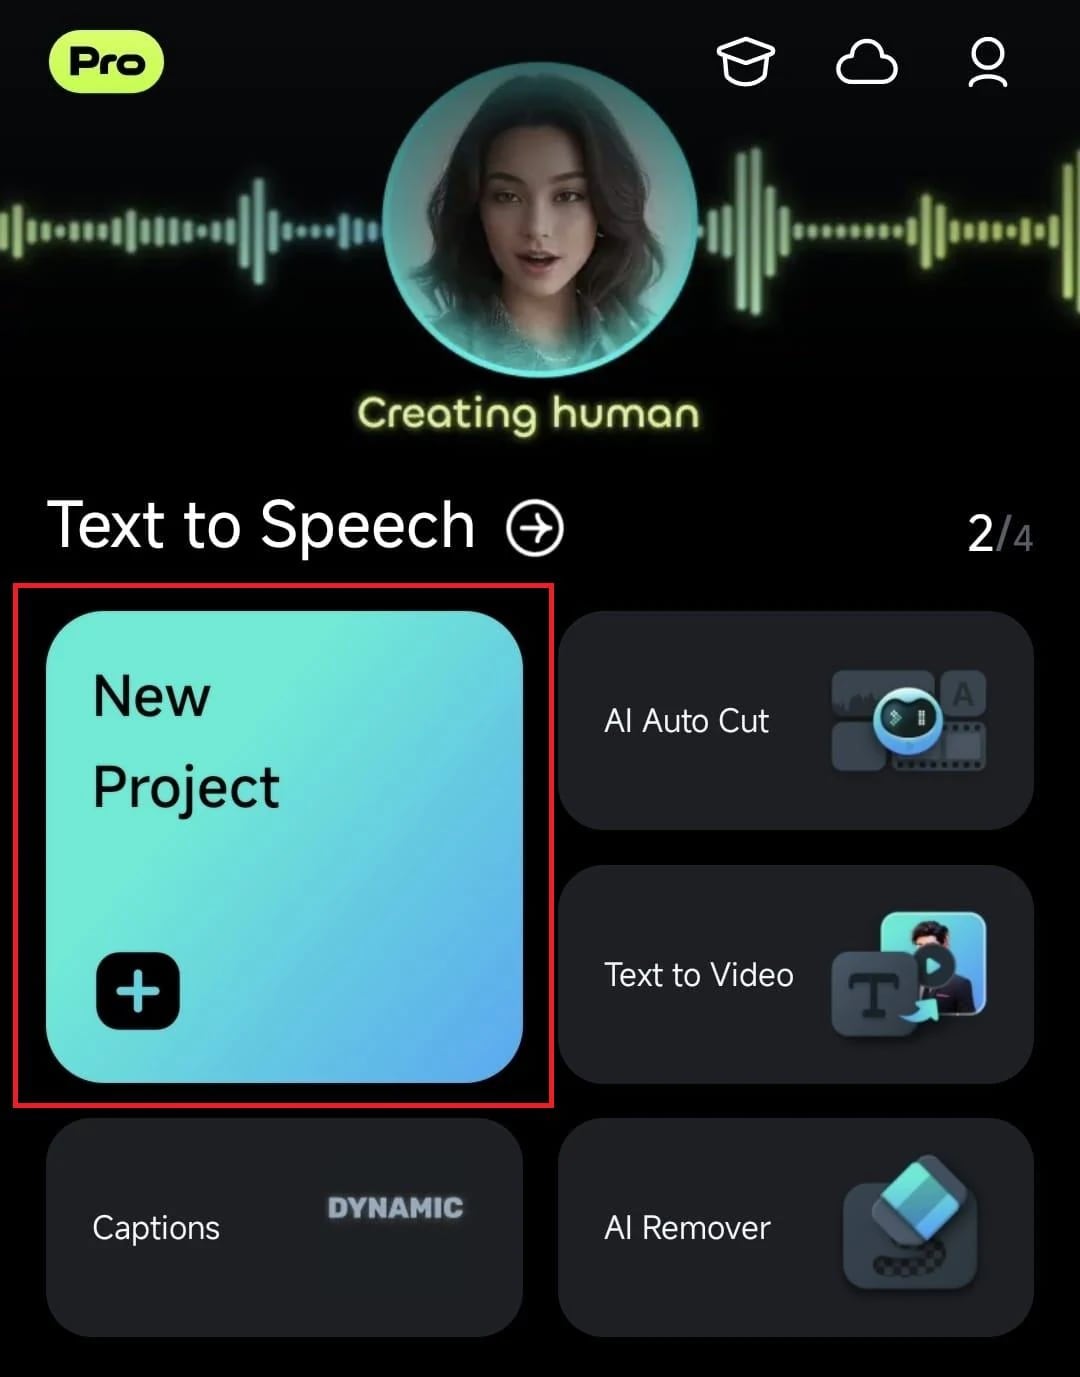
Step 3. Reverse the Video
After importing the video, tap on the clip in the timeline to reveal editing options. Scroll through the tools and select "Reverse". Filmora will instantly reverse the video for you.
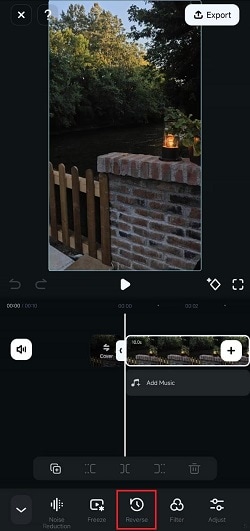
You can further enhance the reversed video by adding music, filters, or adjusting the speed for dramatic effect.
Step 4. Export Video
Once the video is ready, tap the "Export" button on the top right corner of Filmora's work area and choose the format. After that, you can share your reverse video on your Instagram.
Creating reverse videos for Instagram adds a fun and creative twist to your content with Wondershare Filmora.

Part 3. How to Reverse Video on Instagram Online?
After exploring how to reverse videos using third-party software like Filmora on both desktop and mobile, you might be looking for an online solution. If you don't want to download or install an app, ezgif.com offers a simple, web-based tool that allows you to reverse videos directly in your browser.
While it doesn’t provide greater video editing tools like Filmora, it's quite useful if you're working with smaller video files and need to reverse them without extra editing. EZgif supports multiple video formats such as MP4, WebM, AVI, and more, and allows files up to 200 MB in size.
Here's a step-by-step guide to help you reverse videos on Instagram using EZgif.
Step 1. Visit the EZgif Website
Visit the EZgif video reverse website. Then, you can upload the video directly from your device (max file size of 200MB), or paste a video URL if it's hosted online.
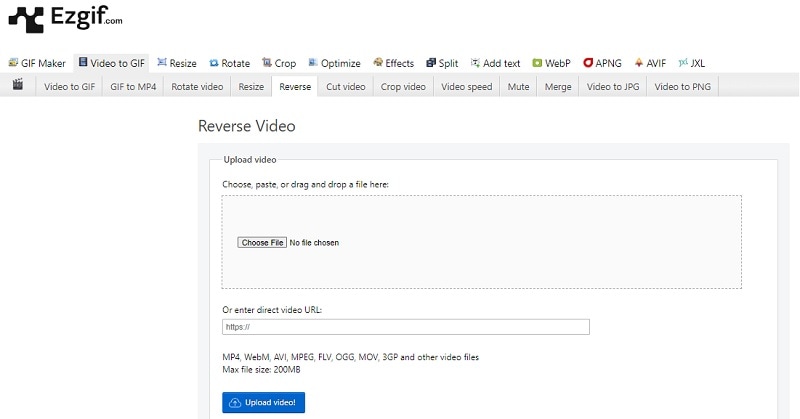
Step 2. Customize Settings
Once your video is uploaded, choose whether you want to reverse the sound along with the video. If you don’t need audio or prefer it reversed separately, you can mute or adjust it.
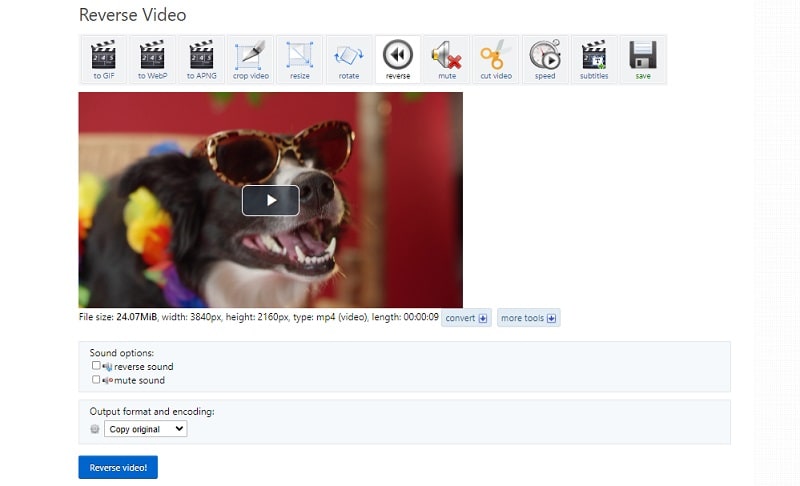
Step 3. Reverse the Video
Click the “Reverse” button. Ezgif will process the video and reverse it for you, maintaining the same resolution and format.
Step 4. Download the Reversed Video
Once the process is complete, you can preview the reversed video, and download it directly to your device. Now that your video is reversed, it’s ready to be uploaded to Instagram Reels or Stories.
Creating reverse videos for Instagram adds a fun and creative twist to your content with Wondershare Filmora.

Conclusion
Creating reverse videos for Instagram adds a fun and creative twist to your content, whether it’s for Reels, Stories, or posts. While Instagram’s built-in camera lacks a reverse feature, tools like Filmora makes the process simple and accessible across devices.
Filmora provides more control with advanced features on both desktop and mobile. And if you want an online option, you can use Ezgif. By following the steps outlined, you can easily reverse videos and enhance your Instagram post with unique, engaging content that grabs attention.


