In this article
Understanding Continuity Editing
Continuity editing is a term that is directly related to comprehension. Without it, the movies we watch, the TV shows we admire, and even the videos we watch on YouTube would be very hard to follow. Imagine a scene where a character is entering a building on the far right of the screen. Then, in the next scene, we see them entering the next room on that very same side of the screen. You may think it is abrupt.
Editing for continuity is all about logically implementing each scene after the last one, keeping spatial and temporal consistency intact. Let's learn a lot more about it.
Continuity editing is a video editing technique with one main goal: to ensure that the narrative in the video has a smooth and natural flow of events across a sequence of scenes. It also ensures that the viewers can understand the chronology of events and the space in which the events are happening. When transitioning from one shot to the next, you need to ensure that everything remains logical.
Key Techniques of Continuity Editing
If you want to follow continuity editing principles, you need to know the rules. Below are the top five key techniques that you need to master to create a video with a natural and logical flow.
180-Degree Rule: This rule dictates that you need to maintain a consistent spatial relationship between scenes by keeping the camera on only one side of an imaginary line between two characters in a conversation.
If they are moving, their movement path represents this line. If we view the space in the scene as a circle, this line would be the diameter, and your camera should always be on one side of that imaginary circle (that's where the 180-degree angle comes from).
Check out this cool video that explains the 180-degree rule perfectly:
Match on Action: If there is a location shift between two scenes, when transitioning from the former to the latter, you can focus on a specific action. End the first scene at the beginning of that action and begin the next to continue and end the action in question.
For instance, at the end of the first scene, the character opens a door, and in the next scene, they continue opening the door and entering a different location. This keeps the audience in tune with the narrative flow.
Eyeline Match: This technique lets the audience know what the character in the scene is looking at. It is done by cutting from a shot that focuses on the character's eyes or face looking in a specific direction to a shot of a different person or object. That way, the audience knows exactly what's going on. A staple of this technique is to keep the eyes and the person or object at the same part of the screen, preserving a logical visual connection and ensuring narrative continuity.
Eye Trace: When we watch a movie, we usually get accustomed to seeing a certain character or object in the same place on the screen throughout the entire film. For example, if there are two main characters, one will usually be on the left while the other will be on the right in different scenes. This is done to keep the audience's attention at high levels, as important elements like faces, clues, or important objects will be placed in the same area of the screen across cuts.
Shot/Reverse Shot: Every time you see a dialogue in a movie or a TV show, you see the shot/reverse shot technique. It's a filmmaking staple whenever you are working with dialogue scenes. The camera alternates between shots of two (or more) characters speaking, making sure that their eyes are at the same level, and that the camera alternates angles depending on who is speaking.
People confuse this technique with the eyeline match, so here's a video that explains the difference.
What are the Applications of Continuity Editing?
As we have established, continuity editing is present in almost any video, whether it is a simple podcast or a high-budget Hollywood movie. Let's consider the genres where it is most commonly used, different techniques that can be combined with it, and some artistic considerations.
Genre-Specific Applications for Continuity Editing Techniques
1. Creating a Narrative in Film and TV
Without continuity editing, you wouldn't be able to tell any story, and film and TV as we know them would be a lot different. The audience would have a hard time following the narrative, and getting emotionally involved in the story becomes next to impossible if you don't follow continuity editing principles. Also, you would get confused regarding the space in which the action is happening. That's why all reputable videographers and filmmakers finish a course on continuity editing to learn and employ it properly.
One of the best examples of continuity editing in film is this lobby shootout scene from The Matrix:
2. Making Successful Commercials and Ads
If you are making an ad, you have to say a lot of things in a short time, spread a clear message, and even send a clear call to action message to your viewers. Without continuity editing principles, this would be completely impossible. Imagine that you are making a real estate ad, and the speaker is entering the frame from illogical places, and the inside of the property looks weird because you are not sure which side is which. If you follow the key techniques as we outlined above, you will have a much easier time conveying your message.
This commercial from Sony practices excellent continuity editing principles. Learn from it:
3. Event Videography
If you are hired to record an event, you must pay attention to the story. Whether it is a wedding, a birthday party, or something else, you always have the scene with guests arriving, everyone mingling, eating, drinking, laughing, dancing, and the entire event has some kind of flow. Follow that flow with continuity editing principles. This way, you can create a meaningful narrative without actually having anyone speak to the camera at any point. Pick the right recording angles and stitch them all together.
Here's what continuity editing looks like in a conference video from 2022:
Combining the Establishing Shot with Other Creative Techniques
No matter the type of video you are working on, you will need to have continuity editing rules in mind. Here are some creative techniques you can consider to combine with continuity editing.
The Top 3 Artistic Considerations Connected to Continuity Editing
An Easy Guide to Practice Continuity Editing
If you are a filmmaker who wants to tell a cohesive story, you need a tool like Filmora. It features easy timeline management, giving you the option to make the perfect cut at the right moment. It also has professional color correction features that let you manually change the colors in your video with color wheels and HSL sliders. You can also use one of the thousands of creative assets in the filters category.
To add finishing touches, you can explore effects and transitions and make your project stand out in a very competitive field.
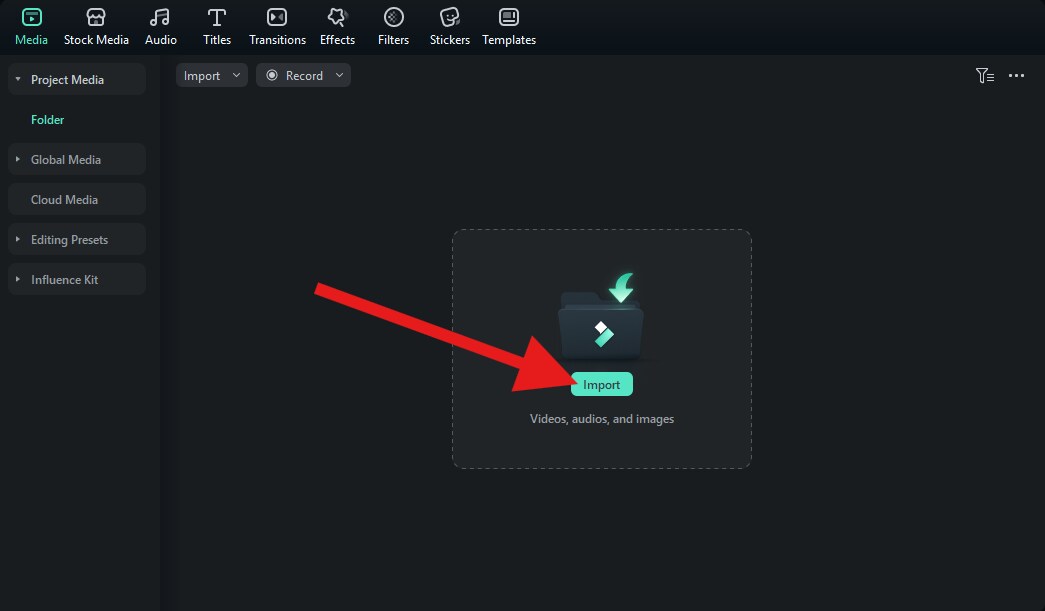
The following tutorial will teach you how to organize clips in the Filmora timeline. Download and install Filmora on your Windows or Mac device.

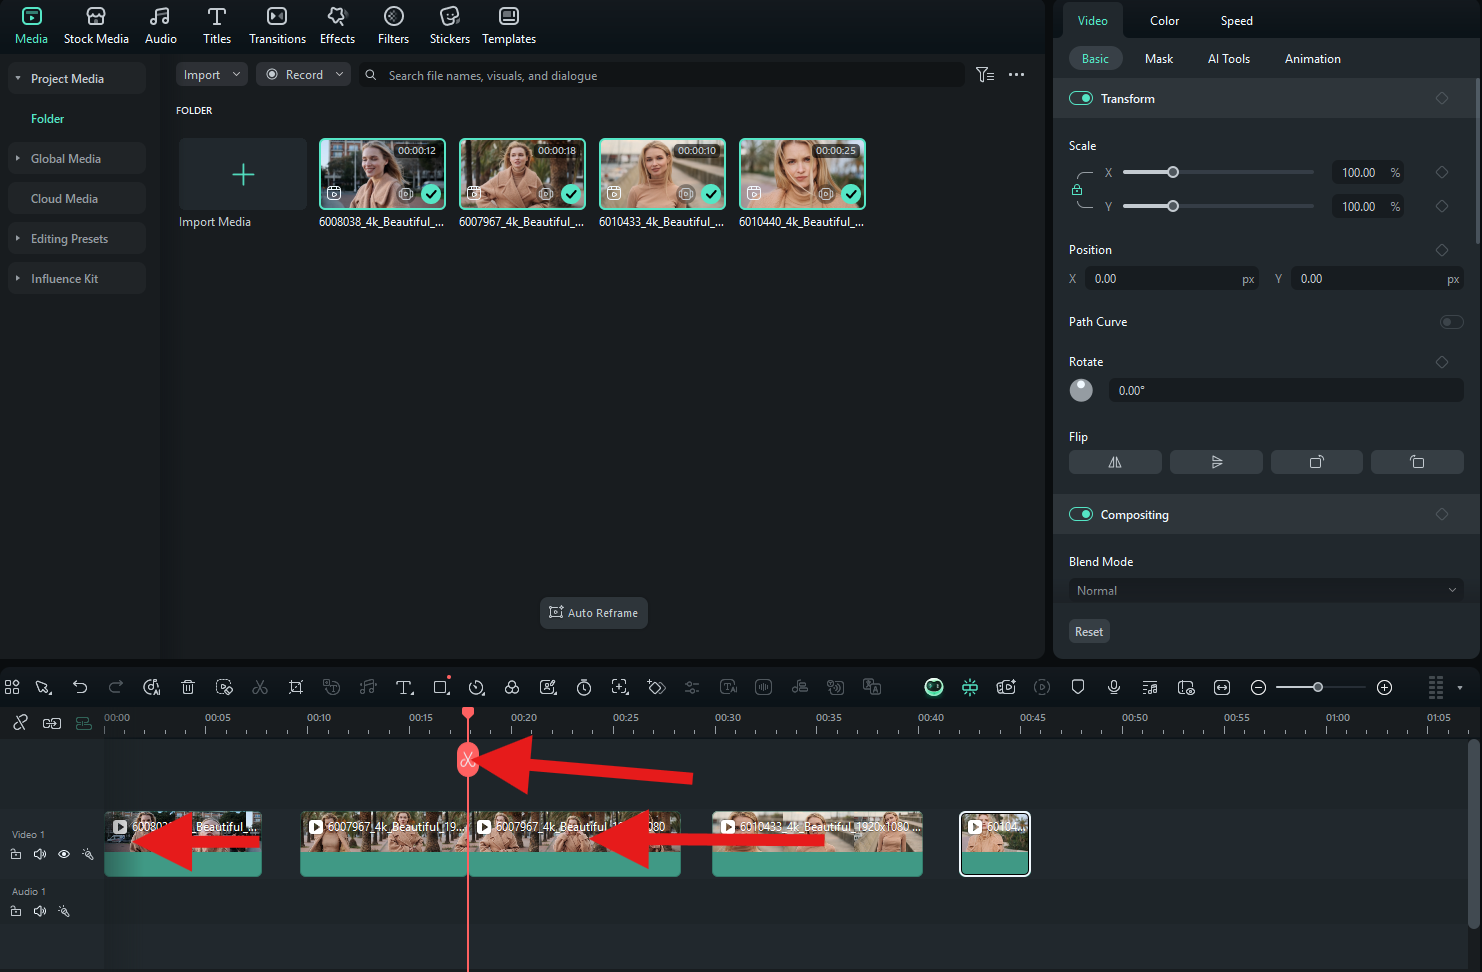
Import the videos you want to combine into a story, and drag them to the timeline in chronological order.
Find the moment in the timeline when you want to make the cut and use the Scissors icon. To trim videos, hover over the beginning or end of each clip and move the cursor left or right. Finally, select each clip and move it along the timeline to combine them.
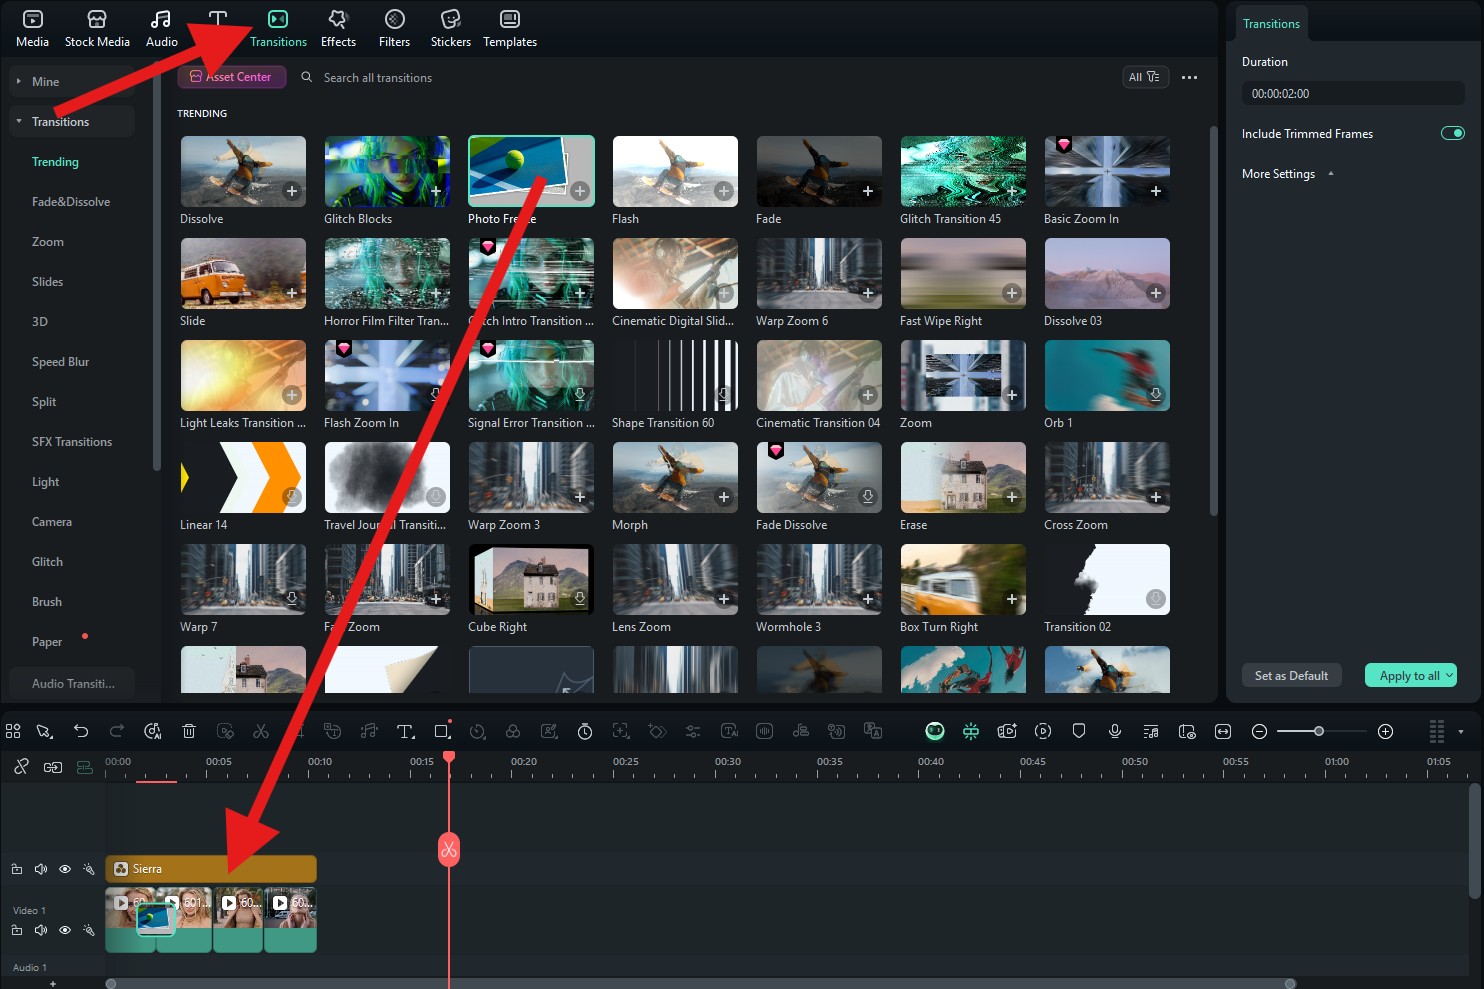
To add transitions, go to the Transitions tab and browse through an endless selection of creative assets. Then, pick something that you like and drag it to the timeline between two clips.
Fixing Common Issues with Continuity Editing
A cup is full in one shot and empty in the next; a hand switches positions.
Keep a continuity log during filming; Assign a person to monitor props, clothing, and positioning; or record reference photos of the scene setup.
The camera crosses the imaginary axis between two subjects, making the screen direction confusing.
Always stay on the same side of the line unless you use a neutral shot or a deliberate camera move to cross it. Or plan your shots in advance with a floor plan or storyboard.
Sudden changes in ambient sound, volume, or tone break immersion.