In this article
Understanding Rack Focus
As a visual artist, your goal is to direct your audience's attention to the most important element in the scene. Everyone from painters and photographers to Hollywood movie makers uses all sorts of techniques to tell the audience what to focus on. One of those techniques is the rack focus shot, which uses a focus lens on the camera to shift focus from one part of the scene to the other seamlessly, letting the audience know which character or object is most important at that specific moment.
Today, we will do our best to understand this technique and show you an easy guide to achieving it without many complications. Stick around!
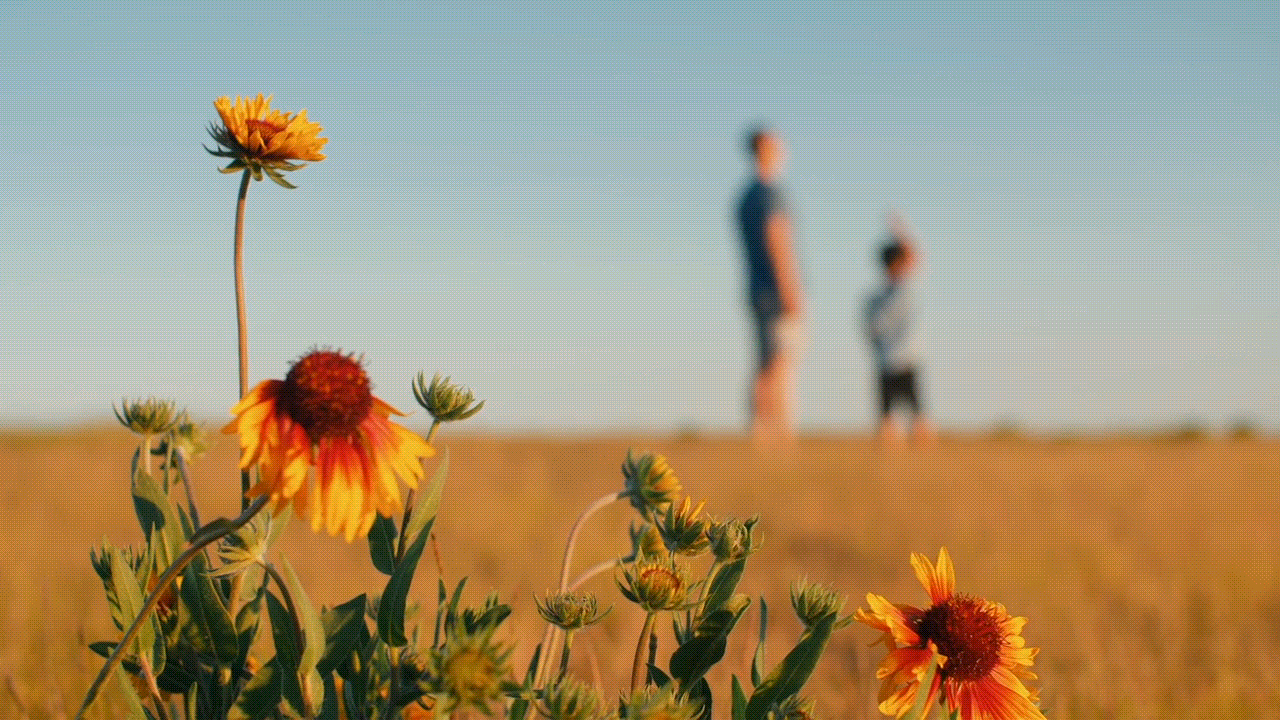
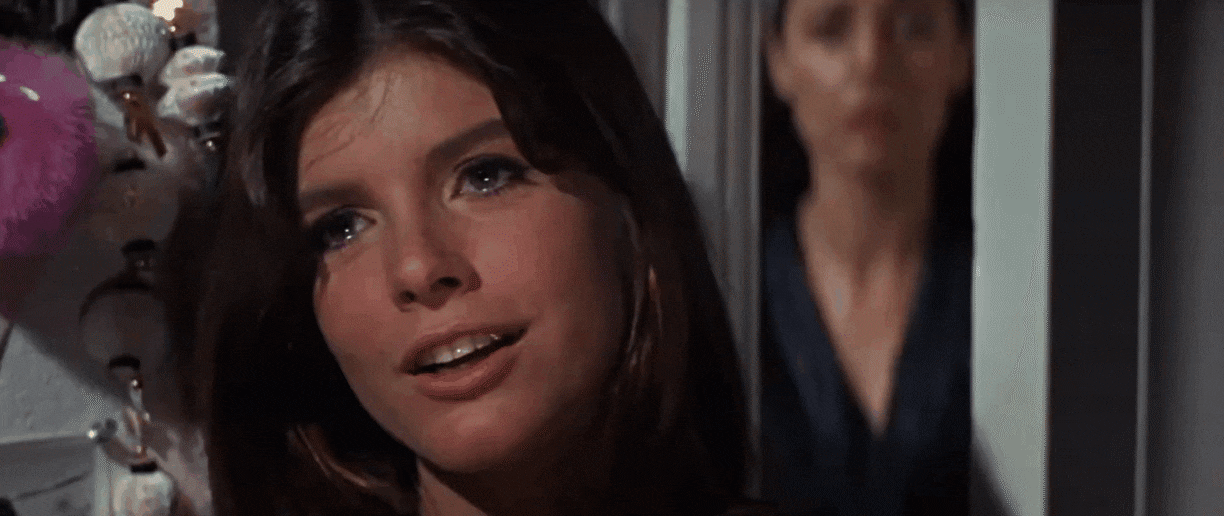
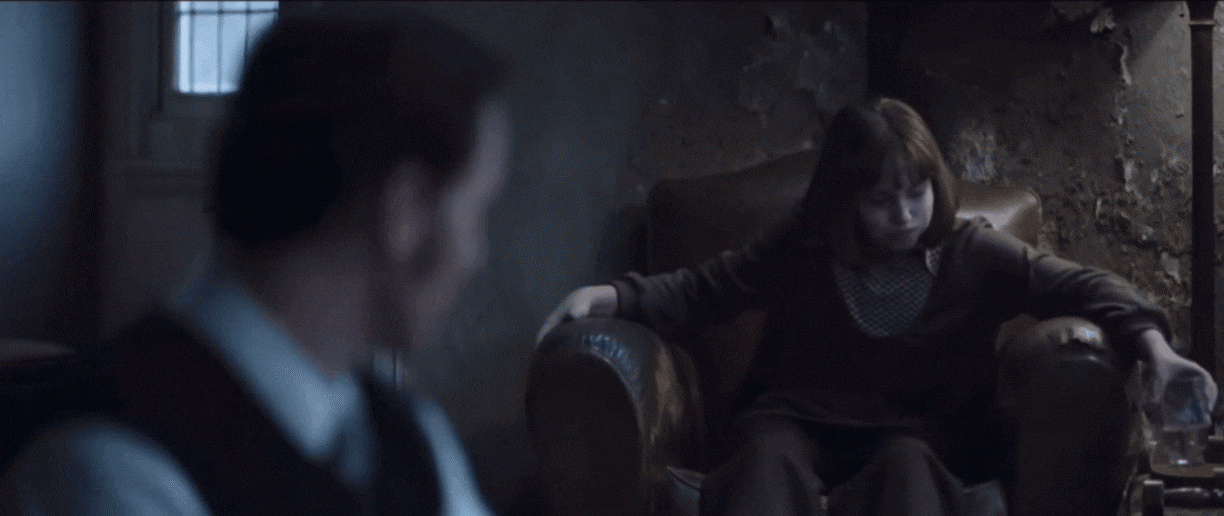
Rack focus is a technique often used by cinematographers in which the camera operator shifts the focus during a shot from one character or object to another. Some of the more common examples include switching from the foreground to the background or vice versa, from a character to an object and vice versa, and from one character to the next. You have probably seen it used in dialogue scenes and suspenseful reveal moments, and your focus shifted where it was supposed to without you even realizing it.
Artists and storytellers from different genres use this technique to build a clear narrative and avoid unnecessary cuts.
The Top 3 Visual Characteristics of the Rack Focus Camera Movements
Rack focus has become one of the most essential tools in several types of visual storytelling tasks, so let's try to understand it better by examining its most prominent visual characteristics.
Now that we understand this technique better, let's see how to set up your camera to achieve this effect while filming.
How to Set Up Your Camera for the Rack Focus Effect?
If you're in the field and want to use your camera to record footage with the rack focus effect, here's a step-by-step guide on how to do it.
- Set up your scene with two subjects and make sure everything is in place before you start recording. There should be enough space between them.
- Manually focus your camera on the first subject. When you find the perfect setting, mark it.
- Then, start recording, and try to turn the focus knob on the camera smoothly and constantly until the first subject goes out of focus and the second subject is in focus.
- Finish the recording and review the footage. If everything is in order, you can move on, and if not, you might need to readjust something.
Some advanced tips would include using a shallow depth of field (low f-stop like f/2.8 or f/1.8) to enhance the blur between two focal planes, and using a tripod to keep the camera in place.
When and Where to Use the Rack Focus Shot Technique?
This technique is used for many things, from emphasizing which subject is important at any given point, thus guiding the viewers' attention to the right part of the screen, to enhancing storytelling by creating dramatic and dynamic tension. Here are the most common instances where you can use it freely.
The Three Most Common Genre-Specific Applications for Rack Focus

Use the Rack Focus Shot with Other Creative Techniques
As you can imagine, rack focus is a very versatile technique, and you can pair it with other things you learned in filmmaking school with ease. Here are some common examples.
- Pair Rack Focus with Over-the-Shoulder Filming:
If you have an experienced camera operator, you can use this technique with free filming techniques. This will add an extra dose of tension to the scene, and your colleagues and peers will praise you for it, as it is a very challenging task to achieve.
Example: The camera follows a man running towards something or someone. He is in focus, and everything else is blurred out. Then the focus shifts to a woman on the other side of the street, and they meet and kiss. You can do the same thing to reveal something horrifying.
- Enhance Rack Focus with Lighting Cues:
If you are using a smooth rack focus transition, you can use that time to implement a few changes in the lighting. This will add more dynamics to the scene, and you might achieve cool lighting effects to emphasize the artistic side of the film.
Example: The subject in focus is well lit, and the subject out of focus is in a poorly lit area of the scene. As the rack focus technique kicks in, you can shift the lighting to always follow the camera focus, thus adding an additional element that will keep your audience engaged.
- Introduce the Rack Focus Shot with an Invisible Cut:
An invisible cut is when you cut between two scenes seamlessly without anyone even noticing. During the focus shift, you will have a few frames where you can actually use footage from a different take if you feel that it has a better performance.
Example: You have a fixed camera recording of several takes of a scene with the same rack focus effect. However, the actors' best performances are not in the same clip. You can use the focus shift moment to switch between two scenes and get the best possible scene.
Top Two Artistic Considerations About Rack Focus
If you want to stand out and create the perfect rack focus camera shot, keep these artistic considerations in mind.
By now, you should properly understand this technique and what to use it for. But, what happens if you are on a budget and cannot afford those expensive cameras that will let you record a video with rack focus manually? We have the perfect solution.
An Easy Way to Create the Rack Focus Effect
The Filmora desktop app for Windows and Mac is the perfect tool for all video editors. It comes packed with creative assets that you can use to mimic all sorts of expensive effects, including rack focus.
A Step-by-Step Guide to Creating the Rack Focus Effect
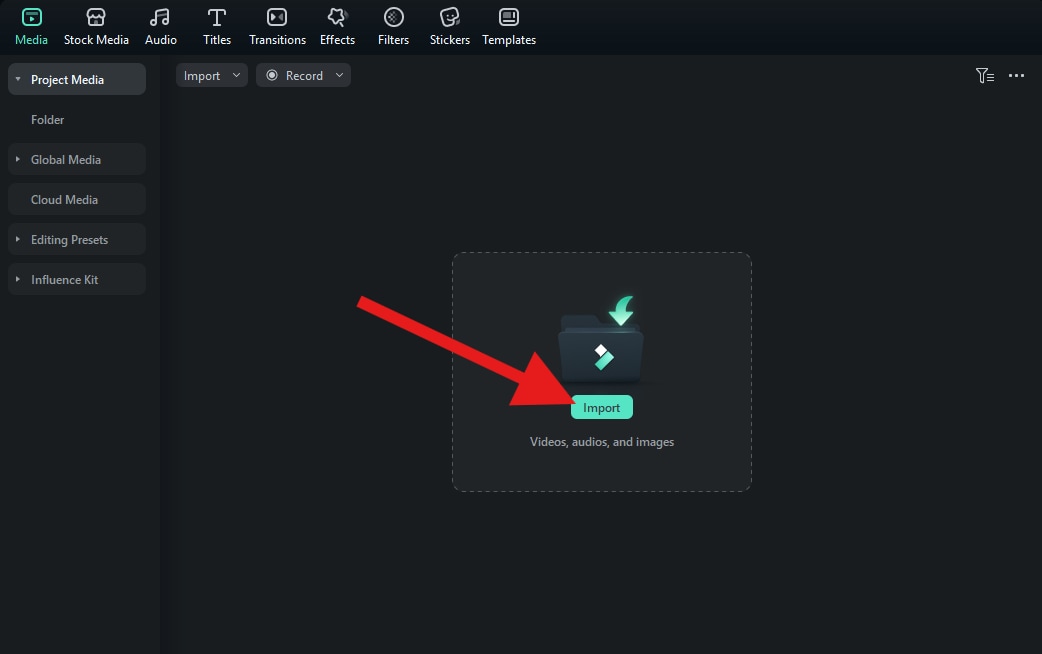
To begin your fun video editing journey, download and install Filmora on your PC, open the program, and create a new project. Then, follow the steps below to learn an easy way to create the rack focus effect from a normal video.

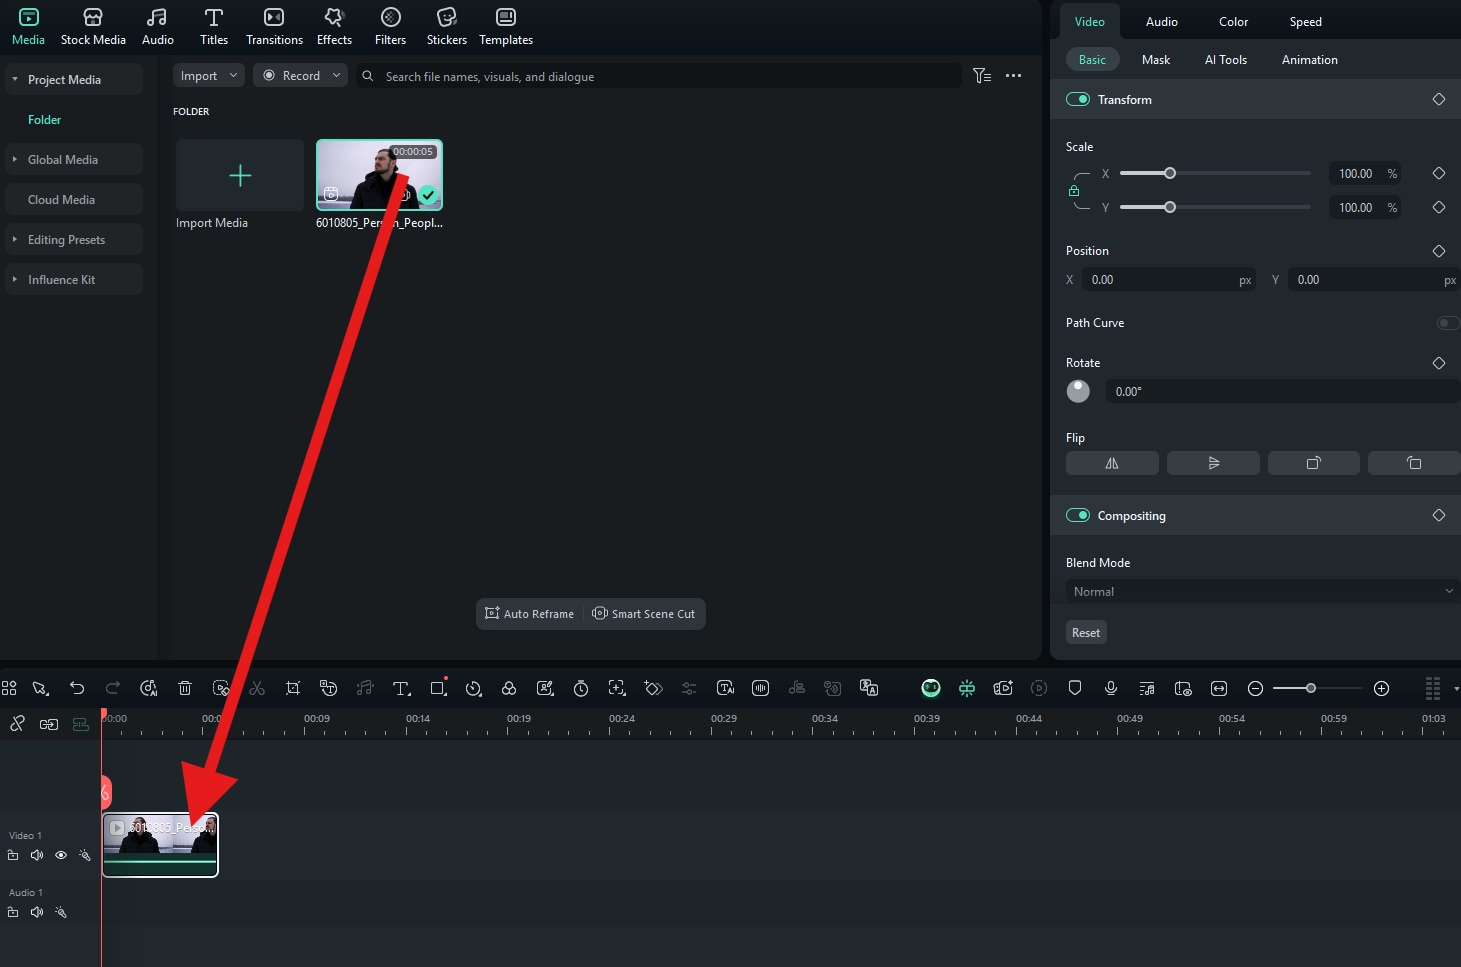
Click on the Import button.
Drag the file to the timeline.
Go to the Effects tab, and search for the Blur to Clear effect. Then, drag it to the timeline above the video you are working on.
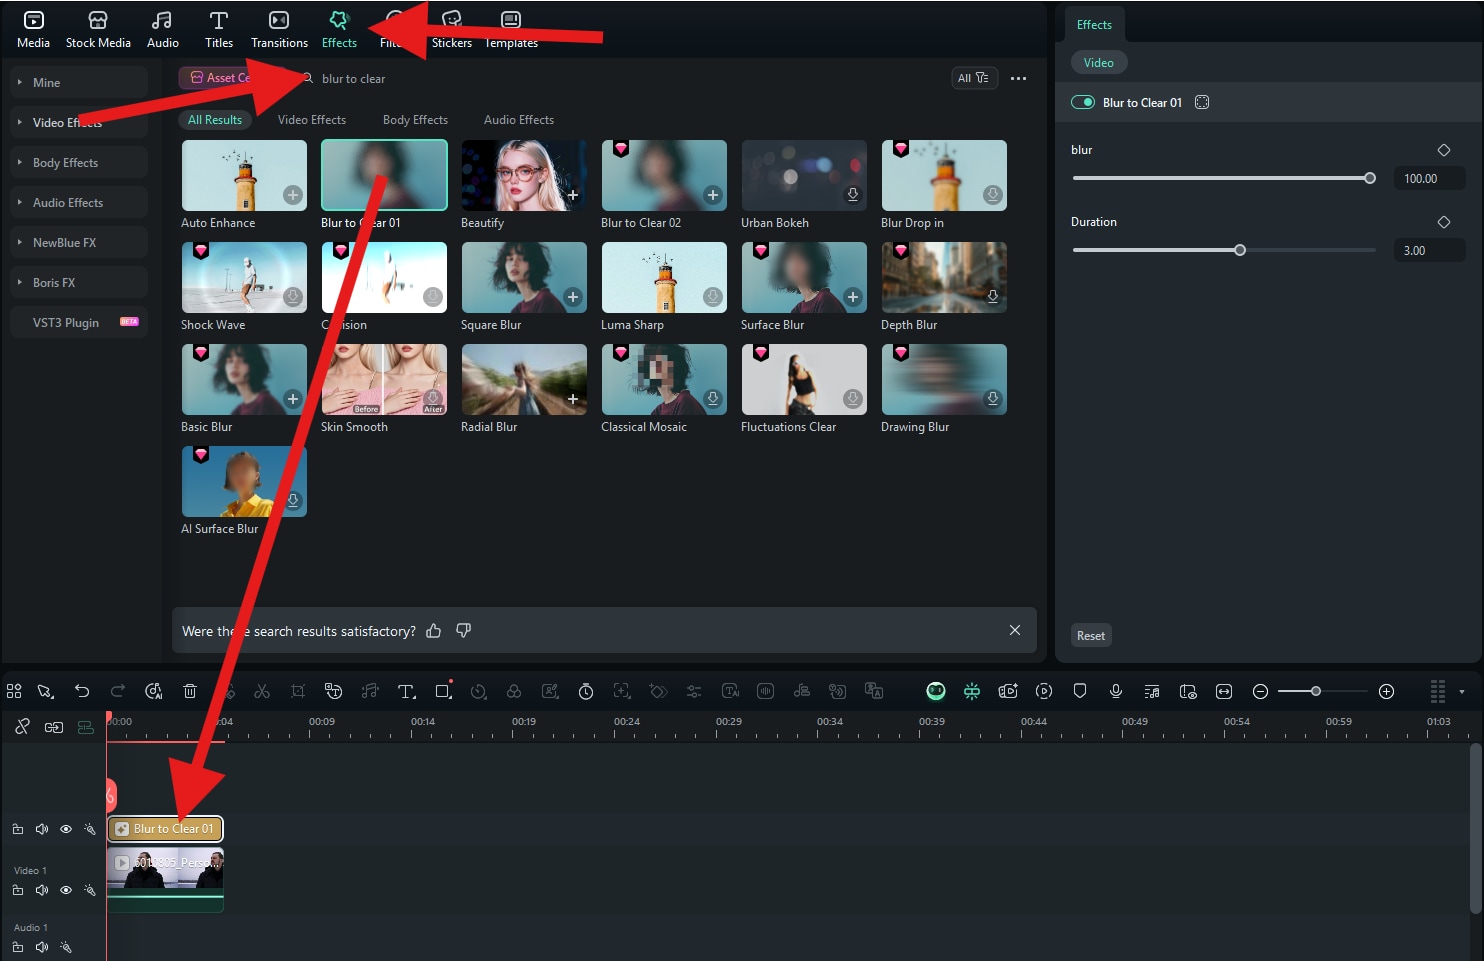
We completed this task in these three simple steps, and it was so easy. Take a look at the awesome result we were able to get.

Avoid the Most Common Issues with Rack Focus Shots
For the final piece of the puzzle, check out these common issues and how to avoid them.