

 ChatGPT
 Perplexity
 Gemini
 Claude
 Grok
Grok
Do you have a shaky video due to a lower shutter speed in dim lighting, fast motion, loose camera mounting, or vibrations during a bike ride? Adobe After Effects can save the day.
How can After Effects stabilize footage? It analyzes it for camera movement, automatically cropping it to offset unwanted jitter. Then, it scales up the video to remove the edges and produce a smoother effect.
Let’s see how to fix a shaky video in After Effects and explore a worthy alternative.
In this article

- Superb video stabilization with low distortion.
- Vast video/audio effects and creative assets.
- Powerful AI for effortless content creation.
- Intuitive, professional yet beginner-friendly.
- Works on Mac, Windows, iOS, and Android.


How to Fix Shaky Videos in After Effects
The best way to stabilize a video in After Effects is to use the Warp Stabilizer VFX (formerly Warp Stabilizer). It’s a built-in effect for removing or minimizing the camera shake and correcting distortion due to fast motion (e.g., quickly panning your camera while recording). It repositions the frames and auto-scales the borders for smooth shots.
Here’s how to stabilize footage in After Effects using the Warp Stabilizer VFX:
Step 1: Launch After Effects and click New Project.

Step 2: Go to File > Import > File and select your shaky video. You can also double-click the empty area in the Project panel.

Step 3: Right-click the video in the Project panel and click New Comp from Selection. That way, After Effects will use your footage as a sample, creating a new video for editing.

Step 4: Click the video layer on the timeline to select it.

Step 5: Go to Animation > Warp Stabilizer VFX to stabilize a camera in After Effects. You can also search for it in Effects & Presets and drag and drop it onto the composition’s video layer.

Step 6: The feature will automatically analyze frames and stabilize your video. The process may take a while (depending on the footage length and CPU), so be patient. You can perform other edits because the Warp Stabilizer VFX works in the background.

Once the orange Stabilizing banner disappears, After Effects will play your video. Is it everything you wanted, or does it require tweaking? Let’s see how to stabilize a video in After Effects with additional adjustments.
How to Fine-Tune Stabilized Videos in After Effects
The Warp Stabilizer VFX typically does an excellent job, but some videos require fine-tuning. Here’s how to modify the effect’s settings:
Step 1: Go to the Effect Controls panel and expand the Warp Stabilizer VFX section.

Step 2: Increase the Smoothness and wait until stabilization completes (the applied effect will restabilize your video after every modification).

Step 3: Change the Stabilization Method, experimenting with all four types to see which yields the best results. For instance, the default Subspace Warp may introduce unwanted distortion.

Step 4: If necessary, change the Result to No Motion. That will gray out the Smoothness option and lock the camera in position, further scaling up the footage (notice how the Auto-Scale value changes after each adjustment). Then, choose Stabilize Only under Framing to prevent extreme cropping and boost the Additional Scale, ensuring you don’t exceed 115%.

Step 5: Expand Advanced options for more parameter adjustments. For instance, Detailed Analysis does the extra work to track motion and remove unwanted movement and artifacts.

Step 6: Once you achieve satisfying results, click Composition > Add to Render Queue. You can use Adobe Media Encoder, but it will reduce your video’s size, affecting its quality.

Step 7: You’ll see several settings options. Click each to set your preferences, including where to output your stabilized video.

Step 8: A dialog box will open once you click the default Best Settings link under Render Settings. Leave everything as is, except change Motion Blur to Current Settings. Optionally, you can increase the frame rate.

Step 9: Click OK and hit the link next to the Output Module to choose a format. Then, go to Format Options and pick a video codec.

Step 10: Click OK > Render to apply all changes and save your stabilized video.

Is Adobe After Effects Video Stabilization Effective?
Stabilization in After Effects works like a charm for most videos. Some might argue it produces better results than Premiere Pro video stabilization.
However, while it can soften movement from the unwanted camera shake, it needs improvement when stabilizing videos where the camera follows a moving subject. It can remove jitter and retain focus on the subject but introduces unpleasantly-looking distortion.
Let’s not forget After Effects has a steep learning curve. You may be better off with a more user-friendly alternative if you’re a beginner. Here’s one to consider.
A Time-Efficient Alternative: Wondershare Filmora
Wondershare Filmora is an intuitive video editor that takes efficiency to the next level. Its AI-powered features streamline post-production, helping you spend more time creating and less time editing videos.
Camera stabilization in After Effects requires extensive fine-tuning, which isn’t the case with Filmora. The software’s AI does all the legwork, recognizing the best ways to stabilize footage and providing fantastic results.
Filmora packs a punch for video, audio, and text editing, letting you interpolate videos, track motion, generate music, transcribe and translate videos, remove noise, add rhythmic text animations, etc. There’s even an AI Copilot, Text-to-Video functionality, and a growing library of 10+ million creative assets and templates.
The best way to see what Filmora can do is to download it to your computer. You can use many features, including video stabilization, for free, making it perfect for determining if it suits your needs.
How to Use Filmora to Stabilize Your Video
Filmora’s AI-powered video stabilization requires only a few clicks. Here’s how to use the feature:
Step 1: Launch the software and create a New Project.

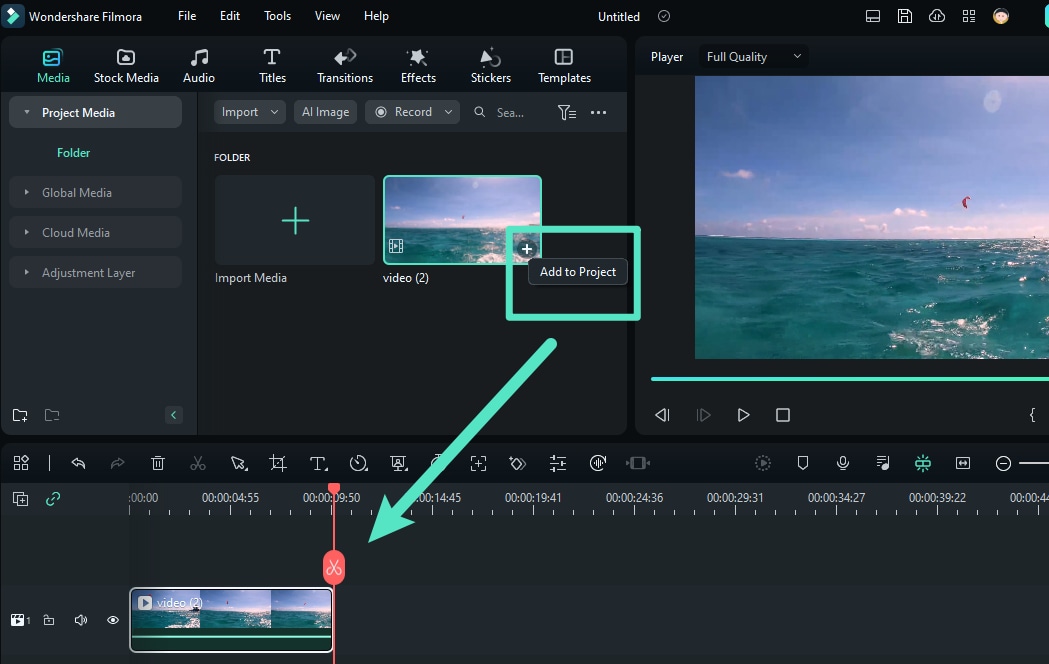
Step 2: Click File > Import Media > Import Media Files and choose a shaky video from your computer.

Step 3: Drag the video from the Media panel and drop it onto the timeline.
Step 4: Click Video > AI Tools in the Properties panel and toggle the Stabilization switch.
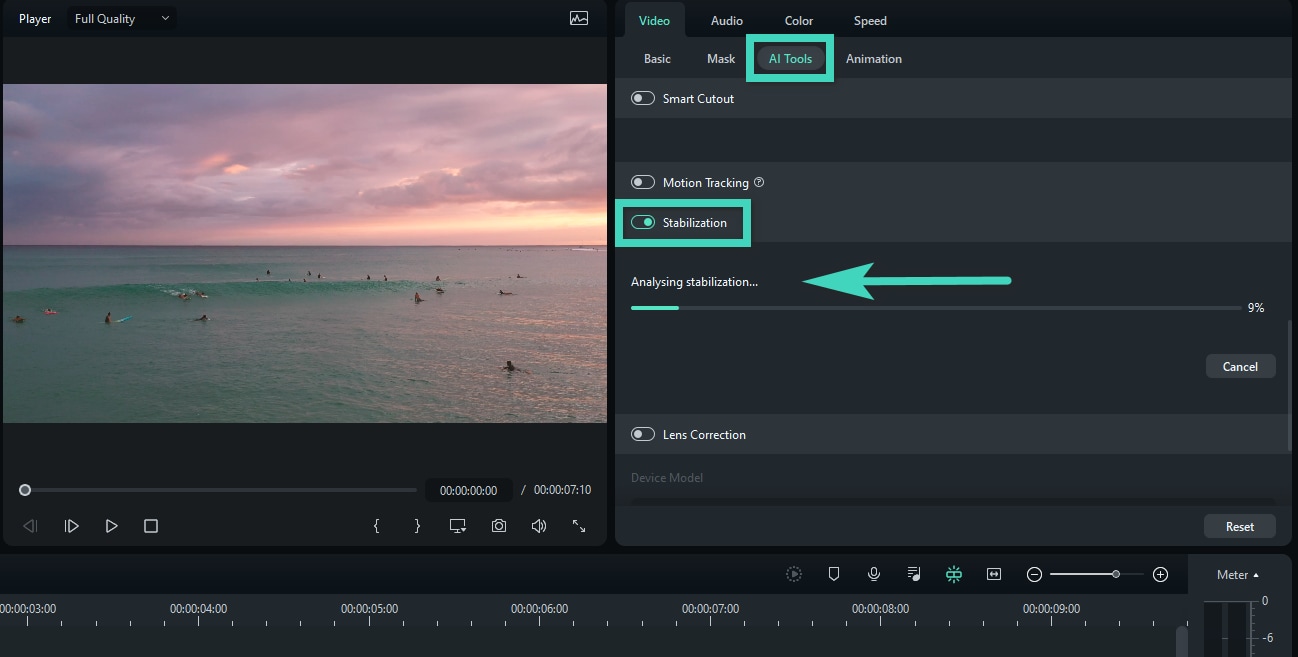
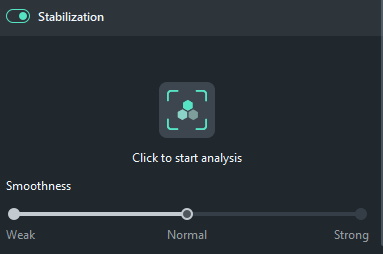
Step 5: Filmora will automatically analyze and stabilize your footage, so check the Player panel to see the results. If necessary, drag the Smoothness Level slider. Then, choose an Edge Processing method (Extend, Reflect, Tile, or None) to specify what to do with the moving borders.
Step 6: Play the video again and tweak the settings if necessary. Then, explore other editing tools and hit Export to save the footage.
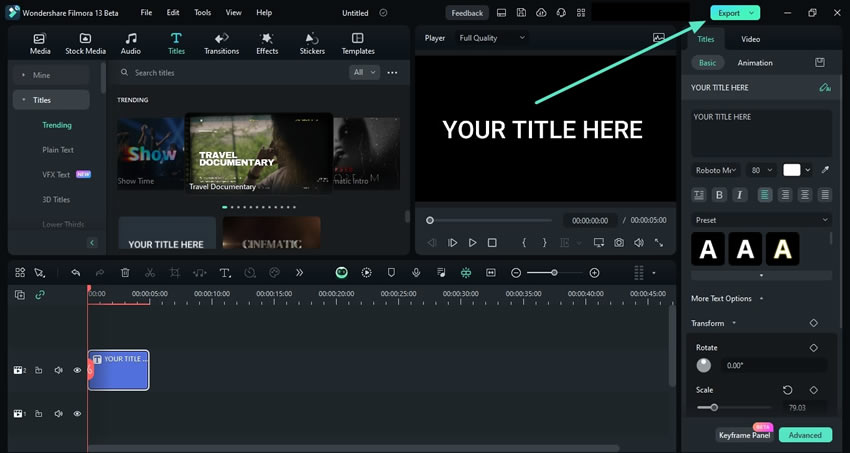
Step 7: Choose where to output the video and set your preferences (e.g., the format, resolution, quality, and frame rate). Finally, click Export to save it to your computer or share it on social media.

Conclusion
Knowing how to stabilize in After Effects is an excellent skill. However, Wondershare Filmora produces better results without requiring extensive learning and adjustments. It’s also more affordable, making it ideal for avid content creators and editors on a tight budget. Try it for free to see it in action.
FAQ
-
How can After Effects stabilize the camera shake?
The software analyzes frames for unwanted camera movement, repositioning footage to reduce or eliminate jitter. However, the process adds black borders, requiring cropping to make the footage professional. -
Does stabilizing a video reduce quality?
Stabilization slightly degrades the video quality. Cropping the edges after repositioning the frames scales down the footage, requiring zooming to match the original resolution. However, advanced AI algorithms (like those in Filmora) can minimize distortion and ensure smooth results. -
How can I improve video stabilization?
Tripods and gimbals are your best allies for steady videos. As for freehand recording, keep the camera close to your body, move your body when panning, and don’t use zooming. Also, prioritize wide-angle shots, primarily when following a moving subject. That way, cropping won’t significantly affect the footage if you need to stabilize it.
