
 100% Security Verified | No Subscription Required | No Malware

Hardly anything is as maddening as discovering your material footage is shaky after finishing recording. It’s even more frustrating if you can’t reshoot the video because the moment is gone.
Are you an Adobe user wondering how to stabilize a video in Premiere Pro? This comprehensive guide will walk you through the process and introduce alternative software.
Let’s see what causes jittery videos before showing you how to stabilize a shaky video in Premiere Pro and sharing tips for avoiding shaky footage.
In this article
- Superb video stabilization with low distortion.
- Vast video/audio effects and creative assets.
- Powerful AI for effortless content creation.
- Intuitive, professional yet beginner-friendly.
- Works on Mac, Windows, iOS, and Android.


What Causes Shaky Footage?

Understanding what causes shaky footage will help you avoid the problem and record professional-level videos. Here are the most prominent culprits:
- Vibrations – Have you recorded a video while riding a bike, mounting your camera on the handlebar? There’s the answer to your shaky footage. The vibrations and bumps during the ride shake your camera, causing jitter.
- Fast motion – Moving your handheld camera quickly while panning or capturing dynamic shots may be the most prevalent cause of jittery footage.
- Loose camera mounting – Have you used a chest or helmet mount while taking action shots? You may not have tightened the straps correctly, allowing your camera to move enough for your video to become shaky and blurry.
- Poor lighting – Recording in low-light conditions can add motion blur to your videos because your camera shoots at a lower shutter speed and frame rate to let more light through the lens.
Fortunately, you can fix your camera shake in post-production. Here’s how to use Adobe Premiere Pro to stabilize a video.
How to Stabilize a Clip in Premiere Pro
Adobe Premiere stabilization opens the door to several options. The best ways to stabilize a shot in Premiere Pro is to use the Warp Stabilizer, the BCC Optical Stabilizer, or an After Effects composition. Here are the steps for each.
Method 1: Premiere Stabilization Use the Warp Stabilizer
The Warp Stabilizer is a Premiere Pro video effect for smoothening jitter from camera movement. It analyzes footage by individual frames and corrects camera motion to stabilize the video.
Here’s how to stabilize a video in Premiere using the Warp Stabilizer:
Step 1: Launch Premiere Pro and click the Project panel. Then, right-click the empty area and select Import to add your shaky video.

Step 2: Drag and drop the video onto the timeline.

Step 3: You’ll see a new sequence. Right-click it to rename it (e.g., Premiere Pro image stabilization). That will help streamline your workflow if you create multiple sequences in post-production.

Step 4: Switch to the Effects panel and search for the Warp Stabilizer. You can find it in Video Effects > Distort.

Step 5: Drag and drop the effect onto your shaky video on the timeline.

Step 6: Give Premiere Pro time to analyze your video for camera movement.

Step 7: The process may take a while (depending on your PC’s CPU and footage length). Check the Effect Controls panel to monitor the frame analysis.

Step 8: Once Premiere Pro stabilizes your video, tweak the Warp Stabilizer settings (if necessary) in Effect Controls. Choose Smooth Motion under Result and adjust the Smoothness level (a higher percentage will add more blur and artifacts, so don’t go overboard). Then, play the video to see if the jitter is gone. If not, select a Method (the first two usually give the best results) and modify the Framing under Borders to control how the software will stabilize the moving edges.

Method 2: How to Stabilize A Shaky Video In Premiere Pro with the BCC Optical Stabilizer
Boris FX offers Continuum plugins for Adobe users, providing various effects like noise reduction filters. There’s also a video stabilizer for Premiere Pro. Therefore, download the pack from the official website and install it on your PC; its effects will instantly appear in Premiere Pro.
Here’s how to stabilize a clip in Premiere Pro using the BCC Optical Stabilizer:
Step 1: Go to the Effects panel and find the BCC Optical Stabilizer. It’s under Video Effects > BCC Image Restoration. Drag and drop it onto the video on the timeline.

Step 2: Switch to the Effect Controls panel and hit Click to Analyze under BCC Optical Stabilizer > Analyze.

Step 3: Let the software analyze the frames for camera motion and stabilize the footage. Once it finishes, play the video to see the result.

Step 4: Fine-tune the settings in the Effect Controls panel if you think there’s more room for improvement. The plugin unlocks many Optical Flow parameters, so experiment with them to achieve the desired result.

Method 3: Premiere Stabilization Use the “Replace With After Effects Composition” Feature
Another way to stabilize footage in Premiere Pro involves integrating After Effects into your workflow. It’s perfect if the previous methods don’t meet your expectations because After Effects does a brilliant job fixing jittery videos.
Here’s how to stabilize a shaky video in Premiere Pro using an After Effects composition:
Step 1: Right-click your video on the timeline and select Replace With After Effects Composition.

Step 2: Search for the Warp Stabilizer under Effects & Presets once After Effects launches. You’ll find it under Distort, so drag and drop it onto the video on the timeline. After the program analyzes and stabilizes the footage, play the video and adjust the parameters under Effect Controls, like in Premiere Pro (if necessary).

A Better Alternative to Adobe Premiere Pro Video Stabilization – Wondershare Filmora
Adobe Premiere image stabilization is fantastic, but the software has a steep learning curve and a hefty price tag. Are you looking for a user-friendly, affordable alternative? Try Wondershare Filmora, an AI-powered video editor for beginners and professional content creators.
This cutting-edge software has many AI editing tools, including an AI Copilot, stabilization, motion tracking, lens correction, and text-to-video. It can also generate music, isolate or remove vocals, denoise audio, reframe videos for social media, and create auto-captions and subtitles.
Furthermore, you can add text, transitions, filters, LUTs, dynamic stickers, sounds, royalty-free music, and visual effects (e.g., a meteor explosion dunk, neon lights, Dr. Strange’s shield, etc.). There’s a treasure trove of features; these only scratch the surface.
Therefore, download Wondershare Filmora to explore the software and its extensive library of creative assets (10+ million). The best part? Many features are free of charge, including video stabilization.
How to Stabilize a Video in Filmora
Stabilizing a shaky video in Filmora is a walk in the park, primarily because you don’t need to adjust many parameters; the software’s AI does the legwork. Here’s what to do:
Step 1: Launch Wondershare Filmora and create a New Project.

Step 2: Go to File > Import Media > Import Media Files and add your shaky video.

Step 3: Drag and drop the video onto the timeline.
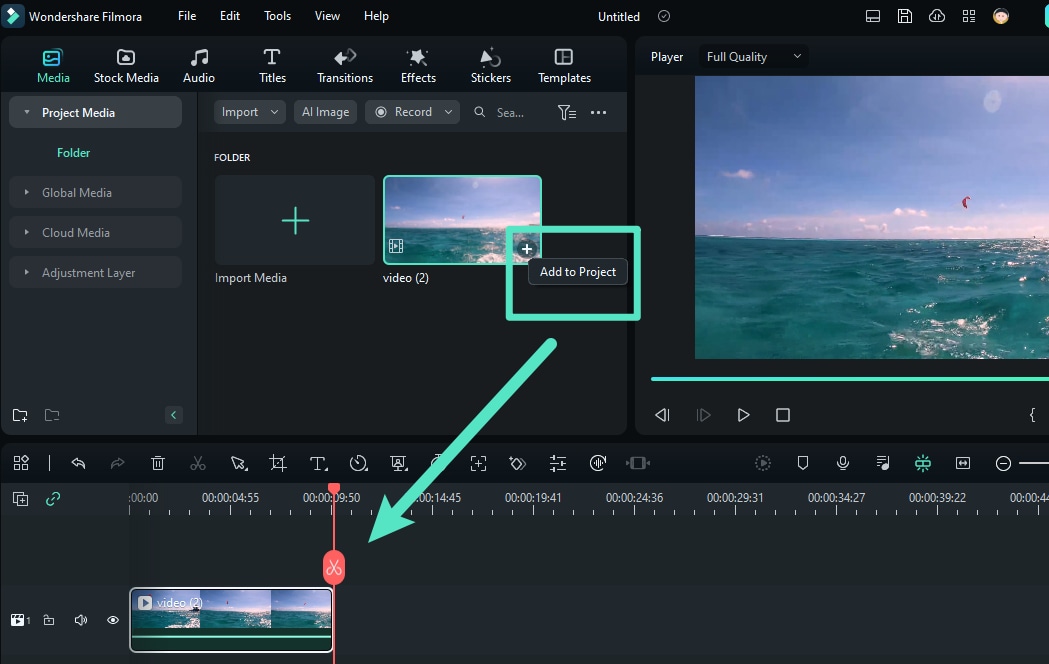
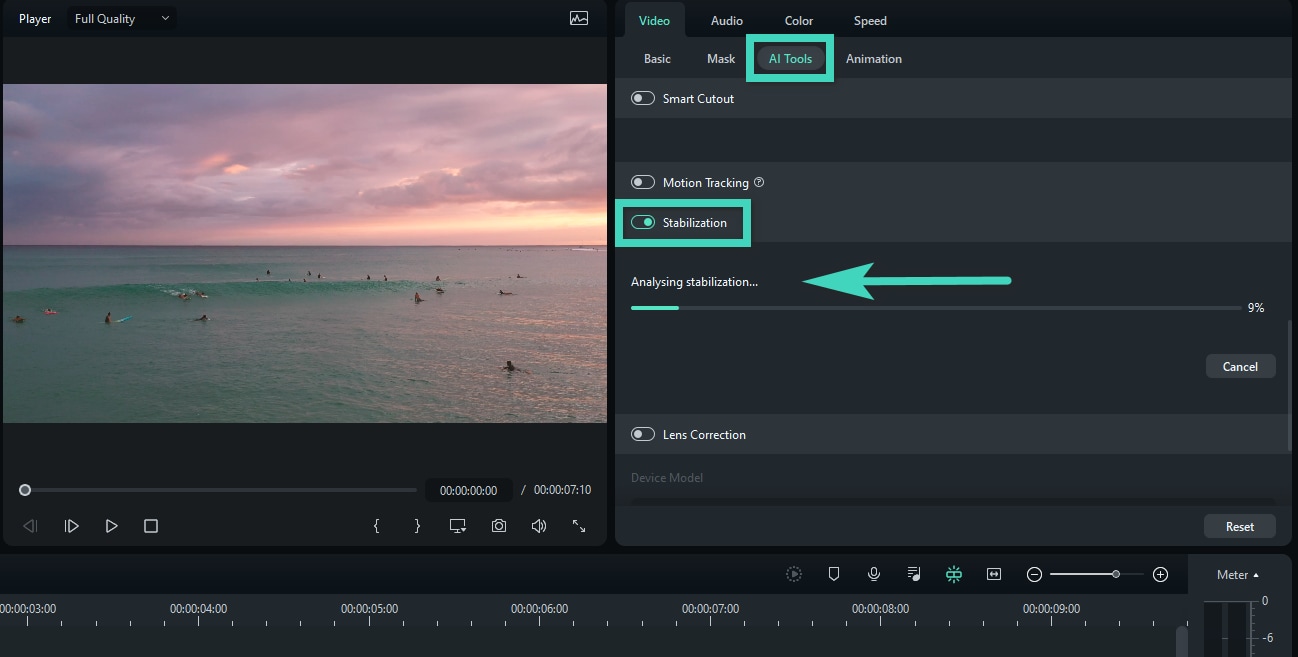
Step 4: Click the video on the timeline to select it and go to Video > AI Tools > Stabilization in the right-hand Properties panel. Filmora will automatically analyze the footage once you flip the switch.
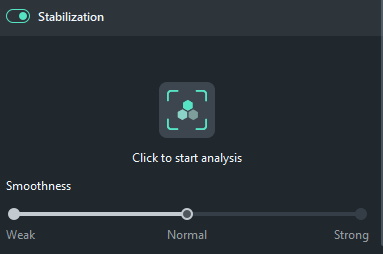
Step 5: After the program stabilizes your video, adjust the Smoothness Level by dragging the slider and choose an Edge Processing method (Extend, Reflect, Tile, or None) for stabilizing the video’s moving edges.
Step 6: Play the video in the Preview panel to see the results. If necessary, make other edits before clicking Export.
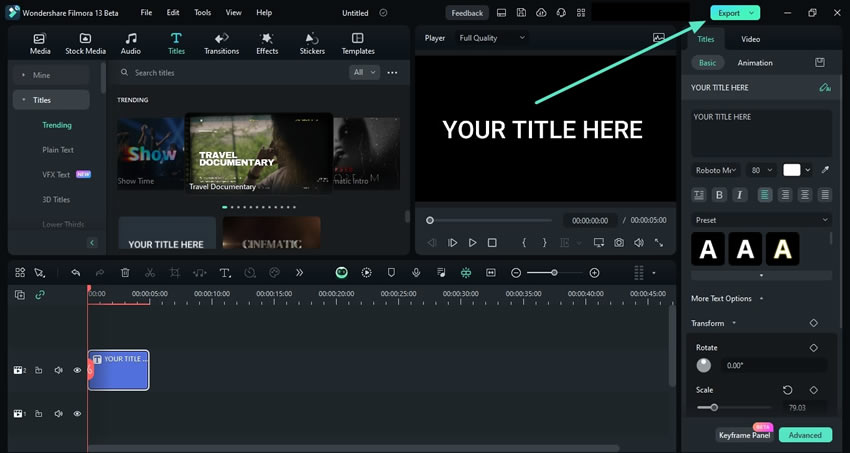
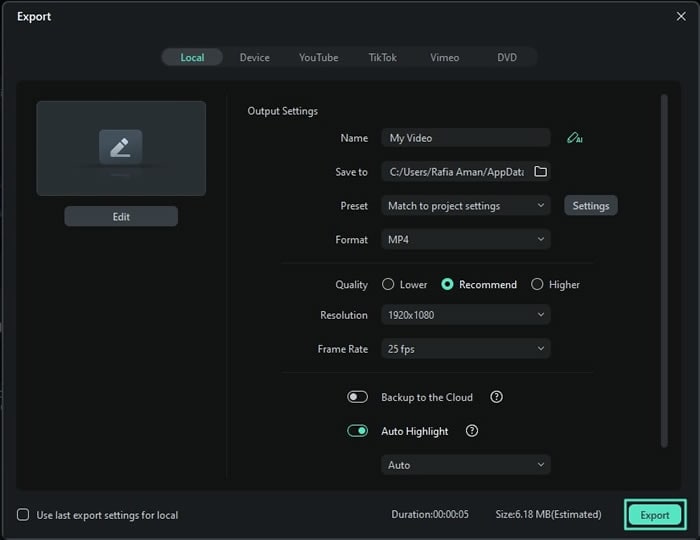
Step 7: Modify the output settings and hit Export to save the stabilized video to your device (or share it directly on social media).
Tips to Avoid Shaky Footage

Learning to use Premiere Pro to stabilize a video is half the battle. Here are the essential tips and tricks to avoid shaky footage:
- Use a tripod or gimbal – A tripod is perfect for static footage, while a gimbal is a no-brainer for dynamic shots. Both keep your camera steady, preventing unwanted movement and jittery videos.
- Hold the camera close to your body – Outstretching your arms when holding a handheld camera will make the footage shaky, primarily when recording for an extended period. Instead, use a stable grip and tuck your elbows toward your chest. That way, your arms won’t tire quickly and become shaky.
- Don’t zoom in or out during freehand recording – That will cause minor jerks, turning them into noticeable movements in the video.
- Move your body when panning – Beginners typically move only their hands when horizontally swiveling a camera. However, that introduces the unwanted camera shake. The key is to rotate your entire body.
- Make wide-angle shots – Wide-angle lenses provide a wide field of view and allow for higher shutter speeds. Besides hiding subtle movement, that gives you more footage to work with, making it ideal when editing in Premiere Pro. After all, the Warp Stabilizer automatically crops your video’s edges before scaling it up to match the original aspect ratio.
These are only some tips for stabilizing videos in production, but they’re an excellent starting point.
Conclusion
Now that you know how to smoothen a video in Premiere Pro, it’s time to put your newfound knowledge to use. Try the three methods above and experiment with various settings to see which provides the best results.
However, Wondershare Filmora offers many more AI-driven features at a competitive price, and its intuitive interface makes it ideal for novice video editors. Try it for free to see how it suits your needs.
FAQ
-
How does video stabilization work?
Software like Premiere Pro and Filmora stabilize videos by analyzing each frame to detect motion before removing outliers and modeling camera motion. That means filtering out spikes in movement. Finally, they warp the frames for camera correction and video synthesis, rendering stabilized footage. -
Is Adobe Premiere video stabilization effective?
Absolutely! Its Warp Stabilizer effect often does the trick, but filters from third-party plugins like Boris FX’s Continuum can further smoothen a shaky video. However, Adobe After Effects and Wondershare Filmora may do a better job. -
Is Wondershare Filmora better than Premiere Pro at stabilizing videos?
Both advanced programs deliver excellent results, but Filmora is more affordable and user-friendly. Its AI-powered stabilization tool is on par with the anti-shake in Premiere Pro, and it also supports third-party plugins like Boris FX and NewBlue FX.
