
 100% Security Verified | No Subscription Required | No Malware


 ChatGPT
 Perplexity
 Gemini
 Claude
 Grok
Grok
Did you know that adding videos to PowerPoint can boost audience engagement by up to 80%? Studies show that people pay more attention and remember more when videos are included. But here’s the problem—how you add a video matters.
Many people link to online videos, only to face buffering, broken links, or internet issues. The solution? Embed videos directly in PowerPoint. This ensures smooth playback with no interruptions and keeps your audience focused.
So, how do you embed a video in PowerPoint the right way? And how can you create high-quality videos that fit perfectly? We'll guide you through this article.

In this article
Part 1. How to Embed a Video in PowerPoint (Step-by-Step Guide)
Adding a video to your PowerPoint presentation is simple and can make your slides more engaging. By embedding a video directly, you ensure smooth playback without relying on an internet connection. Follow these steps to embed a video in PowerPoint the right way.
Step 1. Open PowerPoint and Select Your Slide
Start by opening PowerPoint and loading your presentation. Navigate to the slide where you want to add the video. Selecting the correct slide before inserting the video helps you place it exactly where you need it.
Step 2. Insert the Video
Once you have your slide ready, go to the Insert tab in the top menu. Click Video, and you will see different options for adding a video.
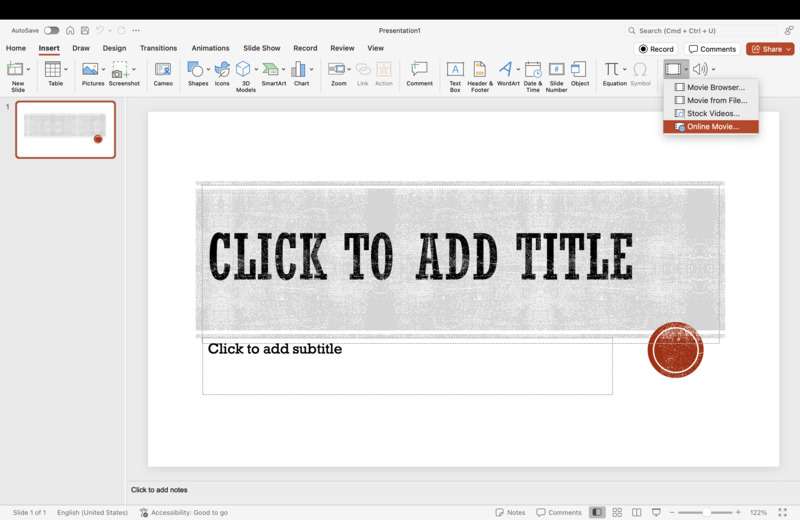
You can choose:
- Video on My PC – If you have a video file stored on your computer, select this option to embed it directly into PowerPoint.
- Online Video – If you want to add a video from YouTube, Vimeo, or another online source, paste the video link here.
- OneDrive – If your video is saved in OneDrive, you can select it from your cloud storage.
Choosing the right source depends on your needs. Embedding a video directly (instead of linking it) ensures it plays smoothly, even without an internet connection.
Step 3. Customize Playback Settings
Once the video is inserted, click on it to access the Video Format and Playback tabs. These settings allow you to control how your video plays during the presentation.

Some important options include:
- Start Automatically – The video will begin playing as soon as the slide appears.
- Play on Click – The video will only play when you manually click on it.
- Loop Until Stopped – This option makes the video replay continuously.
- Mute or Adjust Volume – You can choose to mute the video or adjust the sound level based on your presentation needs.
Customizing these settings ensures that your video plays exactly as intended, without interruptions or awkward pauses.
Pro Tips for Best Compatibility
For the best experience, always use MP4 format, as it is the most compatible with PowerPoint. If your video is in a different format, you can use a third-party tool like Wondershare Filmora to convert and export it in MP4 effortlessly. Filmora also allows you to enhance the video quality, trim unnecessary parts, and add effects before embedding the video in PowerPoint.
In the next section, we’ll explore how to create high-quality videos that are optimized for PowerPoint using Filmora.
Part 2. Easy Ways to Create Video for PowerPoint
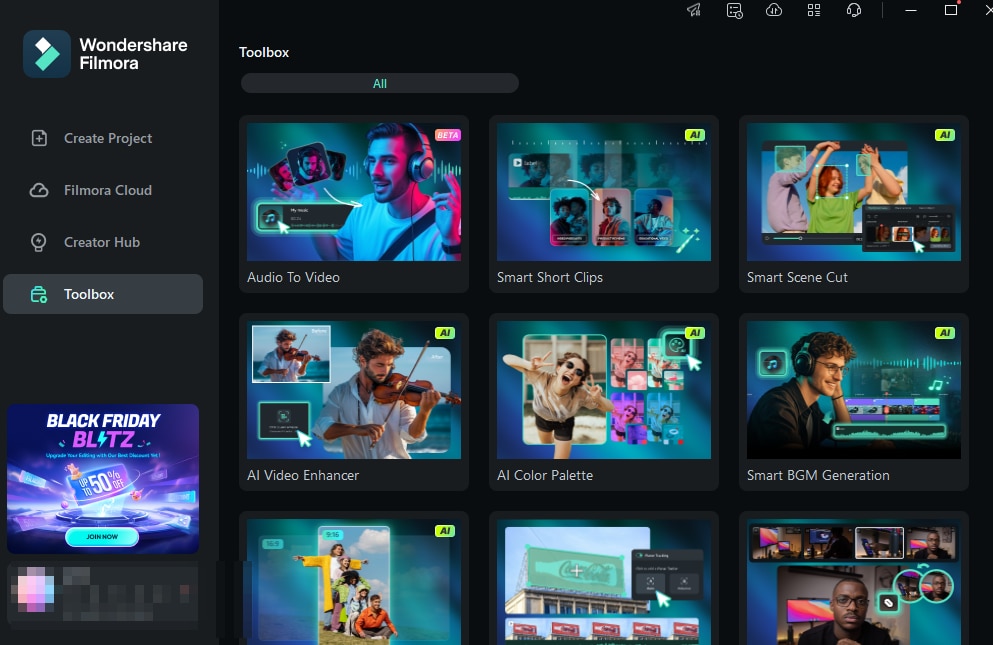
A great video can make your PowerPoint presentation more engaging, but not all videos are ready to use as-is. You may need to adjust the size, remove backgrounds, or improve audio quality before embedding it into your slides. That’s where Wondershare Filmora comes in.
 secure download

Effortless Aspect Ratio Presets
PowerPoint slides have specific aspect ratios, such as 16:9 (widescreen) or 4:3 (standard). If your video doesn’t match, it may appear stretched, cropped, or misaligned. With Filmora’s Aspect Ratio Presets, you can instantly format your video to fit perfectly within your slides—no manual resizing is needed.
AI Magic Tools for Quick Enhancements
Not all videos are presentation-ready, but Filmora’s AI-powered tools help you fix common issues in seconds.
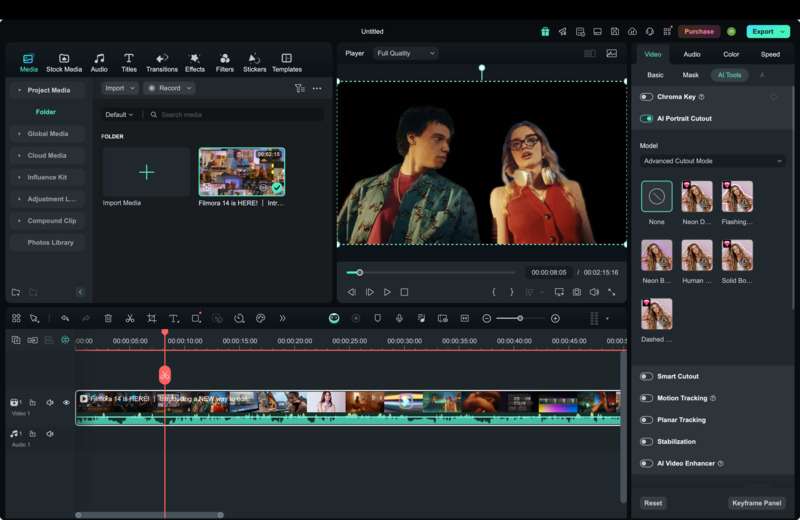
- AI Portrait – Removes backgrounds from videos without needing a green screen, perfect for overlaying your speaker video onto slides.
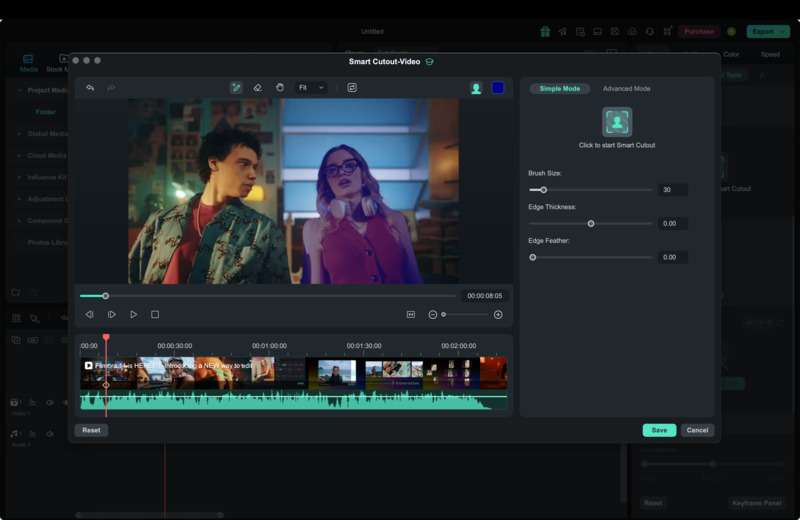
- Smart Background Removal – Easily cut out unwanted backgrounds and blend videos seamlessly into your PowerPoint design.
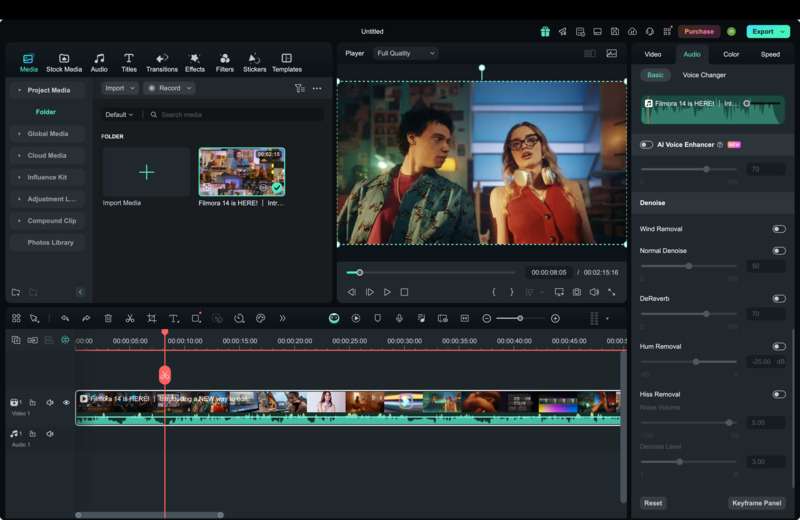
- AI Audio Denoise – Cleans up background noise to make your video sound clear and professional.
Make Your Videos Stand Out with Stunning Effects
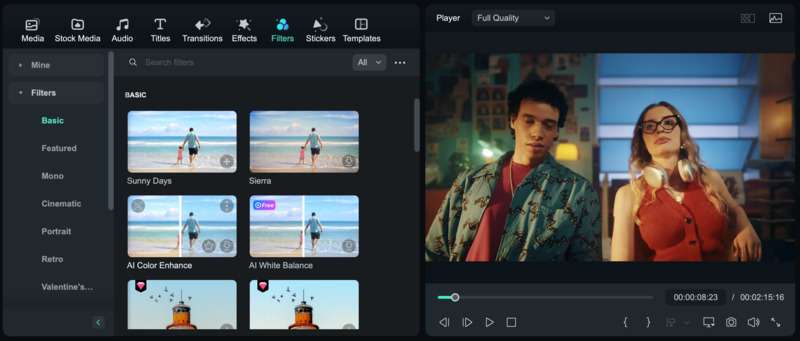
A boring, static video won’t impress your audience. With Filmora’s library of thousands of effects, filters, and text animations, you can make your video more dynamic and visually appealing. Add transitions, animated text, overlays, and even motion graphics to keep viewers engaged.
secure download
How to Create Video for PowerPoint using Filmora
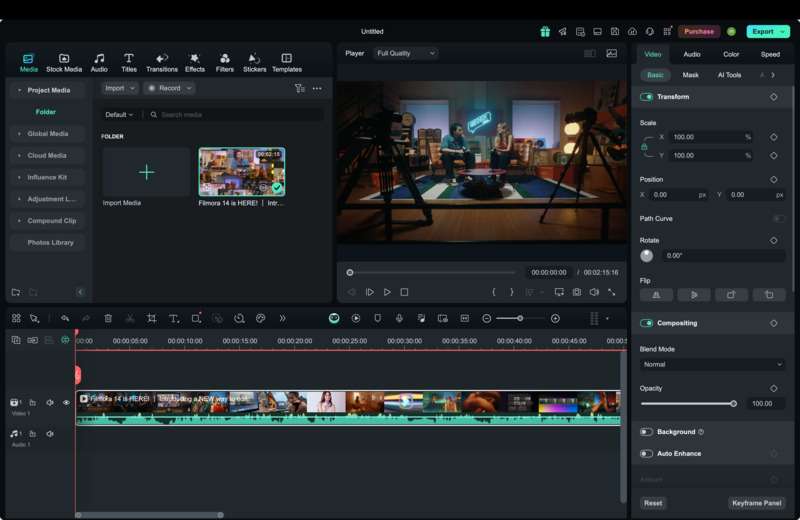
Step 1. Open Filmora and Import Your Video
Start by launching Filmora on your computer. Click Import Media and select the video you want to use. If you don’t have a video yet, Filmora allows you to record directly from your webcam or screen or create a slideshow using images and clips.
Step 2. Resize the Video for PowerPoint
PowerPoint slides usually use either 16:9 (widescreen) or 4:3 (standard) aspect ratios. If your video doesn’t match, it may appear cropped or distorted. To fix this, drag your video to the timeline and go to Project Settings. Select the correct Aspect Ratio Preset to instantly adjust your video.
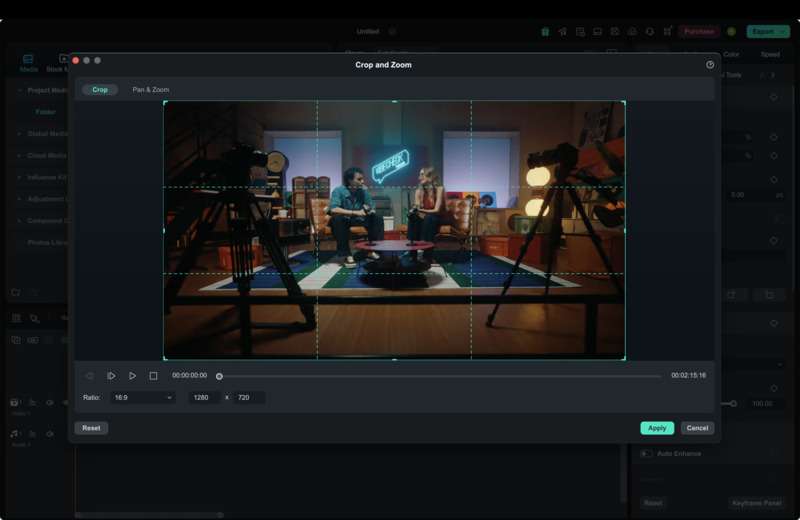
If necessary, you can also manually resize or crop the video using the Transform tool to ensure a perfect fit within your slides.
Step 3. Enhance Your Video with AI Tools
Filmora offers AI-powered tools that can quickly improve video quality. If your video has a distracting background, use AI Portrait to remove it without a green screen.
If there’s background noise, apply AI Audio Denoise to clean up the sound.
Additionally, Smart Background Removal allows you to eliminate cluttered backgrounds and seamlessly integrate your video into a PowerPoint slide.
Step 4. Add Text, Effects, and Transitions
A plain video may not be enough to capture your audience’s attention. Filmora offers thousands of effects, filters, and text animations to make your video more engaging. Smooth transitions help blend different scenes naturally, making your video flow better.
Choose a design that matches your PowerPoint presentation’s style for a consistent and professional look.
Step 5. Export the Video in PowerPoint-Ready Format
Once your video is ready, it’s time to export it. Click Export, then select MP4, which is the most compatible format for PowerPoint. To ensure high-quality playback, set the resolution to 1080p.
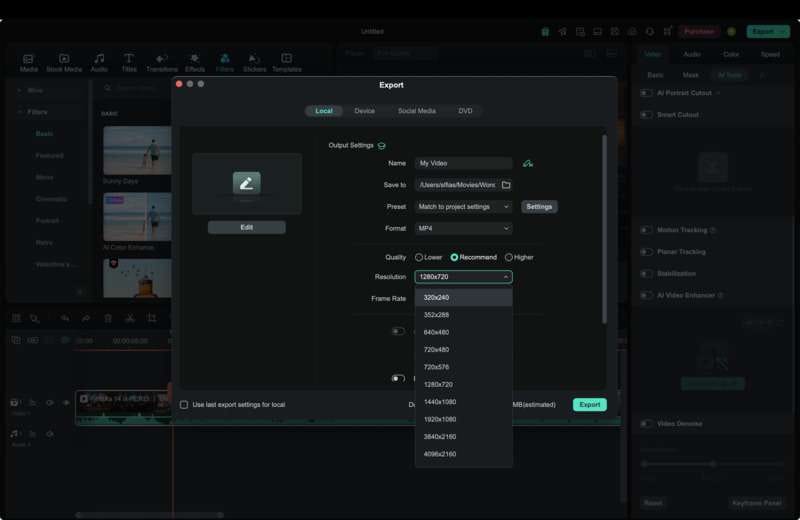
Filmora optimizes videos automatically for PowerPoint, so your video will play smoothly without lag or quality loss. Once exported, you are ready to embed your video in PowerPoint.
Part 3. Best Practices for Embedding Videos in PowerPoint
Embedding a video in PowerPoint is easy, but ensuring smooth playback and professional presentation quality requires some extra steps. Here are the best practices to follow when adding videos to your slides.
1. Always Preview Your Presentation
Before presenting, always test your video playback. Play the slideshow to check for lag, sound issues, or formatting errors. If you’re using a different computer, make sure the video is properly embedded and not linked to an external source. This prevents unexpected problems during your presentation.
2. Compress Large Video Files
Large video files can slow down PowerPoint or cause playback delays. To avoid this, use Filmora’s built-in compression tool. It reduces file size without losing quality, keeping your presentation fast and smooth.
To compress a video in Filmora:
- Click Export, then open Settings.
- Lower the bitrate or resolution to reduce file size. Or you can also enable “Advanced Compression” in the Export window.
- Save the video in MP4 format for best PowerPoint compatibility.
Smaller files also make it easier to share your presentation via email or cloud storage.
3. Match Your Video’s Style to Your Presentation
Your video should blend with your slide design. Whether your presentation is professional, educational, or creative, make sure the video fits the theme.
- For business presentations: Use clean text, subtle transitions, and minimal effects.
- For educational slides: Keep overlays simple and easy to read.
- For creative projects: Experiment with dynamic effects and engaging visuals.

With Filmora’s filters, transitions, and text overlays, you can easily customize your video to match your presentation’s style. A well-matched video keeps your audience focused and engaged.
Part 4. Troubleshooting Video Issues in PowerPoint
Even after embedding a video in PowerPoint, you might run into playback issues. Don’t worry—most problems have simple fixes. Here are some common issues and how to solve them using Filmora.
1. "My video in PowerPoint won’t play!"
If your video won’t start or PowerPoint shows an error, it’s likely a format issue. PowerPoint works best with MP4 (H.264 codec). If your video is in a different format, convert it using Filmora.
How to fix it:
- Open Filmora and import your video.
- Click Export and select MP4 as the output format.
- Re-embed the new file into PowerPoint and test playback.
2. "The video in PowerPoint looks pixelated!"
If your video appears blurry or low-quality, it may have been exported at a low resolution. This often happens when resizing a small video to fit a large slide.
How to fix it:
- Open the video in Filmora and click Export.
- Choose a high-resolution setting (at least 1080p HD).
- Make sure the bitrate is high enough for clear playback.
3. "It’s too large to upload the video to PowerPoint!"
Large video files can make PowerPoint slow or difficult to share. Compressing the file helps reduce its size without losing quality.
How to fix it:
- Open Filmora and go to Export.
- Lower the bitrate slightly to reduce size.
- Use the compression tool to shrink the file while keeping it in MP4 format.
Conclusion
Embedding videos in PowerPoint can boost engagement and make your presentations more dynamic. By using Wondershare Filmora, you can create high-quality videos, resize them effortlessly, and enhance them with AI tools. With Filmora’s MP4 export, compression, and format conversion, you’ll avoid playback issues and ensure smooth performance.
Follow the best practices, troubleshoot common problems, and your videos will play seamlessly every time. Ready to level up your presentations? Start creating professional videos with Filmora today!
