

 TL;DR:
Wondershare Filmora's Enhanced Mask feature allows video editors to selectively hide or reveal specific clip areas, enabling seamless scene transitions, dynamic text animations, and precise subject isolation.
● Shape, Text, and Alpha masks are primarily utilized to build transitions and layer transparent graphics, whereas Inverted and Object masks excel at isolating subjects to blur backgrounds or apply selective color corrections.
● To animate a mask or keep it aligned with a moving subject throughout the footage, you must apply keyframes to the mask's position, size, and rotation settings, or integrate it directly with Filmora's motion tracking feature.
● While masking effectively covers minor background distractions and blends split-screen combinations via edge feathering, completely removing complex unwanted objects from a shot may require supplementary compositing tools.
Ask AI for a summary
 ChatGPT
 Perplexity
 Gemini
 Claude
 Grok
Grok
Have you seen videos where text moves inside footage, scenes blend smoothly, or only a specific part of the frame changes? These effects are often created with a masking effect. In video editing, a mask effect controls which areas of a clip appear and which remain hidden, allowing you to easily blend footage, highlight subjects, and create layered visuals.
Beyond simple reveals, mask effects can be used for transitions, text animations, object edits, and creative masking overlays. In this guide, you'll learn common types of masking effects, how to create them in Filmora using its Mask feature, and practical ideas to try in your own videos.
Part 1. Common Types of Masking Effects
A masking effect is not limited to one editing technique. It can be used in different ways depending on what you want to reveal, hide, or combine in your video. Some masks help create smooth transitions, while others are used for text animations, subject isolation, or more advanced visual effects. Here are the masking effects you'll come across most often.
Shape Mask
If you've ever seen a video reveal itself through a circle, rectangle, or custom shape, you've seen a shape mask in action. It's one of the easiest masking effects to create and works well for clean, modern edits.
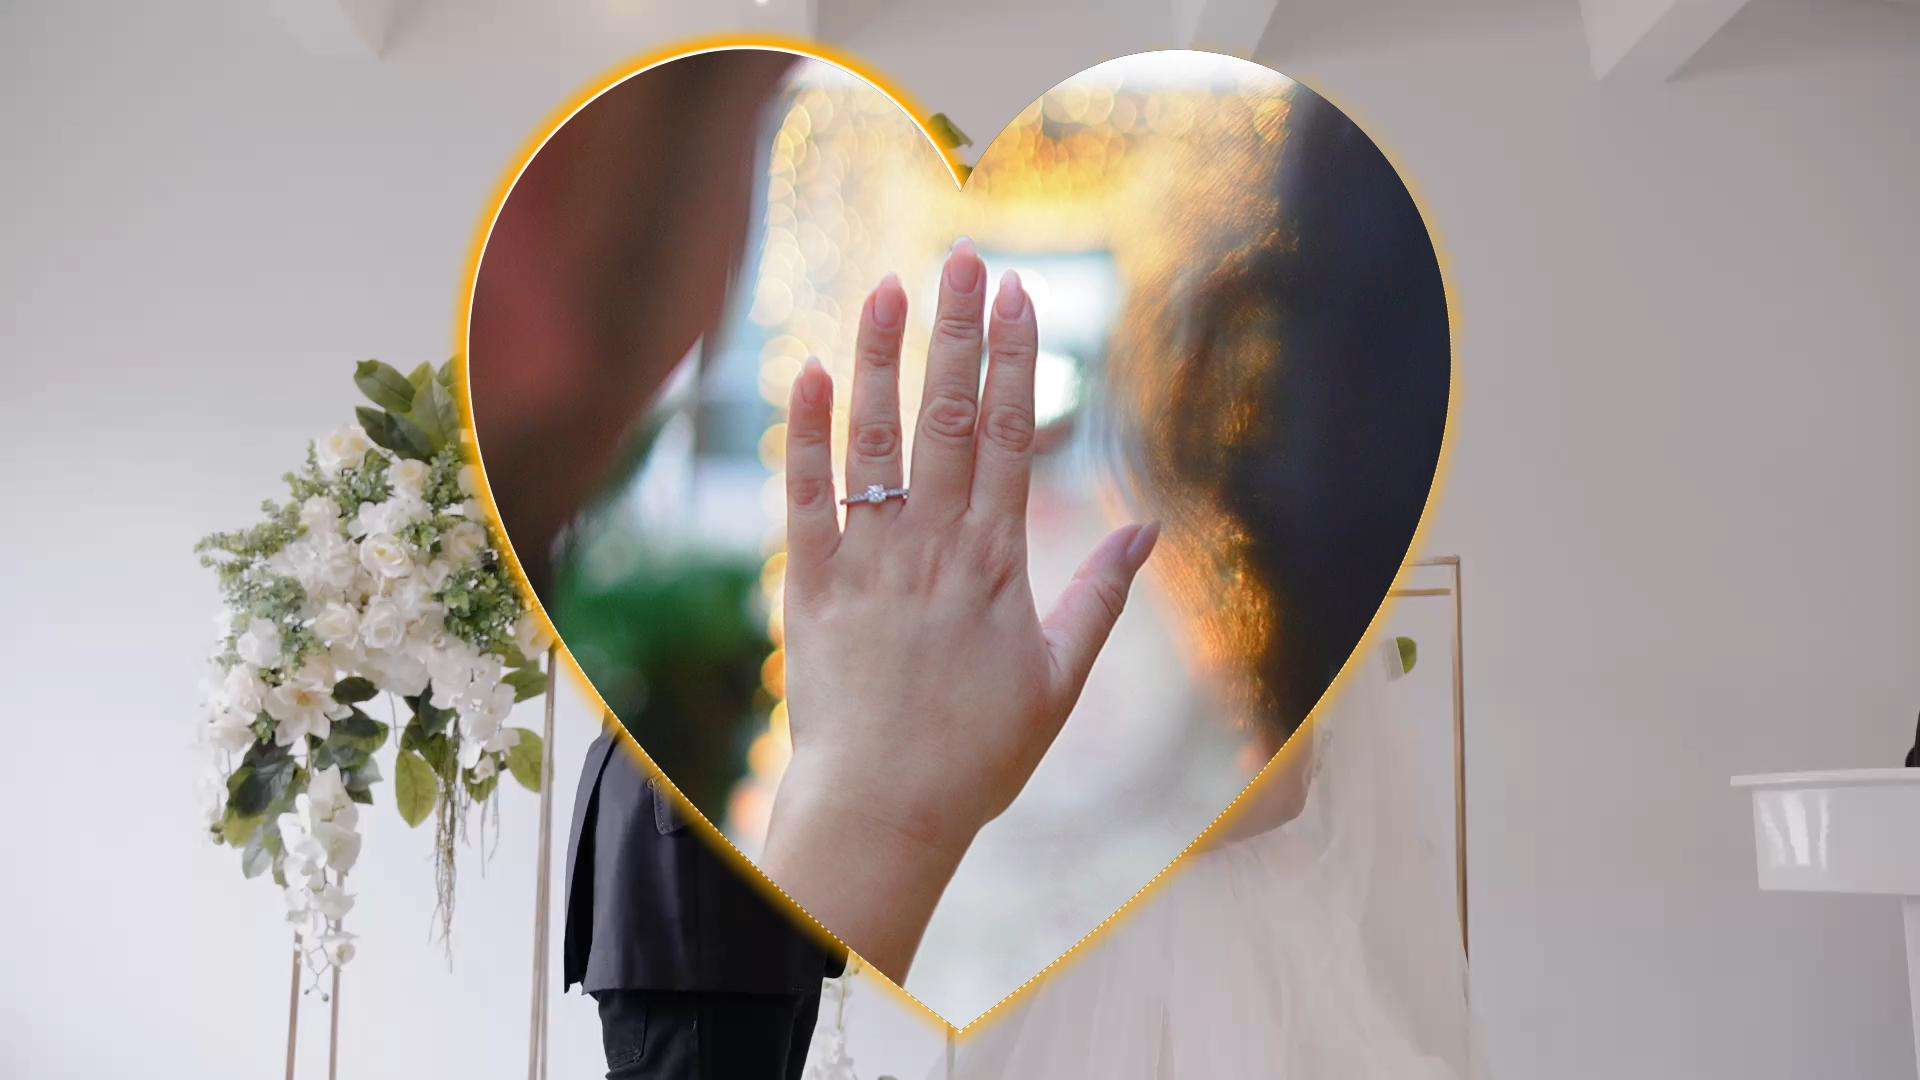
Shape masks are commonly used to:
- Reveal a clip through animated shapes
- Create split-screen compositions
- Frame a subject without cropping the entire video
- Build simple transition effects
Since the mask can be resized, rotated, and feathered, it's a versatile option for both subtle and creative edits.
Text Mask
A text mask turns typography into part of the visual effect. Instead of placing text over your footage, the video is revealed only inside the letters, giving titles much more movement and depth.
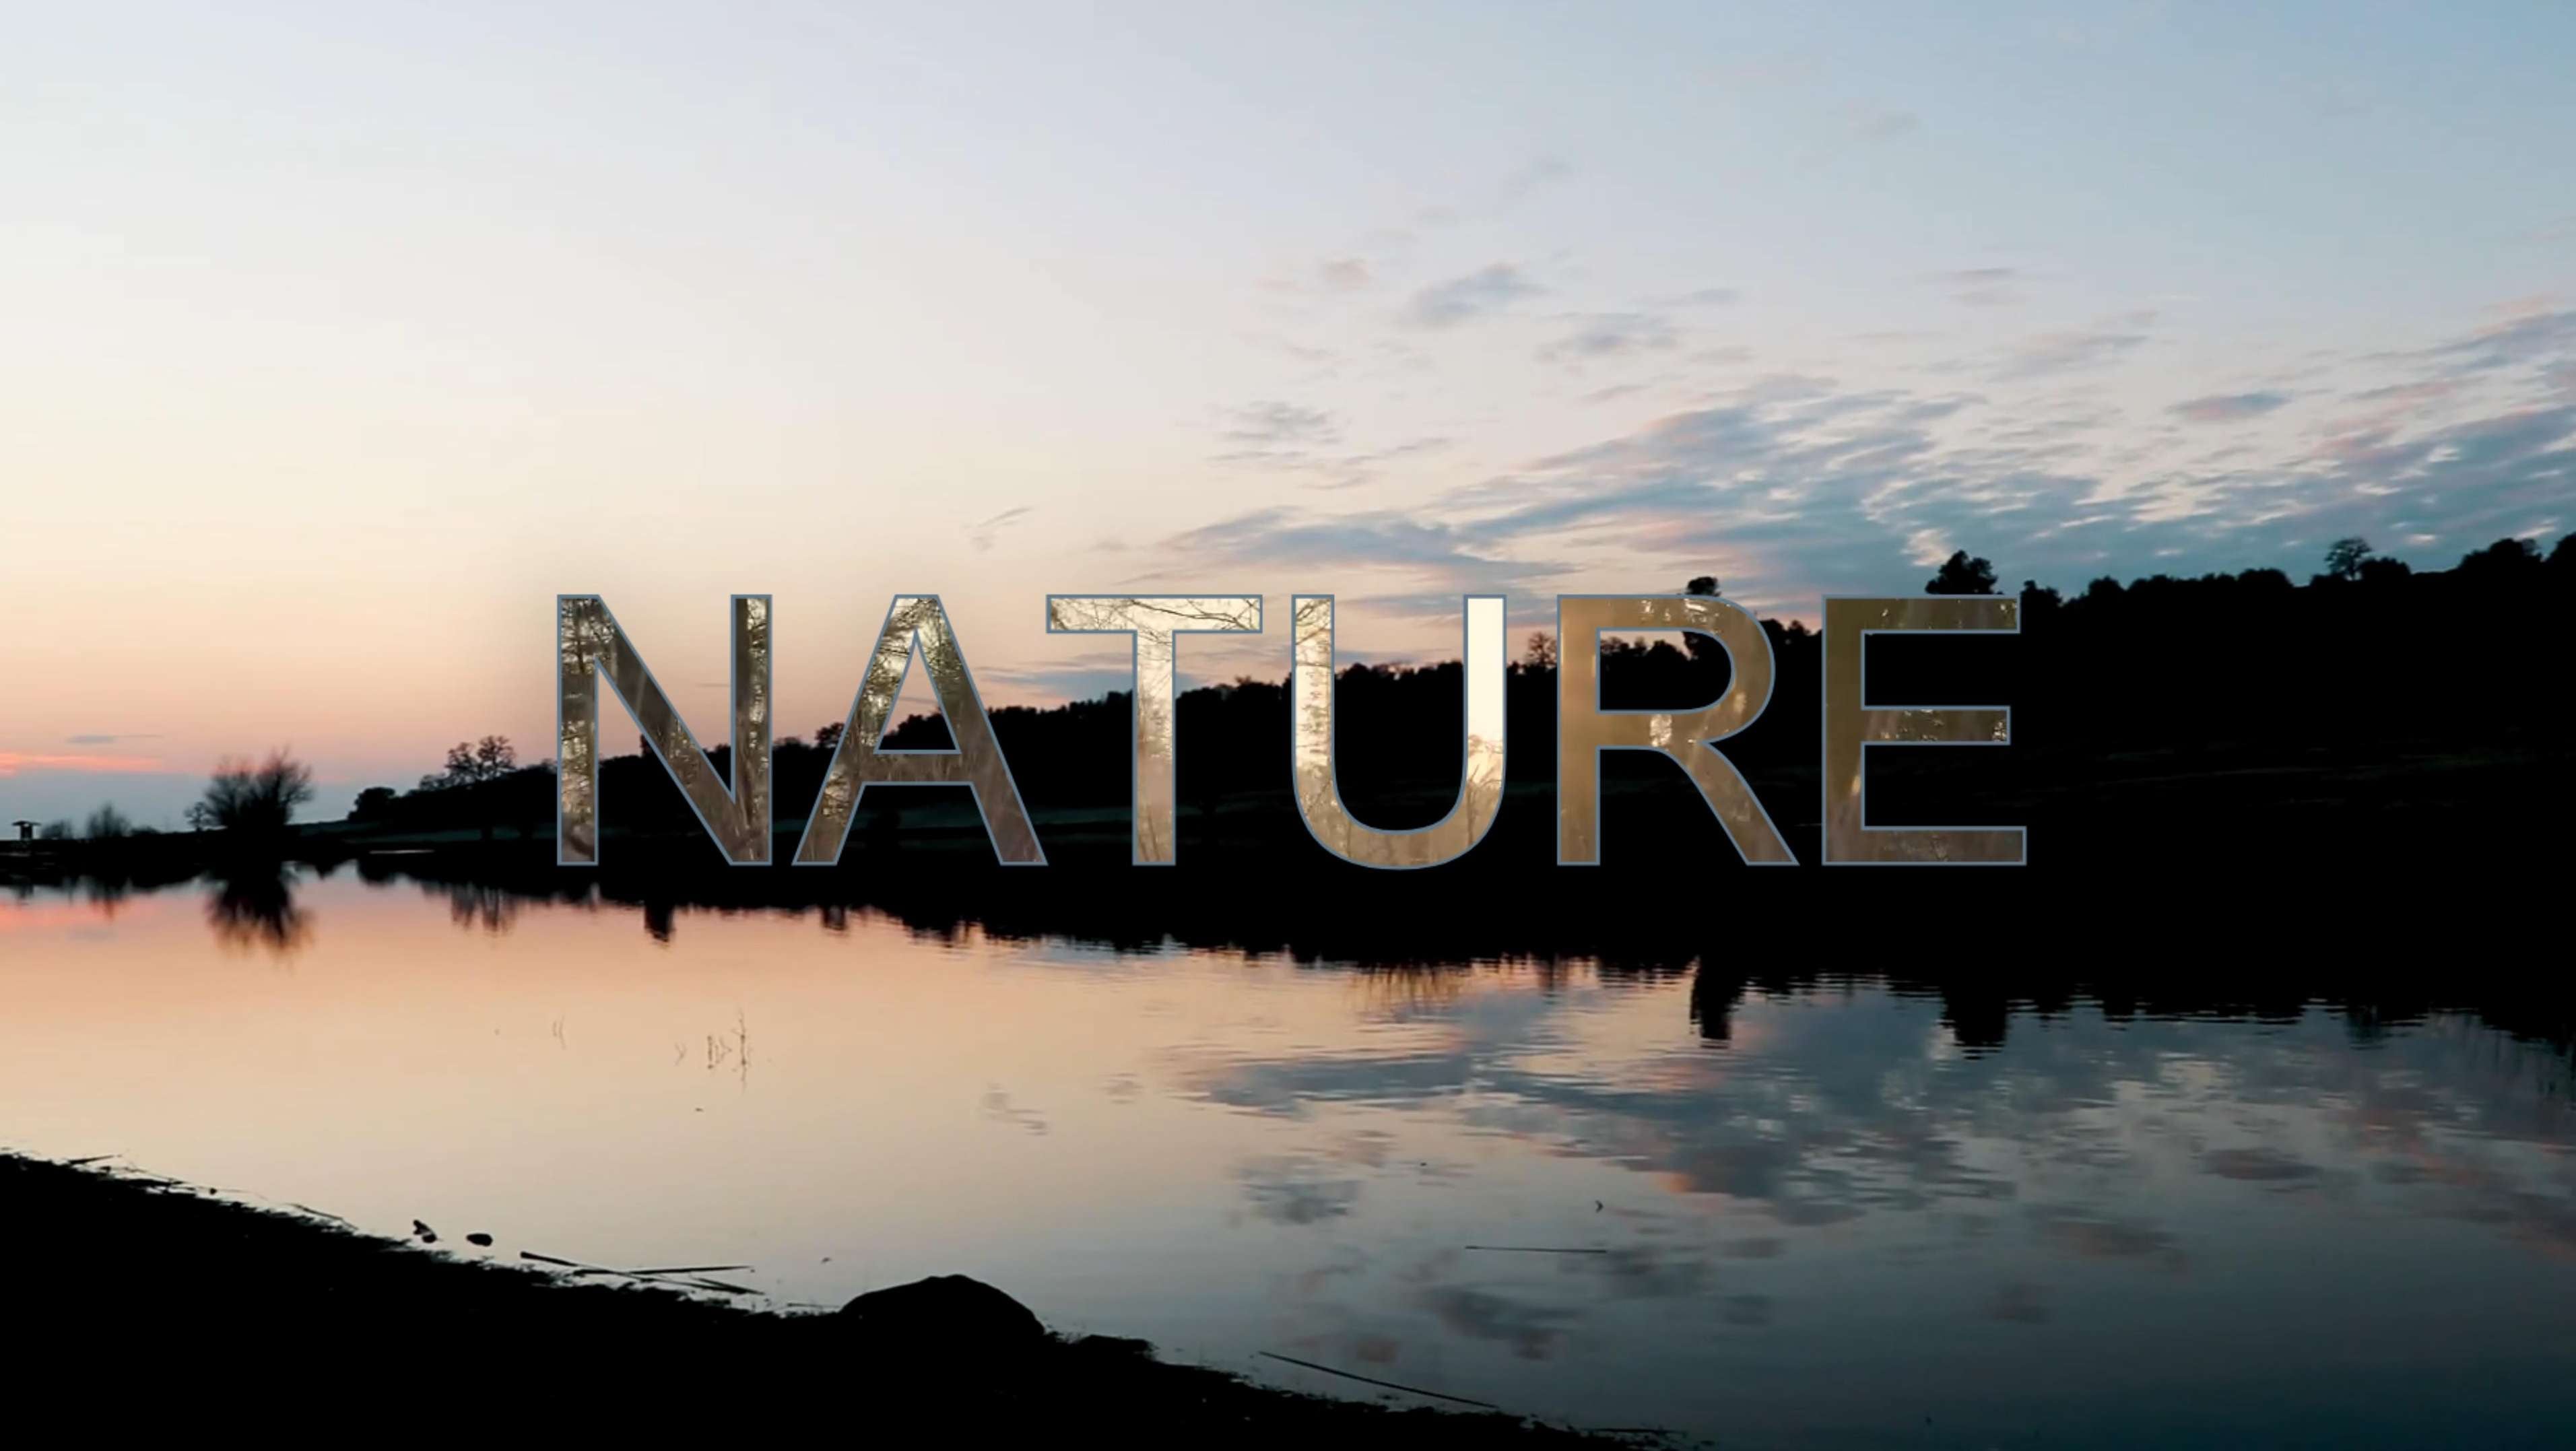
You'll often spot this effect in:
- Travel montages
- Brand introductions
- Music videos
- YouTube intros and cinematic openers
Adding motion to either the text or the background clip makes the effect feel even more dynamic.
Inverted Mask
An inverted mask reverses the selected area of a mask. It keeps the masked area hidden while allowing the rest of the clip to remain visible for editing.
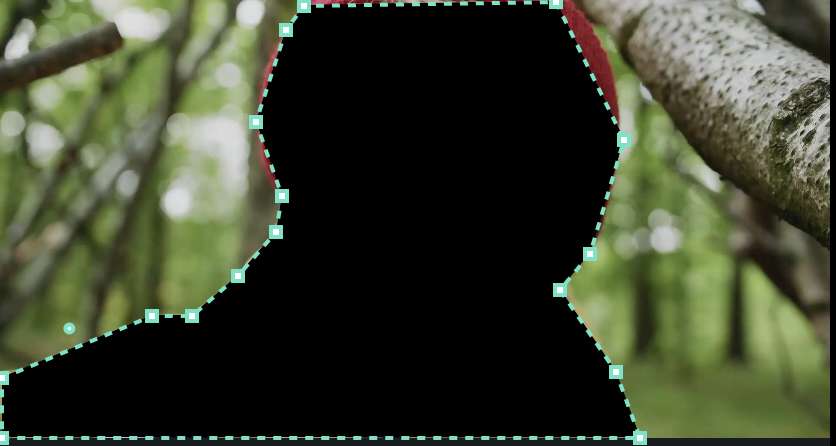
This type of mask is useful when you want to:
- Blur the background while keeping a person sharp
- Darken the edges of a frame
- Draw attention to a product or speaker
- Apply color corrections only outside the masked area
It's a simple technique that can dramatically change where viewers focus.
Object Mask
An object mask is designed to isolate a person or object from the rest of the frame. Once the subject is separated, you can apply effects, corrections, or animations without changing the surrounding scene.
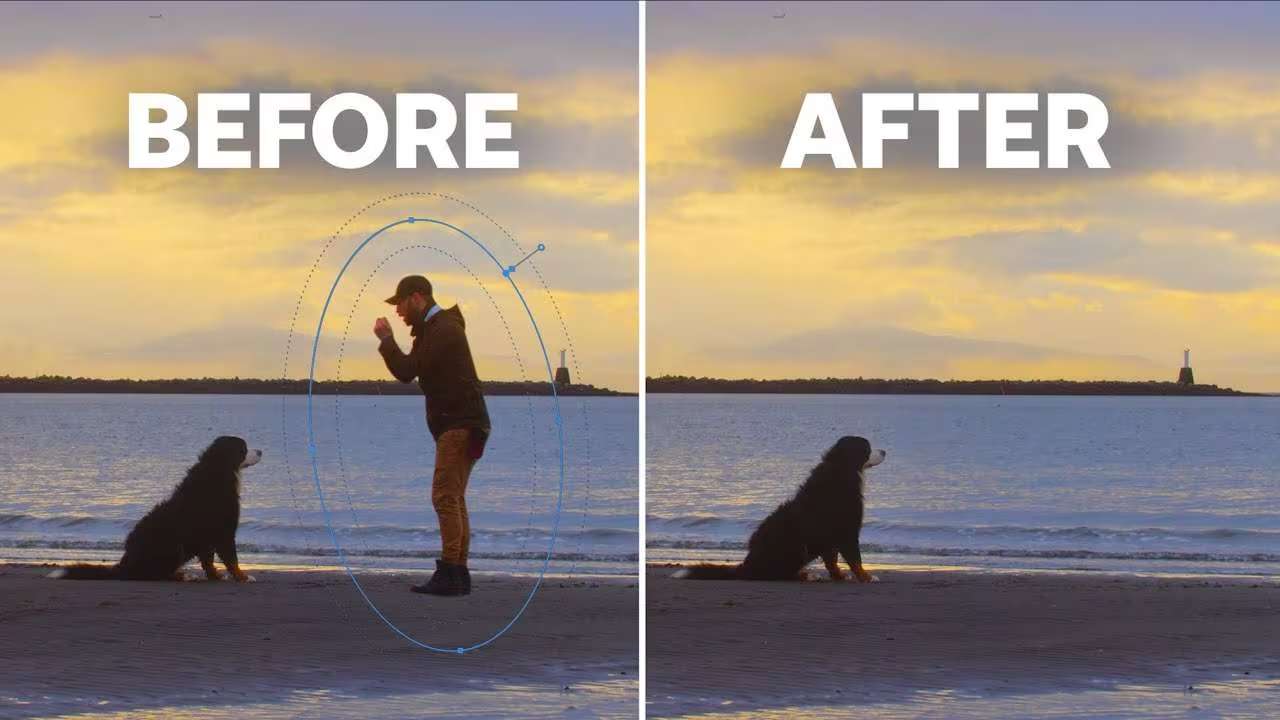
Creators often use object masks to:
- Highlight a moving subject
- Replace or edit backgrounds
- Add effects to a single object
- Create selective color or lighting adjustments
When combined with motion tracking, the mask can stay aligned with a moving subject, making the edit look much more natural.
Alpha Mask
Unlike shape or text masks, an alpha mask uses the image or graphic transparency to control what appears on screen. Because transparency can include soft gradients and detailed edges, alpha masks are ideal for more polished visual effects.
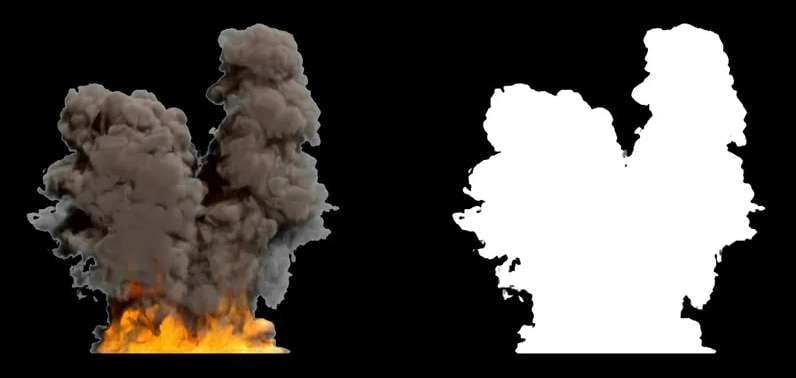
They're frequently used for:
- Animated logo reveals
- Smoke, ink, or light overlays
- Textured transitions
- Layering graphics with transparent elements
Although more advanced than basic masking, alpha masks offer greater creative flexibility when building cinematic edits.
Once you know which masking effect fits your goal, creating it becomes much easier. In the next section, we'll show you how to build these effects in Wondershare Filmora using its Enhanced Mask feature, with step-by-step instructions you can follow even if you're new to video editing.
Part 2. How to Create a Mask Effect in Filmora (Step-by-Step)
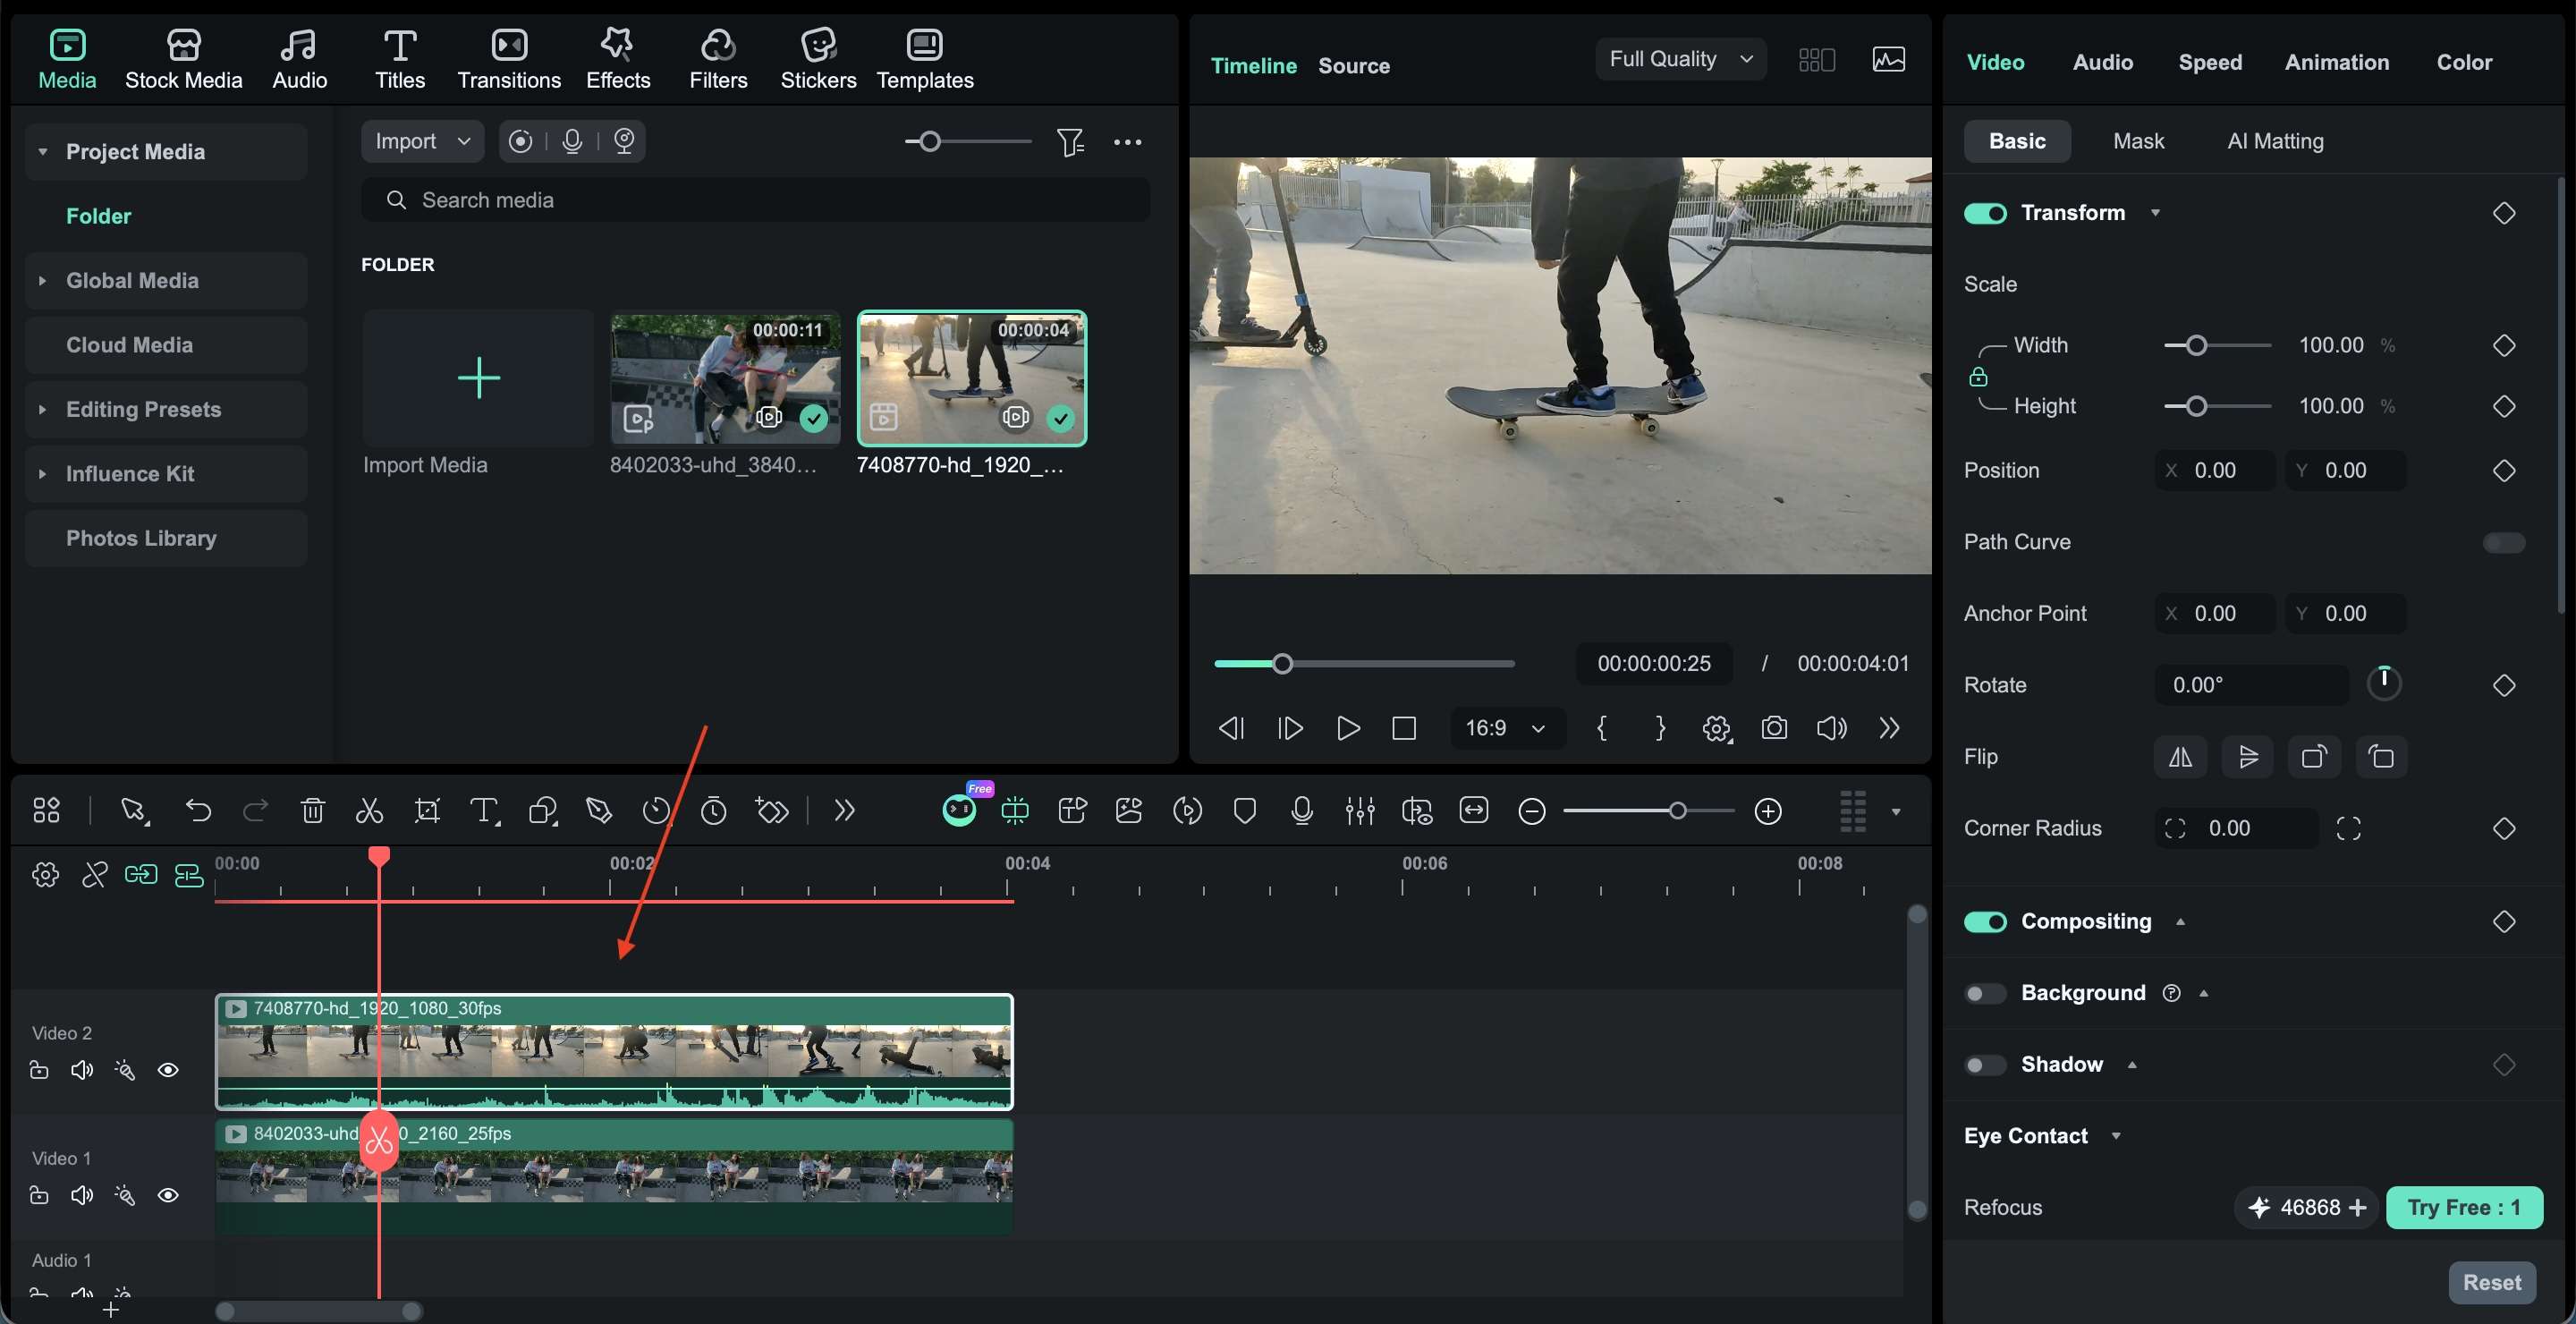
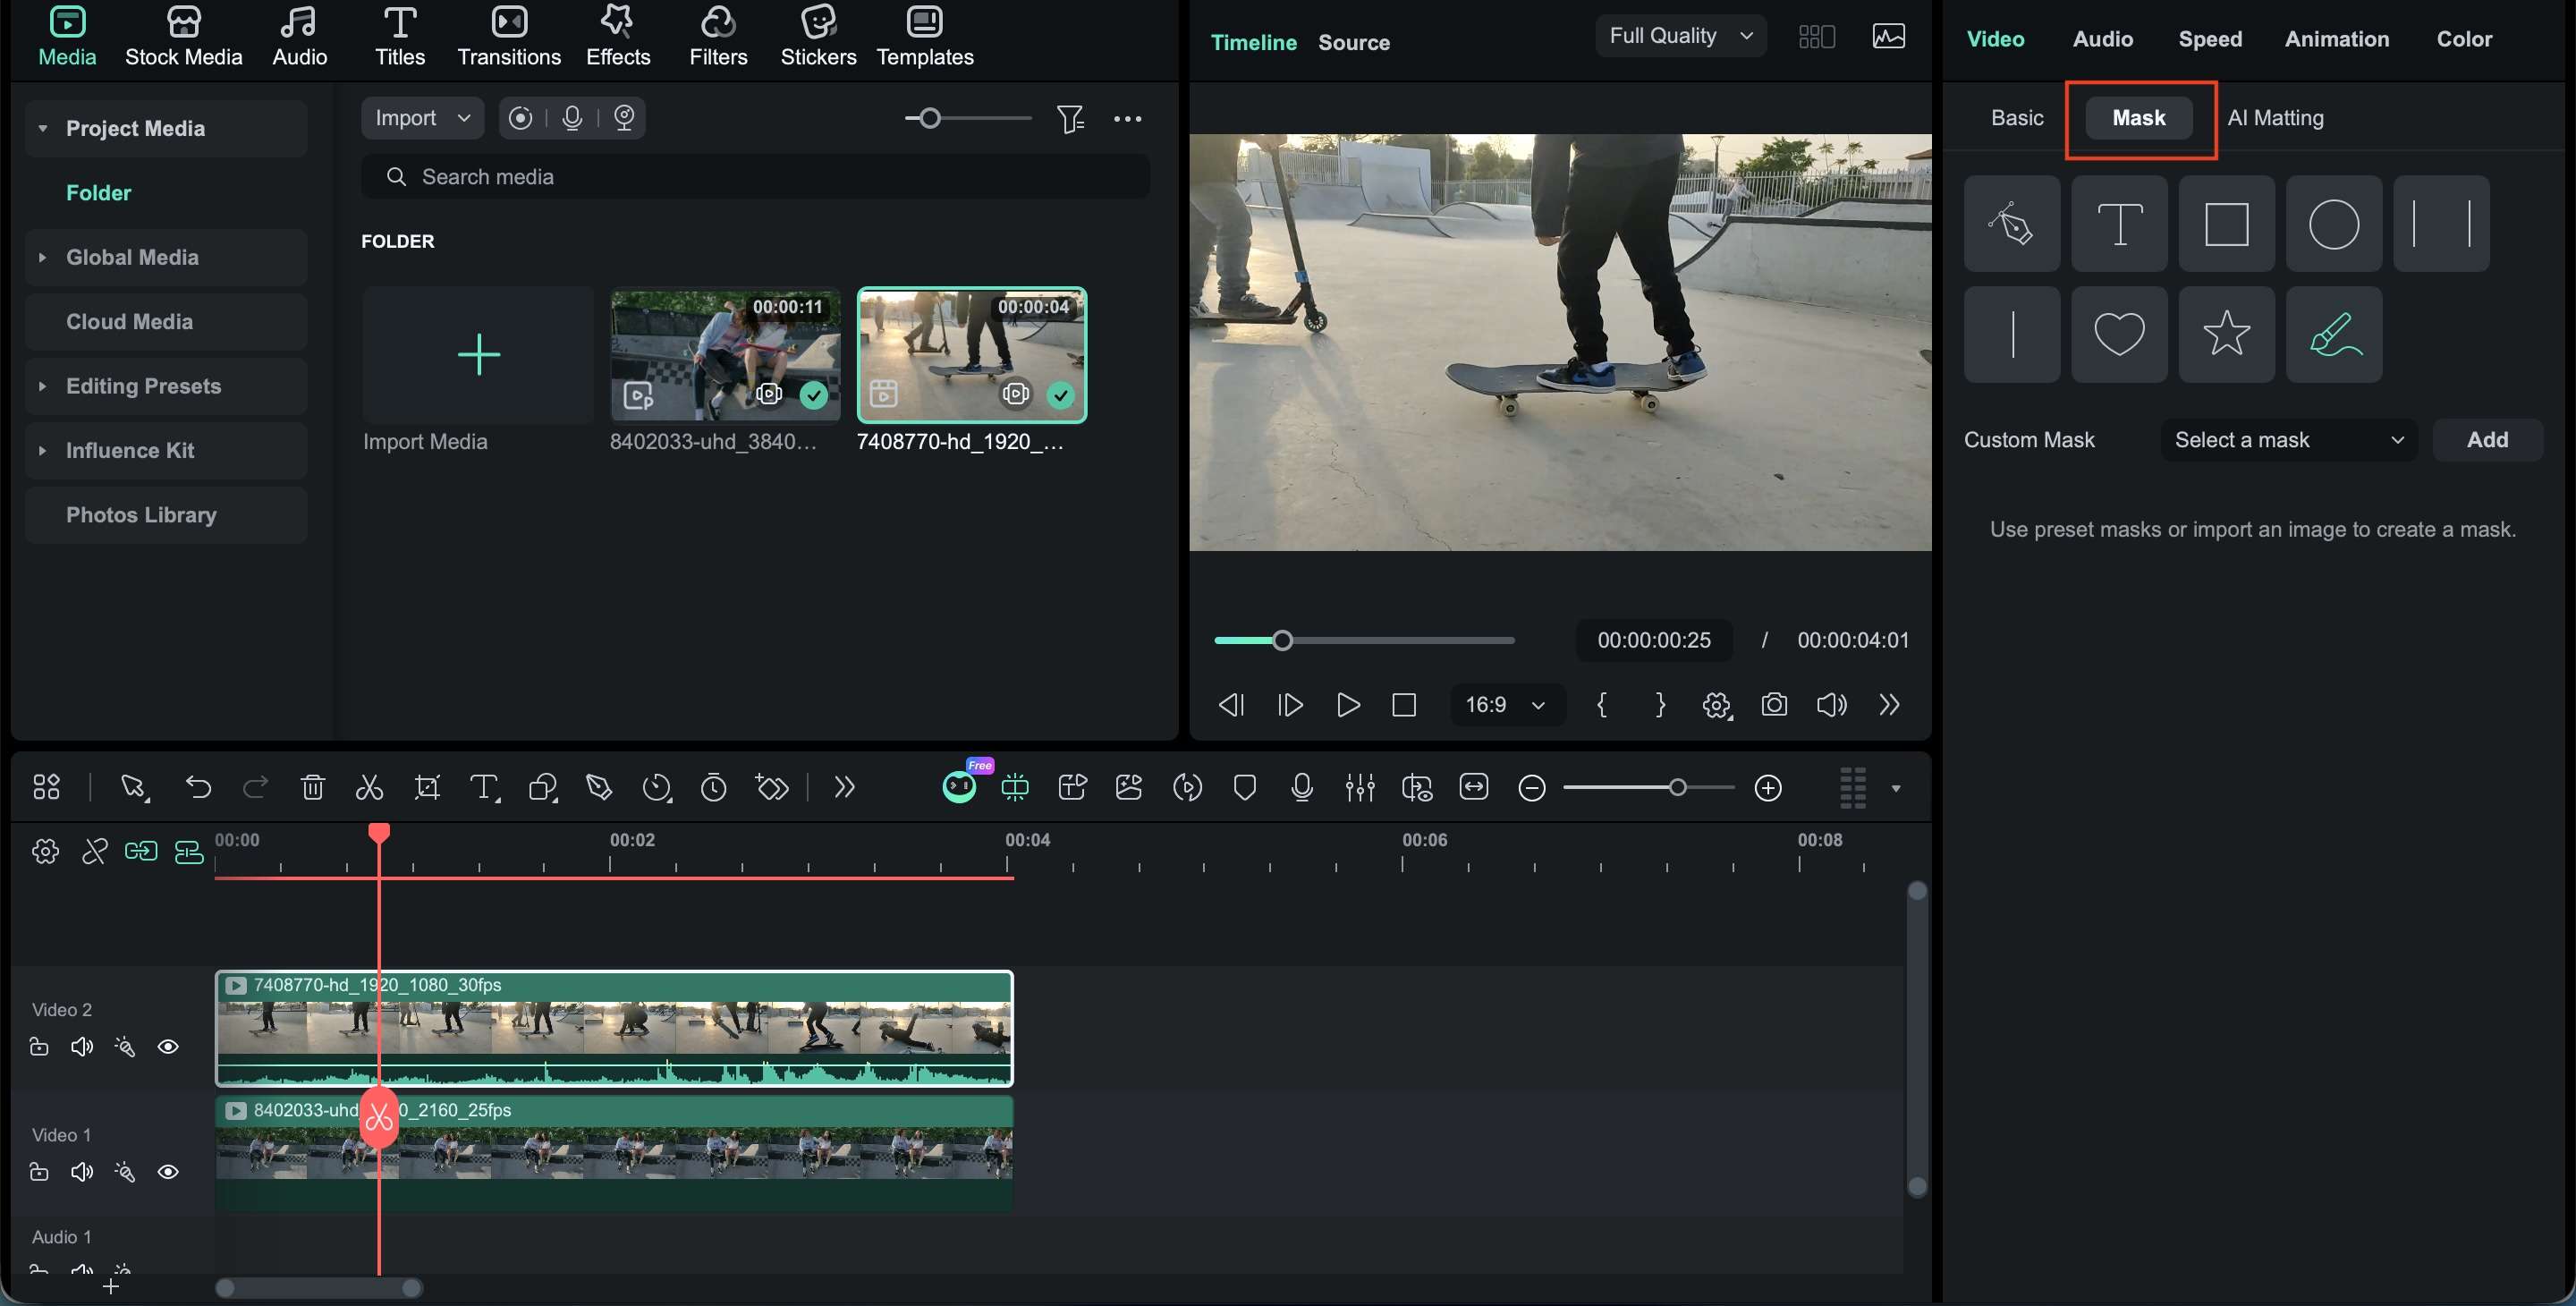
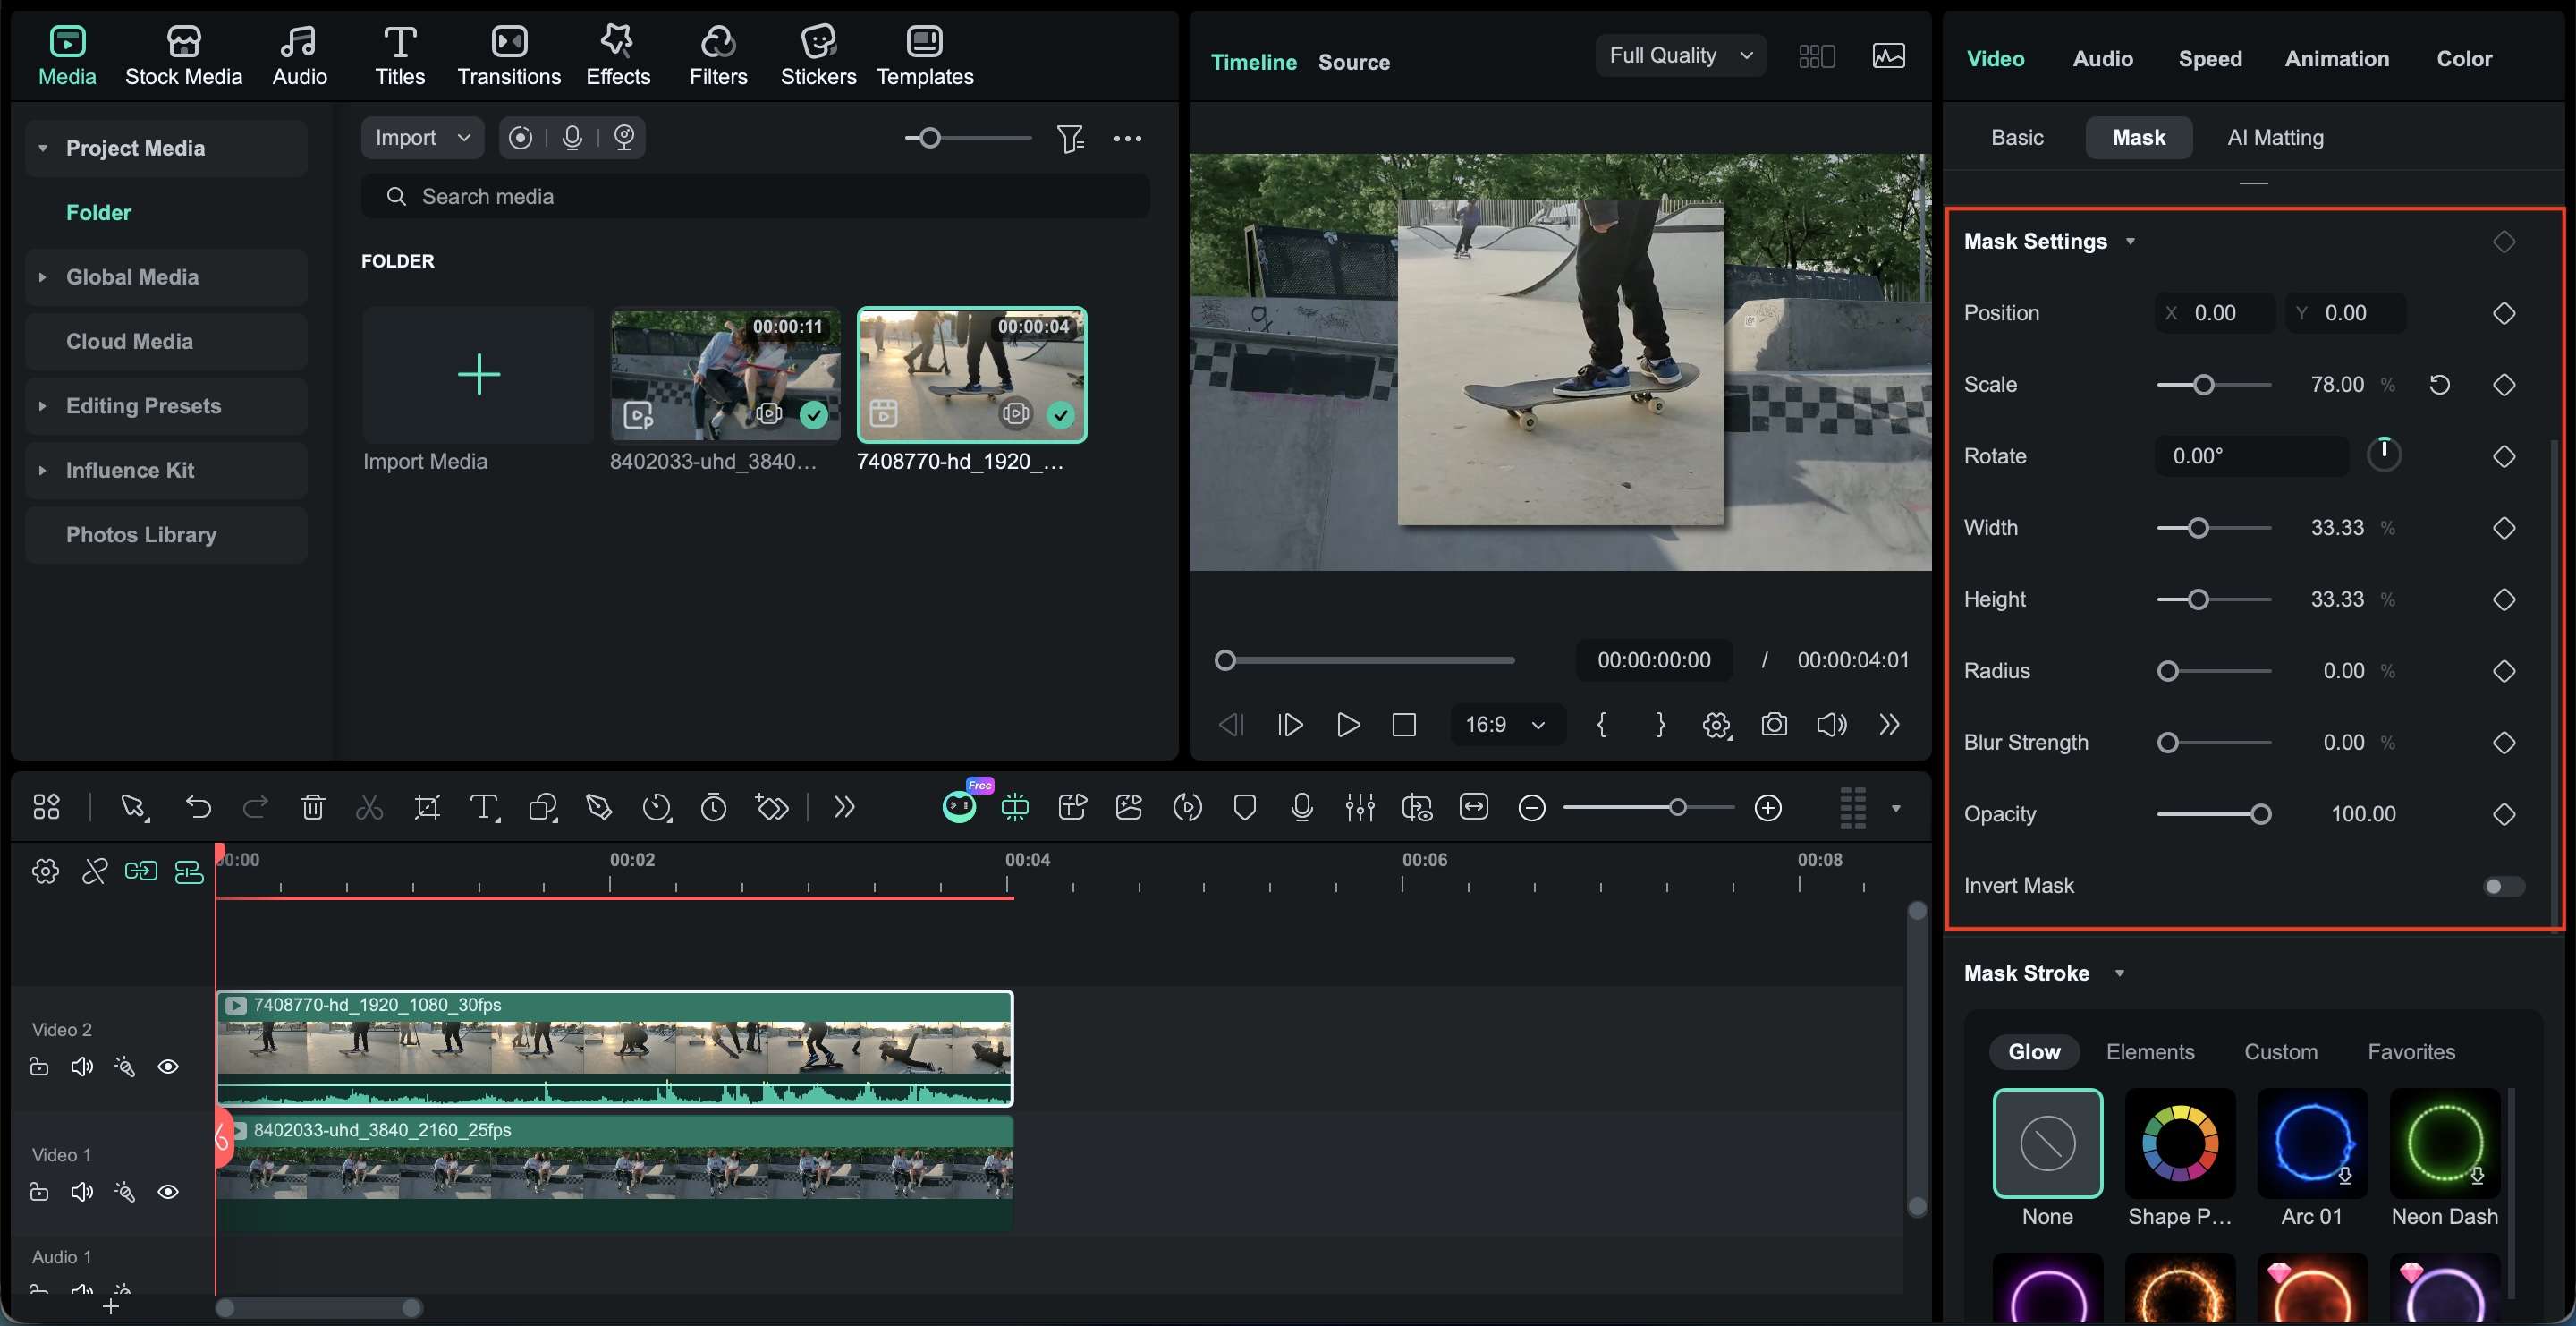
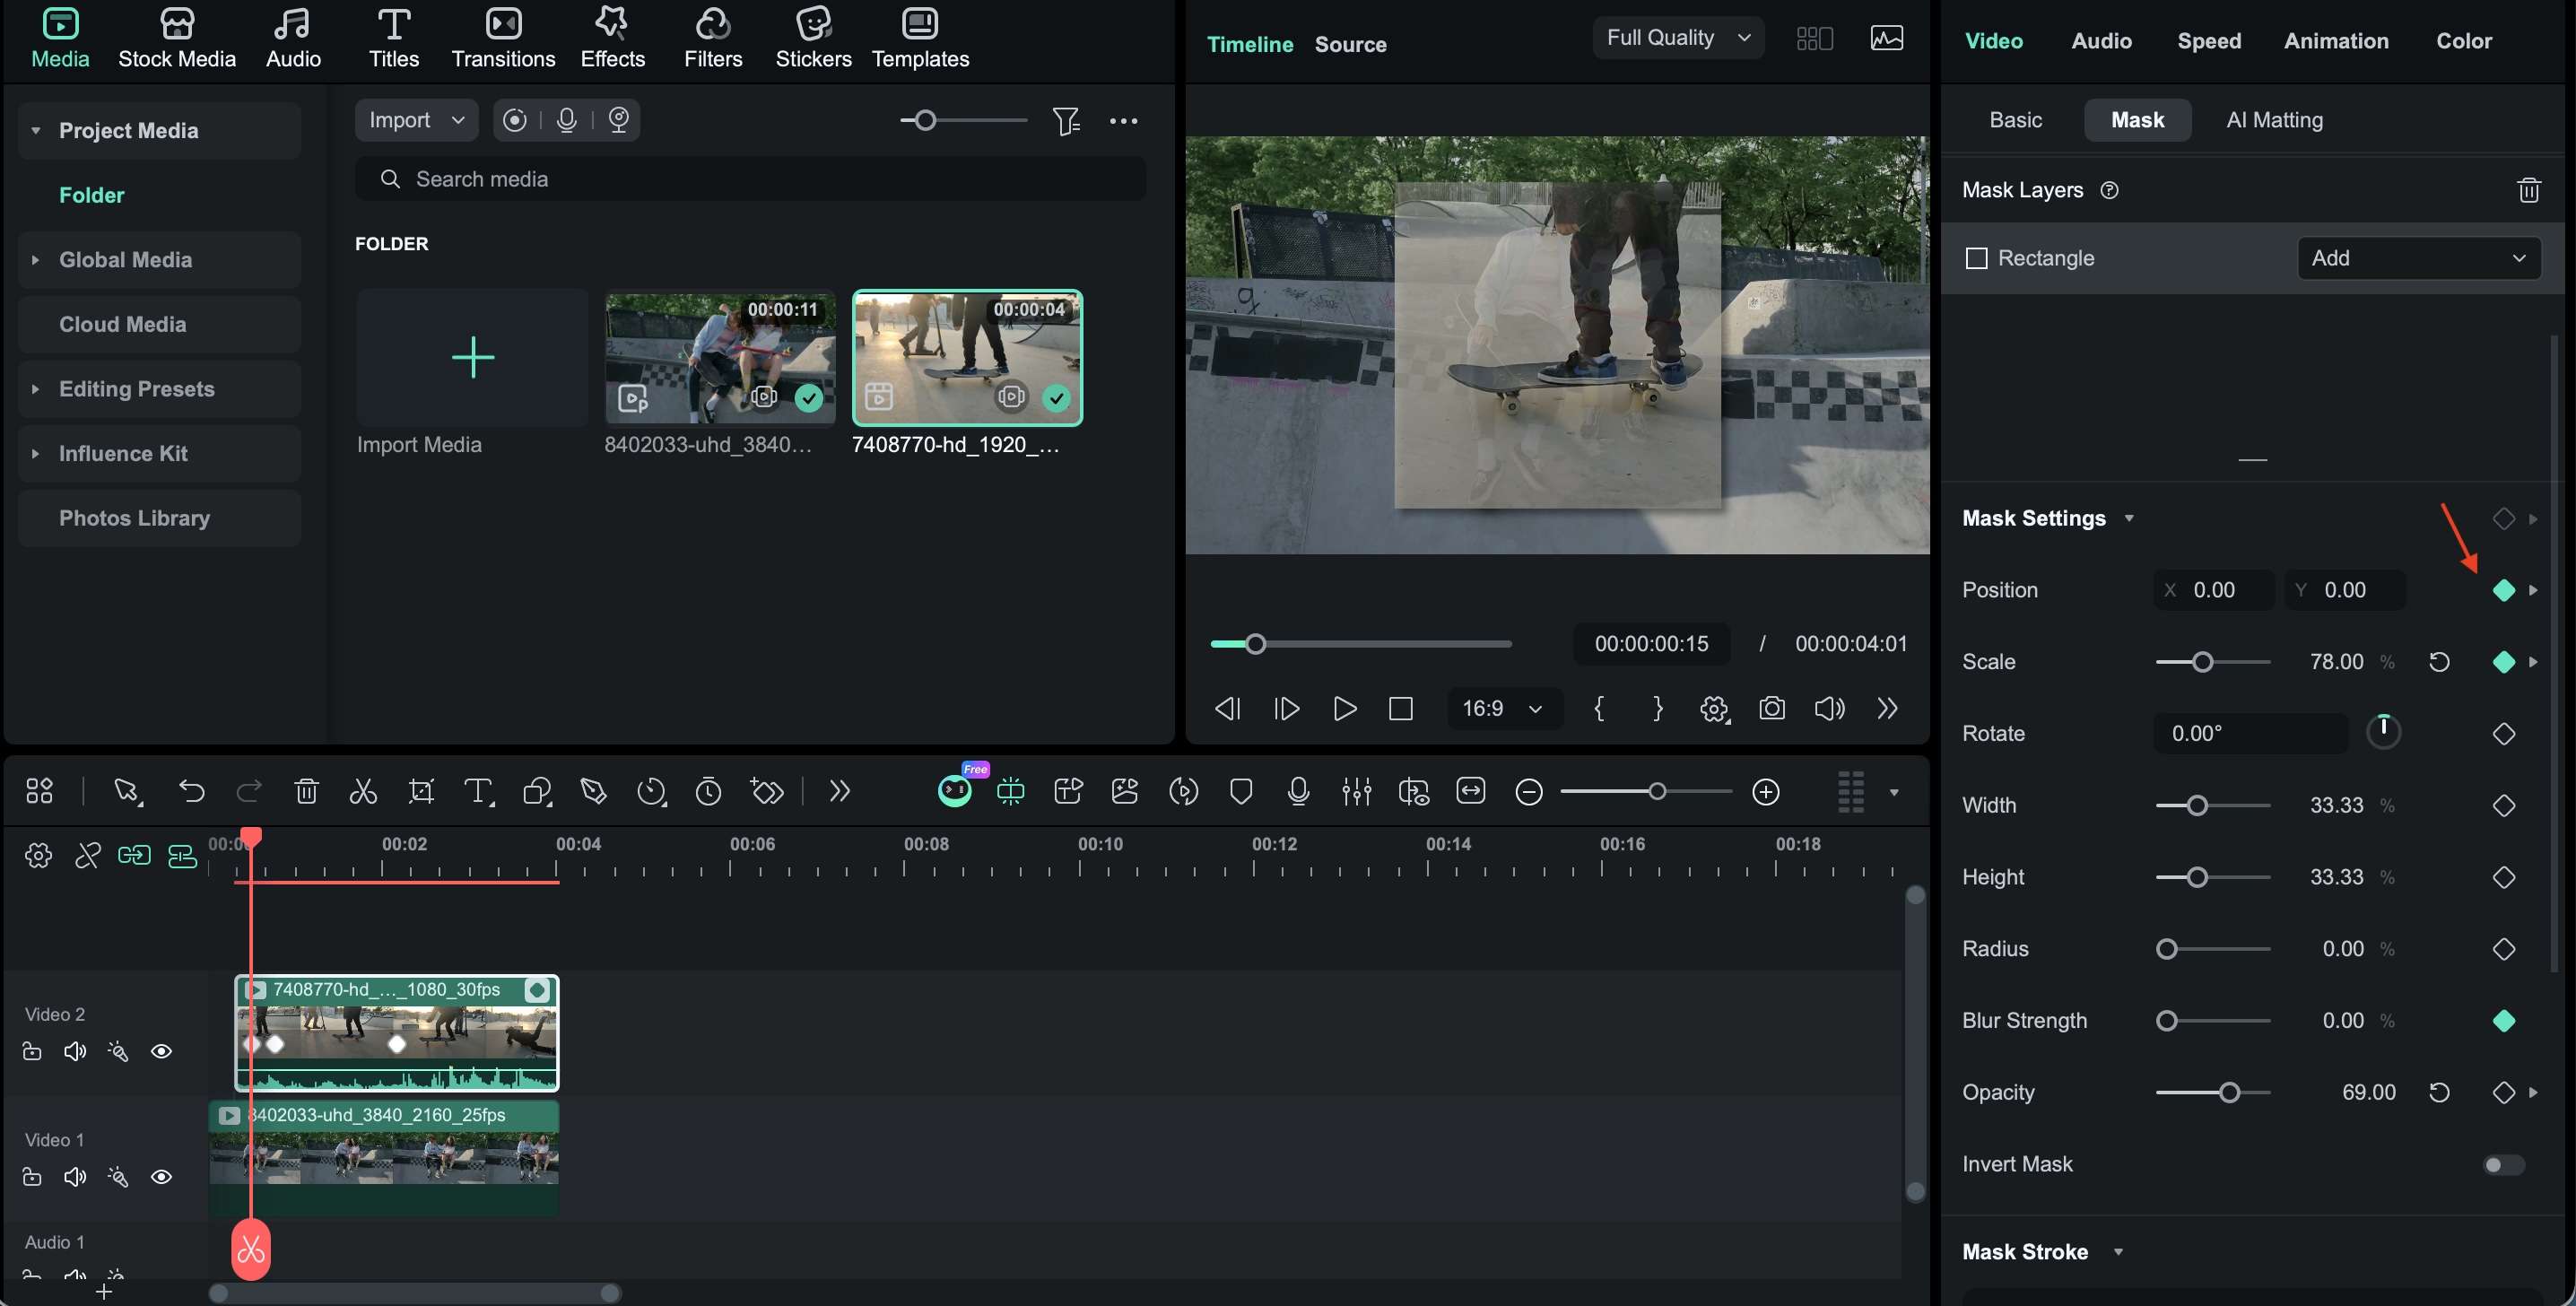
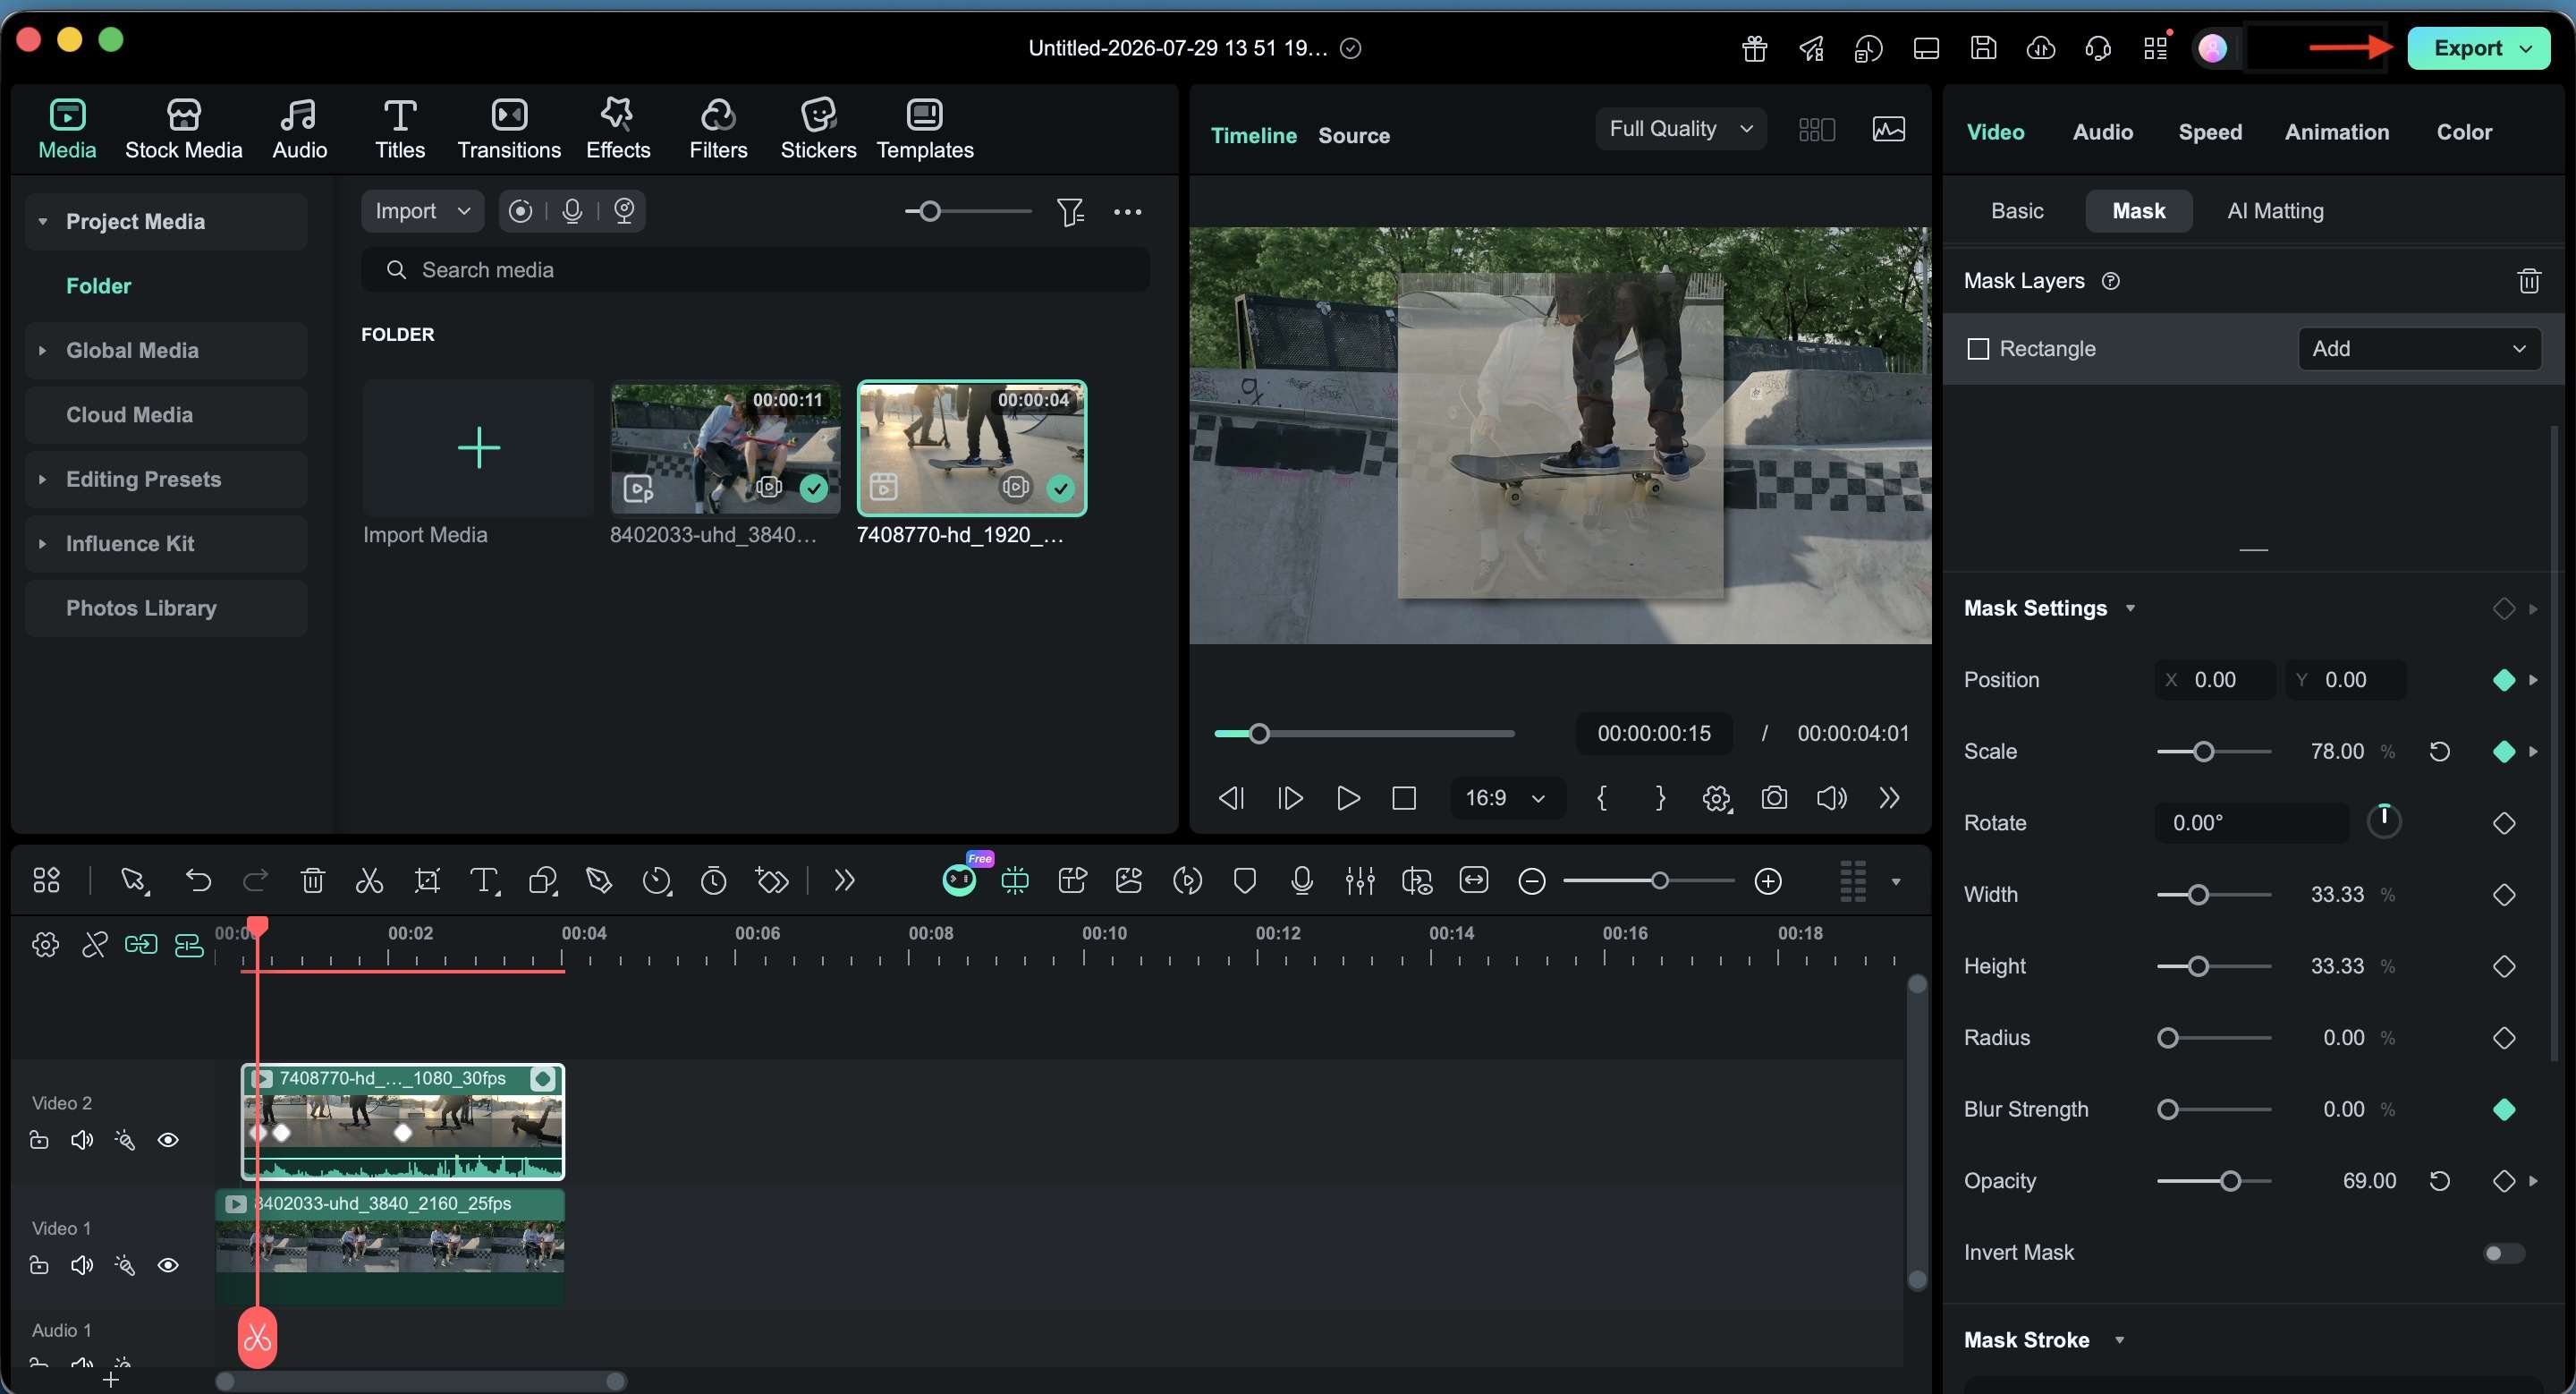
Creating a masking effect in Filmora doesn't require complicated compositing tools. With its built-in mask feature, you can control which parts of a clip appear, combine multiple layers, and create effects such as reveals, transitions, and subject highlights.
Filmora offers a variety of masking options, including preset shapes and customizable masks, with settings for position, size, rotation, feathering, and inversion. Follow these steps to create a mask effect in Filmora.
How to Use Filmora's Mask Feature
 Secure Download
Part 3. Popular Mask Effects You Can Create in Filmora
Once you understand how masking works, the creative possibilities become much wider. A simple mask can turn an ordinary clip into a smooth scene transition, make text feel like part of the footage, or help different videos blend naturally into a single frame.
In Filmora, you can combine masks with effects, keyframes, and multiple layers to create edits that look more polished without needing advanced compositing skills. Here are some popular mask effects you can try.
Masking Transition
A masking transition creates a scene change by revealing the next clip through a moving area of the frame. Unlike basic transitions that are added between clips, masking transitions let you control exactly how the new scene appears.
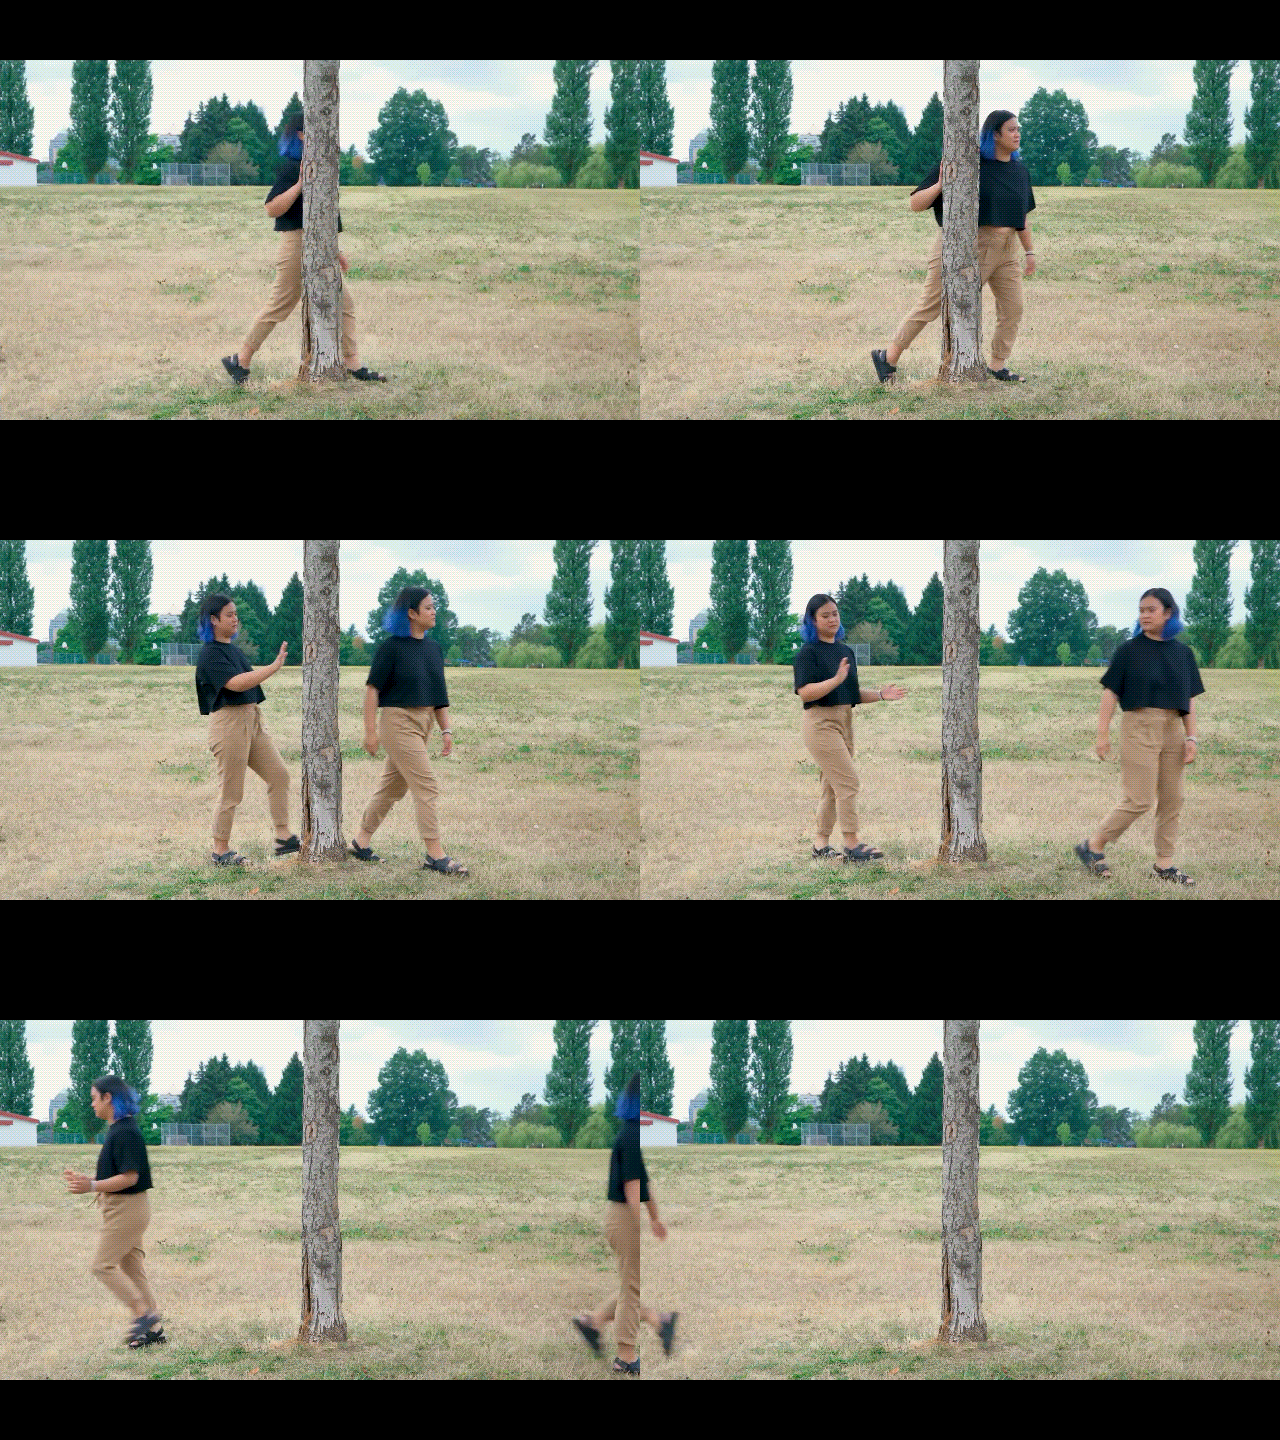
For example, a person walking across the screen can reveal the next shot, or a circular mask can expand to introduce a new scene. This technique is often used in travel videos, cinematic reels, and storytelling content because the transition feels connected to the footage.
Text Mask Effect
A text mask effect gives your titles a more immersive look by making the text part of the video itself. The letters act as a frame within which your video clip plays, creating movement and depth without adding extra visual elements.
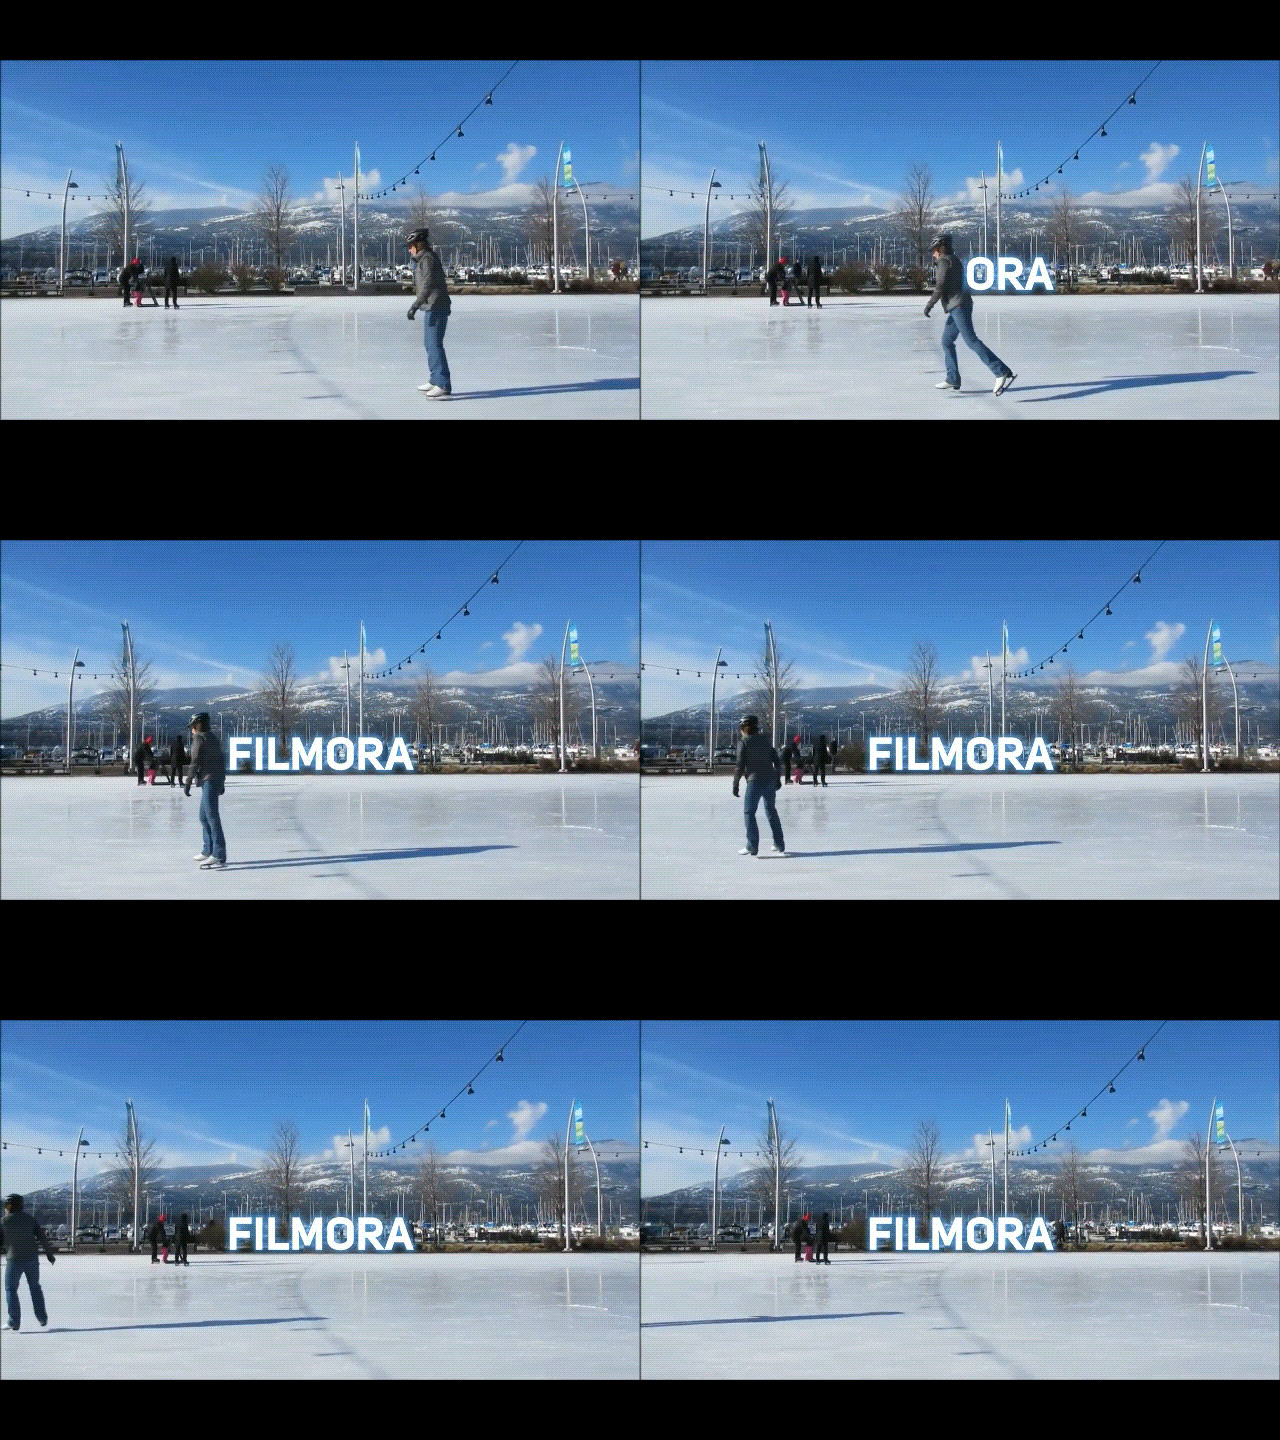
This works especially well for:
- Opening titles
- Travel videos
- Event highlights
- Social media intros
For example, the moving cityscape within the word “NEW YORK” immediately creates a stronger visual impact than static text.
Object Removal Mask Effect
A masking effect can help clean up footage by isolating specific areas that need adjustment. While completely removing an object may require additional tools, masks are often part of the process for covering distractions or blending replacement elements.
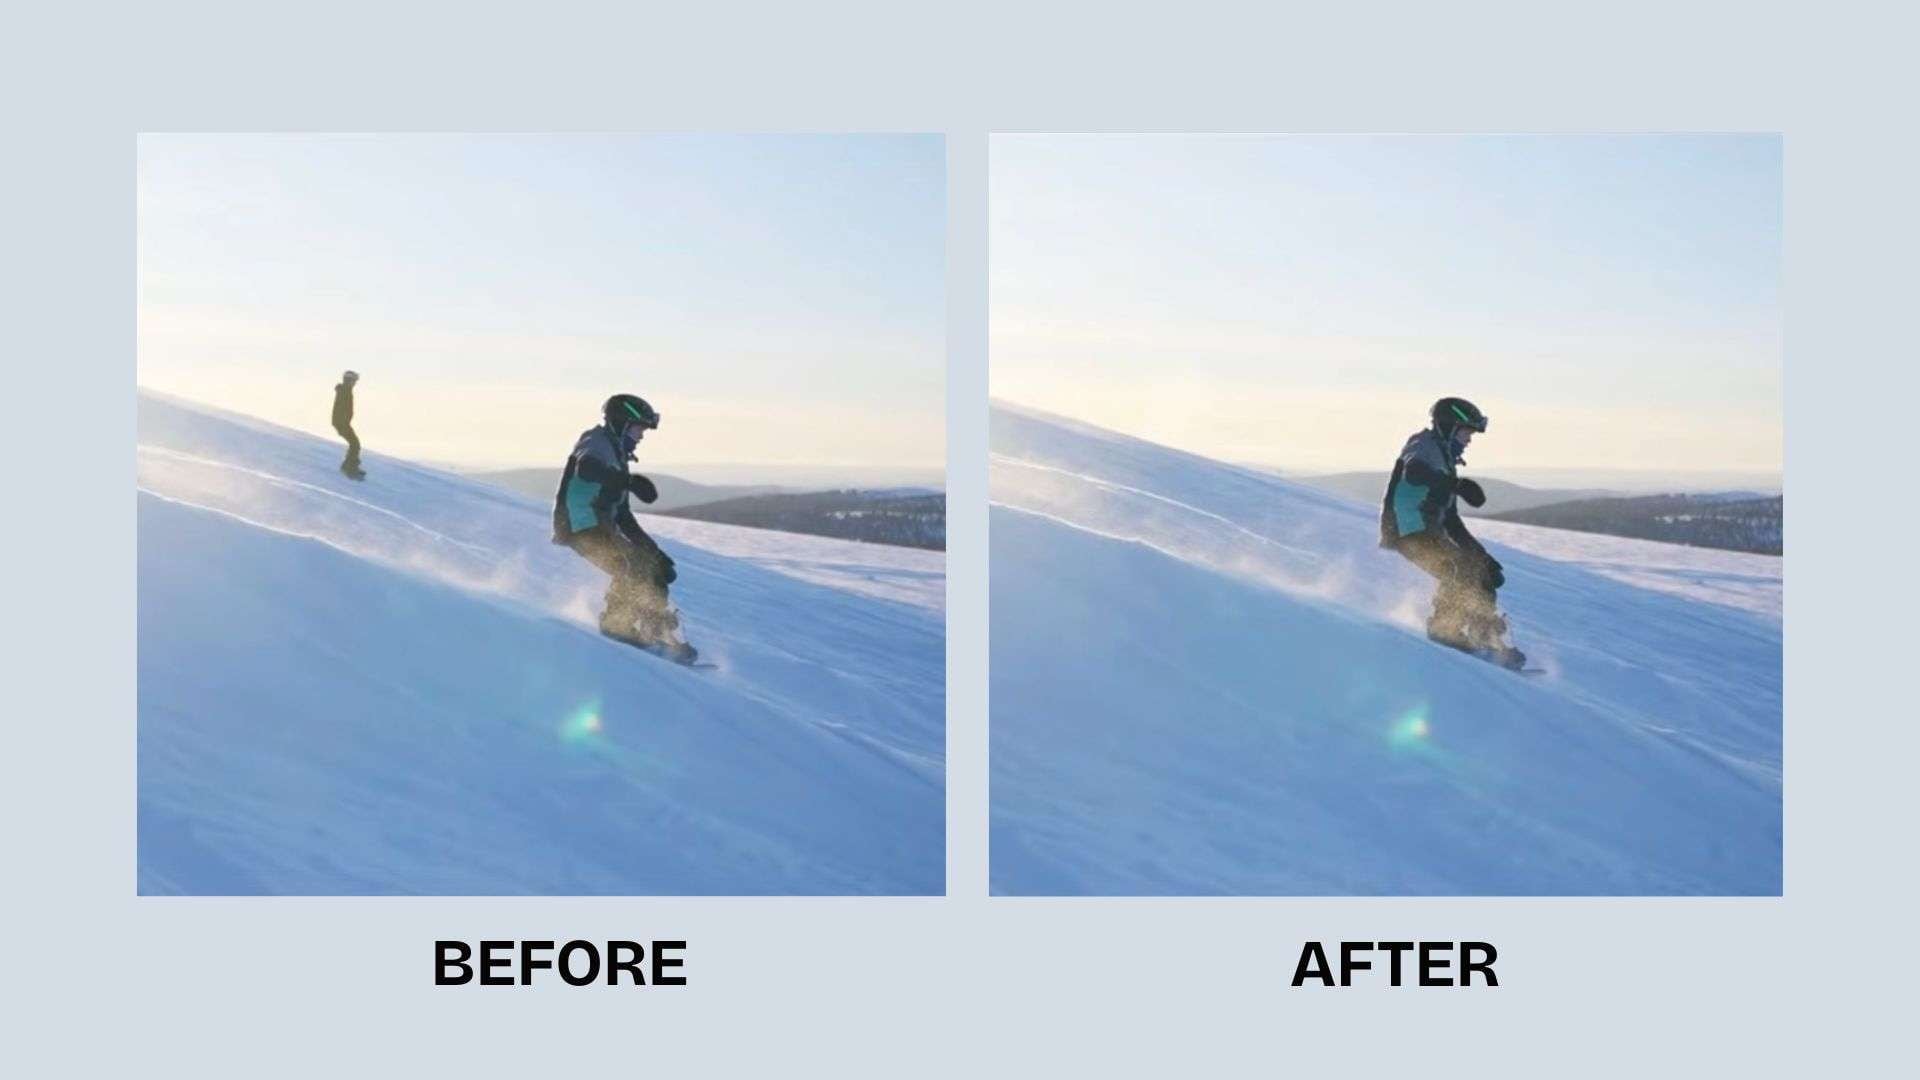
This technique can be useful for:
- Removing unwanted objects from a shot
- Improving product videos
- Fixing small distractions in the background
Split-Screen or Clip Combination Mask Effect
When you want multiple clips to tell a story at the same time, a split-screen mask effect gives you more control than simply placing videos side by side. You can shape each section, soften the edges, and create a smoother connection between clips.
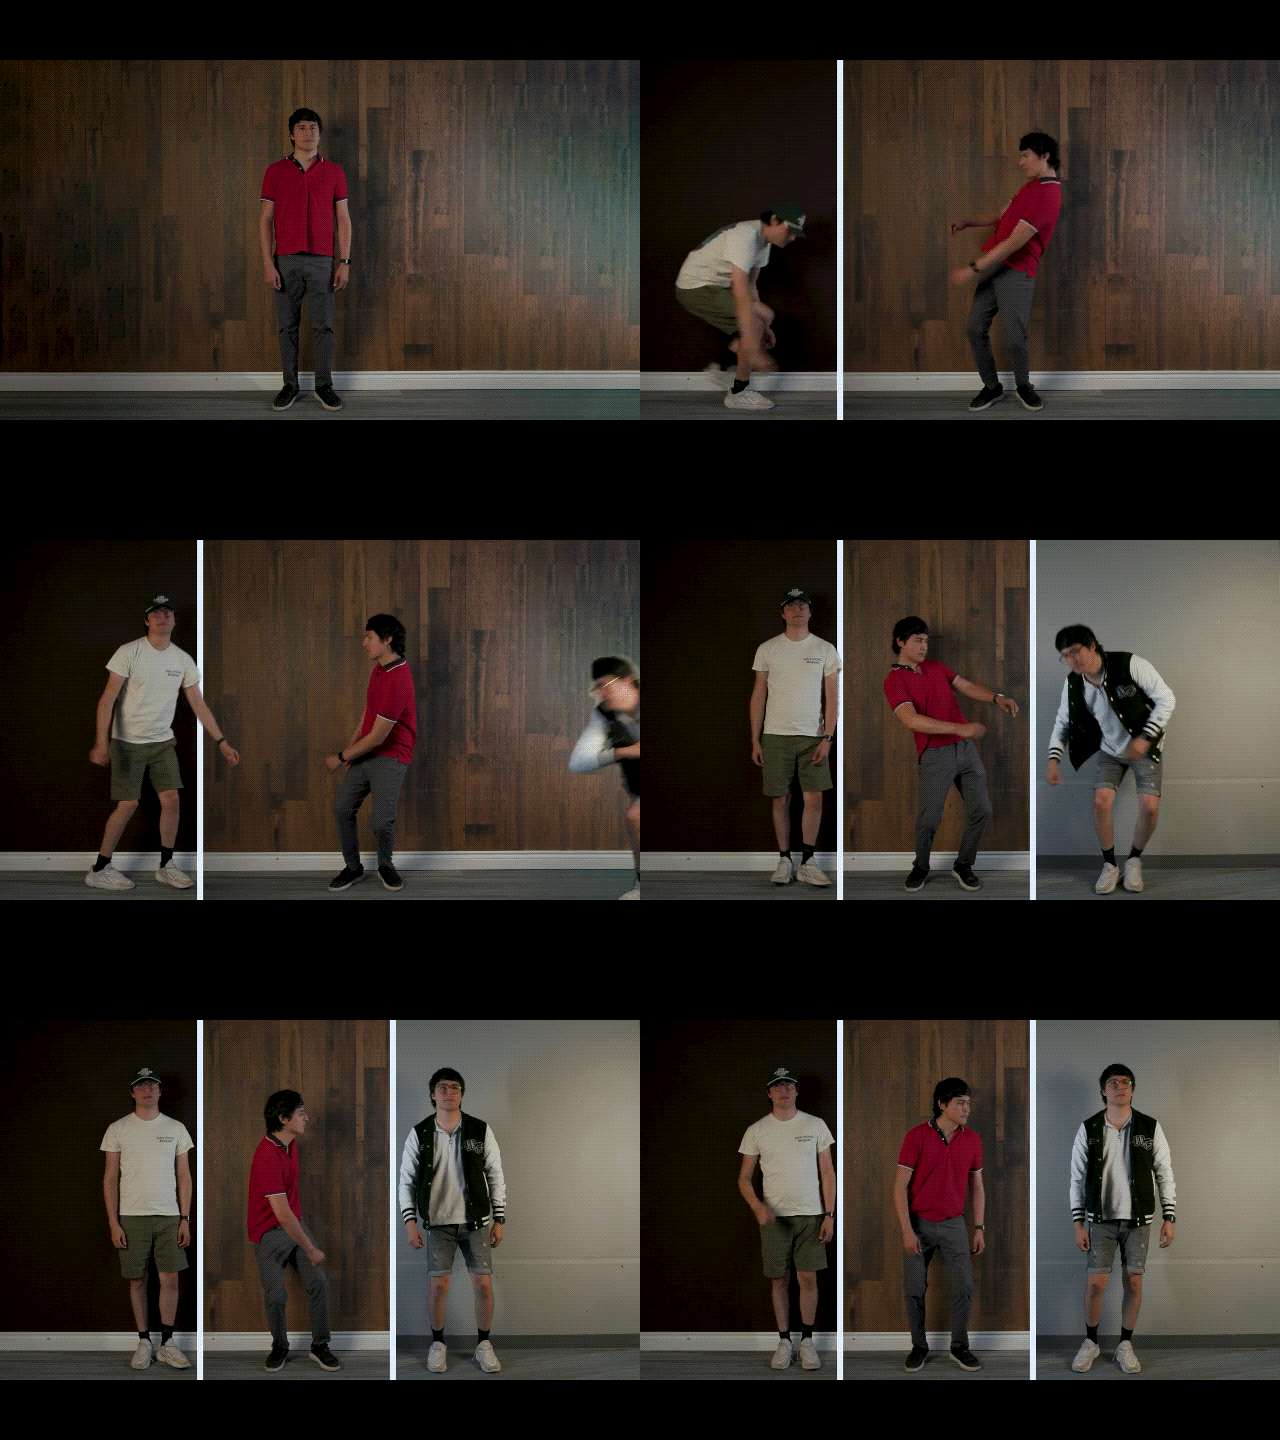
Creators often use this effect for:
- Comparison videos
- Before-and-after transformations
- Reaction videos
- Multi-angle storytelling
Masks with smoothed edges can make two separate clips feel as though they’re part of the same composition.
Face or Subject Highlight Mask Effect
A face or subject highlight mask effect helps guide viewers' attention to the most important part of a scene. By isolating a person or object, you can adjust the surrounding area without changing the subject.
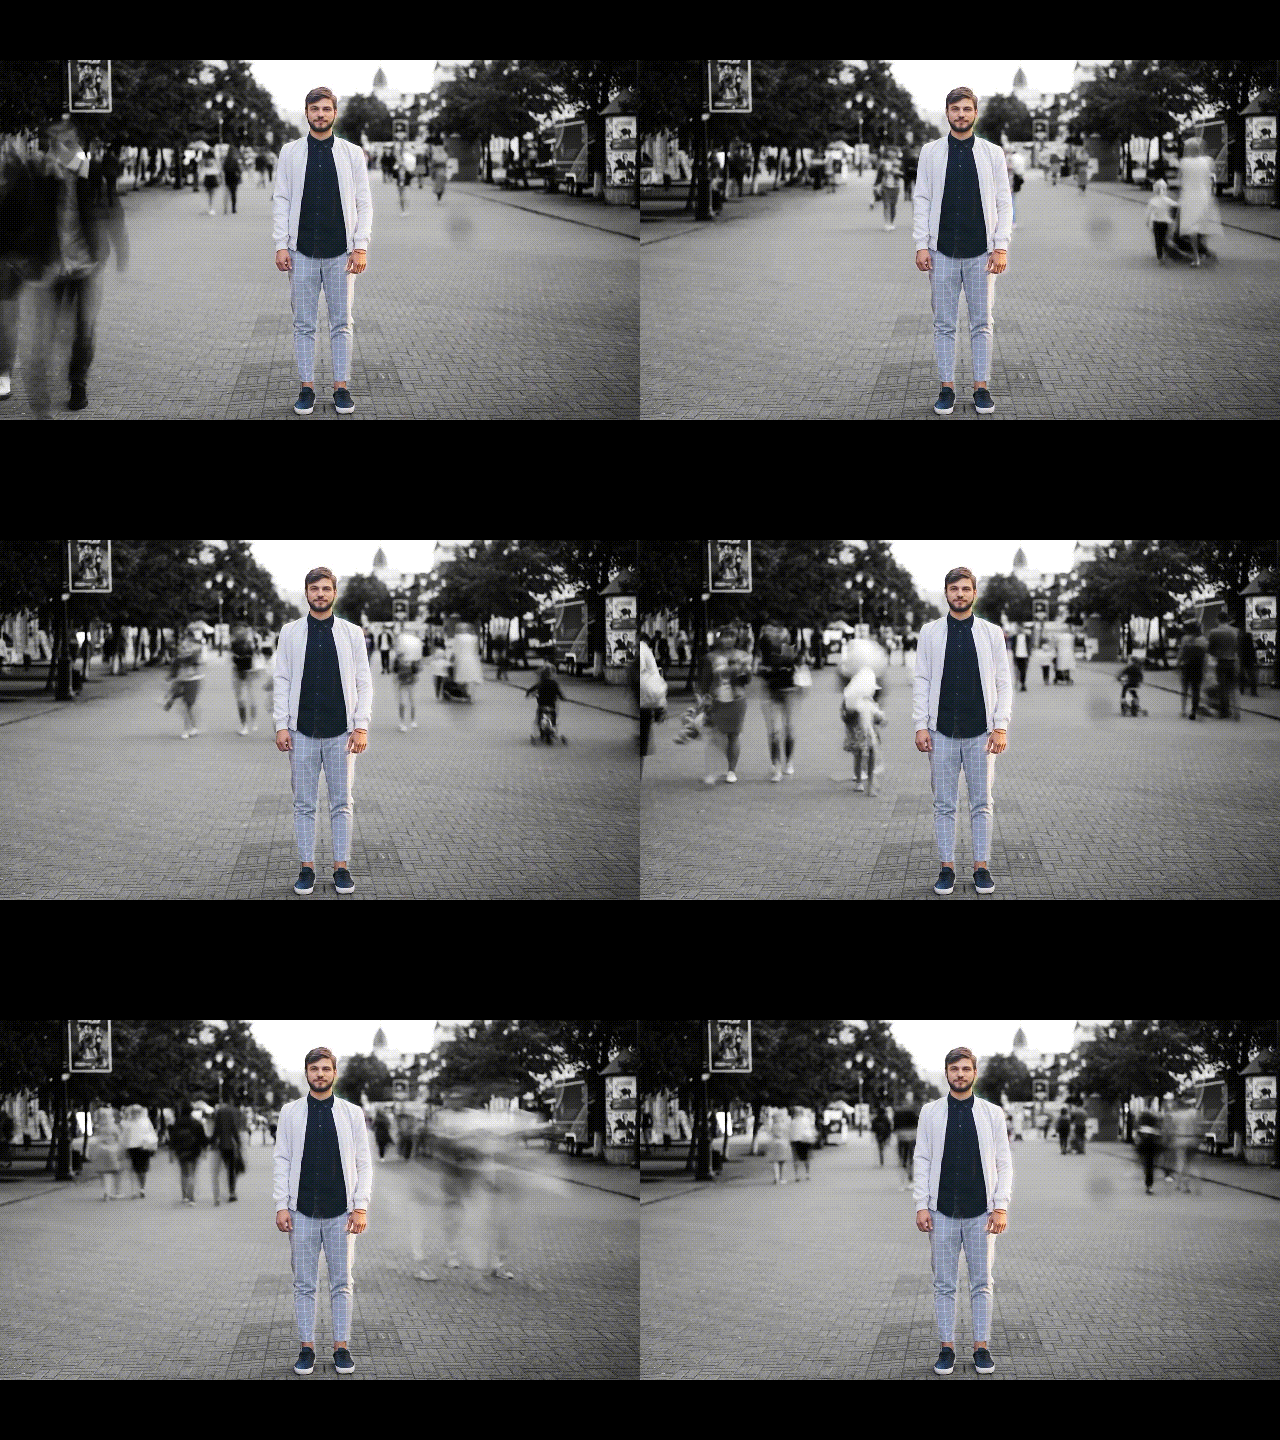
Common examples include:
- Keeping a speaker bright while dimming the background
- Highlighting a product in a review video
- Adding a cinematic focus effect to portraits
This is a simple technique, but it can make footage feel more intentional and professional.
With these masking ideas, you can move beyond basic edits and start creating videos with more control over movement, focus, and storytelling. Filmora's masking tools let you easily experiment with these effects and develop a style that feels unique to your content.

Conclusion
Masking is one of those techniques that becomes more useful the more you experiment with it. A simple shape can turn into a transition, a title can become part of the footage, or a subject can stand out without distracting elements around it. With Filmora, you can try different mask effects and see how small adjustments change the final look of your video. Start with basic masks, explore different combinations, and find the techniques that fit the type of content you create.
You May Also Like
FAQs
-
What is a masking effect in video editing?
A masking effect is a technique that controls which parts of a video layer appear on screen. Editors use masking to reveal specific areas, combine clips, create transitions, or apply adjustments to specific parts of a frame. -
How do you create a mask effect in Filmora?
To create a mask effect in Filmora, add your clip to the timeline, open the mask settings, and choose a preset shape or create a custom mask. You can adjust the mask position, size, rotation, and feathering to get the desired look. Keyframes can also be used to animate the mask over time. -
What can you use masking effects for?
Mask effects can be used for many creative edits, including scene transitions, text reveals, split-screen videos, object isolation, and subject highlights. They are useful whenever you need more control over how different parts of your footage appear. -
Can a masking effect follow a moving object?
Yes. Masking can follow moving objects using keyframes or the motion tracking feature. This allows the masked area to stay attached to a person, product, or other subject as it moves throughout the video.
