

 TL;DR:
To animate a mask in After Effects, select your target layer before drawing with the Pen or Shape tool to prevent creating an independent shape layer, press 'M' twice to open properties, and click the stopwatch icon next to Mask Path, Feather, Opacity, or Expansion to set keyframes as you move the playhead and reshape the mask.
● Apply Smart Mask Interpolation to prevent vertex distortion when transitioning between drastically different mask shapes, and use Easy Ease (F9) on keyframes to eliminate mechanical, linear motion.
● If the mask shape changes but fails to animate, verify that the stopwatch for Mask Path is actively enabled before repositioning points, and always check the middle frames of the animation to correct hidden in-between distortions.
● For projects requiring faster workflows, use Wondershare Filmora for built-in shape presets, DaVinci Resolve for node-based compositing, Premiere Pro for AI-assisted object tracking, or CapCut for quick social media content.
Ask AI for a summary
 ChatGPT
 Perplexity
 Gemini
 Claude
 Grok
Grok
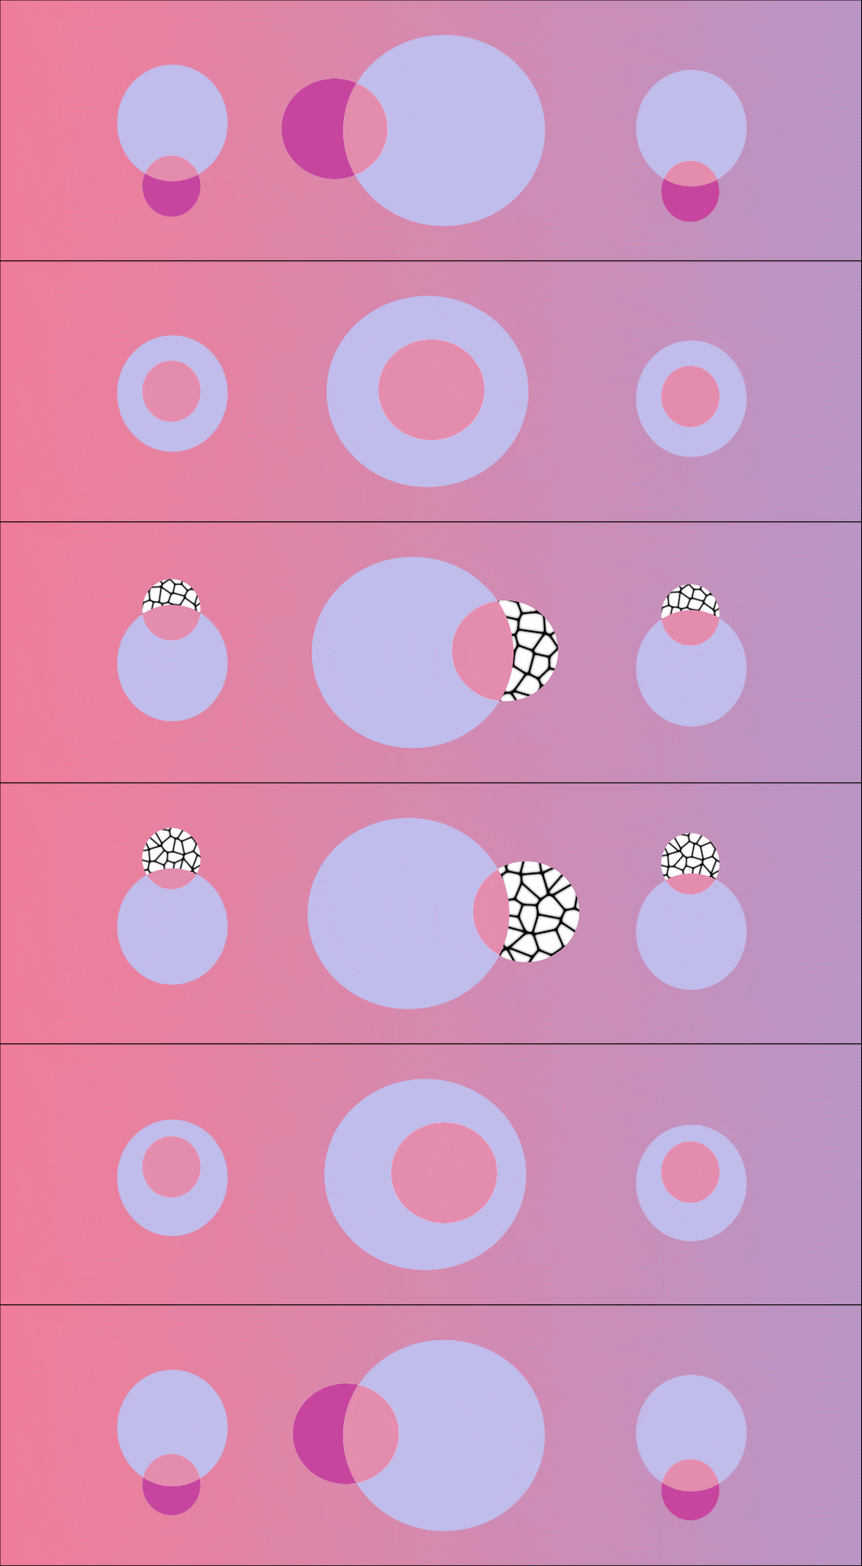
There's a difference between a static and a moving one. A mask in After Effects is a shape, drawn with the pen tool or a shape tool, that hides or reveals part of a layer. But when you work on a project that needs the masked area to move, resize, or soften as the footage plays, you need to also animate the mask itself.
Animating a mask in After Effects means changing its path, feather, opacity, or expansion over time so the visible area shifts, grows, shrinks, or tracks something moving in the frame. If you are new to masking, let alone After Effects masking animation, the steps below will get you there from scratch and build up to the more advanced techniques.
Part 1. How to Animate a Mask in After Effects (Beginner Guide)
After Effects is a compositing and motion graphics tool built around layers, keyframes, and effects. One thing that trips up a lot of new users is that a mask looks static the moment you draw it, but you can also keyframe its path, feather, opacity, and expansion just like any other property.

Following the tutorial made by Animation Explained on YouTube, the steps below cover how to animate a mask in After Effects.
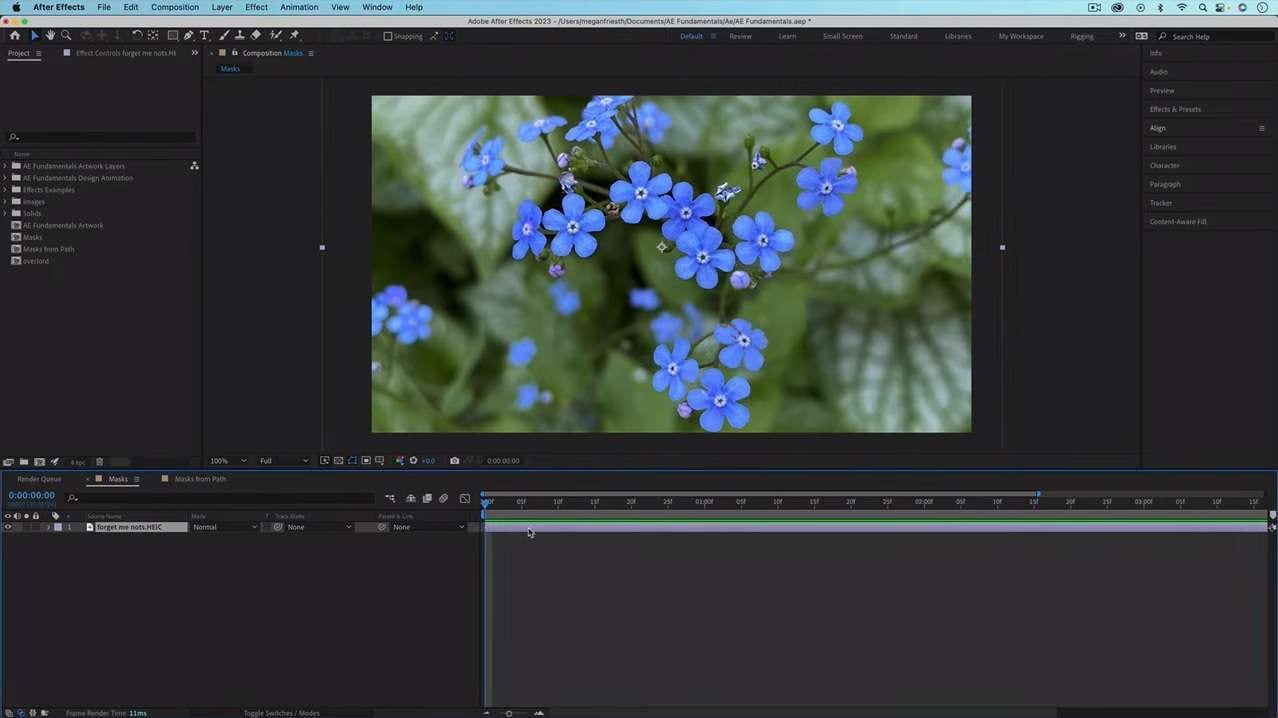
Note: Make sure to select the layer. If not, After Effects will create a new shape layer instead of a mask.
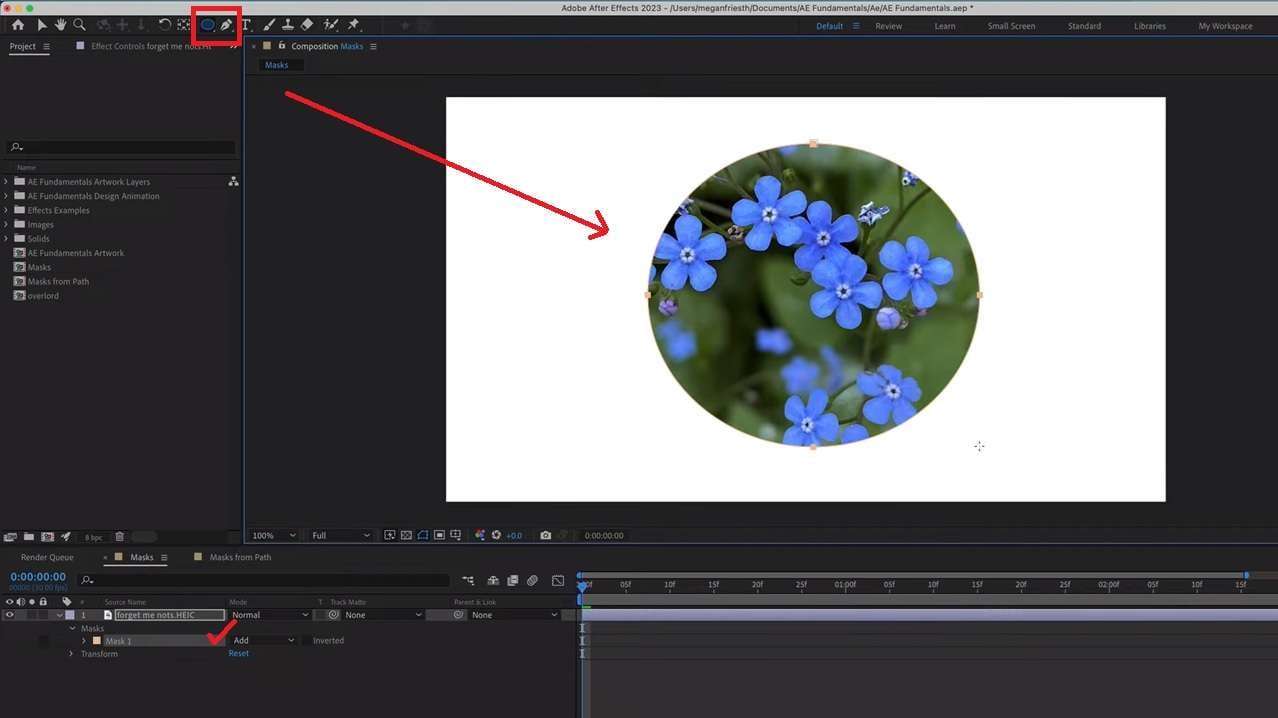
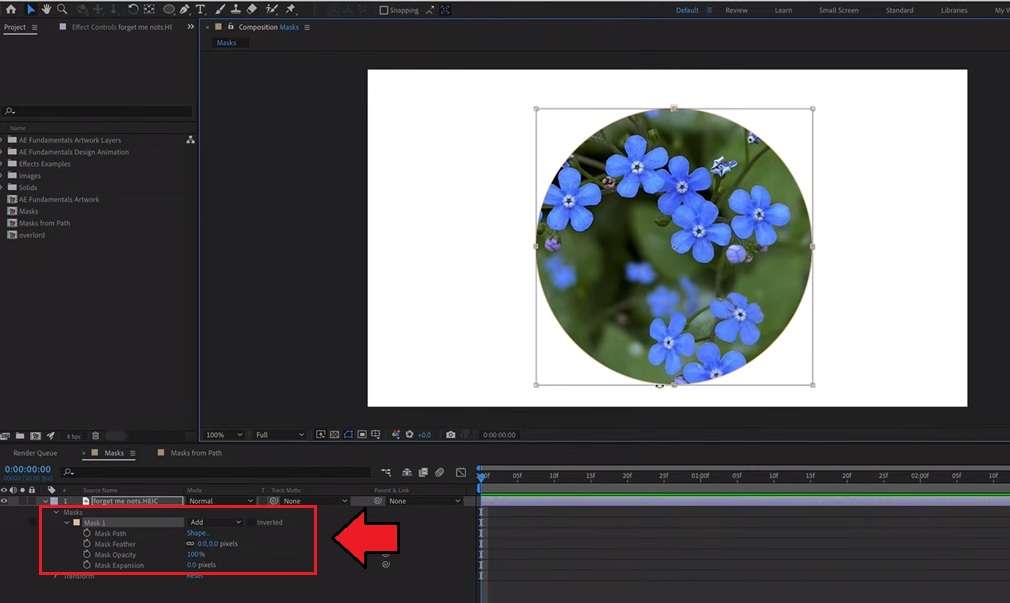
- Move the playhead to the frame where the animation should start.
- Set the initial value for the mask property you want to animate.
- Click the stopwatch icon next to that property to create the first keyframe at that position.
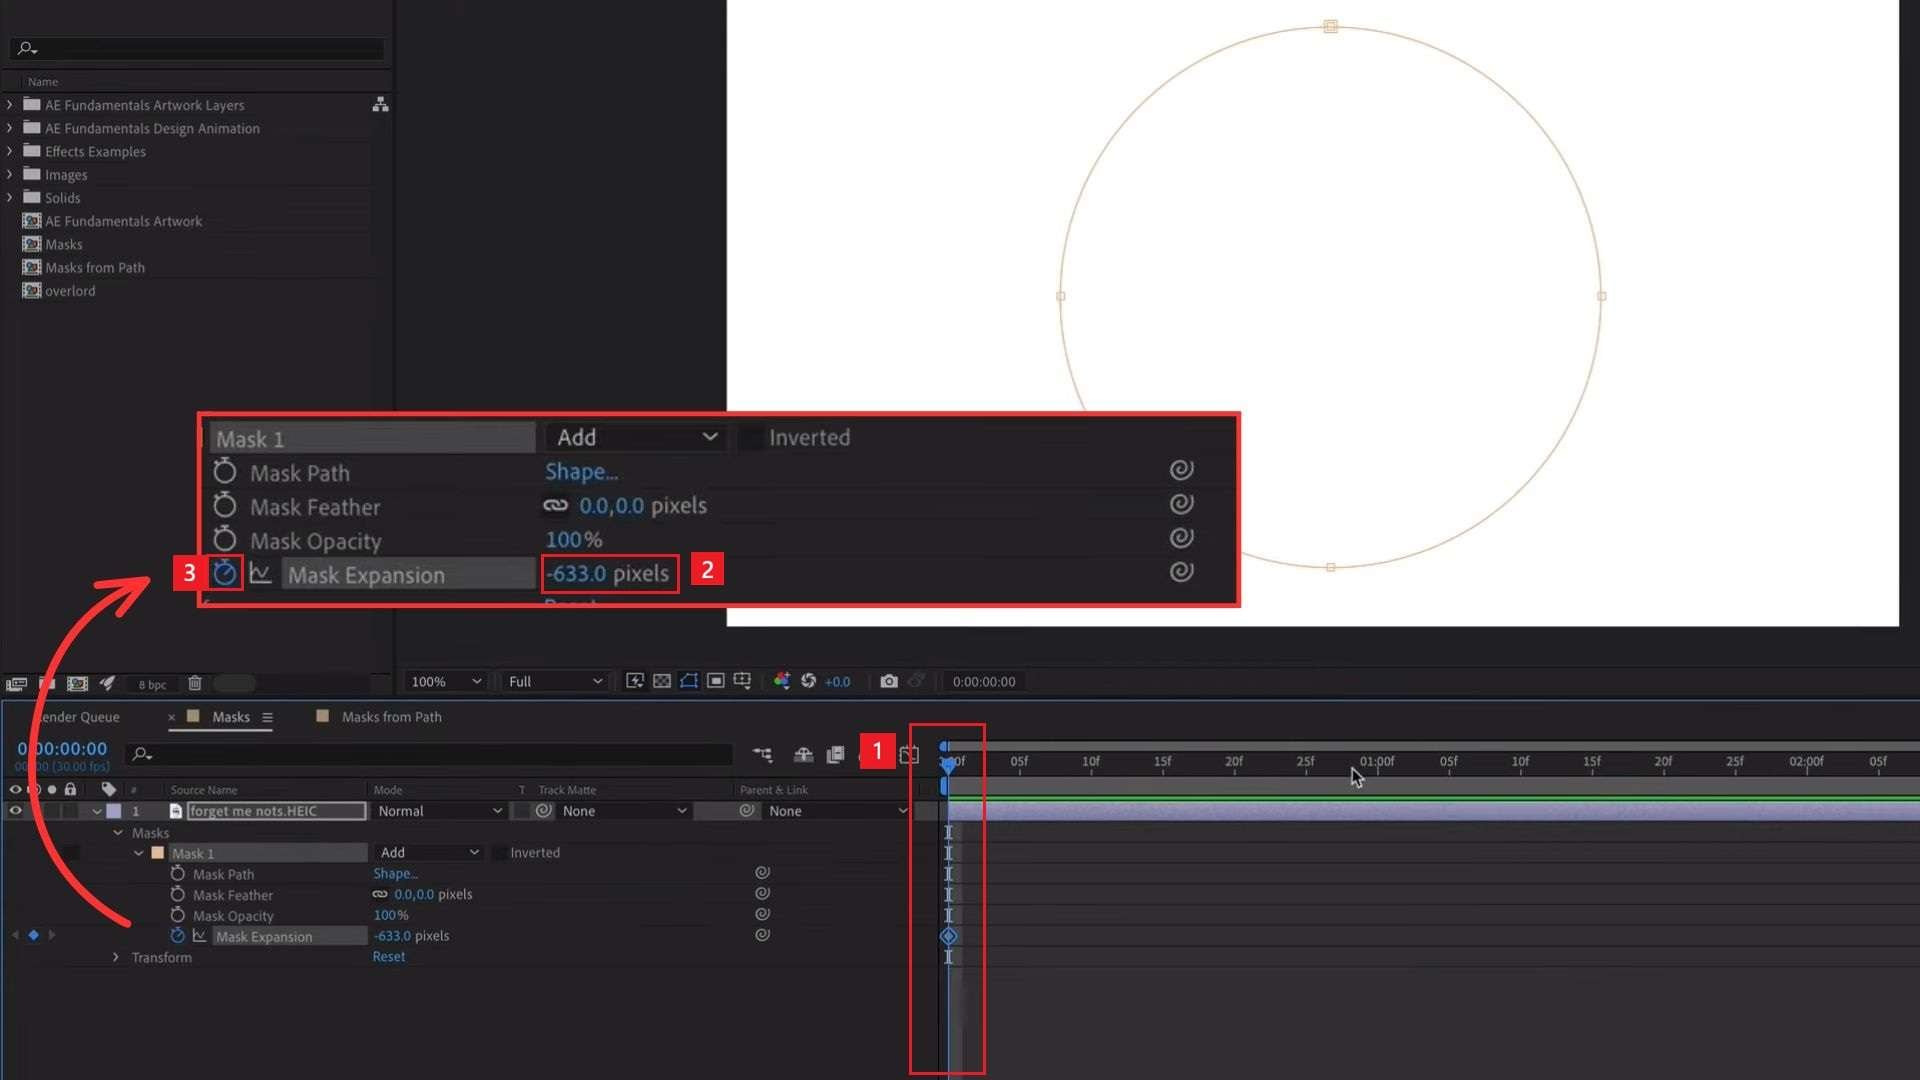
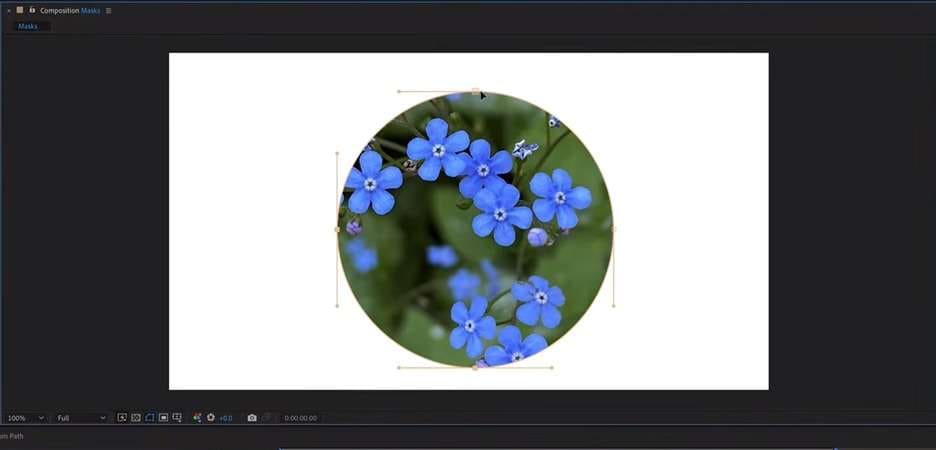
After that, move the playhead and reshape the mask as needed. Set the second keyframe:
- Go to the next point in time.
- Reshape or reposition the mask by adjusting its points or other mask properties.
- After Effects will automatically create a new keyframe to record the changes.
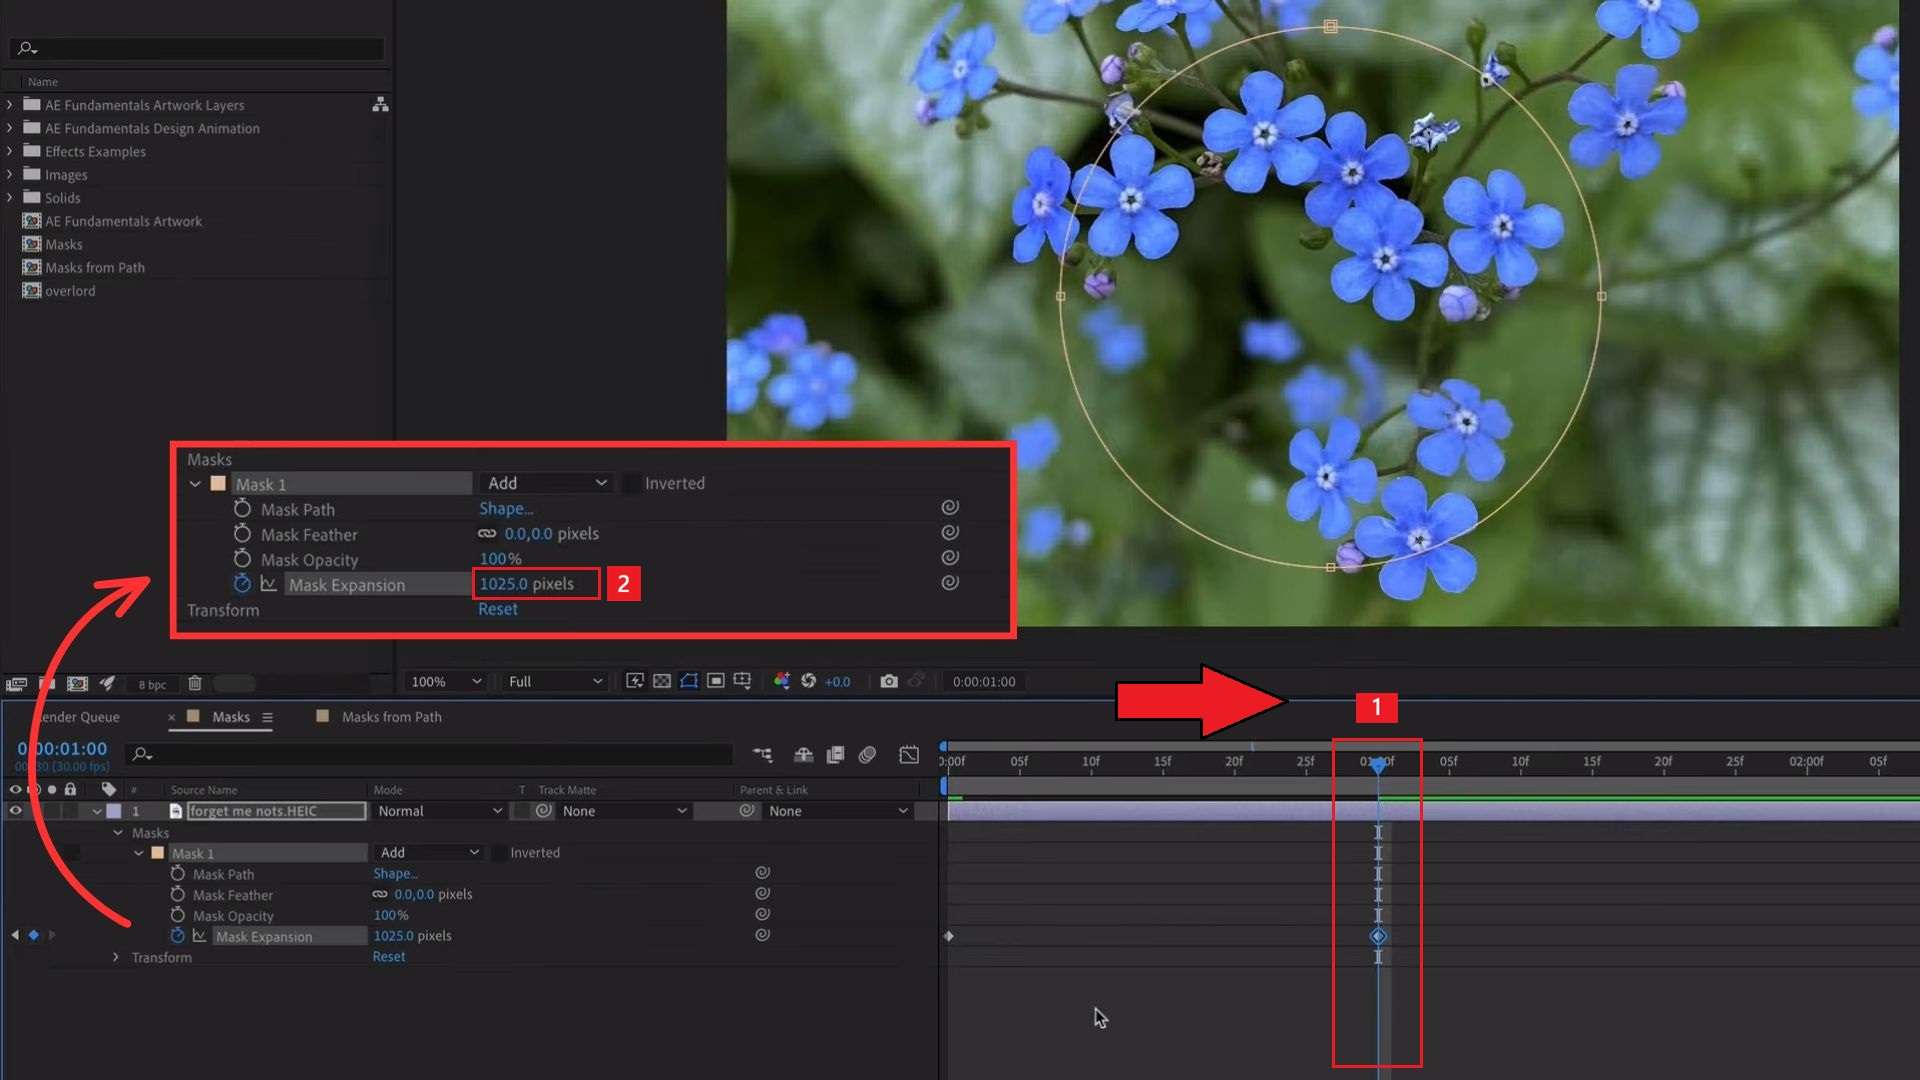
Repeat for as many keyframes as needed. You can animate different mask properties in After Effects to create various effects, including:
- Mask Path: Reshape, reposition, or move the mask to create reveal animations.
- Mask Feather: Adjust the softness of the mask edge over time for smoother transitions.
- Mask Opacity: Create fade-in or fade-out reveal effects by changing the mask visibility.
- Mask Expansion: Make the mask area grow or shrink over time.
Part 2. Advanced Mask Animation Techniques in After Effects
After understanding how basic After Effects moving masks work using keyframes, you can try these advanced techniques to make your videos even better and cut down the manual work it takes to get there.
Smart Mask Interpolation
Smart Mask Interpolation is a built-in After Effects feature that adds extra keyframes between two mask shapes and makes the transition look smoother. Normally, if you animate a mask from one shape to a very different one, AE just moves each vertex in a straight line to its new position. That often causes weird distortion or crossing lines partway through the animation, which Smart Mask Interpolation helps to avoid.
Auto-Orient and Path-Based Motion
Auto-orient is useful when you're animating a mask in After Effects or a layer along a path and want it to rotate naturally as it moves, instead of staying locked at a fixed angle. Combined with path-based motion, this technique is common for animating objects that need to follow a curved trajectory, like an arrow tracing a route on a map or an object moving along a winding line.
Track Mattes
Aside from drawing shapes and using keyframes to create After Effects masking animation, you can also use track mattes to control visibility without drawing a shape by hand at all. A track matte uses one layer's alpha channel or luminance values to control what's visible on the layer below it, instead of drawing a shape with the pen tool.
This means you can use text, footage, or even a moving shape layer as the source that reveals or hides another layer. You can use this technique for text reveals, light sweeps, or any effect where the "mask" itself is a moving pattern rather than a fixed shape.
Rotoscoping
Rotoscoping is the process of manually tracing an object frame by frame to isolate it from its background, usually for compositing or masking around something that moves in a complex way, like a person walking with loose hair or clothing.
With After Effects' Roto Brush tool (Roto Brush 2 in newer versions), you just need to paint over the foreground object on one frame, and the tool tracks and propagates that selection across the following frames.
Part 3. Best Alternatives for Mask Animation
After Effects gives the most granular control over masks, but working on keyframes and all those parameters to build a masking animation comes with a learning curve. If you need faster results or you're working on shorter-form content, these tools can be a good alternative.
1. Wondershare Filmora
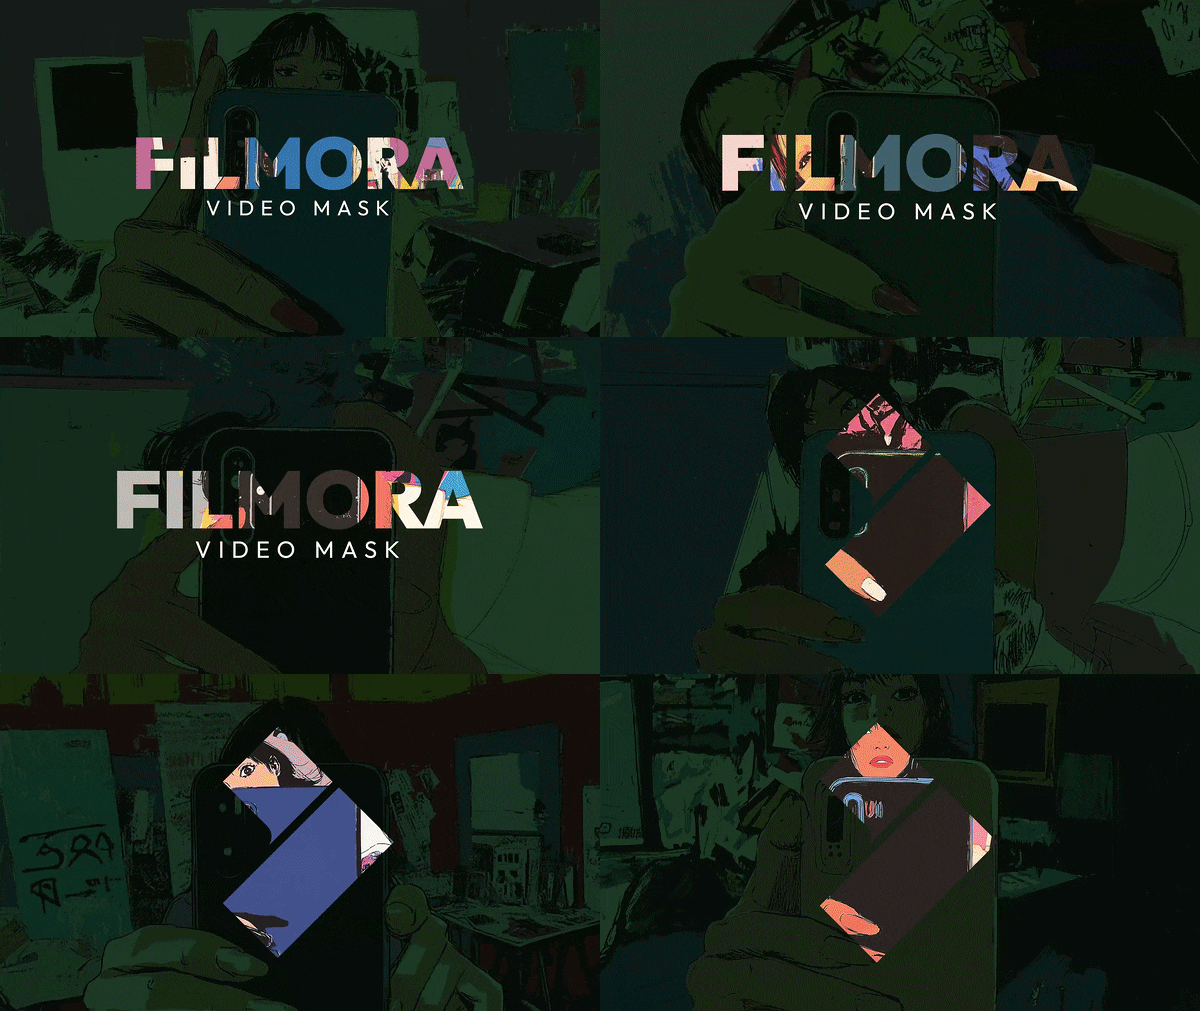
Filmora's masking tool is built for people who don't want to spend an hour figuring out how masks work before they can actually use one. A few things that make it easier to work with are:
- Built-in presets for common shapes, so you can apply a mask without drawing it manually.
- A pen tool for drawing the shape from scratch when none of the presets fit.
- Auto-shape (Custom Mask) option that fits the mask to irregular or complex subjects, with adjustable anchor points afterward to fine-tune the edges manually.
- Stylish outline presets and decorative elements you can drop onto the mask to make it look cooler without editing anything by hand.
For animation specifically, Filmora uses keyframes the same way After Effects does, just with less setup involved. You can also use AI Portrait or Smart Cutout for automatic background removal and subject isolation without green screen or manual masking.
 Secure Download
2. DaVinci Resolve
DaVinci Resolve handles masking through its Color page (Power Windows) and Fusion page (nodes):
- Power Windows are quick for simple color-correction masks with basic tracking.
- Fusion offers node-based masking with more animation control, closer to After Effects in depth, with a compositing environment rather than a simple keyframe panel.
Resolve also includes an AI-powered Magic Mask tool that tracks subjects automatically, without manual tracking work.
3. Premiere Pro
Built by Adobe, the same company behind After Effects, Premiere Pro's masking gives a familiar starting point, just built for a narrower purpose. It now includes an Object Mask Tool that uses AI to detect people or objects in a clip automatically, so you can create a mask with a single click instead of drawing one by hand.
From there, you can animate the mask by either letting Premiere track the object automatically with the AI tool's tracker, or falling back on manual keyframing through the Effect Controls panel.
4. CapCut
CapCut offers mask shapes (circle, rectangle, star, and a few others), along with a pen tool and brush tool for custom masking. After that, you can track the mask to animate its position and shape over time or use manual keyframing.
Which One Should You Use?
To help you choose which tool to try, take a look at this comparison and pick based on how complex your animation needs to be.
| After Effects | Filmora | DaVinci Resolve | Premiere Pro | CapCut | |
| Best for | Professional-grade mask control | Fast masking with built-in presets and auto-shape | Color-correction masks and node-based compositing | AI-assisted object masking | Social media content |
| Learning Curve | ★ ★ ★ ★ ★ | ★ ★ | ★ ★ ★ ★ | ★ ★ ★ | ★ ★ |
| Free/Paid | Paid, subscription | Free; Paid (subscription/perpetual license) for full features and no watermark | Free; Paid (Studio ver.) for advanced tools | Paid, subscription | Free; Paid Pro tier (subscription) for full features and no watermark |
| Auto Masking | Relies on Roto Brush/plugins | Custom Mask, AI Portrait, Smart Cutout | Magic Mask | Object Mask Tool | Auto Cutout |
| Animation method | Manual keyframes, rotoscoping | Keyframes | Node animation in Fusion; basic tracking in Power Windows | AI tracking or manual keyframing | Mask tracking and keyframes |
You May Also Like
Part 4. Tips for Better Masking Animation
Working on mask animation in After Effects or any tool, especially once a project has more than one or two masks running at the same time, can get hard no matter how experienced you are. But a few habits make it easier to manage:
- Name each mask. Double-click the mask name in the timeline and give it a label that describes what it's doing, like "face blur" or "text reveal." This matters once a layer has three or four masks stacked on top of each other.
- Ease your keyframes. Right-click a mask keyframe and choose Keyframe Assistant > Easy Ease, or select the keyframes and press F9. Linear mask motion tends to look mechanical, especially on Mask Path keyframes.
- Check mask interpolation at a few points, not just the ends. Scrub through the middle of a mask animation, not just the first and last keyframe, since the in-between shape can distort even when both ends look fine.

Conclusion
Animating a mask in After Effects starts with setting keyframes on the properties that control how the mask behaves, whether that's the path, feather, opacity, or expansion. After you've nailed the basics down, you can push further into more advanced techniques that give you room to refine the motion.
If After Effects feels like more than a project needs, or the deadline doesn't allow for a steep learning curve, you can try a more beginner-friendly option like Filmora that covers a piece of the same job with less setup for animation.
FAQs
-
1. Why isn't my mask animating in After Effects?
If the After Effects mask animation isn't working, it usually happens when you move the mask's position or points without the stopwatch enabled for Mask Path first. If keyframes still aren't appearing, check whether the Mask Path property (not the layer position) is what's highlighted and selected before you move the mask. -
2. Does masking slow down rendering?
Masks themselves are lightweight, but stacking several masks with effects on one layer can slow things down. Precomposing masked layers, or reducing the number of active masks and effects on a single layer, usually helps keep render times manageable. -
3. What's the difference between a mask and a shape layer?
A mask is a path that hides or reveals part of an existing layer, while a shape layer is its own independent layer with a visible fill and stroke. To apply it in After Effects, it comes down to whether a layer is selected when you draw. If you draw a shape with a layer selected, it becomes a mask on that layer. If not, it creates a new shape layer.
