


 100% Security Verified | No Subscription Required | No Malware

While recording a video, it is pretty normal if you don't end up having a stabilized clip due to camera shakes or movements on an unstable and unpaved road. This is where the Google stabilizer video editing feature comes into play. You can stabilize a video with the Google Photos app that has a built-in video stabilizer and other editing tools to give a finishing touch to your media files before they are shared online or with family, friends, and/or colleagues.
In this article, we will show you how to use Google Photos to stabilize video. In addition, you will also learn about one of the most trusted and efficient third-party tools to stabilize the clips if the Google video stabilizer fails to produce quality output.
In this article
Part 1: What is Google Photos and How Does It Work?
Google Photos is an app that can be obtained from the Play Store or App Store to be installed on an Android-based smartphone, iPhone, or iPad, respectively.
The program can store photos and videos from your phone, and ensures that those media files are well-backed up so they can be recovered easily if/when lost due to some mishaps. Furthermore, the tool even lets you edit, customize, and share your photos and videos with ease.
1. History and Current Policies
Earlier, Google Photos used to offer unlimited storage to users, where they could save as many photos as they wanted, as long as the images were saved in 'high-quality' resolution. However, from June 01, 2021, Google changed its policies of using the app, and now the tool offers limited storage. If more space is needed, the users must subscribe to a paid plan.
2. Accessibility
Google Photos can be accessed from a web browser, the Google Drive desktop program, and the smartphone app. While you can make only minor changes to the videos, such as editing date, time, and location when accessing Google Photos via a web browser, the smartphone app allows you to edit the videos comparatively more sophisticatedly.
3. Deletion
The files that are stored in Google Photos remain there for an indefinite duration, of course, until the entire space is completely consumed. When you delete something, it is moved to the Trash and stays there for another 60 days, after which it is automatically deleted from the Cloud forever.
Related Topics: How to Stabilize Shaky Videos – 7 Top Tools
Part 2: How to Stabilize Videos with Google Photos on Android and iPhone?
Google Photos is available for both Android and iPhone smartphones, and as explained earlier, the app can be downloaded from the Play Store and App Store, respectively. Using the built-in Google stabilizer video editor of the Photos app on both platforms is almost identical and extremely easy.
You can learn how to work with the Google video stabilizer to stabilize a video by following the steps that are given below:


Related Topics: How to Stabilize a Video in Premiere Pro
Part 3: How to Stabilize Videos with a Professional Video Stabilizer and Editor?
Unfortunately, Google Photos stabilizer doesn't have many editing options when accessed via a web browser, and therefore, at the time of this writing, you cannot stabilize a video with the tool's web interface. But if you are using a Windows or Mac computer, you can try some free online video stabilization software, or use Wondershare Filmora video editor to stabilize video with one click.
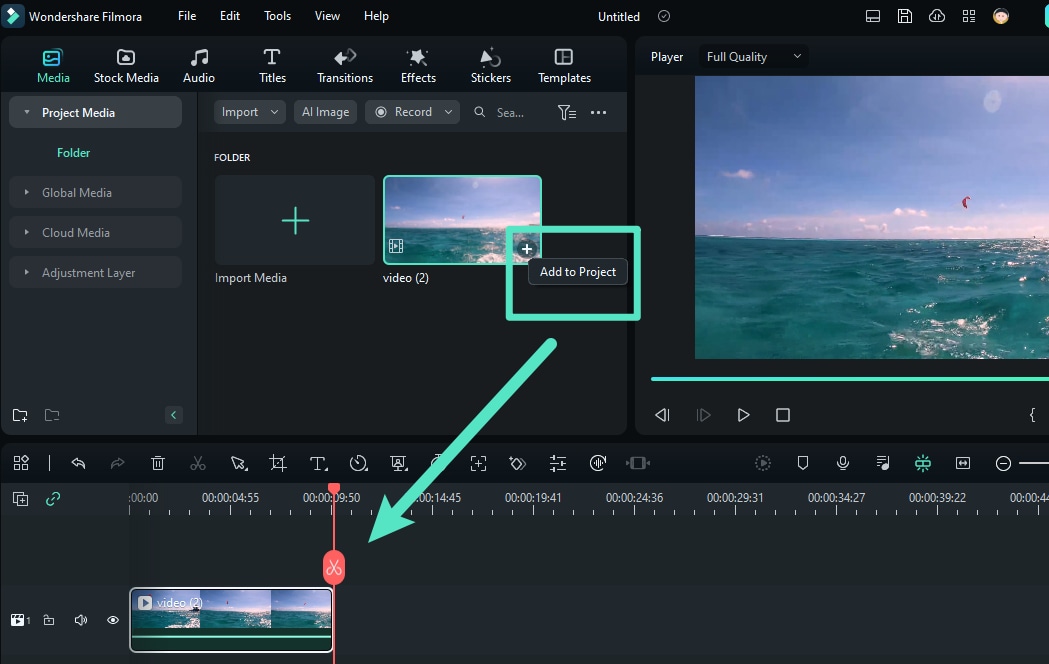
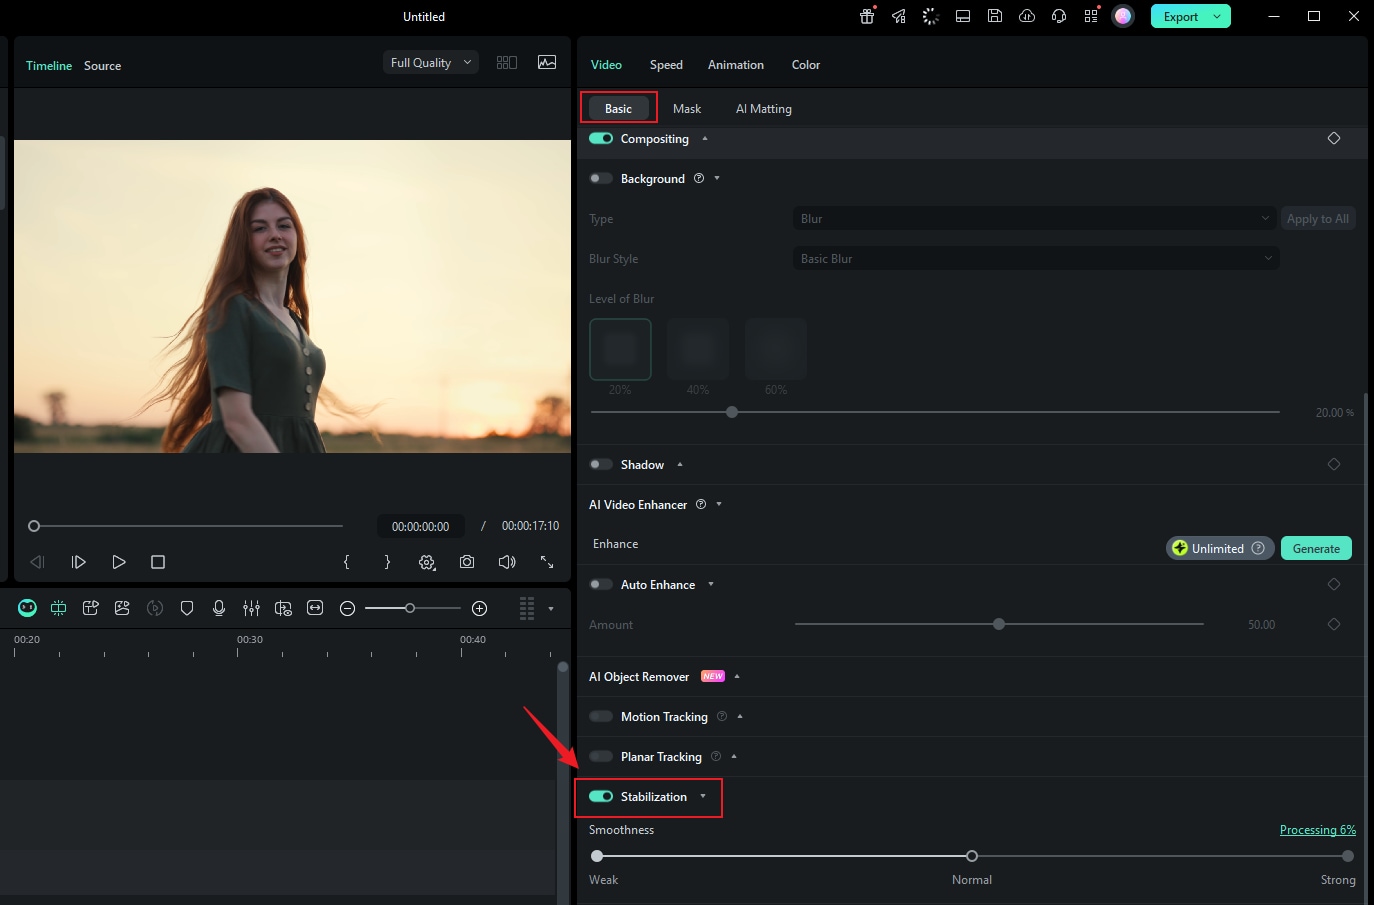
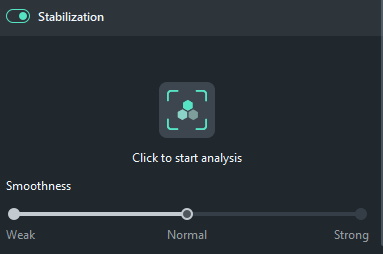
Wondershare Filmora video editor is available for Windows and Mac platforms, and gives tough competition to other industry-standard video editing applications like Final Cut Pro X and Adobe Premiere Pro. You can learn how to stabilize a clip with Filmora instead of using Google stabilizer video editor by following the step-by-step instructions that are explained below:
Part 4: 5 Tips for Avoiding Shaky Footage
To prevent shaky footage in the first place, it's essential to adopt certain filming techniques. Here are some effective tips to help you capture stable videos:
- Use a Tripod: A tripod is one of the most effective tools for stabilizing your camera. It allows you to keep your device steady, especially during longer shoots or when filming stationary subjects.
- Opt for Gimbals: If you plan on moving while filming, consider investing in a gimbal. This device stabilizes your camera, allowing for smooth movement even when walking or running.
- Practice Good Handheld Techniques: If you're shooting handheld, keep your arms close to your body. This technique provides better control and reduces shaking. Use both hands to grip the camera firmly.
- Plan Your Shots: Before filming, take a moment to plan your shots. Consider the movements you'll need to make and aim for smoother transitions. Slow, deliberate movements can significantly reduce shakiness.
- Utilize Optical Image Stabilization (OIS): If your camera or smartphone has built-in OIS, make sure it's enabled. This feature helps counteract small movements and vibrations while filming.
By implementing these tips, you can significantly reduce the likelihood of shaky footage, making your videos more professional right from the start.
Part 5: How to Use Google Photos to Edit Video?
Google Photos not only works as a Google video stabilizer app, but it also enables you to edit your media clips much more professionally. Some post-production tasks that you can perform while using Google Photos include:
1. Trimming
The trimming handles can be seen when you are on the 'Video' section after tapping 'Edit' in Google Photos after opening the video. You can drag these handles inwards to get rid of the unwanted starting and ending parts of a clip.

2. Cropping
The 'Crop' section enables you to crop the videos in a particular aspect ratio that can be selected from the available list, or drag the handles manually to get custom results.

3. Rotating
The 'Crop' section also has an option to rotate the video. Each time you tap the 'Rotate' icon, the screen rotates 90o in the counterclockwise direction.

4. Color Correction
The 'Adjust' section allows you to adjust the display of a video such as its brightness, contrast, shadows, etc.

5. Filters
You can even add a filter using the presets available in the 'Filters' section.

6. Annotations
The 'Markup' section enables you to annotate the video. You can either use the 'Pen' tool or 'Highlighter' to write text on the video or give the screen a different shade, respectively.

Depending on the type of modifications you want in your video, you can use Google Photos to get the job done easily and quickly.
Bonus: How to Edit Snapseed Photos?
Conclusion
Google Video Stabilizer is a built-in tool in Google Photos. Google Photos can be obtained from the Play Store or the App Store for your Android or iOS smart devices, respectively. In addition to stabilizing your videos, the Google Photos app also enables you to make other modifications, such as trimming, cropping, applying filters, and much more.


