“Help! My hiking video looks like it was filmed during an earthquake. How can I fix this shaky footage?"
If you've ever asked a similar question, you're not alone. Tons of amateur videographers and content creators have major issues with shaky footage. With the correct tools and techniques, you'll be able to turn your wobbly videos into smooth and professional-looking content.
Kdenlive is a powerful open-source video editing software, which serves as a good match for video stabilization. In this full guide, we will step by step show you how to stabilize video in Kdenlive.
Whether you're a complete beginner or an established editor looking to finesse your skills, this article on Kdenlive video stabilization is guaranteed to put you on the path to some problem-free, steady footage.
In this article
Understanding Kdenlive Video Stabilization
Video stabilization is a post-production process applied to realign shaky video images. In simple terms, it analyzes the motion in between frames and then applies corrective adjustments to make a smoother and more watchable video.
This can greatly improve the quality of handheld or action camera shots, so it's a necessary skill for any video editor to know.
- Superb video stabilization with low distortion.
- Vast video/audio effects and creative assets.
- Powerful AI for effortless content creation.
- Intuitive, professional yet beginner-friendly.
- Works on Mac, Windows, iOS, and Android.

Why Use Kdenlive for Video Stabilization?
Kdenlive stands out as an excellent choice for video stabilization for several reasons:
- Open-source and free: Kdenlive is completely free to use and regularly updated by a community of developers.
- User-friendly interface: The software offers an intuitive layout that's easy for beginners to navigate.
- Powerful stabilization algorithm: Kdenlive's stabilization tool is capable of handling various types of camera movement.
- Extensive feature set: Beyond stabilization, Kdenlive offers a wide range of video editing tools.
- Active community support: Users can find help and resources from a large community of Kdenlive enthusiasts.
- Regular updates: The software is continuously improved and refined.
Kdenlive Video Stabilization: Step-By-Step Guide To Stabilizing Video In Kdenlive
Follow these simple steps to stabilize video on Kdenlive video editor:
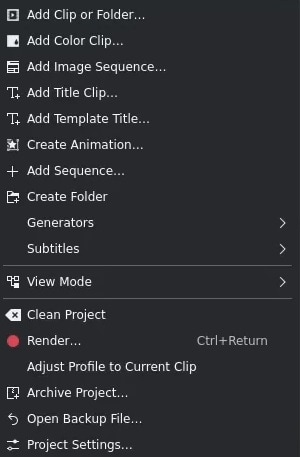
Step 1: Launch Kdenlive and create a new project. Click on "Add Clip or Folder" or drag and drop your video into the Project Bin.
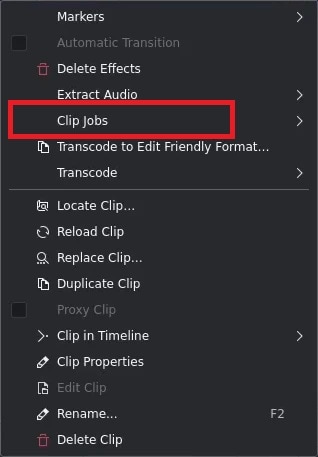
Step 2: Right-click on the clip in your project bin and select “Clip Jobs --> Stabilize/Vidstab.” A variety of settings will appear that might help you achieve the desired effect, along with a central box to enable cropping.
Step 3: In the Effect Stack panel, you'll see the Stabilize effect parameters.
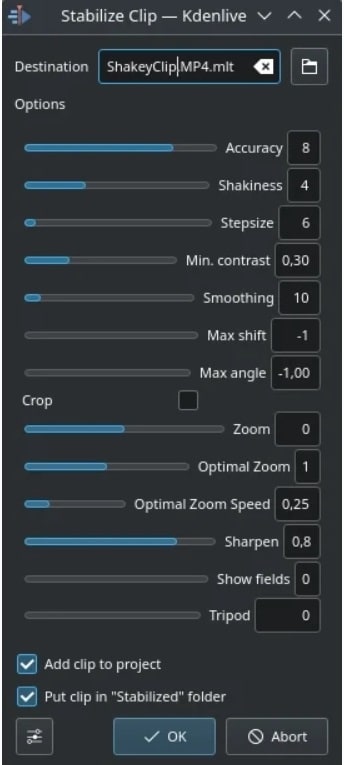
- Smoothness: Controls how aggressively the stabilization is applied.
- Accuracy: Determines the precision of motion tracking.
- Zoom: Adjusts how much the video is zoomed to compensate for edge movement.
Step 4: Click on "Analyze" in the Stabilize effect controls. This process may take some time depending on your video length and computer power.
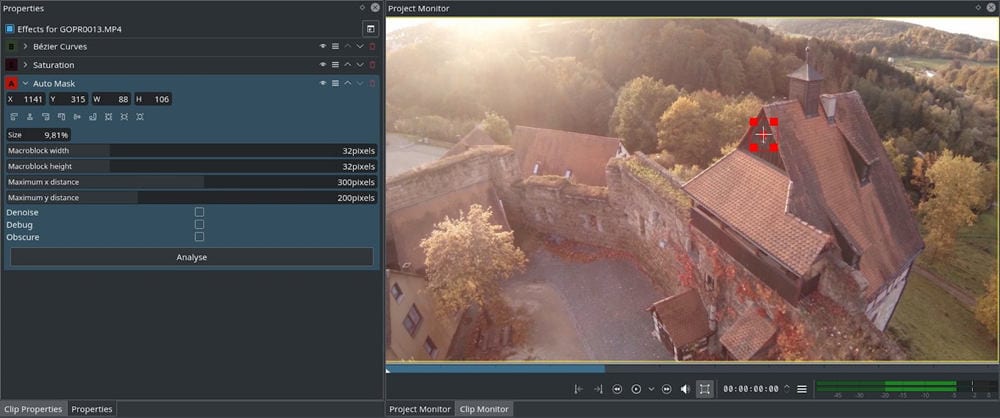
Step 5: Once the analysis is complete, play back your video to see the stabilization effect. Adjust the Smoothness, Accuracy, and Zoom parameters to achieve the desired result. Remember, higher values may result in more cropping or warping of the video.
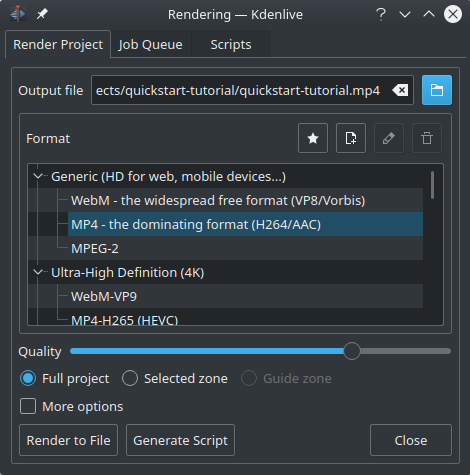
Step 6: Once satisfied, render your project by clicking on "Render" in the top menu. Choose your preferred output format and settings, then click "Render to File".
Tips for Effective Video Stabilization
Shoot with stabilization in mind: While Kdenlive can work wonders, starting with the steadiest possible footage will yield the best results.
- Use a higher frame rate: Shooting at 60fps or higher gives the stabilization algorithm more data to work with, potentially improving results.
- Leave some headroom: Frame your shots with extra space around the edges, as stabilization often crops the video slightly.
- Be patient with analysis: For longer videos, the analysis process can take time. Let it complete for the best results.
- Experiment with settings: Don't be afraid to play with different Smoothness, Accuracy, and Zoom values to find what works best for your footage.
- Use keyframes for varying stabilization: If different parts of your video need different levels of stabilization, use keyframes to adjust the effect over time.
- Combine with other effects: Sometimes, pairing stabilization with a slight blur or sharpening effect can help mask any artifacts from the stabilization process.
What If Kdenlive Doesn't Work Properly? Don't Worry, Use Wondershare Filmora
While Kdenlive is a powerful tool for video stabilization, some users might find it challenging or may encounter issues with its performance. In such cases, Wondershare Filmora presents an excellent alternative.
Filmora offers several advantages over Kdenlive:
- More intuitive interface: Filmora's user-friendly design makes it easier for beginners to navigate.
- Faster processing: Filmora often completes stabilization tasks more quickly than Kdenlive.
- Additional built-in effects: Filmora comes with a wide array of pre-installed effects and transitions.
- Regular updates and support: As a commercial product, Filmora receives frequent updates and has dedicated customer support.
Here's how to stabilize video using Wondershare Filmora:
Step 1: Launch Filmora and create a new project. Click "Import" or drag your video into the Media Library.
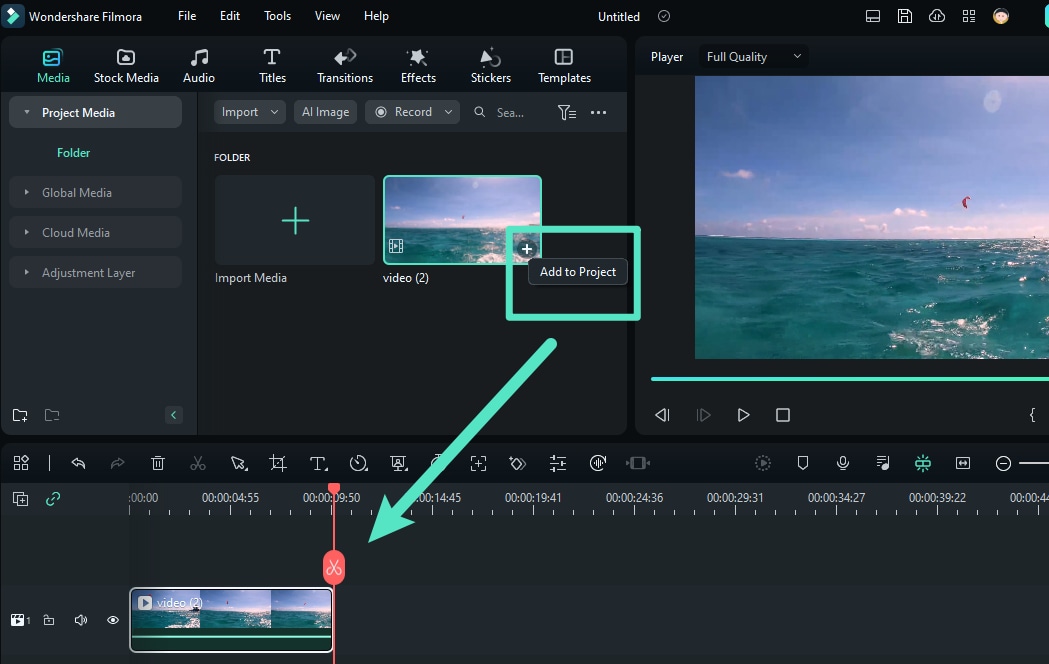
Step 2: Click on your clip in the timeline. In the upper menu, click "Stabilization" under the ""AI Tools" " tab.
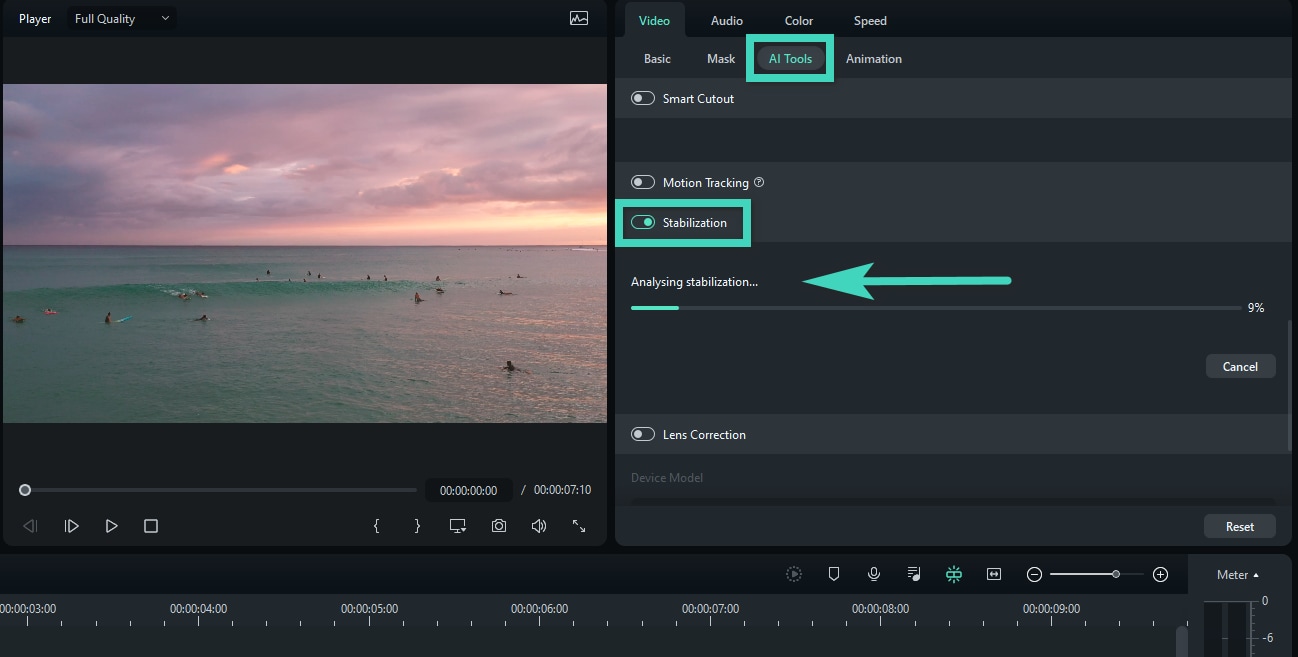
Step 3: In the preview window, you'll see options for Smoothness and Crop Ratio. Adjust these sliders to achieve your desired level of stabilization.
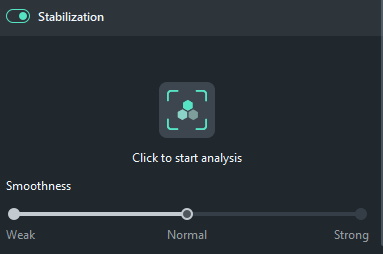
Step 4: Use the play button to preview your stabilized footage. Once satisfied, click "Export" to render your video with the applied stabilization.
Conclusion
This wraps our guide on Kdenlive video stabilization. Learning how to stabilize videos in Kdenlive can greatly improve the look of your video projects. By using the step-by-step instructions and tips given, you'll quickly learn to make your videos look smooth and professional.
Keep in mind that with practice, you'll get better, so don't worry if your initial tries aren't perfect.
You can use Kdenlive or try other programs like Wondershare Filmora. The important thing is to try different methods and find what works best for you.
With time and effort, you'll be able to turn shaky, beginner-style videos into steady, well-made content that keeps your viewers interested.
FAQ
-
How do you stabilize an unstable video?
To stabilize an unstable video, you can use video editing software with stabilization features like Kdenlive or Wondershare Filmora. These tools analyze your footage and apply corrective adjustments to reduce shakiness and create smoother motion. -
Can you edit a video to stabilize it?
Yes, you can edit a video to stabilize it using post-production software. Programs like Kdenlive and Filmora offer tools that allow you to apply stabilization effects to your footage after it has been recorded. -
How to remove shaking in video?
To remove shaking in video, import your footage into a video editing program with stabilization features. Apply the stabilization effect, adjust settings like smoothness and accuracy, and let the software analyze and correct the shaky motion in your video.


