

 TL;DR:
Adding motion blur in After Effects requires enabling both the individual layer and main composition switches for native graphics, while pre-rendered footage and complex speed ramps rely on specific pixel-tracking effects or dedicated third-party plugins.
● The built-in CC Force Motion Blur is designed for precomps while Pixel Motion Blur handles live-action speed changes, but raising the Shutter Angle on these effects heavily slows down previews and can create warped edges or ghosting around fast-moving subjects.
● Editors working on gaming montages, AMVs, or sports edits often bypass native tools for paid plugins like ReelSmart Motion Blur (RSMB) or Boris FX Continuum, which track complex footage better but can still generate artifacts when processing overlapping subjects, water, or smoke.
● Wondershare Filmora provides a less resource-intensive alternative that bypasses After Effects' dual-switch technical setup, offering users simple slider-based intensity controls, real-time previews, and three specific directional options (Forward, Backward, Centered).
Ask AI for a summary
 ChatGPT
 Perplexity
 Gemini
 Claude
 Grok
Grok
Adobe After Effects is one of the most popular tools for motion graphics, visual effects, title animation, and polished video work. And among their wide range of tools, one small effect that can make a big visual difference is motion blur in After Effects.
The right motion blur effect in the After Effects workflow helps movement feel smoother, faster, and more natural. The problem is that many beginners do not know which tool to use, since After Effects has built-in options, native effects like CC Force Motion Blur and Pixel Motion Blur, plus plugins like BorisFX BCC Motion Blur. So, let's break it all down in a way that actually feels usable.
Part 1. What Is Motion Blur in After Effects?
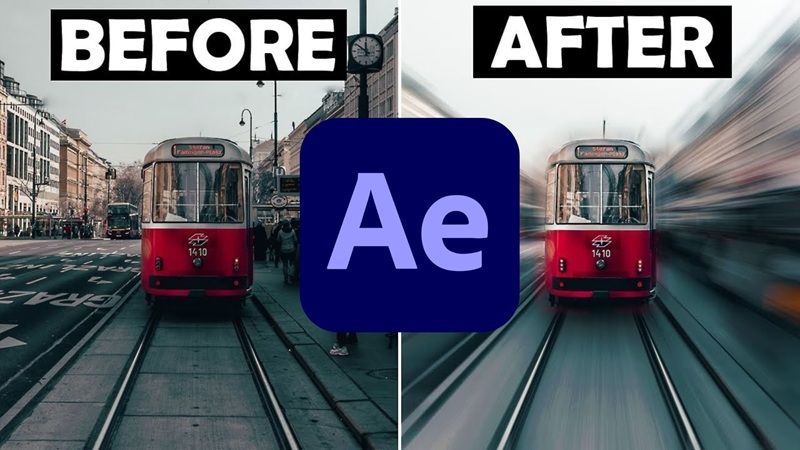
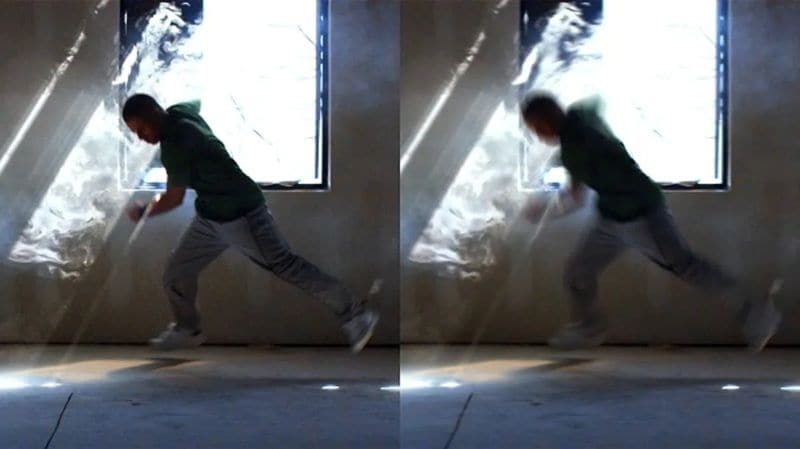
Basically, motion blur is the soft streak or smear you see when something moves quickly in front of a camera. In real life, it happens because the camera shutter stays open for a tiny amount of time while the subject is moving.
So, the motion blur effect in After Effects helps animated objects feel less robotic. Without it, a fast-moving title, shape, logo, or camera move can look like it is jumping from one frame to another. With it, the same movement feels smoother and more believable.
Why Motion Blur Matters
Think about a fast lower-third animation. If the text slides in sharply with no blur, it may look cheap or too digital. Add a bit of blur, and suddenly it feels closer to a real camera move.
Plus, motion blur in After Effects is useful because it can:
| Benefit | Why It Helps |
| Makes motion feel smoother | Fast animation looks less choppy |
| Adds realism | Movement feels closer to real camera footage |
| Hides tiny animation jumps | Small frame-to-frame jumps become less obvious |
| Improves fast transitions | Whip pans, zooms, and slides feel cleaner |
| Makes graphics feel more polished | Text, logos, and shapes look less flat |
Is Motion Blur Free in After Effects?
When it comes to your wallet, the basic motion blur tools are included inside After Effects. You do not need to buy a separate plugin to use the native motion blur After Effects layer switch, CC Force Motion Blur, or Pixel Motion Blur.

The higher cost is After Effects itself. Adobe sells After Effects through Creative Cloud subscription plans, which currently run around $22.99 a month on an annual plan billed monthly, though pricing can change by country, billing type, and promotions.
Part 2. What Can After Effects Motion Blur Actually Do?
Motion blur in After Effects is not just one button. It is more like a small family of tools. Some are great for clean animations. Some are better for footage. Some are better when you want a stronger, more stylized blur.
That is why choosing the right method matters. If you use the wrong one, you may get weird ghosting, slow previews, or blur that barely shows up.
| Tool | Best For | Ease of Use | Main Weakness |
| Layer Motion Blur Switch | Text, shapes, logos, camera moves | Very easy | Mostly works on layer movement |
| CC Force Motion Blur | Precomps and stronger blur | Medium | Can slow previews |
| Pixel Motion Blur | Footage and speed changes | Medium | Can create artifacts |
| Motion Blur Plugins | Footage, edits, speed ramps, pro workflows | Medium | Usually paid |
Who Will Benefit from It Most?
After Effects motion blur is especially helpful for:
- Motion Designers: Great for titles, logo reveals, kinetic typography, and fast graphic transitions.
- YouTubers: Useful for intro animations, zooms, whip transitions, and gaming-style edits.
- VFX Compositors: Crucial for matching 3D model renders into live-action camera plates, blending digital assets seamlessly into physical film grain.
- Character Animators: Enhances fast limb extensions, athletic jumps, and stylized comic movements while saving hours of manual cell illustration.
- Editors: Fast footage can look too sharp or jumpy. Pixel-based blur or plugins can help smooth it out.
- Beginners: Motion blur is one of the easiest ways to make a simple animation feel more finished.
Part 3. How to Add Motion Blur in After Effects Using Built-in Tools
There are two main ways to add motion blur in After Effects: use the built-in tools or install a motion blur plugin in After Effects. Let's start with the built-in methods first.
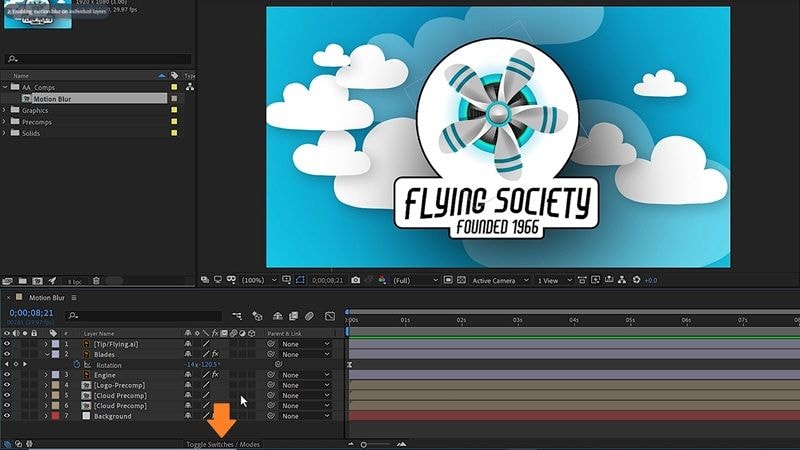
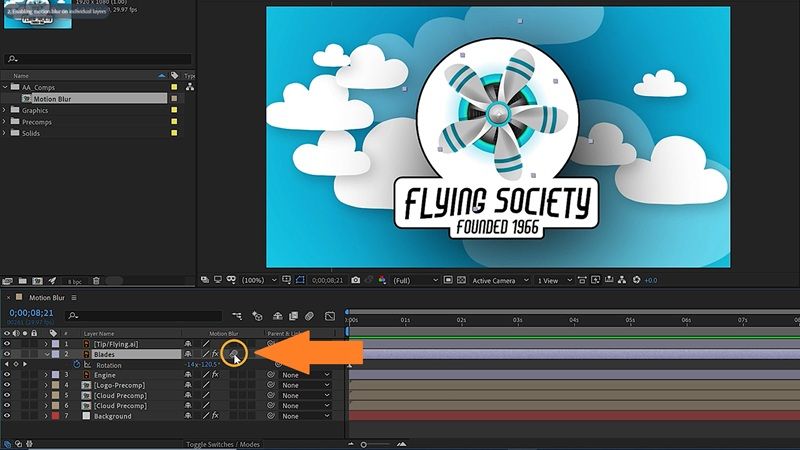
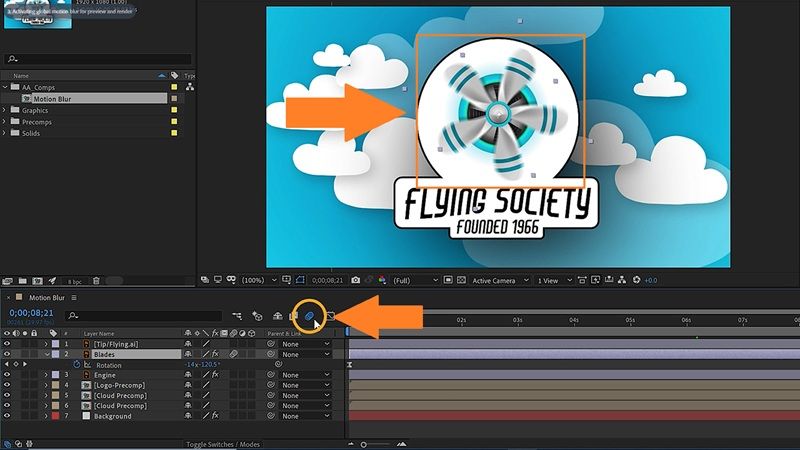
Method 1. Use Native After Effects Settings
This is the best place to start if you are animating text, shapes, logos, images, or layers inside After Effects. Follow the steps below to learn how:
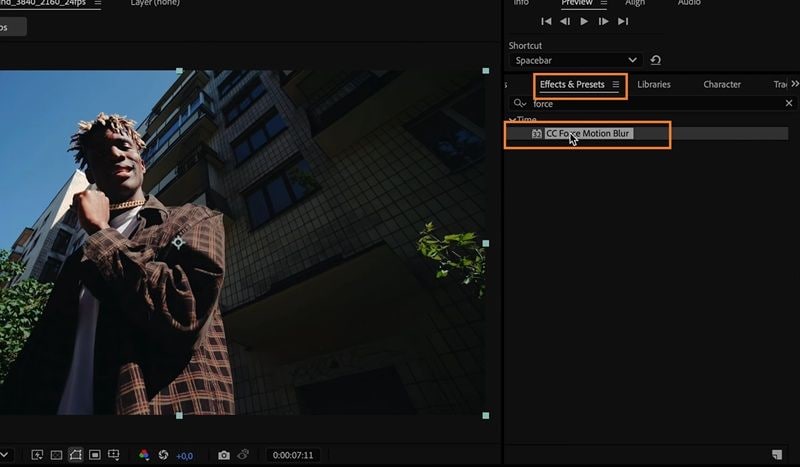
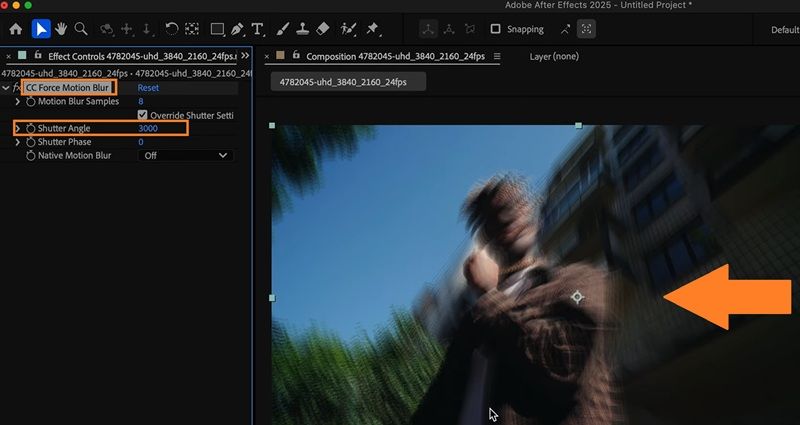
Method 2. Use CC Force Motion Blur
CC Force Motion Blur is also built into After Effects. It is useful when the regular motion blur switch does not give you enough control or when you are dealing with precomps and effects-heavy animation.
Guided by the Creative Society video on YouTube, see the steps below to learn how to use CC Force Motion Blur:

Best For
- Precomposed animation.
- Stronger stylized blur.
- Fast graphic movement.
- Effects that do not respond well to the normal motion blur switch.
Watch Out For: Higher samples can improve the look, but they can also make previews slower. Use only as much as you need.
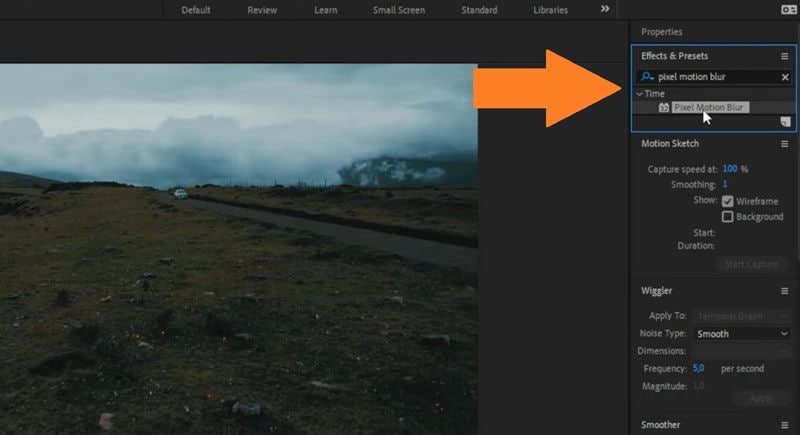
Method 3. Use Pixel Motion Blur After Effects
Pixel Motion Blur After Effects is different from the basic layer switch. Instead of looking only at the layer's movement, it analyzes pixel movement inside the image.
This time, let's take a look at Adobe Basics' tutorial on YouTube to learn how to use this method:

Best For:
- Speed ramps.
- Pre-rendered animations.
- Footage with missing blur.
- CGI-style motion.
- Fast video clips.
Watch Out For: Pixel Motion Blur can be heavy on your PC, especially with high settings. If playback becomes slow or the clip looks warped, lower the shutter angle.
Part 4. How to Add Motion Blur in After Effects Using Plugins
Native tools are good, but plugins are often better when the movement is inside the footage itself. That is why editors working on gaming montages, sports edits, AMVs, music videos, and speed ramps often use a dedicated motion blur plugin After Effects workflow.
Plugin Option 1. ReelSmart Motion Blur After Effects
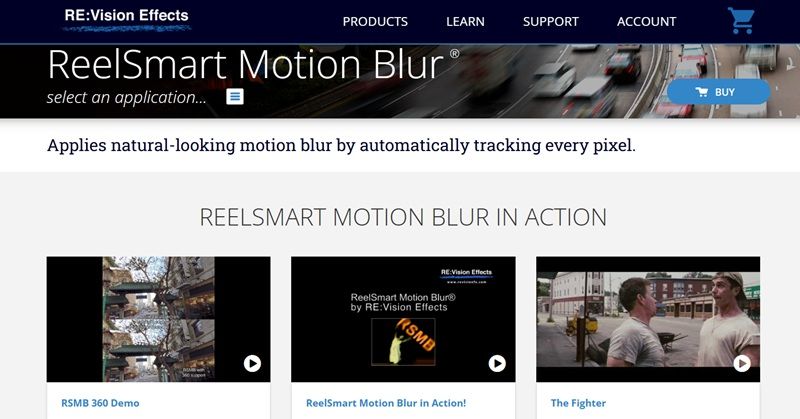
ReelSmart Motion Blur, usually called RSMB, is one of the most popular motion blur plugins for After Effects. It is popular because it works well on footage, not just layer animation. If your clip has fast movement, the ReelSmart Motion Blur After Effects plugin can often make it feel smoother without needing to rebuild the animation inside After Effects.
- Gaming edits.
- AMVs.
- Sports clips.
- Music videos.
- Speed ramps.
- Fast transitions.
- Footage that looks too sharp or choppy.
A free trial is not available. One-time purchase of ReelSmart Motion Blur v6 GUI at $109.95, and ReelSmart Motion Blur Pro v6 GUI at $169.95.
RSMB is strong, but it is not magic. It can still create artifacts when the motion is messy, the background is busy, or the subject overlaps with other moving objects. Still, for many editors, it is one of the fastest ways to get smooth motion blur on footage.
Plugin Option 2. Boris FX Continuum Motion Blur
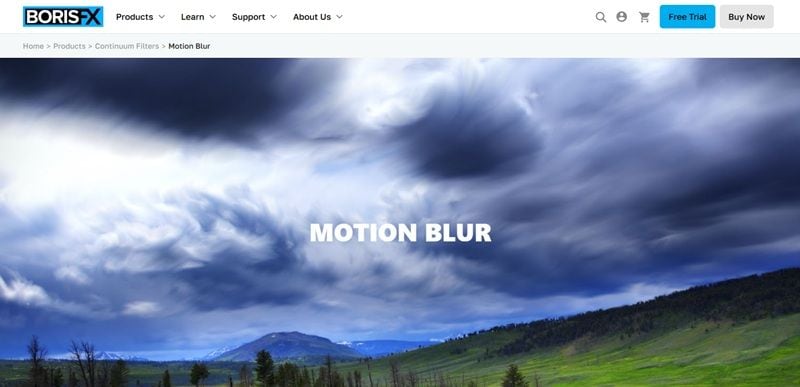
Boris FX also offers motion blur tools through its Continuum effects. Known as BCC Motion Blur, it creates blur based on motion in the image and is designed to simulate the blur you would get when filming a moving object with a camera.
- Professional VFX work.
- Editors already using Boris FX.
- More advanced blur control.
- Stylized motion blur.
- Commercial video work.
A free trial is available. Subscription plans start at $27.08 per month.
Boris FX makes more sense if you need a larger effects toolkit, not only motion blur. If all you want is a quick blur plugin, RSMB may feel more direct. If you already use Continuum, Boris FX can fit nicely into your workflow.
Part 5. The Honest Breakdown: Pros and Cons of After Effects Motion Blur
Every tool has its bright spots and its dark corners, including the Motion Blur in After Effects. So, it helps to look at exactly where the tool shines and where it might leave you pulling your hair out during a tight deadline. Here is the honest breakdown.
- Multiple Native Choices: You are not stuck with one option. You can use the layer switch, Composition Settings, CC Force Motion Blur, or Pixel Motion Blur After Effects, depending on the project.
- Plugin Support Is Strong: After Effects has a mature plugin ecosystem. Tools like ReelSmart Motion Blur After Effects are widely used because they can handle footage-based motion better than basic layer blur.
- Good Control Over Blur Strength: Settings like Shutter Angle and samples let you control how soft, strong, or smooth the blur feels.
- Works Well With Precomps: If your animation is tucked inside a precomp, CC Force Motion Blur can help when the normal motion blur switch does not give the result you expected.
- Two Switches Can Confuse Beginners: Turning on the layer switch is not enough. You also need the main composition motion blur switch. Many beginners miss that and think the feature is broken.
- Pixel Motion Blur Can Create Weird Edges: Pixel-based blur can look great, but it may create ghosting, warping, or strange outlines around fast-moving subjects.
- Previews Can Slow Down: CC Force Motion Blur, Pixel Motion Blur, and plugins can increase render time, especially on longer clips or high-resolution projects.
- Results Depend on the Footage: Motion blur is not one-click perfection for every clip. Busy backgrounds, overlapping subjects, smoke, water, and hair can still break the effect.
Part 6. A Friendlier Alternative to After Effects for Motion Blur
After Effects motion blur works well, especially for motion graphics. Still, the flaws are hard to ignore. The interface can feel technical, the settings take time to understand, and plugins can add more cost to the workflow.
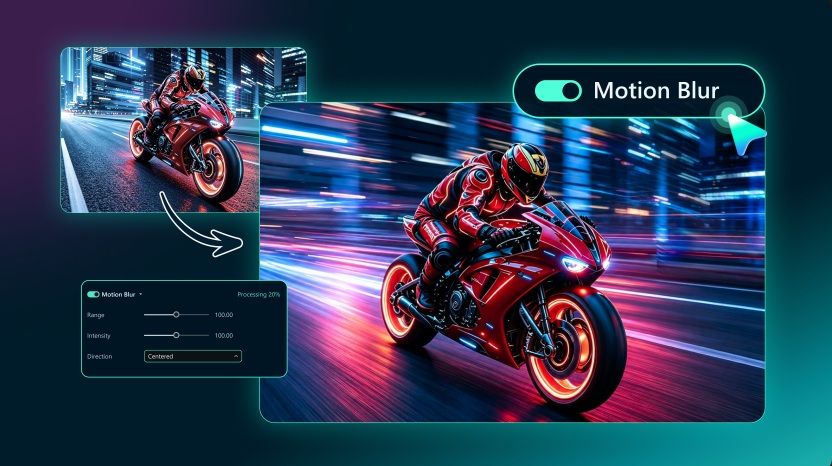
If you are totally over After Effects, its menus, and the way it lags your computer, you can always just use Wondershare Filmora. For motion blur specifically, Filmora has been promoting easier blur workflows, including an Motion Blur-style approach in its recent updates.
What Makes Filmora Motion Blur Great
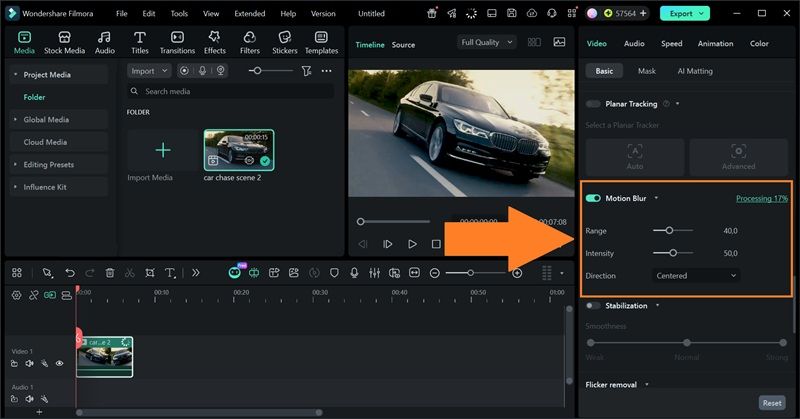
- One-Click Application: Filmora lets you apply the motion blur effect more directly with a single layout switch that analyzes your video instantly.
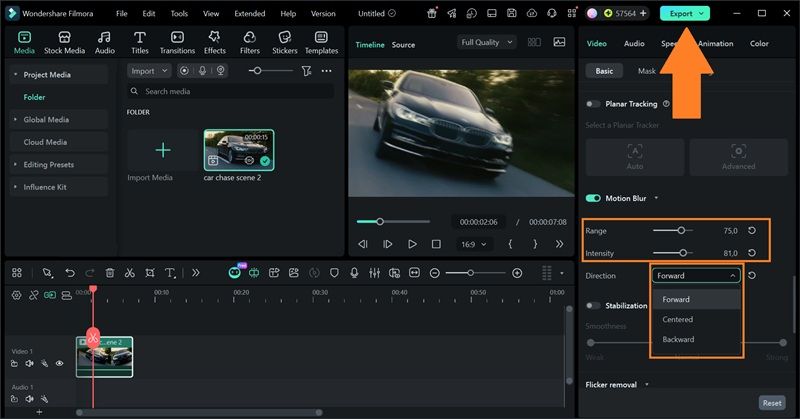
- Control Range and Intensity: Instead of working with more technical motion blur settings, Filmora lets you control the blur strength with simple sliders. That makes it easier to test a subtle blur, a stronger speed effect, or something in between.
- Control Direction: Direction control is useful because motion blur does not always need to trail the same way. You have 3 options: Forward, Backward, and Centered.
- Real-Time Preview: As you adjust the slider, the preview updates, so you can see what is happening before exporting. That matters because motion blur is very visual.
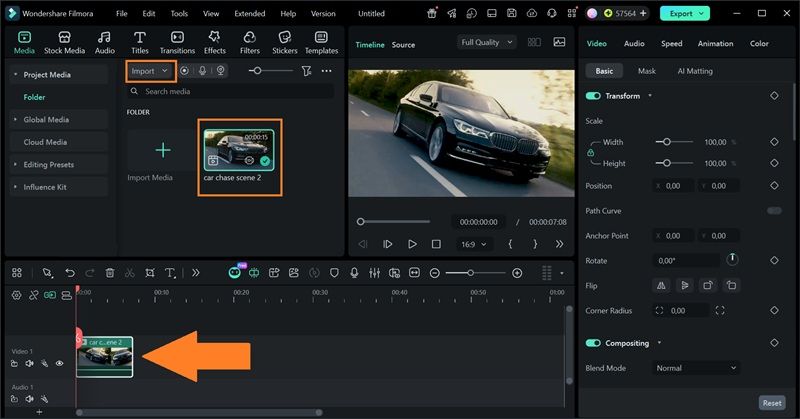
How to Add Motion Blur in Filmora
Conclusion
Motion blur in After Effects is one of those effects that looks small at first, but it can completely change how polished your animation feels. Built-in options such as CC Force Motion Blur gives you more control for precomps, while Pixel Motion Blur After Effects is better for footage and speed changes. For heavier edits, ReelSmart Motion Blur After Effects is still one of the strongest plugin choices.
That said, After Effects is not always the fastest path. If you want a smoother, simpler way to add motion blur without digging through technical settings, Filmora is a practical alternative. It gives you slider-based control, direction options, real-time preview, and a full editing timeline in one place.
FAQs
-
Why is motion blur not showing in After Effects?
Most of the time, one of the two motion blur switches is off. You need to enable motion blur for the layer and also turn on the main motion blur switch in the Timeline panel. -
Is CC Force Motion Blur better than Pixel Motion Blur?
They solve different problems. CC Force Motion Blur is useful for stronger blur on layers and precomps. Pixel Motion Blur is better when the motion is inside footage or a pre-rendered clip. -
Does ReelSmart Motion Blur work better than native After Effects motion blur?
For footage and speed ramps, often yes. RSMB tracks pixel movement, so it can handle motion inside the clip better than the basic layer motion blur switch. For simple text or shape animation, native motion blur is usually enough. -
Can motion blur make videos look worse?
Yes. Too much motion blur can make footage look smeared, hide details, and make text hard to read. Use it lightly first, then increase the strength only if the movement still feels too sharp.
