

Imagine you’re watching a thrilling film on QuickTime, the plot thickens... and then, silence. The characters are talking, but you’re missing every single word. This is a familiar scenario for movie lovers on iOS.
QuickTime is a versatile multimedia player and editor that has been a staple on iPhone, iPad, and Mac devices for years. It offers features ranging from basic video playback to basic video editing options, including screen recording. While QuickTime is an impressive multimedia tool for watching, recording, and even lightly editing videos, adding subtitles isn’t as straightforward.
This article aims to overcome these limitations and provide a clear solution for Mac users who wish to enhance their video viewing experience by adding subtitles to QuickTime. Whether you're a regular user or a video editor, this article will provide a comprehensive guide on how you can use QuickTime player with subtitles.
In this article
Part 1: Why Your Subtitles Won't Show in QuickTime Player

You're not alone if you’ve ever encountered issues with subtitles not appearing or syncing correctly in QuickTime Player. This can be frustrating, especially when you're trying to watch a video in a language you're not fluent in or when you need to access closed captions for accessibility purposes.
Several factors can contribute to these problems; and like every other problem, understanding them is the first step to resolving them.
Incompatible Subtitle Format: QuickTime Player primarily supports .qt.text (QuickTime text) subtitle formats. If your subtitles are in different formats like .srt (SubRip Subtitle) and .ttxt (Text Text), they may not display correctly.
Incorrect Encoding: Subtitles are essentially text files, but how they’re encoded matters. QuickTime typically requires subtitles to use UTF-8 encoding for proper display. Files encoded in ANSI, ASCII, or other formats may fail to load entirely.

- Improper File Naming: Quicktime uses Image names to link subtitles to video files. For the subtitles to work, the subtitle file must have the same name as the video file, albeit with a different extension.
For example; if a video file is named that_movie.mp4, the corresponding subtitle file must be named that_movie.qt.text.
- Mismatched Timings: Subtitles are synced to specific timestamps within a video. If the timing of your subtitle file doesn’t match the video, the subtitles will either display incorrectly or not at all.
- Absence of Subtitles in the Video File: Some videos lack embedded subtitles altogether. This leaves you dependent on external subtitle files, which may only sometimes be readily available or compatible.
To address some of these issues, you can either convert your subtitle file to a more compatible format using a subtitle conversion tool or ensure the Image names are matched precisely.
If you’ve addressed all the above and are still facing issues, it may be due to QuickTime’s inherent limitations. In cases like that, external solutions are required.
Part 2: How to Add Subtitles in QuickTime Player on Mac
Adding subtitles to videos in QuickTime Player on your Mac is a straightforward process once you understand the steps involved. For videos that don’t have embedded subtitles, you’ll need to manually attach an external subtitle file to ensure a seamless viewing experience. You can either add your subtitle file directly to QuickTime—which may be a challenge—or use a third-party tool like Subler.
How to Add Subtitles to QuickTime Videos Using Subler
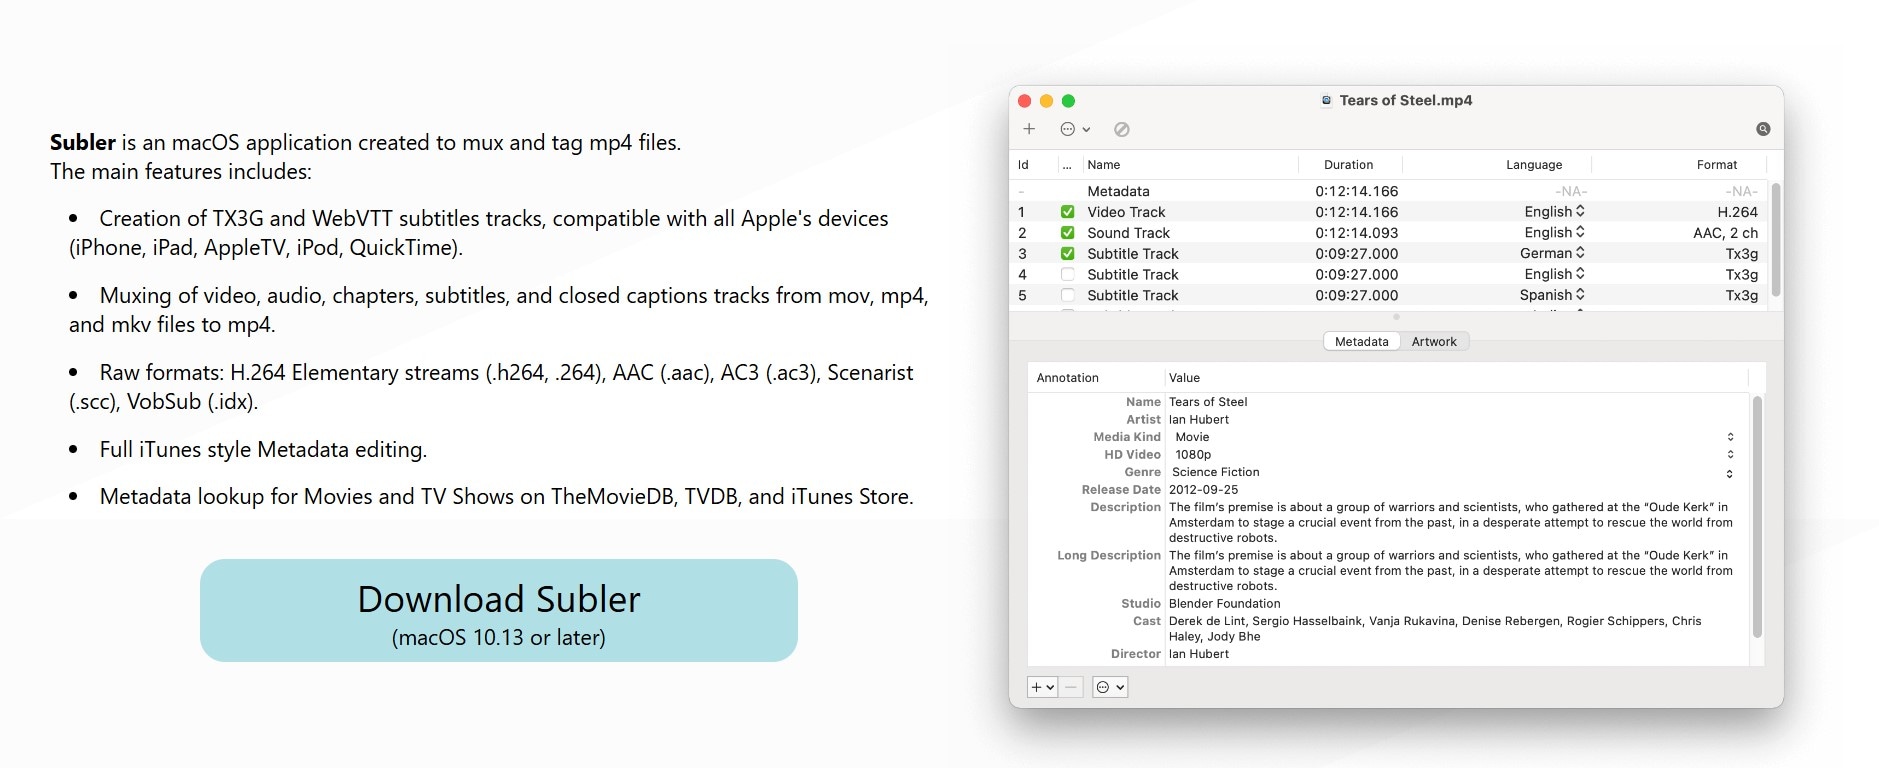
Step 1: Download and install the Subler app from subler.org. Launch the Subler app and allow all permissions.
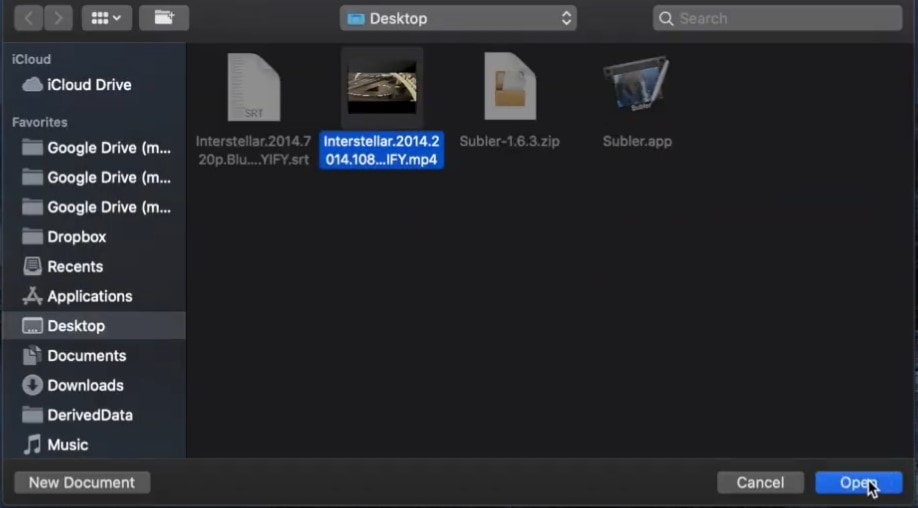
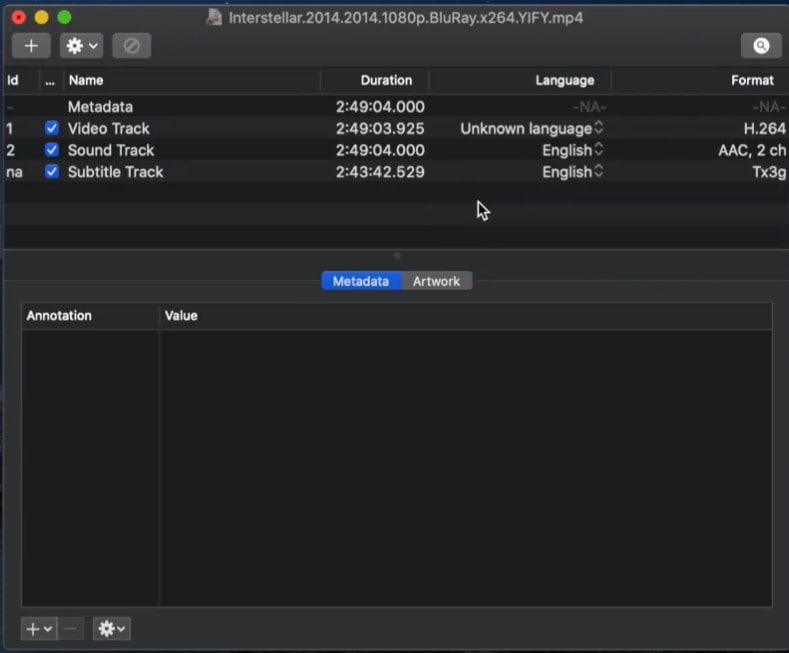
Step 2: Open the Subler app, drag and drop the video you want to subtitle, and click on Open.
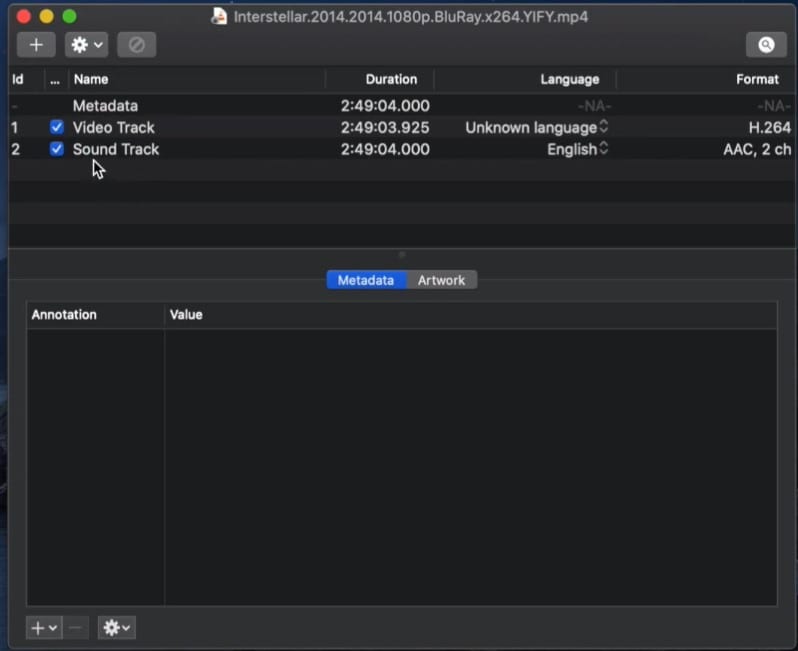
You will notice a line-up of your video clip and video soundtrack as shown in the image.
Step 4. Drag and drop your subtitle file under the soundtrack.
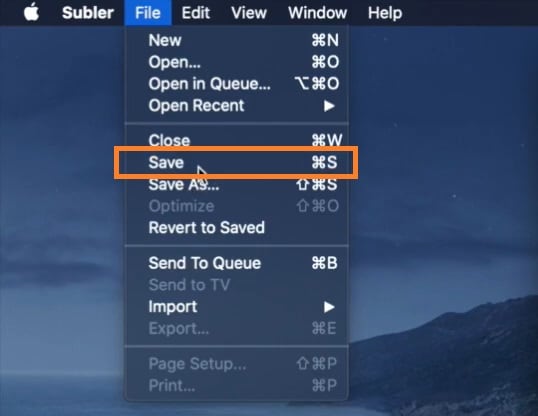
Step 5. Then save using the Cmd + S shortcut on your keyboard. Or go to File > Save on the toolbar.
And voila! You’ve successfully added subtitles to your video. Go ahead and open your video on QuickTime player per usual, you will notice the subtitles added to the videos.
Adding subtitles to QuickTime in this manner allows subtitles to show when you view your video in picture-in-picture (PIP) mode, unlike other media players.
How to Create Custom Subtitles for QuickTime Player
While movies or TV show subtitles are available for download online, videos like social media content, presentations, or personal projects may need you to create subtitles from scratch.
This can seem daunting, but creating custom subtitles ensures your content is accessible, engaging, and easy to follow, especially for viewers who may rely on subtitles for clarity or language support. Thankfully, tools like Wondershare Filmora make this process simple and efficient.

Filmora is a video, audio, and text editing software with several intuitive features that allow you to create and edit high-quality video and audio content. This tool has regular and AI-powered features that streamline your editing process and get precise results in seconds.
Filmora’s Speech-to-Text (STT) feature automatically creates subtitles from spoken dialogue in your video or audio clip, saving time and effort. You can edit the generated subtitles directly within the software to ensure accuracy. You can also save the generated subtitles as a separate .srt file or embed them into your video and download them as one.
- Superb video stabilization with low distortion.
- Vast video/audio effects and creative assets.
- Powerful AI for effortless content creation.
- Intuitive, professional yet beginner-friendly.
- Works on Mac, Windows, iOS, and Android.


Follow these steps to create custom video captions using Fiilmora’s STT.
Step 1: Upload the video whose audio you want to generate subtitles. If the audio is a different file, upload the audio clip to Filmora.
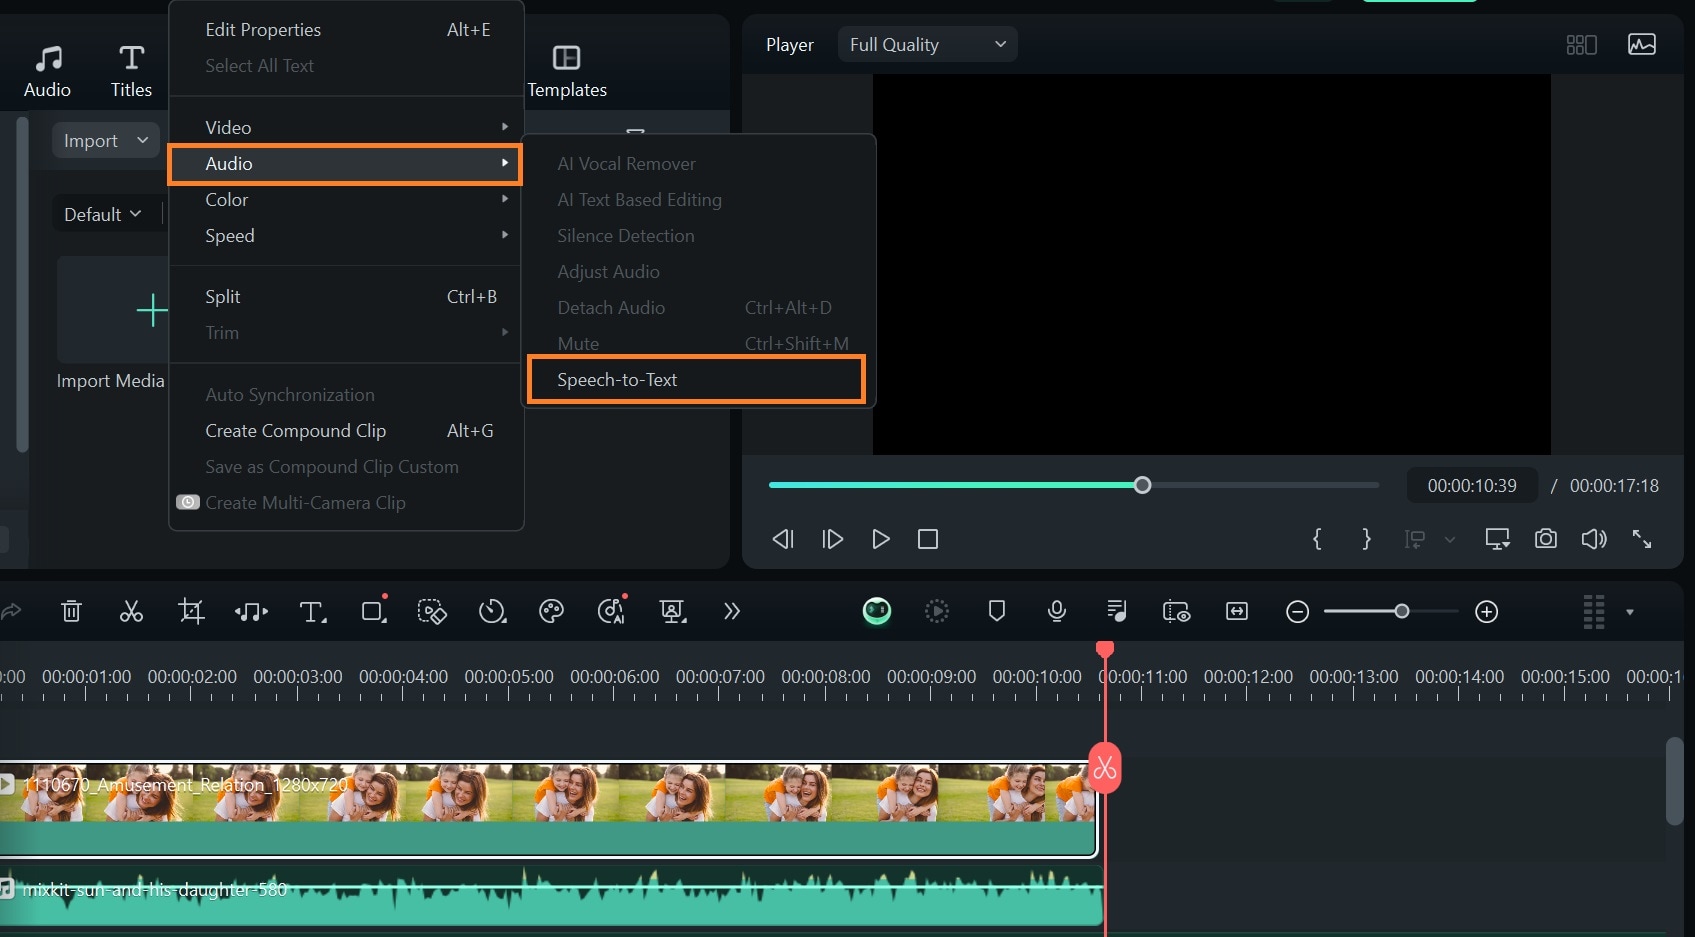
Step 2: Go to Tools > Audio > Speech-to-Text on the toolbar to activate the speech-to-text feature.
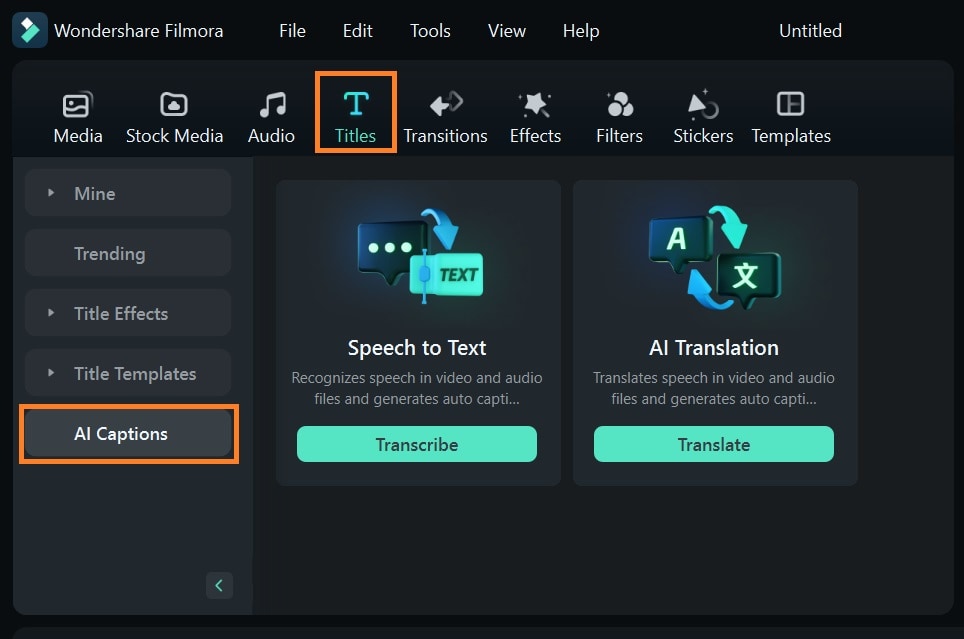
Or go to Titles > AI Captions and select the Speech-to-Text tool.
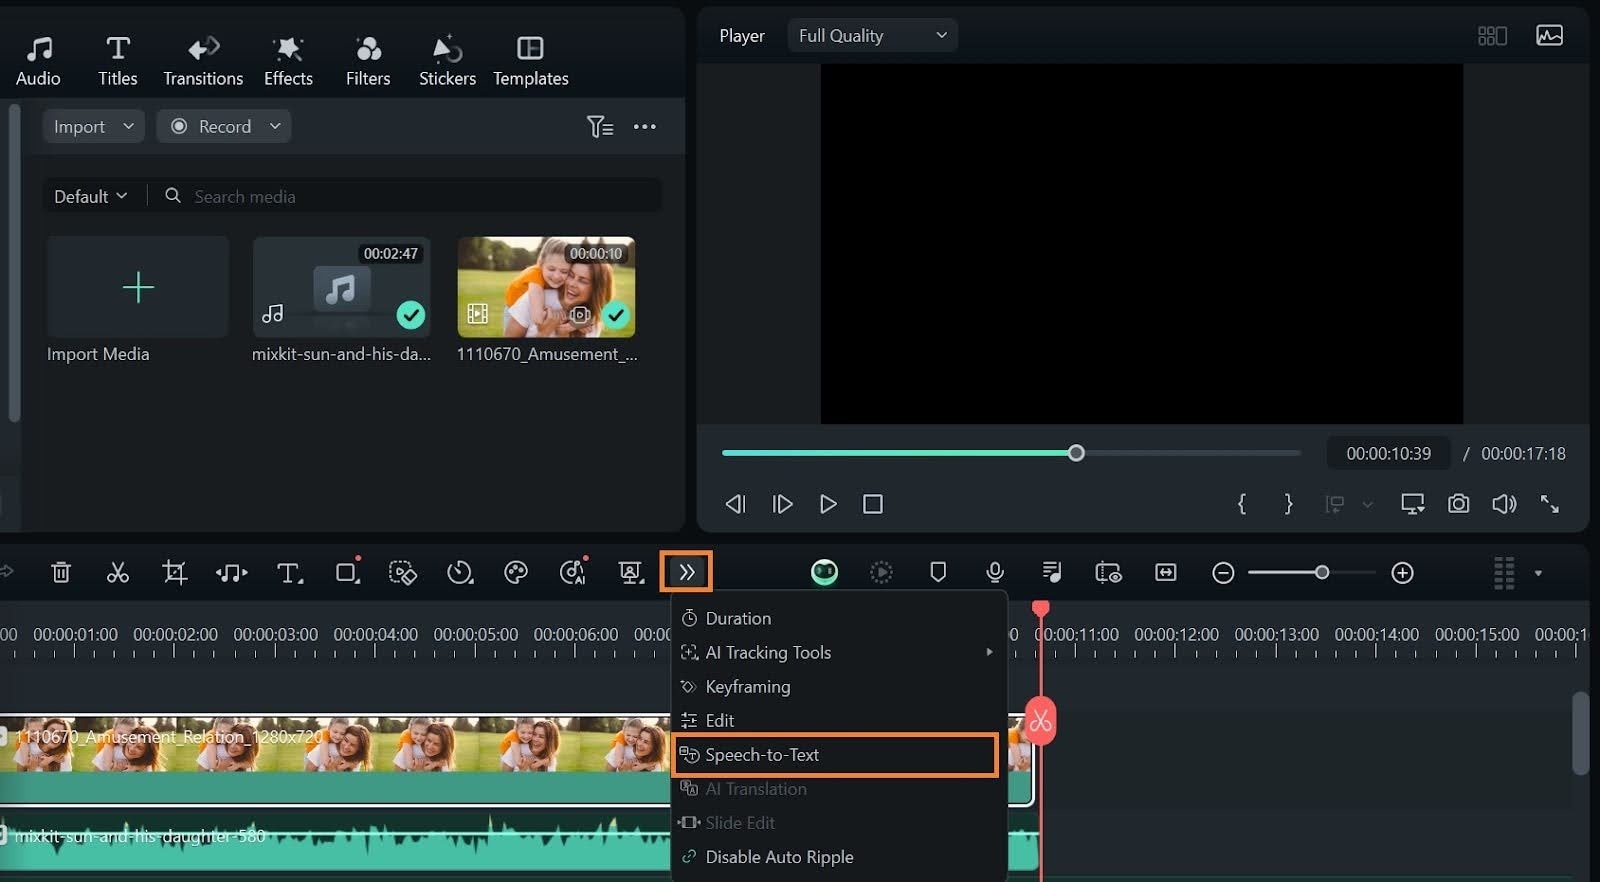
Alternatively, select the Speech-to-text tool from the timeline toolbar. If the tool icon is not there, click on the arrow to the right of the timeline toolbar to reveal more editing options. Select Speech-to-text from the tool options provided.
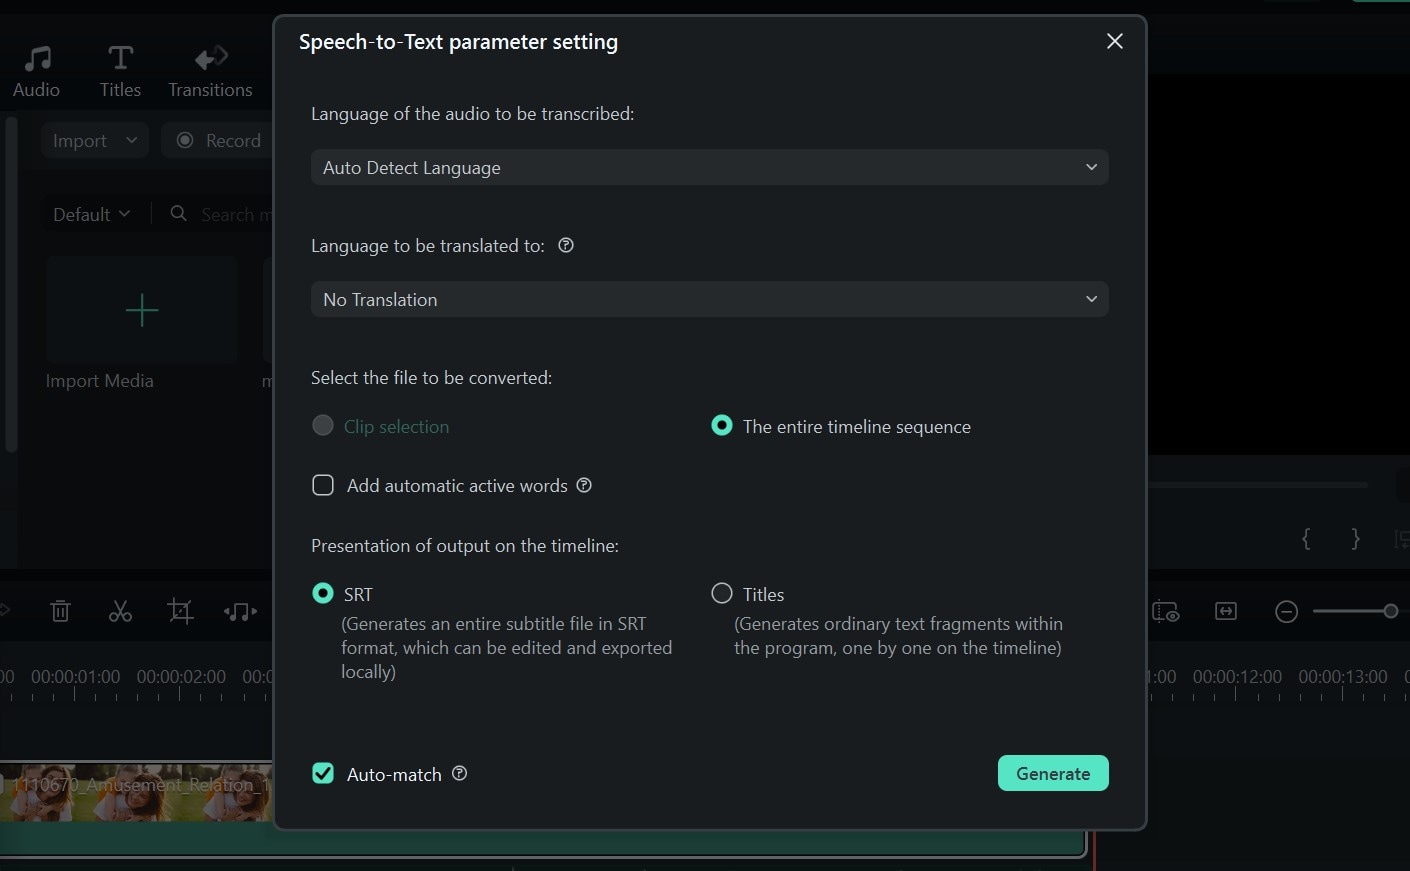
Step 3: A Speech-to-text editor dashboard will appear. Here you can set your text to be written in a different language from the audio you’re transcribing. You can also have your text written out in fragments on the timeline or generated in .srt format, edited, and exported. Click Generate
If you generate your subtitle in .srt format, your audio may take a minute to upload and transcribe. A dialogue box will pop up where you can monitor the upload or transcription process.
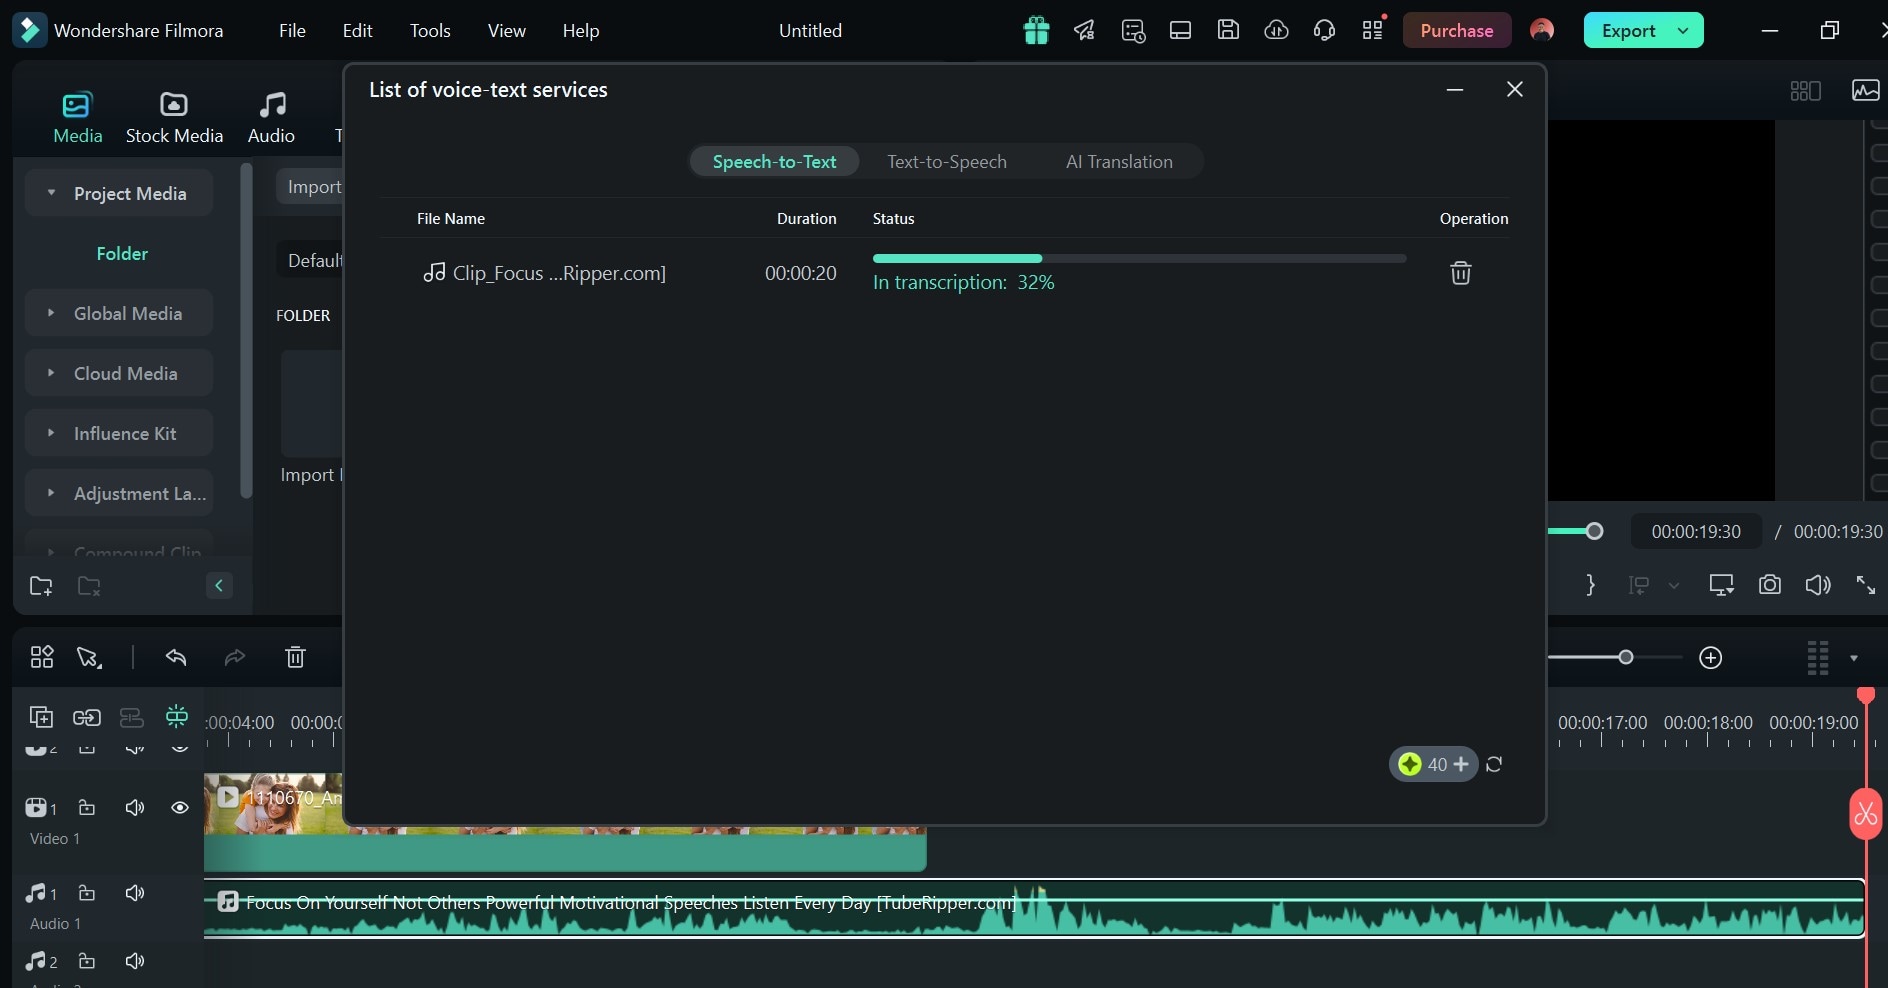
Once the upload/transcription is done, your subtitle will automatically appear in your video.
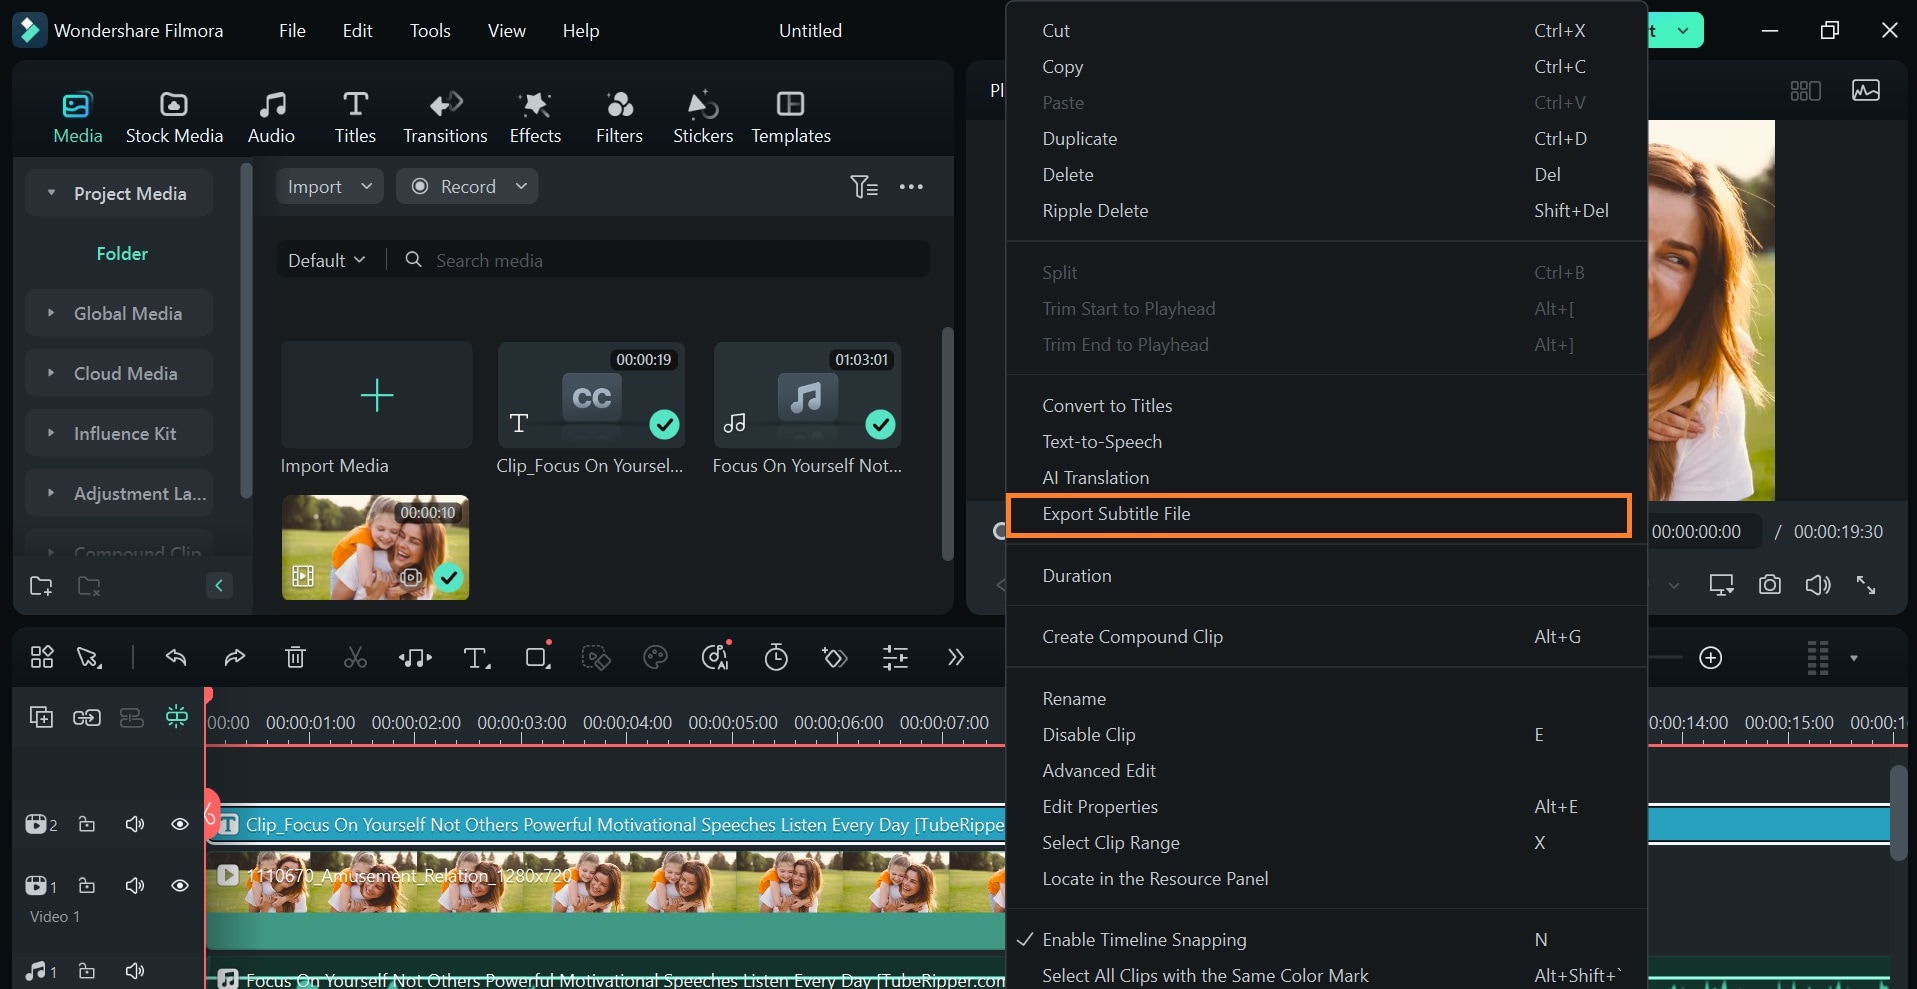
To download only the subtitle file in .srt format, right-click the subtitle clip on the timeline and select Export Subtitle File.
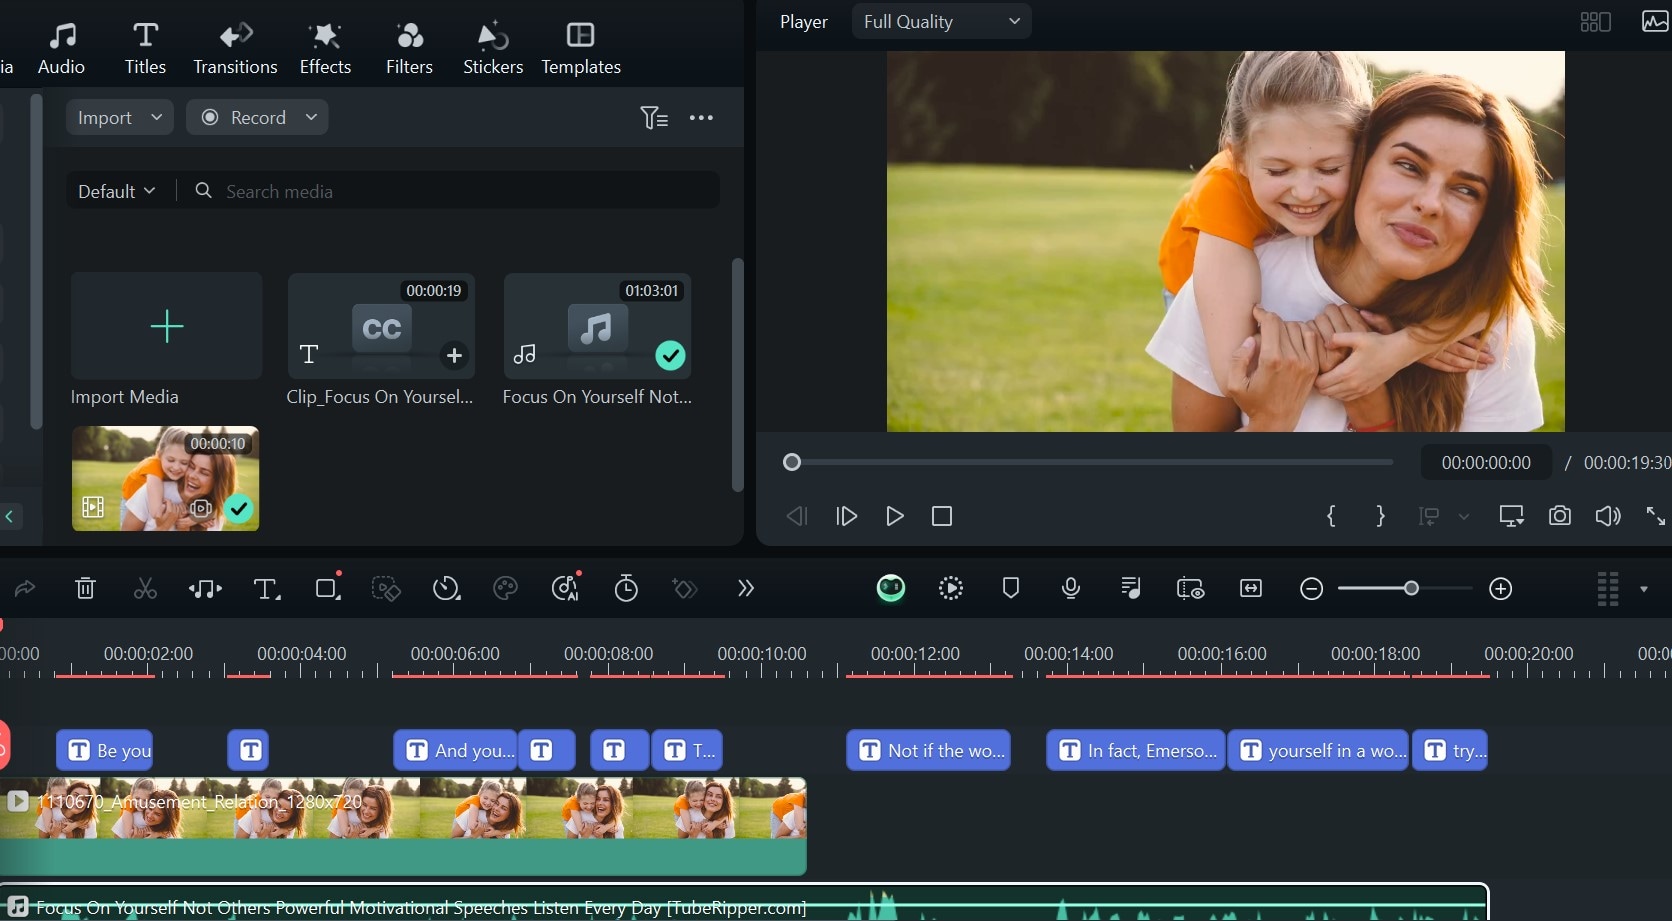
If you generate your subtitle in text fragments on the timeline, it will appear as shown in the image. You can manually edit and reposition your subtitle texts to suit your preferences.
Part 3: Bonus: Creating SRT files for QuickTime or Adding Subtitles to Videos Using Filmora?
To add subtitles in QuickTime, you can either download or create .srt files for your videos, or directly embed subtitles into your videos using Filmora. While generating .srt files with Filmora and moving them to QuickTime is an option, the entire process is more seamless and efficient to complete directly in Filmora. It is more streamlined, faster, easier, and less of a hassle.
Aside from the ease and time efficiency of working with Filmora, this software allows you to adjust font styles, sizes, colors, and placement—an option ideal for themed videos or ones where personal style/brand is important. You can use transitions and text animations to add a creative twist to your subtitle texts.
- Superb video stabilization with low distortion.
- Vast video/audio effects and creative assets.
- Powerful AI for effortless content creation.
- Intuitive, professional yet beginner-friendly.
- Works on Mac, Windows, iOS, and Android.
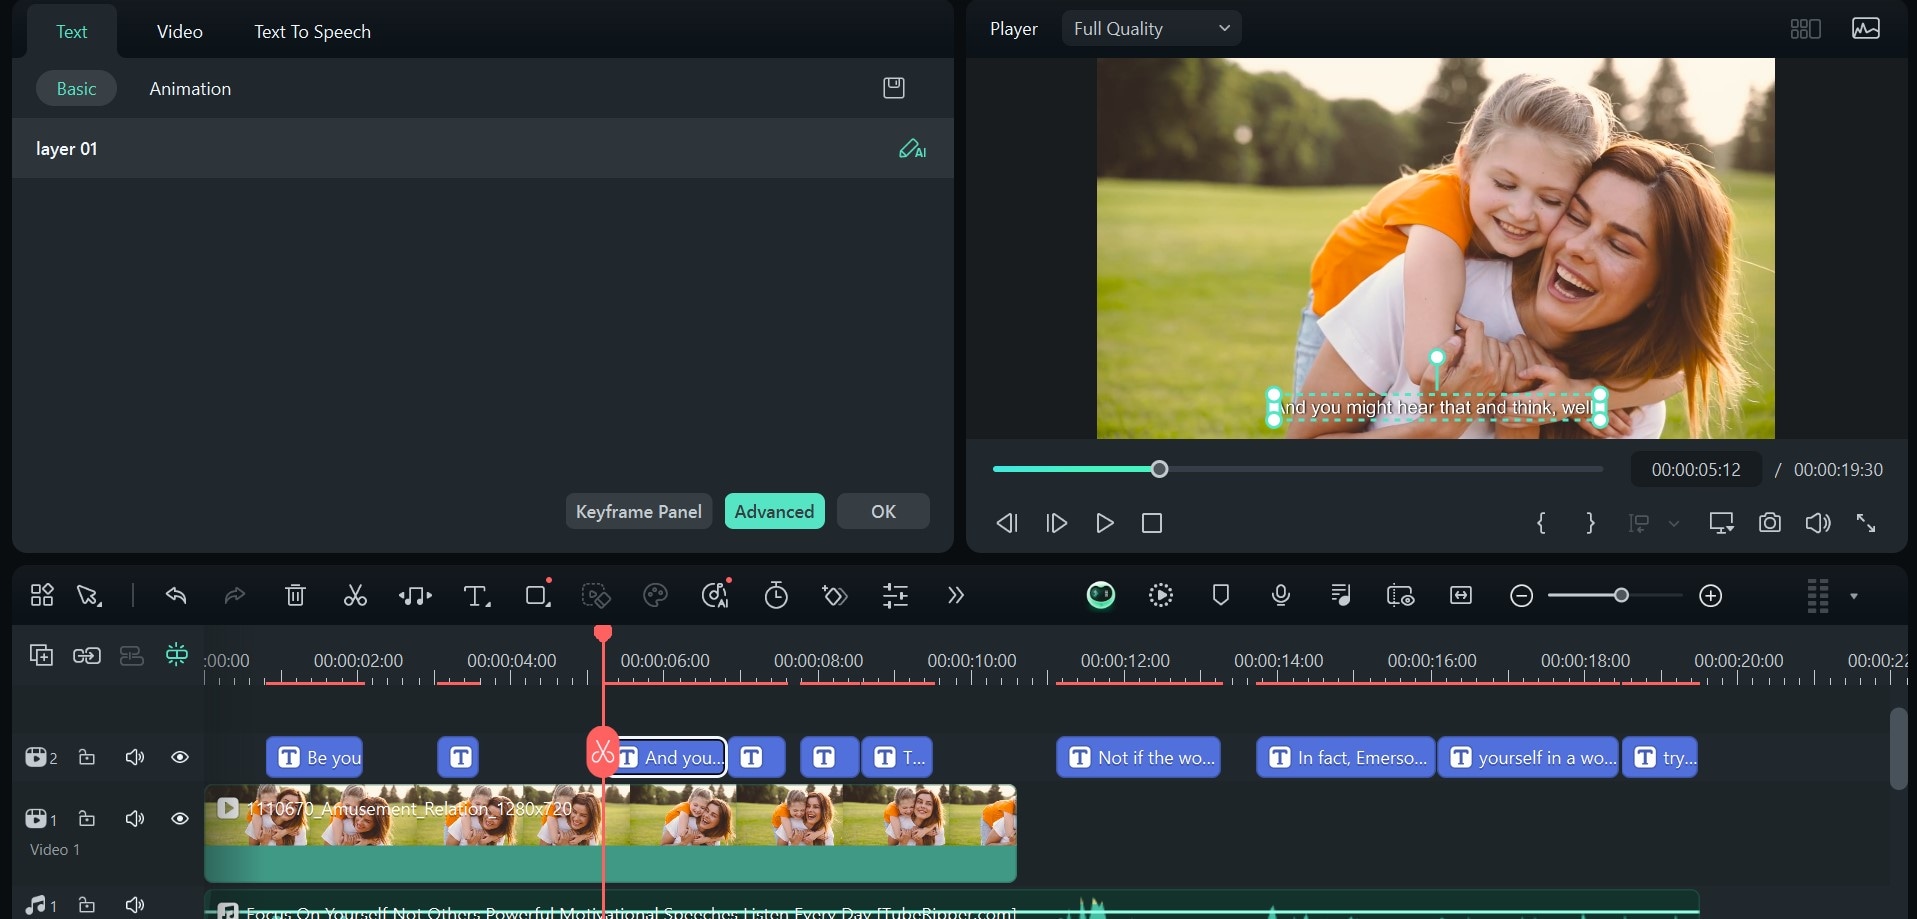
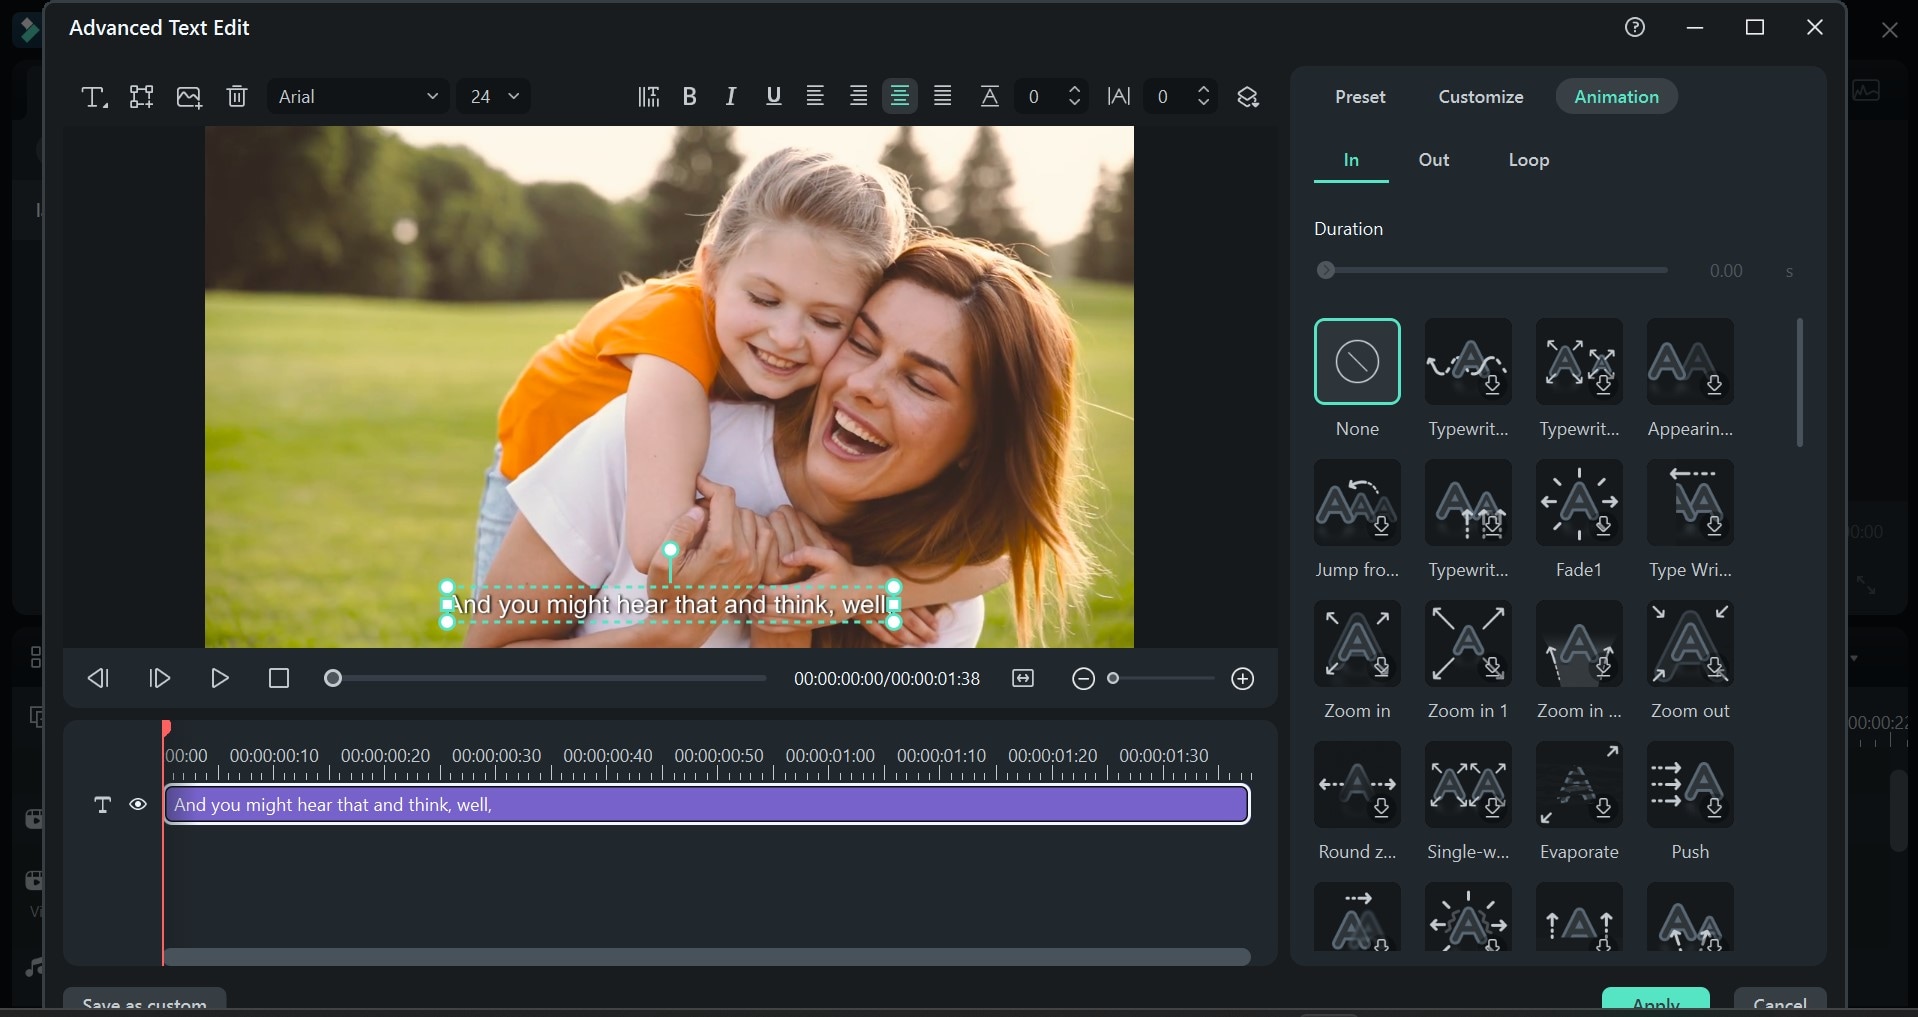
- To add transitions to your captions, double-click any of the subtitle clips on the timeline and click on Advanced Settings.
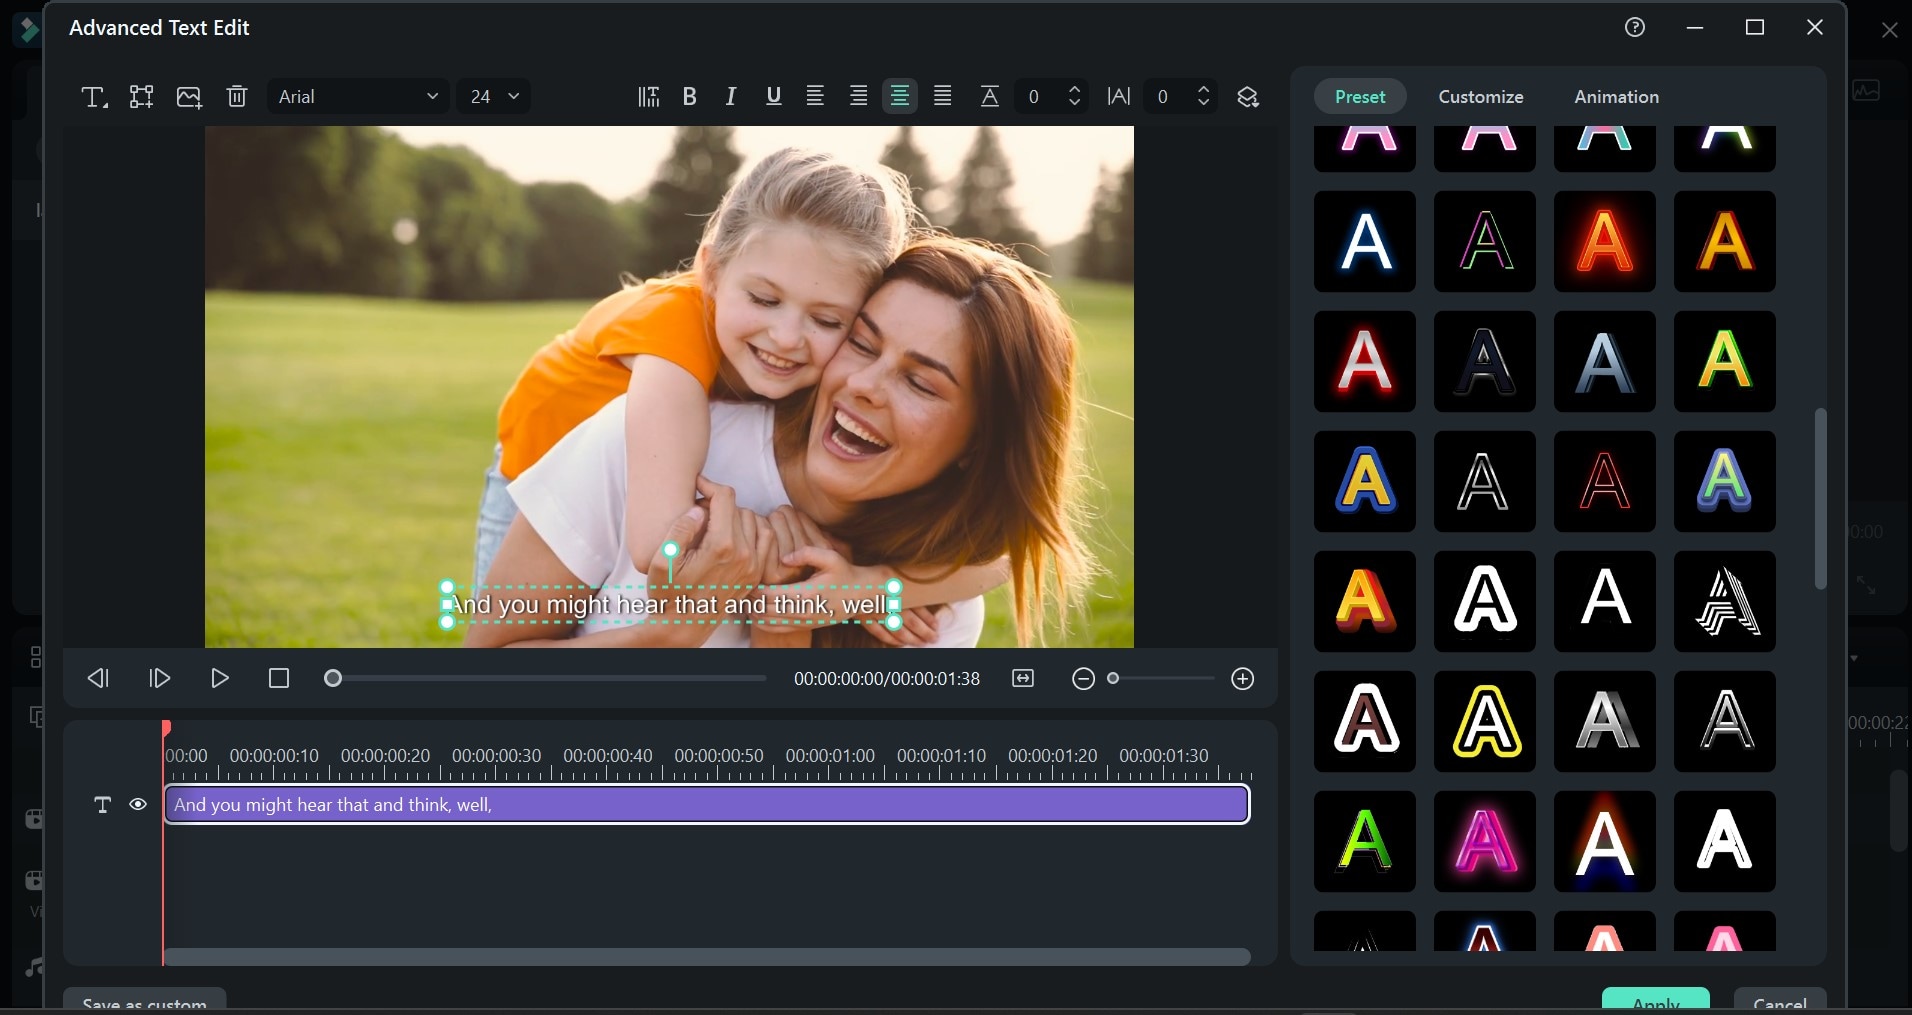
Change your text font style, size, and alignment on the toolbar above your video. You can also add images and shapes, adjust letter spacing, and rearrange objects on your screen using this toolbar.

- The Preset tab on the editor panel allows you to choose from Filmora’s text preset library. You can select and apply any preset that matches your video aesthetic.
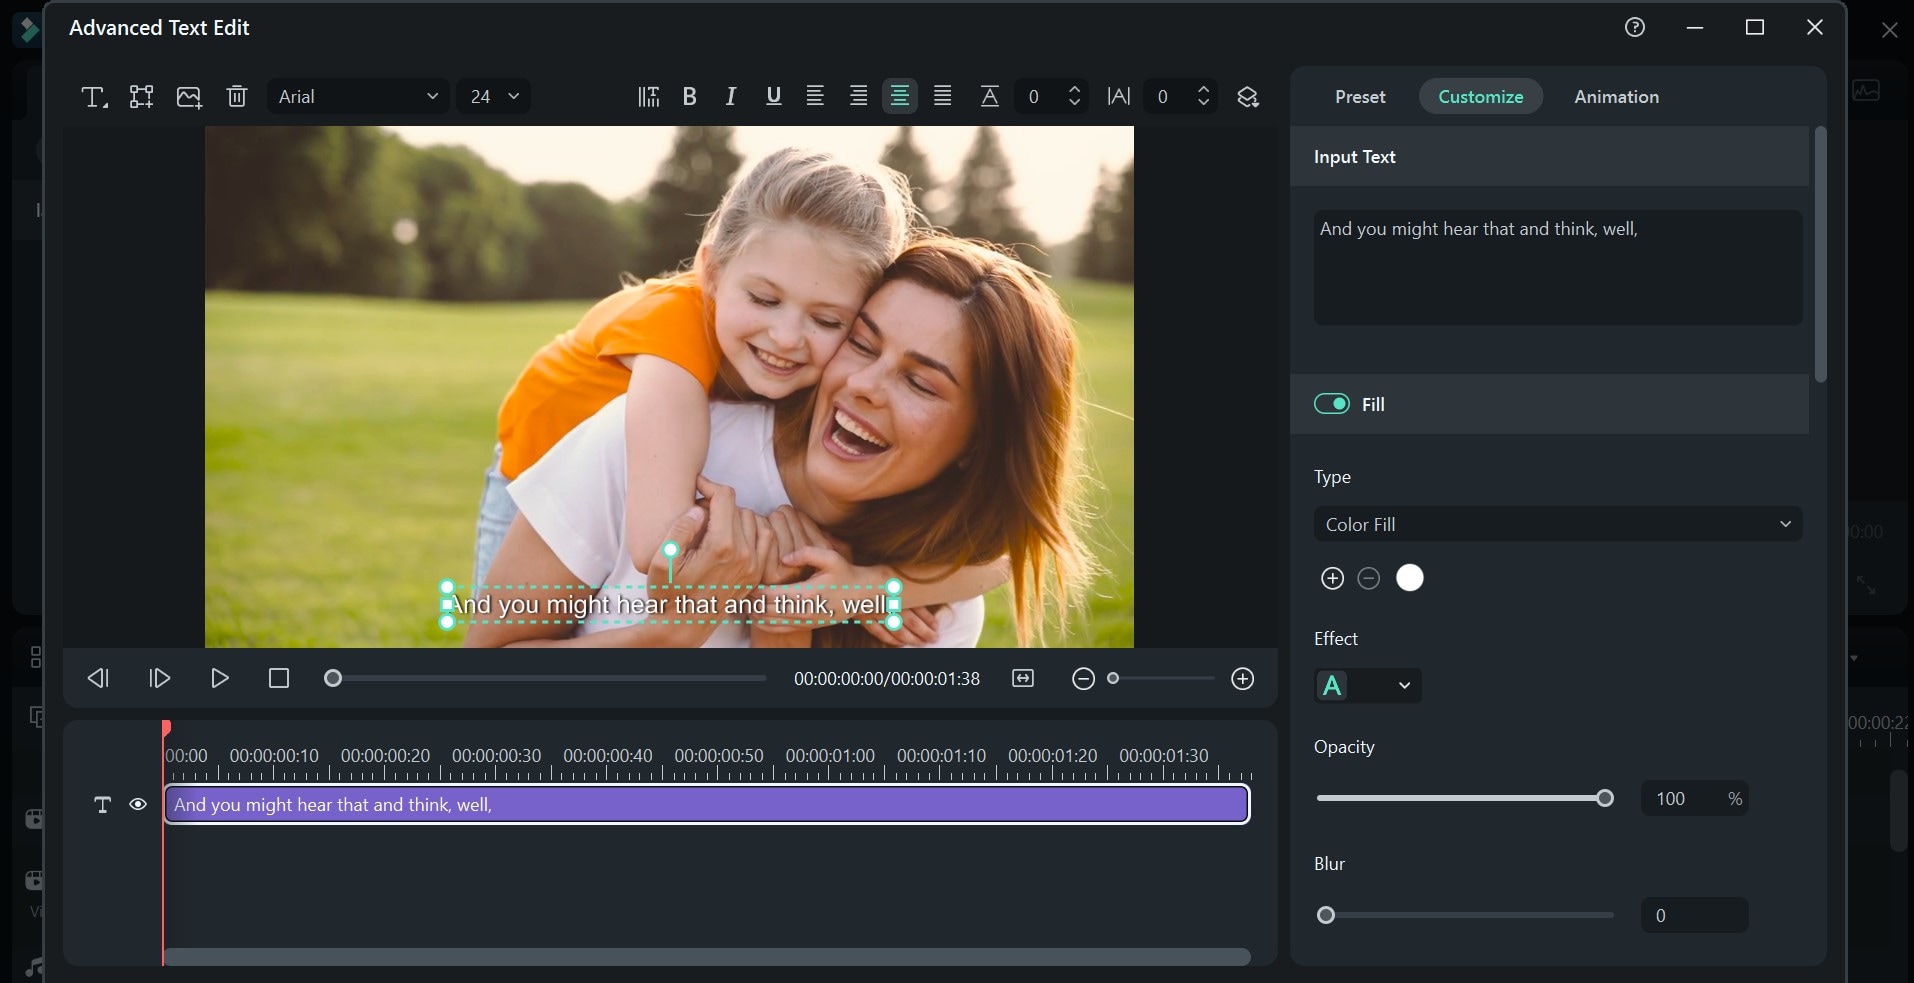
To customize your texts more, go to the Customize tab. Here, you can edit your subtitle text, select text effects, and adjust Blur, Shadow, and Opacity effects.
Adding text transitions also elevates your subtitle text. You can choose from over 100 transition styles and adjust your transition duration on the Animations tab.
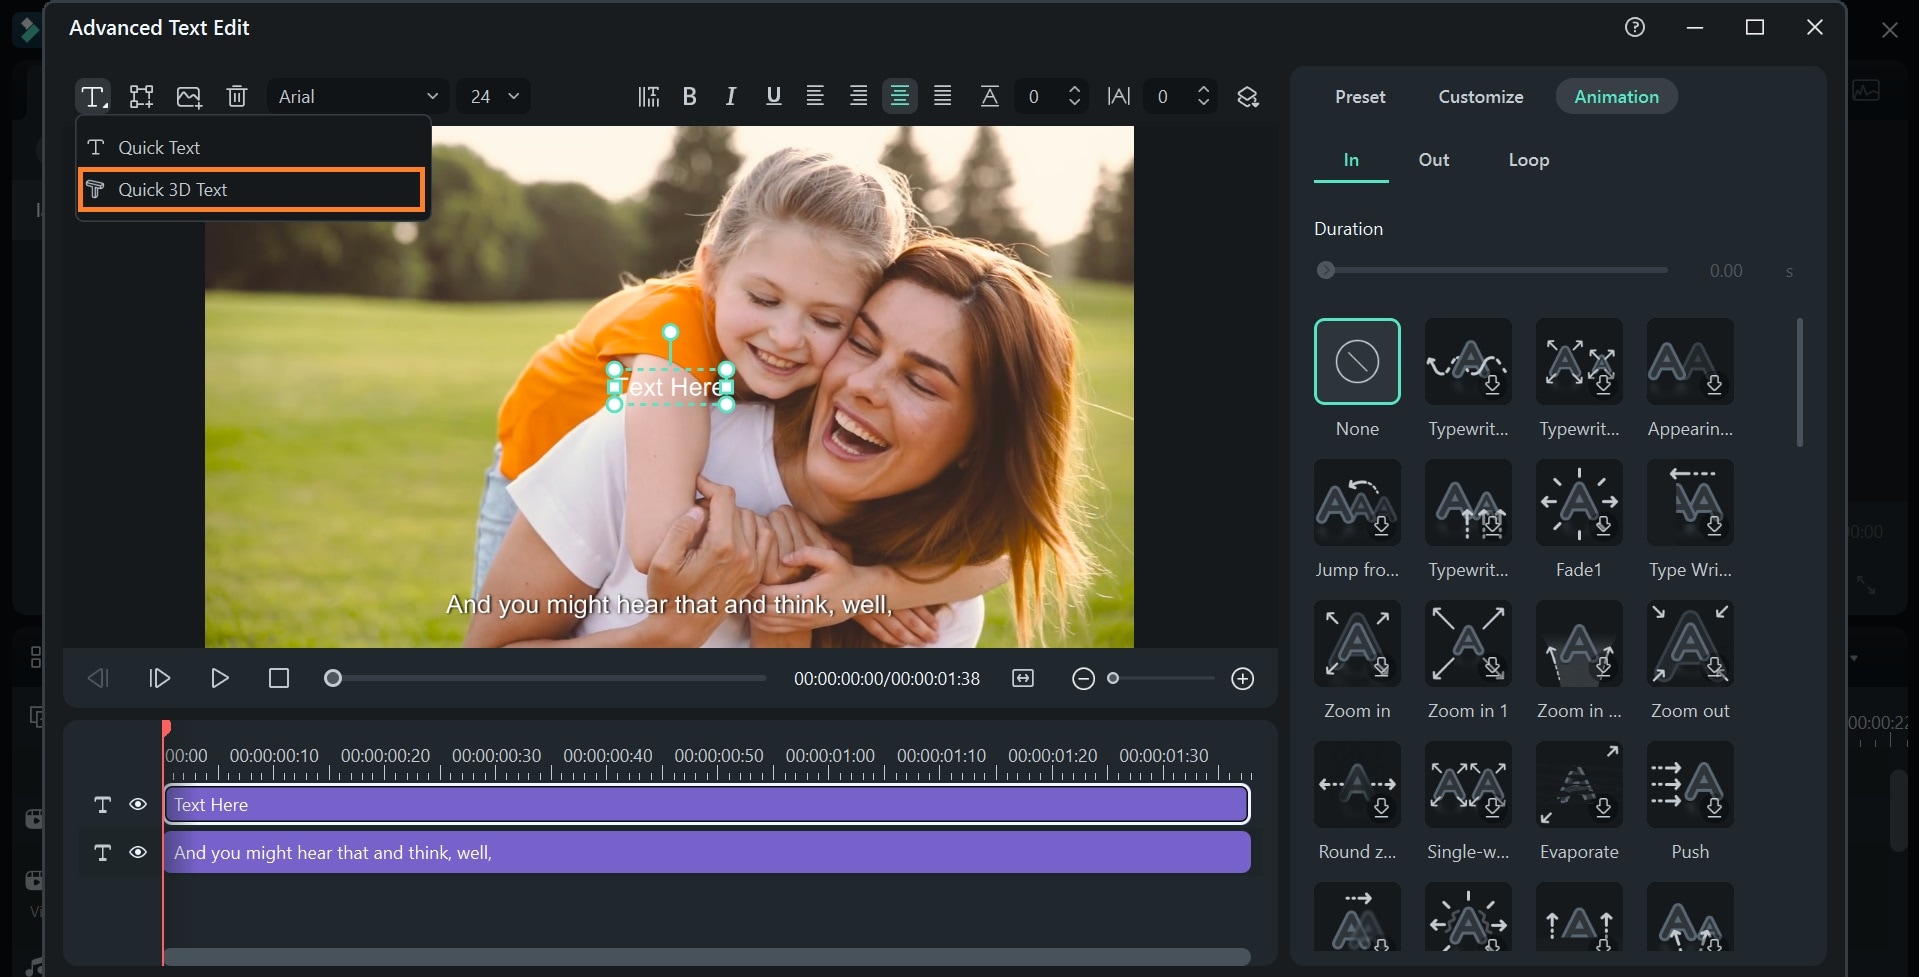
- Another way you can make your subtitles stand out further is by adding 3D text effects to your videos. Select the Text icon on the toolbar and click Quick 3D Text. A textbox will appear on your screen where you can type in and edit your desired text.
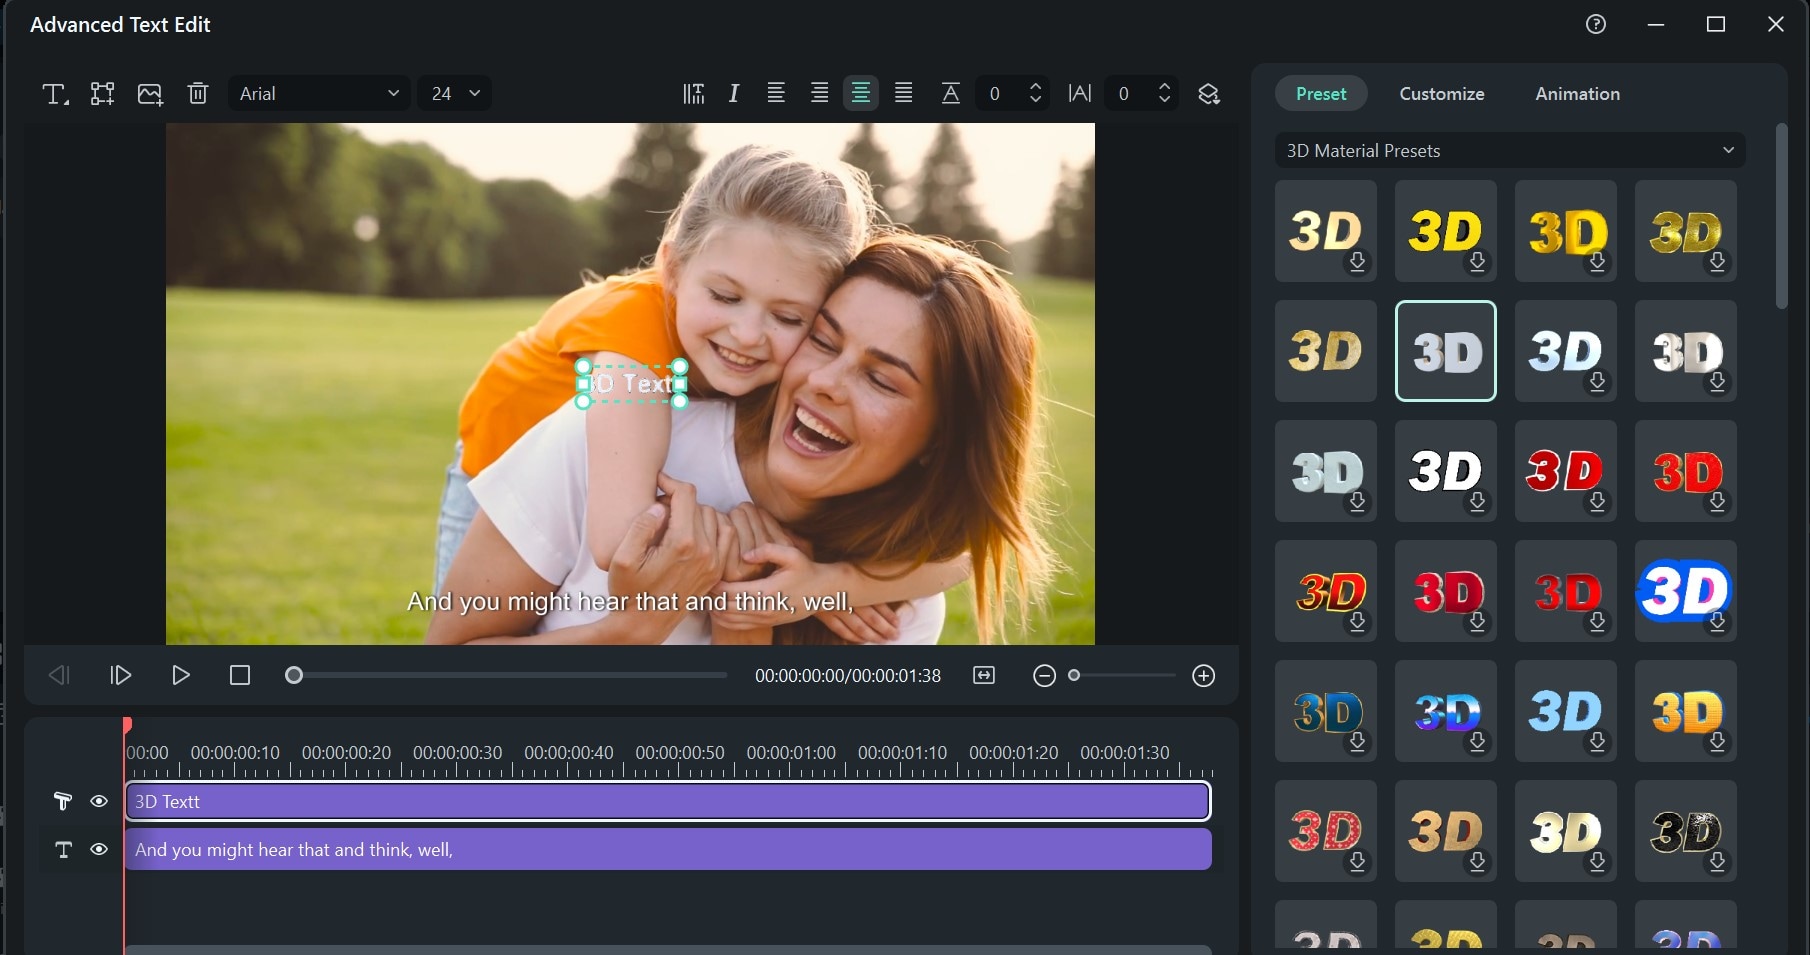
After inputting your 3D text, choose any 3D text preset from Filmora’s preset library.
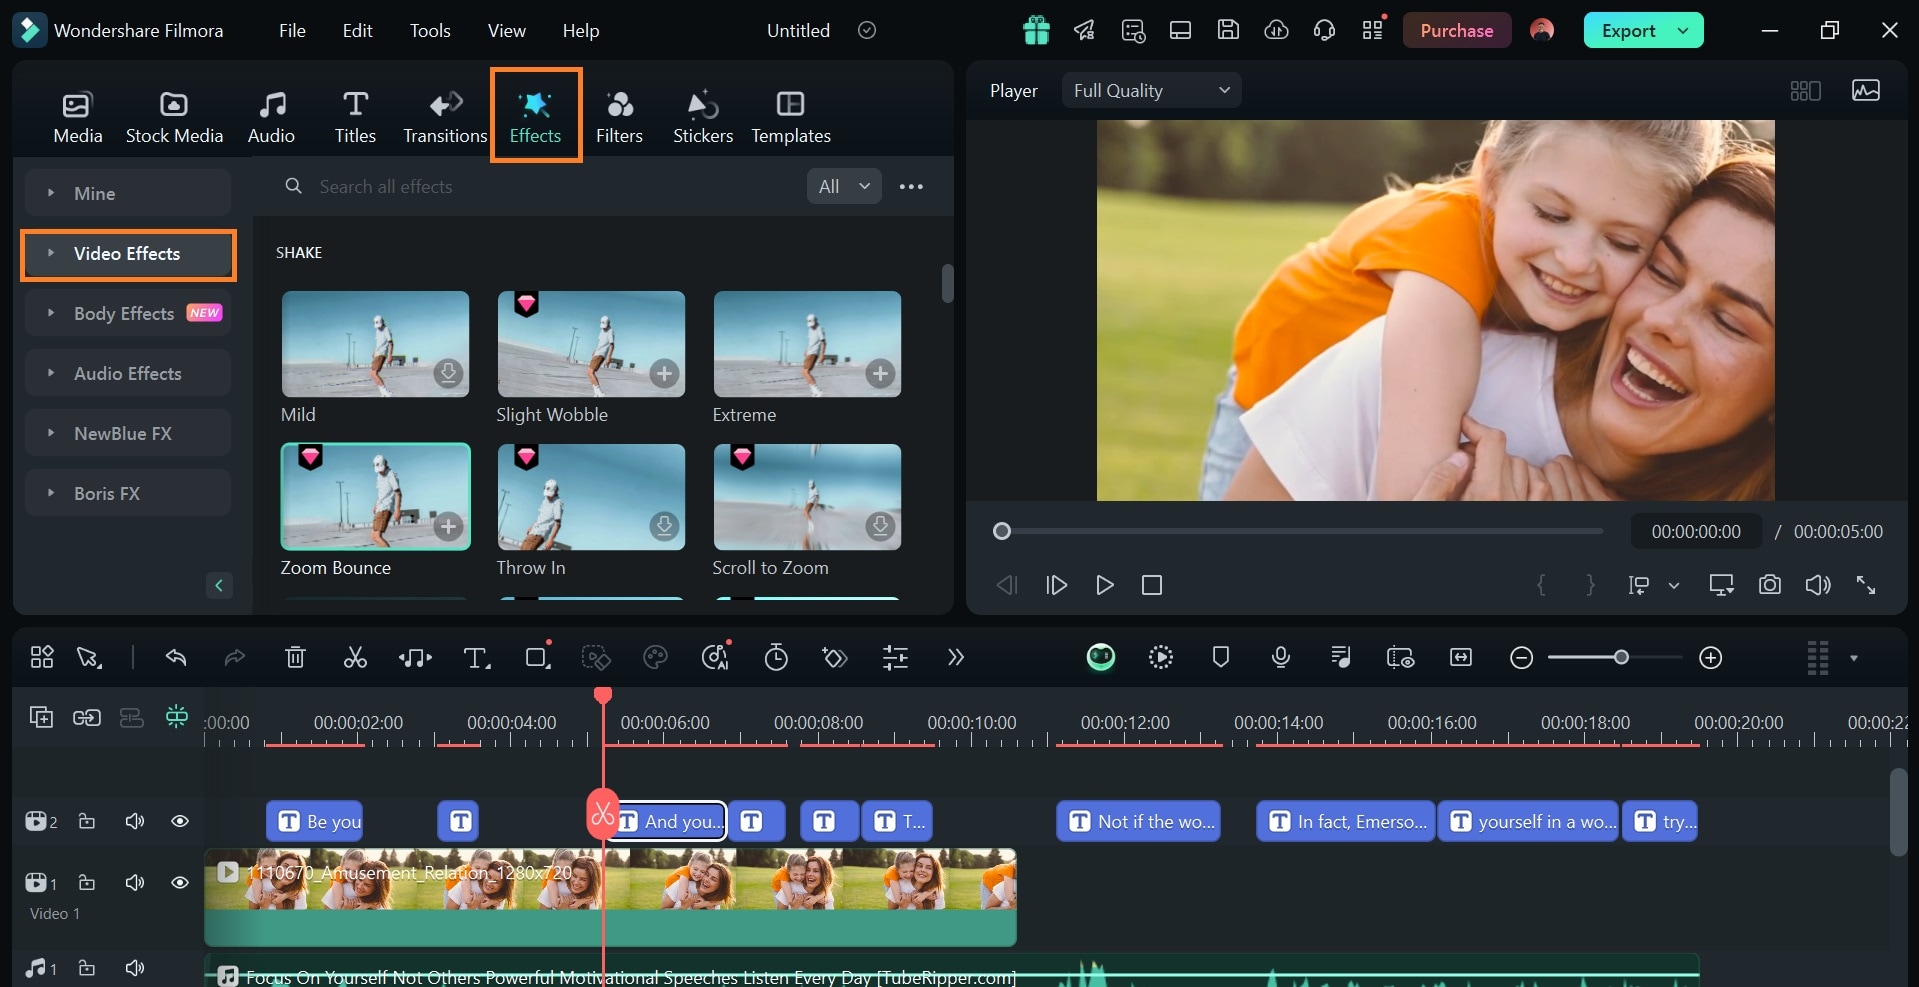
In addition to the various text effects and transitions, you can combine text effects with other video editing tools like video effects, split screen, or video transitions to create visually cohesive content.
- To apply a video effect, go to Effects > Video Effects, choose any effect that suits your video, and drag it to the timeline.
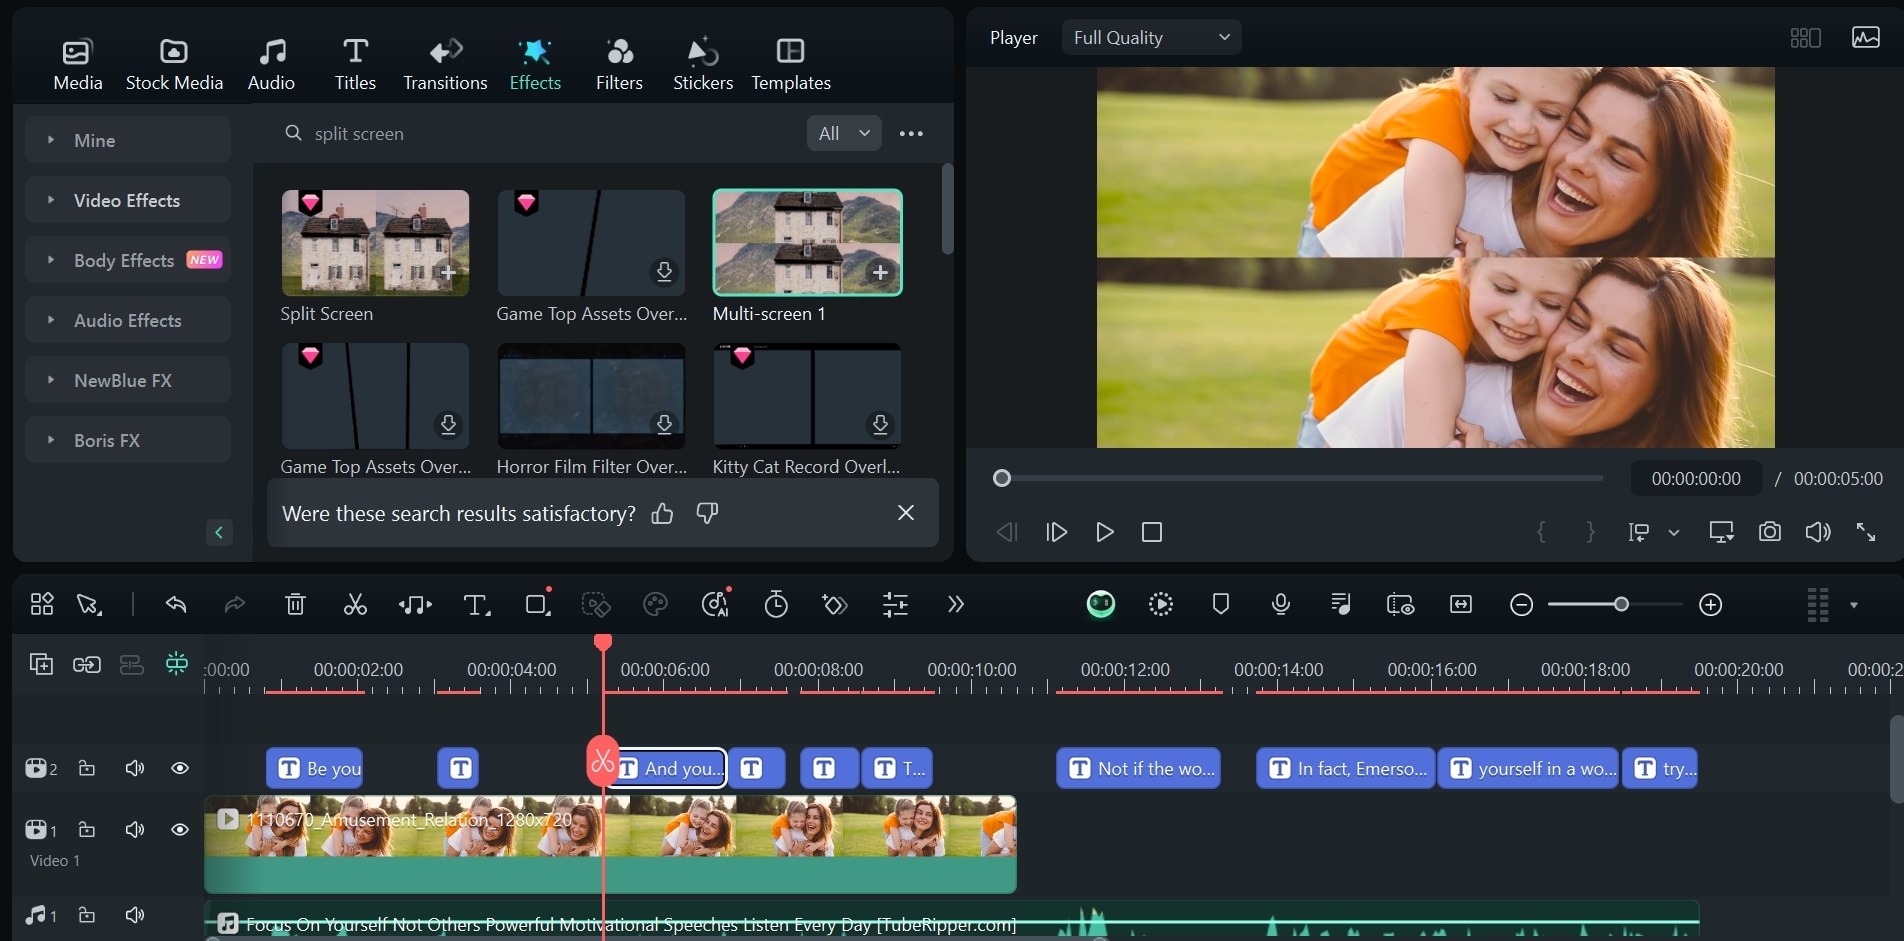
- For split-screen video, simply search split screen in the search bar. You will find different types of split-screen effects. Pick anyone that’s preferable and drag it to the timeline.
Ensure you position your video effects correctly on the timeline to ensure they apply in the specific parts of your video you want.
Whether you’re generating subtitles for accessibility or adding a personal touch to your content, Filmora ensures your subtitles are not just functional but also an integral part of your video’s storytelling.
Conclusion
Adding subtitles to Quicktime Player on Mac includes understanding how to work with compatible formats, converting several subtitle formats, and properly naming files. However, if you’re seeking a more streamlined and creative approach, Filmora offers a better and more flexible solution.
Filmora’s Speech-to-Text feature automates text transcription from audio and video clips. It comes with a text effects library and several customization options that add a distinct touch to your video content. This tool allows you to create, edit, and embed subtitles directly into videos and download subtitle files in .srt formats, eliminating the hassle of installing multiple tools and juggling from one tool to another. It allows you to do everything in one place.
Whether you choose to download compatible subtitle files for QuickTime or create subtitles with Filmora's STT feature, the goal remains the same—ensuring your videos are accessible and engaging.
