
 100% Security Verified | No Subscription Required | No Malware

Transition effects are a staple of the video editing industry. They are one of the rudimentary effects that every beginner or professional video editor must know. Instead of always cutting to the next scene abruptly, adding transitions makes the footage calmer and eases the viewer into the next scene.
Today, we will talk about how to add the transition effect in Adobe Premiere Pro, and we’ll also give you a better alternative. Stick around!
In this article
A Step-by-Step Guide on Adding Transitions in Adobe Premiere Pro
Let’s get right into the nitty gritty. To begin the process, open Premiere Pro on your desktop or laptop device and add two media files to the timeline.
There are a few ways to add transitions, so we will cover all available methods.
Method 1
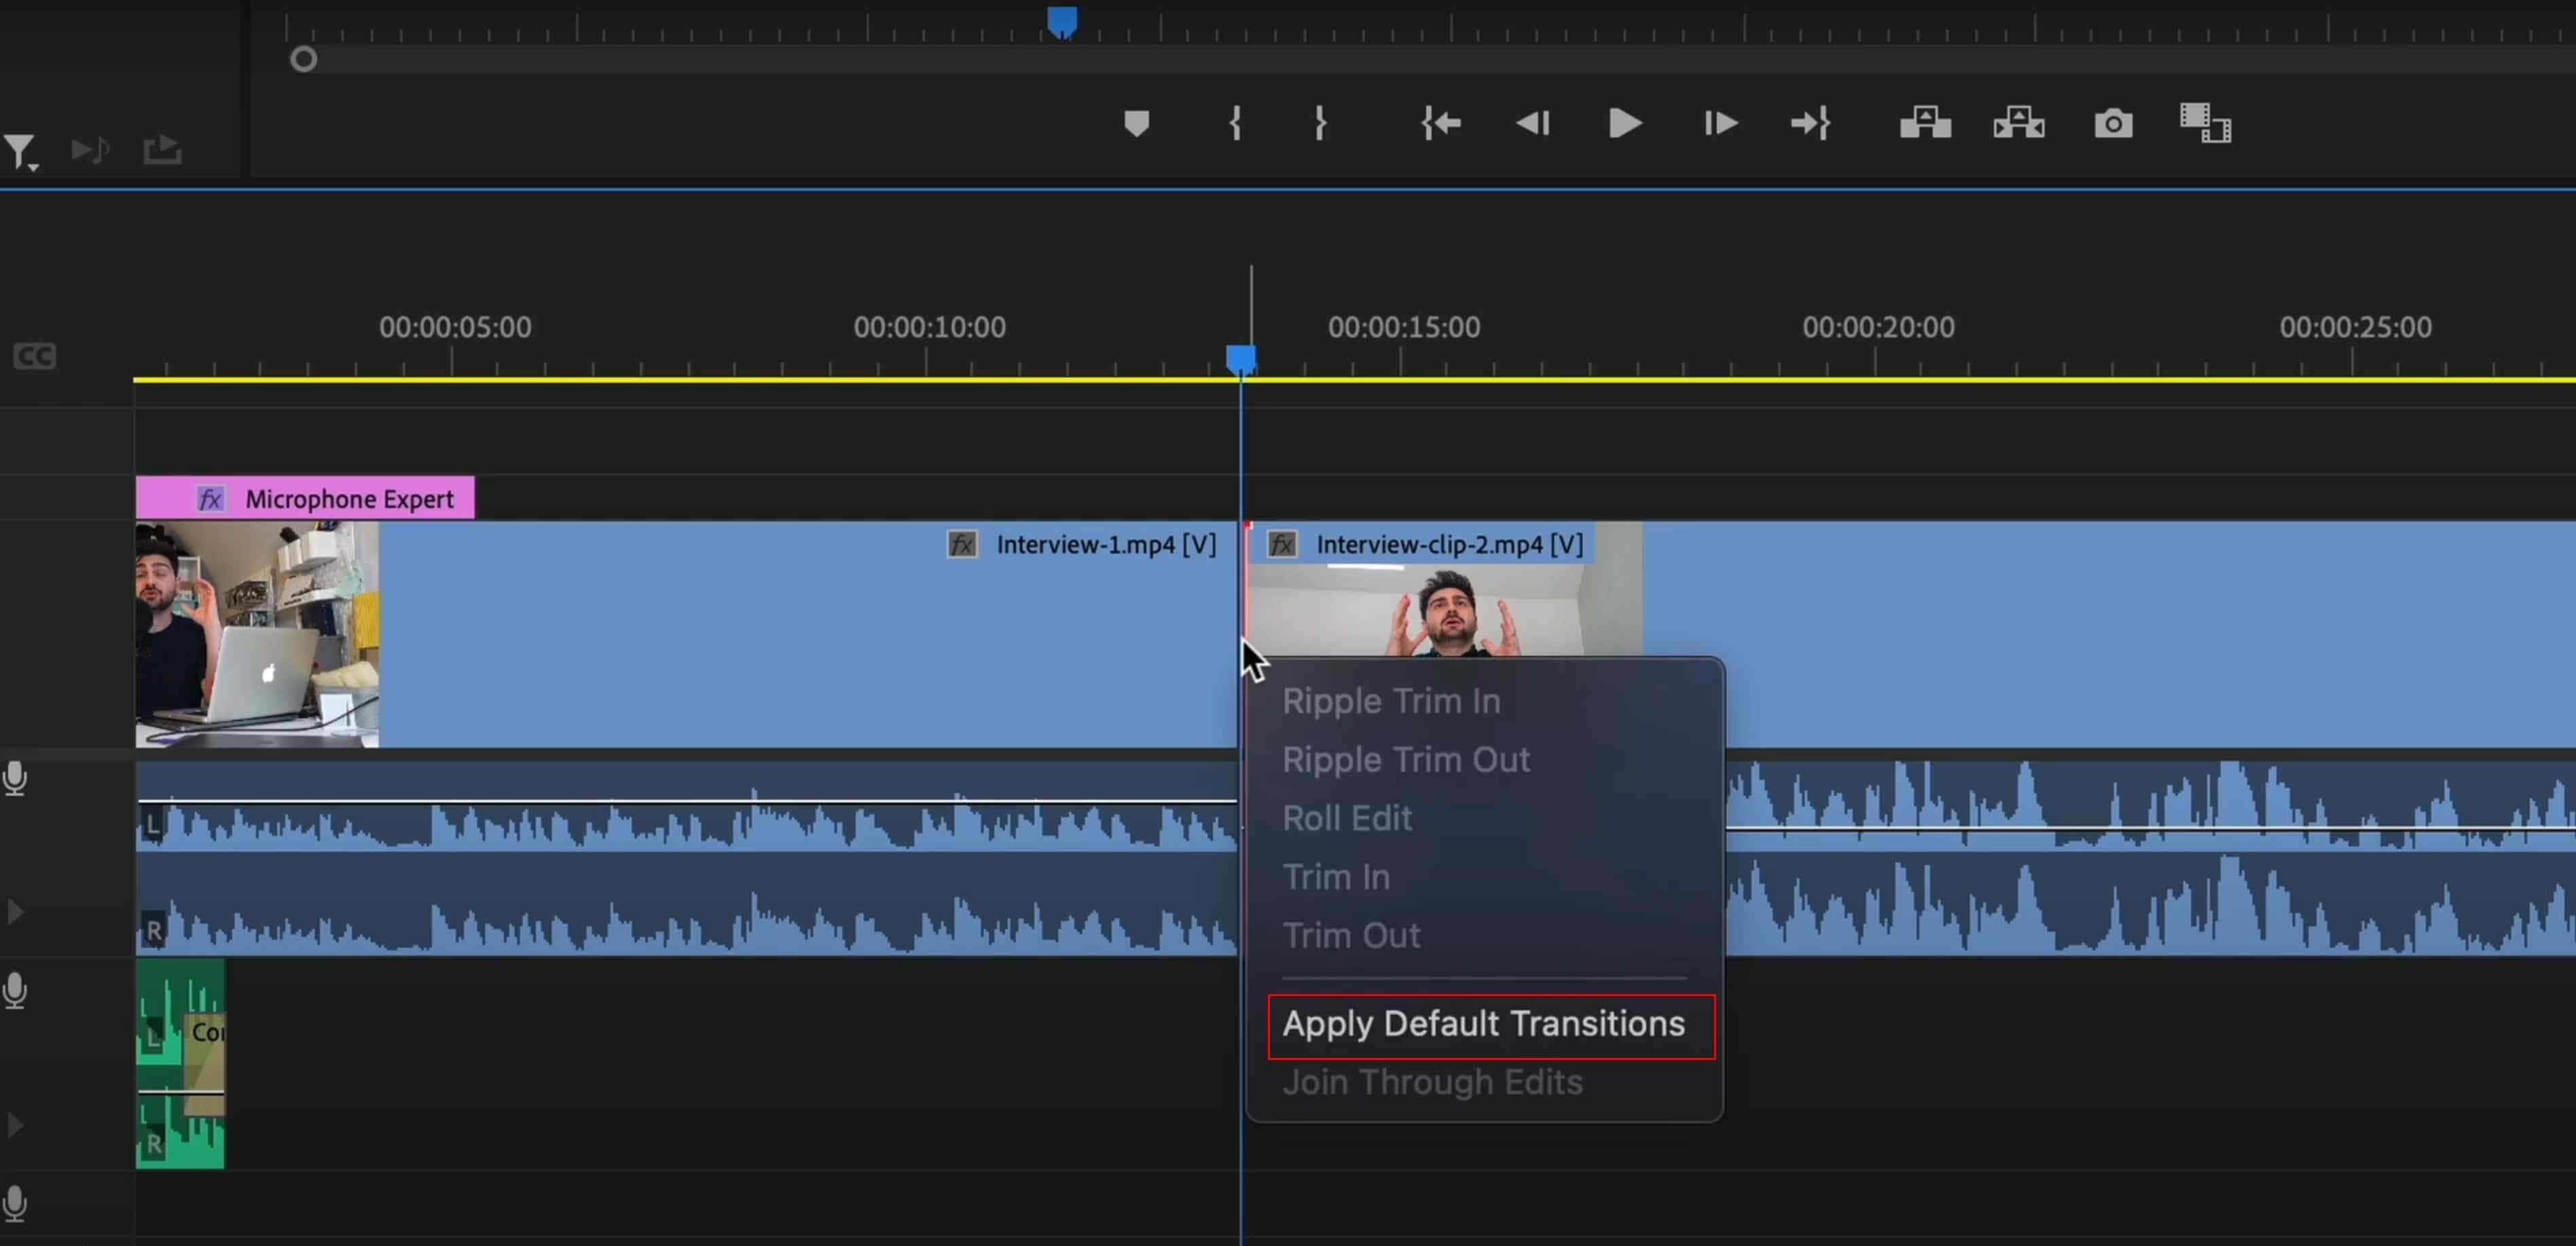
Right-click between two media files and click on Apply Default Transitions. This will generate a fast fade transition effect between the two videos or images.
Method 2
Step 1: Click on Effects in the lower-left quarter of the screen and click on Video Transitions.

Step 2: Select one of the offered transition effects and drag it to the appropriate frame in the timeline.

And there you have it. You have learned to add the transition effect in Premiere Pro. This really is easy, but that’s because adding transitions is so common in the video editing process. There are many other skills that you need to master if you want to use this tool like the pros.
But, there is a more intuitive alternative, as the title suggests.
Exploring A More Intuitive Alternative for Transitions - Wondershare Filmora

 secure download

When it comes to adding transitions, the process is as simple as it can be.
Download the installation file, complete the setup process, launch Filmora, and create a new project.
Step 1: Click on Import and add your videos and images. For this guide, we will use two video files.

Step 2: Drag the media files to the timeline and place them one after the other.

Step 3: Go to Transitions in the upper left quarter of the screen, browse through a wide selection of transition effects offered by the team at Wondershare, select the one you like, and drag it between the two media files.

That was as easy, and it does seem easier than Premiere Pro. Plus, with Premiere Pro, you get only a handful of transitions, whereas Filmora offers a whole lot of them. There are standard options, but also creative options if you are looking for something specific, all readily available out of the box.
You can search for a transition effect in the search box and choose from the provided results. Filmora also has very helpful AI features, and we will talk about a few of them in the following section.
Filmora Also Offers Powerful AI Features
When you are working on a video, you need many things. Music is one of them. Fast audio and video editing features are also essential. Filmora has cool shortcuts in each of these categories.
Generate Royalty-Free Background Music in Minutes
Having good music to accompany a video is crucial if you want your video to stand out. If you are tired of the same royalty-free music everyone is using, you can try and create something nobody has ever heard before with Filmora. Here’s how to do it.
Step 1: When you upload a video or image to the timeline, you can click on the Smart BGM Generation button in the toolbar.
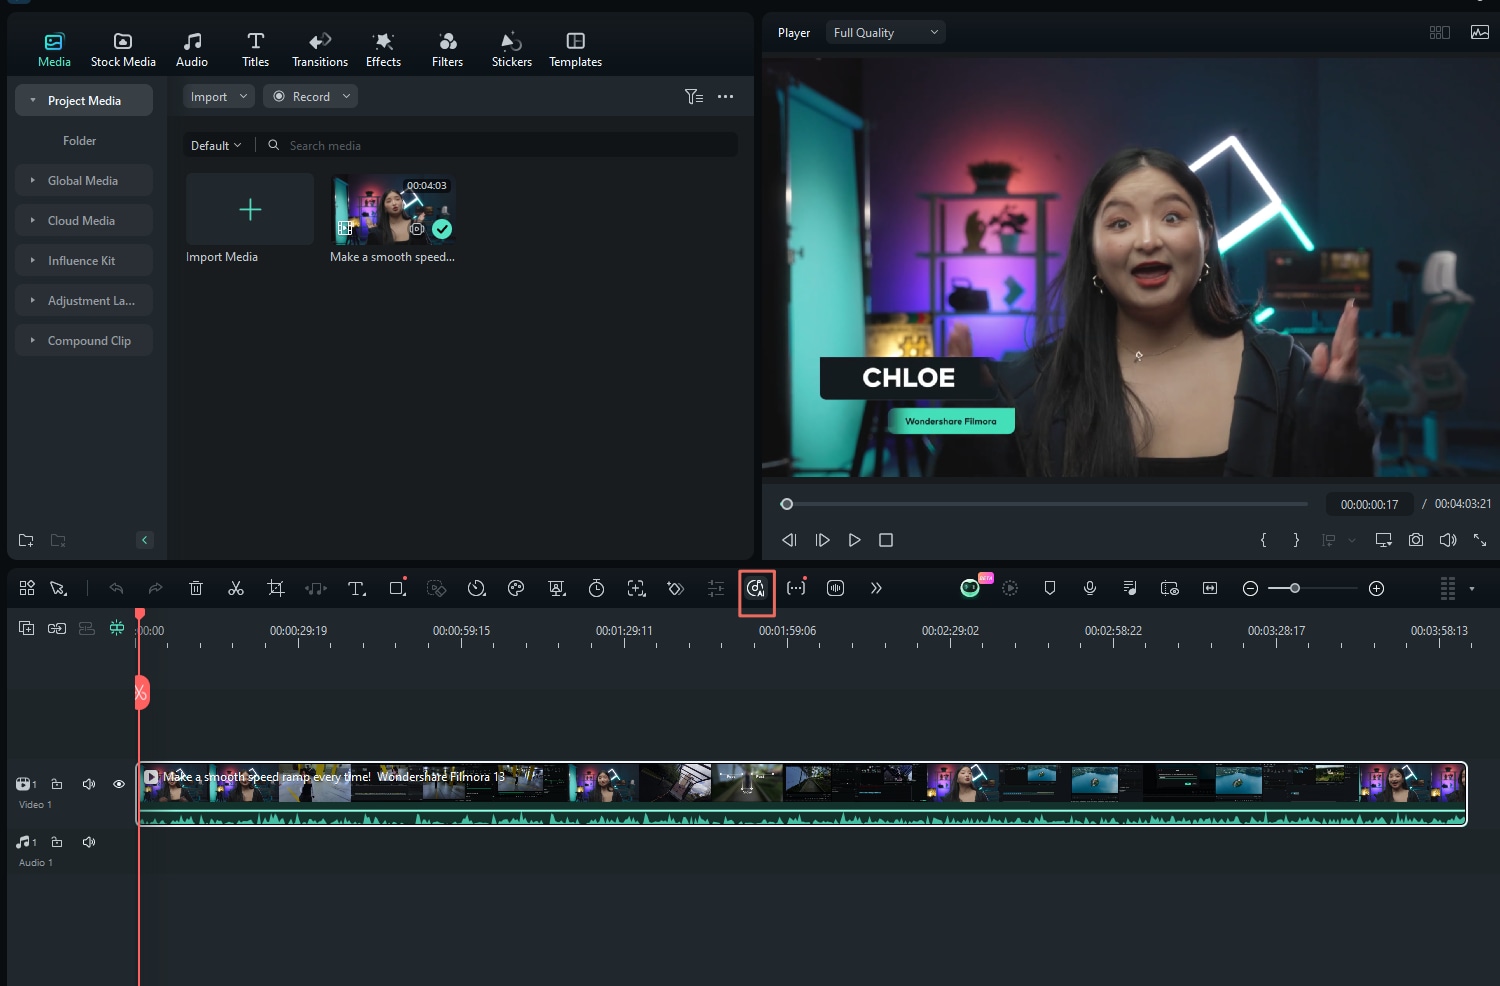
Step 2: A new window will appear where you just need to click on Create.

Filmora will work its magic, analyze your video, and create suitable background music in minutes.
Use AI to Enhance the Sound of People Talking
Filmora has the AI Voice Enhancer feature, which can be very useful if you happen to record the audio file in sub-par conditions. This tool will resolve the issue pretty fast. Here’s how to use it.
When you have an audio file in the timeline, simply click on Audio > Basic, and activate the AI Voice Enhancer feature.
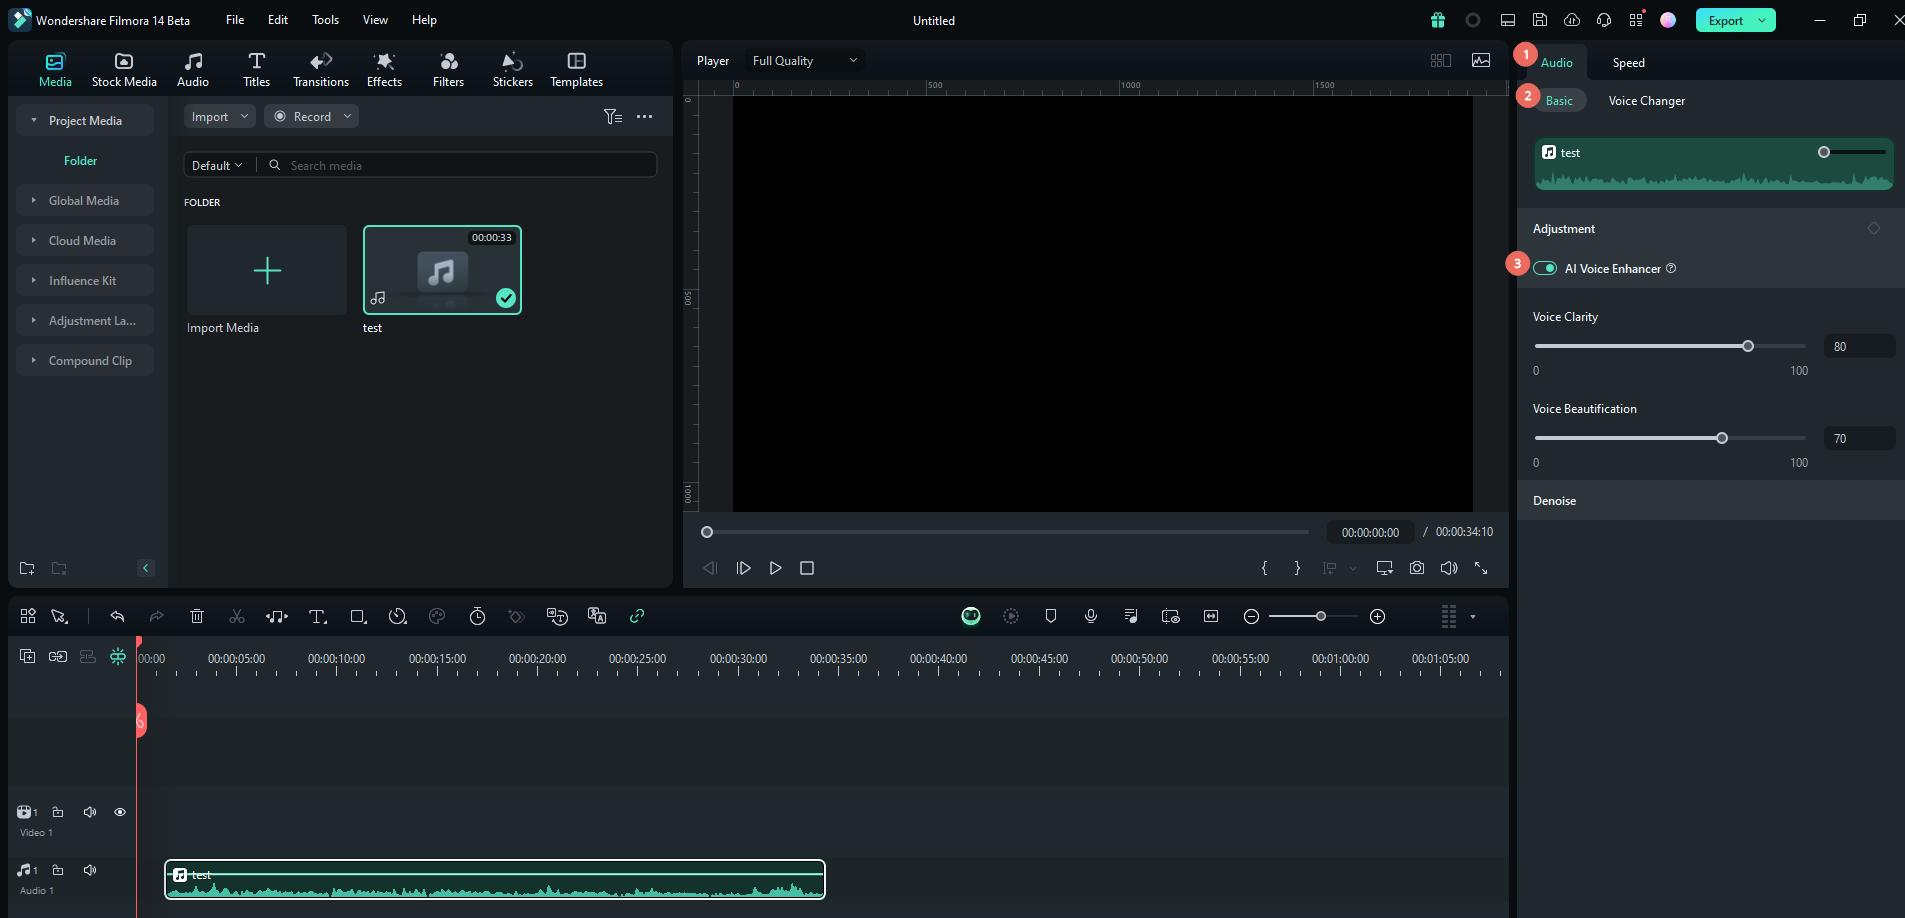
You can then adjust the Voice Clarity and Voice Beautification sliders.
Enhance the Quality of the Entire Video with AI
This AI feature is called AI Video Enhancer, and it does just that. Here’s how to use it.
When you click on the video in the timeline, focus on the right side of the screen. There, you will find the option to go to AI Tools, where you can see the AI Video Enhancer feature. Simply click on Generate.
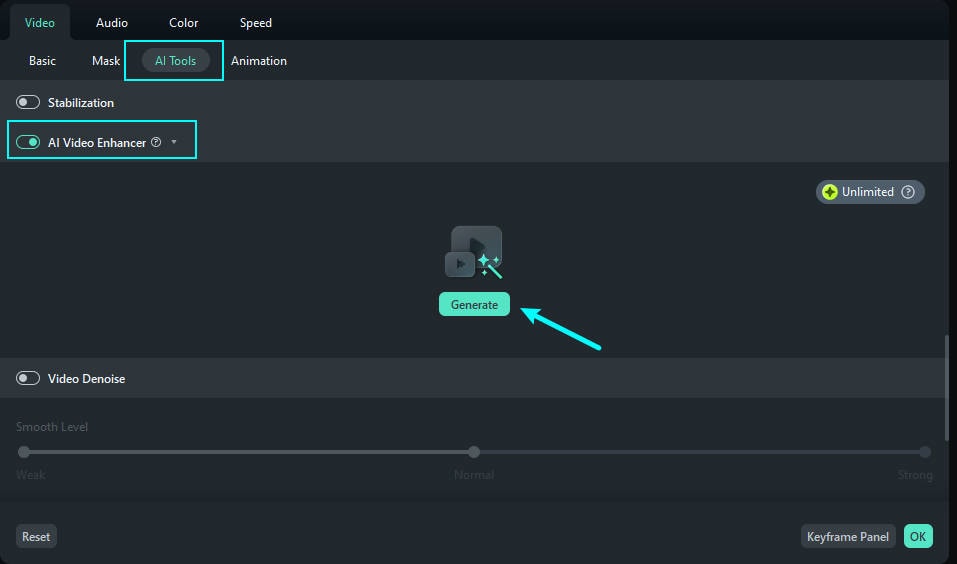
Wait for a while, and Filmora will analyze the video and enhance it by upgrading the resolution, clarity, and frame rate.
Conclusion
Adding transitions in Premiere Pro is easy, but exploring and learning the program can be challenging. That’s why we recommend that you give Filmora a shot. It can do just about anything Premiere Pro can, but it also comes with premade templates and effects that you can use from the get-go, and the AI features are simply too fun to play around with.
