
 100% Security Verified | No Subscription Required | No Malware

Video cutting is a key part of video editing, helping you remove unwanted sections, create specific clips, and polish your content for a better presentation. VLC Media Player is a popular choice for this task because it offers powerful video editing features and works on desktop and mobile devices.
However, if you're new to VLC, you might find it a bit overwhelming at first. But don't worry! This guide will show you exactly how to cut videos using VLC on both desktop and mobile apps, making the process simple and straightforward.
In this article
Part 1. What You Can Do with VLC
Formerly called the VideoLAN Client, VLC Media Player is a versatile and open-source media player with many features. Released in 2001, VLC has become one of the most popular choices for media playback and video editing. It is now available on various platforms, including Windows, macOS, Android, and iOS.
Moreover, VLC Media Player is run by a non-profit organization that relies on user donations (which you can make on their website). This helps keep VLC free and open-source for everyone. Besides cutting videos in VLC, here's what else you can do with this media player:
- Play Various Media Formats: VLC supports almost all audio and video formats, including MP4, AVI, MKV, MP3, and more, without needing additional codecs.
- Convert Media Files: Easily convert media files from one format to another using VLC's built-in conversion tools.
- Edit Videos: Trim and cut video files directly within VLC, allowing for simple video editing without additional software.
- Add Subtitles: Load and synchronize subtitles for videos, and adjust subtitle settings for better readability.
- Record Desktop: Record your desktop screen and save it as a video file, useful for creating tutorials or recording gameplay.
- Stream Media: Stream videos and audio from various sources over the internet, such as online radio or live video streams.
- Adjust Playback Settings: Customize playback settings including speed, video and audio effects, and audio synchronization to enhance your viewing experience.
Part 2. How to Cut Videos on VLC Desktop Devices
As previously mentioned, VLC Media Player is available for desktop users on various operating systems, including Windows, macOS, and Linux. This means users on any of these systems can use VLC to cut and edit videos. Among several benefits of using VLC on a desktop for video editing, here are some of them:
- Larger Screen and Interface: A desktop offers a bigger screen and clearer tools, making it easier to see and manage your video clips.
- More Powerful Performance: Desktops usually have better processing power and memory than mobile devices, which helps make video editing faster and smoother.
- Enhanced Control: VLC's desktop version provides more advanced tools and options for precise video cutting and trimming.
- Better File Management: Using a desktop makes it easier to organize and access your video files and other resources.
Now that you know the benefits of using desktop devices for video editing and cutting, it's time to put that knowledge into practice. Follow this step-by-step guide to cut an MP4 video using VLC on a Windows desktop:
- Step 1. Install VLC and upload your video
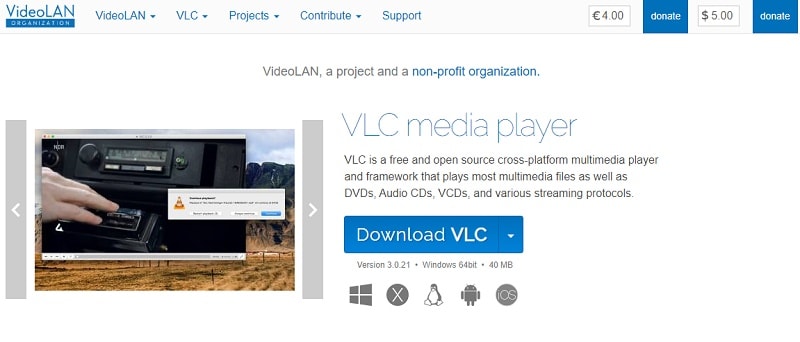
If you haven't already, download and install VLC Media Player from the official VLC website. After that, follow the installation process and double-click on the program to launch VLC Media Player on your Windows desktop.
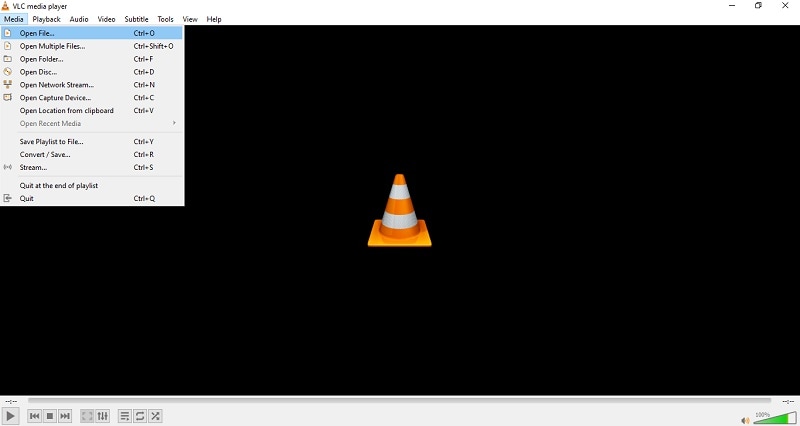
Click on "Media" in the top menu. Then, select "Open File..." and browse to the MP4 video you want to cut. Click "Open" to load the video into VLC.
- Step 2. Find recording controls
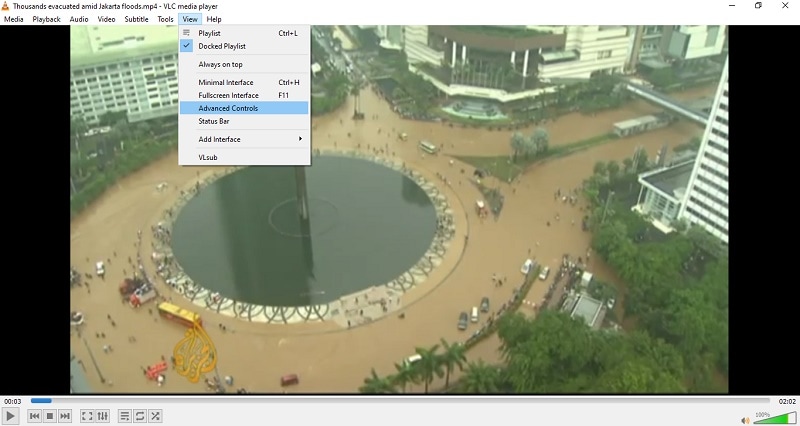
Go to "View" in the top menu and select "Advanced Controls". This will add extra buttons and the recording controls will then appear in the interface.
- Step 3. Cut your videos
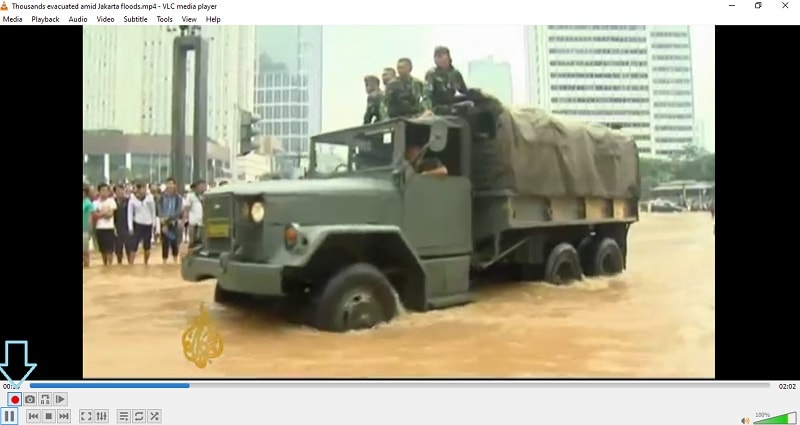
Play the video and pause it at the point where you want to start cutting. Then, click the "Record" button (a red circle) to mark the beginning of your cut. Continue playing the video until you reach the point where you want to end the cut. Click the "Record" button again to stop the recording. VLC will save the cut portion as a new file.
The new video file will be saved in your "Videos" folder by default. You can find it by navigating to This PC > Videos in File Explorer.
Part 3. Can You Cut Videos Using VLC on Mobile Apps?
Thanks to its versatility, VLC Media Player is also available for mobile devices such as Android and iOS. This means you can edit your videos not only on desktops but also directly from your smartphone or tablet. Here are some of the benefits of using VLC on mobile apps for video editing:
- Portability: You can edit videos on the go, anywhere and anytime, without being tied to a desktop.
- Convenience: Mobile apps offer the ease of editing videos directly from your phone or tablet, making it simple to manage and adjust your videos quickly.
- Touch Interface: Editing on a mobile device allows for intuitive touch controls, making it easy to trim and cut videos with gestures.
- Immediate Access: Edit videos directly from your mobile device's gallery or camera roll, saving time and effort in transferring files.
Unfortunately, the VLC Android app does not include the ability to cut video files. But don't worry—Google Photos lets you edit videos with effects, filters, and more right from your mobile device. Here's a simple step-by-step guide for cutting an MP4 video using the mobile app on Android:
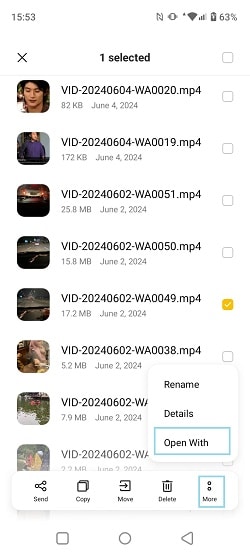
- Step 1. Open the video you want to edit
Open "File Manager" and locate the video you want to edit. Press and hold the video until the "More" option appears at the bottom of your screen. Select "Open With" and choose Google Photos.
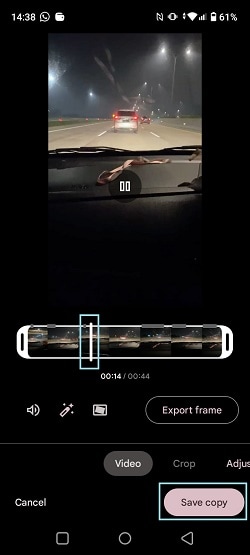
- Step 2. Edit your video
Once your video starts playing, tap the "Edit" button. To cut the video's length, drag the white bars at the start and end to adjust. To save your edited video, tap "Save copy" at the bottom. The trimmed video will be saved as a new file in your default video folder or a location you choose.
Part 4. Alternative to Cutting MP4 Videos: Wondershare Filmora
The lack of video-cutting features in the VLC app for Android can be a key factor in someone's decision when choosing a video editing app. If VLC doesn't fulfill your video-cutting needs, Wondershare Filmora is a great alternative for more advanced editing.
In addition to its desktop and mobile apps for video cutting, Filmora’s easy-to-use interface is perfect for beginners, allowing you to start editing immediately without a steep learning curve. Filmora also offers powerful tools like Scene Detection and Quick Split Mode, providing the precision needed for detailed video cutting and trimming.


Here's a step-by-step guide on how to use Filmora to cut out part of a video:
- Step 1. Install Filmora and upload your video
First, make sure you have the latest version of Wondershare Filmora installed. Then, open Filmora, start a new project and import your videos. Next, drag and drop the videos onto the editing timeline using your mouse.
- Step 2. Cut you video
Next, select the video in the timeline, position the playhead at the point where you want to cut, and click the scissors icon above the timeline to split the video into two clips.
Alternatively, you can cut the video using the Split option. Select the video, move the playhead to the point where you want to split, right-click, and choose "Split" from the context menu.

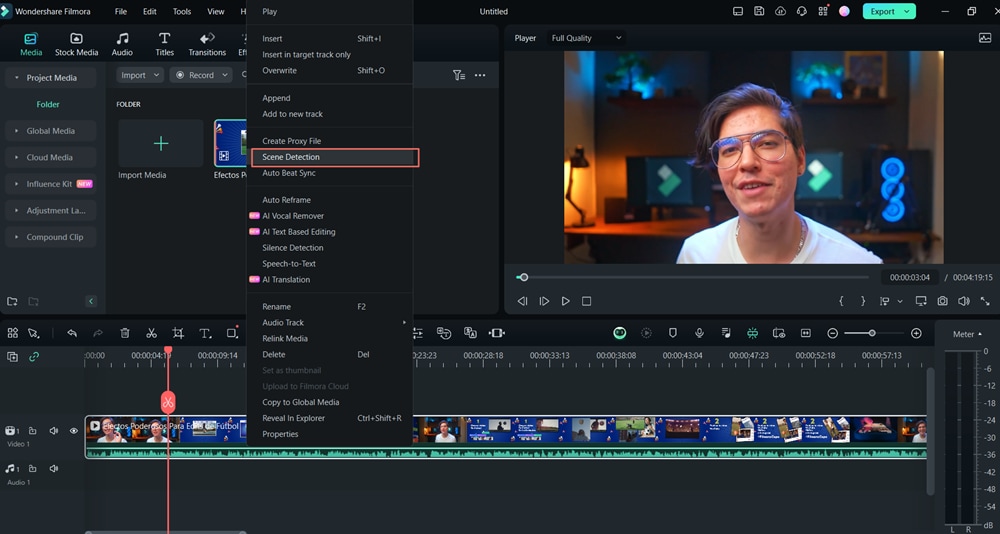
- Step 3. Use scene detection as another option
You can also use Scene Detection to simplify your video editing. This feature in Filmora automatically splits your video into segments by detecting changes between shots. It helps you manage large videos more easily by breaking them into shorter clips, so you don't have to edit frame by frame.
To use Scene Detection, right-click on your video in the editing timeline and choose the "Scene Detection" option.
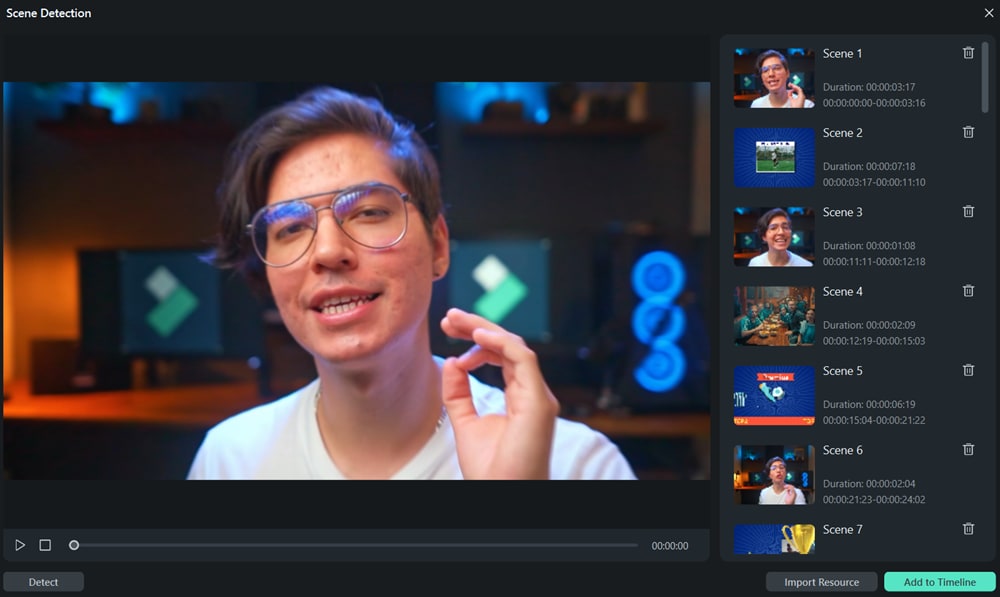
- Step 4. Automatically detect all scenes
A pop-up window will appear; click "Detect" to quickly divide the original file into smaller segments.
You can double-click on each segment to preview it. If you're happy with the results, click "Add to Timeline" to place all the segments onto the video track on the timeline.
Conclusion
VLC Media Player is a popular choice for video cutting due to its ease of use and compatibility with both desktop and mobile devices. And this article has explored various features of VLC and discussed the benefits of using it on both desktop and mobile platforms.
Unfortunately, the VLC app for Android doesn't have video-cutting features. But if you need more advanced cutting tools, Wondershare Filmora is a great alternative. Filmora includes features like Scene Detection and Quick Split Mode, which offer the precision needed for detailed video editing.
Overall, Filmora's combination of user-friendliness, advanced features, and cost-effectiveness makes it a top choice for cutting large video files and handling a variety of video editing tasks.
