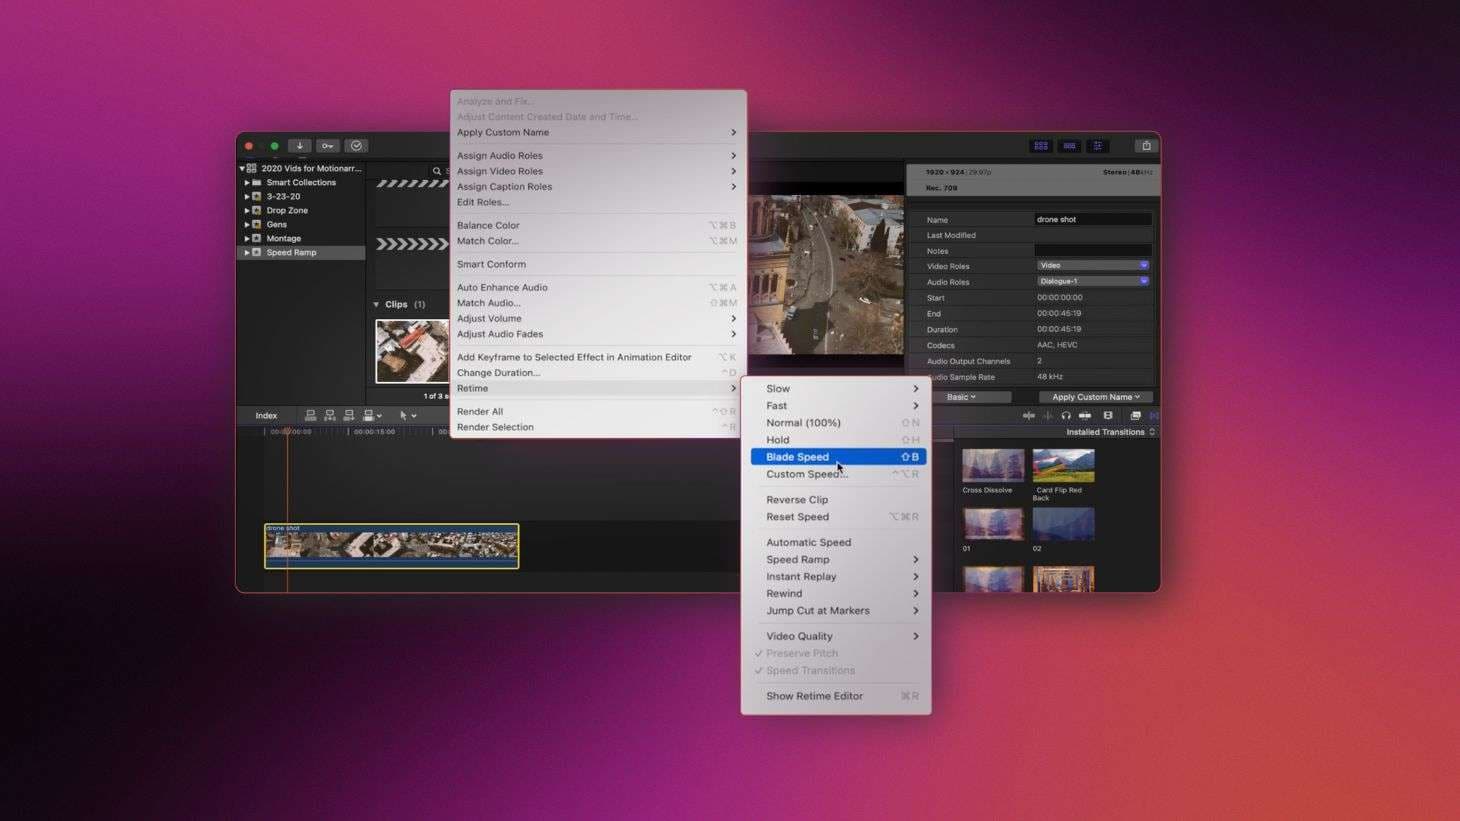
Apple’s Macs have long been recognized as video editing powerhouses due to their highly efficient yet mighty hardware. The company’s closed-source software approach has also led to the creation of dozens of great tools, including Final Cut Pro X (FCPX), whose set of editing features is renowned.
One of these features is the speed ramp in FCPX, which is also the topic of our discussion today. Stay around; we’ll delve deeper into FCPX speed ramping, show you how to use it, look into its downsides, and present a powerful video editing alternative you might like even more. Let’s dig in.
In this article
What Is Speed Ramping in FCPX?
In most video editing apps, including FCPX, speed ramping refers to dynamic adjustments to the speed of a video. With this technique, video editors can ramp up the speed of their clip’s less important segments or gradually slow it down to create dramatic effects and emphasize the video’s most essential moments.
How to Use a Speed Ramp in FCPX
Applying a speed ramp in FCPX lets you vary your footage’s speed and creates a dynamic visual effect that makes your videos more professional. You can use it by following these simple steps:
Step 1: Launch Final Cut Pro X on your Mac and create a new project or open an existing one. Then, import the video to which you want to apply speed adjustments.
Step 2: Add the imported media into the Timeline and click on it to select it.
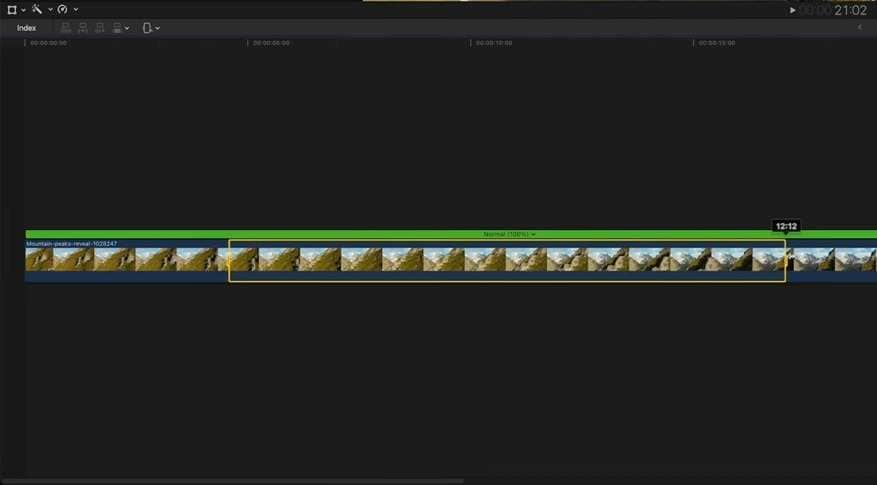
Step 3: Press the R key on your keyboard and drag over the part of the clip to select a segment.
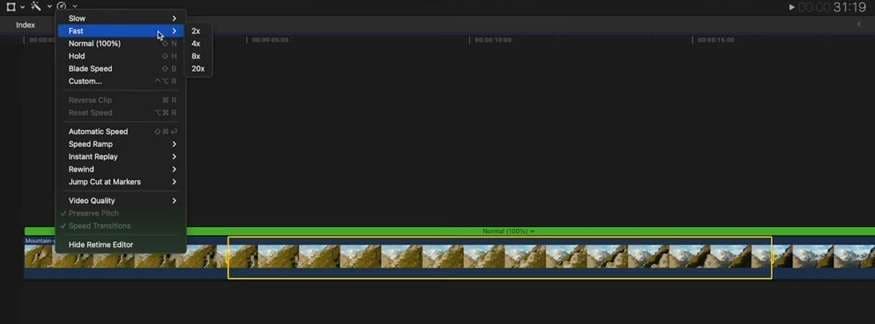
Step 3: Tap the Retime icon (the third icon in the top left of the Timeline) and choose one of the options depending on whether you want to speed up the clip segment or slow it down.
Step 4: Applying a specific Retime setting will create an inner video section with your speed option. You can drag the mark in and out buttons depending on how fast you want the transition.
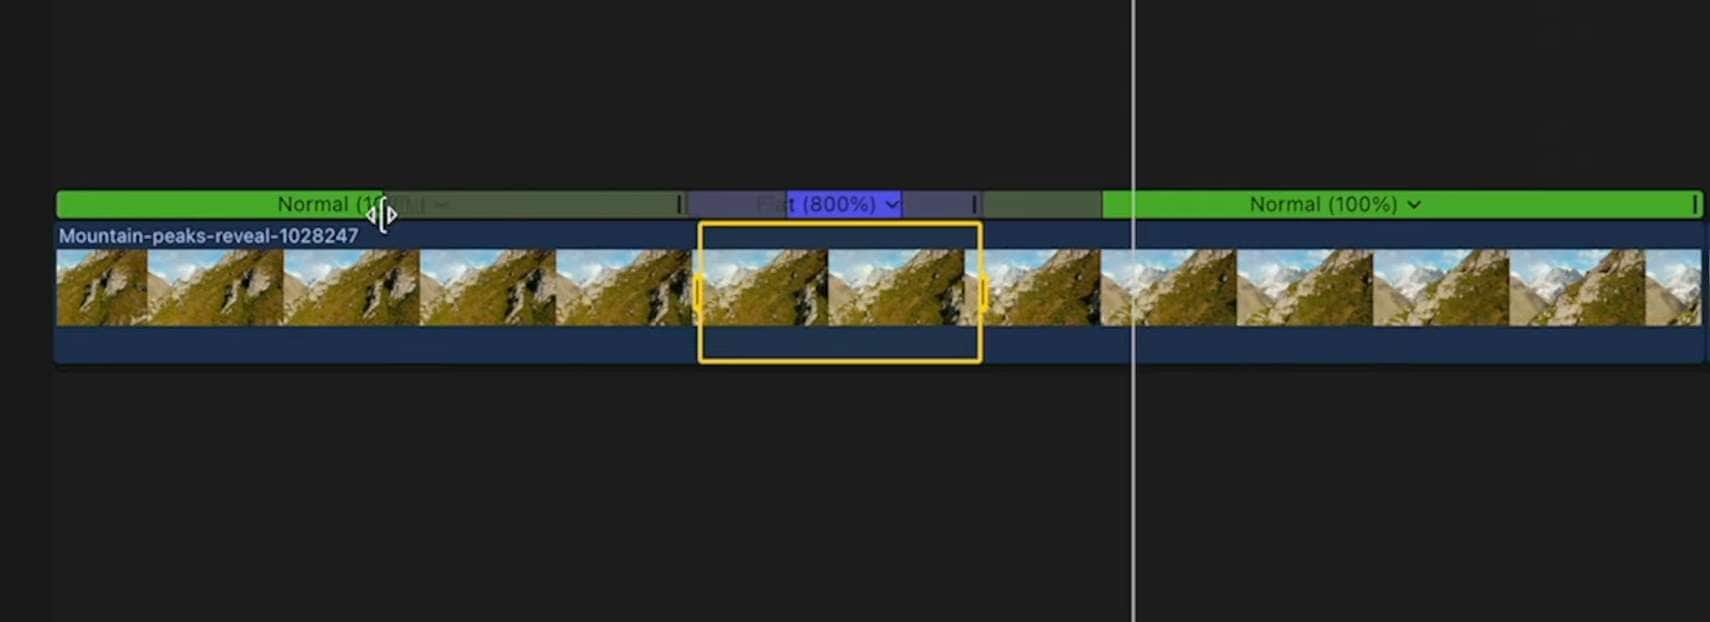
Step 5: To adjust the speed of the inner video segment further, tap the tiny Arrow next to the percentage and choose the Custom option.

Step 6: Adjust the transition by changing the Rate and Duration and adding the Ripple effect.
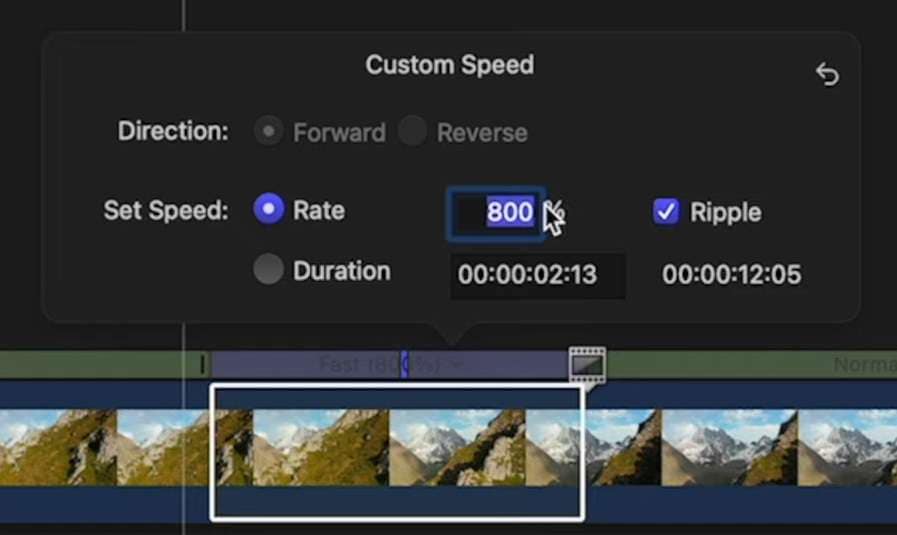
All that’s left to do is fine-tune the exact starting and ending points of the FCPX speed ramp, and you’ll create an exciting video transition that significantly improves your video.
Which Frame Rates Should be Used for Speed Ramping in FCPX?
Achieving a smooth transition and creating an exciting video clip with speed ramping in FCPX depends on the frame rate of the footage you’re working with. For example, working with 30FPS clips can cause stutters and laggy videos, especially if you intend to slow it down. Such transitions won’t make your editing look professional.
If you want to create visually appealing edits with FCPX’s speed ramp tool, you’ll need videos of higher quality and with more frames. As a rule of thumb, it’s best to work with footage that has twice your final intended frame rate.
For example, working with 120FPS footage lets you slow it down to 60FPS without harming the flow of your story.
Most Suitable Footage for Speed Ramping in FCPX
Unfortunately, not all video clips are good options for dynamic speed adjustments. You’ll need to carefully choose the footage to which you apply an FCPX speed ramp, as such transitions usually favor videos with dynamic motions. These include sports, action scenes, nature videos, and similar footage.
Moreover, speed ramping in FCP is often used to reveal particular landscapes, show the scale of a specific area, and create captivating transitions in real estate videos. Still, many other use cases exist for FCPX speed ramping, with your imagination being the only limiting factor.
Downsides of Speed Ramping in FCPX
While FCPX’s speed ramp tool can be a valuable ally to any video editor, the feature also has several limitations you should be aware of. They include the following:
- Lengthy Process – If you’re a beginner editor, achieving that perfect transition will take dozens of adjustments, resulting in a process that’s more time-consuming than it’s worth.
- Choppy Footage – When you apply an FCPX speed ramp that is too fast, the lack of frames, especially when working with low-FPS videos, will result in choppy and unnatural-looking scenes.
- Flow Disruption – Video editing is all about telling a story you’ve envisioned, and too much speed ramping in FCPX can disrupt the story’s flow by making the transitions too distracting.
It’s also worth noting that speed ramping in FCP isn’t precisely a beginner-friendly tool, as the whole video editing app is geared more toward professional editors.
A Better Speed Ramping Alternative to FCPX - Wondershare Filmora
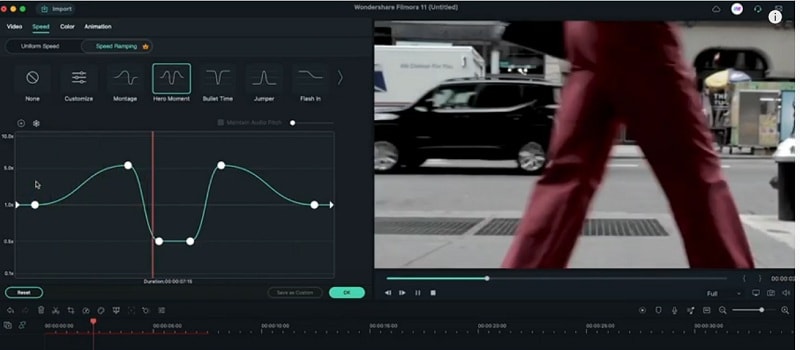
While Apple’s editing software, Final Cut Pro X, offers extensive speed ramping adjustments, it’s not the only tool for creating dynamic video speed transitions. After all, its focus on pro users doesn’t sound great to many beginner video editors, causing many to look into alternative editing solutions.
Fortunately, that’s also the exact spot Wondershare Filmora can effortlessly fill. Unlike FCPX, this mighty yet user-friendly cross-platform editing tool works on macOS, Windows, iOS, and Android, allowing users to create exciting videos from whatever device they have.
Its exceptionally intuitive user interface makes navigation seamless, and the app comes with hundreds of built-in presets for quicker and easier edits. Moreover, it’s a much more cost-effective editing solution, as you won’t have to fork over $300 like you would for Final Cut Pro.
How to Create a Speed Ramp in Filmora?
As Filmora was primarily designed with beginners in mind, the process of creating a speed ramp in this intuitive video editing app is effortless and looks like this:
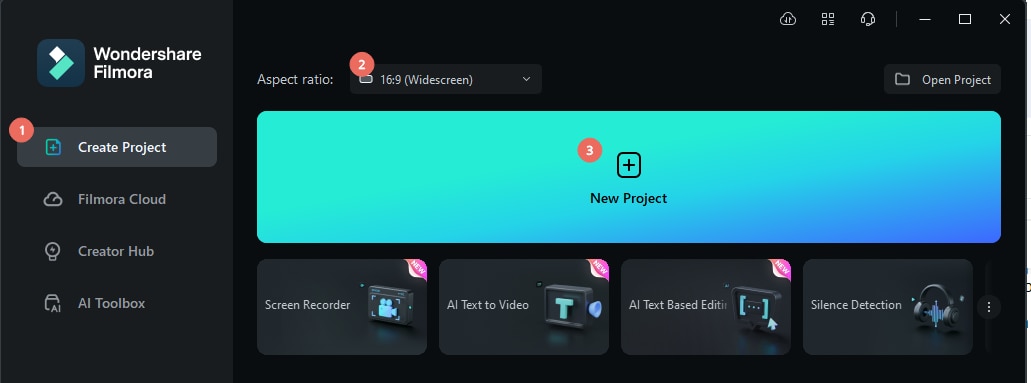
Step 1: Launch Filmora on your Mac and click the Create Project tab on the left. Then, adjust the aspect ratio and tap the New Project button.
Step 2: To add your video or audio, click in the Import field in the Project Media area.
Step 3: Drag and drop the imported media into the Timeline below.
Step 4: Tap the Speed icon above the Timeline and choose Uniform Speed. You can also access it by pressing CTRL + R on your keyboard and selecting the Uniform Speed tab.

Alternatively, right-click the video or audio file in the Timeline, select Speed > Uniform Speed, and click the appropriate tab. You can also access it from the menu bar on the right by navigating to the Speed tab and tapping the Uniform Speed tab under it.
Step 5: Select one of the six available Speed Ramping presets, such as Montage, Hero Moment, or Bullet Time, or tap Customize to create a custom speed ramp and adjust it to your liking in the Speed Ramping panel underneath these options.
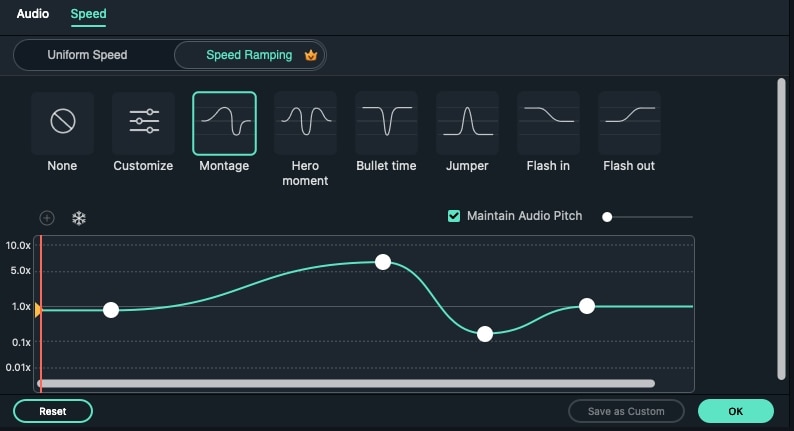
Once you’ve customized the speed ramp, preview the effect by checking the video or audio in the Player. If satisfied, tap the Export button in the top right, adjust the output settings, and save the speed-ramped video to your device.
Conclusion
Speed ramping in FCPX is a professional-grade video editing technique that creates dynamic speed transitions and adds visual flair to your videos. Editors inside the Apple ecosystem can use the company’s powerful Final Cut Pro X to create such transitions and make their videos more professional.
However, FCPX isn’t the most approachable video editing tool, especially for novices. That title belongs to Wondershare Filmora, a software alternative to FCPX with a much more beginner-friendly and intuitive user interface.
With Filmora, even beginner editors can effortlessly master speed-ramping transitions. The editing tool is much easier to navigate and dramatically more affordable than FCPX, making it the better choice for creating captivating video content with the speed ramp technique.


 100% Security Verified | No Subscription Required | No Malware

