LUT video effects, when duly used in color grading while editing videos, help you ensure end-to-end consistency, clarity, and creativity in the process. Though resembling color filters, LUTs are fundamentally predetermined sets of mathematical algorithms that allow swift and seamless mapping of one color into another, maintaining uniformity while giving surreal and striking contrast.
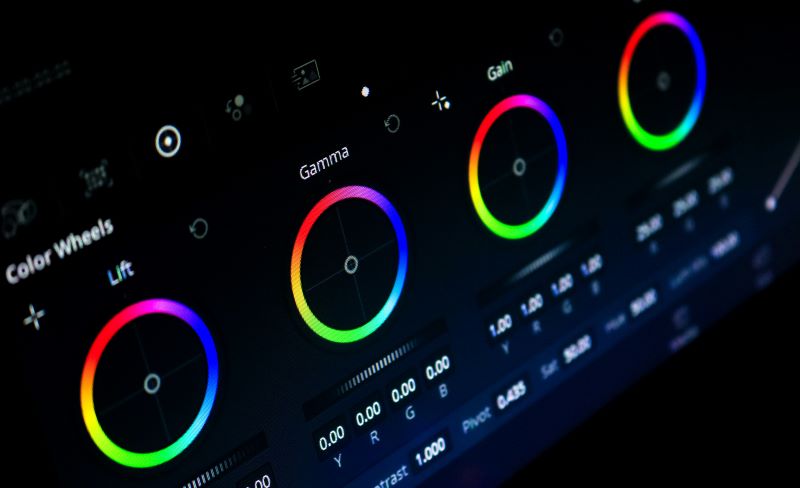
In this article, you will discover the significance of LUT video grading and editing in visual content creation. As you read on, you will understand LUT’s uses, various types, and differences from color presets. Ultimately, you will find a stepwise guide on using color LUT and color-correct footage with Filmora. Let’s dig into the article right away!
In this article
What is LUT Video Color Grading & Editing?
LUT video embodies a range of sought-after color grading and editing tools that aid designers in achieving chosen aesthetics. LUTs, or Look-up tables, are mathematical formulations that automatically modify an image’s color and tone by applying a predefined large set of numbers and modifying them.
LUTs speed up your color grading while editing a video, ensuring uniformity, flexibility, and efficiency throughout the creative project. By restyling and remapping the original colorimetry of your image, LUTs give your footage a professional appeal while letting you attain your desired visual goal.
LUT vs Color Presets
LUTs and presets are common color-grading tools, but they operate differently. Here is a table that highlights the difference between LUTs and color presets:
| LUT (Look-up Tables) | Color Presets |
| LUTs are predetermined mathematical algorithms. | Color presets are predetermined sets of adjustments. |
| LUTs emphasize consistency in color grading. | Presets emphasize creativity in color grading. |
| LUTs are more applicable for video editing. | Color presets can be applied to both photo and video editing. |
| LUT video features are complex and, hence, are used by professionals. | Color presets are easy to use and can be used with different levels of expertise. |
What are the Uses & Types of Color LUT in Video Editing?
LUT color grading is automated, so you don’t have to change the color settings repeatedly manually. LUT video tools let you create a distinctive and dignified appearance that matches your visual goal and mood. For example, with LUTs, you can turn your video into a noir film, a sci-fi thriller, or a vintage documentary. Here are the different types of color LUTs used in video editing:
Technical/Transformation LUT
Technical LUTs map footage from one color space to another. With a technical LUT, you can convert a standard color space used for high-definition video (Rec. 709 footage) to a color space used for digital cinema projection (to DCI XYZ).
Calibration LUT
Calibration LUTs calibrate the color space and ensure it displays the same color characteristics throughout. With Calibration LUT, you can ensure the final footage is accurately and consistently indented with the viewing space.
Speed/Normalization LUT
Speed LUTs transform footage from a camera’s log color profiles to more standard color spaces. Log color profiles give footage a high dynamic range, but they also make the footage appear flat and unsaturated.
Viewing LUT
Viewing LUTs adjust the video from the camera to match the desired result. They facilitate viewing live shots on the monitors by transitioning log color profiles into a more standard space, preventing the footage from appearing flat.
Creative LUT
Creative LUT video features augment the appearance or aesthetic of an image in your video. Creative LUTS can be dropped onto footage resembling a filter that creatively modifies appearances in numerous ways.
1.3D LUTs
While 1D LUT regulates white points, color balance, and contrasts, 3D LUTs affect a wider range, including hue, saturation, and luminance (or brightness) in a 3D space.
How to Use Color LUT with Filmora?

With Filmora’s wide range of LUT video features, you can color grade flexibly and ensure uniqueness in the process. Filmora LUT color grading effects can transform the original colors in your video into seamless cinematic scenes. It allows quick adjustments to gamma, contrast, saturation, luminance, and hue. Here’s a step-by-step guide on how to use color LUT with Filmora:
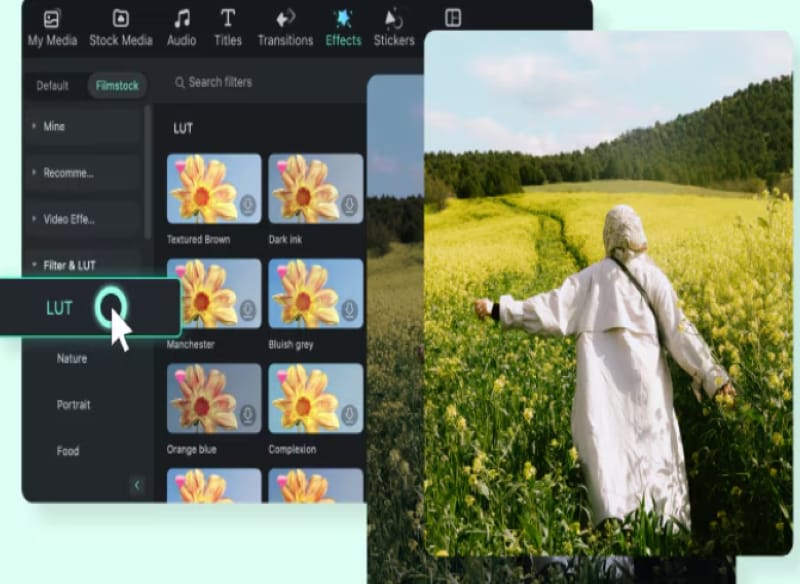
Step 1: Import Video & Find LUTs
Start by importing the chosen video clip and dragging it to the Filmora timeline. Then click the “Effects” option in the media panel and select “Filter & LUT” from the category. Alternatively, you can right-click the video clip in the timeline, choose edit properties, and click “Color and LUT” in the panel.
Step 2: Select & Apply LUT
Filmora allows you to either browse through the built-in LUTs or import your custom LUT. Select whichever LUT appeals to you, apply it to your video clip, and alter its intensity and strength as per your liking.
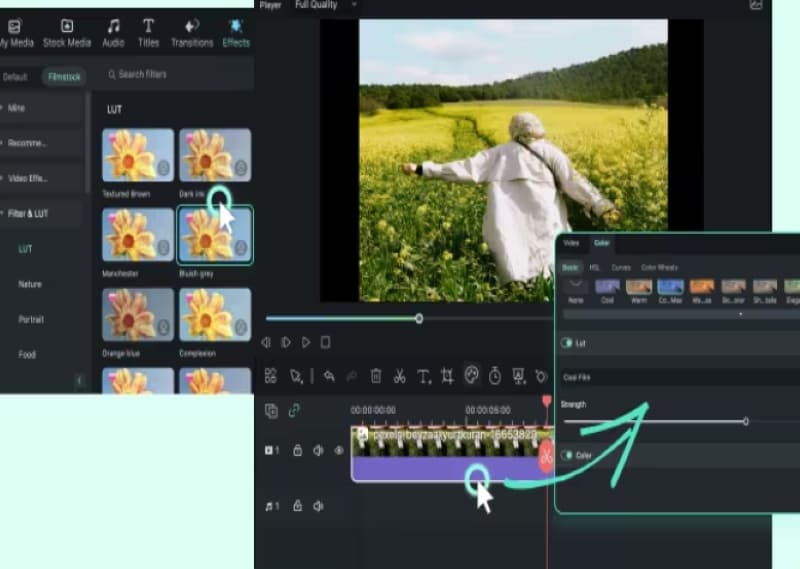
Step 3: Preview & Export
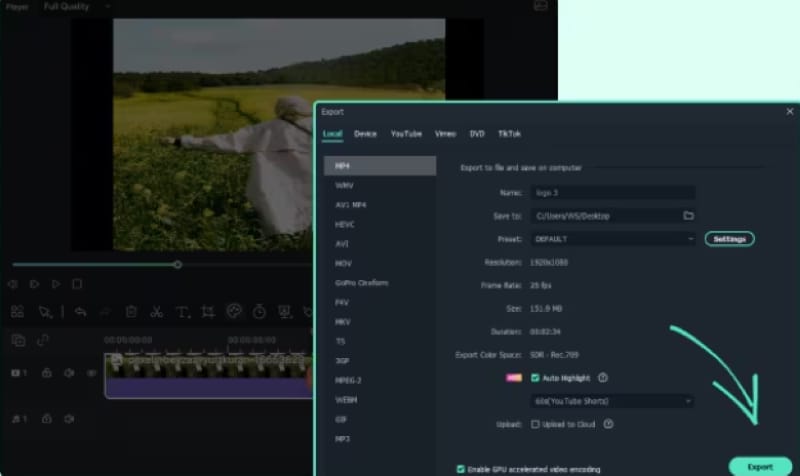
Click the "Preview" button and go over and preview the LUT on your video clip. If you find the result matches your vision, save the project and export the final video.
How to Edit Video and Color Correct with Filmora?
Filmora video editing software facilitates the video editing process by giving you creative control over trimming, transitions, overlays, and effects. It also helps you achieve your desired visual goal.
Its advanced and modern color correction and editing features make color video editing a plain sailing process. Filmora’s efficient and futuristic tools ensure stunning visual outcomes with strong storytelling. Here’s a step-by-step guide on how to edit video and color correct with Filmora:
Step 1: Import Your Video
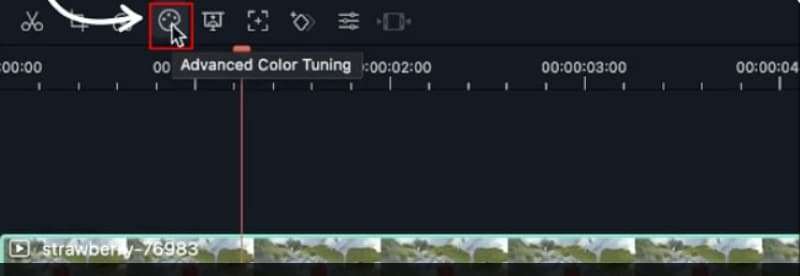
Head over to Filmora and instantly import your chosen video clip into Filmora’s media library. You can drag and drop your video clip into Filmora's timeline. Now, double-click on the video clip for color correction and head to the “Advanced Color Tuning” option depicted by a color tuning icon. Proceed and click the “Color Correction” option by clicking the “Advanced Color Tuning” icon.
Step 2: Start Color Correction
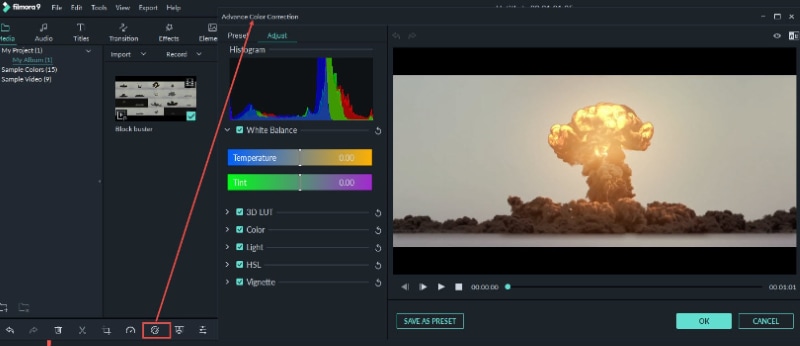
Double-click the target video on the timeline, and the video editing window will appear on your screen. Choose the "Color" panel, and you will see several parameters, such as contrast, saturation, brightness, tint, 3D LUT, and more.
You can easily change any of the parameters by clicking and moving along the slider. When you release the mouse, your chosen value will be applied. You can also view the changes on Filmora’s “Preview Window.”

Step 3: Advance Color Correction
To advance your color tuning, you can opt for Filmora’s “Advanced Color Tuning” option and enter the “Advanced Color Tuning” window. You can apply the color preset templates in the LUT video or adjust the color here.
Step 4: Save & Import
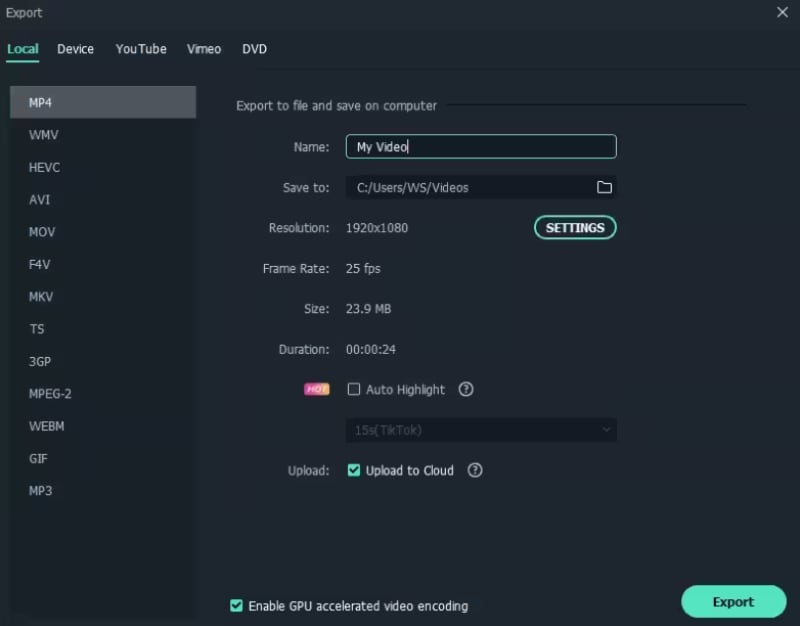
Review your video thoroughly in the “Preview” window and see whether you like what you see and whether the outcome meets your expectations. If your answer is yes, proceed and click “Export” to export your video. Additionally, you can opt to save the new videos in different formats under the “Format” tab.
Conclusion
The article aims to get you to acknowledge how using LUT video features can advance your creative control of the video editing process. With LUT video grading and editing, you can put on your creative hat and seamlessly experiment and elevate the visual outcome while maintaining consistency and clarity in the visuals. Filmora’s color correction and LUT video editing features can be a powerful tool in your arsenal, making your creative process a wondrous experience. Download the tool today to get to a professional and impassioned visual outcome.


 100% Security Verified | No Subscription Required | No Malware

