
 100% Security Verified | No Subscription Required | No Malware


Every time you make a transition between two scenes that is not a standard cut but rather a longer transition effect, we can call this a smooth transition. These types of transitions are essential in every video editor’s toolkit because you need them for several types of video editing tasks. An abrupt cut just won’t cut it every time. Pun intended!
Today, we will give you a detailed guide on how to add smooth transitions in Premiere Pro. This tool is a tough nut to crack if you want to master everything it offers. Therefore, we will show an alternative for beginners near the end.
In this article
A Step-by-Step Guide to Smooth Transitions in Adobe Premiere Pro
In this section, we provide a detailed guide that teaches you how to add a smooth transition in Premiere Pro. If you follow the steps below, you should have no issues.
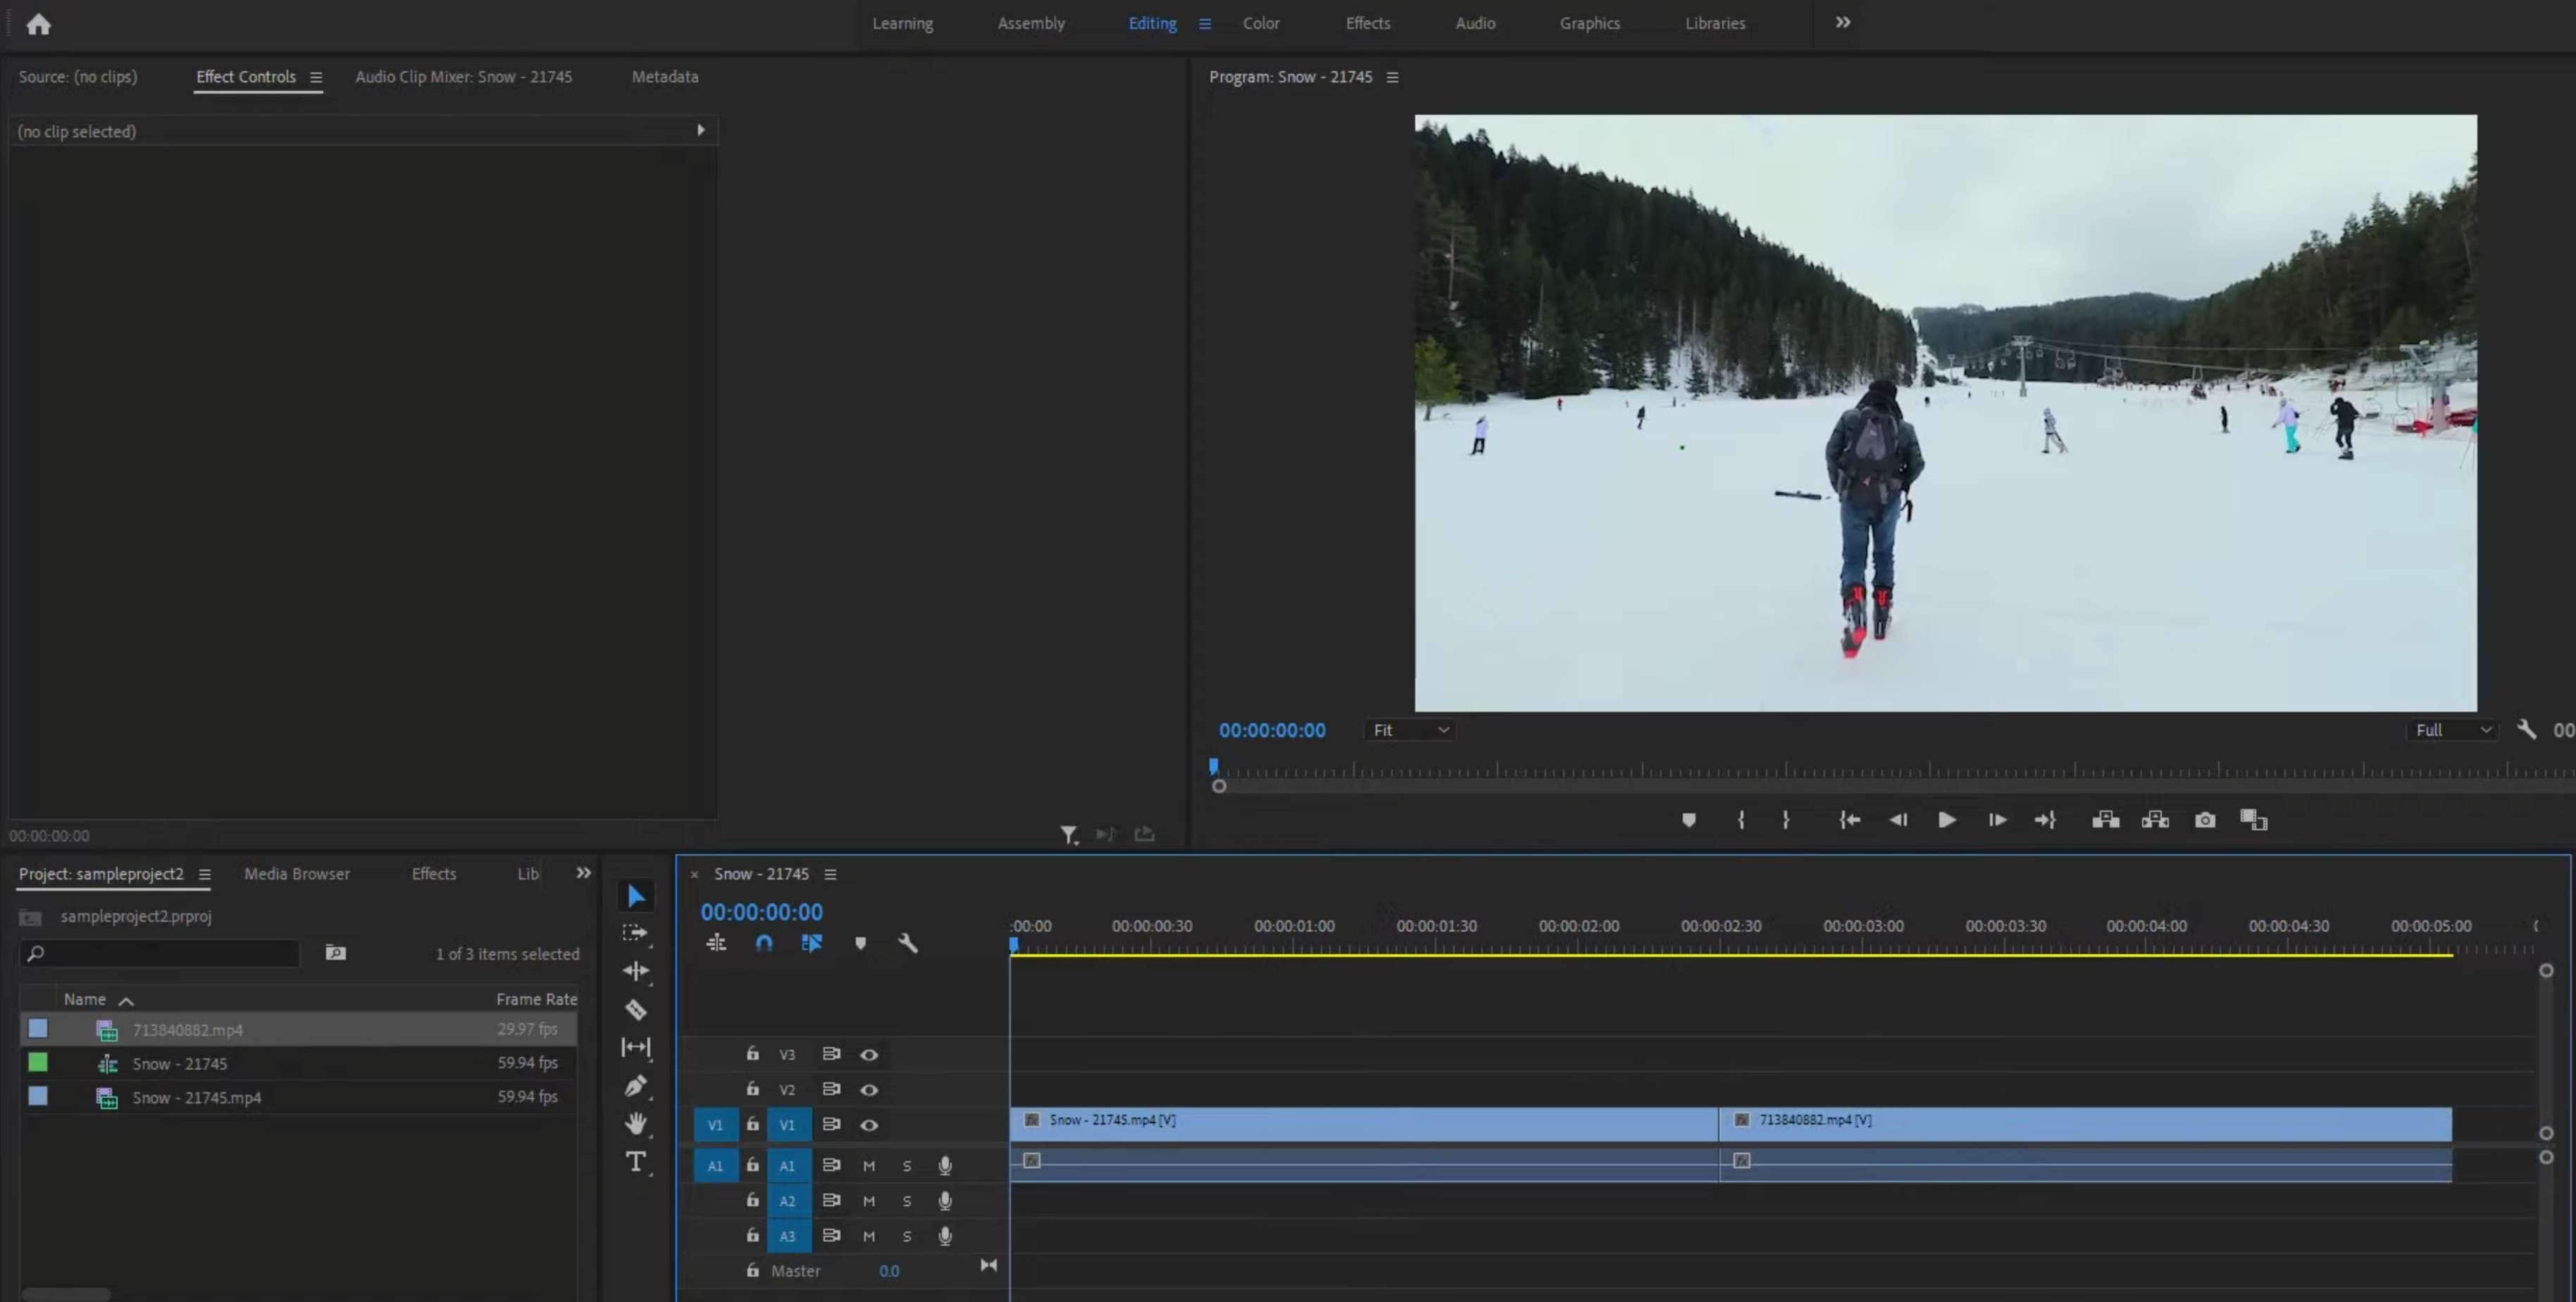
Step 1: Add two videos to the timeline, one after the other, in the same video channel. The timeline should look something like the screenshot below. Make sure to trim the first video near its end and the second video near its beginning (we will explain why later).
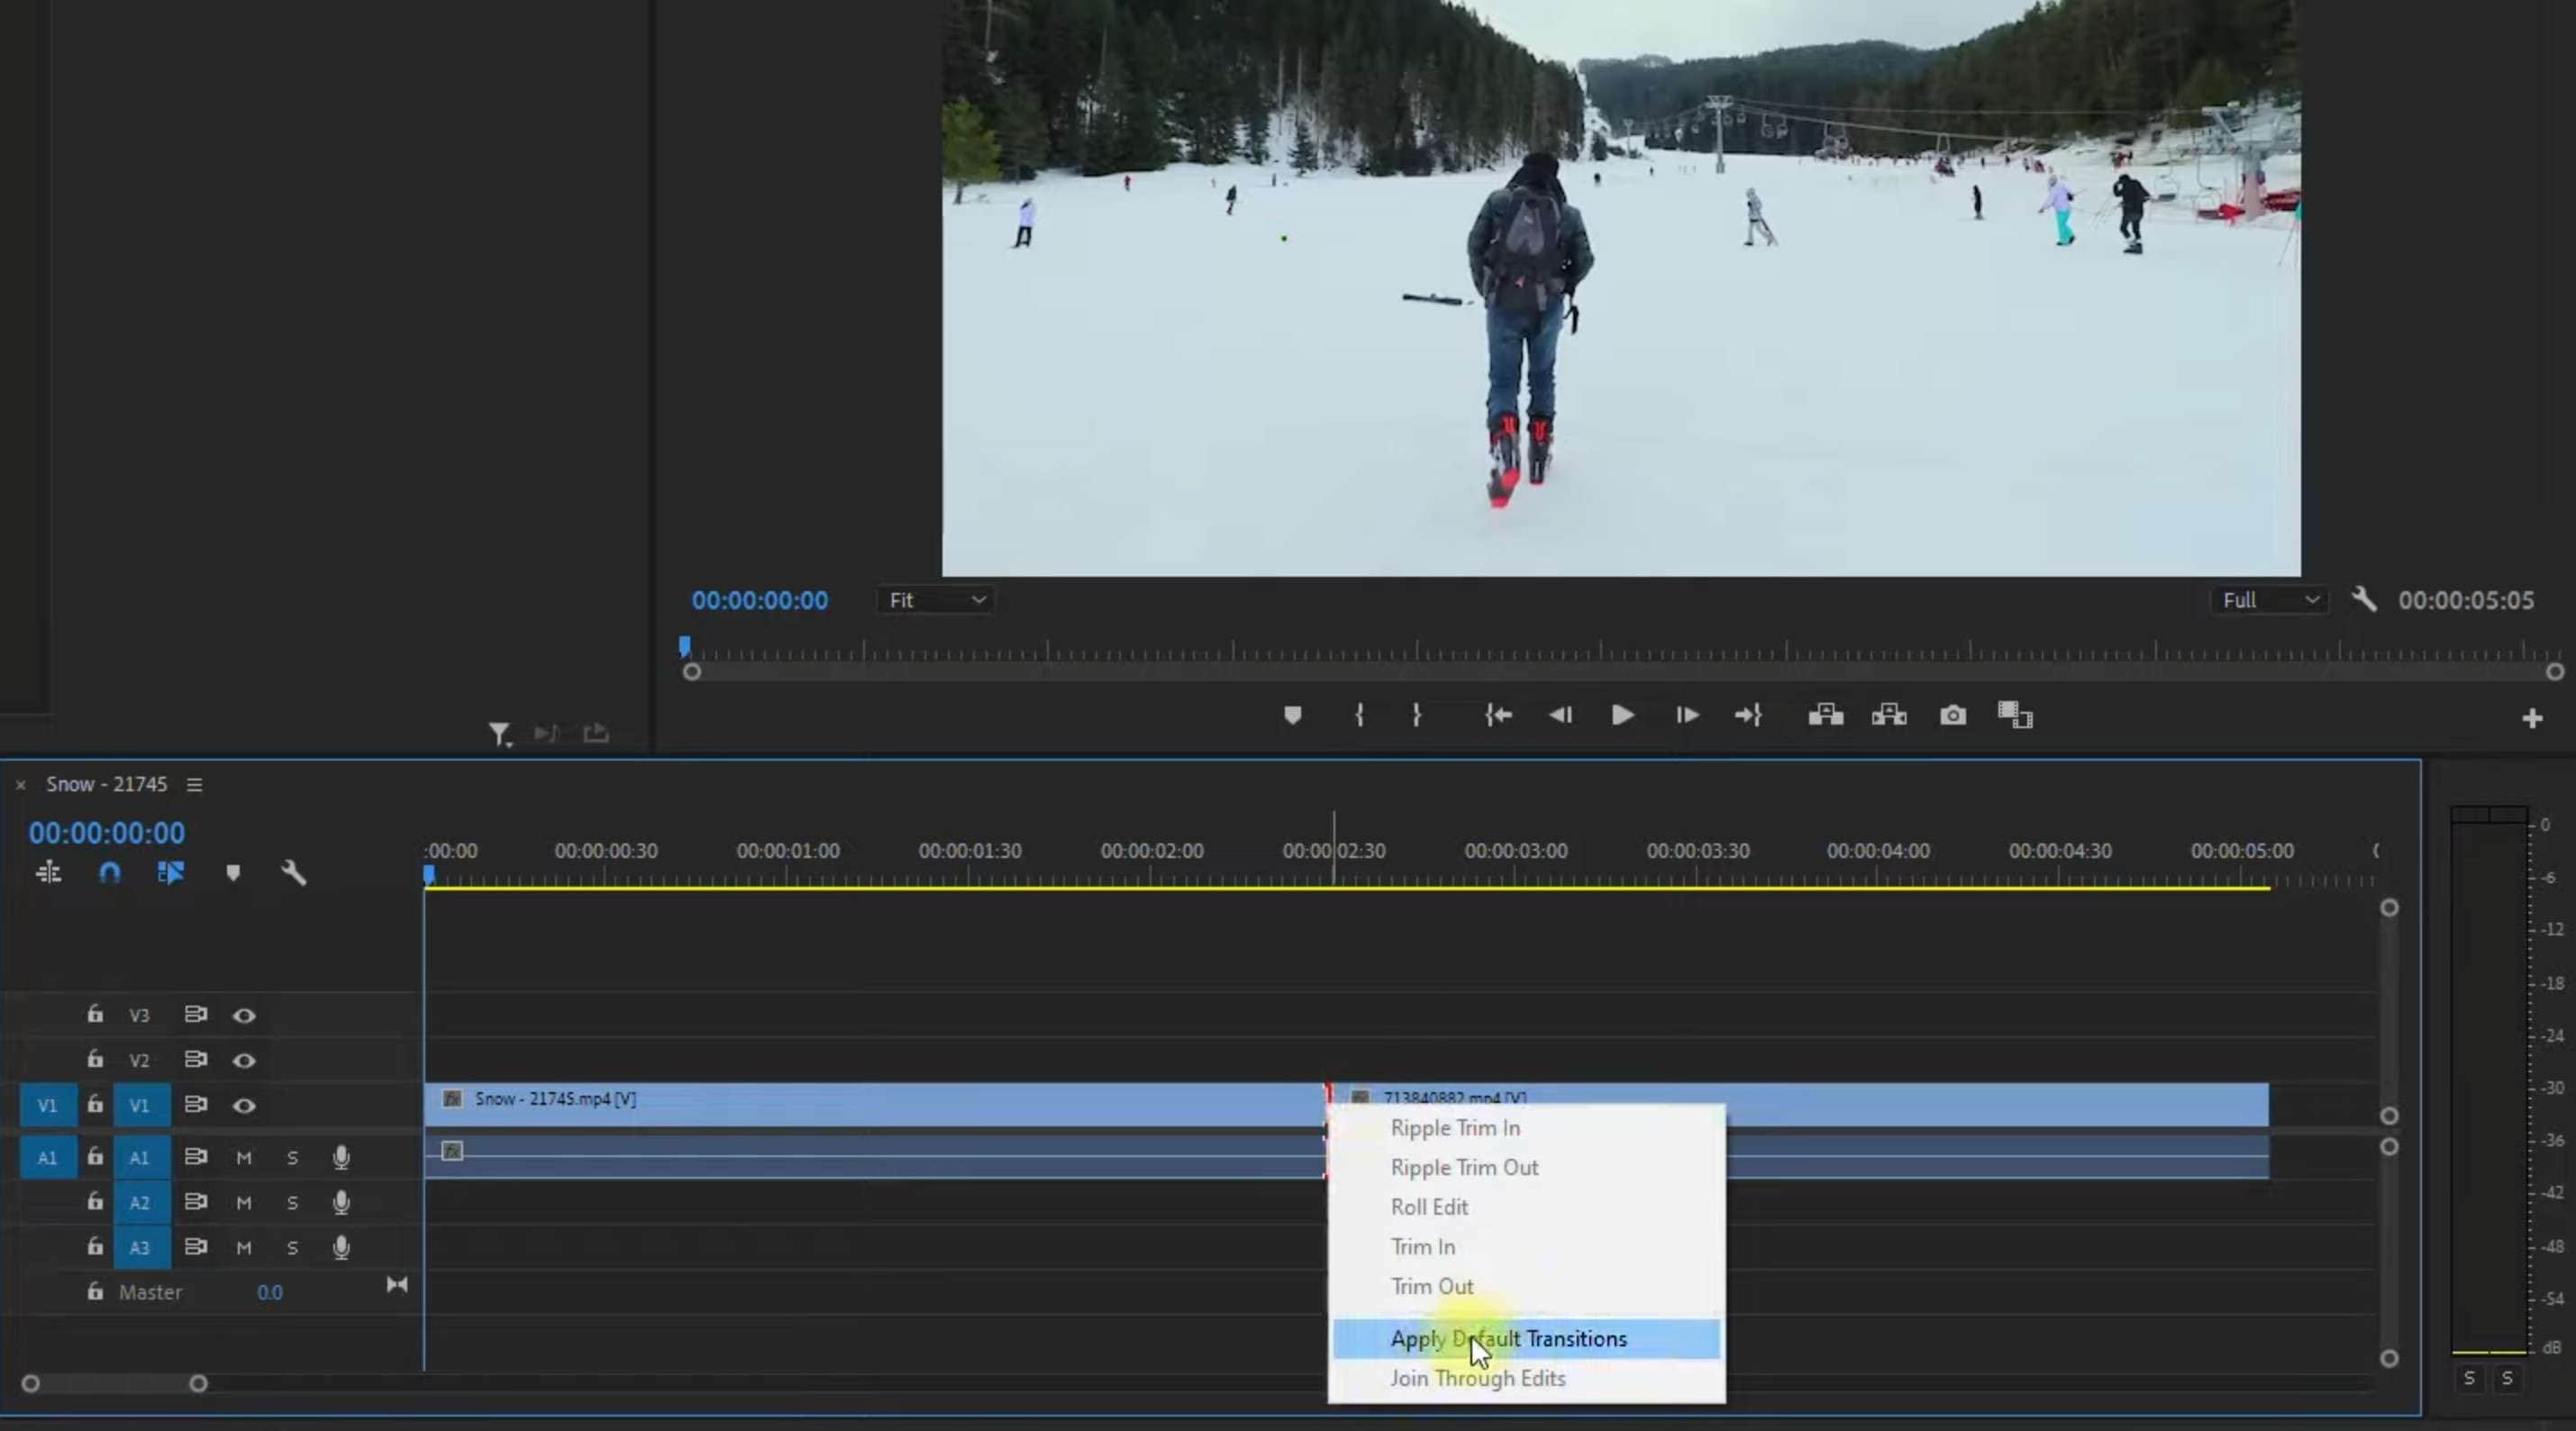
Step 2: Hover over the space between two clips, then right-click and select Apply Default Transitions.
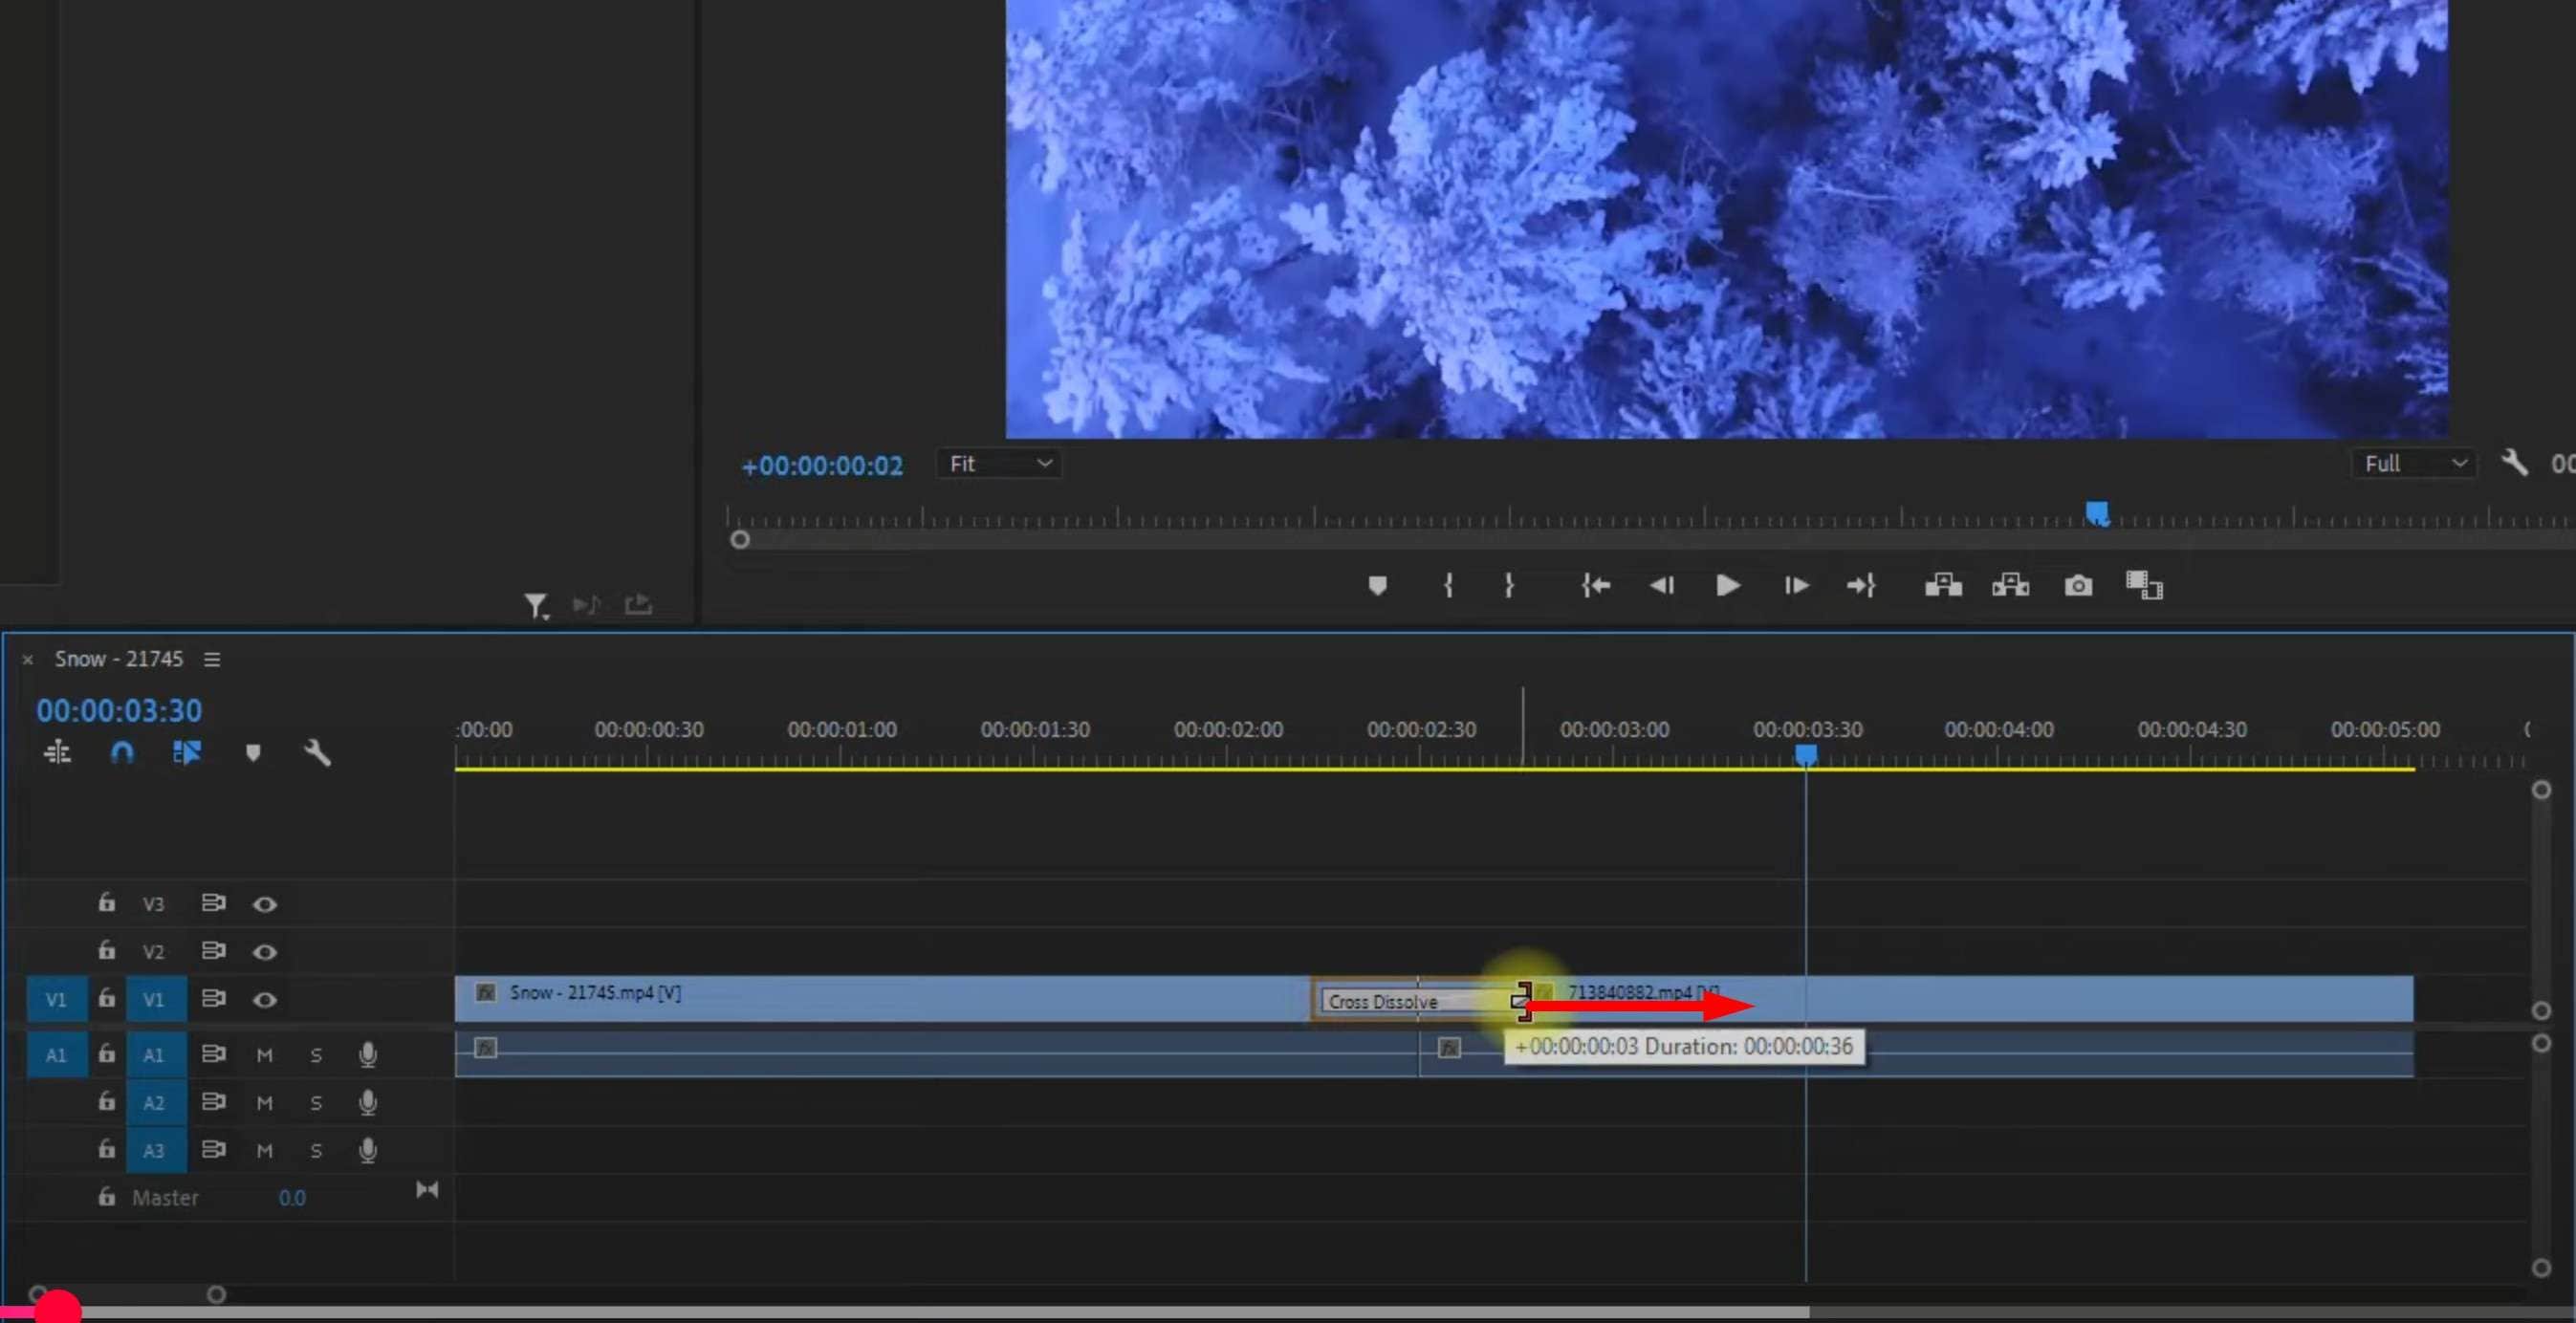
Step 3: This will automatically apply a smooth transition called Cross Dissolve (which is the default transition in Premiere Pro). To adjust the duration of the transition, simply hover over the beginning or end point of the transition effect in the timeline and then click and drag left or right to adjust the duration. Consult the screenshot below if you are having issues.
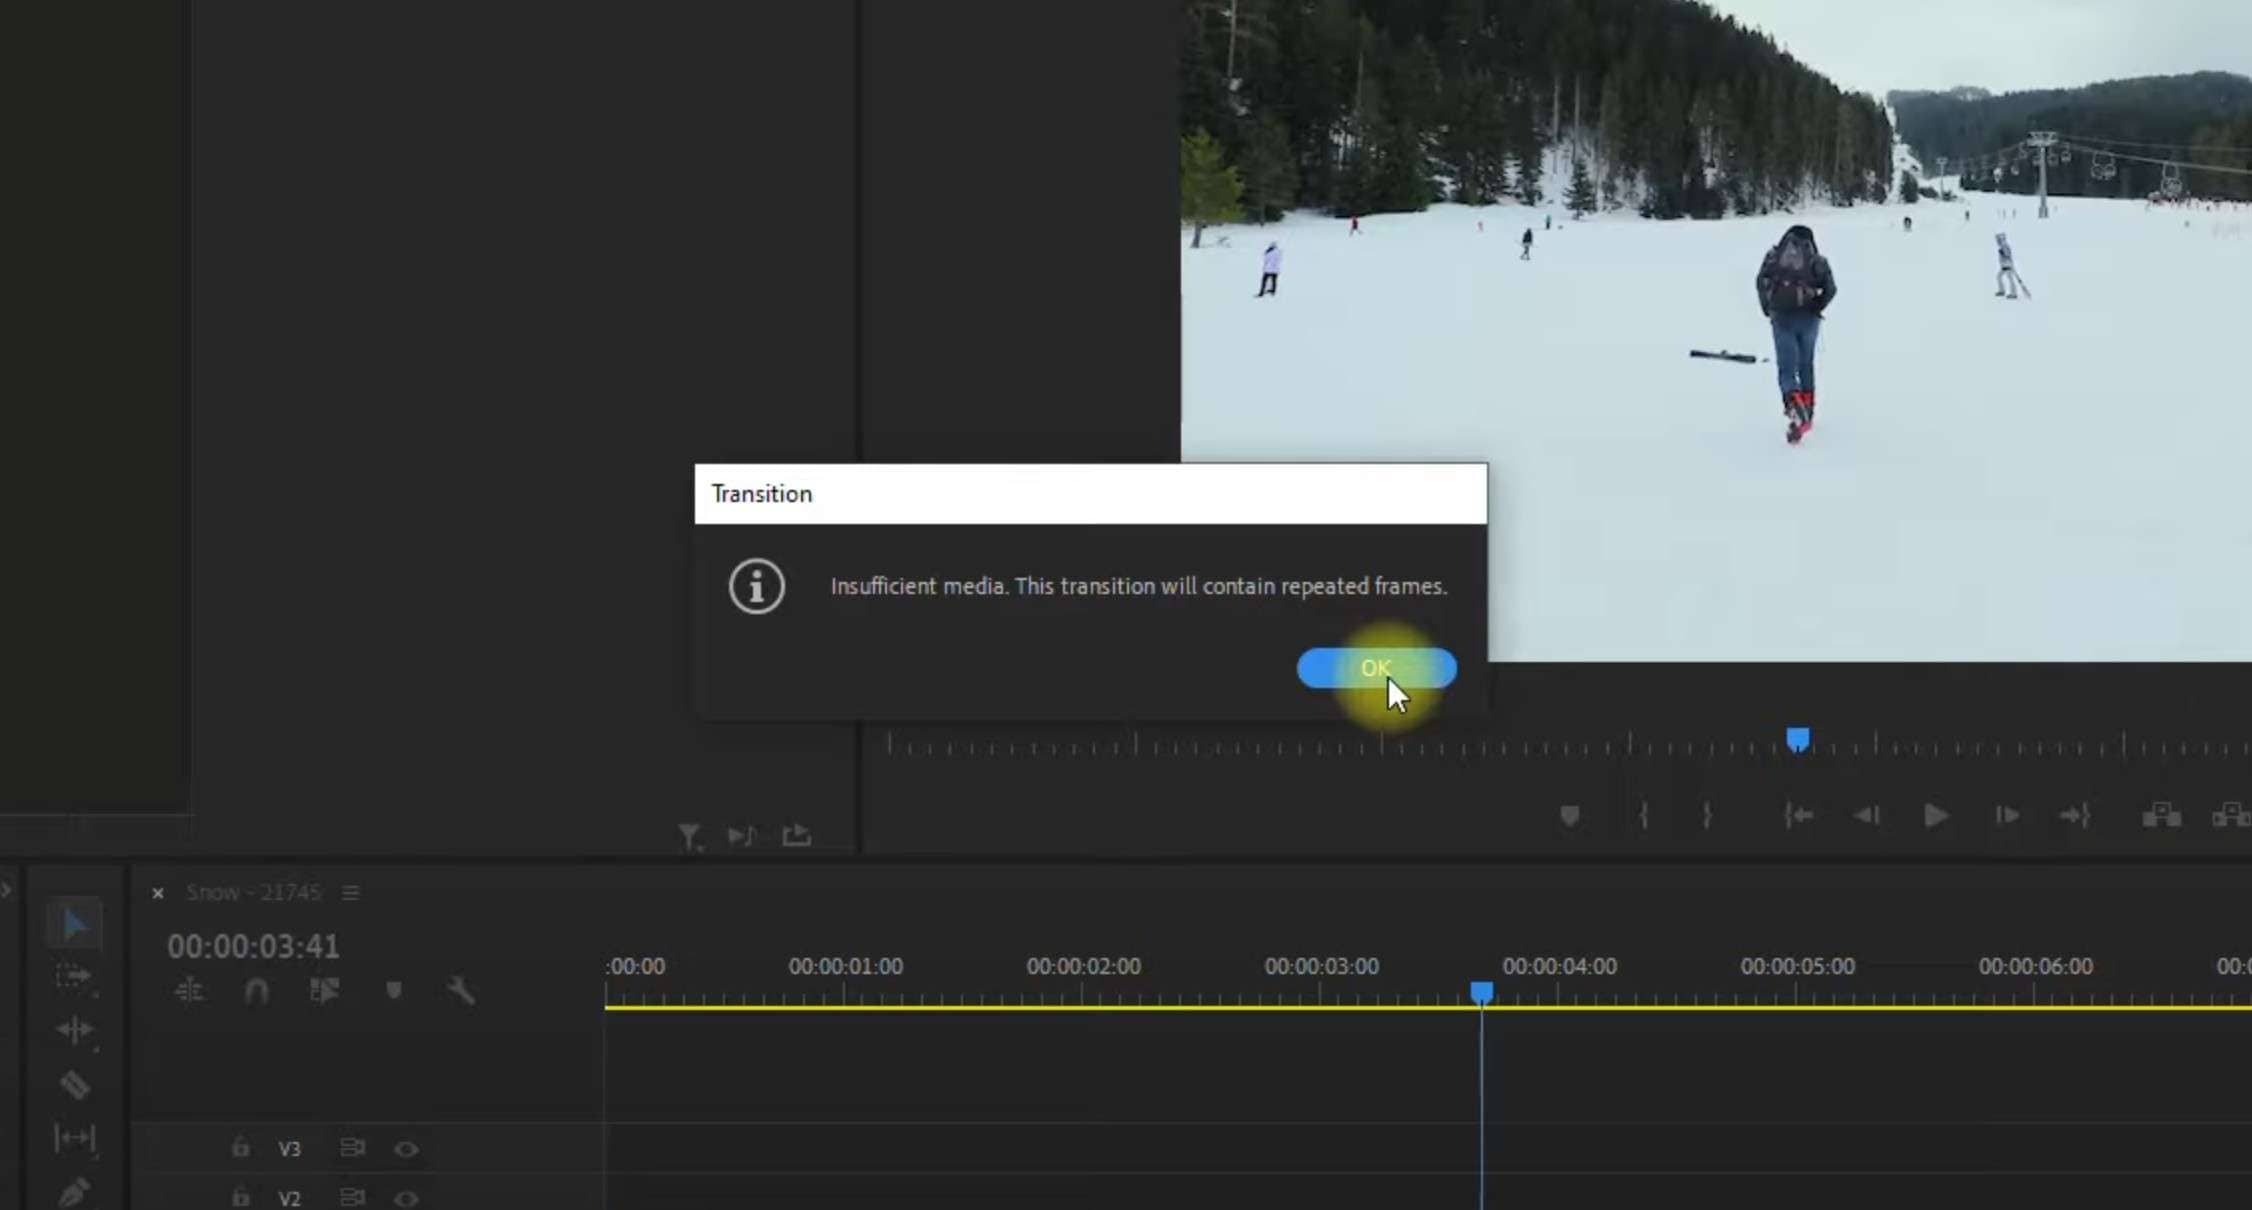
This is not that big of a problem, but it will reduce the smoothness of the transition, which might be noticeable to viewers. To avoid this error, trim the ending of the first clip and the beginning of the second clip.
If you want to use a different transition that is not Cross Dissolve, follow these steps.
Step 1: Navigate to the Effects tab and expand Video Transitions.
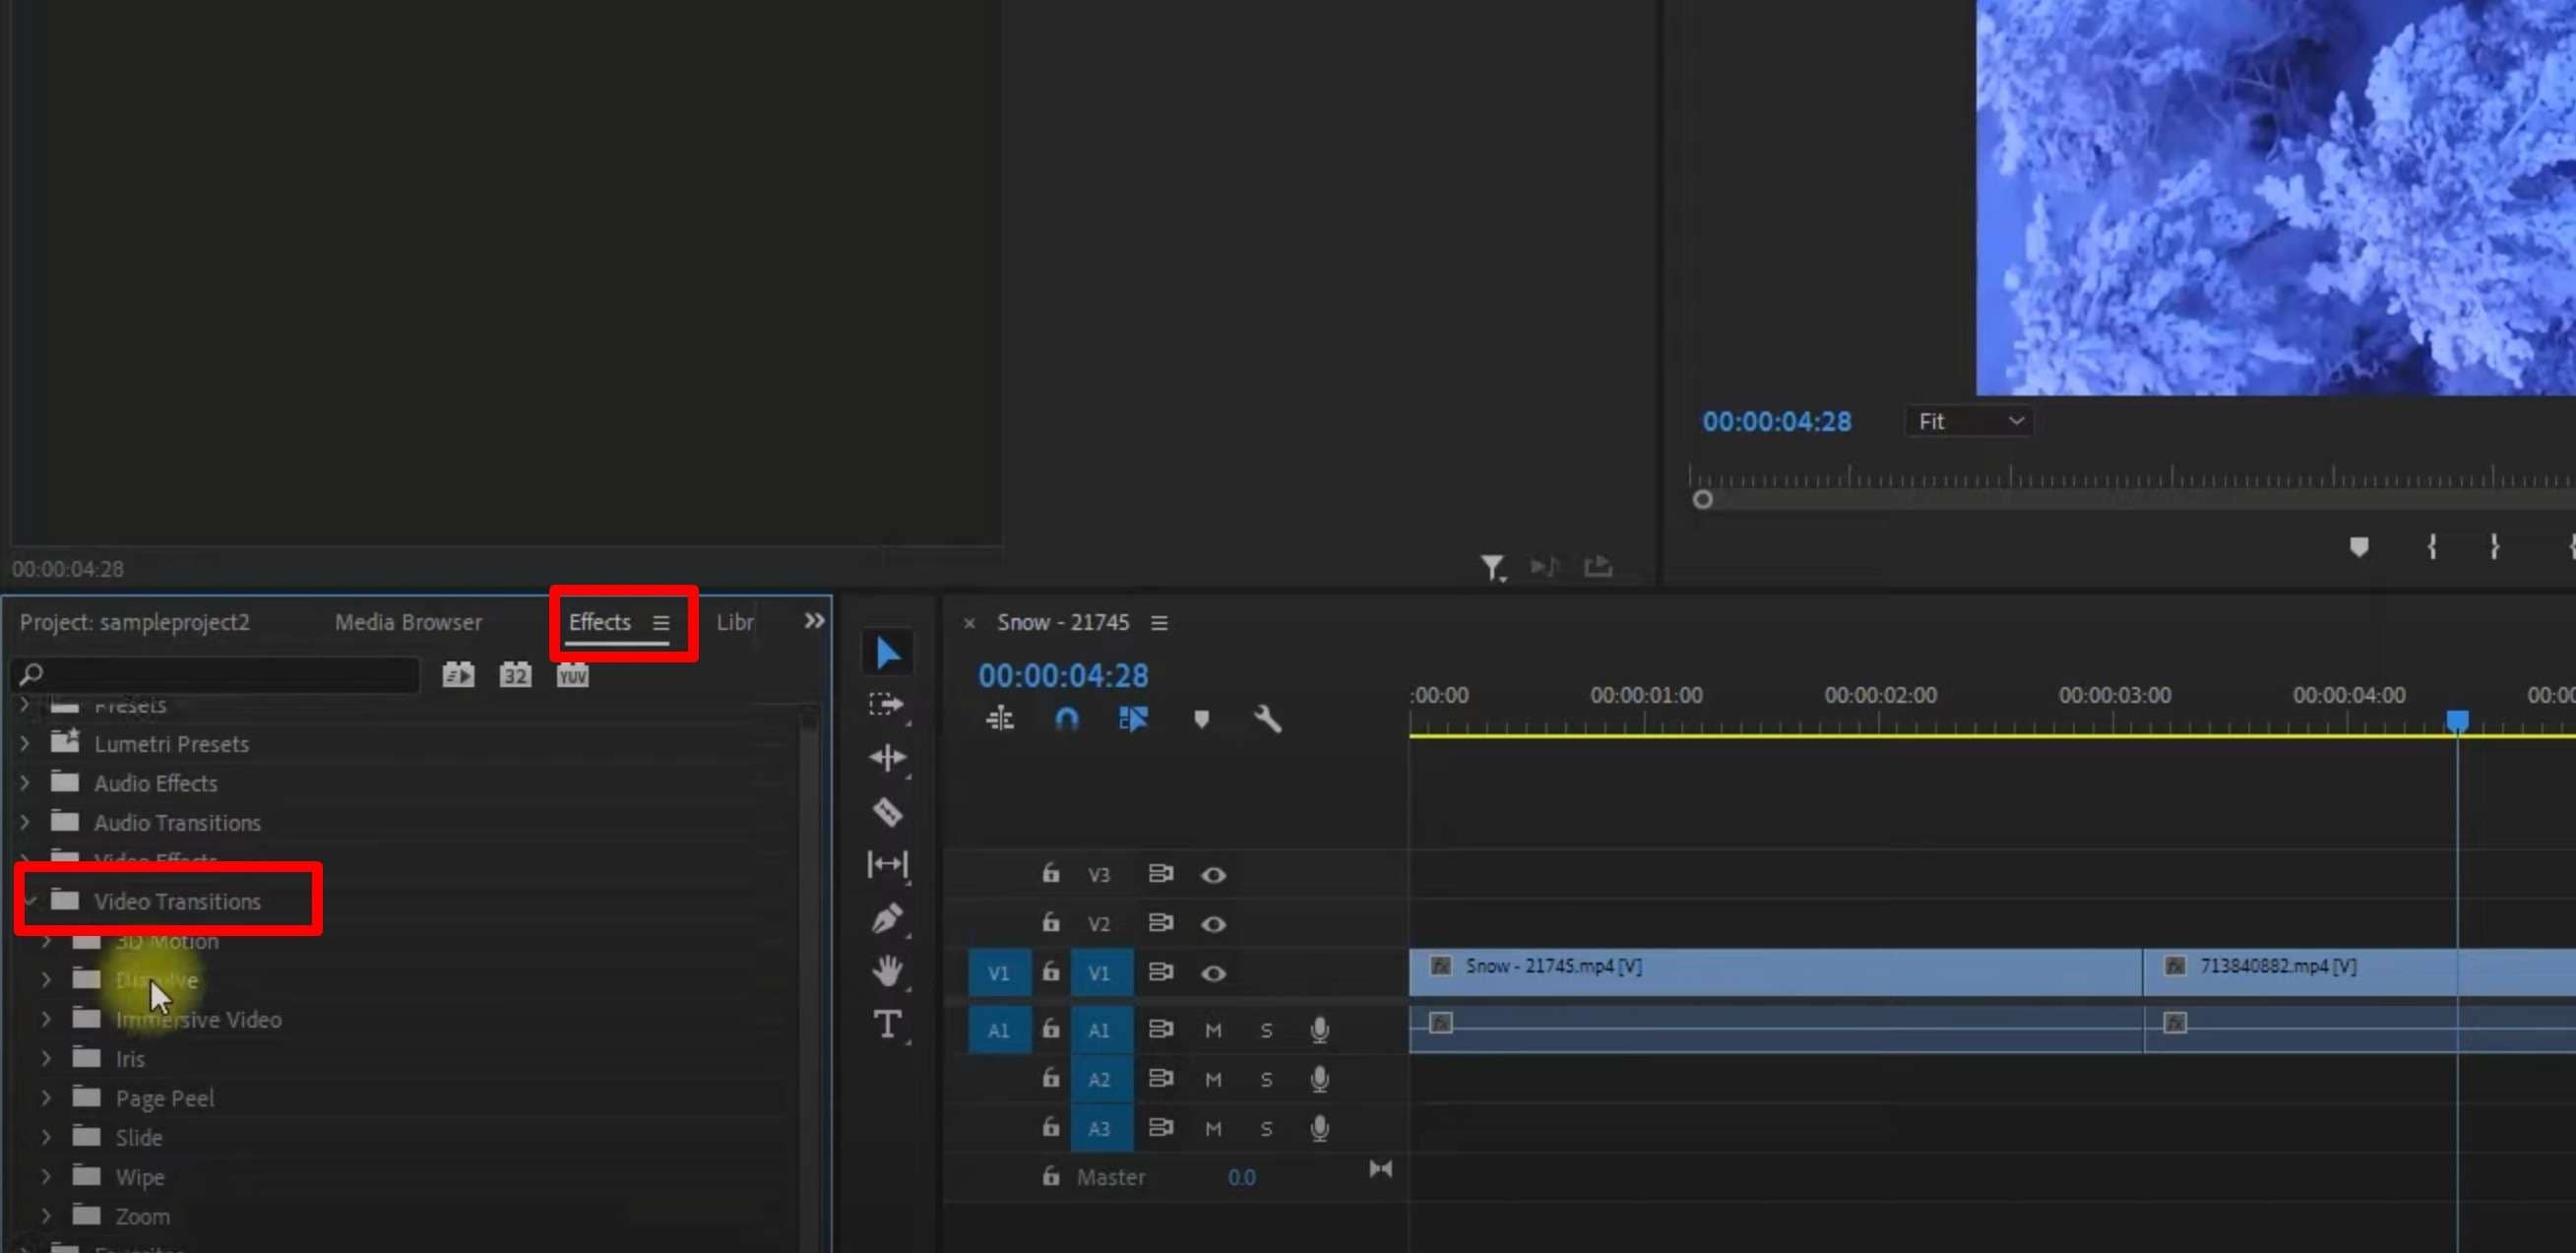
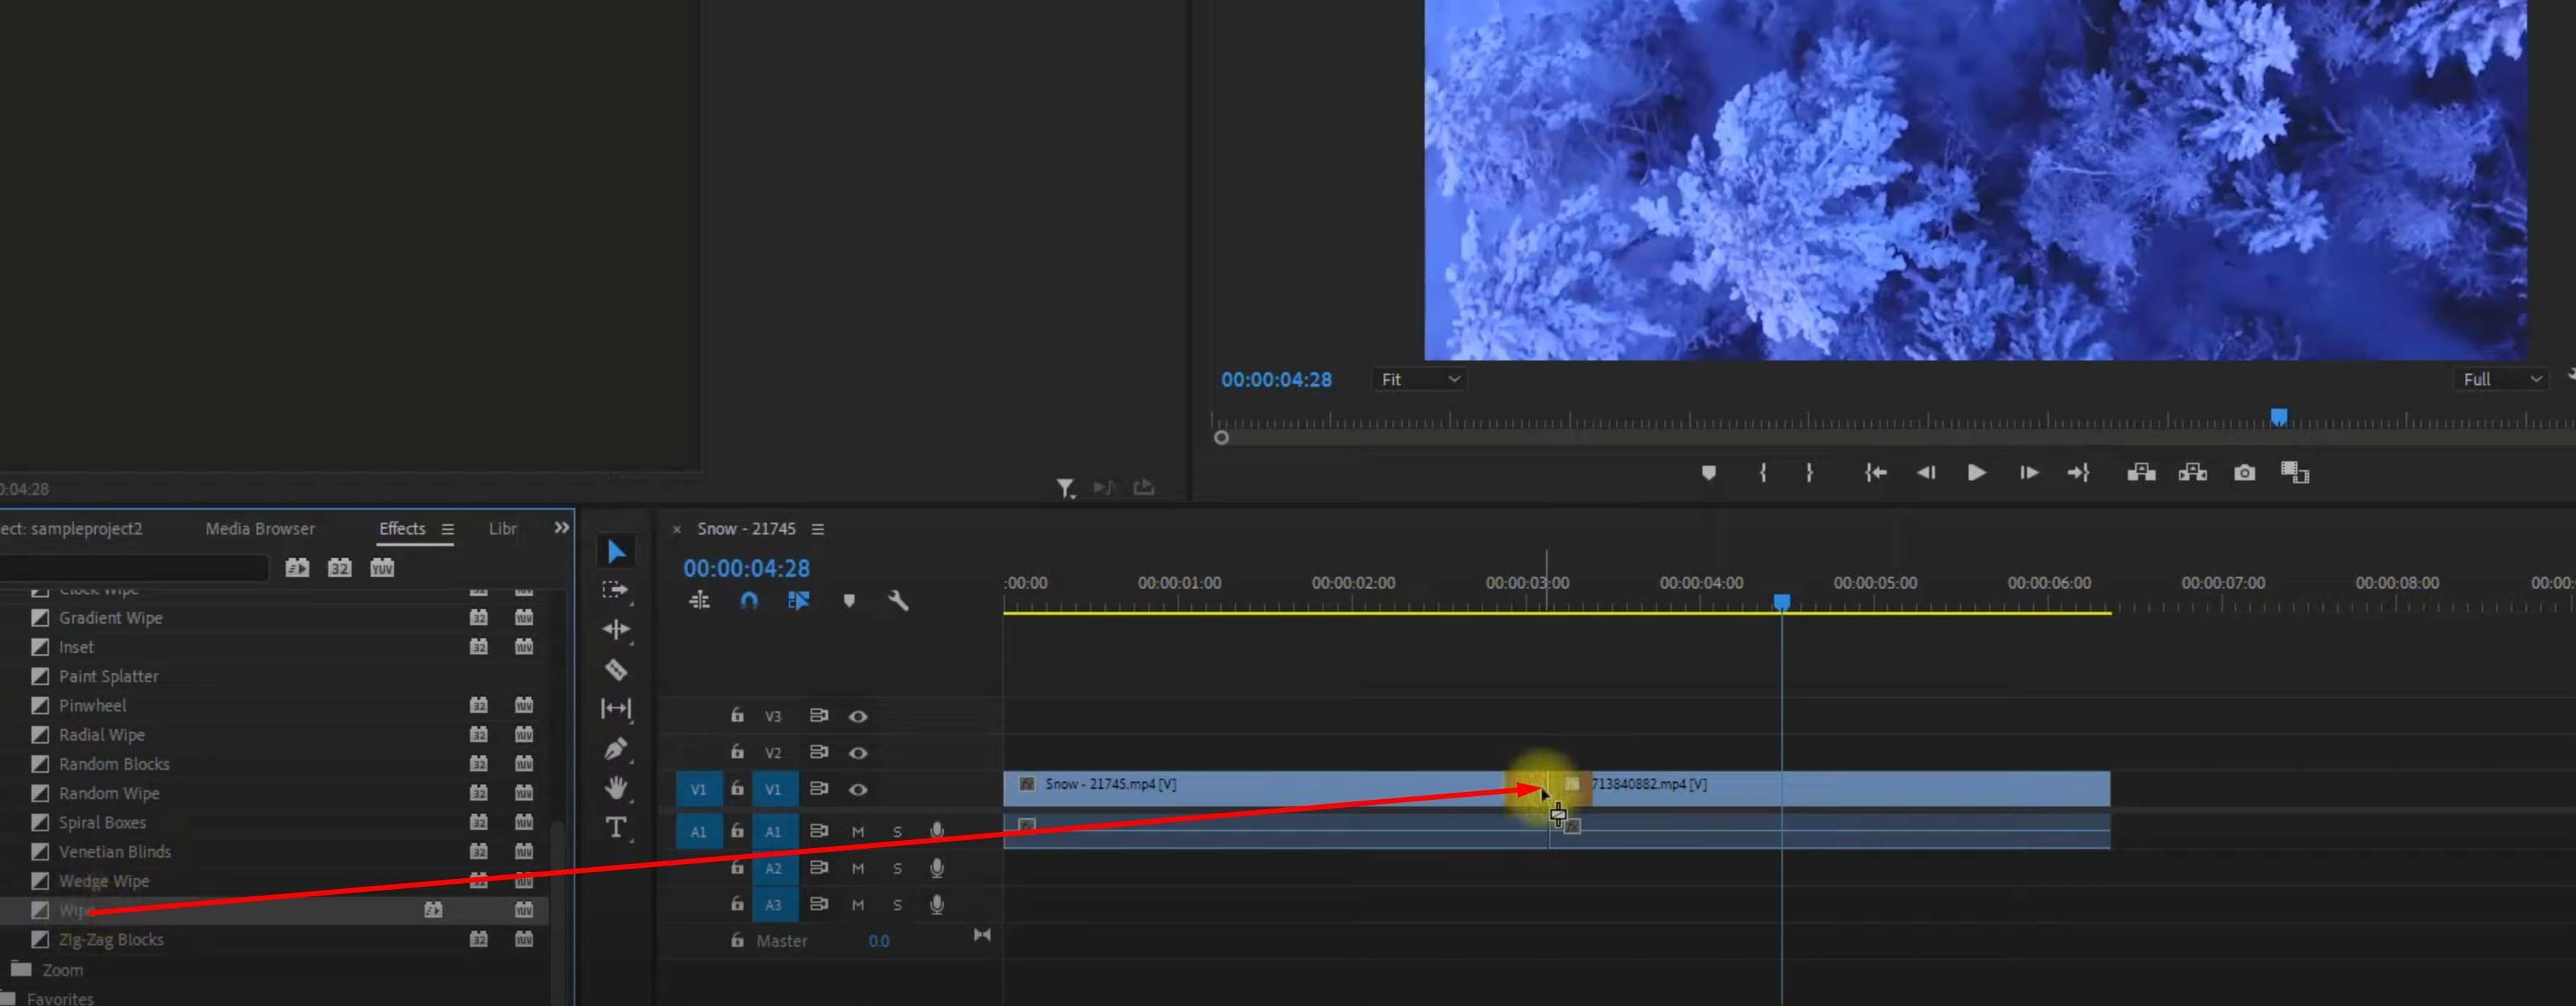
Step 2: You can explore the options provided and pick something that you like. When you find something, select it and drag it to the timeline between the two video clips.
As you can see, adding smooth transitions in Premiere Pro is not that challenging. However, if you want to continue your editing process, you might run into some dead ends. If Premiere Pro turns out to be a bit overwhelming for you, we have a different, more intuitive tool for you.
We would like to introduce you to Filmora and show you how you can make a smooth transition quickly and effortlessly.
Add Smooth Transitions in Filmora in Seconds

 secure download

Filmora, developed by Wondershare, is a video editing tool different from Premiere Pro in that it focuses on user-friendliness. Premiere Pro is a serious tool, and it requires a steep learning curve. Filmora offers almost everything you can find in Premiere Pro, but it does it in a way that is geared toward inexperienced users.
Let’s illustrate this claim by giving you a short tutorial on adding smooth transitions between two video clips.
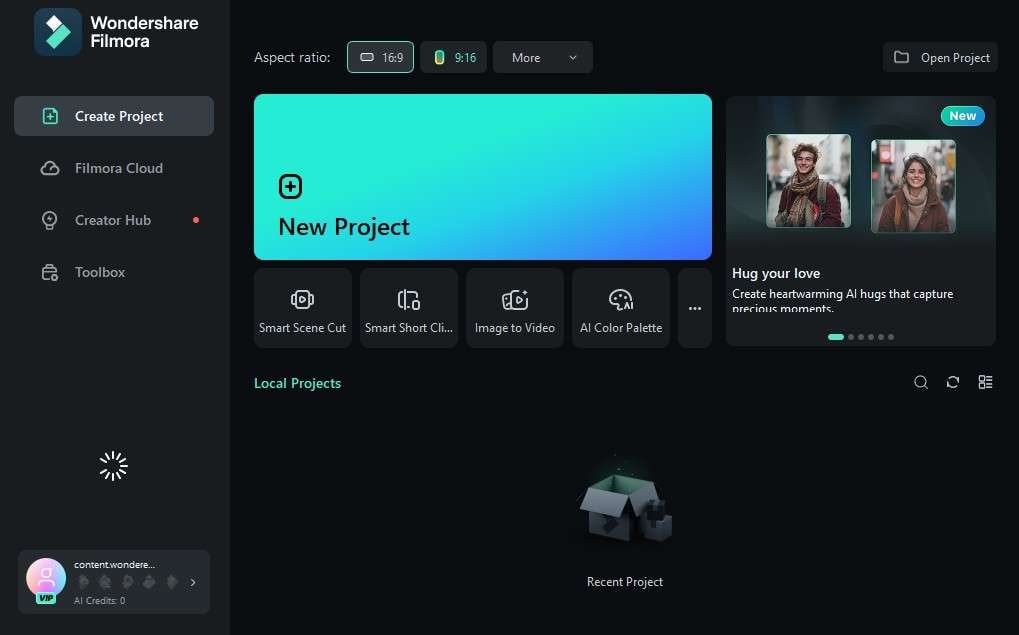
Step 1: Open Filmora and click on the biggest button you can see that reads New Project.
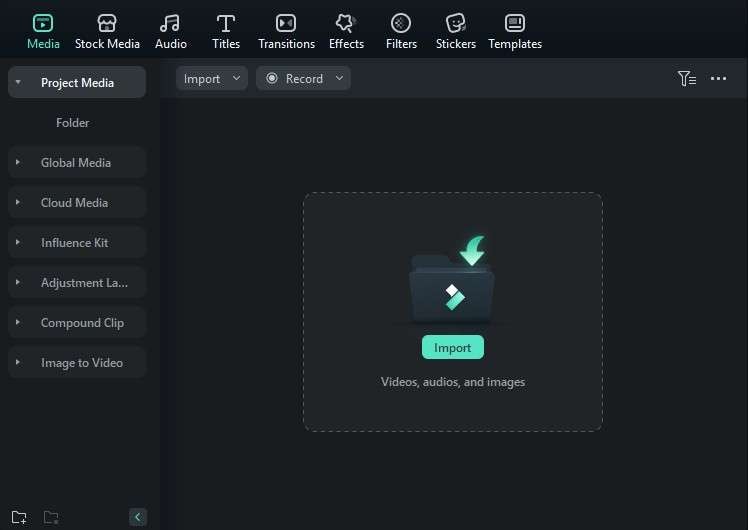
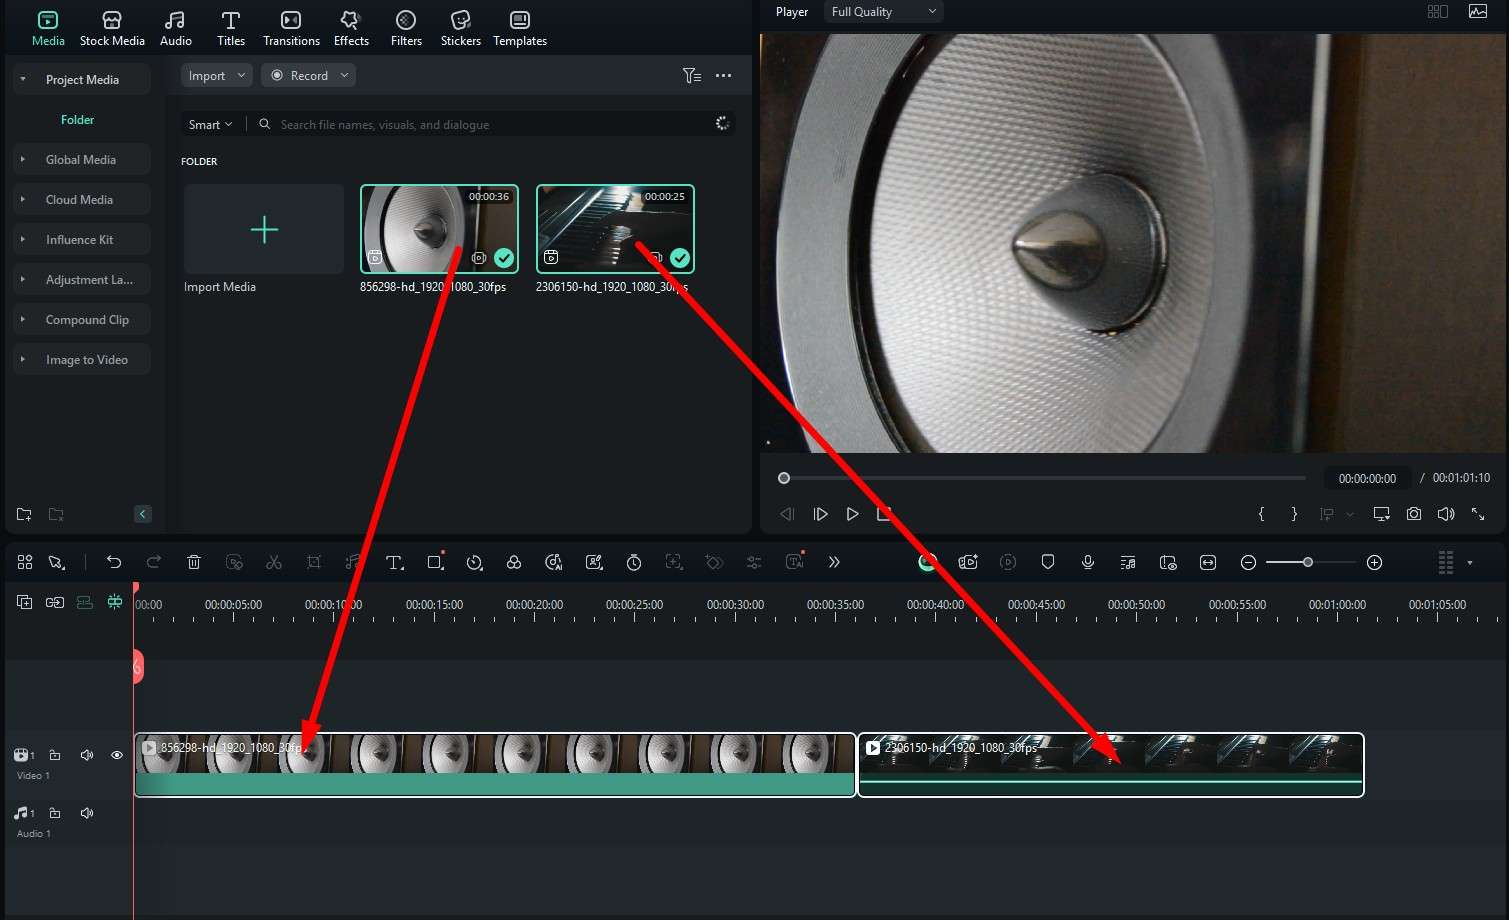
Step 2: Click on the Import area and then proceed to add two video files to your project.
Step 3: Drag the files to the timeline one after the other, as in the screenshot below. That way, you will be able to add a transition between them.
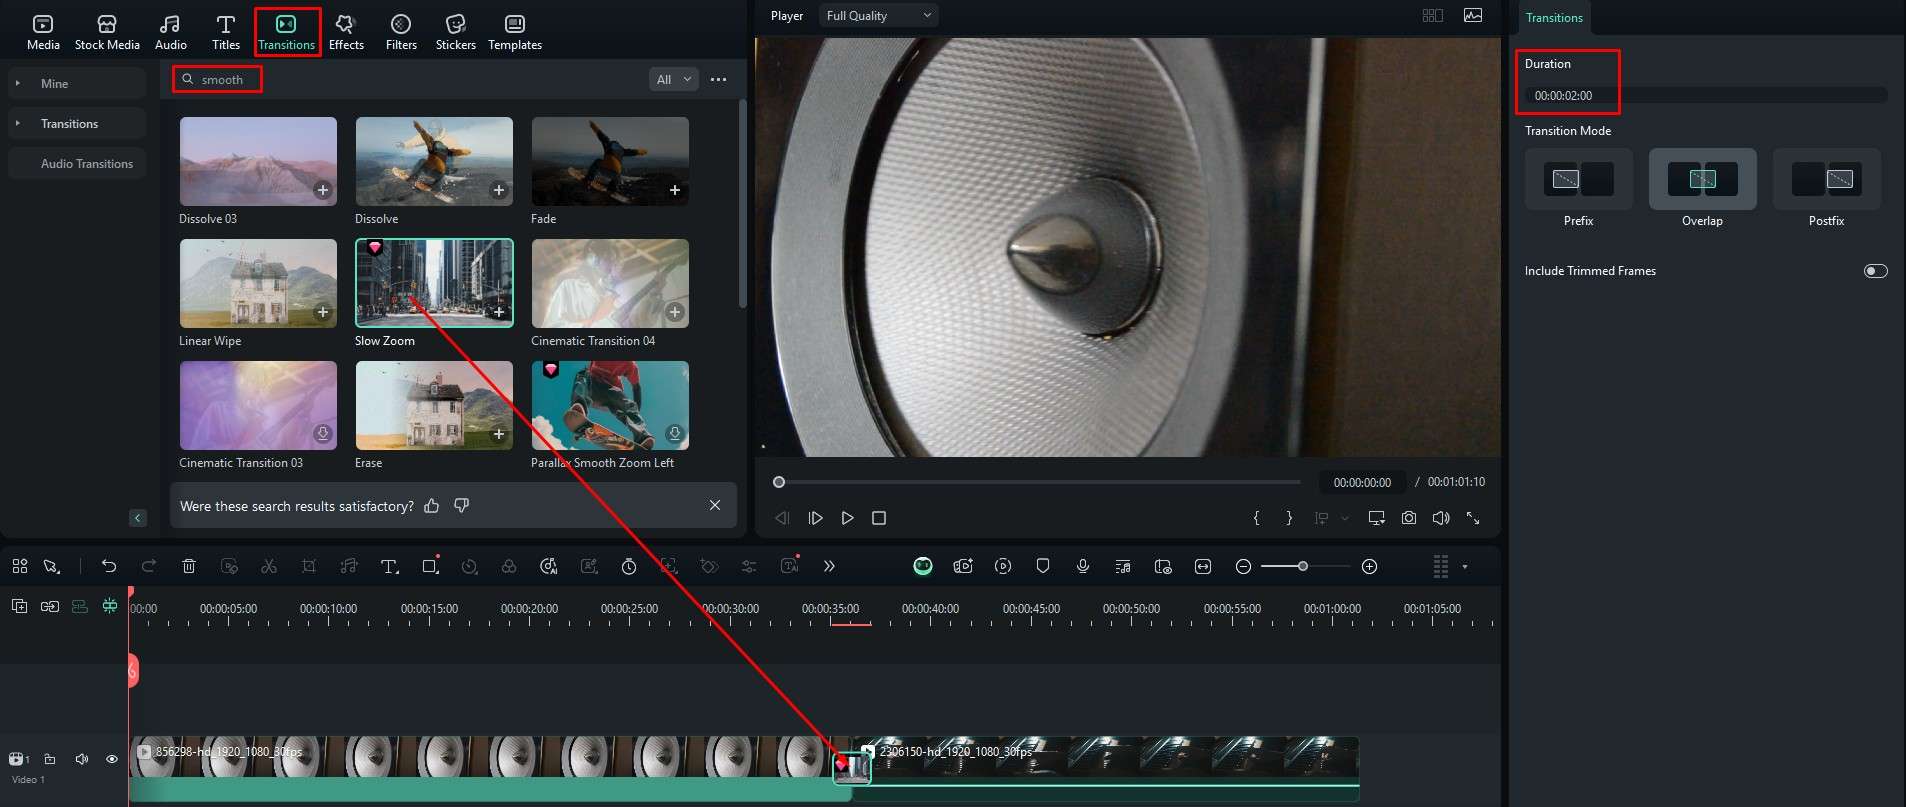
Step 4: Go to Transitions, then type smooth in the search bar, pick something that you like, and drag it to the timeline between the two media clips. On the right, you can adjust the duration of the smooth transition effect.
That’s it. You’re done. You can see that we have proven our theory from the beginning of this section. Using Filmora is certainly easier than using Premiere Pro, yet you can get results that are indistinguishable from Premiere Pro. Let’s continue proving this theory by showing you how to improve your video further with Filmora.
Add Effects in Filmora Fast
Navigate to the Effects tab (right next to the Transitions tab) and browse through a wide selection of effects that you can use out of the box. The team at Wondershare wanted to make as many pre-made effects as possible. When you find something that interests you, you can drag the effect to the timeline and adjust the available parameters on the right.

You can adjust the duration of the effect by hovering over its beginning and end points and dragging them left or right.
Add Animated Titles to Your Video
Good videos need a proper title sequence, or you might need to add some text. To do that in Filmora, you need to go to the Titles section, pick something that fits your video, and drag it to the timeline. Then, on the right, you can edit the words shown in the title, and there are other customization options to explore to make the text look just the way you want it.
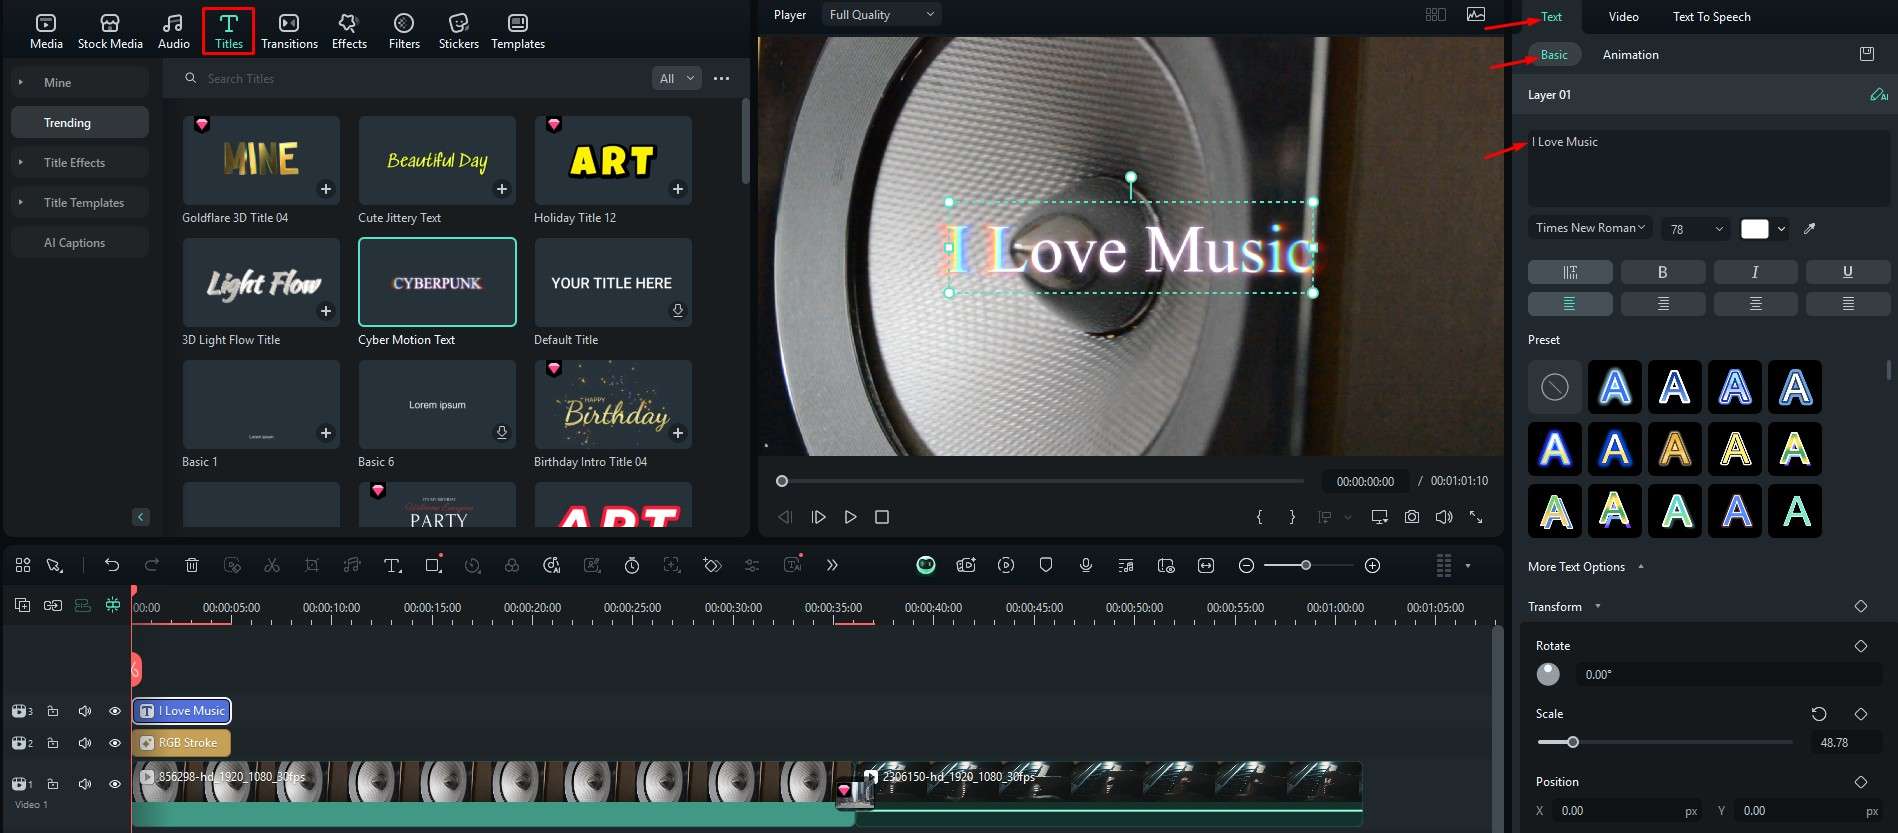
We would advise that you pick an animated title option to make your video more interesting for viewers. On the other hand, if the video requires static text elements, Filmora offers options for that as well.
Add Stickers to Make the Video Unique
Stickers are very popular today, especially among a younger audience. If you want to add animated stickers in Filmora, we are sure that you already know how to do it. Just go to Stickers, find a sticker that you like, and drag it to the timeline. On the right, you will have the option to adjust the Video, Color, and Speed features.
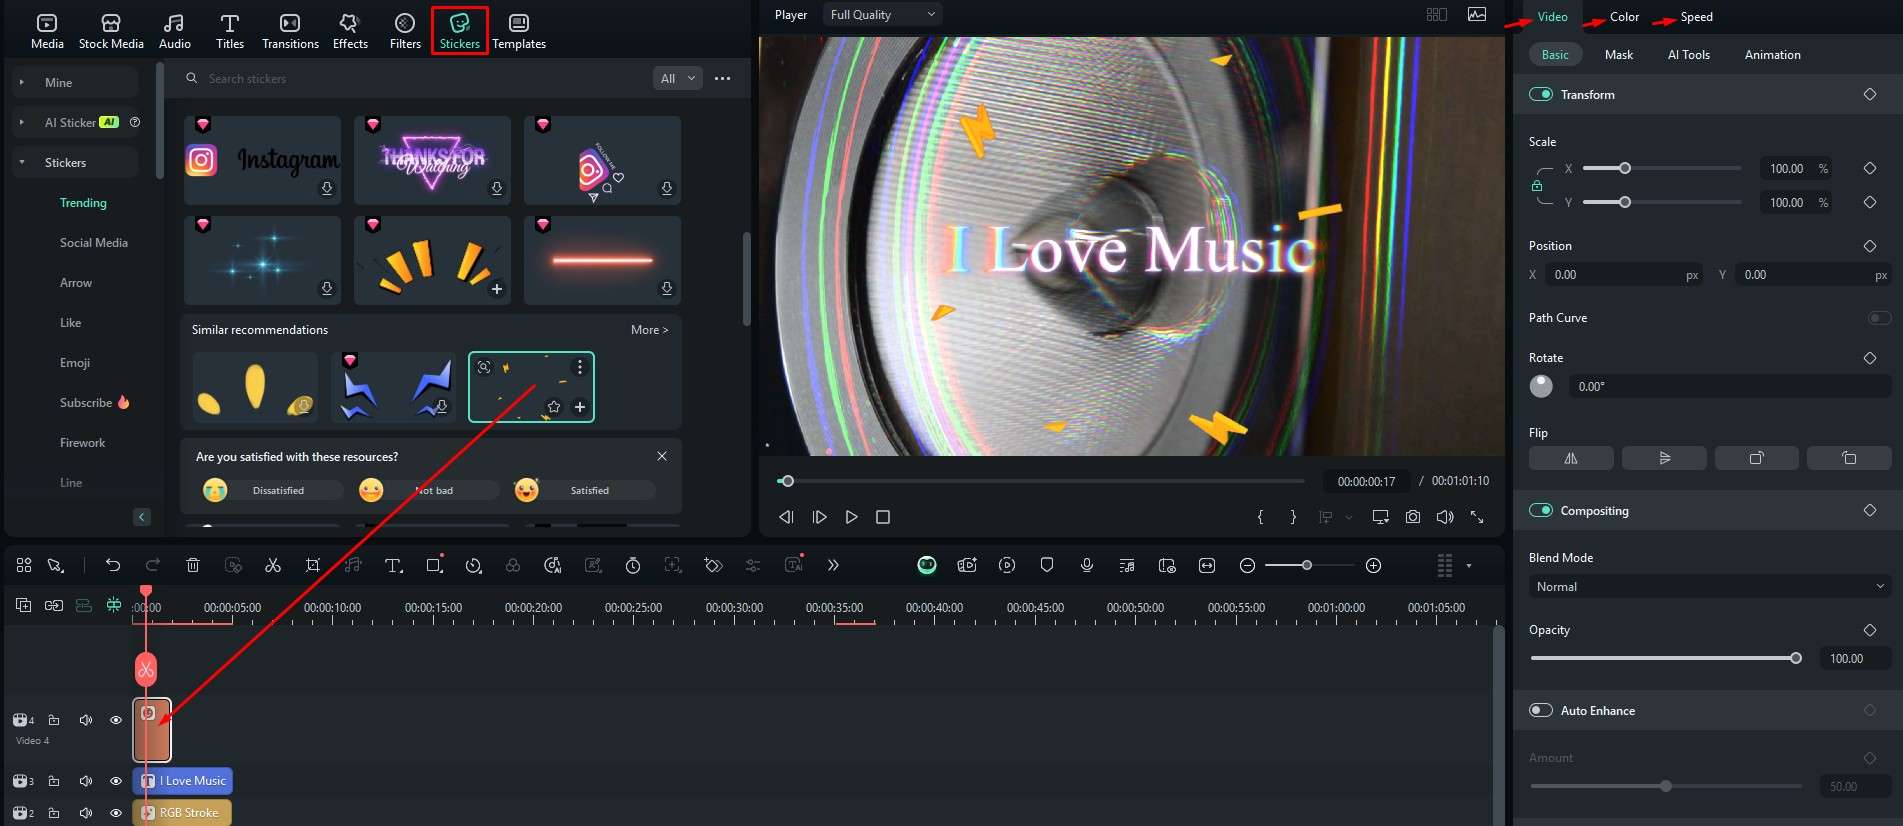
When you add the sticker, you can easily select it in the video player and adjust its size. This will help you create the perfect scene composition.
Use Filters to Change the Color Scheme
If you want to change the color scheme of the entire video, Filmora (of course) offers the option to do this manually. However, we would like to show you how to change colors in your video with Filters . Simply navigate to the Filters tab, pick something that you like, and drag it to the timeline. You can adjust the opacity on the right.
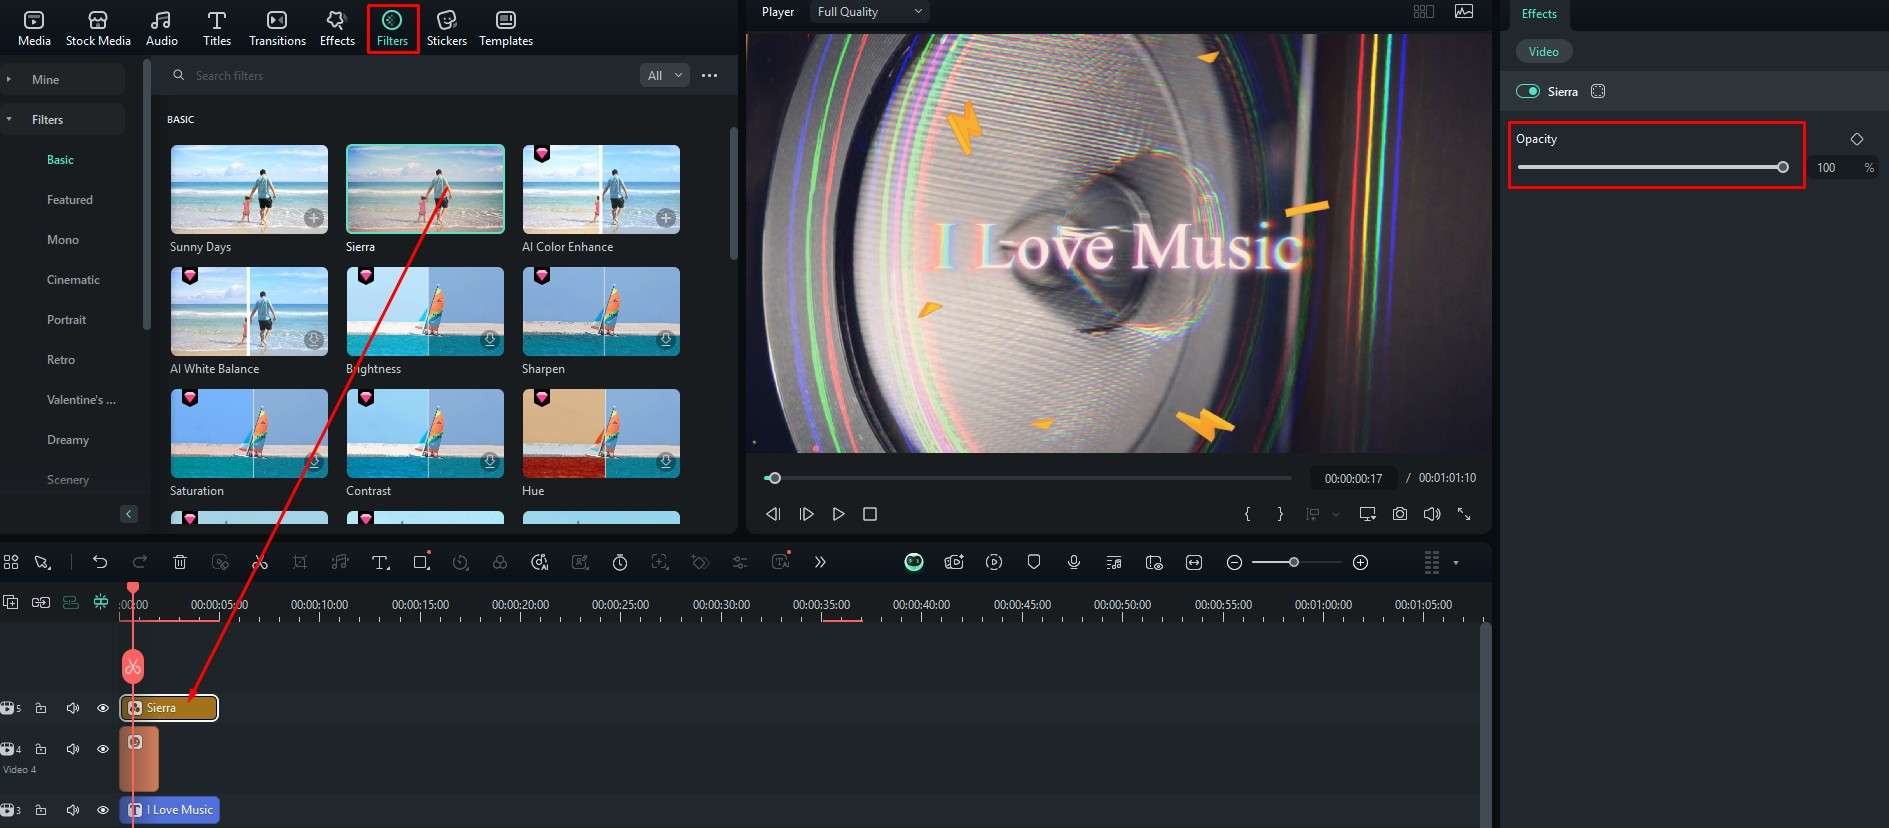
When you are done editing your video, experimenting with filters adds the much-needed final touch to your work, turning it from an amateur project into a professional-looking video.
Conclusion
We have reached the end of this guide. You have learned how to add smooth transitions in Premiere Pro, but we’ve also shown you how to use Filmora to create a perfect video with smooth transitions. We advise you to continue using Filmora on your Windows or Mac device and play around with the available AI features. If you want to use Filmora on the go, it is also available for Android and iOS platforms.
