
 100% Security Verified | No Subscription Required | No Malware

Digitalization and increased competition on social media platforms have significantly increased the demand for video editing software to split videos into multiple parts. Despite the introduction and availability of numerous software, you might find it challenging to decide on one software that fits your video editing criteria.
This guide will introduce some powerful software that can be used for different systems, such as Android, Mac, Windows, Linux, iPhone, etc., to split your videos into parts.
In this article
- What Does Video Splitting Mean and Why Is It Important
- How to split a video into parts on Windows
- How to split a video into parts on Mac
- How to split a video into parts on Linux
- How to split the video into parts on iPhone
- How to split the video into parts on Android
- How to split the video into parts online
- Common Mistakes to Avoid Before Splitting Video into Parts
What Does Video Splitting Mean and Why Is It Important
Video splitting is actually a procedure that allows you to divide a video file into smaller parts or segments. It can be used for purposes such as playback, efficient storage, or transmission. Video splitting can be beneficial if you are considering the aspects mentioned below:
Reduce video size: You can reduce the overall size of the video by splitting it and making it easier to transmit, store, or stream.
Improve scalability: Splitting video into parts makes it efficient to handle large video files, which makes it suitable for applications with high traffic or large file sizes.
Faster Streaming: You can stream smaller video segments more quickly to improve the user experience.
Enhance editing flexibility: Splitting video into parts allows editors to work on individual segments independently.
Improve error tolerance: In case a part of the video is corrupted or lost during storage or transmission, the rest of the video will remain unaffected.
How to split a video into parts on Windows
Some video editors can help you accomplish your goal of easily splitting videos on your computer with half the work! Next, we'll suggest a few light and user-friendly video editors for the Windows operating system.
Wondershare Filmora
Well, if you are looking for a video editing tool that helps you split your video while providing professionalism, you should not go anywhere else. We bring the tool right here only, and the tool is Wondershare Filmora. Using this tool makes you satisfied with video splitting, as it works with perfection. To learn more about its features, let's go through the details mentioned below:
Key Features:
- Easy to remove unwanted and unnecessary parts of your video with its perfect splitting tool.
- Offers cloud backup of the videos, making it easy to upload, transfer, and store a video.
- Easy to export output video in different formats, such as MP4, WMV, AVI, MOV, GIF, and more, without quality loss.
- Superb video stabilization with low distortion.
- Vast video/audio effects and creative assets.
- Powerful AI for effortless content creation.
- Intuitive, professional yet beginner-friendly.
- Works on Mac, Windows, iOS, and Android.


Well, you can split your video in four ways while using this software. Let's discuss what these are:
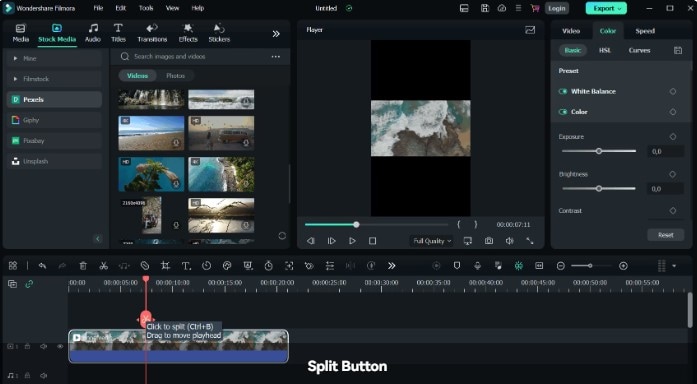
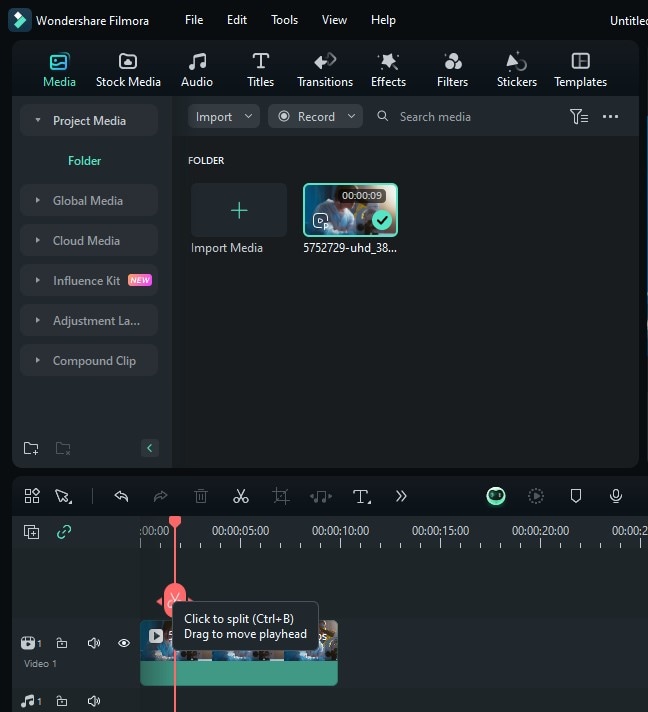
Method 1: Click to split
Drag the playhead on the video part you want to split, and click the Split button on the playhead.
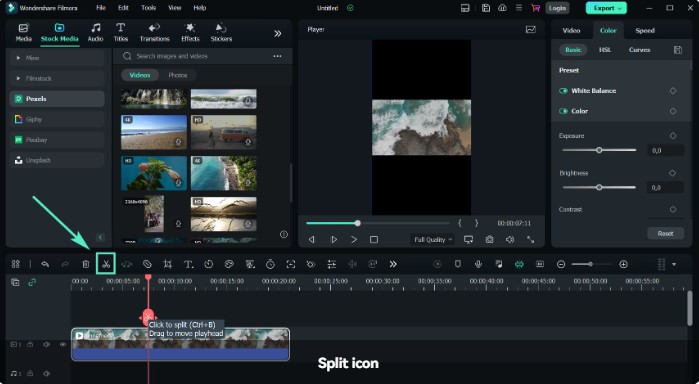
Method 2: Scissor icon
Simply drag the playhead button on the selected video and press the Scissor icon button, as shown in the image.
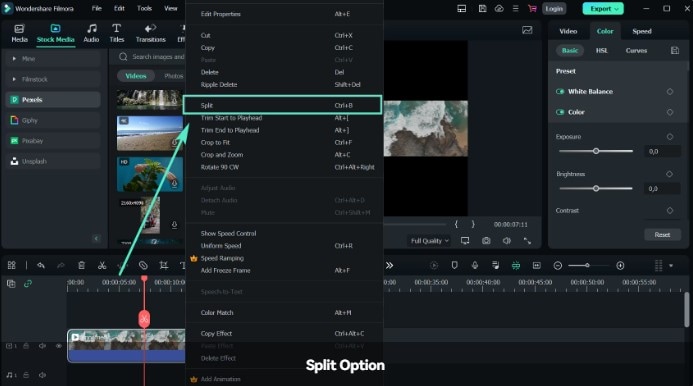
Method 3: Split Option
Keep the playhead on the video. Select the Split option while right-clicking on it.
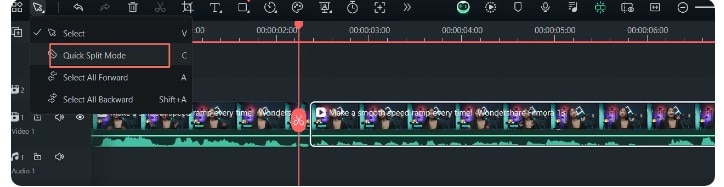
Method 4: Quick Split Mode
Go to the Arrow near the custom toolbar and select Quick Split Mode from the dropdown. and click on the part of the video to split the video file.
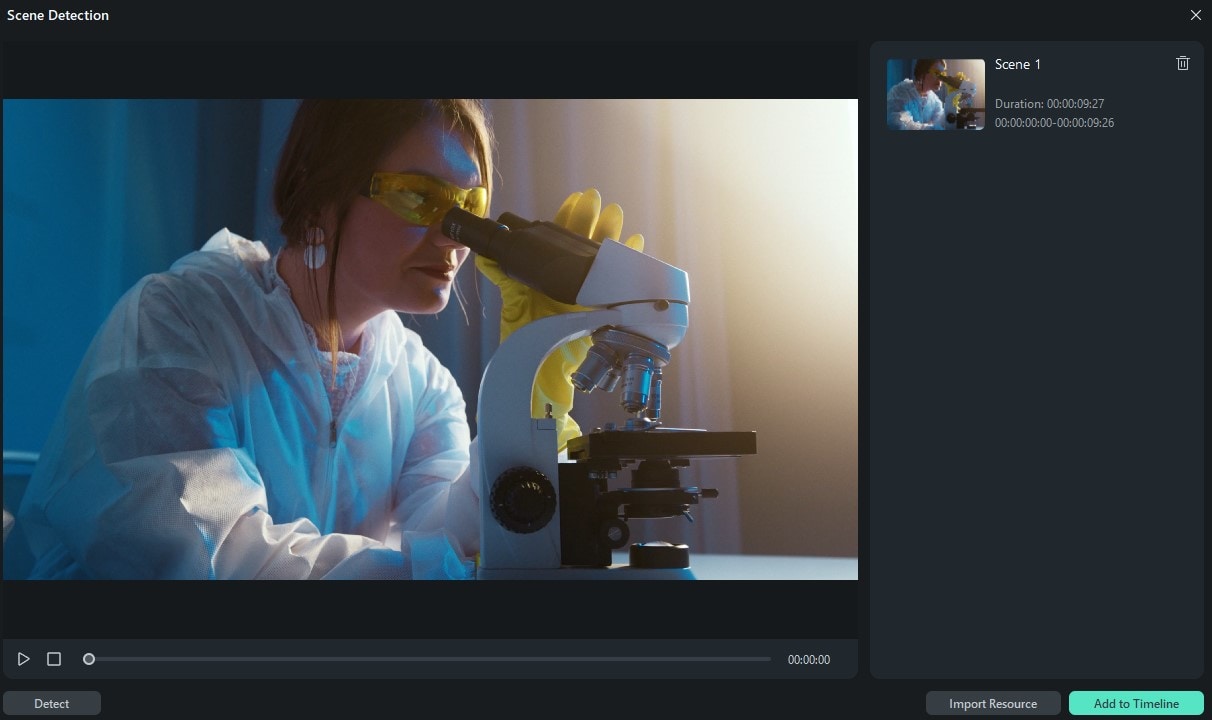
To make your work easier, we are providing a step-by-step guide using the scene detection button option. Scene Detection is an advanced editing feature offered in Filmora, which can be used to automatically split a film into basic temporal segments by detecting the transitions between shots in a video.
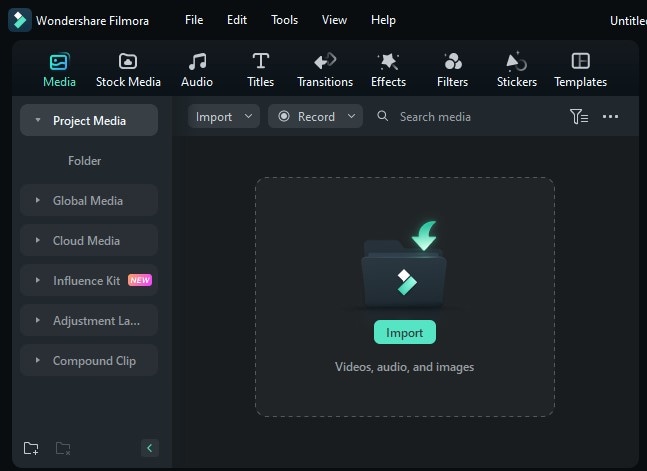
Step1Download and launch Filmora
Download Wondershare Filmora on your device and navigate to Install > Open > New Project > Import to import the video for splitting.
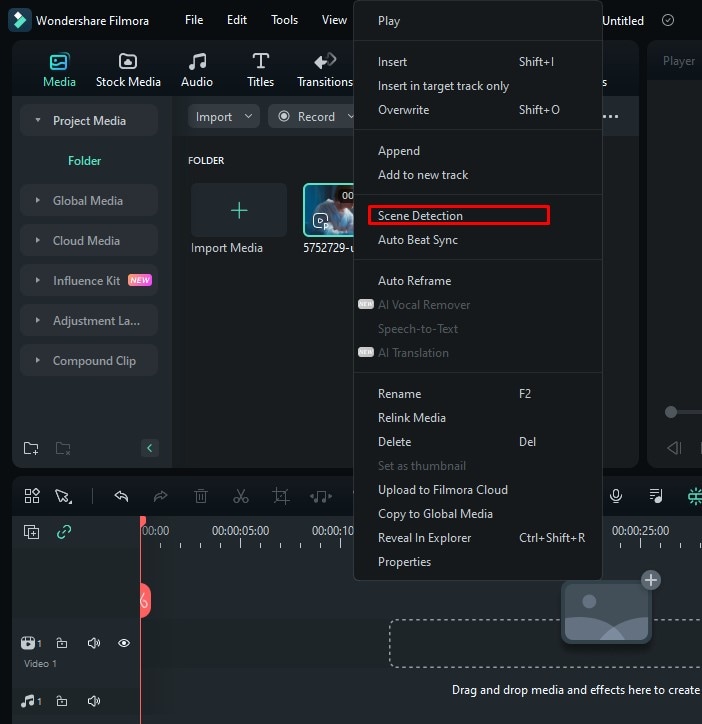
Step2Scene Detection
Right-click on the video and select the Scene Detection option.
Step3Tap on the Add to Timeline option.
Step4Customize the video
You can use transitions, effects, filters, and stickers to enhance your video.
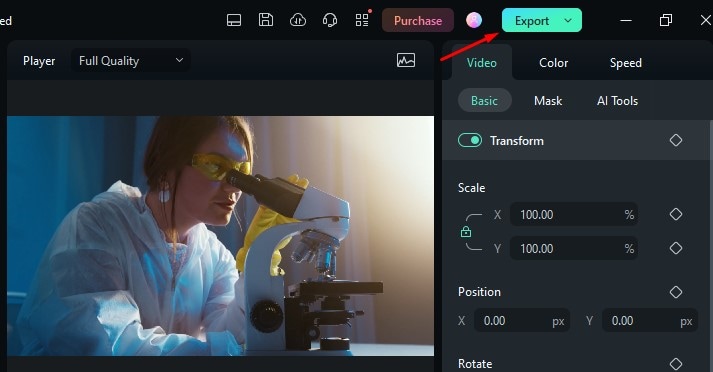
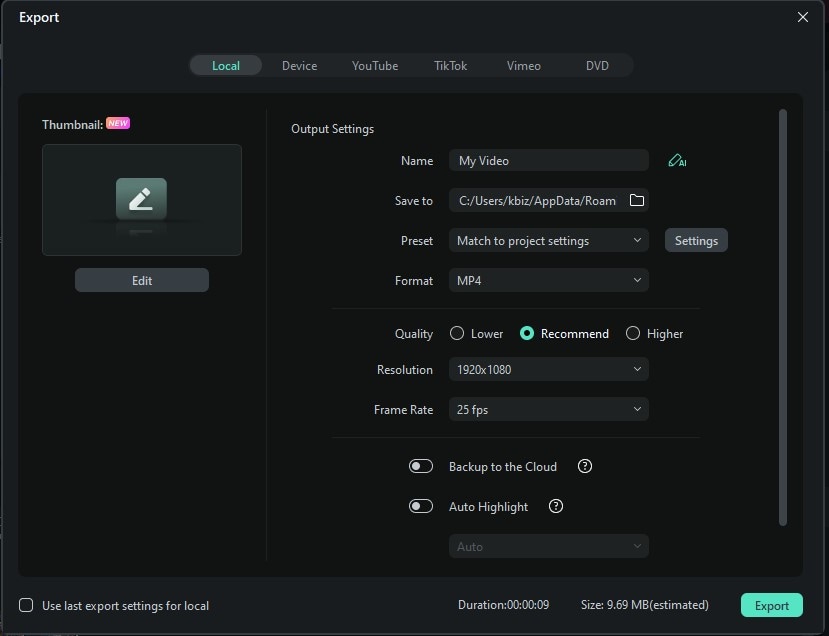
Step5Adjust export settings
Change format, resolution, and frame rate according to your requirements and press the Export button to save the changes.
Hope that this step-by-step guide helps you with how to split a video into multiple parts while providing ease.
How to split a video into parts on Mac
If you want to edit your video and trim, you can do it by Filmora on Mac. They are
1. Wondershare Filmora for Mac
Wondershare Filmora is a video editing program with a delightfully user-friendly interface that enables anyone to become an excellent video editor. With the help of various strong editing tools and Wondershare Filmora, users may quickly and easily make great videos.
You can easily split the video into different parts by following these steps:
Step1Install the Filmora video editor on your Mac.
Step2Start Filmora, select New Project, then import the video you want to split.
Step3On the timeline, drag the red scissor icon to the place where you wish to split it, then right-click on it. Click the "Split" option when you see it now.

Or choose the video from the timeline, slide the red line to the target dot, and then click the red scissor or the scissor at the top of the timeline to split it.

Step4You can export your video after finishing all the editing.
2. iMovie
iMovie is a video editing software designed and built by Apple Inc. for their products, such as Mac. This video editing software involves a wide range of features that include the modification and enhancement of video quality, split, trimming, or crop videos, adding transitions, and some other valuable and useful features.
There are steps to get your edited video by iMovie.
Step1Download and launch iMovie on your device.

Step2Upload the video for editing by clicking on Create Project.

Step3Trim or Split the video.

Step4Export and save the video.

How to split a video into parts on Linux
OpenShot is a potent free video editor that supports more than 70 languages and has a variety of useful functions, including video motion effects. It is unquestionably a simple, quick-to-learn, yet surprisingly effective video editor.
We can be done this by using OpenShot on Linux after going through the steps below:
Step1Install the OpenShot on your Linux and launch it.
Step2Import the video files, then select Split Clip from the context menu by right-clicking. You can also use the keyboard shortcut Ctrl + X.
Step3In the preview window, select the start screen and click Start (the end screen and click End). When finished, press Create. This video will then be extracted and show up in your media library as a separate clip.
How to split the video into parts on iPhone
1. Built-in Photos App
We advise using the editing feature in the iPhone's built-in Photo app if you only want to do basic video editing.
Step1Open the Photos App and press the Edit button to split the video.
Step2Move the pointer on the desired clip to modify the selection, then click the Done button in the bottom right corner to save the video.
Step3You have the option of immediately replacing the original or selecting Save Video as New Clip.

2. Filmora
You can cut your video by iPhone by the following method:
Step1Install the Filmora application from the play store and launch it. Click on New Project to upload the video.
Step2To split a frame, you must drag the video clip onto the timeline while allowing the playhead to remain where you want it. To finish separating, tap the Split button.
Step3Tap the Export button once you've finished editing the video.

How to split the video into parts on Android
1. Built-in Gallery app on android
There is the easiest way to divide your videos into multiple parts by Android. You can cut it into pieces or edit a video by using this one.
Step1Open gallery on your phone and tap on the item you need to split. Then, click on the Pencil icon.
Step2Edit the video by touching on the scissor i.e., allowing you to split the video.
Step3Once you have completed editing the video, save the video.

2. Filmora on Android
As in iPhone, Filmora also helps to cut, delete, or edit the video according to our choice in Android. It makes the clip of the movie short or pure. To get all the processes keenly study the steps below:
Step1Install the Filmora application from the play store and launch it. Click on New Project to upload the video.
Step2Upload the video.
Step3Split the video into as many parts as you want. Delete the other parts if you do not need them.
Step4Once you have edited the video, export and save it.

How to split the video into parts online
All the above methods are possible if we install and download the software or apps. But in the online method, you go to the website and can get your video in trimmed form any time. No need to download it before work. They are:
Veed.io
Users can make video and audio playlists using the online video editor VEED and then share them on social media websites. Moreover, it has a lot of editing options that might help you realize more potential for your videos.
Use the following instructions:
Step1Open Veed.io on Google and click Choose video.

Step2Upload your video item, then drag and splice your video in the timeline.

Step3The video will be divided into many parts as you want

Step4Delete them by clicking Split or S on the keyboard

Step5Click the Export to save the edited video.
Common Mistakes to Avoid Before Splitting Video into Parts
Well, now you are aware of how to split large video file into multiple parts using the tool mentioned below. However, there are common mistakes you should avoid before splitting the video into parts. By doing this, you will save time and effort without any disturbance.
Choppy Edits: So make sure to use a video editing tool that provides your video with smooth transitions. Choppy edits means you may have disjointed cuts between shots that make your video disorganized.
Ignoring Video Quality Settings: Always keep a check on these quality settings of the video such as resolutions, frame rate, or format to attracting a large audience without any quality loss.
Scene Transitions: It doesn't matter if you want to split mp4 video into parts or any other format video; you must focus on the perfect splitting, scene transitions, and elements that guide your audience through the story you want to describe.
Audio Sync Issues: Always remember that your audio is properly synched frame by frame, which includes matching waveforms of audio to video or syncing points of your video and audio before and after splitting into parts.
Conclusion
Today, we recommend the most user-friendly video editors available for each platform, in which Filmora is one of the best editing software which can be used easily. It can be used on many devices, as discussed above. They can cut and make our videos better for you. Usually, you guys need to edit your videos according to your will. Filmora helps you in it and makes your presentation well.
