The After Effects text animation presets looks amazing, perfecting it might take a lot of time and work. You may get professional results in a lot less time by using text animations in After Effects. The editor has changed from a straightforward storyteller to a one-person team that combines a motion designer, audio mixer, and a video editor as a result of the industry's high standards. In this guide, we'll go through how to create After Effects text animations, so stick with us to find out how.
The days when editors just altered videos are long gone. In order to stay ahead of the competition, editors must now include After Effects text animation presets into their work. Text animation is one of AE's most popular applications. Even basic Premiere text animations may give your films the extra lift they need to become more vibrant. In AE, using animation presets, text animators, transform settings, and expressions methodology, text layers may be animated in After Effects. Follow for the details.
In this article
Part 1. How to Add Text Animation in After Effects
You may roughly follow the instructions in this article and produce a similar effect with After Effects if you are familiar with that application and prefer it for graphics and animations. Using Adobe AE, let's demonstrate how to make a text animation effect.
1. After Effects' Fly-in Text Animation
Fortunately, creating this type of effect inside of Adobe AE is really fairly simple and doesn't need downloading and installing any other templates. For those who are knowledgeable with AE and want to create the effect, that is a significant bonus.
Steps to Add Fly-in Text Animation in AE:
Step1 The first step is adding your Title Layer to a Comp that has a colorful backdrop and create a route for the text to follow using the Pen tool.
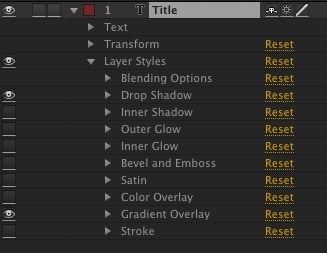
Step2 In the next step, rotate the Text menu, Path Options, and Layer down. Using the Pen Tool, change the path to the mask you just created. To advance a few frames, use your keyboard's directional keys.
Step3 Afterwards, set a Keyframe for First Margin at frame 0; reduce the value to whatever is appropriate for your Path and change the First Margin value to 0 at frame 30 to center the text on the path's length.
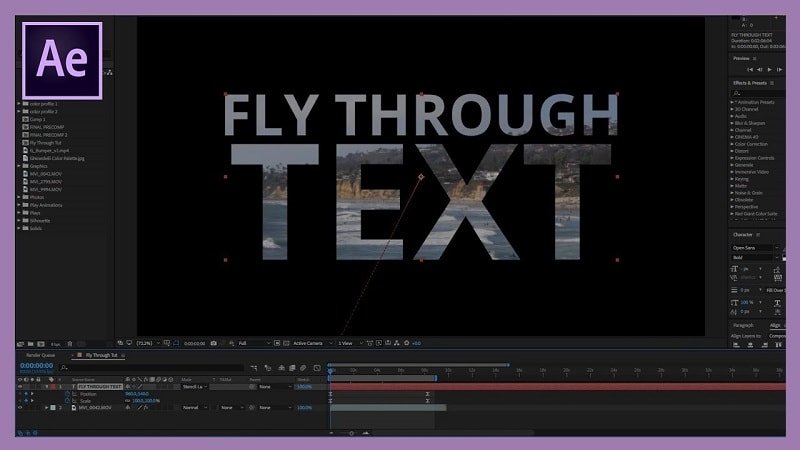
Step4 Lastly, give this keyframe an Easy Ease to setup the Fly-in text animation.
2. After Effects Typewriter Animation
A great pre-set for animators wishing to produce effects of text on paper is Typewriter Text Presets. The Bevel settings, which let you create the essential indentation effect, are more stunning than the pre-speed set's control. A fun and simple method to show titles in your films is using typewriter effects. While the classic typewriter effect could seem a bit antiquated, combining it with additional text effects will result in something fresh and interesting.
Steps to Add Typewriter Animation in After Effects:
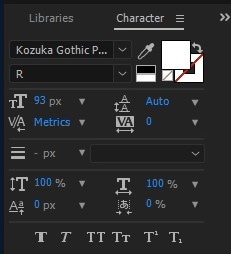
Step1 In the Media Viewer, choose the Text tool and enter your title. Then, use the Character panel to change the font, color, and size.
Step2 Look for the Typewriter effect in the Effects panel. To see text choices, click the little triangle.
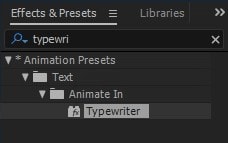
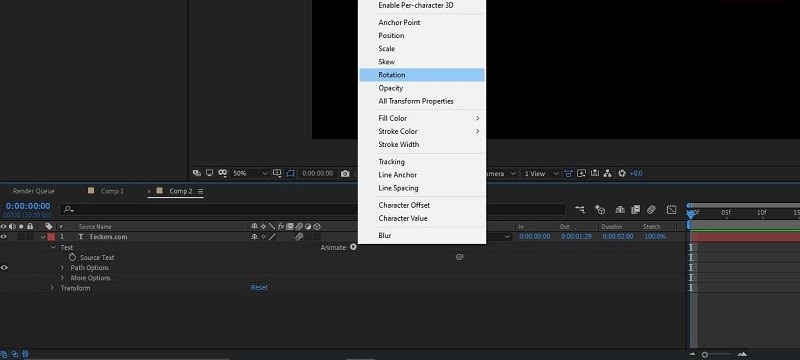
Step3 Select "Opacity" under "Animate" from the menu and advance your timeline a bit and alter the number from "Start" to 100%. Change the keyframes' positions to alter the animation's length.
3. Wiggle Text Animation in After Effects
By using the many effects tools of Adobe After Effects, we may edit any image inside of After Effects. One of them is Wiggle, which you can think of as an effect that aids in introducing vibration to the motion of any object to create motion graphics for a variety of objectives in a specific project.
Steps to Add Wiggle Text Animation in AE:
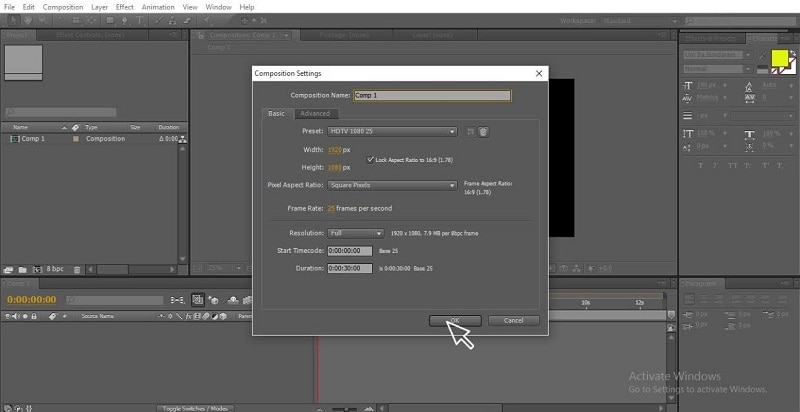
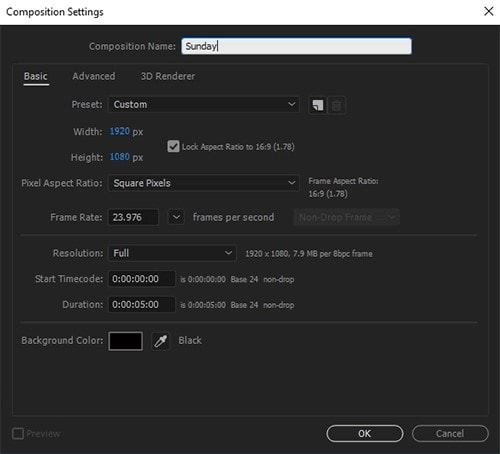
Step1 Go to the menu bar at the top of the working screen, choose Composition from the menu, then modify the composition's parameters to your specifications before clicking the dialog box's Ok button.
Step2 Go to the Window menu on the Menu bar and choose the Wiggler option from the drop-down list to get the Wiggler option. You are free to choose the wiggle value.

Step3 From the Dimensions option of this box, you may separately animate a shape in the X- or Y-direction depending on your needs.
image name: rotation-premiere-pro.jpg

Part 2. Alternative Way to Add Animation Effects
Filmora by Wondershare is more than just a generic animated text generator; it has a huge collection of animated texts and annotations that have already crossed the After Effects text animation presets. Without any prior animation skills, this user-friendly program enables you to create animated text for your ads, square recordings, and even Facebook covers.
There are several capabilities included in this free animated text maker program. Additionally, you can combine videos and animated GIFs with your photos to create brief, captivating video posts that you can easily publish on your preferred social media site, notably YouTube. Are you new to Filmora? Do not fret! Here, we'll give you a brief introduction to this feature - packed animated text generator, along with clear instructions. Let's start now!
Step1 Import media
Importing your material into the "Project Media" located on the left side of the screen is the first step. Drag the material into the empty canvas once it has been imported.

Step2 Add Texts and Titles Presets
Select the Annotations tab from the menu on the left side of the screen. Double-clicking the default text will allow you to replace it with your own. You may change the hue and opacity by selecting the properties option on the right side, based on your preferences and how well they go with the movie.

Step3 Create Your Animated Text
Adjust your text and lower third length to the longest name or title that will be typed on the same toolbar as the Annotations tab. This makes it possible to maintain a constant text size and length throughout your whole movie. You may modify the layers you've made to suit your preferences and the way your movie flows best.

Step4 Add Keyframing
Use animated effects and keyframing to give your films life and movement. It simplifies animation and enables rapid application of adjustments like expanding, rotating, narrowing, etc. Simply choose the beginning and ending keyframes, and Filmora will add all the intermediate frames automatically while preserving coherence. Keyframes may be altered by adjusting their position, transparency, size, etc.
Step5 Export the Animated Content
When you're through wanting to add the text animations to your projects, just click the Export button in the top-right portion of the screen as shown below to export them as a GIF.
In addition to the GIF export option in the export box, you may choose to share your creation with just one click on your official YouTube account.
Part 3. Related FAQs About Text Animations
1. How do you make words move in After Effects?
In the Composition panel, choose the exact characters you wish to animate, or choose a text layer in the Timeline panel. Choose one of these: Select a property from the menu by selecting Animation > Animate Text. Use Animate. To animate a parameter, click the button to the right of the term "Animate." A Text Animator will be applied to the text after a parameter has been selected.
2. How do you make 3D text in After Effects?
To begin, enter a word using the Type tool (T). To activate 3D on a layer, utilize the Switches/Modes toggle to examine the switches in the timeline and turn on the 3D Layer switch to the layer's right. When a layer is enabled for 3D, options to move it in 3D space and change the layer's appearance in the composition are made available.
3. How to make logo animation in After Effects?
In After Effects, you may add your animation to the render queue as usual and choose "png sequence" from the output module options. Choose the 3D layer you wish to rotate. To find out if the Rotation tool affects Orientation or Rotation attributes, choose the Rotation tool and select Orientation or Rotation from the Set menu.
The Bottom Line
Text animation may be obtained in a variety of methods. Text presets in After Effects are simple-to-use presets that may be applied to text layers, if you are not already acquainted with them. With the help of this manual, it is now incredibly simple to use and add animation flavor to the text and videos with little effort especially with the Filmora solution. This may be used to make the video texts more engaging and do the trick of crossing viewer’s attention. Download this software to give it a try on your own.


 100% Security Verified | No Subscription Required | No Malware

