


 100% Security Verified | No Subscription Required | No Malware

Many smartphone video editing apps provide quick services for creating content. However, few offer privileges of including features like motion blur within the videos. The motion blur effect is one of the most recommended features in a video to give it a realistic touch. Where many tools fail to offer this effect, Video Star stands in the line of applications that do not disappoint users.
For this article, we will work on a guideline for how to use motion blur on Video Star. Through the provided details, you can verify and work through a similar model for creating a perfect video.
In this article
Part 1: What is Video Star?
We will first review the Video Star application and its features for a better overview of the tool. Video Star is a video editing tool designed to present impressive music videos with appropriate lip-syncing and fan edits. While the application is known for its music editing, Video Star has embedded a variety of features in its package that makes the process interesting.
It includes the option of managing the color and animation in the video. You can also find the tool appropriate for enhancing, combining, and timing clips. Video Star is a complete package when it comes to creating videos on smartphones. With its free features and advanced functionalities, Video Star does not disappoint.
The application has multiple power packs available that can be bought from a subscription plan. With the authoritative control and connection offered, this application makes quite a mark regardless of its mobility.

Download: App Store
Key Features
There are options available on Video Star, which makes it a great video editing option. Those who are up for quick editing should try this option. For that, let's check out its prominent features:
- You can customize the background and mode of the application according to your needs. Personalize the outlook of your Video Star application as per your desires.
- Add multiple songs of your choice within the video to perfection.
- The tool is integrated with iCloud, providing a dedicated button for connecting the application with the assorted data.
- Features an "Insider" page showing all essential details and updates about the application.
Review
The review of Video Star is quite promising; but mixed. You can add effects within your videos, such as motion blur. But the application still has some concerns which might need some addressing.
When it comes to updating and managing it, there are some drawbacks to its operation. Sometimes, it might even lag for no reason. Along with that, there are some complaints about the text effects included in the application. An overall review might sound good, but some tweaking is needed.
Part 2: How to Use Motion Blur on Video Star?
We will now look into some details about using the motion blur effect on Video Star. While you learn how to target the Video Star motion blur effect to perfection, a comparison in procedure will also be highlighted for better understanding. Look through the details to know more about how to use motion blur to perfection:
Steps to Perform Motion Blur Through Transform on Video Star
Step1 As you download and install Video Star, launch and tap the “+” icon on the top-right to add a video. You must select the “Edit Video” option to proceed further.

Step2 After adding the video, you must use the "Set Start" and "Set End" buttons to trim out the unnecessary part of the video. Select the "Make Video" button on the top and lead to the next part.

Step3 As the video is trimmed, tap the “New” button on the bottom-right and proceed to select “Transform” from the available options.

Step4 You must select the "Motion Blur" effect from the options below. As you are led into the parameter settings of the effect, you will find multiple things to cover on the screen. While you can set the blur element using the slider, set whether the effect will be "Trailing," "Leading," or "Both."

Step5 You can set the video on a lower frame rate using the "Dial" icon. Set the slider under the "Blend" option and proceed to click the "Create" button.

Steps to Perform Motion Blur Through Re-Effects on Video Star
Step1 While you try another technique to perform motion blur on Video Star, you must import the video and set its starting and ending points. As you edit the video, select "New" and find the "Re-Effect" option.

Step2 Continue to the next screen and tap the "+" icon to add an effect. You can find the "Motion Blur" effect by using the "Search" icon present on the screen. As the motion blur effect is added, you have to set the effect using the slider.

Bonus Tips – Add Motion Blur with Filmora on Desktop
If you are looking for a better option than the motion blur effect on Video Star, a desktop editor can give you a more flexible and polished workflow. One strong alternative is Wondershare Filmora, an easy-to-use yet powerful editing tool that now includes a built-in Motion Blur feature. It helps creators make fast-moving footage look smoother, more natural, and more dynamic with less manual work.
To learn more about Wondershare Filmora, here are some of its key advantages:
- Filmora now offers AI Motion Blur, which can automatically apply natural-looking motion blur to fast-moving elements in your footage.
- It supports flexible adjustments such as Range, Intensity, and Direction, making it suitable for both beginners and advanced users.
- You can export videos in multiple resolutions and optimize settings for different devices and platforms.
- Along with motion enhancement, Filmora also provides transitions, filters, effects, stickers, and other creative tools for faster editing.
Steps For Adding Motion Blur to Wondershare Filmora on Desktop
Now, let’s look at how to add motion blur in Filmora with the latest workflow:
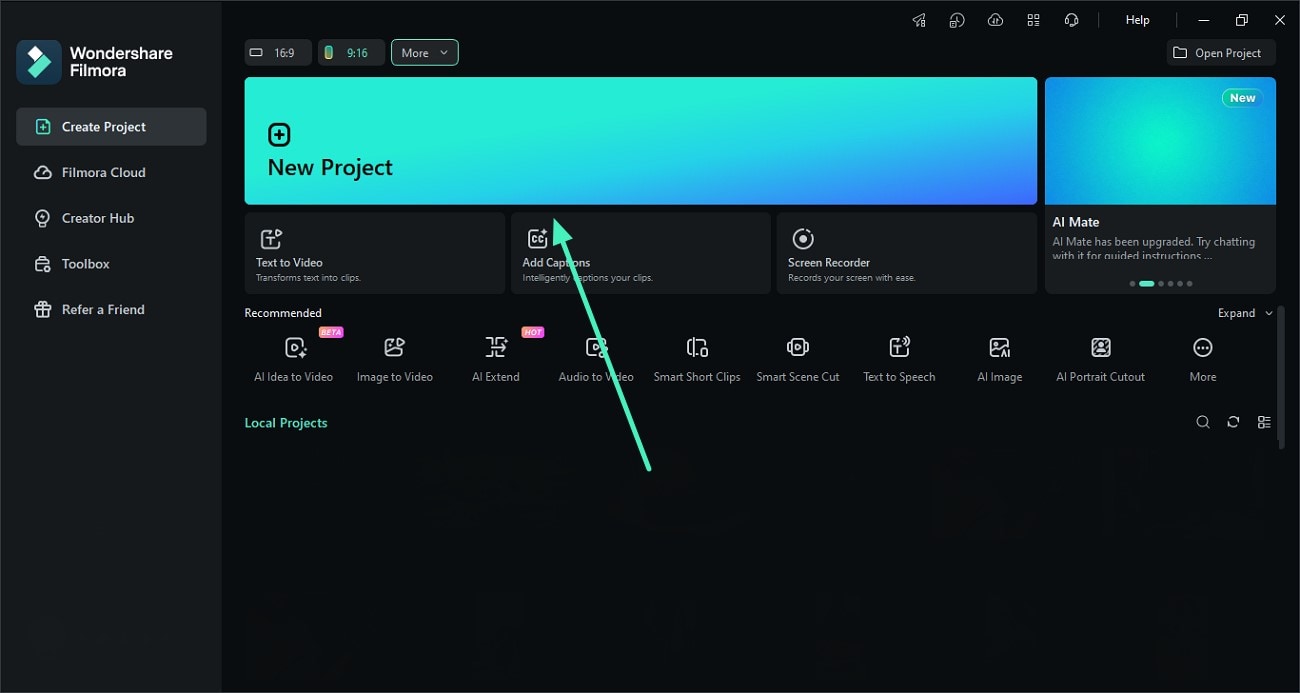
Step1 Open New Project and Import Video
Launch Wondershare Filmora and create a New Project. Import your video into the media library, then drag and drop it onto the timeline for editing.
Step2 Enable the AI Motion Blur Feature
Select the clip on the timeline and turn on the Motion Blur feature. Filmora will automatically apply motion blur to fast-moving elements in the footage.
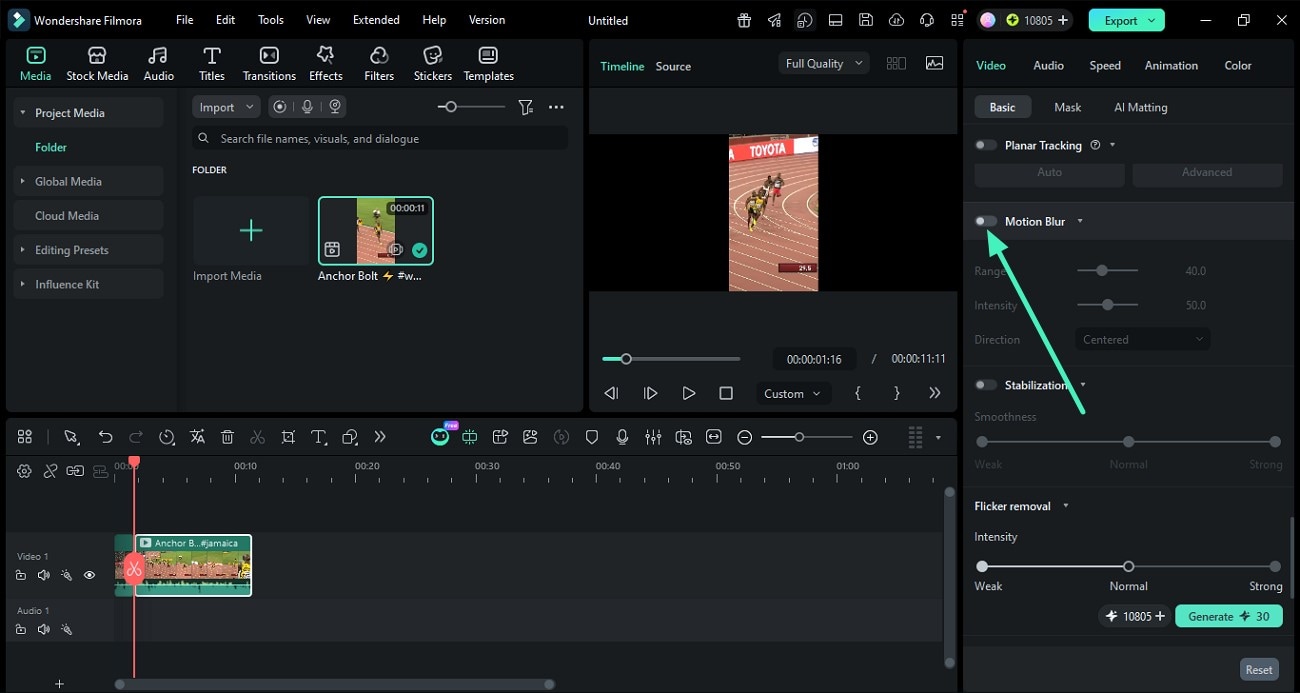
Step3 Adjust Blur Range and Intensity
Use the Range slider to control the spread of the blur effect and adjust Intensity to define how strong the motion blur appears. Then expand the Direction menu to choose the motion style that best matches your footage. Preview the result and refine it as needed.
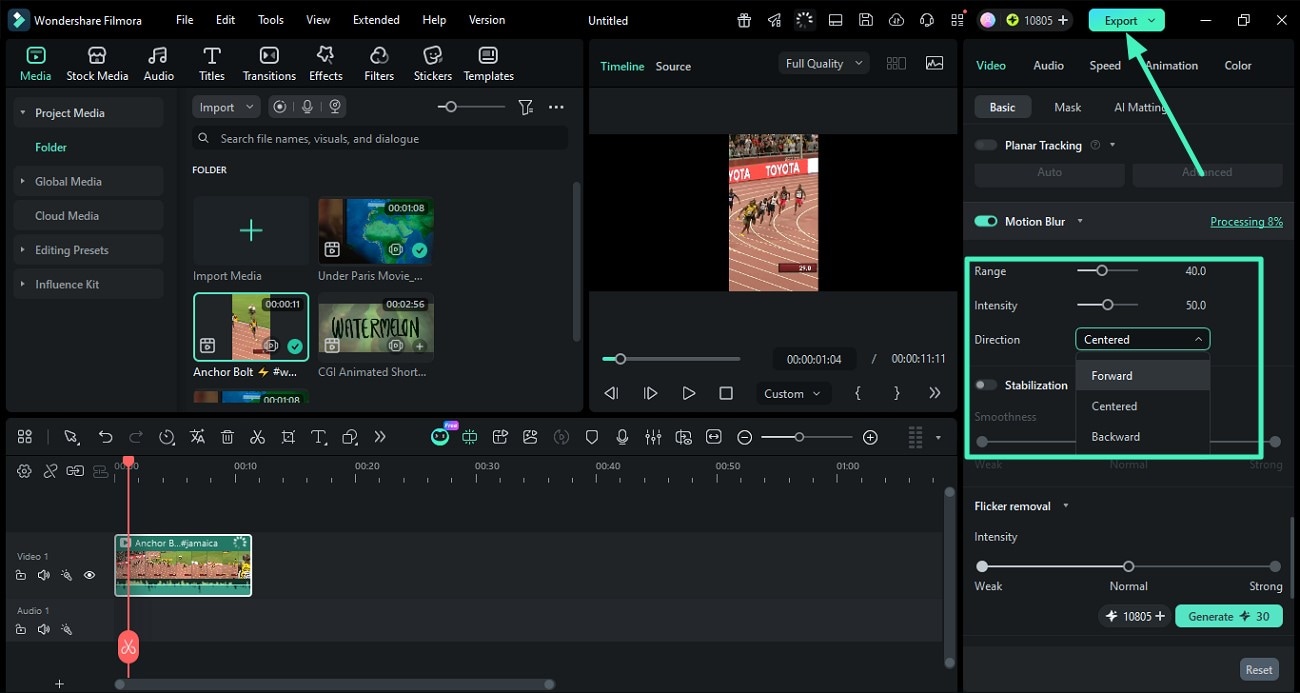
Step4 Export the Edited Video
Once you are satisfied with the result, click the Export button to save your video in the preferred format and resolution.
Last Words
The article has provided a complete overview of the Video Star Motion Blur effect. With the provided details and a guideline on adding motion blur to a video, it is prominent how one can add the effect to make their video look realistic. For a better editing experience, you can consider using Wondershare Filmora on your desktop for better results.
