


LUTs, or Look-Up Tables, are one of the easiest ways to transform flat-looking footage into videos with richer, more cinematic colors. That's why many creators search for free LUTs, cinematic LUTs, or the best LUT download options to speed up their color grading workflow.
Among the many video editors available today, Wondershare Filmora LUTs have built a strong reputation for its large built-in collection and an easy-to-use editing experience. But are Filmora LUTs really worth using, and how do they compare to downloading LUTs from other sources? Let's break down the full collection, how to use them, and whether they are worth adding to your editing toolkit.
Part 1. Understanding LUTs: Everything Beginners Should Know
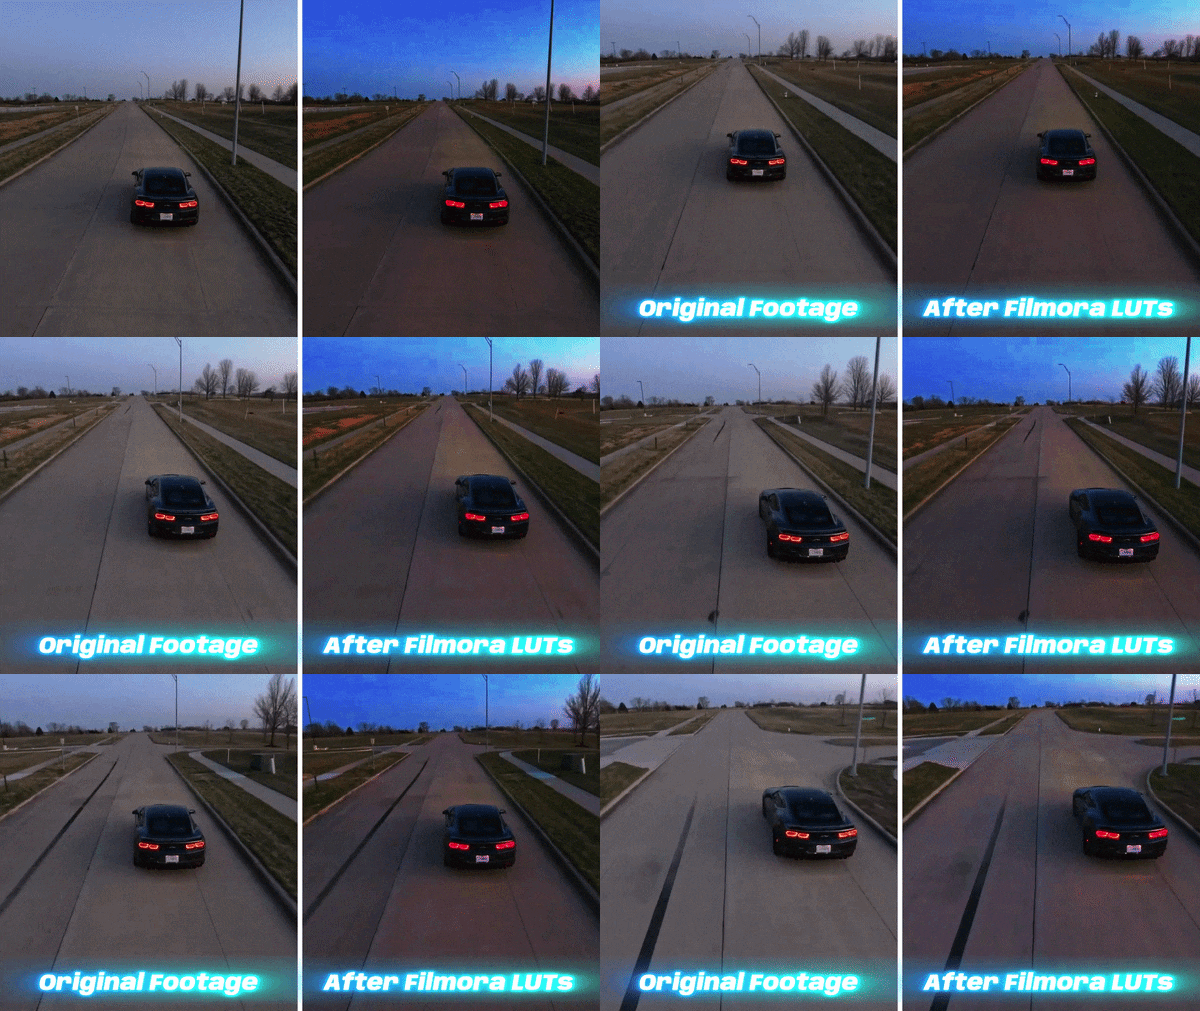
In video editing, a LUT is essentially a set of instructions that maps existing colors in your footage to new color values. The result can change the overall color, contrast, brightness, and mood of a clip. It turns flat greys into deep contrast and dull blues into vibrant skies instantly.
Because of its capabilities, a lot of people lump video LUTs and filters together, but they're not quite the same tool. Here's the difference:
| Feature | LUTs | Filters |
| How It Works | Precise mathematical pixel mapping | Graphic or global color overlay |
| Log Footage Support | Tailored to convert flat Log footage to Rec.709 | Designed mainly for standard footage |
| Color Accuracy | Preserves high dynamic range without crushing details | Can easily blow out highlights or ruin shadows |
| Flexibility | Standard format (.cube) shared across pro software | Built for specific apps or social platforms |
Part 2. What’s So Special About Filmora LUTs?
If you've ever tried searching for LUTs for video, you'll quickly discover that there is no shortage of options. There are camera LUTs, film LUTs, cinematic LUTs, free LUT packs, paid collections, and countless websites offering LUT download files.
But among many options fighting for your attention, Filmora LUTs have earned a genuinely good reputation. Here's what actually sets the collection apart.
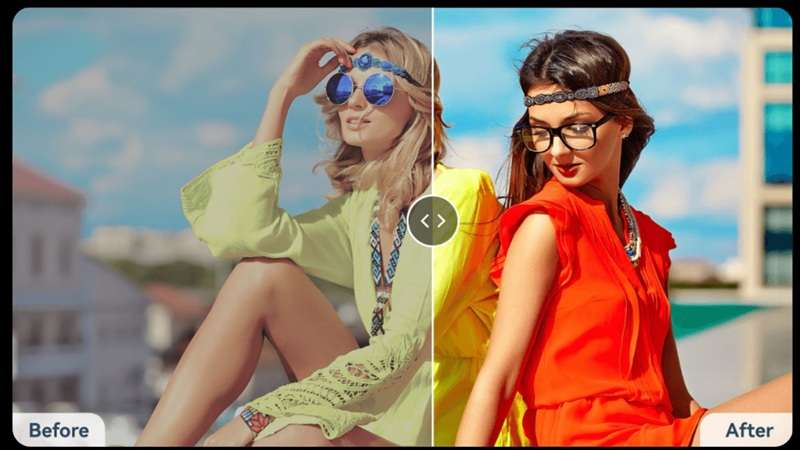
1. Available for Many Cameras and Styles
Footage looks different depending on what you shot it on: a DSLR, a drone, a phone, or a cinema camera with a flat log profile. Filmora's free LUT library accounts for that variety, offering options tuned for different source footage and creative styles rather than a one-size-fits-all approach that only looks good on one type of camera.
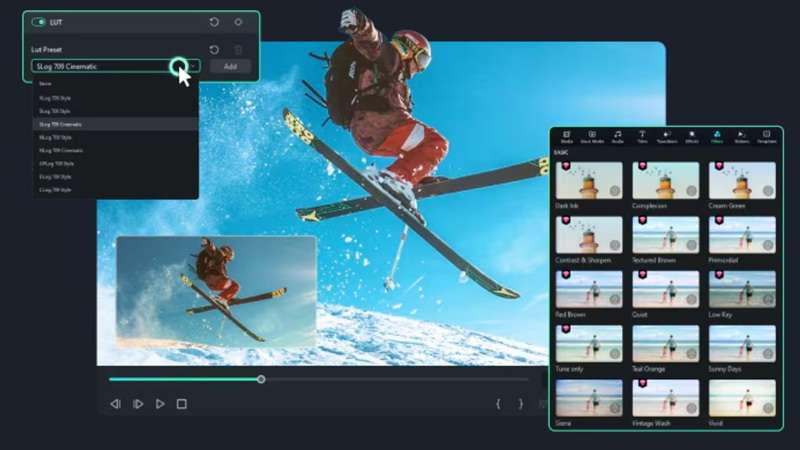
2. Rich Collection of Cinematic Collection
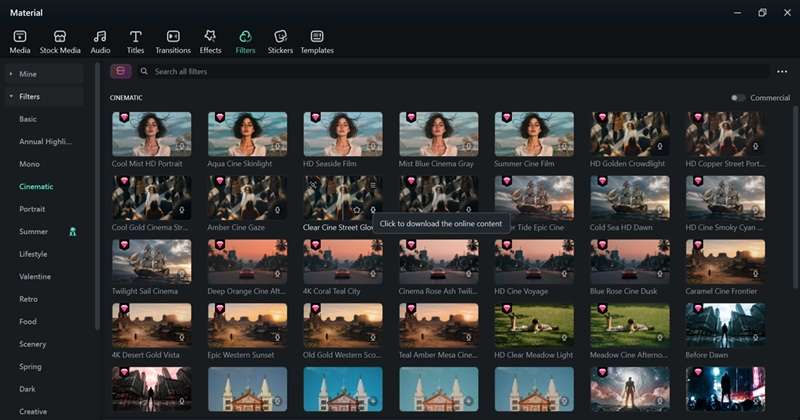
Finding cinematic LUTs for Filmora is pretty easy. Filmora currently packs in over 800 built-in 3D LUTs, spanning cinematic, vintage, moody, and film-inspired looks. So, whether you want a moody black-and-white look, warm vintage film vibes, or punchy blockbuster color palettes, there is a preset sitting right inside the workspace.
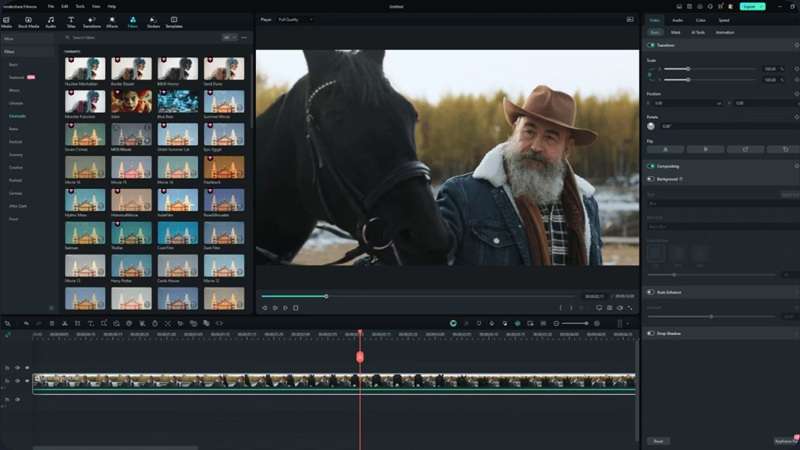
3. Easy to Download
Downloading LUTs for Filmora couldn't be simpler. You just open the editor, browse through the built-in collections, and click the download icon next to whichever LUT catches your eye. Once it downloads, it's ready to apply straight away. You won't need to download free LUTs from other sources because it's all there in Filmora.
4. Customize Power and Protect Your Skin Tone
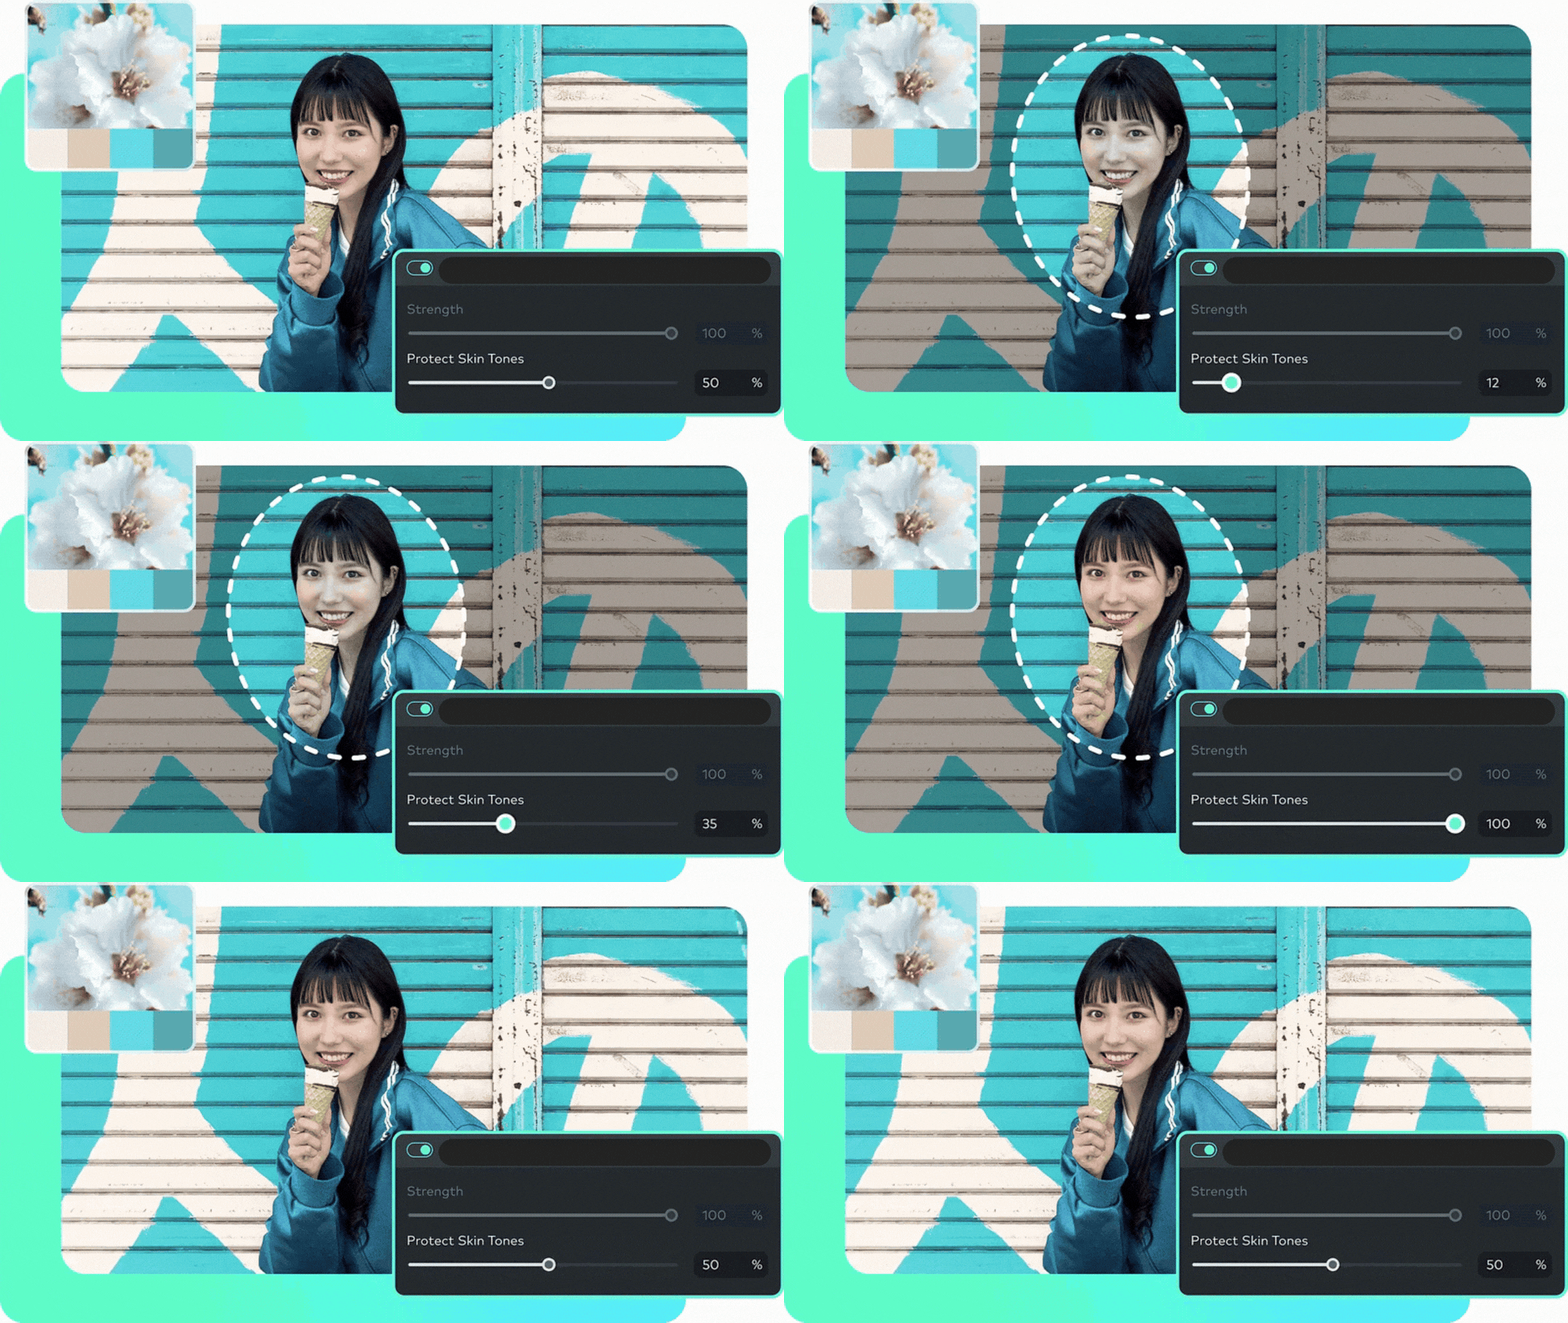
Heavy video LUT presets can sometimes leave people looking like unearthly oranges. Filmora solves this with an opacity slider to dial back the intensity, along with dedicated skin tone protection that keeps human faces looking healthy and real while the background takes on the cinematic tone.
5. Available on Desktop and Mobile
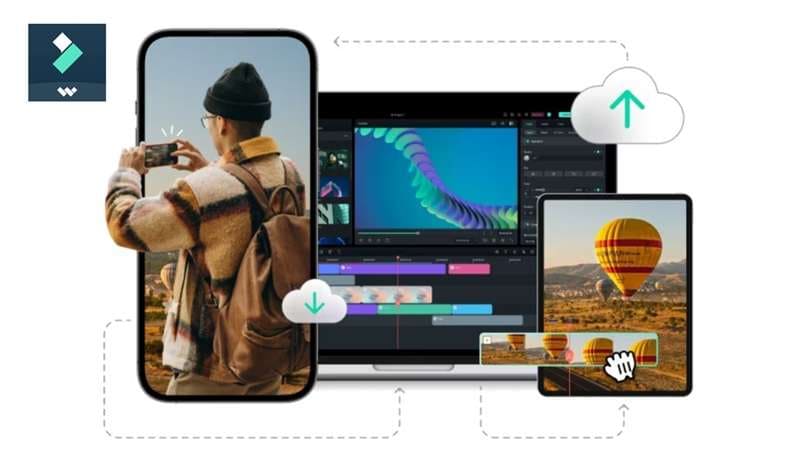
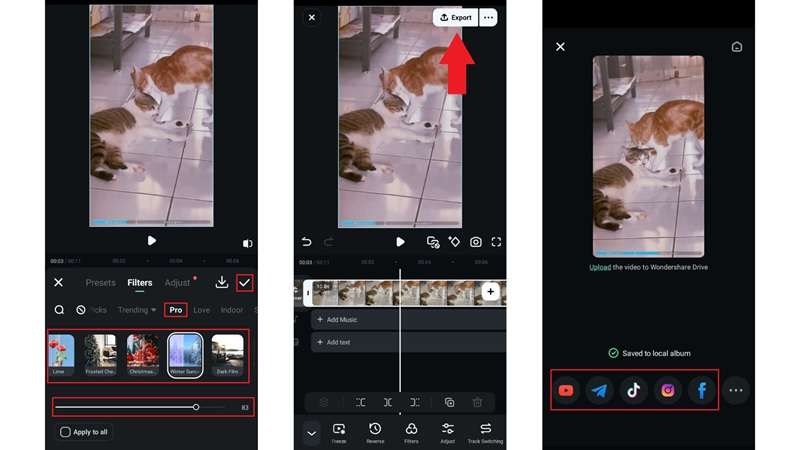
You're not locked to one device either. Cinematic LUTs in Filmora are accessible across Windows, macOS, iOS, and Android, so you can start a color grade on your desktop and keep tweaking it from your phone, or just edit entirely on mobile if that's your preferred workflow.
Part 3. How to Use Filmora LUTs and Enhance Your Clips
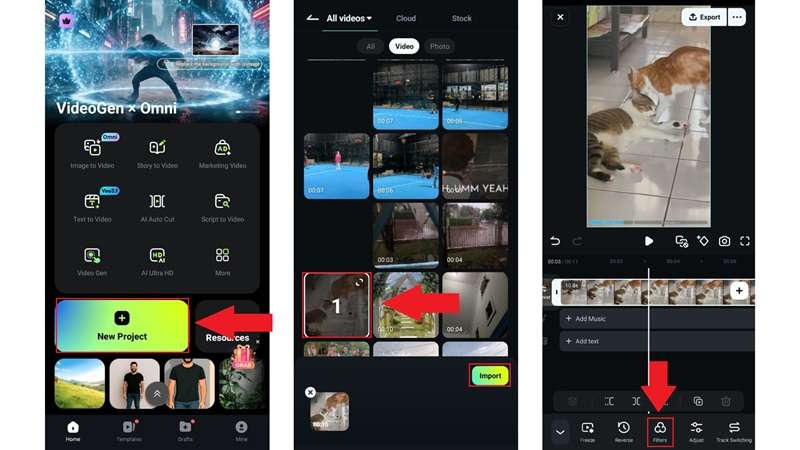
Finding good LUTs for Filmora is only half the job. The real difference comes from knowing where to put it and how much of it to use. Fortunately, Filmora keeps the basic workflow pretty simple. Here's exactly how to do it, whether you're editing on a computer or your phone.
Via Desktop
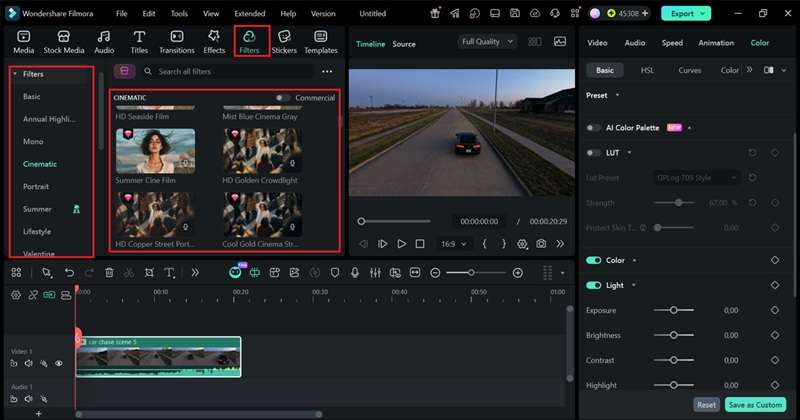
On the desktop, you've actually got two paths to reach Filmora's LUTs: through the Filters panel, or directly through the Color tab. Here's the step-by-step:
Method 1: Apply a LUT Through Color Settings
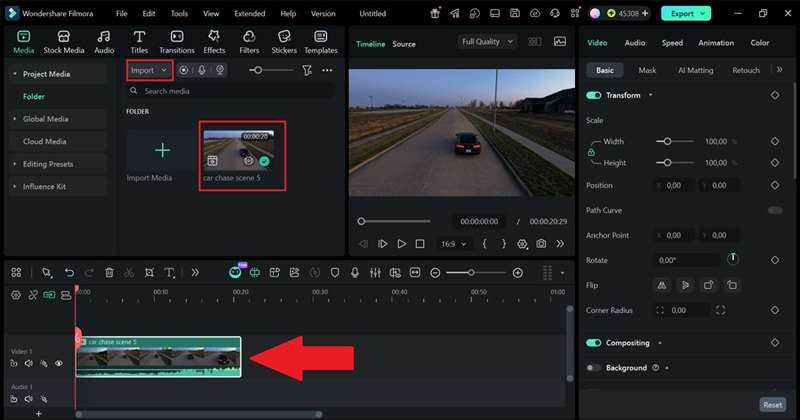
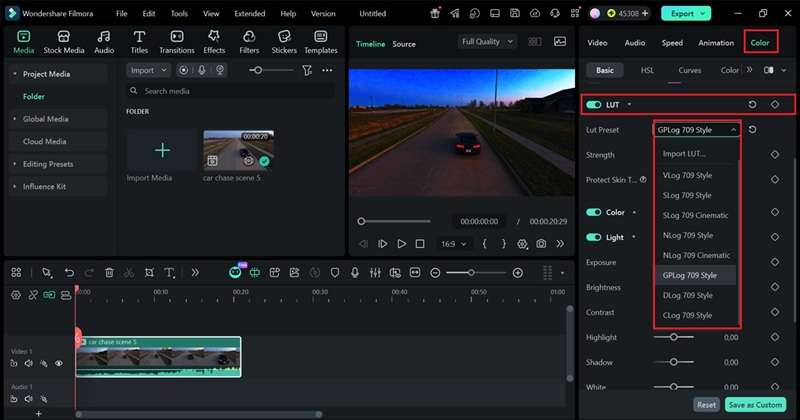
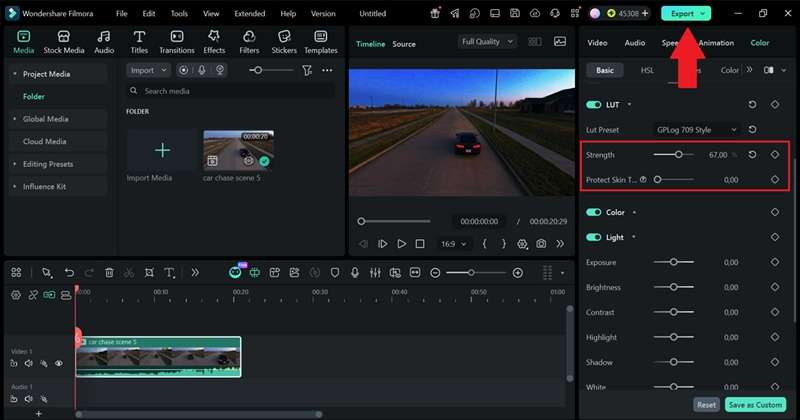
Method 2: Apply a LUT Through Filters
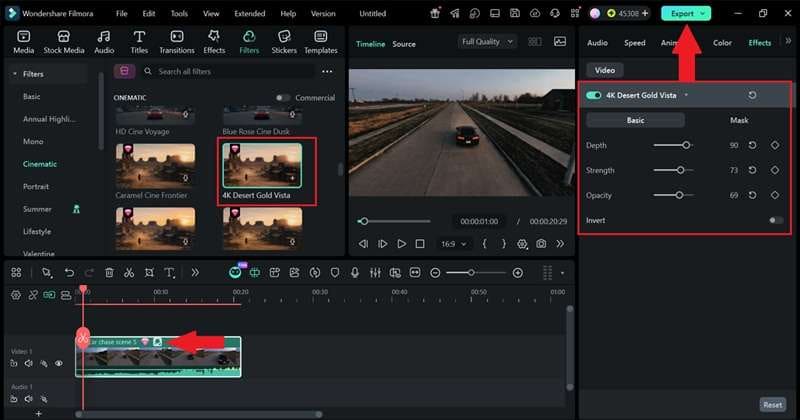
Via Mobile
 Secure Download
Part 4. Who Would Benefit From Filmora LUTs?
As you can see, Filmora LUTs are so easy to download, access, and apply. And because of that, the appeal genuinely stretches across a lot of different creative professions, not just one niche.
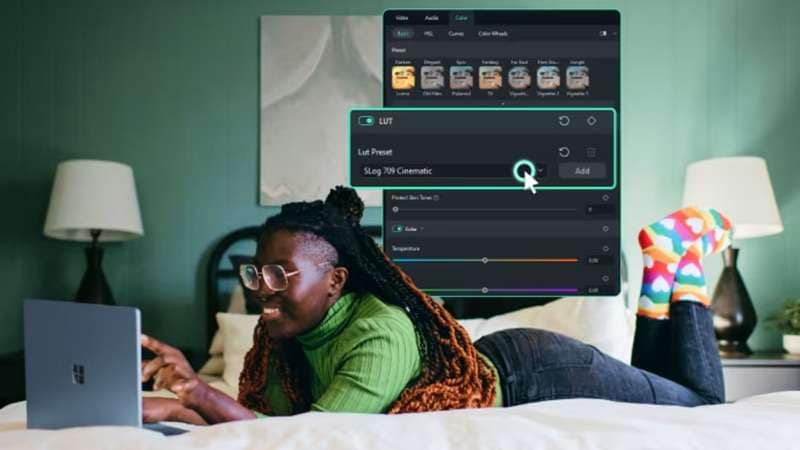
So, who gets the most out of them?
- Professional Filmmakers: Build lightning-fast rough cuts for clients or normalize flat S-Log footage on tight deadlines.
- YouTubers and Content Creators: Maintain a consistent channel aesthetic across weekly uploads, TikToks, and Instagram Reels.
- Travel Vloggers: Make ocean blues pop and mountain landscapes look vibrant without spending hours tweaking individual hue wheels.
- Wedding & Event Videographers: Blend footage taken from different camera models into one unified visual narrative.
- Small Business & Marketing Teams: Produce high-end promotional reels and product videos that look expensive on a lean budget.
Part 5. 5 Tips to Get Better Results With Filmora LUTs
As you can already tell, a LUT can make a big difference, but slapping one onto unprepared footage rarely gives you the best result. To get clean, professional outcomes every time, keep these practical tips in mind while working with Filmora LUTs:
1. Always Fix Exposure First
Never throw a preset onto an under- or overexposed shot. Clean up your basic brightness, contrast, and white balance before applying the LUT for optimal results.
2. Match Your Clips First
If you are cutting between two different angles, perform basic color correction so both shots look similar before dropping a global look over them.
3. Stack with Creative Filters.
Combine a subtle color preset with Filmora's light leaks or film grain overlays to give your footage a unique visual flavor.
4. Build an Adjustment Layer
Instead of applying your preset clip by clip on your timeline, create an Adjustment Layer on the track above your edits. Apply the preset there to grade your entire scene at once.
5. Save Your Favorite Looks for Consistency
Once you tweak a look to perfection, save it as a custom preset inside Filmora so you can apply your signature aesthetic to future projects in one click.
Bonus: Other Ways to Color Grade in Filmora
By now, you've learned all about Filmora LUTs. But the thing is, LUTs and filters are just part of the story. Since Filmora is a genuinely all-in-one video editor, there are a couple of other powerful ways to shape your video's color beyond the built-in collection.
1. Use Filmora AI Color Palette

Instead of hunting for the perfect pre-made LUT, Filmora's AI Color Palette lets you extract a color scheme directly from a reference image or video and apply it to your own footage. The AI analyzes the tones in your reference, matches them across your clips, and even includes the same skin tone protection and strength adjustment options as the LUT library, making it a smart shortcut when you already know exactly the look you're chasing.
2. Control Your Color Manually
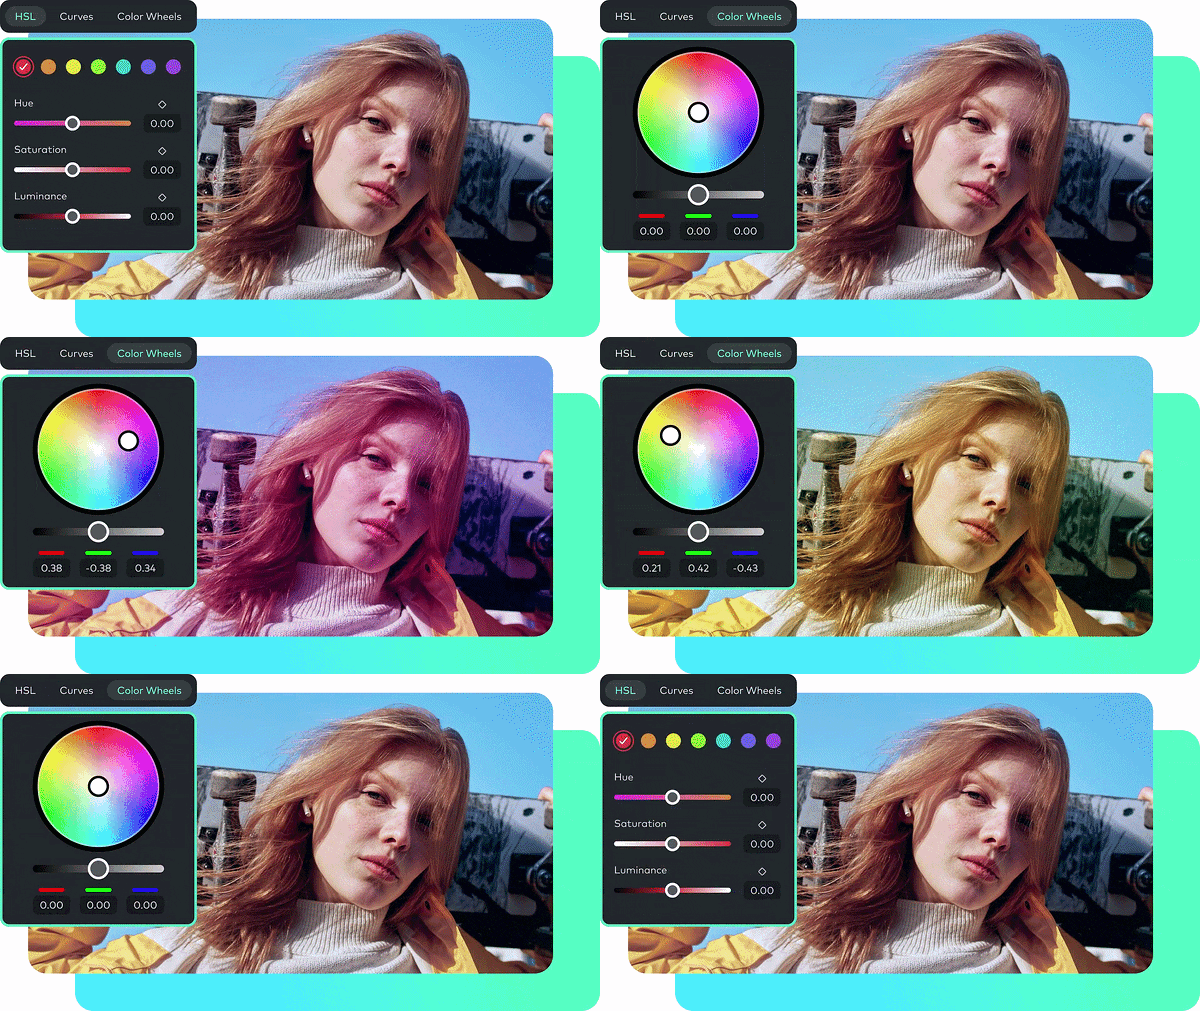
For editors who want complete precision, Filmora's Color tab also includes proper HSL controls, Curves, and Color Wheels.
- HSL Sliders: Adjust Hue, Saturation, and Luminance for specific individual colors.
- Curves: Fine-tune overall contrast, highlights, and shadow ranges with precise control points.
- Color Wheels: Separately tint your shadows, midtones, and highlights to craft custom looks.
Secure DownloadConclusion
Filmora LUTs earn their reputation honestly. With a massive built-in library, genuine customization control, skin tone protection, and availability across both desktop and mobile, they make cinematic color grading accessible without demanding a steep learning curve. Whether you're a filmmaker prototyping a grade or a vlogger just trying to make your footage look a little more polished, there's real value here.
And since LUTs are just one part of the picture, Wondershare Filmora rounds things out with the AI Color Palette, manual HSL and Curves controls, and a genuinely deep editing toolkit beyond color alone, making it a solid home base for anyone serious about giving their videos a cinematic finish.
FAQs About Filmora LUTs
-
Can I import third-party LUTs purchased from external websites into Filmora?
Yes. Filmora supports importing custom .cube LUT files, so if you've bought or downloaded a LUT pack from another source, you can bring it directly into the app and apply it just like one of the built-in options. -
Can I use the same LUT on videos from different cameras?
You can, but the results won't always match perfectly. Different cameras capture color and dynamic range differently, so the same LUT can look noticeably different from one camera's footage to another's. It's best to treat the LUT as a starting point and adjust from there rather than expecting an identical result across every camera. -
Will applying a LUT fix blurry or out-of-focus footage?
No. LUTs only affect color; they have zero impact on sharpness, focus, or resolution. If a clip is genuinely out of focus, no color grade will fix that; you'd need to use Filmora’s AI video enhancer feature instead. -
Do Filmora LUTs increase my final video rendering time?
Slightly, since applying any color effect adds a small amount of processing work during export. In practice, the difference is usually minor and won't meaningfully slow down your render unless you're stacking multiple heavy effects on top of each other across a long timeline.
