
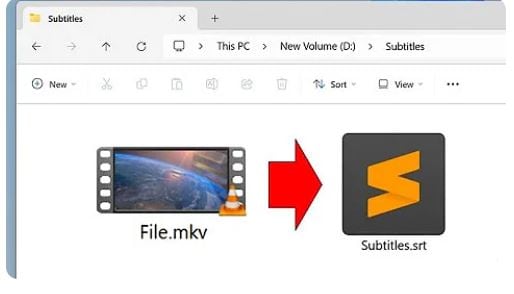
You are here because_ maybe you struggle to understand a foreign language film or TV show. Or perhaps you want to extract those subtitles for personal use or to create a more accessible video with subtitles for a wider audience. If so, you've come to the right place.
MKV (Matroska Video) files are a popular video format for storing video and audio content. They often contain embedded subtitles that can enhance your viewing experience.
So, by extracting subtitles from MKV files, you can customize your viewing experience, create subtitles for your own videos, or use them for language learning.
In this guide, we'll discuss various methods to extract subtitles from your MKV files. We'll provide step-by-step instructions and tips to ensure a smooth and efficient process. So, keep reading!
In this article
Part 1. Check the Subtitle Type and Format
Before going into the details of exporting subtitles from the MKV file, it's important to understand the types of subtitles you might encounter in MKV files.
| Softcoded Subtitles | Hardcoded Subtitles |
| Exist as a separate file (SRT, ASS, etc.) | Permanently embedded in the video file |
| Can be edited, extracted, or replaced | Cannot be extracted or modified |
| Doesn't significantly increase file size | Increases file size |
| Can be turned on or off, or switched to different languages | Fixed and cannot be changed |
Once you've confirmed that your MKV file contains soft subtitles, you'll need to identify their format. Two common subtitle formats are:
- SRT (SubRip Text): It is a simple text-based format that uses timecodes to indicate when subtitles should appear and disappear.
- ASS (Advanced SubStation Alpha): A more advanced format that supports various styling options, such as fonts, colors, and effects.

Part 2. Methods for Extracting Subtitles From MKV Files
Extracting subtitles from MKV files can be straightforward with the right tools. Here are several methods and their step-by-step instructions for subtitle extraction.
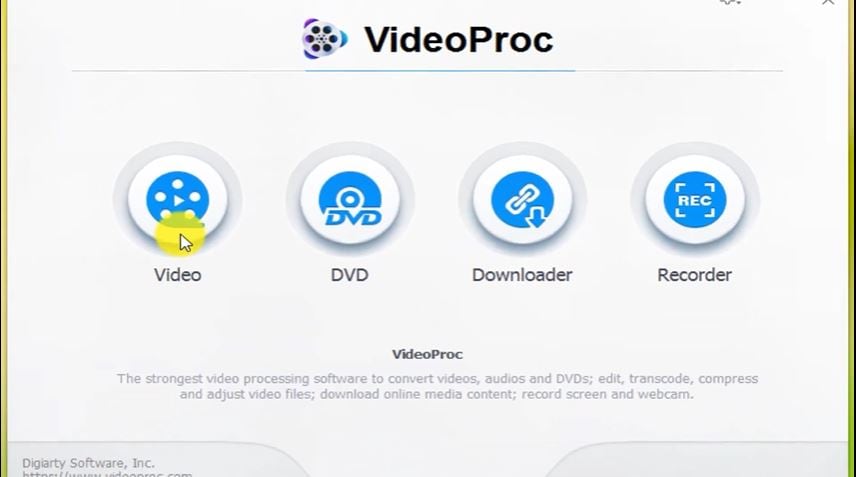
[Method 1] Extract Subtitles on PC/Mac Using VideoProc Converter
VideoProc Converter is a versatile video-processing tool that simplifies subtitle extraction while offering additional features like video editing, audio adjustments, and file compression. With support for multiple subtitle formats and languages, it’s an excellent choice for extracting subtitles from MKV files.

Step-by-Step Guide:
Here's a step-by-step guide on how to extract subtitles using VideoProc Converter:
Step 1. Download and Install VideoProc Converter
Visit the official VideoProc Converter website and download it. Follow the on-screen instructions to install the software.
Step 2. Import the MKV File
Open the VideoProc Converter and Click the Video button in the top-left corner of the interface. In the file explorer window, locate and select your MKV file, then click Open.
Alternatively, drag and drop the MKV file into the central area of the VideoProc Converter window for automatic import.
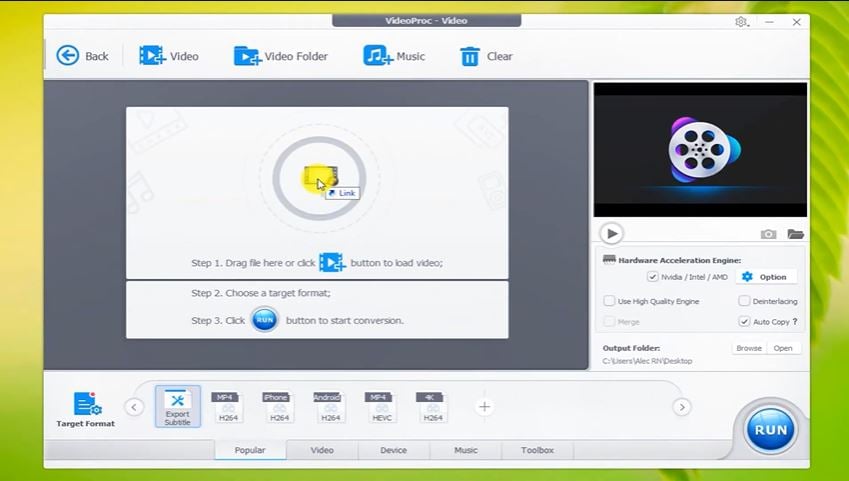
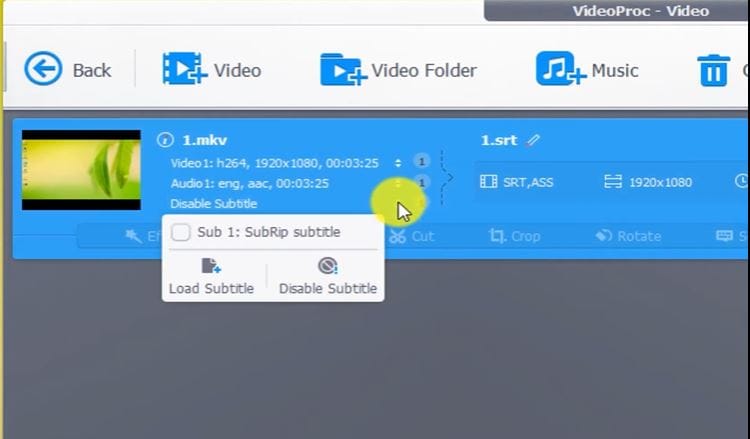
Step 3. Analyze the MKV File
Once imported, the VideoProc Converter will display detailed information about the video, audio, and subtitle tracks. Click on the Disable Subtitle and then check the Subrip subtitle to enable the available subtitles.
Step 4. Access Subtitle Settings
Open the Toolbox section at the bottom of the interface. Click the gear icon next to Export Subtitle.
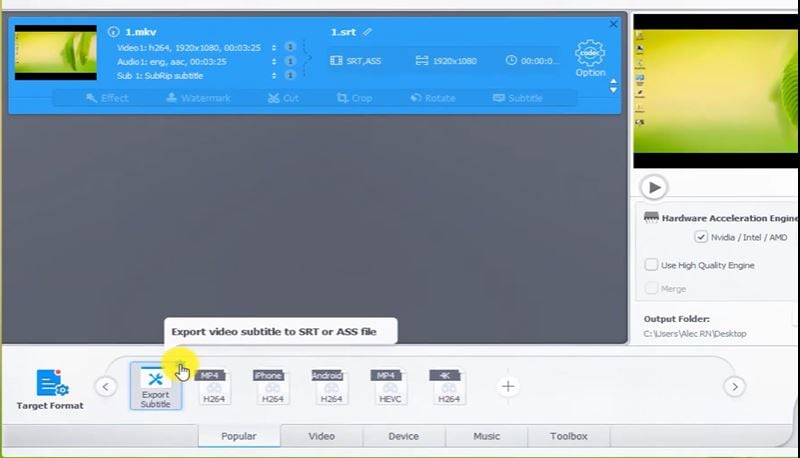
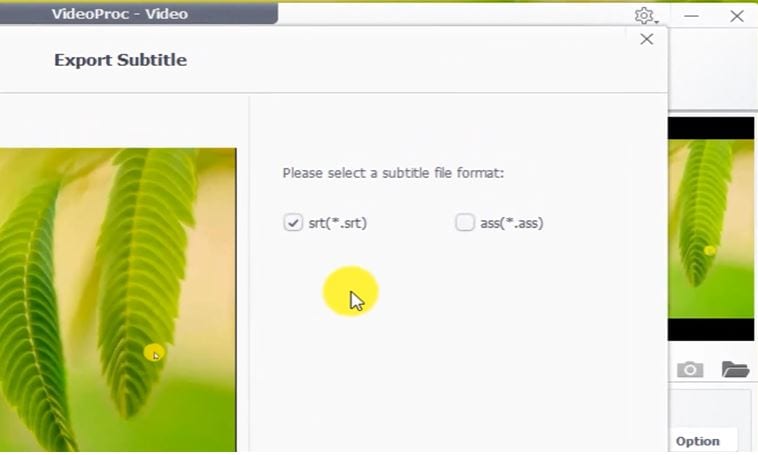
Step 5. Select the Subtitle Format
In the settings menu, choose the format and click Done. You can extract either ASS or SRT to Rip subtitles from MKV.
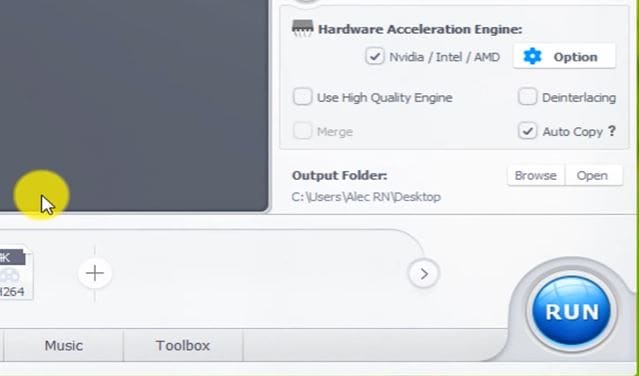
Step 6. Begin Extraction
After confirming the subtitle presence and selecting the desired format, click the RUN button in the bottom-right corner to start the extraction process.
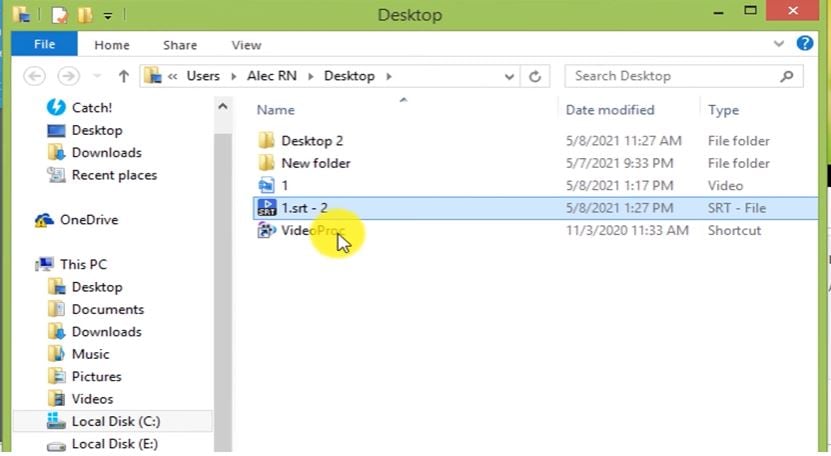
Step 7. Locate the Extracted Subtitle File
The subtitle file is saved in the same folder as your original MKV file by default. The Image name will match the original MKV filename with an extension (e.g., MKV_filename.srt).
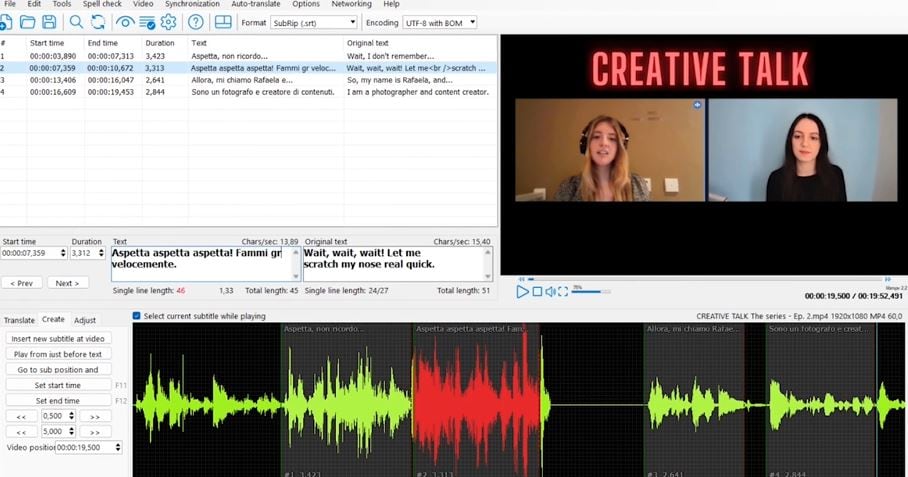
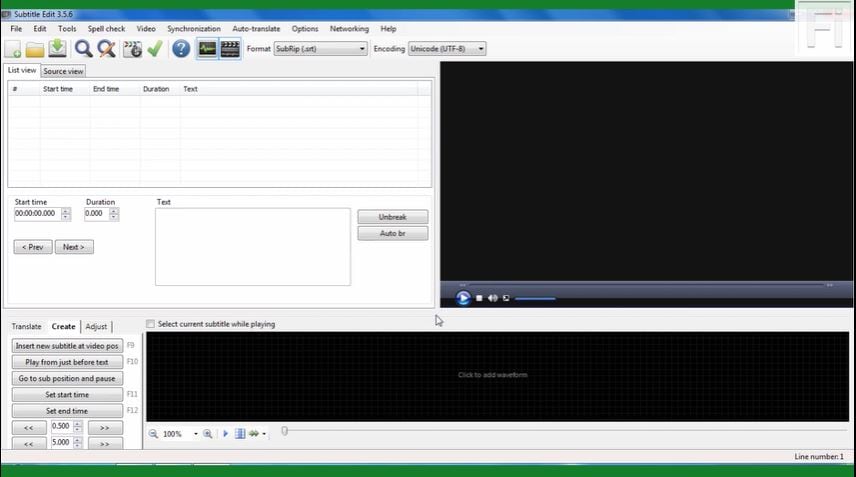
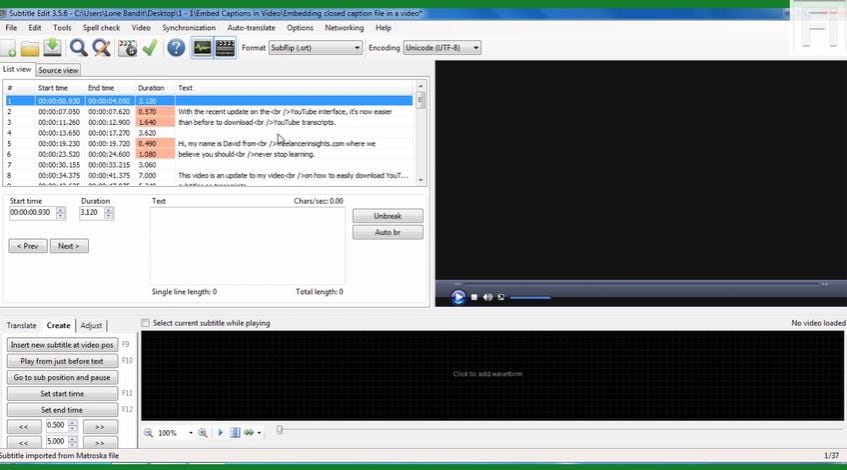
[Method 2] Using Subtitle Edit (Free Software)
Subtitle Edit is another free, and open-source tool designed to Rip subtitles from MKV files. It allows you to edit, synchronize, and extract subtitles from various video formats, including MKV. It supports a wide range of subtitle formats. You can extract subtitles from various video formats, including MKV.
Step-by-Step Guide:
Follow these steps to extract SRT or other subtitle formats:
Step 1. Download and Install
Download the latest version of Subtitle Edit and install it on your computer.
Step 2. Open Your MKV File
Simply drag and drop your MKV file onto the Subtitle Edit window. Or go to the "File" menu, select "Import," and then choose "Subtitle from video file."
Step 3. Select the Subtitle Track
If your MKV file contains multiple subtitle tracks, select the desired track from the list.

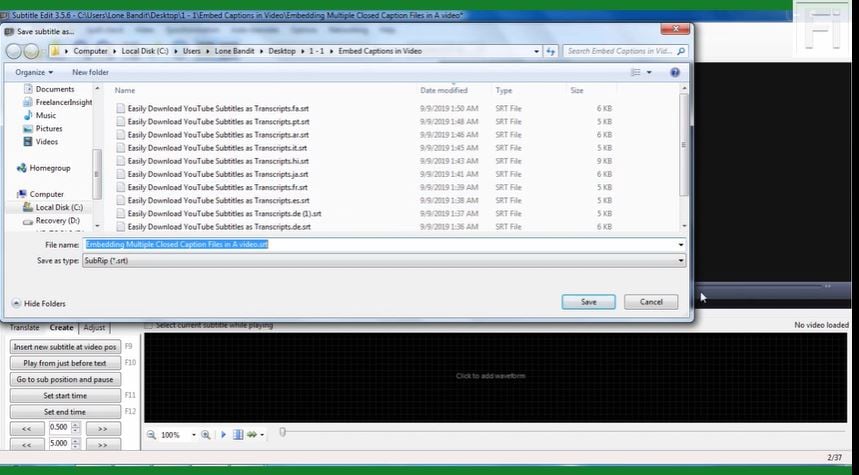
Step 4. Export the Subtitles
Go to the "File" menu and select "Save." Choose the desired output format (SRT, ASS, etc.) and save the extracted subtitle file to your preferred location.
[Method 3] Using MKVExtractGUI-2 (Free Software)
If you’re looking for a straightforward way to extract subtitles from MKV without complex editing tools, MKVExtractGUI-2 offers a user-friendly option. This free tool uses MKVToolNix to extract subtitle tracks efficiently.

Requirements
Before beginning, ensure you have both of the following:
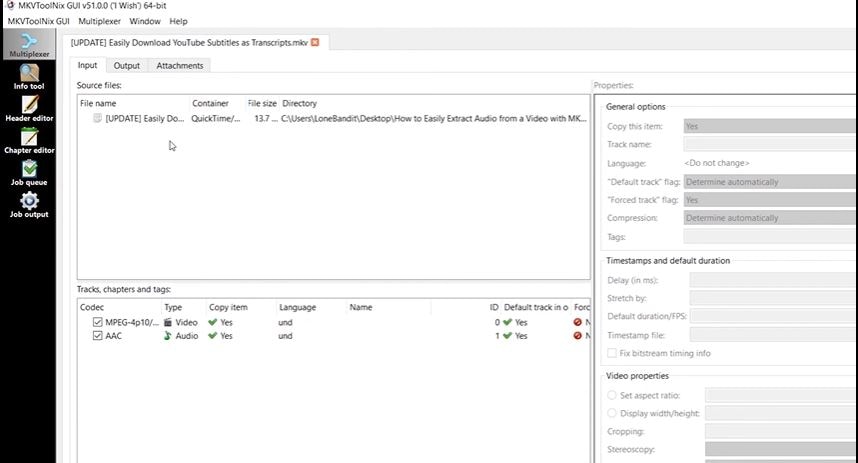
- MKVToolNix: MKVExtractGUI-2 relies on MKVToolNix, so you need to download and install MKVToolNix from a trusted source.
- MKVExtractGUI-2: Download MKVExtractGUI-2 and extract it with a decompression tool like WinRAR or 7-Zip. Place it into the MKVToolNix folder and launch it.
Step-by-Step Guide:
Follow these steps to get started:
Step 1. Load Your MKV File
Drag and drop your MKV file into the Input Files area of MKVExtractGUI-2.
Step 2. Select Tracks for Extraction
MKVExtractGUI-2 will analyze the MKV file and display all embedded tracks, including video, audio, and subtitles. Locate the subtitle tracks and uncheck any unnecessary tracks if you only need the subtitles.
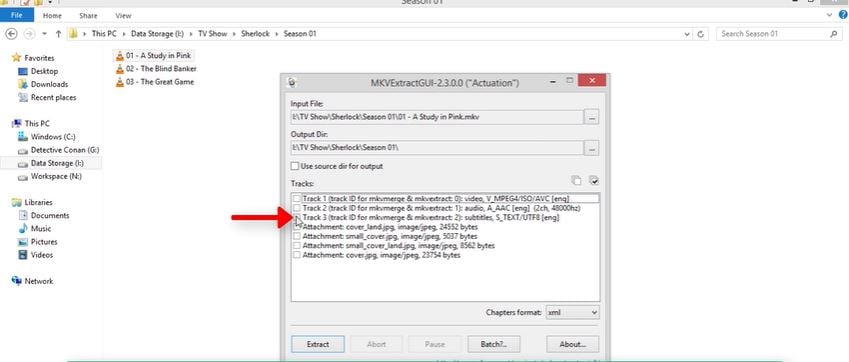
Step 3. Begin Extraction
With the subtitle tracks selected and the output directory set, click Extract to pull the chosen subtitle tracks from the file.
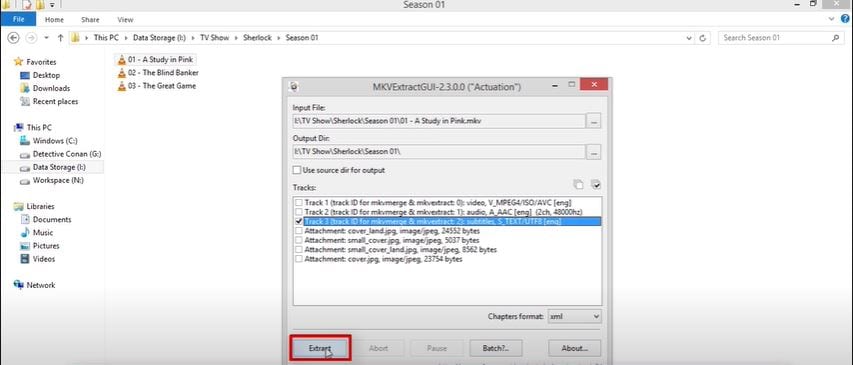
Step 4. Locate the Extracted Subtitles
Now open the specified output directory. Your extracted subtitles appear there in formats like SRT, SSA, or ASS, depending on the original subtitle format in the MKV file.

[Method 4]. Download Subtitles (If Available) Using VLC Media Player
While you cannot directly extract subtitles from MKV using VLC Media Player, it can be a useful tool for downloading subtitles that are available online.
Here's how you can use VLC to download subtitles:
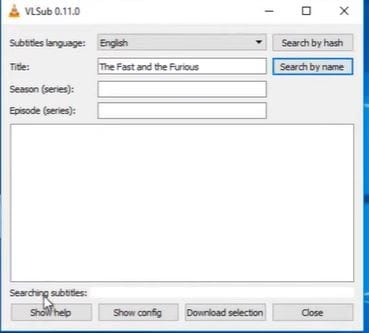
Step 1. Open the MKV File
Launch VLC Media Player and open your MKV file.
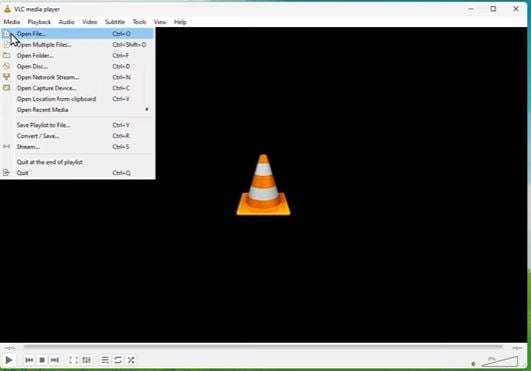
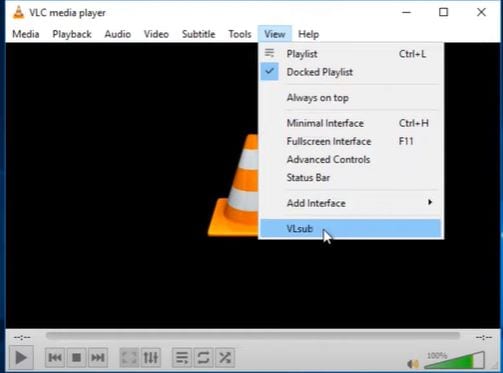
Step 2. Access the Subtitle Search
Go to the "View" menu. Then, select the "VLsub" option.
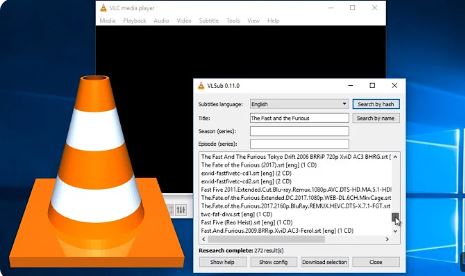
Step 3. Search for Subtitles:
First, select the subtitle language and title. You'll see two options: "Search by Hash" and "Search by Name. Enter the name of your MKV file into the search bar and click "Search."
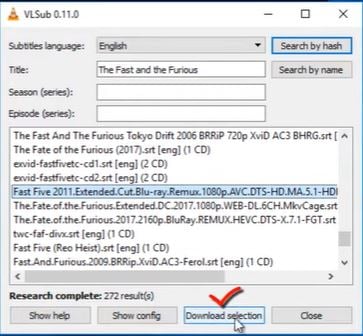
Step 4. Download Subtitles
VLC will search for available subtitles online. If found, you can select the desired subtitle language and click "Download." The subtitle file will be saved.
Part 3. Extract Subtitles Automatically From Your MKV Files [Best Way]
While the above methods to extract subtitles from MKV files are effective, they are not guaranteed to work for every video. They can also be time-consuming and require technical expertise. And most importantly_hardcoded subtitles can’t be extracted as compared to softcoded subtitles. So, in all these scenarios, you need advanced software for a more streamlined and efficient approach.
Wondershare Filmora is the ideal solution for you! It’s a powerful video editing software that can extract and edit subtitles. It also offers a wide range of advanced features that can help you streamline your video editing process.

- Superb video stabilization with low distortion.
- Vast video/audio effects and creative assets.
- Powerful AI for effortless content creation.
- Intuitive, professional yet beginner-friendly.
- Works on Mac, Windows, iOS, and Android.


Why Should You Choose Filmora?
- Automatically generates subtitles from your video's audio track saving you time and effort, especially for longer videos.
- Fine-tune your subtitles with precise timing adjustments, font customization, and stylish effects.
- Enhance the visual appeal of your subtitles with a variety of effects and animations, backgrounds, outlines, and shadows.
- Filmora supports a wide range of languages for diverse audiences.
- Auto-sync feature helps you align your subtitles with the audio track automatically for a better viewing experience.
- Export subtitles from MKV in various formats (SRT, ASS) for compatibility with different devices and software.
Steps to Extract Subtitles Using Filmora
Step 1. Import Your Video
Open Filmora and start by importing your MKV file into Filmora's timeline.

Step 2. Generate Subtitles Automatically
Right-click on the video clip and select "Speech to Text." Choose the desired language and other settings. Filmora will process the audio and generate subtitles automatically.

Step 3. Export Subtitles
Click Export to save the entire video with the embedded subtitles.

Part 4. Edit Your Subtitles Using Filmora
Once you've generated your subtitles, Filmora offers great tools to customize and enhance them.
Here's a guide to editing subtitles in Filmora:
Step 1. Double-click on a subtitle clip in the timeline to open the subtitle editor.

Step 2. Modify the text content and adjust the start and end times to ensure accurate synchronization with the video

Step 3. Click Preset to customize appearance:
- Choose from various fonts and adjust the font size, color, and style.
- Align the text to the left, center, or right.
- Add a background color or outline to improve readability.
- Apply effects like fade-in, fade-out, and slide-in to make your subtitles more visually appealing.

Step 4. Use the preview window to review your edits and make any necessary adjustments.

Conclusion
Extracting subtitles from MKV files is a straightforward process with various methods to choose from. Whether you prefer free tools like Subtitle Edit or MKVExtractGUI-2, or a versatile and advanced video editing software like Filmora. It combines editing and subtitle extraction, you can easily extract and customize subtitles to your liking.
Choosing between these methods depends on your needs—whether you prioritize ease, advanced features, or affordability. After you extract SRT from MKV, enhance your videos by adding subtitles using Filmora. This user-friendly editor brings creativity and accessibility to your projects. Subtitles not only improve clarity but also boost engagement for diverse audiences.
