Masking is a powerful feature in After Effects that allows you to hide, reveal, or manipulate specific parts of a layer. Whether creating animations, visual effects, or enhancing your video content, masking can be a valuable tool in your arsenal. However, it can be intimidating for beginners, as it requires a good understanding of key concepts and techniques.
This article aims to demystify masking in After Effects and provide a comprehensive guide on getting started. Whether a beginner or an experienced user, you'll find useful tips, tricks, and a creative alternative to masking that will take your skills to the next level. So let's dive in and discover the art of masking in After Effects!

In this article
Overview of Masking in After Effects
Masking in After Effects hides or reveals certain layer parts, such as an image or video. This is achieved through masks, paths that determine the visibility of specific layer parts. Masks are an incredibly versatile tool in Adobe After Effects, allowing users to cut out and combine elements, create professional transitions, isolate objects in photos or videos, and build shapes, among other things.
Masks in After Effects are made up of two parts: the mask and the fill. The mask controls what is visible, while the fill determines the color or image used to fill the masked area.
By default, when a mask is created, it is set to "inverted," meaning the masked area is visible, and the rest is hidden. However, this can easily be changed by pressing "M" to access the mask settings in the timeline and selecting the invert checkmark. Alternatively, the mode can be changed to subtract.
Overall, masks are an essential tool in After Effects, and it's worth taking the time to learn as much as possible about them. The possibilities are endless, and mastering masks can greatly enhance your projects.
How To Do Masking in AE Using Shape Tools
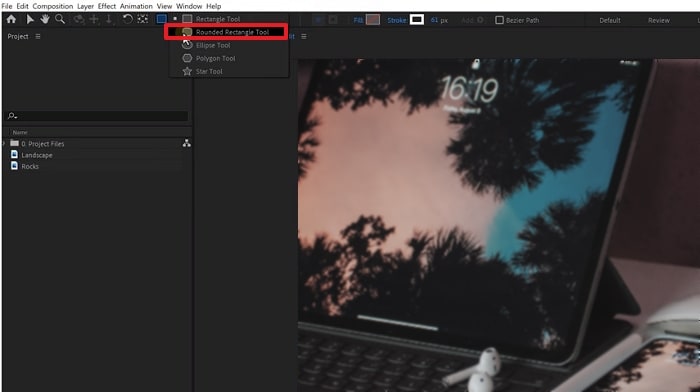
Shape tools provide a quick and easy way to create masks in AE and are a great starting point for beginners. With these tools, you can easily create masks in various shapes and sizes to hide, reveal, or manipulate parts of a layer. We'll guide you through creating masks using different shape tools, including the rectangle, ellipse, and polygon tools. So let's get started!
Step1 Choose the layer to which you want to apply the mask.
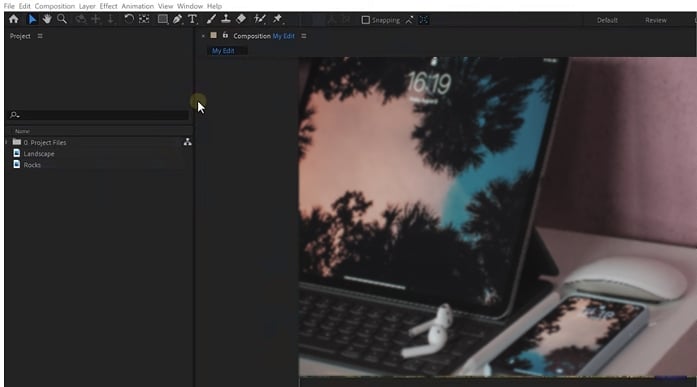
Step2 Choose one of the shape tools from the toolbar.
Step3 Drag the mouse and select the area you want to apply the shape tool mask.
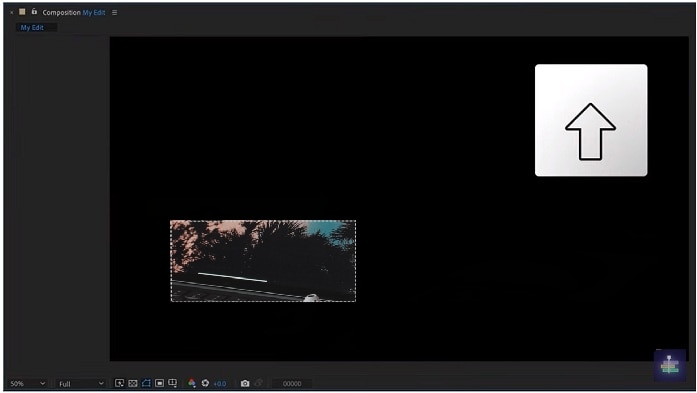
- Holding down the "CTRL" key for Windows or the "CMD" key for Mac will draw the shape from the center.
- Holding down the "Shift" key will maintain equal sides and create symmetrical shapes such as squares or circles.
How To Use Pen Tool for Masking in After Effects
The Pen Tool in After Effects is a powerful, flexible option for creating masks. This section will explore using the Pen Tool to create masks in After Effects.
Whether you need to create a complex or a simple mask, the Pen Tool provides precise control over the mask shape and can create any shape you desire. From freehand masks to geometric shapes, the Pen Tool is the tool of choice for many After Effects users. Let's take a closer look at how to use the Pen Tool for masking in After Effects.
Step1 Import image to project and add to timeline.

Step2 Click on the "Pen" icon to activate Pen Tool, and use it to mask out the background.
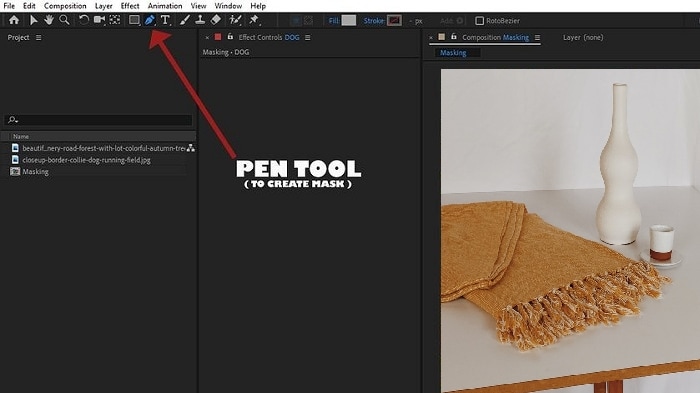
Step3 Place a new image behind a masked image for a new background.
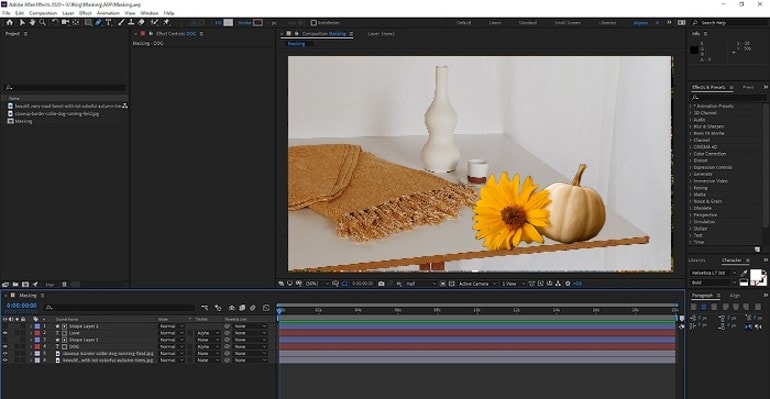
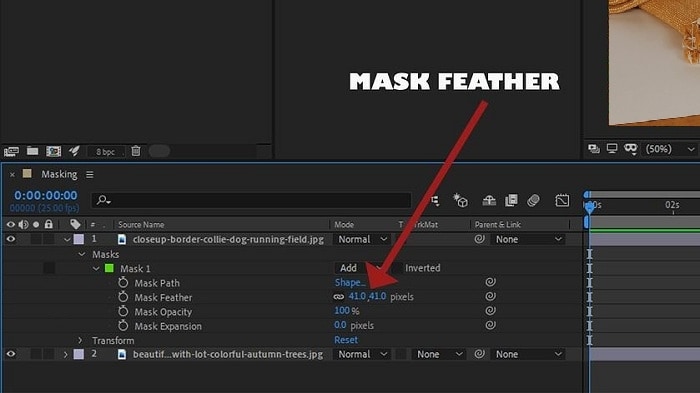
Step4 Add a masked image feather if needed.
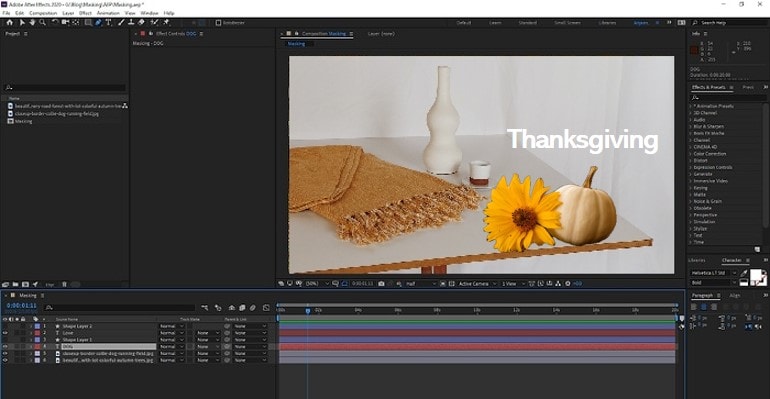
Step5 Add text, and create a "shape layer" to place on the text.
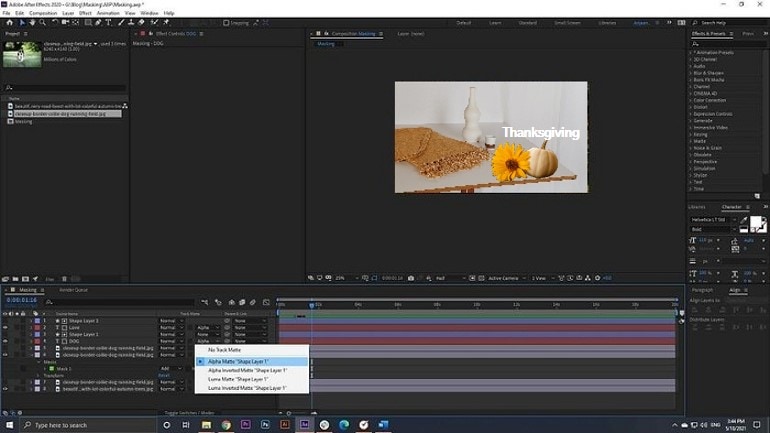
Step6 Use "Alpha Inverted Matte" to mask the text.
Wondershare Filmora - A Great Alternative to After Effects Masking
Wondershare Filmora is a popular video editing software that offers a range of features and tools for video editing. One of the most useful features is its masking capability, which provides a great alternative to the masking feature in Adobe After Effects.
Filmora's masking feature is designed to be user-friendly, making it ideal for both beginner and advanced users. With its intuitive interface, users can easily create masks to hide, reveal, or manipulate parts of a video. The software offers a range of masking tools, including shape, freehand, and gradient masks, providing a wide range of options.
In addition to its masking feature, Filmora offers various tools and features that make it a great choice for video editing. Its keyframe animation allows users to create smooth and professional transitions, and its audio editing features allow users to add music, sound effects, and voiceovers easily. The software also supports various file formats, making it easy to import and export videos for sharing and distribution.
Overall, Wondershare Filmora is a great alternative to After Effects, particularly for users looking for a more user-friendly and affordable video editing and masking option. With its comprehensive features, Filmora provides an excellent option for users who want to create professional-looking videos without needing advanced technical skills.
How To Use Shape Tool In Masking Using Filmora
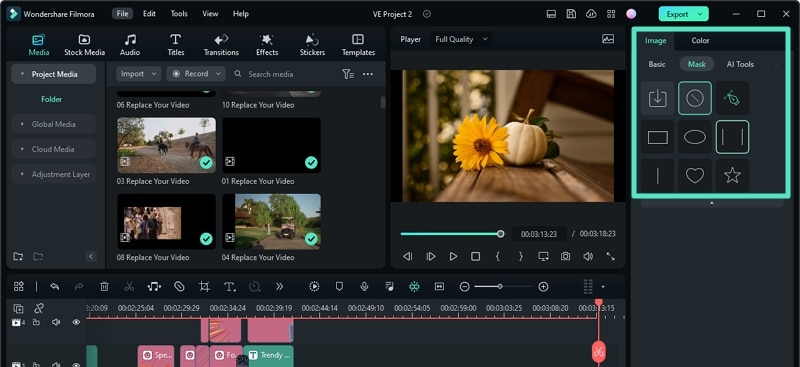
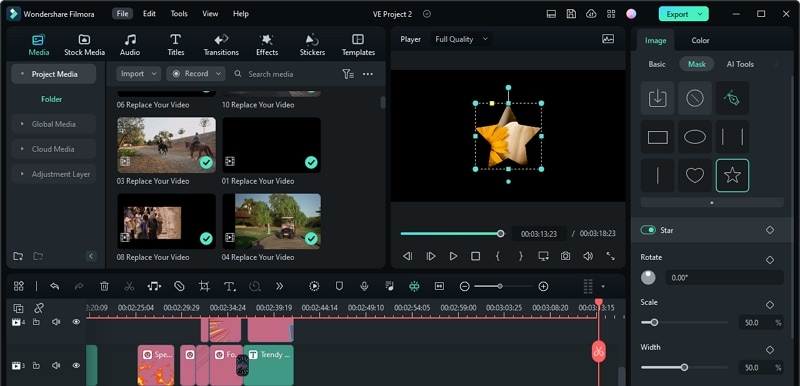
The Shape Tool in Filmora is a feature in the video editing software Wondershare Filmora, which allows users to create masks with various shapes such as rectangles, circles, double lines, single lines, love, and star, as well as custom shapes using the draw mask feature. Masks in Filmora can hide or reveal specific parts of a video clip, add animations, and create composite images and videos.
Discover how to use the Shape Tool in Wondershare Filmora for masking, a great alternative to After Effects masking. Easy to use for beginners and advanced users alike, Filmora's Shape Tool provides options for creating masks to manipulate video content.
Step1 Enter the Video panel, and switch to the Mask tab in Wondershare Filmora. Choose from basic mask shapes or create your own.
Step2 Select a shape; see only the masked area in the Preview window.
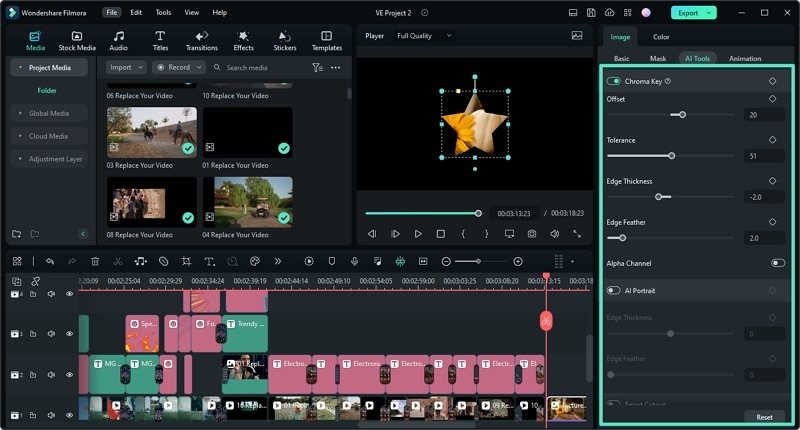
Step3 Add keyframes to animate the mask and adjust position, rotation, size, and blur strength.
How To Use Pen Tool In Masking Using Filmora
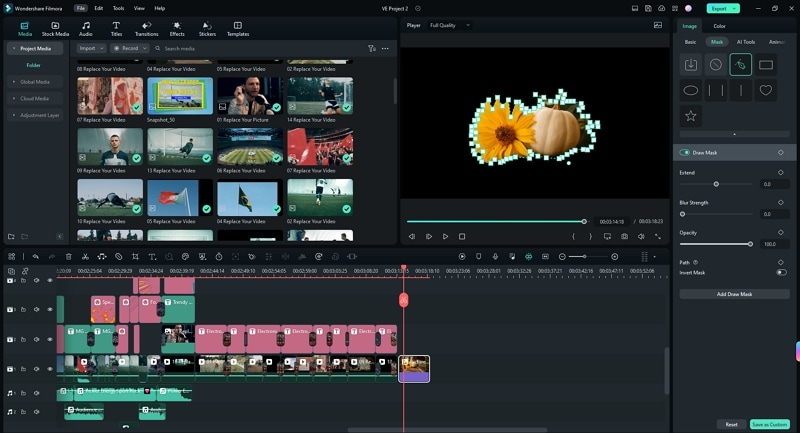
Pen Tool in Masking Using Filmora is a feature that enables users to create complex masks by dragging control points and modifying B-Splines. The tool allows users to draw the mask shape precisely by zooming in and out on the player screen and to create smooth curves by holding the Alt/Option key to adjust the Bessel curve for drawn masks.
The mask created using the Pen Tool can be edited, resized, repositioned, and adjusted using sliders and handles in the Preview window. The tool also enables users to invert the mask, making the original visible part invisible and the hidden part visible.
Learn how to use the Pen Tool in Wondershare Filmora for masking, a versatile alternative to After Effects masking. With the Pen Tool, you can easily outline and manipulate specific areas in your video to create unique and professional effects.

Step1 Create a project and add the media to the timeline. Enter the Mask tab.
Step2 Edit the mask by adjusting the sliders in the Mask tab to resize, reposition, and change orientation. Also, adjust the blur strength, width, height, and radius, or invert the mask.
Conclusion
Masking is an important aspect of video editing and opens up a new world of creative possibilities. After Effects provides a comprehensive set of tools for masking, and Filmora is a great alternative for those looking for a more user-friendly option.
Whether you're using After Effects or Filmora, you can use masks to control the visibility of parts of your image, make shapes, build transitions, and much more. Following this article's simple steps, you can start masking and bringing your creative vision to life.


 100% Security Verified | No Subscription Required | No Malware

