
 100% Security Verified | No Subscription Required | No Malware


 ChatGPT
 Perplexity
 Gemini
 Claude
 Grok
Grok
In this article
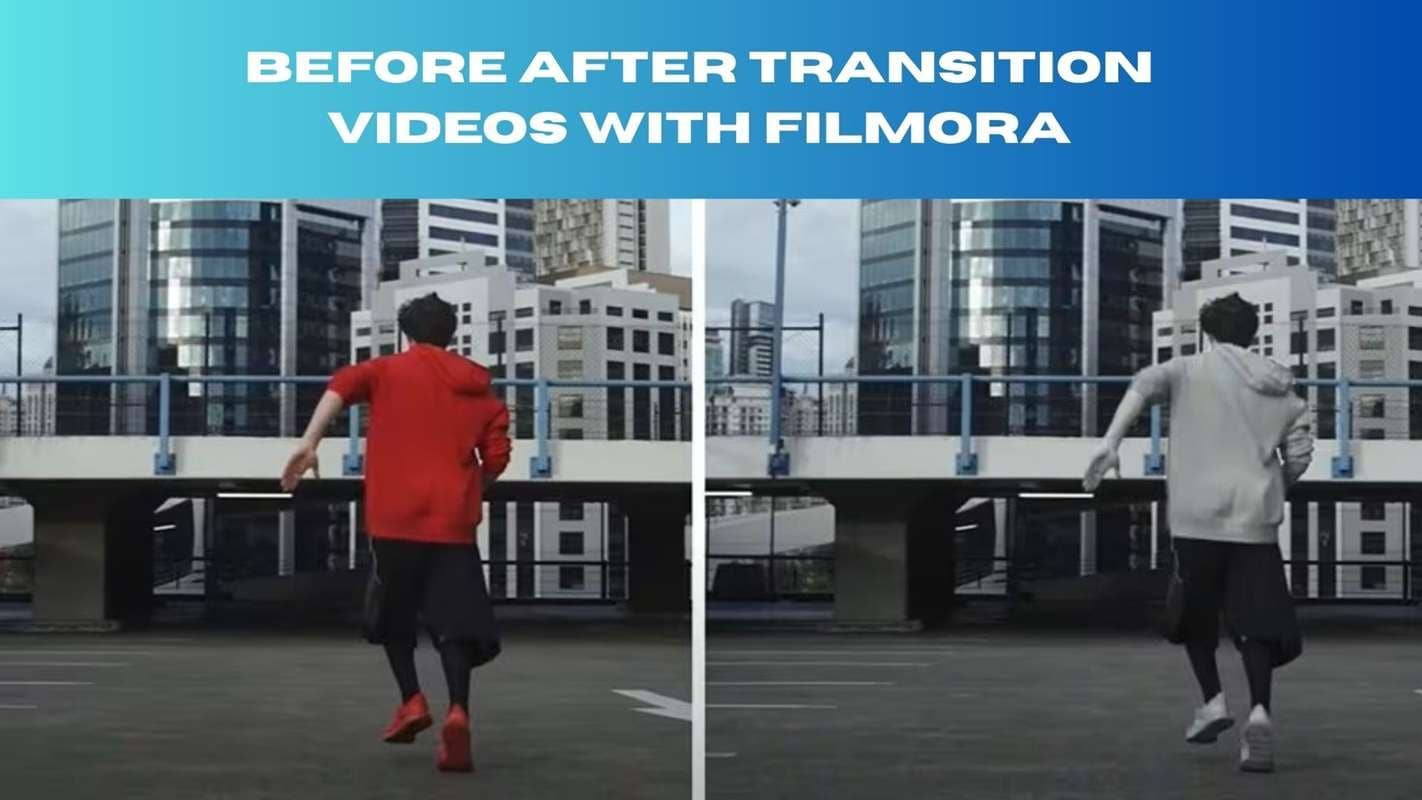
A before-and-after transition video is one of the most effective ways to show transformation in a clear and engaging format. Whether it is a fitness journey, a home makeover, or a creative project, these videos highlight progress in an easy-to-understand and visually striking way.
People search for this type of content because they want practical editing tips, ready-made templates, or inspiration from examples.
Today, you will learn how to create your own before-and-after transition video from planning and shooting to editing and exporting. Wondershare Filmora will be featured as the recommended tool because it combines ease of use with professional-quality results.

Part 1. Why "Before & After" Videos are Popular
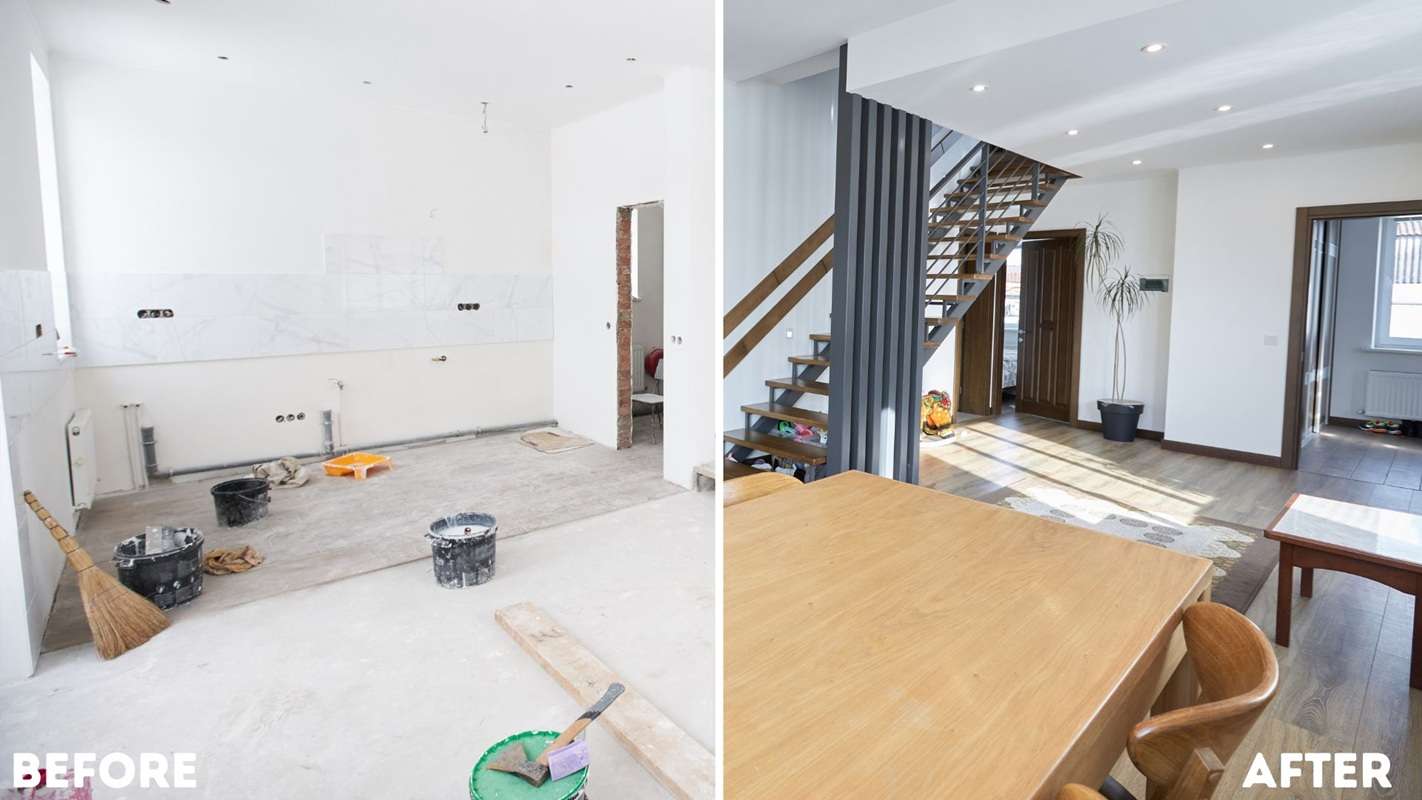
Before and after videos capture attention because they provide undeniable visual proof of change. Instead of telling viewers about progress, they let the transformation speak for itself, which instantly makes the content more engaging and believable.
These videos work well in many different contexts. Fitness creators create them to show results from training, beauty influencers highlight makeup or skincare effects, homeowners showcase renovations, and brands often use them to demonstrate the effectiveness of a product or service.
Part 2. Pre-Production: Planning Your Transformation
Every great before-and-after transition video starts with a clear plan. Taking time to prepare makes the editing process smoother and ensures the final result delivers the impact you want. Key steps in planning include:
1. Choose a clear subject
Pick a transformation that is easy to see and relatable, such as a fitness journey, a beauty routine, or a room makeover. The more obvious the change, the stronger the impact.
2. Define your goal
Decide whether the video is meant to inspire, educate, or promote a product or service. This will shape the style of your edit.
3. Select the right editing tool
Your choice of editor will determine how easy the process feels. For a beginner-friendly option but packed with creative features, we recommend using Wondershare Filmora. It’s available on desktop for Windows and macOS, and you can also edit on the go with the mobile app for iOS and Android.
Part 3. Shooting Smart: Capture for Maximum Impact
Even the best editing tools cannot fix inconsistent footage. To make your before-and-after video look professional, the shots you take must match closely so the transformation feels seamless.

1. Keep the same angle
Use the same camera position for both the "before" and "after" shots. Changing the perspective can distract viewers and make the transformation less convincing.
2. Match the lighting
Lighting should remain as similar as possible. A bright "after" clip compared to a dark "before" may look unbalanced, unless that change is part of the transformation itself.
3. Use consistent settings
Keep the same frame size, camera resolution, and background setup to make the difference between before and after clear.
4. Use simple tools for stability
A tripod ensures your camera stays steady, and a ring light helps maintain even lighting. These small additions prevent shaky or underexposed clips that can make the final edit feel amateurish.
Part 4. Editing Techniques & Tools for the Best Results
Once your footage is ready, the next step is editing with Filmora. Below, you will find a short list of top yet beginner-friendly transitions that work well for before and after videos.
Top transitions for "before & after" for beginners
Filmora comes with built-in transitions that are perfect for before-and-after videos. Here are the most effective ones and how to use them:
 secure download

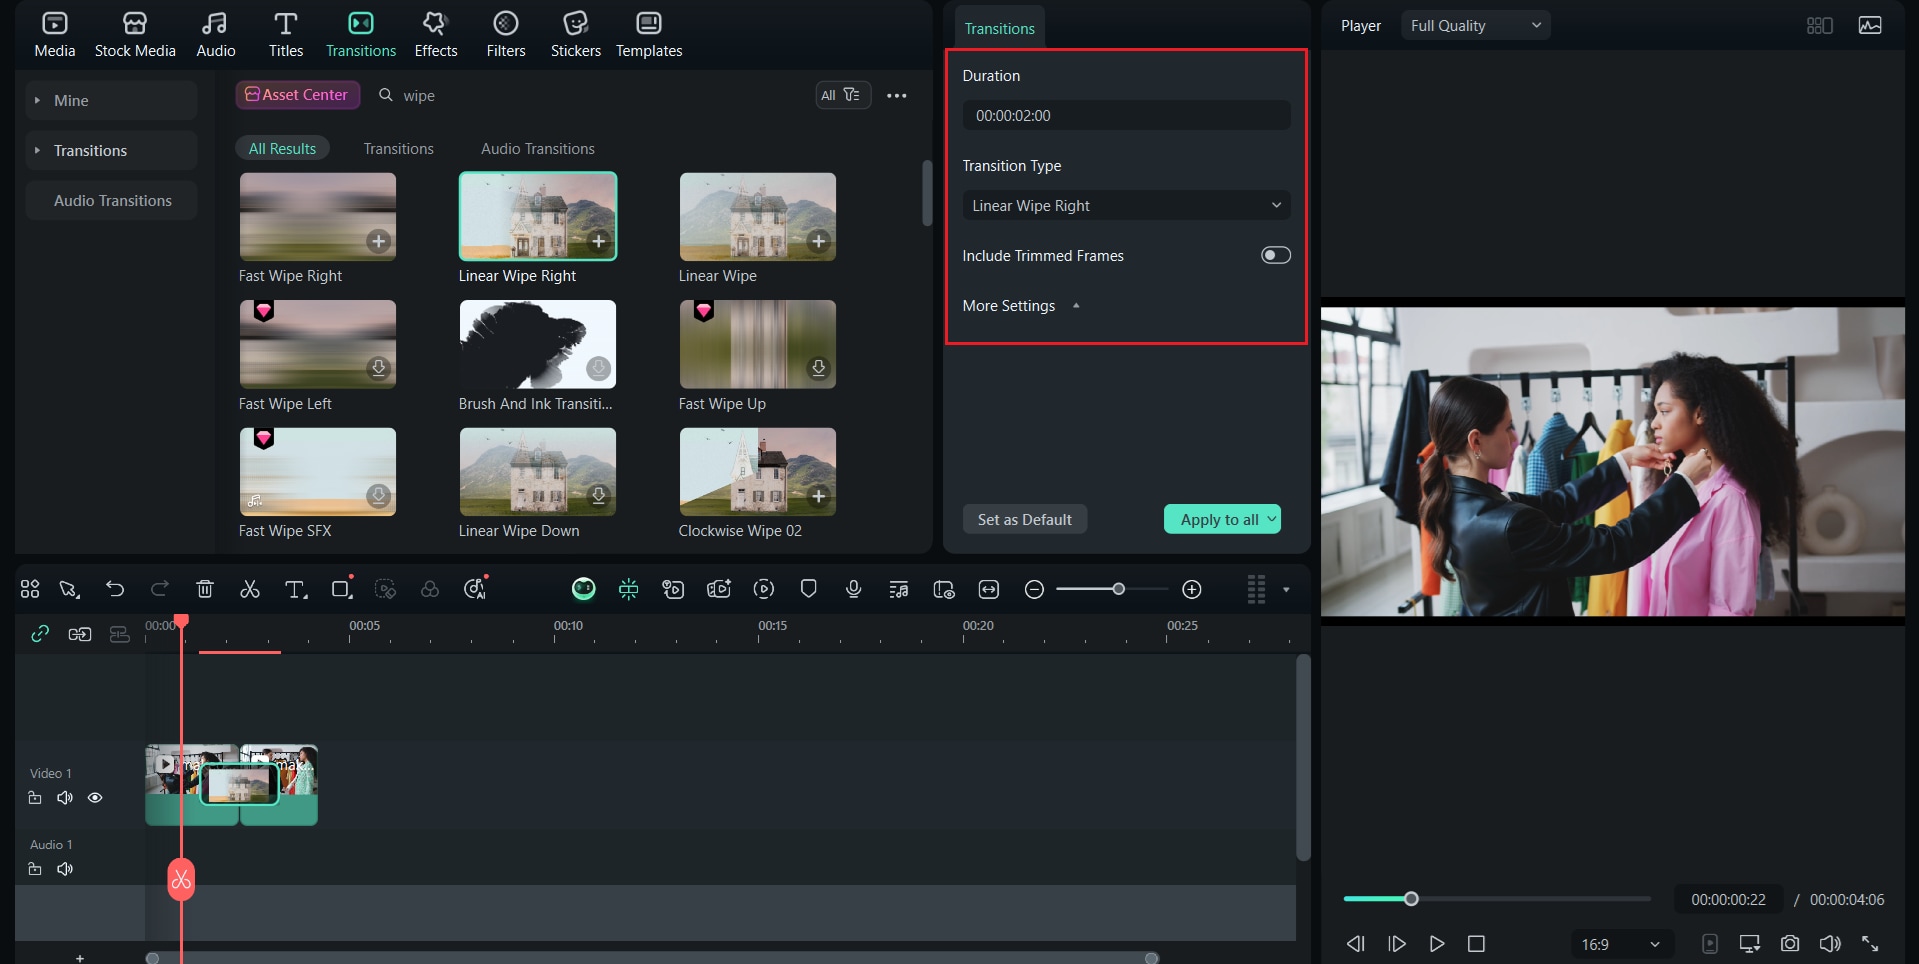
Wipe Effect
1. Place your "before" clip on the timeline.

2. Add your "after" clip right after it.
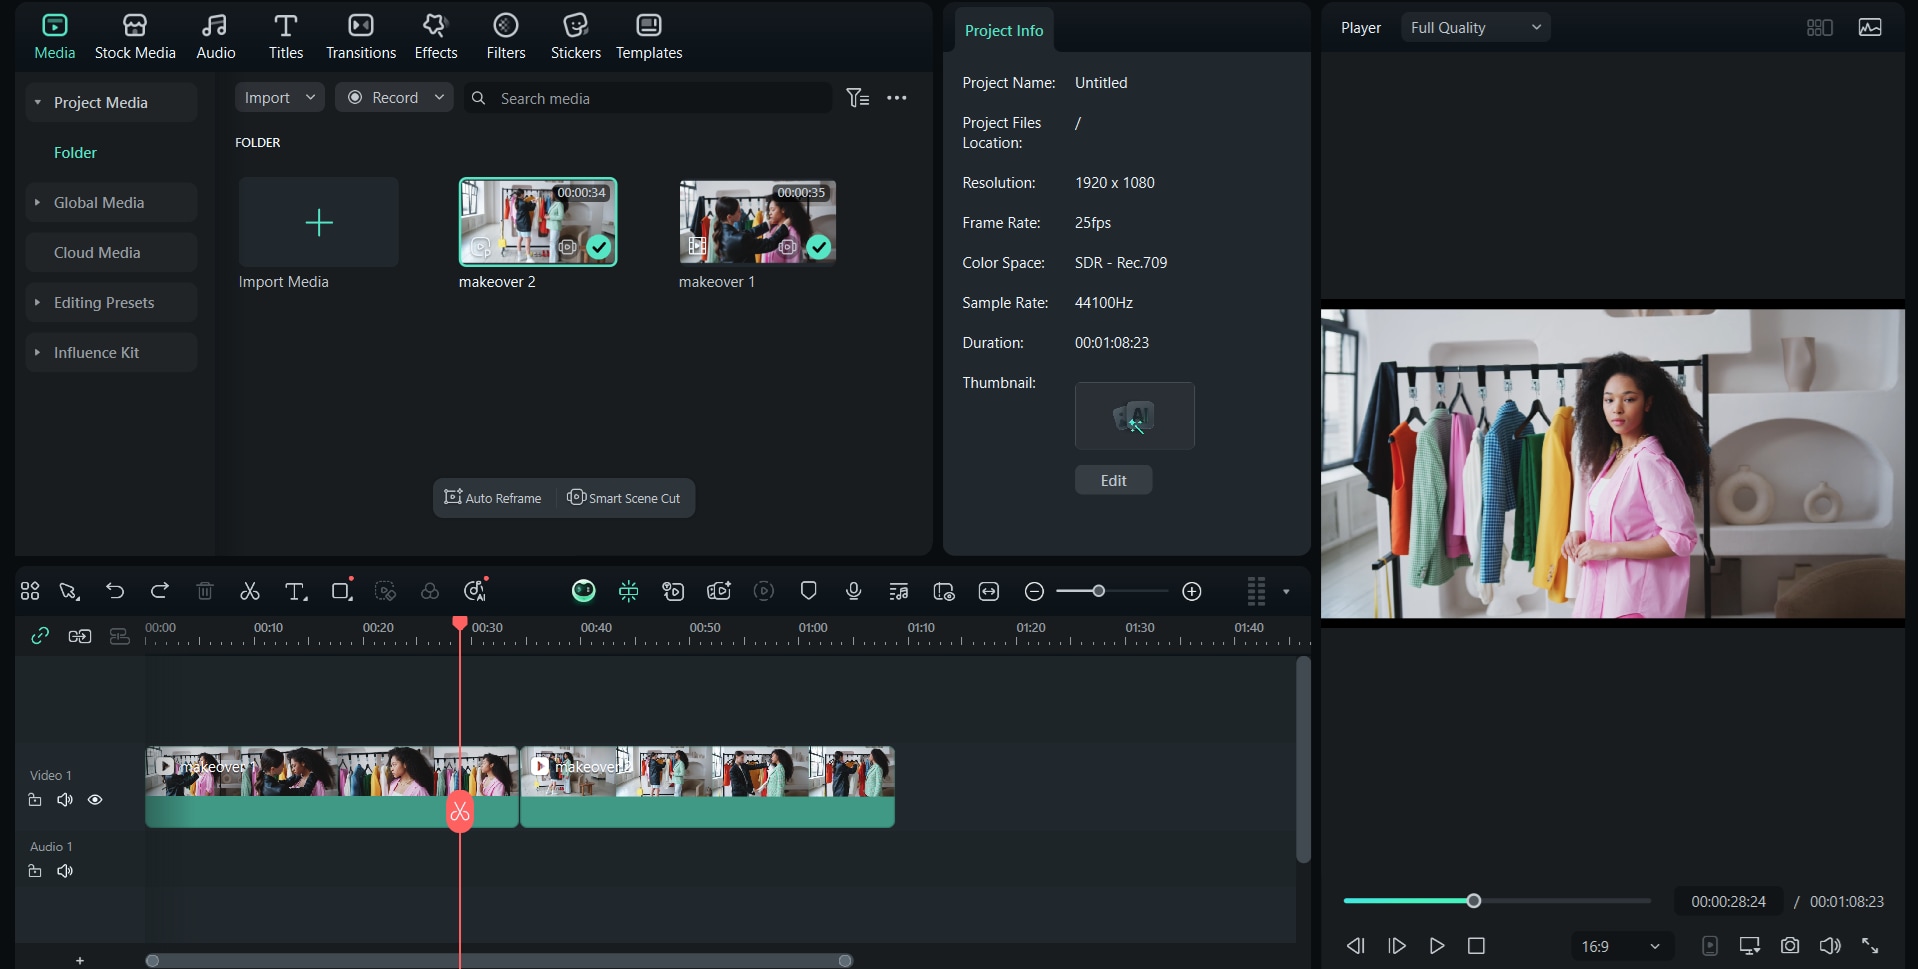
3. Go to the Transitions menu and select Wipe.
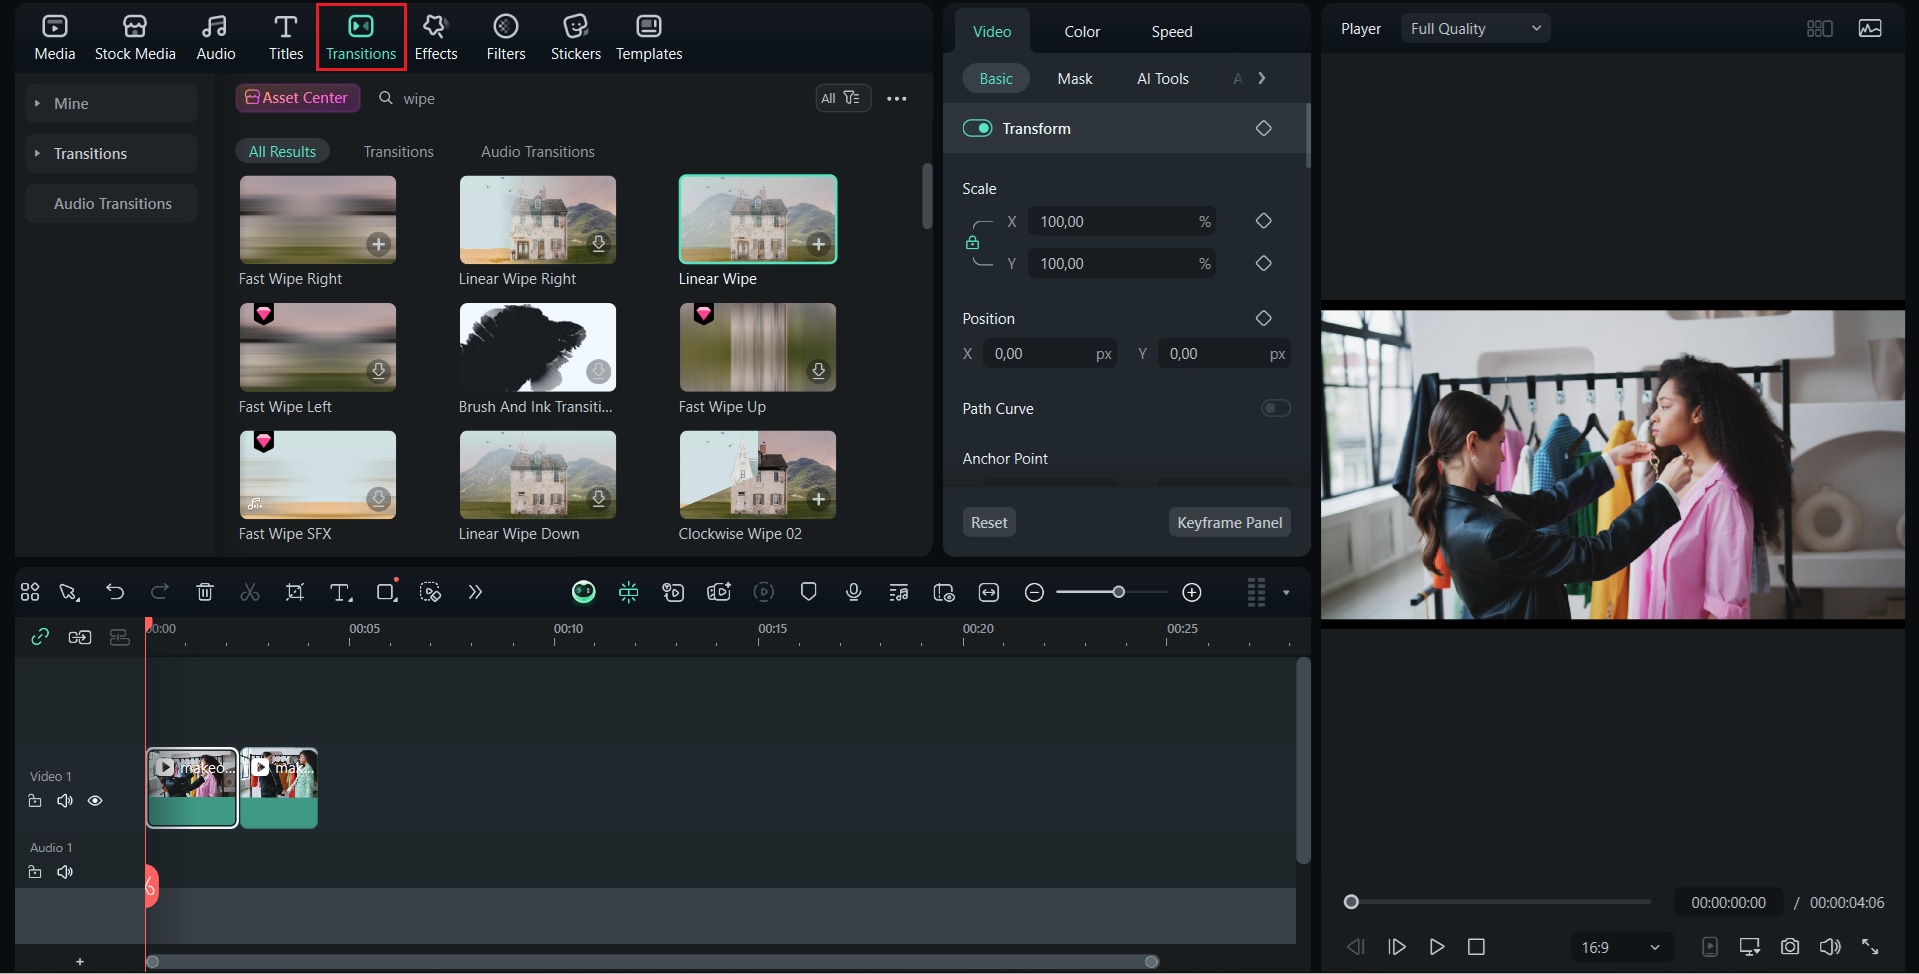
4. Drag and drop it between the two clips.
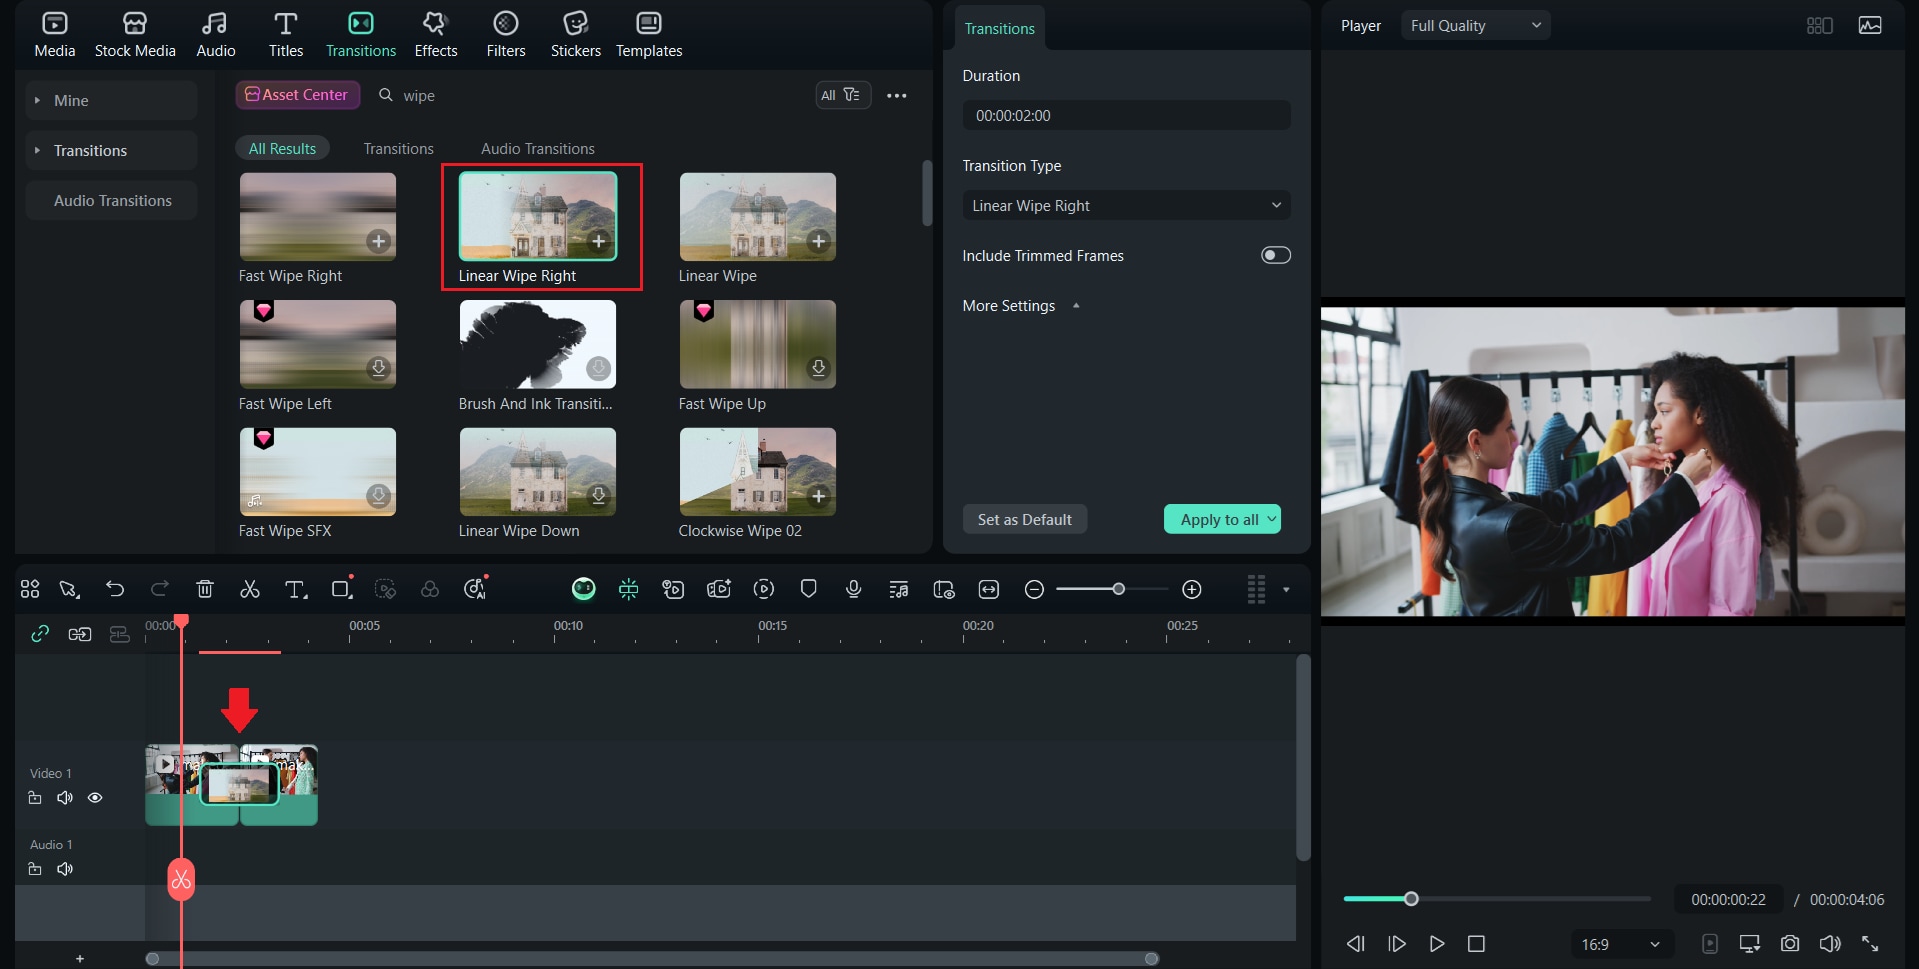
5. Adjust the direction and speed of the wipe to match your style.
Wipe Effect Result:
Dissolve Effect
1. Add the "before" and "after" clips to the timeline.
2. Open Transitions and choose Dissolve.
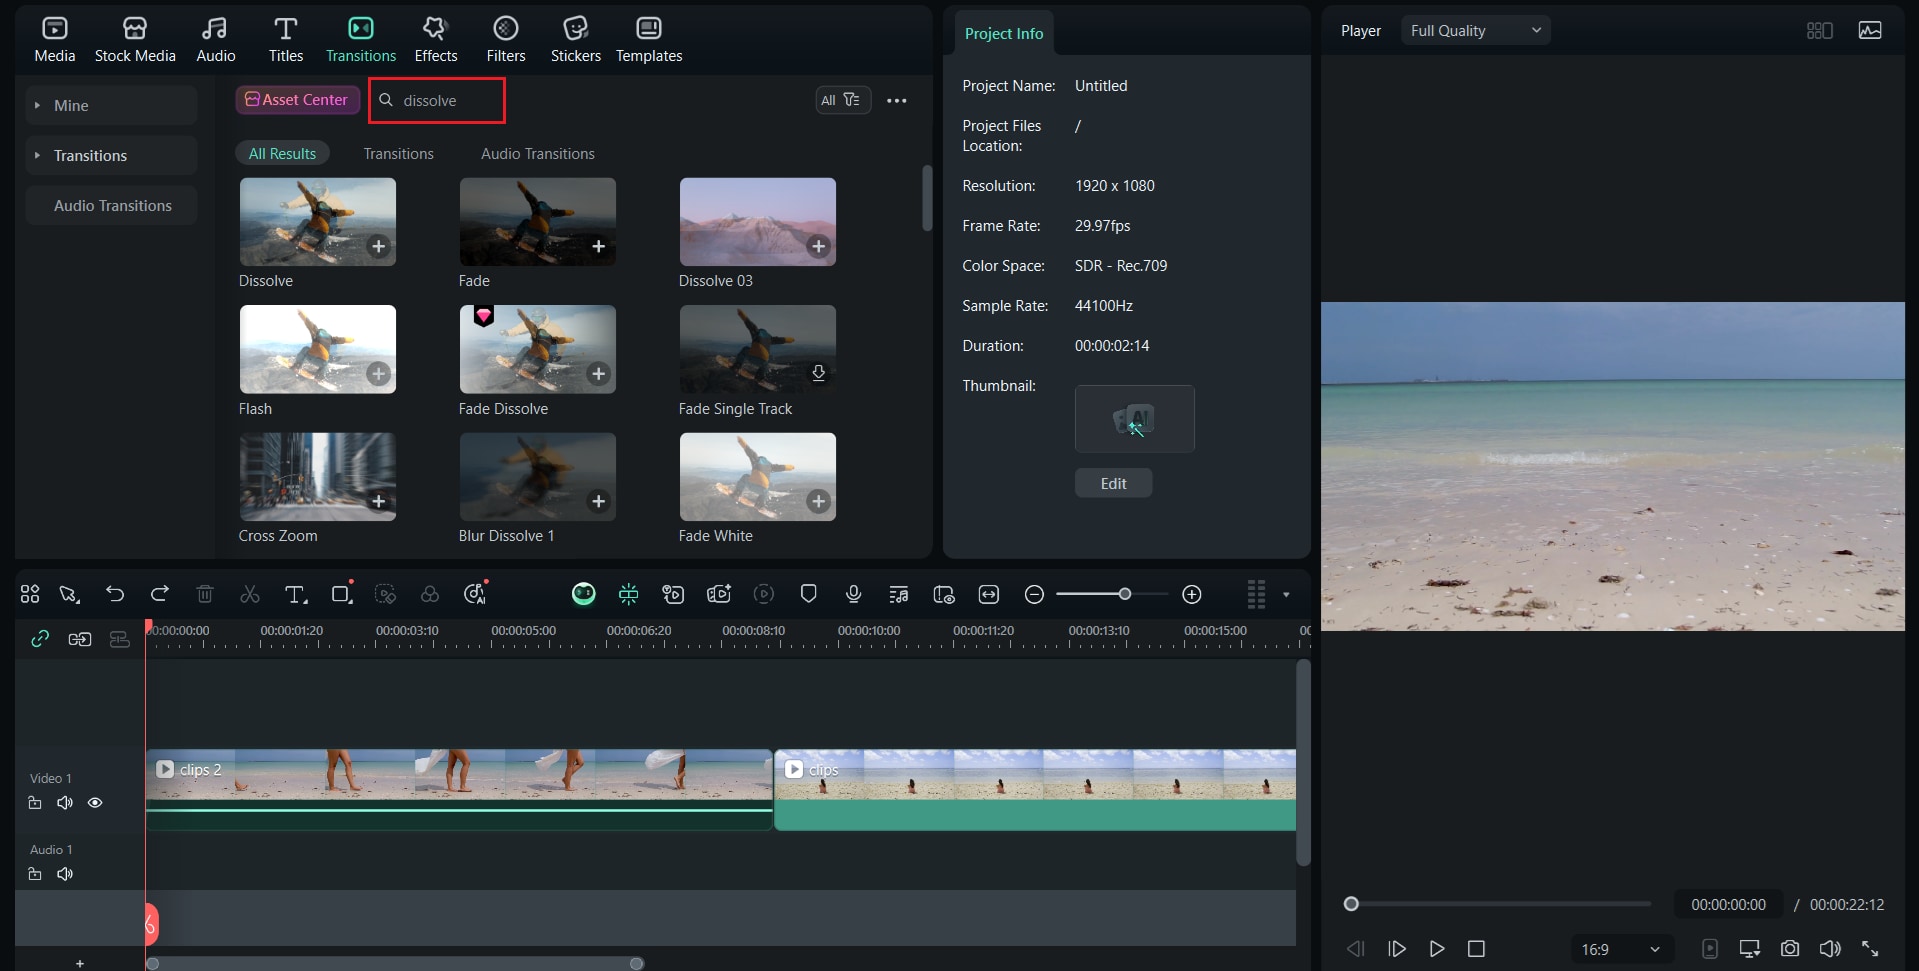
3. Drag it between the clips.
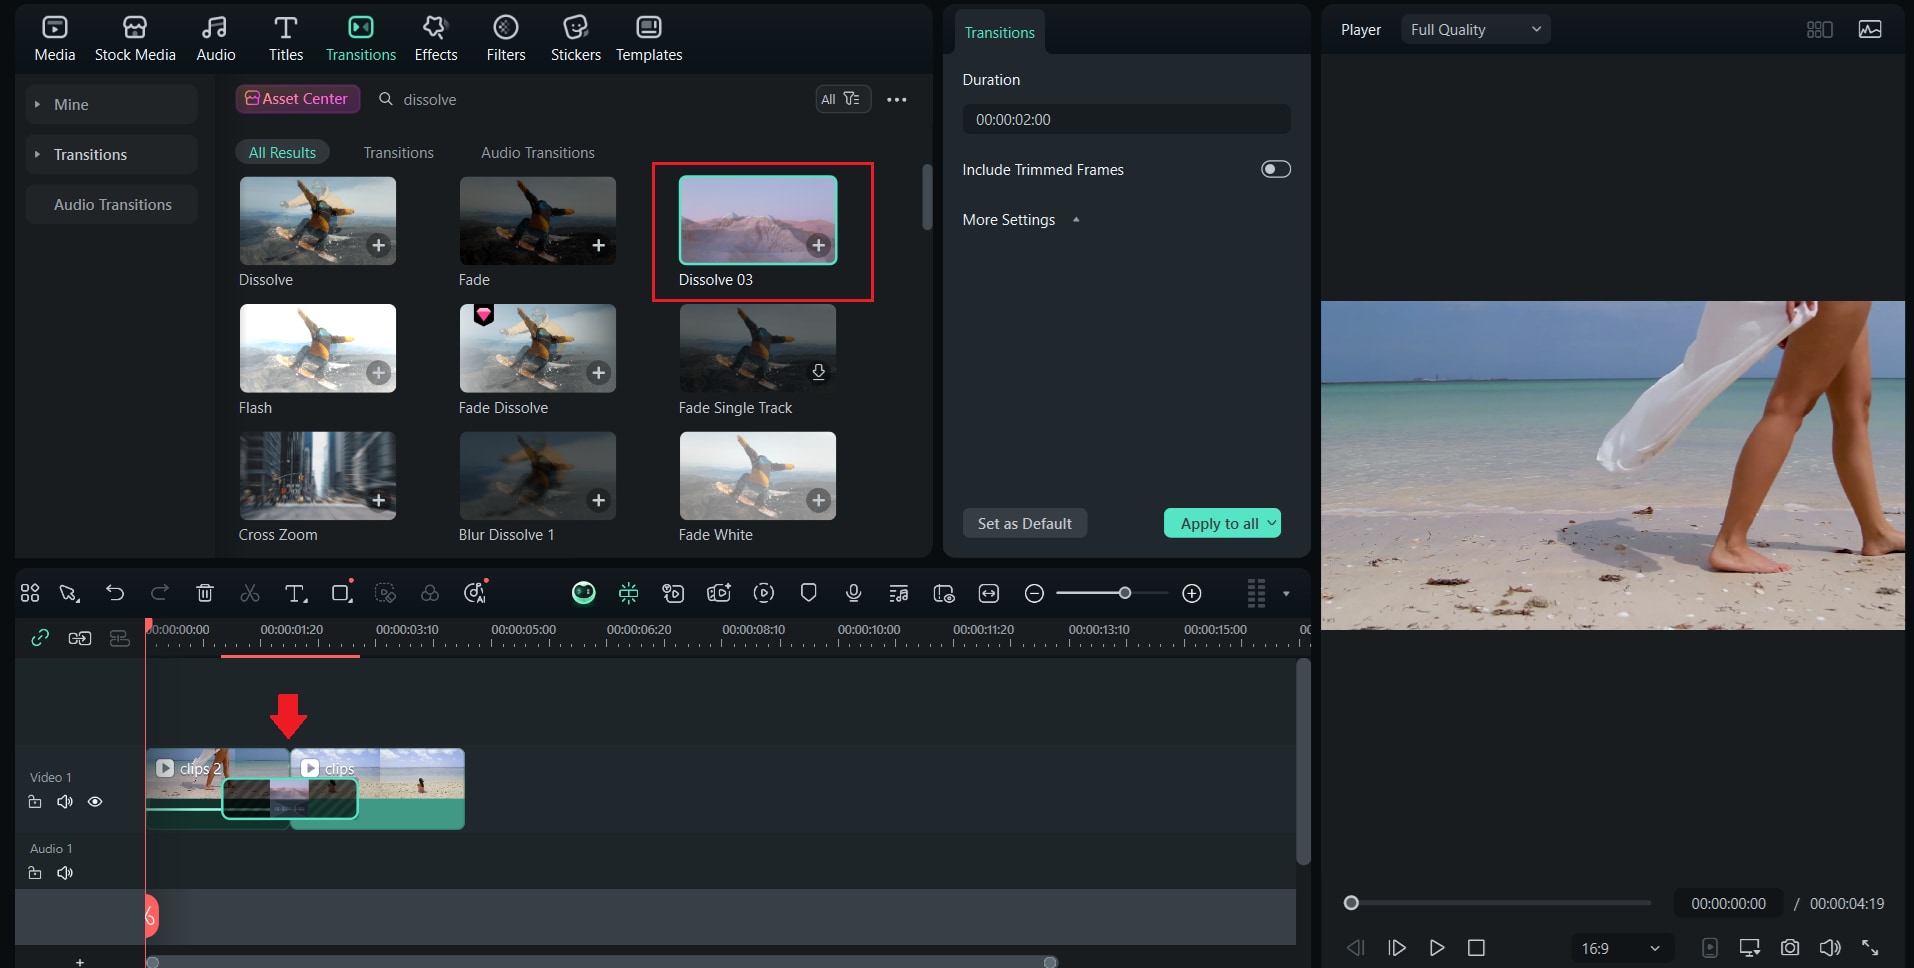
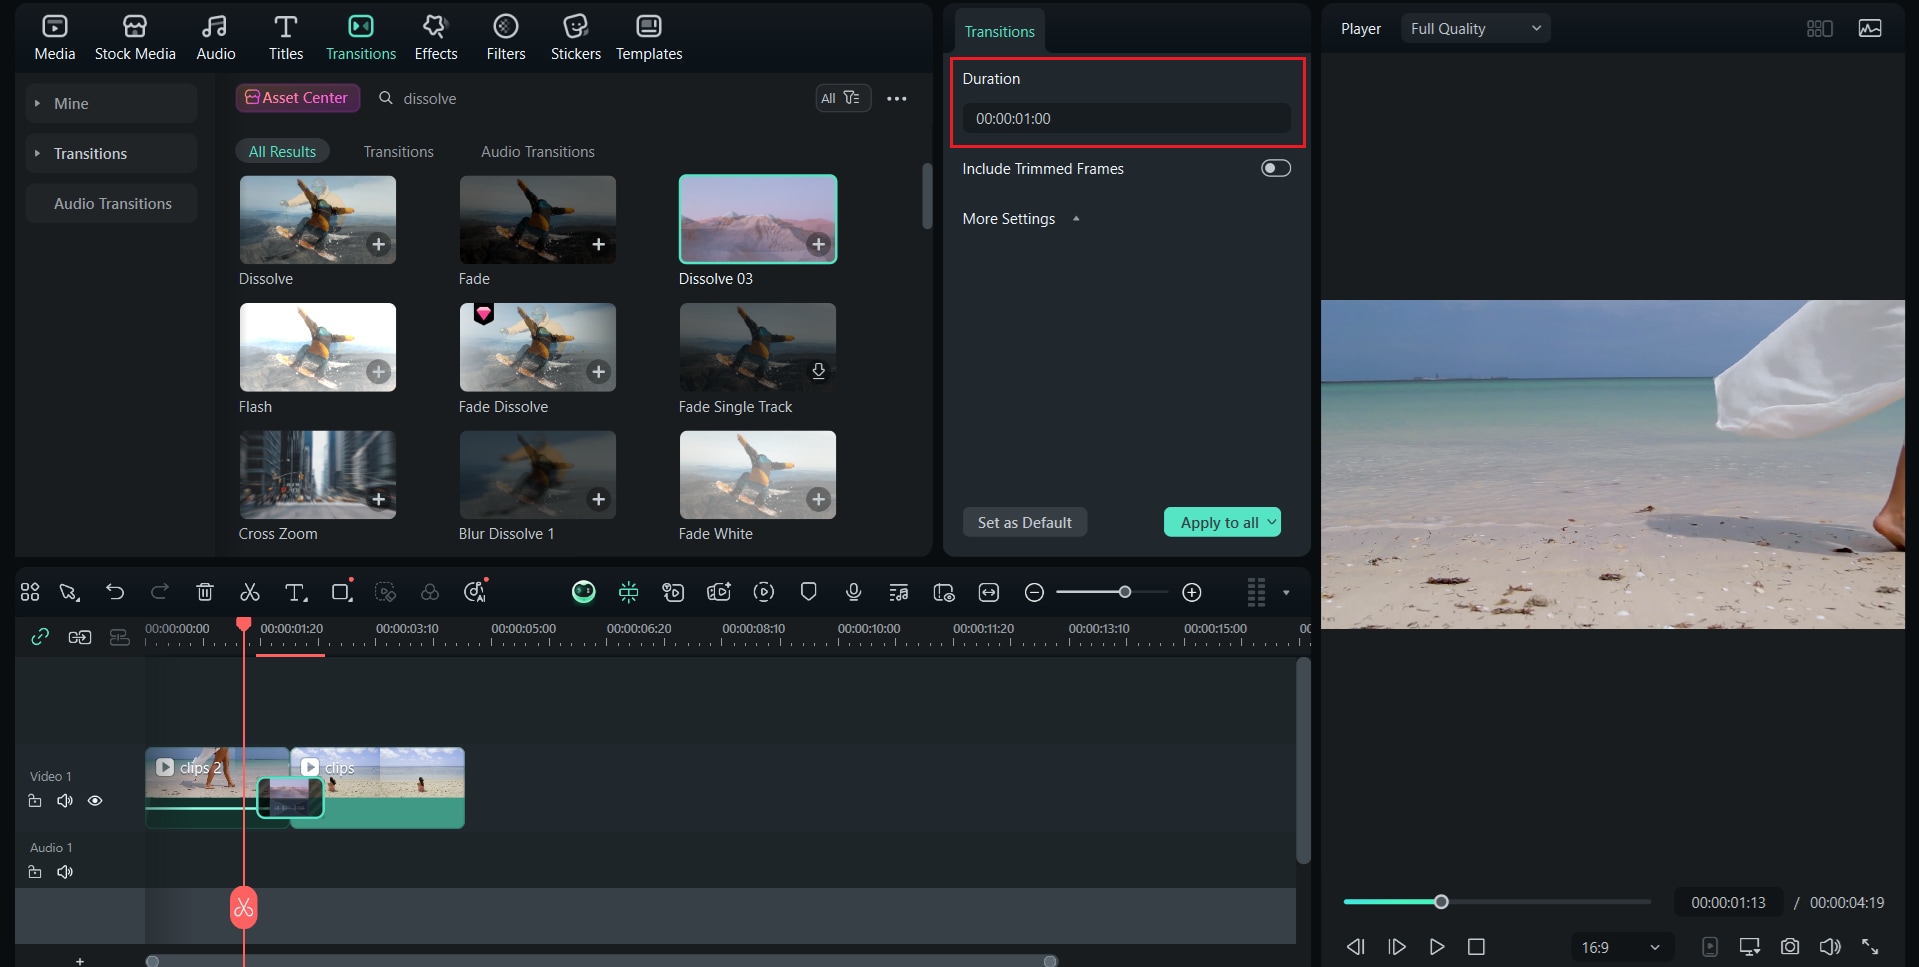
4. Adjust the duration to create a smooth fade.
Dissolve Effect Result:

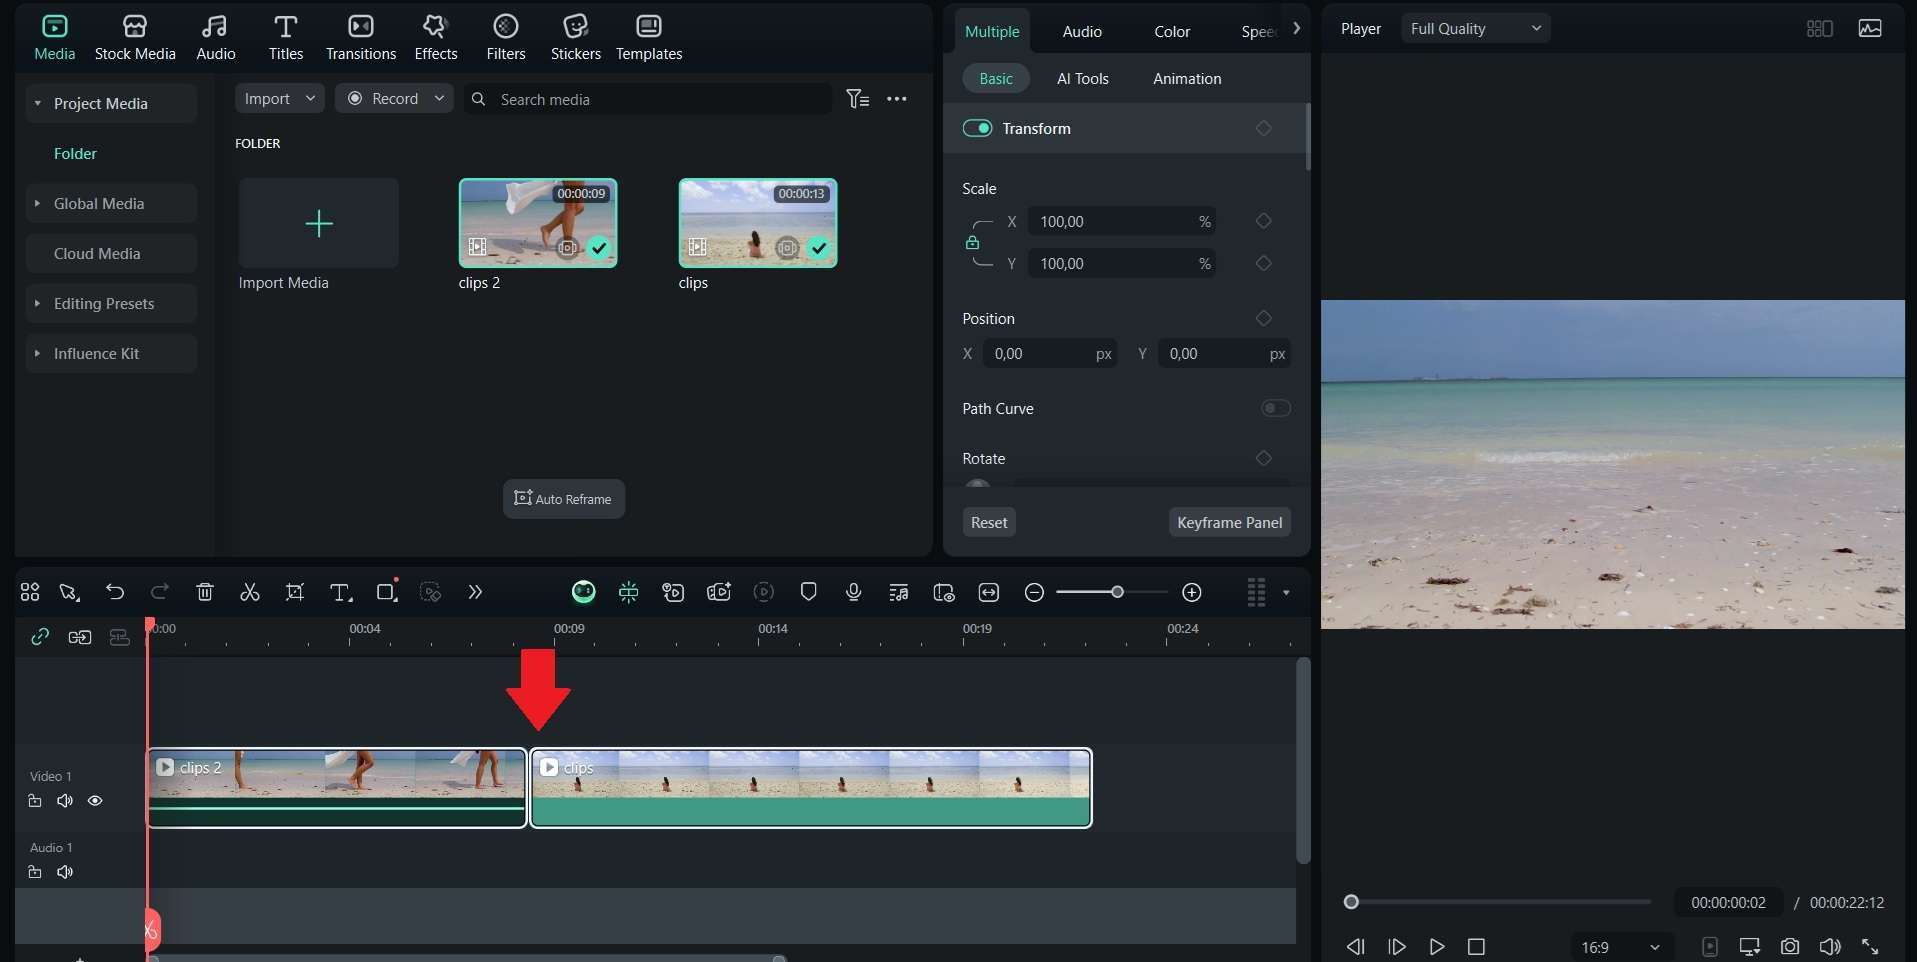
Split Screen Effect
1. Go to the Split Screen menu in Filmora.
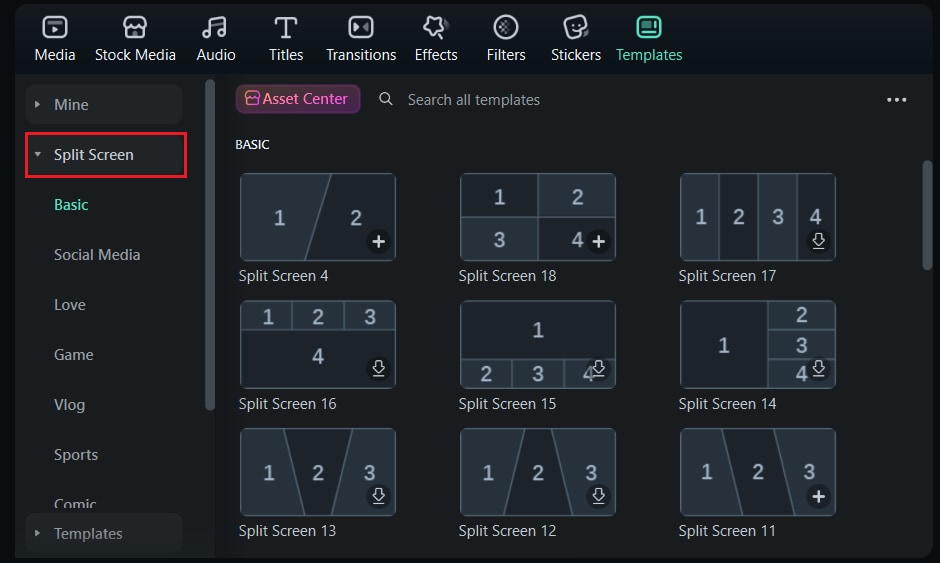
2. Choose a layout that places clips side by side.
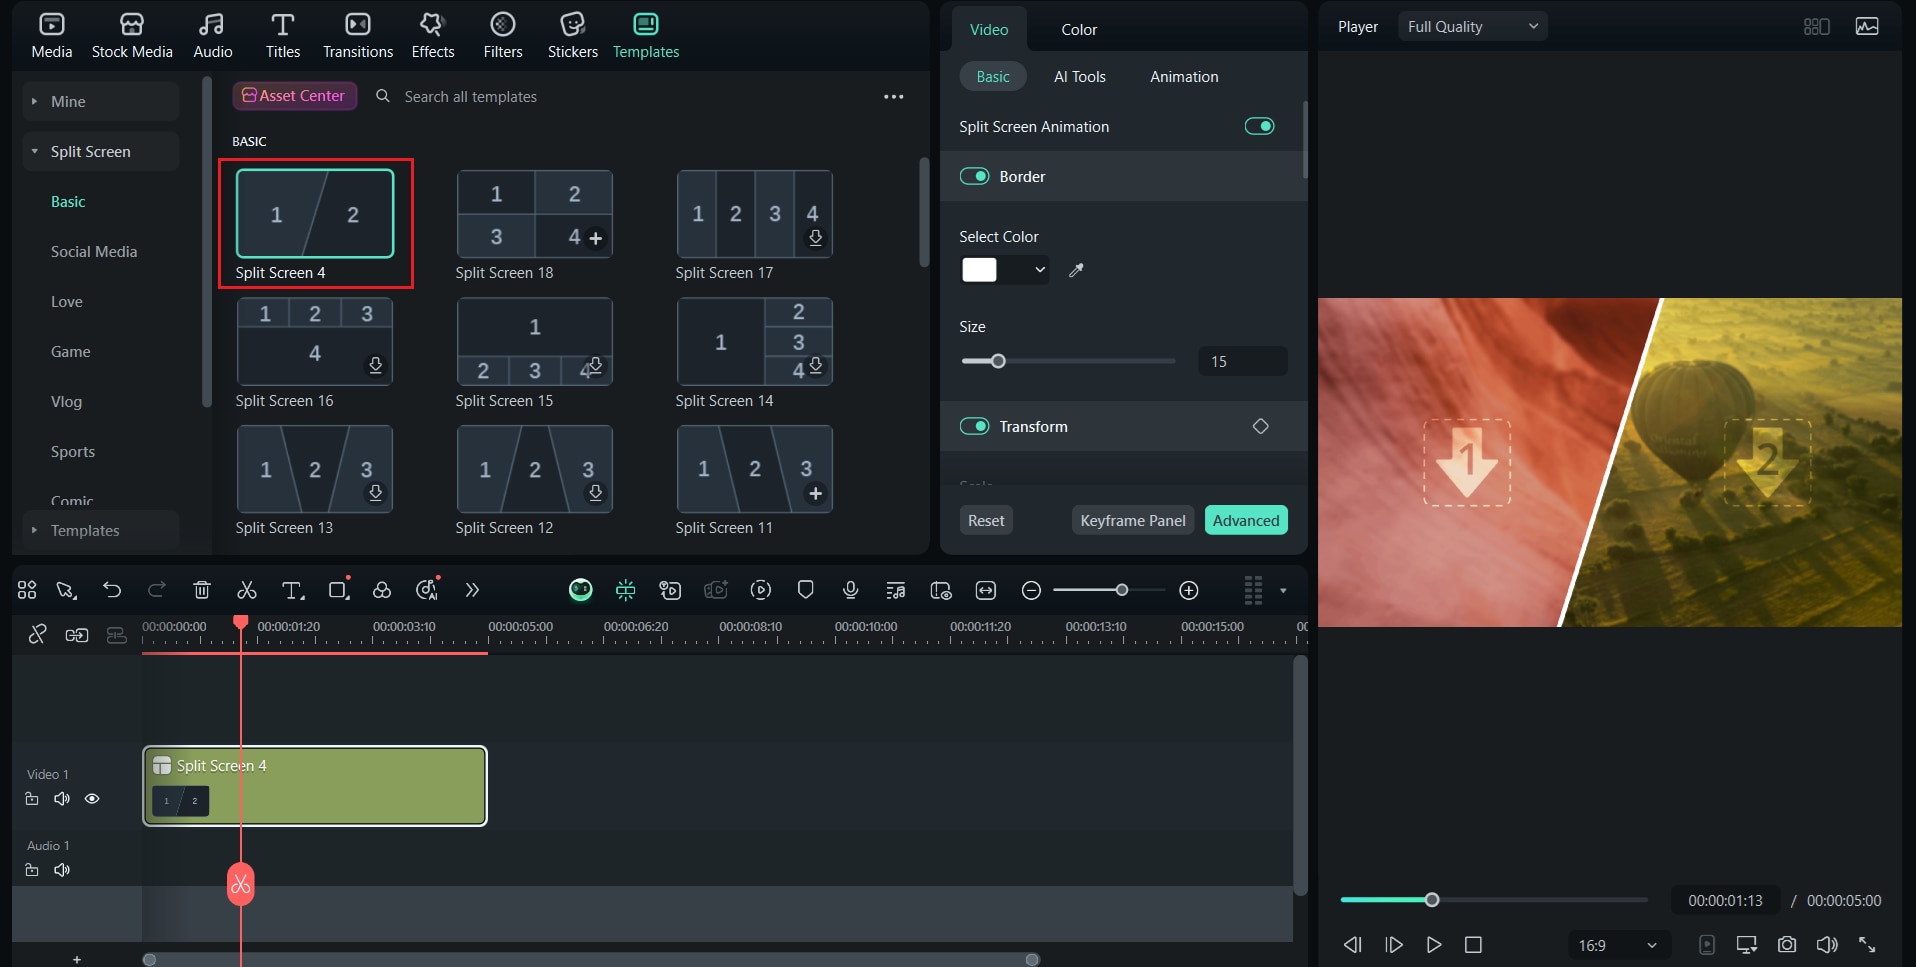
3. Drag the "before" clip into one panel and the "after" clip into the other.
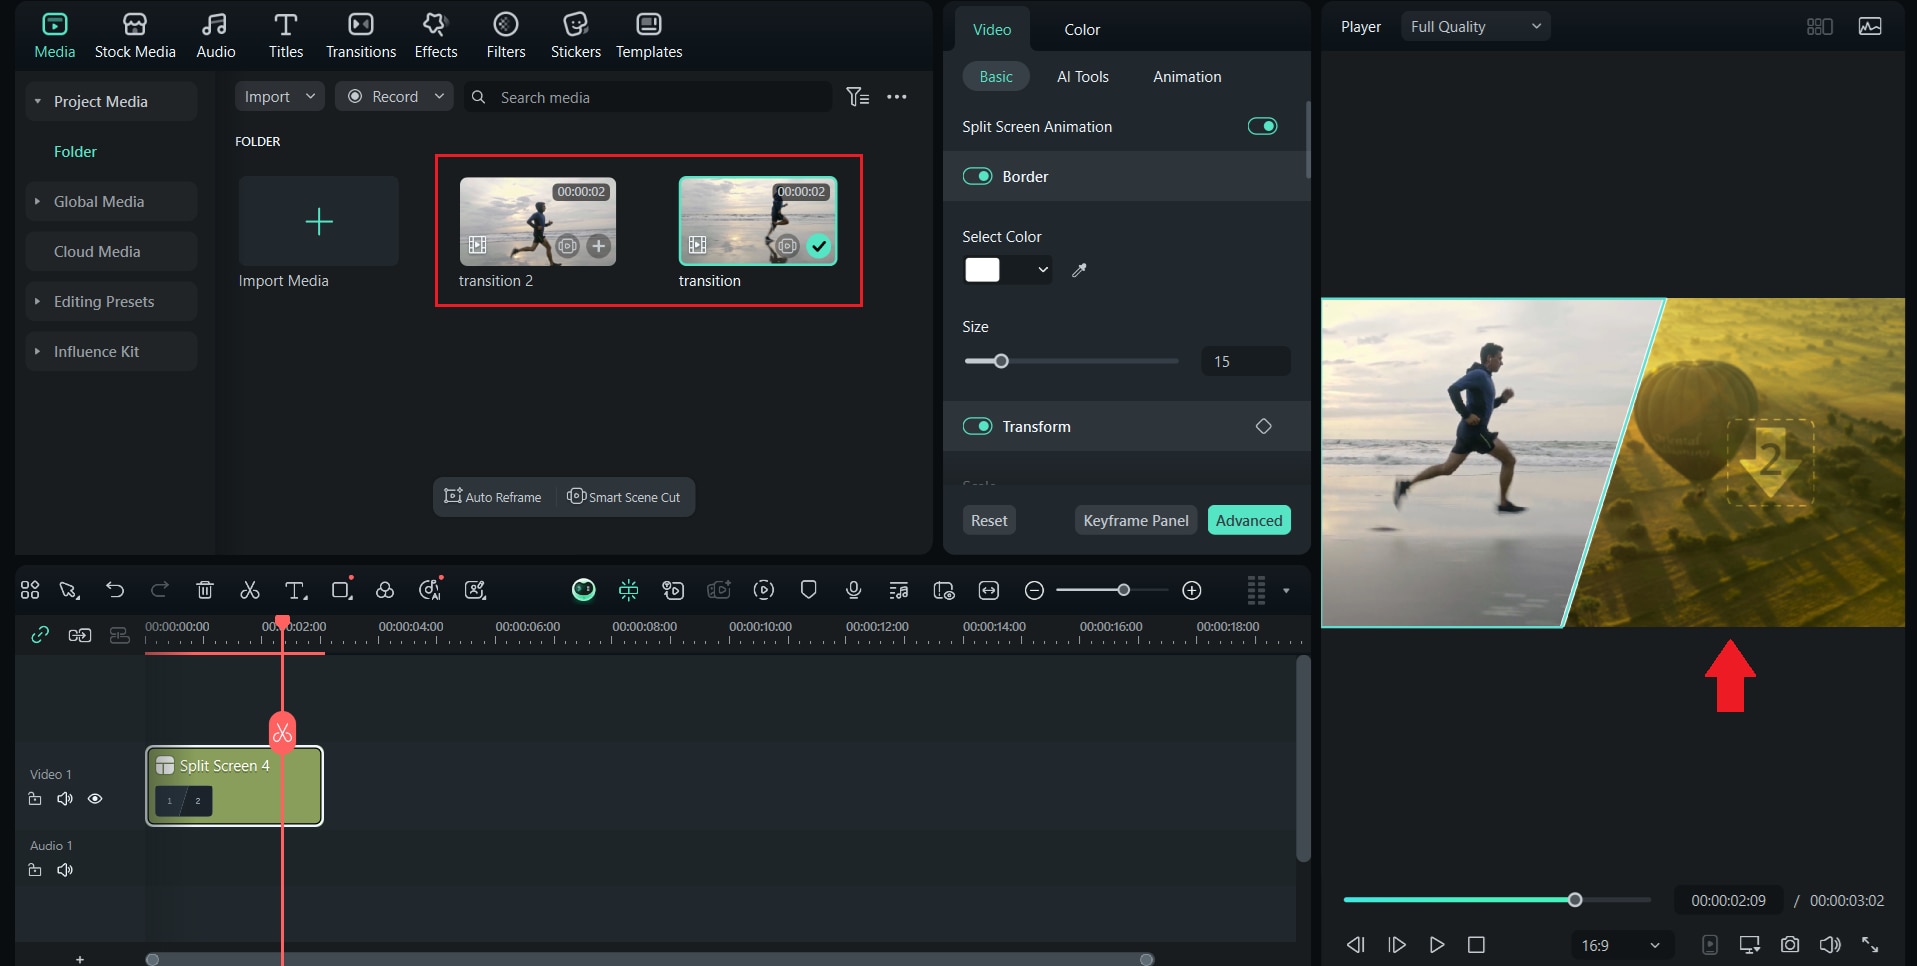
4. Adjust size and position for a balanced comparison.
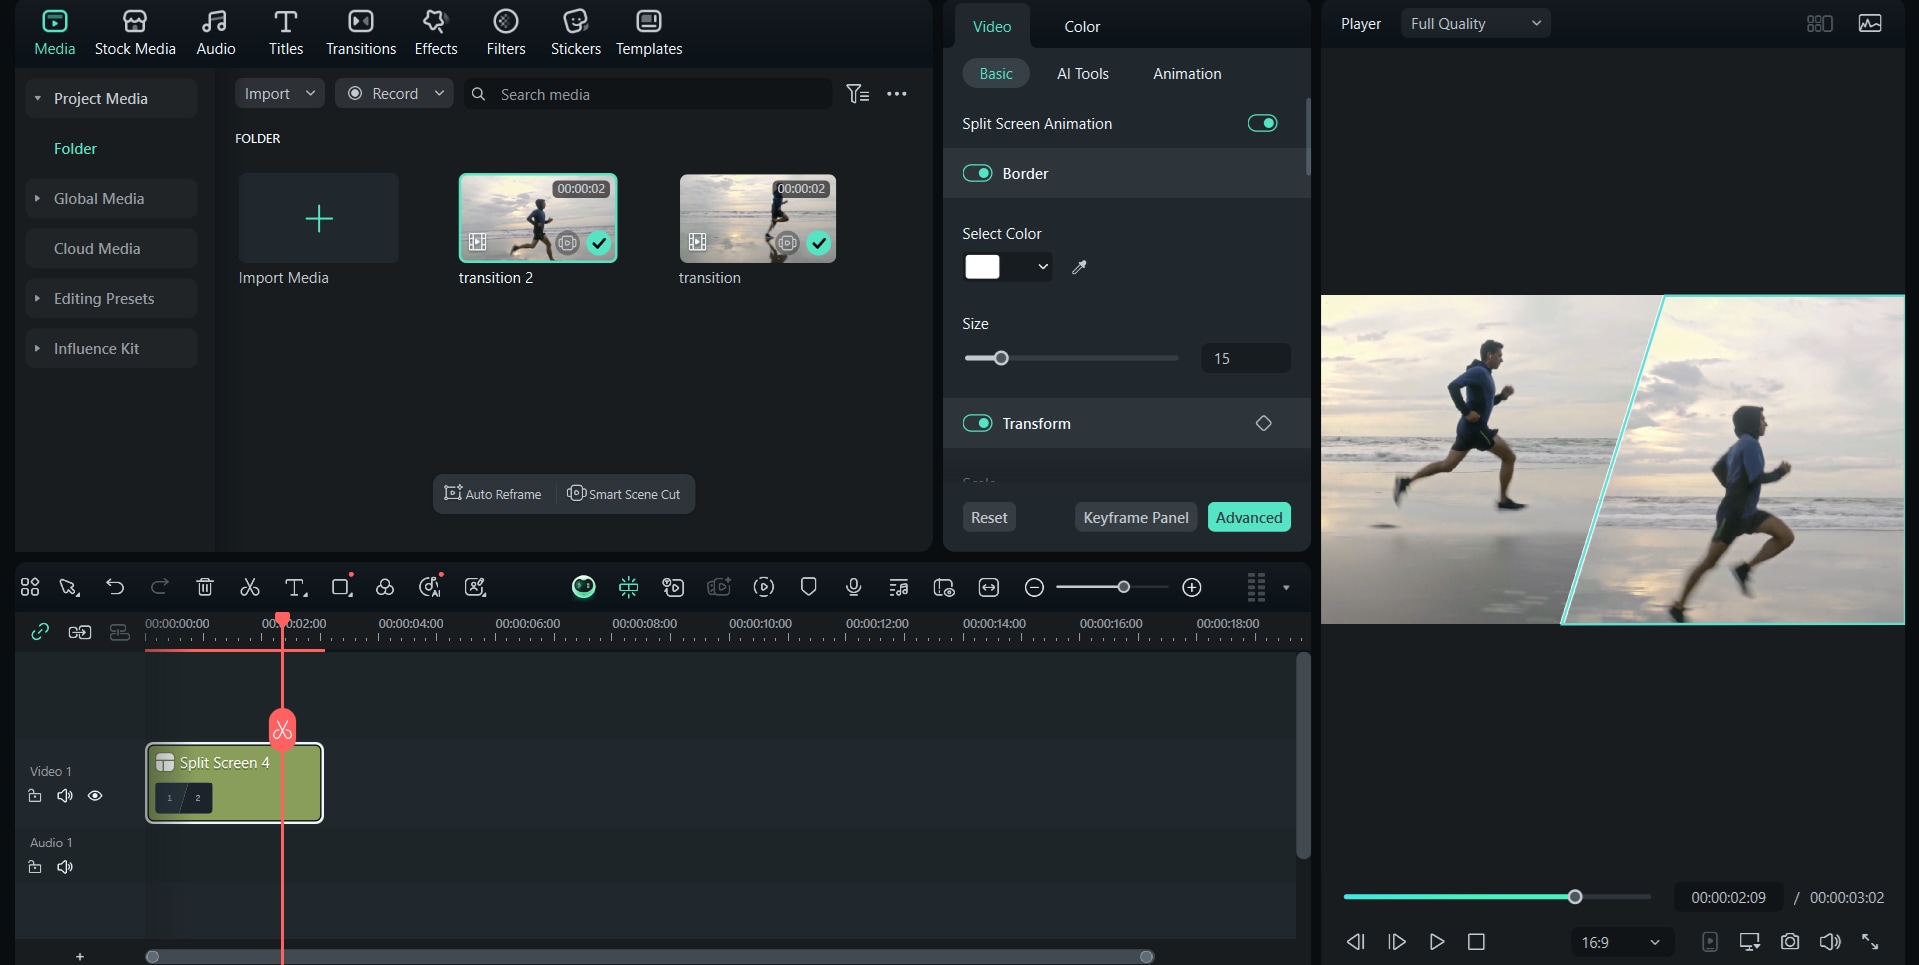
Split Screen Transition Result:

Part 5. Best Practices & Strategies for Creating Before & After Transitions
Good editing is more than just adding effects. The way you structure your workflow and pace your video can make the difference between an amateur-looking clip and a professional before-and-after transition video.
By following some simple strategies, you can keep your edits smooth, your story clear, and your audience engaged:
1. Edit in the right sequence
Start with a rough cut to arrange your clips, refine the timing, then add transitions and effects. Adjust audio and music last to keep everything in sync.
2. Maintain continuity
Keep shots consistent to avoid jarring cuts. Smooth continuity helps viewers focus on the transformation instead of the editing.
3. Use emotional pacing
- Quick cuts create excitement and energy.
- Slower transitions allow viewers to fully appreciate the change.
- Choose pacing based on the mood you want to convey.
Conclusion
Before and after videos are one of the most effective ways to showcase transformation. Whether it’s showing progress, improvement, or a total transformation, these edits grab attention because they show real progress clearly and visually. With the right planning, smart shooting, and thoughtful editing, you can turn simple footage into a powerful before-and-after transition video that resonates with viewers.
Filmora makes the process easier for beginners and professionals, offering intuitive transitions, split screens, and editing tools that help you create polished results without the steep learning curve. By applying the strategies in this guide, you’ll be able to create videos that not only look professional but also tell a story that people connect with.
Frequently Asked Questions
-
How do I do side-by-side before and after videos?
You can use a split-screen effect in editors like Filmora. Simply place the "before" clip on one side and the "after" clip on the other, making sure they play at the same time for a clear comparison.You can use a split-screen effect in editors like Filmora. Simply place the "before" clip on one side and the "after" clip on the other, making sure they play at the same time for a clear comparison.Which software is best for beginners?Which software is best for beginners? -
Which software is best for beginners?
Filmora is a great option for beginners because it has pre-made transitions, split-screen layouts, and an intuitive interface. If you are more advanced, you might explore tools like After Effects, but for most users, Filmora is easier and faster.Filmora is a great option for beginners because it has pre-made transitions, split-screen layouts, and an intuitive interface. If you are more advanced, you might explore tools like After Effects, but for most users, Filmora is easier and faster.What formats should I export a before-and-after video in?What formats should I export a before-and-after video in? -
What formats should I export a before-and-after video in?
The best format depends on where you plan to share it. MP4 is widely supported on platforms like YouTube, Instagram, and TikTok. If you need higher quality for professional use, you can also export in MOV or AVI.The best format depends on where you plan to share it. MP4 is widely supported on platforms like YouTube, Instagram, and TikTok. If you need higher quality for professional use, you can also export in MOV or AVI.How do I do side-by-side before and after videos?You can use a split-screen effect in editors like Filmora. Simply place the "before" clip on one side and the "after" clip on the other, making sure they play at the same time for a clear comparison.Which software is best for beginners?Filmora is a great option for beginners because it has pre-made transitions, split-screen layouts, and an intuitive interface. If you are more advanced, you might explore tools like After Effects, but for most users, Filmora is easier and faster.What formats should I export a before-and-after video in?The best format depends on where you plan to share it. MP4 is widely supported on platforms like YouTube, Instagram, and TikTok. If you need higher quality for professional use, you can also export in MOV or AVI.How do I do side-by-side before and after videos?How do I do side-by-side before and after videos? -
How do I do side-by-side before and after videos?
You can use a split-screen effect in editors like Filmora. Simply place the "before" clip on one side and the "after" clip on the other, making sure they play at the same time for a clear comparison.You can use a split-screen effect in editors like Filmora. Simply place the "before" clip on one side and the "after" clip on the other, making sure they play at the same time for a clear comparison.Which software is best for beginners?Which software is best for beginners? -
Which software is best for beginners?
Filmora is a great option for beginners because it has pre-made transitions, split-screen layouts, and an intuitive interface. If you are more advanced, you might explore tools like After Effects, but for most users, Filmora is easier and faster.Filmora is a great option for beginners because it has pre-made transitions, split-screen layouts, and an intuitive interface. If you are more advanced, you might explore tools like After Effects, but for most users, Filmora is easier and faster.What formats should I export a before-and-after video in?What formats should I export a before-and-after video in? -
What formats should I export a before-and-after video in?
The best format depends on where you plan to share it. MP4 is widely supported on platforms like YouTube, Instagram, and TikTok. If you need higher quality for professional use, you can also export in MOV or AVI.The best format depends on where you plan to share it. MP4 is widely supported on platforms like YouTube, Instagram, and TikTok. If you need higher quality for professional use, you can also export in MOV or AVI.
