
 100% Security Verified | No Subscription Required | No Malware


 ChatGPT
 Perplexity
 Gemini
 Claude
 Grok
Grok
In this article
Adding fire effects to your videos is hands down one of the coolest ways to turn up the energy and grab attention. Seriously, from explosive intros to smoky transitions, learning how to add fire effects in video can seriously level up your content.
And thankfully, you don't need to sell your soul to a Hollywood VFX studio to make it happen. That's right, you're about to learn how to add fire effects in video without the headache. And yes, you can even add fire effects to videos online if that's more your style. Keep scrolling, because things are about to heat up.

Part 1. Get Ready to Set Your Scene on Fire
Before you start adding those eye-catching flames, give your video a solid foundation so the fire effect feels like part of the story instead of something pasted on top. Trust me, setting up the right conditions will make your final edit look polished and believable.
For filming, here's what you'll need:
- Capture Every Detail With A Good Camera
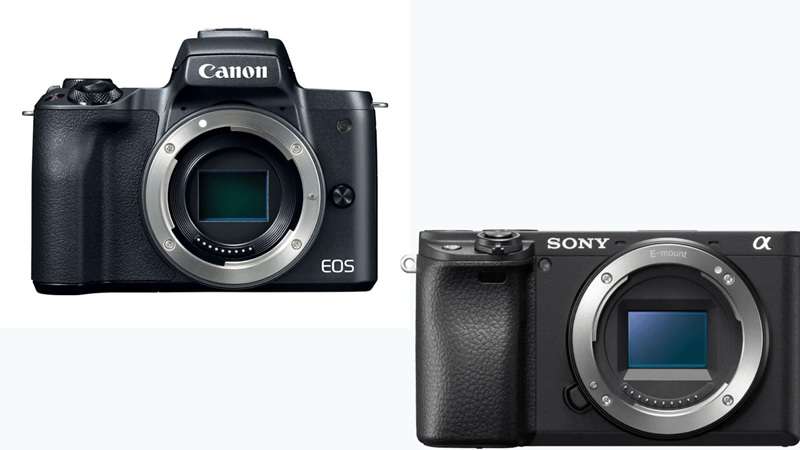
Sharp, clear footage will make the fire effect in your video pop. A DSLR or mirrorless camera like the Canon EOS M50 or Sony Alpha a6400 is perfect for crisp video. If you're on a budget, even a modern smartphone like the iPhone 14 or Samsung Galaxy S23 can handle it.
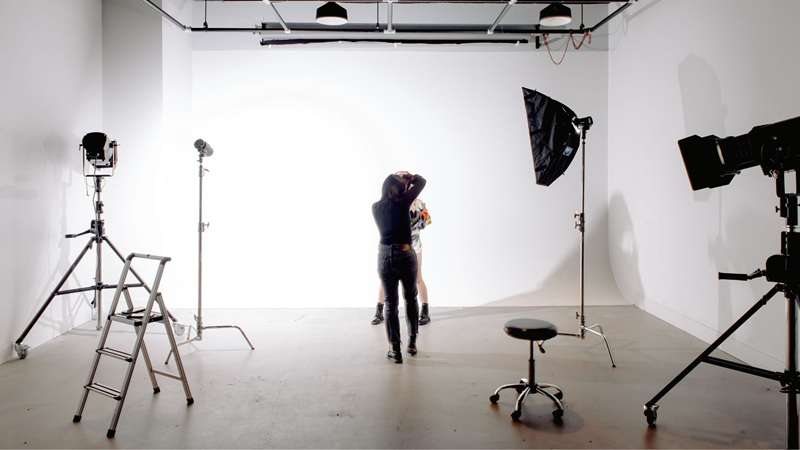
- Create The Glow With A Light Source
Adding a warm light during filming helps mimic the natural glow of fire. A portable LED panel with adjustable color temperature, like the Neewer 660 or Godox LEDP260C, works great. Even a household lamp with a warm bulb can make a difference.
- Video Editing Software
Once you have your footage and lighting, use Wondershare Filmora to seamlessly add fire effects to video. This all-in-one video editor provides a wide range of tools that make it easy to blend the flames so they fit perfectly into your scene.

And beyond the gear, you also need a sharp eye and some creative instinct so that when you add a fire effect to video, it feels like it belongs in the scene instead of sticking out. So, here are some quick tips to make sure you get the footage you want:
- Shoot With Fire In Mind: Frame your shots with enough empty space where the flames will appear. Fire needs breathing room to look natural and convincing.
- Think Lighting: Add shadows or warm glows during filming so the flames will have a realistic impact on their surroundings once edited in.
- Plan The Intensity: Decide early if you want a gentle candle flicker or a dramatic burst of flames. Knowing this will guide you to the right style of fire effect when it's time to edit.
Part 2. How to Add Fire Effect in Video with Filmora
Once your footage is prepped and ready, it's time to bring the heat. If you want to skip over technical headaches and still make your videos look like they came straight from a professional studio, Filmora is your best friend.
This all-in-one video editor makes it simple to add fire effects to video while keeping everything smooth, realistic, and easy to control from start to finish.

Here's why Filmora makes adding fire look effortless:
 secure download

- Huge Built-In Fire Effect Collection: Skip hunting for third-party plugins. Filmora has ready-to-use fire overlays and animations that you can drop straight into your footage.
- Layer Effects Like A Pro: You can stack multiple fire elements, tweak blending modes for a realistic glow, and use keyframes to make the flames move with your scene.
- Edit Anywhere You Want: Filmora works seamlessly on both desktop and mobile, so you can add a fire effect to video whether you're at your desk or editing on the go.
- Friendly For First-Time Editors: Its clean interface and drag-and-drop workflow make it easy to get results even if you've never edited a video before.
- AI Tools That Take It Further: Filmora's AI Smart Cutout can isolate parts of your footage so flames sit perfectly behind objects. You can also use AI Color Enhancement to match the fire's warm tones with your scene for a flawless finish.
With all these tools at your fingertips, mastering how to add fire effects in video turns into a smooth, exciting ride. So, let's jump right into the guide and turn your footage into something that burns with style.
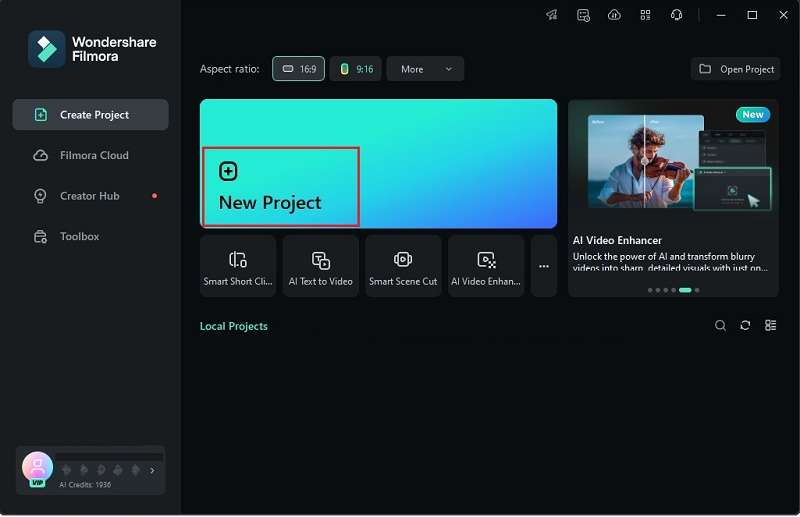
Step 1. Open Filmora and start a new project
Start by downloading and installing the most recent version of Filmora on your device. Once it's ready, open the program and select "New Project" to kick things off with a clean slate.
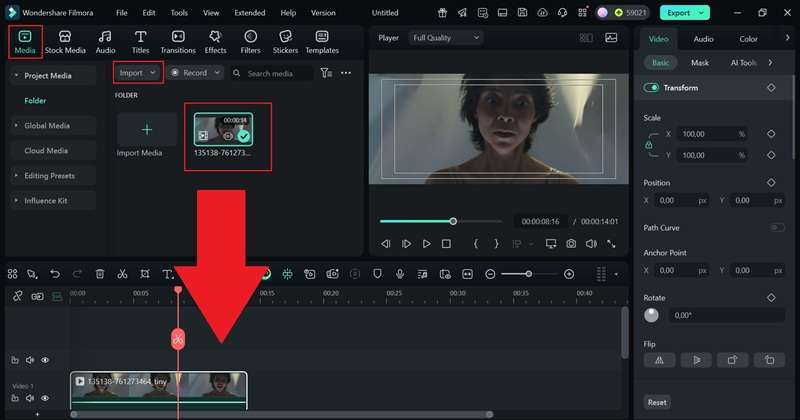
Step 2. Upload your footage
Once you're in the main editing interface, head over to the "Media" tab and hit "Import" to bring in the footage you want to work on. After that, just drag it down to the editing timeline.
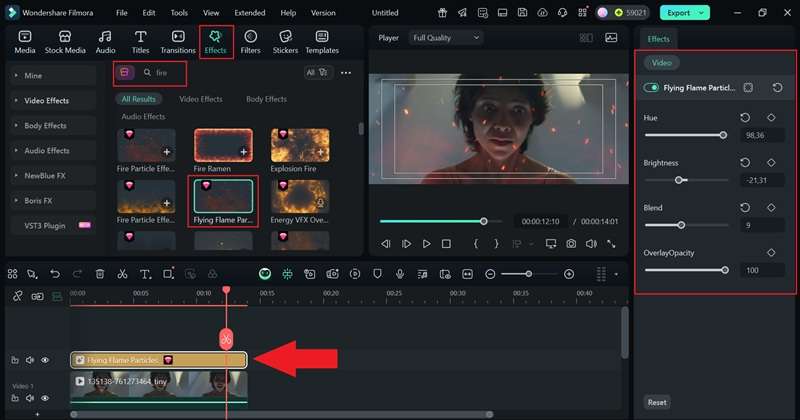
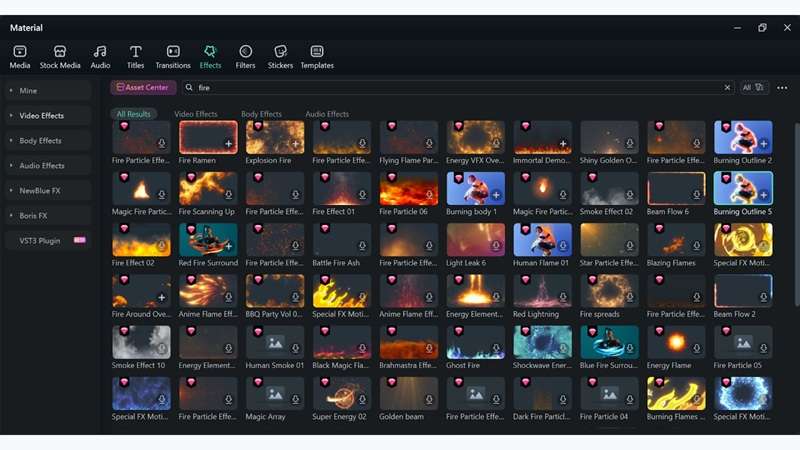
Step 3. Add the fire effect
Next, go to the "Effects" tab and type "Fire" in the search bar to quickly find what you need. Pick a fire effect that matches your scene. For example, in this horror clip where the protagonist finally sees the "ghost fire" below her, a subtle flame works better than a huge blazing fire.
Once you've chosen, drag it onto the timeline. Don't forget to adjust its intensity on the property panel on the right of the screen.
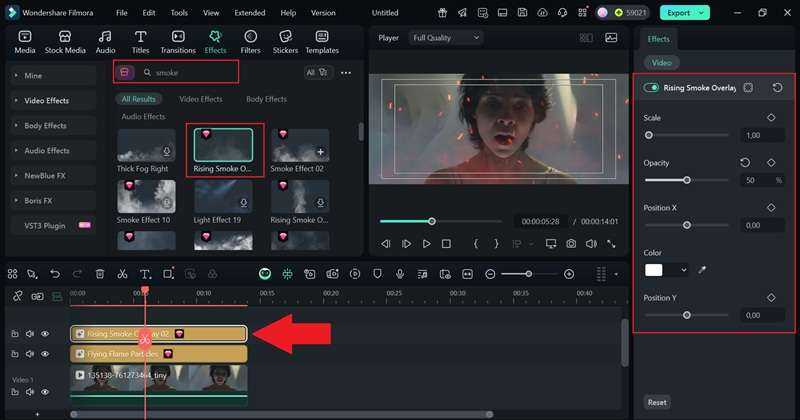
Step 4. Add a smoke effect to make it more believable
Obviously, where there's fire, there's smoke. So, add a touch of smoke effects too using the same method and drag them onto the timeline. Just keep it light so it doesn't overpower the scene.
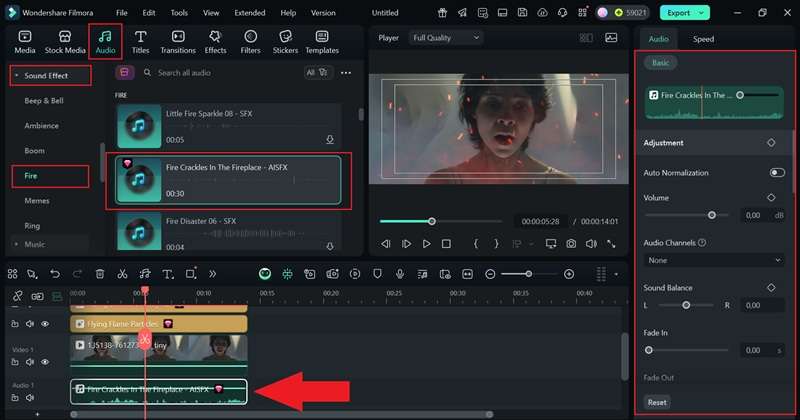
Step 5. Add sound effects
Another way to make your clips feel more real is by adding a flame sound effect. To do this, go to the "Audio" tab, select "Sound Effect", and browse the "Fire" category. Pick the one that matches your scene and drop it onto the timeline. Don't forget to fine-tune the volume in the property panel to make sure it blends perfectly.
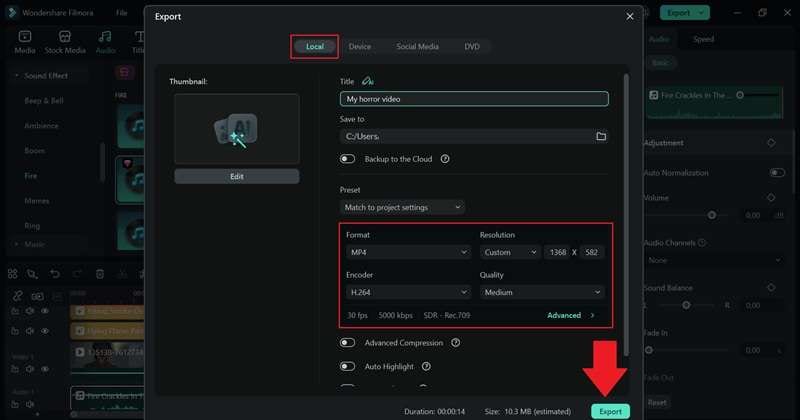
Step 6. Export and save your video
Once you're done editing, hit "Export". Choose "Local" to save it on your device or "Social Media" to post it right away. Add a title, pick the format and resolution, set the save location, then click "Export" again to finish.
And just like that, you're done! The fire effect is now in your video, making the scene more engaging and immersive. Now, sit back and watch your finished creation below.
Part 3. Must-Try Fire Effects in Filmora
As you can see, learning how to add fire effects to video with Filmora is not only effective but also a lot of fun. Along with realistic flames, you can cut and trim clips, add music, layer effects, and shape your video exactly how you want it.
Now that you know how quick and easy it is to add fire effects to video with Filmora, it's time to check out the other fire effects you can use. While browsing through the steps, you've probably noticed that Filmora comes loaded with dozens of fire-themed assets ready to go. Here are a few worth trying.
- Explosion Fire: A massive, fiery blast perfect for intense moments like a car crash or a dramatic bomb scene. This effect fills the frame with energy and instantly grabs attention.
- Human Flame: Flames that wrap around and follow a subject, creating a fiery aura. Ideal for scenes where a hero unleashes hidden power or transforms mid-battle.
- Special FX Motion: Animated fire effects that look straight out of an action-packed anime. Perfect for moments when a character summons an ability or delivers a powerful attack.
- Ghost Fire: A haunting blue flame that brings a supernatural vibe. Works beautifully for eerie scenes like a spirit appearing in the dark or a cursed object glowing with energy.
- Fire Particle Effect: A subtle, warm flame that adds atmosphere without danger. Great for cozy scenes like a picnic at dusk or a calm camping night under the stars.
Related Templates For You to Try


Part 4. Where to Get Fire Effects Online
After exploring Filmora's rich collection of fiery overlays and seeing how effortlessly it helps you shape your videos, you might still want to expand your creative toolbox. If you're looking for even more variety, you can also find other fire effects to video online through a range of web-based platforms.
Here are a few worth checking out.
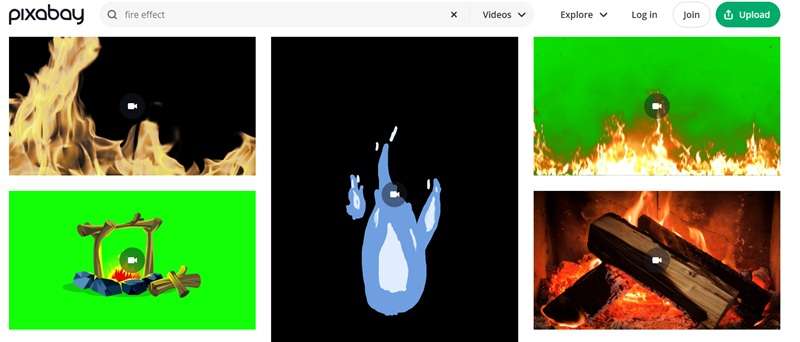
1. Pixabay
Pixabay tops the list with more than 5,000 fire effects you can instantly use to spice up your footage. You'll find everything from green screen flames to straight-up fire footage in crisp 4K. Downloading is quick and simple, and you don't even need to log in.
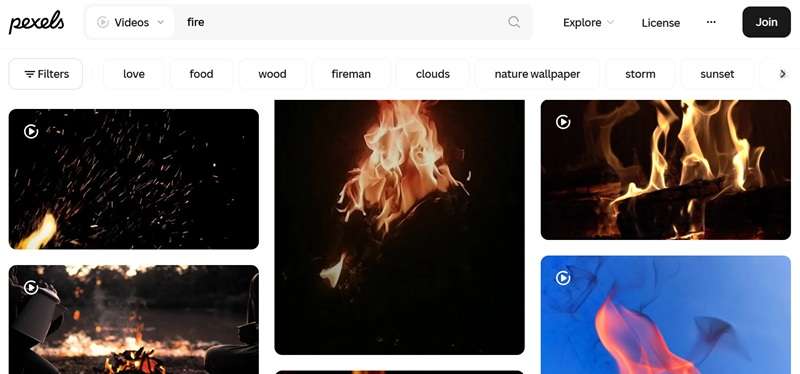
2. Pexels
Pexels is another excellent choice if you want to add a fire effect to a video online, offering over 4,000 high-quality options. Its filter tools make it easy to narrow your search by orientation and resolution so you get the perfect fit for your project.
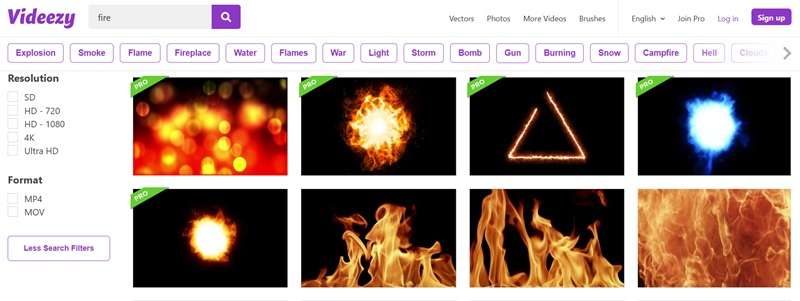
3. Videezy
Videezy brings more than 1,000 fire effects to the table, with footage available in up to 4K resolution. The clips come in MP4 or MOV formats, making them easy to work with on most editors. Just keep in mind that some are exclusive to the Pro version.
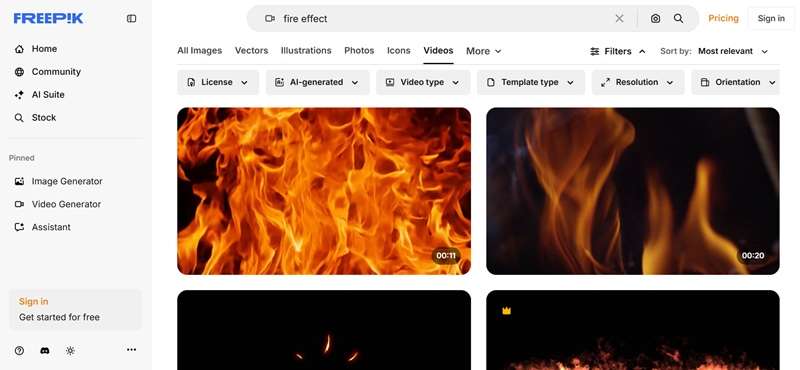
4. FreePik
Moving on, Freepik delivers an impressive collection of over 6,000 fire effects for video, though many are part of its Pro plan. That said, free users can still access creative, high-quality assets but are limited to two downloads a day.
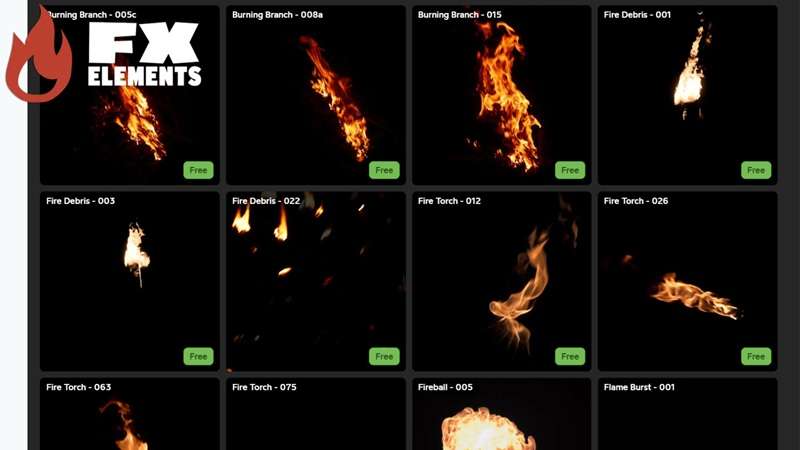
5. FX Elements
Last but not least, FX Elements may not have as many fire clips as other sites, but its quality is unmatched. The library includes 4K fire footage that's good enough for professional productions, even big-screen projects.
Conclusion
Adding fire effects to your video can level up your clips and make them more immersive and exciting to watch. For beginners, this guide shows how to add fire effects in video using the all-in-one video editor Wondershare Filmora.
With Filmora, the process feels effortless since it gives you everything you need in one place, from realistic fire effects to extras like smoke overlays, flame audio effects, and AI tools that make the flames look more believable.
Plus, having it all in a single app means you can focus on creating instead of switching between different tools. Overall, Filmora makes bringing your fiery vision to life faster and more enjoyable.
Frequently Asked Questions
-
Can I add a fire effect to video on my phone using Filmora?
Yes, Filmora works on mobile too, so you can easily add a fire effect to a video right from your phone. The process is quick, and the results look just as polished as on a desktop.Yes, Filmora works on mobilemobile too, so you can easily add a fire effect to a video right from your phone. The process is quick, and the results look just as polished as on a desktop.Does adding fire effects slow down rendering?Does adding fire effects slow down rendering? -
Does adding fire effects slow down rendering?
It can take a bit longer than a plain edit, especially with high-resolution effects, but with Filmora's optimized engine, the difference is minimal.It can take a bit longer than a plain edit, especially with high-resolution effects, but with Filmora's optimized engine, the difference is minimal.Where can I get fire sound effects to match the visuals?Where can I get fire sound effects to match the visuals? -
Where can I get fire sound effects to match the visuals?
You can find them in Filmora's built-in audio library or grab more from free sites like Pixabay, Mixkit, or Freesounds to perfectly sync with your flames.You can find them in Filmora's built-in audio library or grab more from free sites like Pixabay, Mixkit, or Freesounds to perfectly sync with your flames.Can I animate fire effects to follow a moving object?Can I animate fire effects to follow a moving object? -
Can I animate fire effects to follow a moving object?
Yes, you can use Filmora's keyframing feature to make the flames move naturally with your subject, creating a realistic and dynamic fire effect.Yes, you can use Filmora's keyframingkeyframing feature to make the flames move naturally with your subject, creating a realistic and dynamic fire effect.Grammarly -
Can I add a fire effect to video on my phone using Filmora?
Yes, Filmora works on mobile too, so you can easily add a fire effect to a video right from your phone. The process is quick, and the results look just as polished as on a desktop.Yes, Filmora works on mobilemobile too, so you can easily add a fire effect to a video right from your phone. The process is quick, and the results look just as polished as on a desktop.Does adding fire effects slow down rendering?Does adding fire effects slow down rendering? -
Does adding fire effects slow down rendering?
It can take a bit longer than a plain edit, especially with high-resolution effects, but with Filmora's optimized engine, the difference is minimal.It can take a bit longer than a plain edit, especially with high-resolution effects, but with Filmora's optimized engine, the difference is minimal.Where can I get fire sound effects to match the visuals?Where can I get fire sound effects to match the visuals? -
Where can I get fire sound effects to match the visuals?
You can find them in Filmora's built-in audio library or grab more from free sites like Pixabay, Mixkit, or Freesounds to perfectly sync with your flames.You can find them in Filmora's built-in audio library or grab more from free sites like Pixabay, Mixkit, or Freesounds to perfectly sync with your flames.Can I animate fire effects to follow a moving object?Can I animate fire effects to follow a moving object? -
Can I animate fire effects to follow a moving object?
Yes, you can use Filmora's keyframing feature to make the flames move naturally with your subject, creating a realistic and dynamic fire effect.Yes, you can use Filmora's keyframingkeyframing feature to make the flames move naturally with your subject, creating a realistic and dynamic fire effect.Grammarly
