


 100% Security Verified | No Subscription Required | No Malware


 ChatGPT
 Perplexity
 Gemini
 Claude
 Grok
Grok
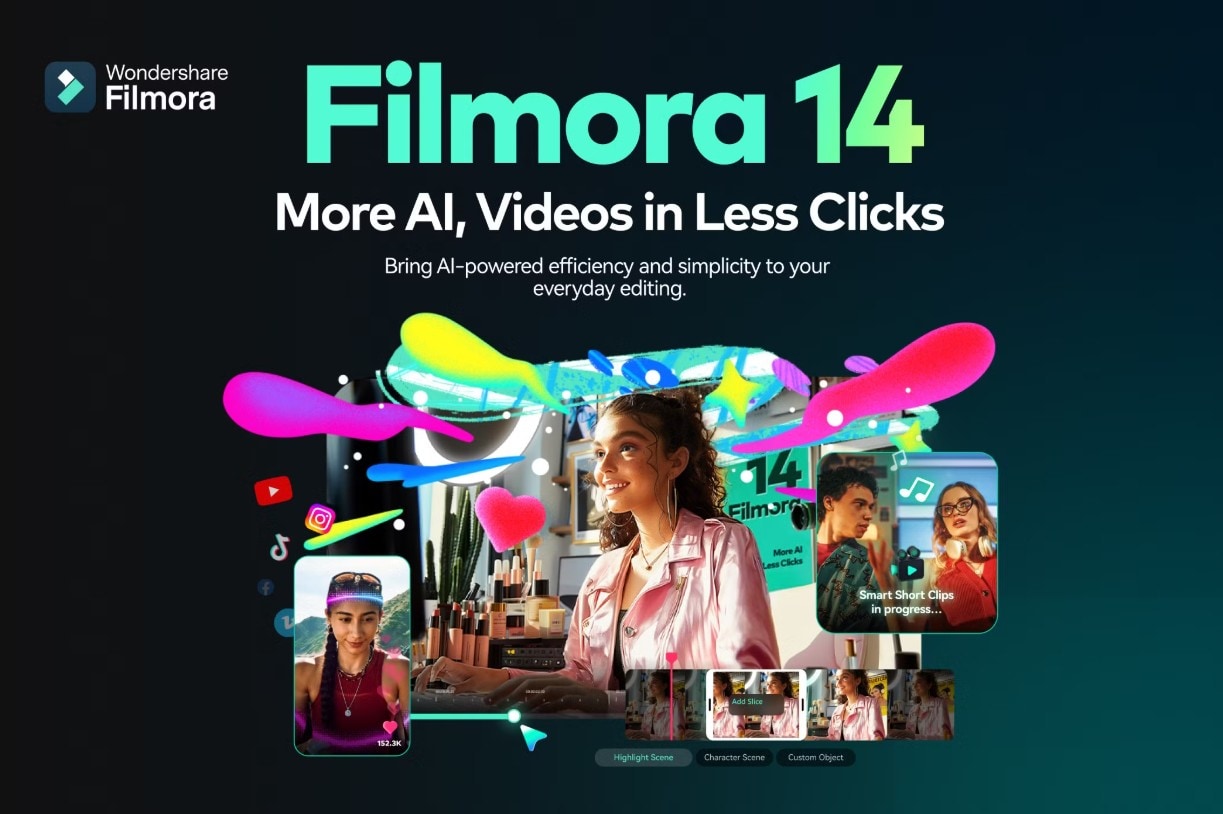
If you have just started using Filmora, you are on the right path toward becoming a video editing expert. Filmora is one of the best video editing tools out there. Developed by Wondershare, a software company famous for its intuitive and well-developed tools, Filmora also offers a huge number of features for audio and image editing and manipulation.
On top of all that, Filmora also has several AI tools that speed up the editing process significantly by eliminating redundant, repetitive tasks. You will be able to see just how well Filmora operates when you read our full tutorial on adding the falling text animation to videos.
To begin your journey, you need to download and install the software first. Filmora is available for Windows and Mac devices, Android, and iOS. Pick a version, and let’s jump into the action.
In this article
How to Add the Falling Text Animation Using Filmora: Mobile and PC Tutorial
Let’s start with the mobile version first.
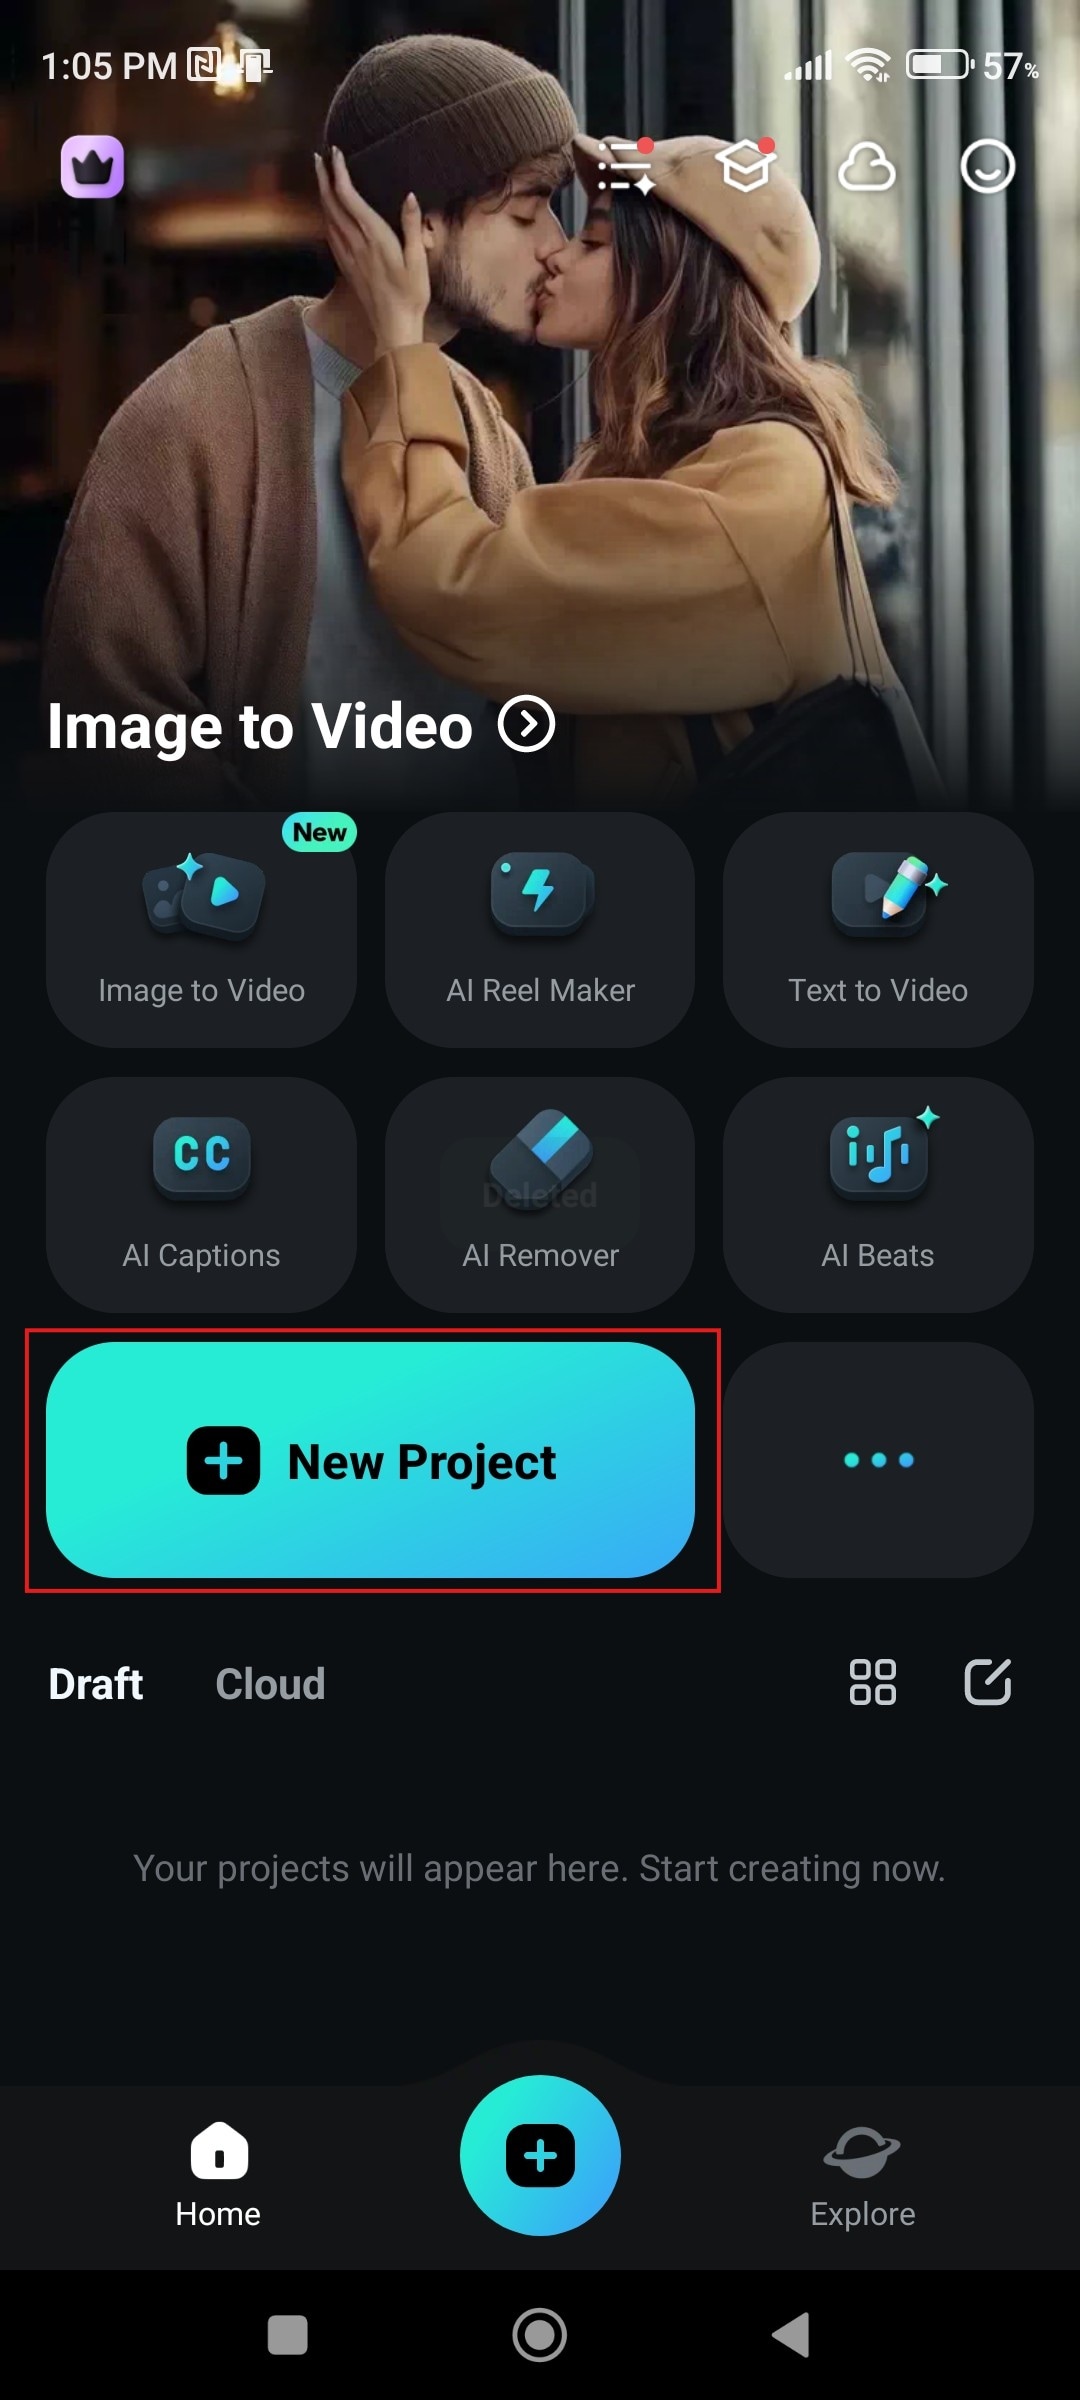
Step 1: Open the app and tap on New Project. Then, please select a video file from your phone and import it to the project timeline.
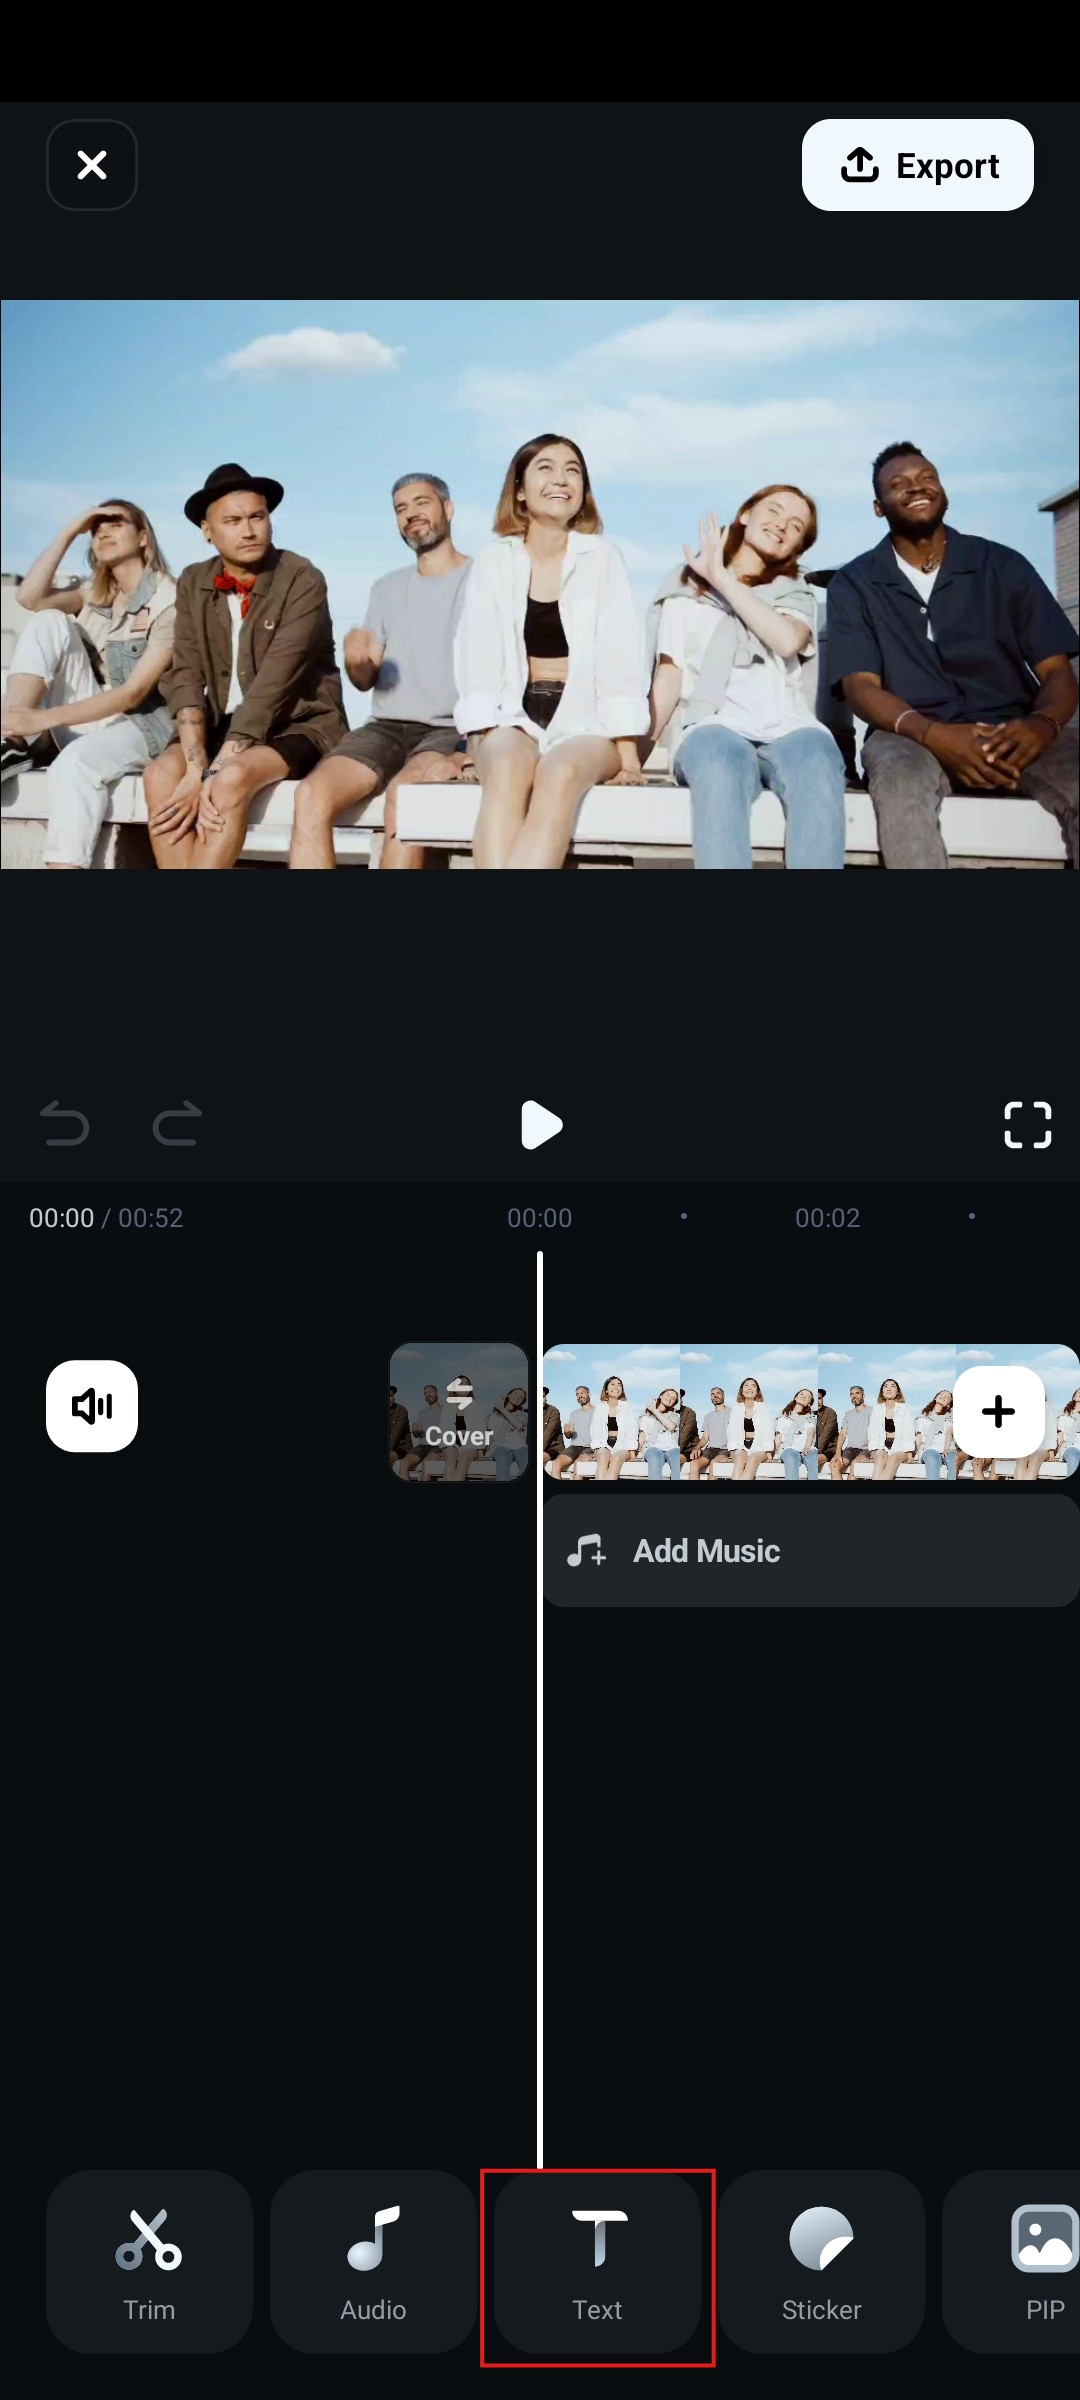
Step 2: Tap on Text at the bottom of the screen.
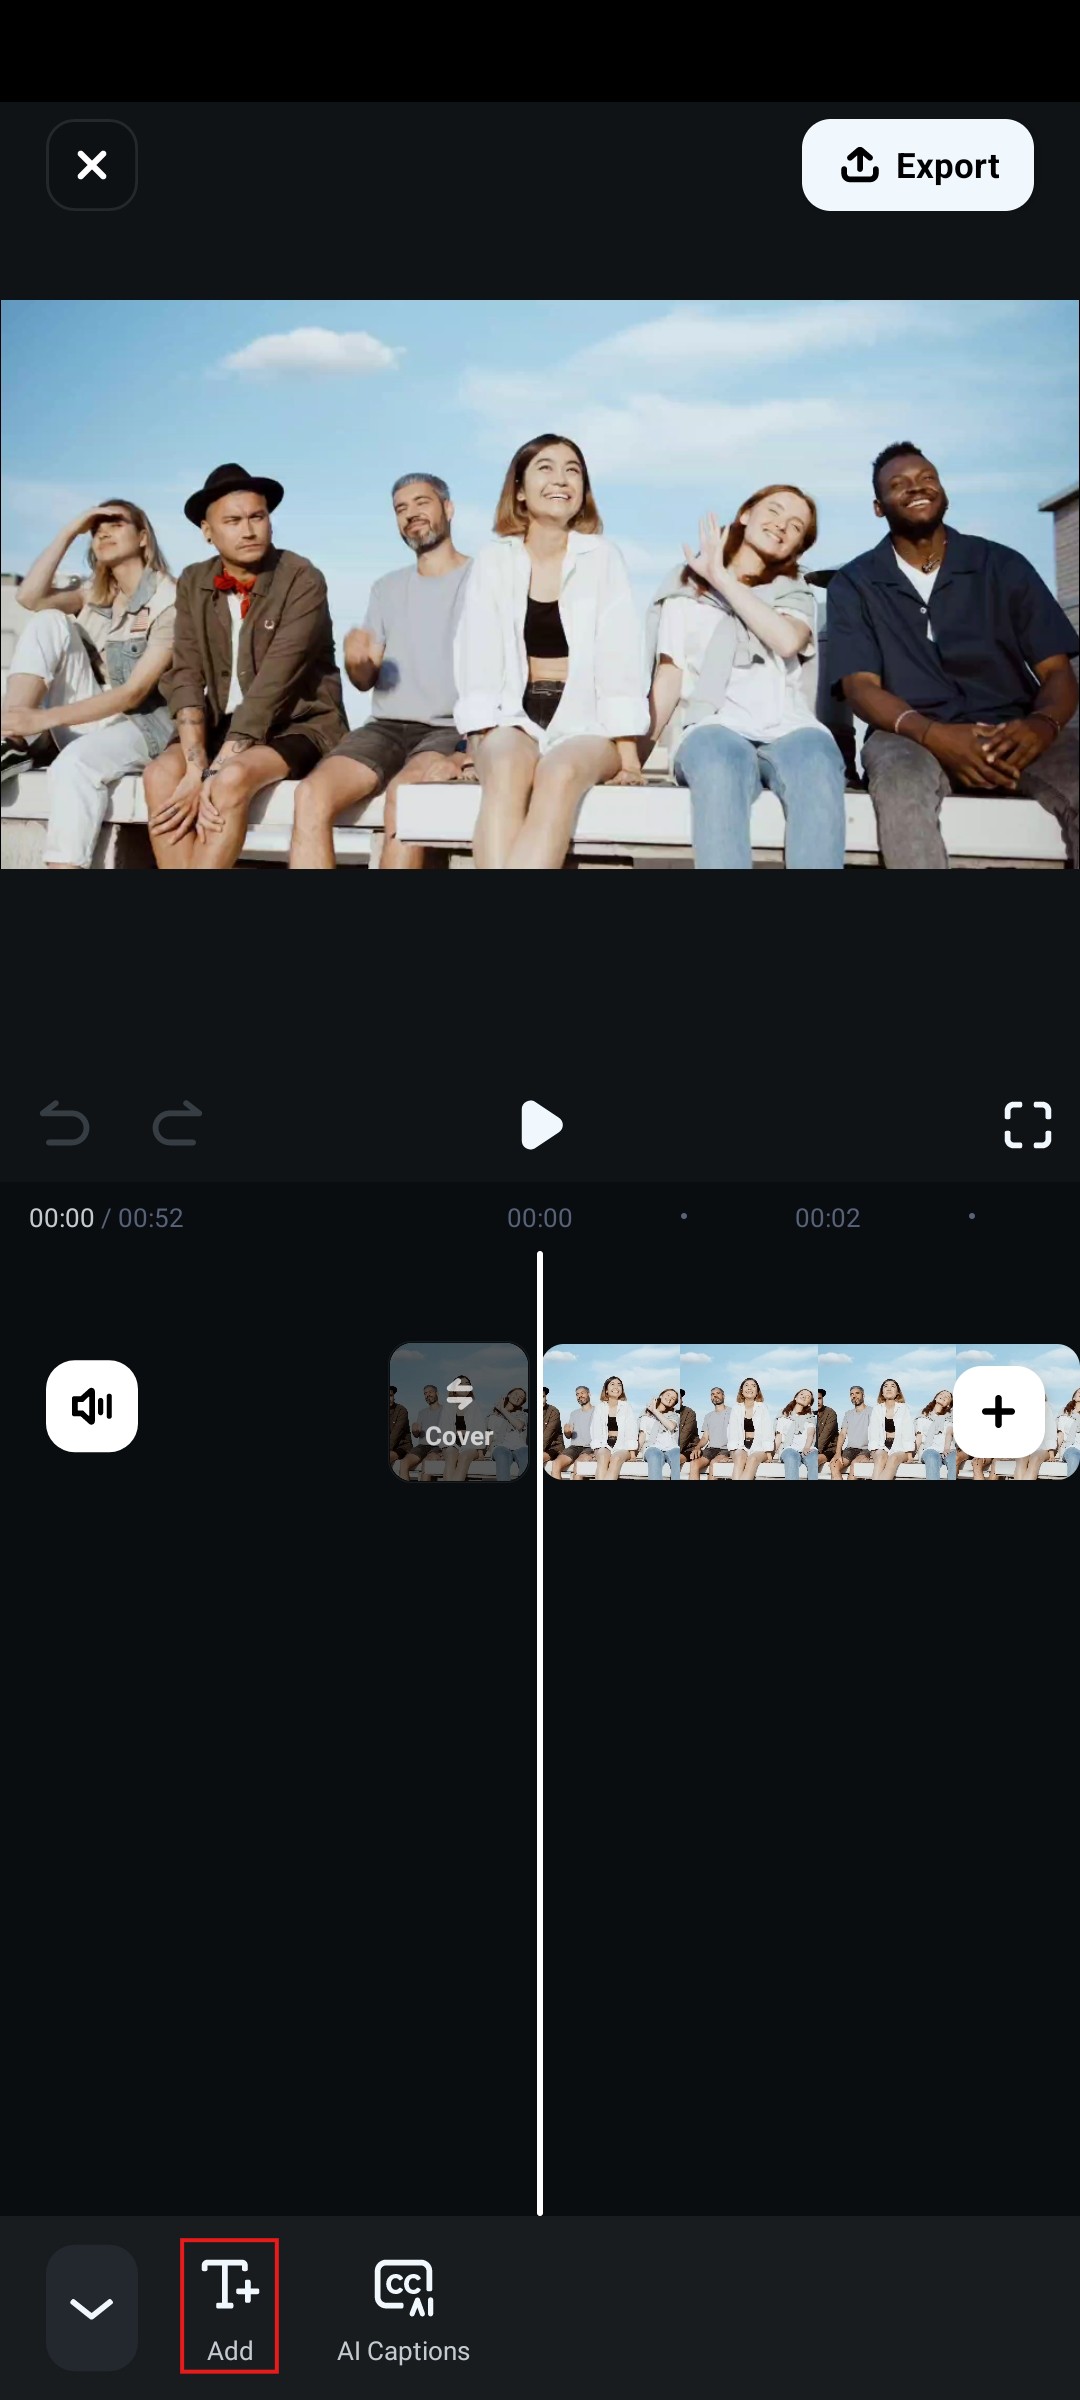
Step 3: Now, tap on Add.
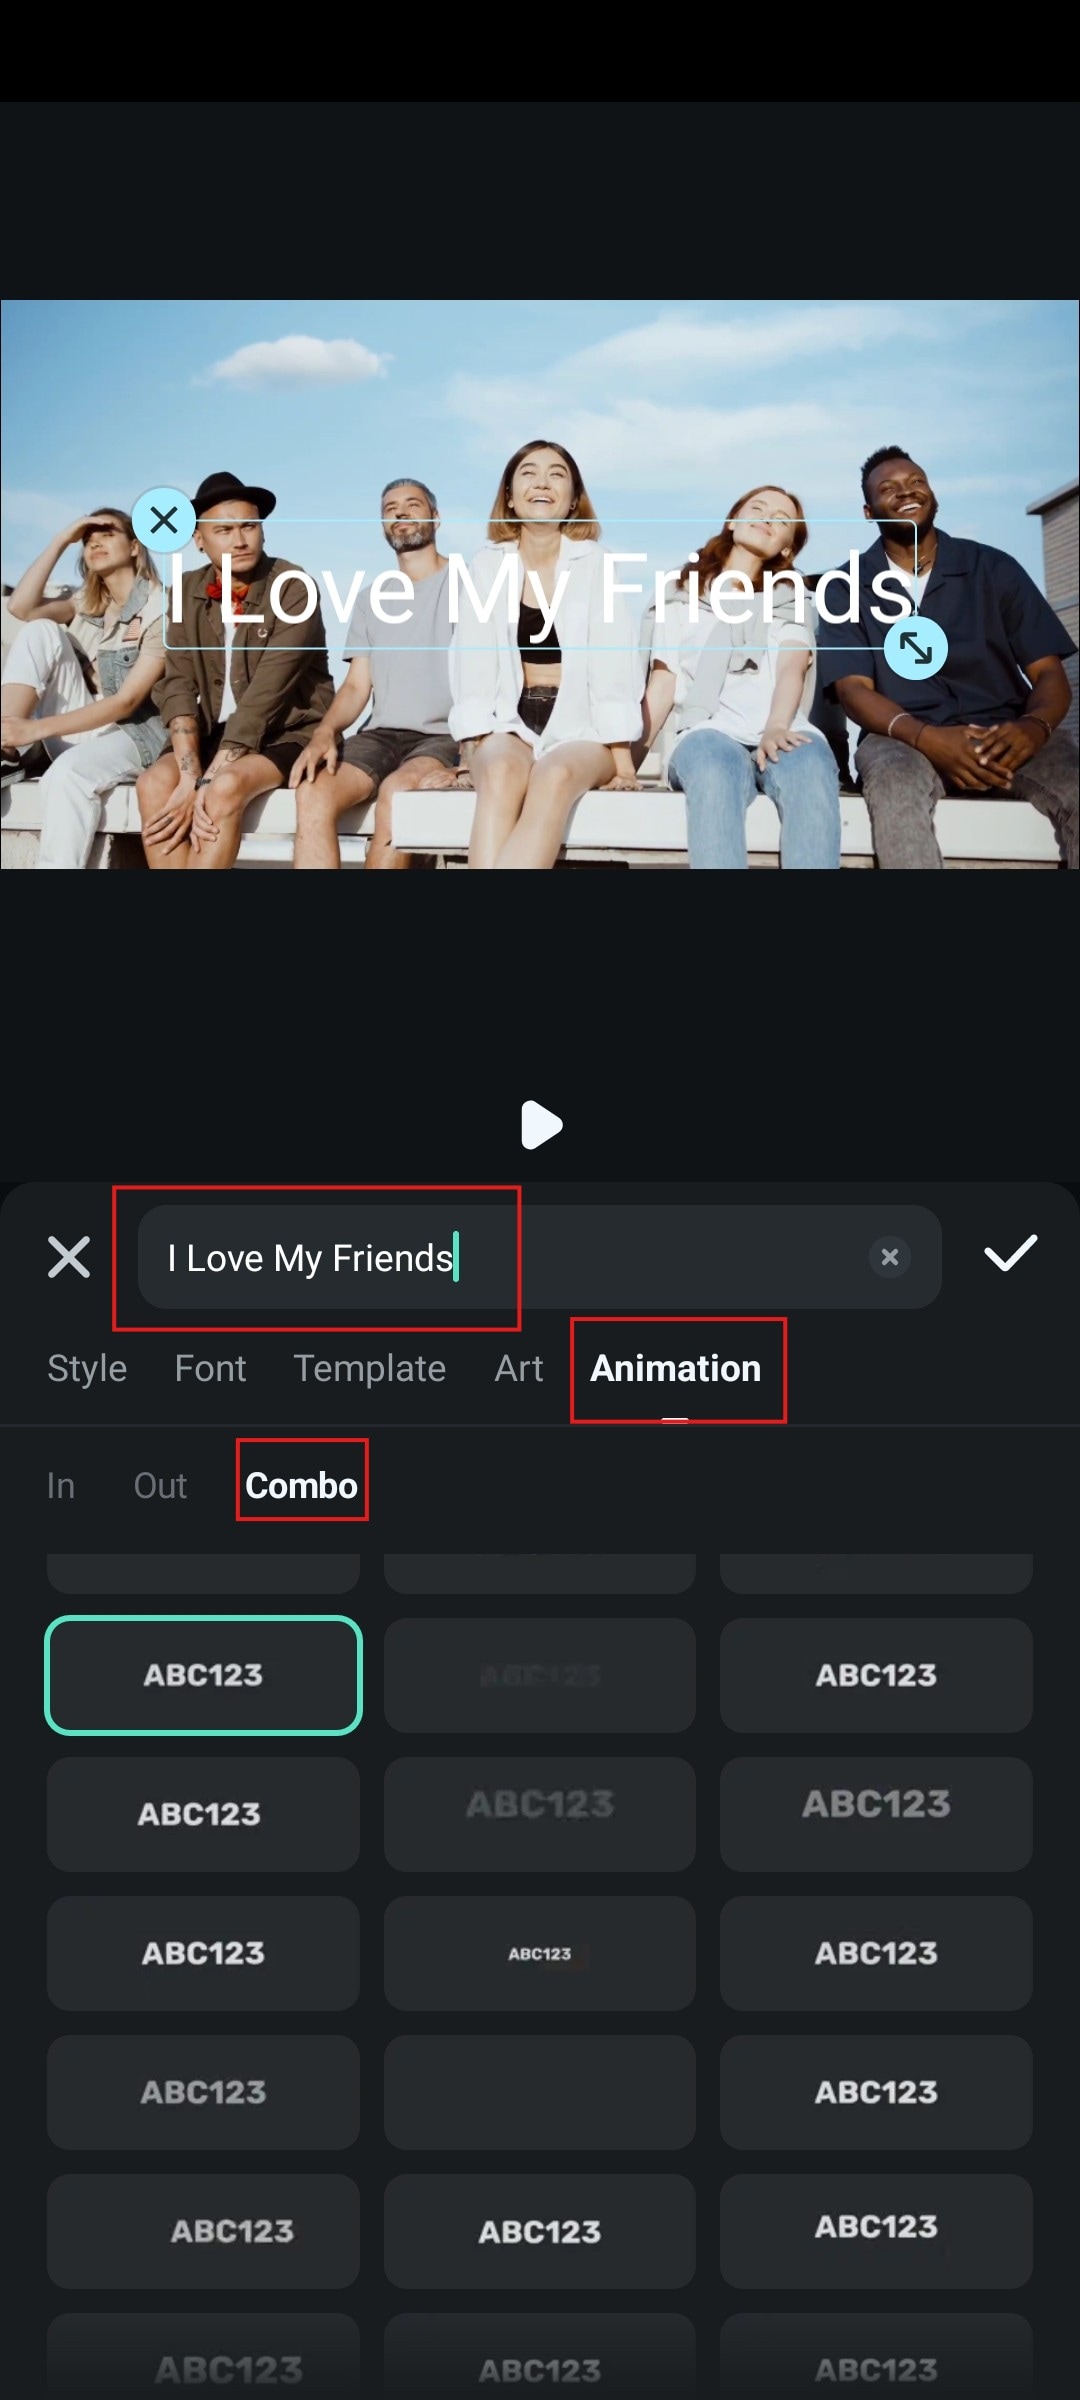
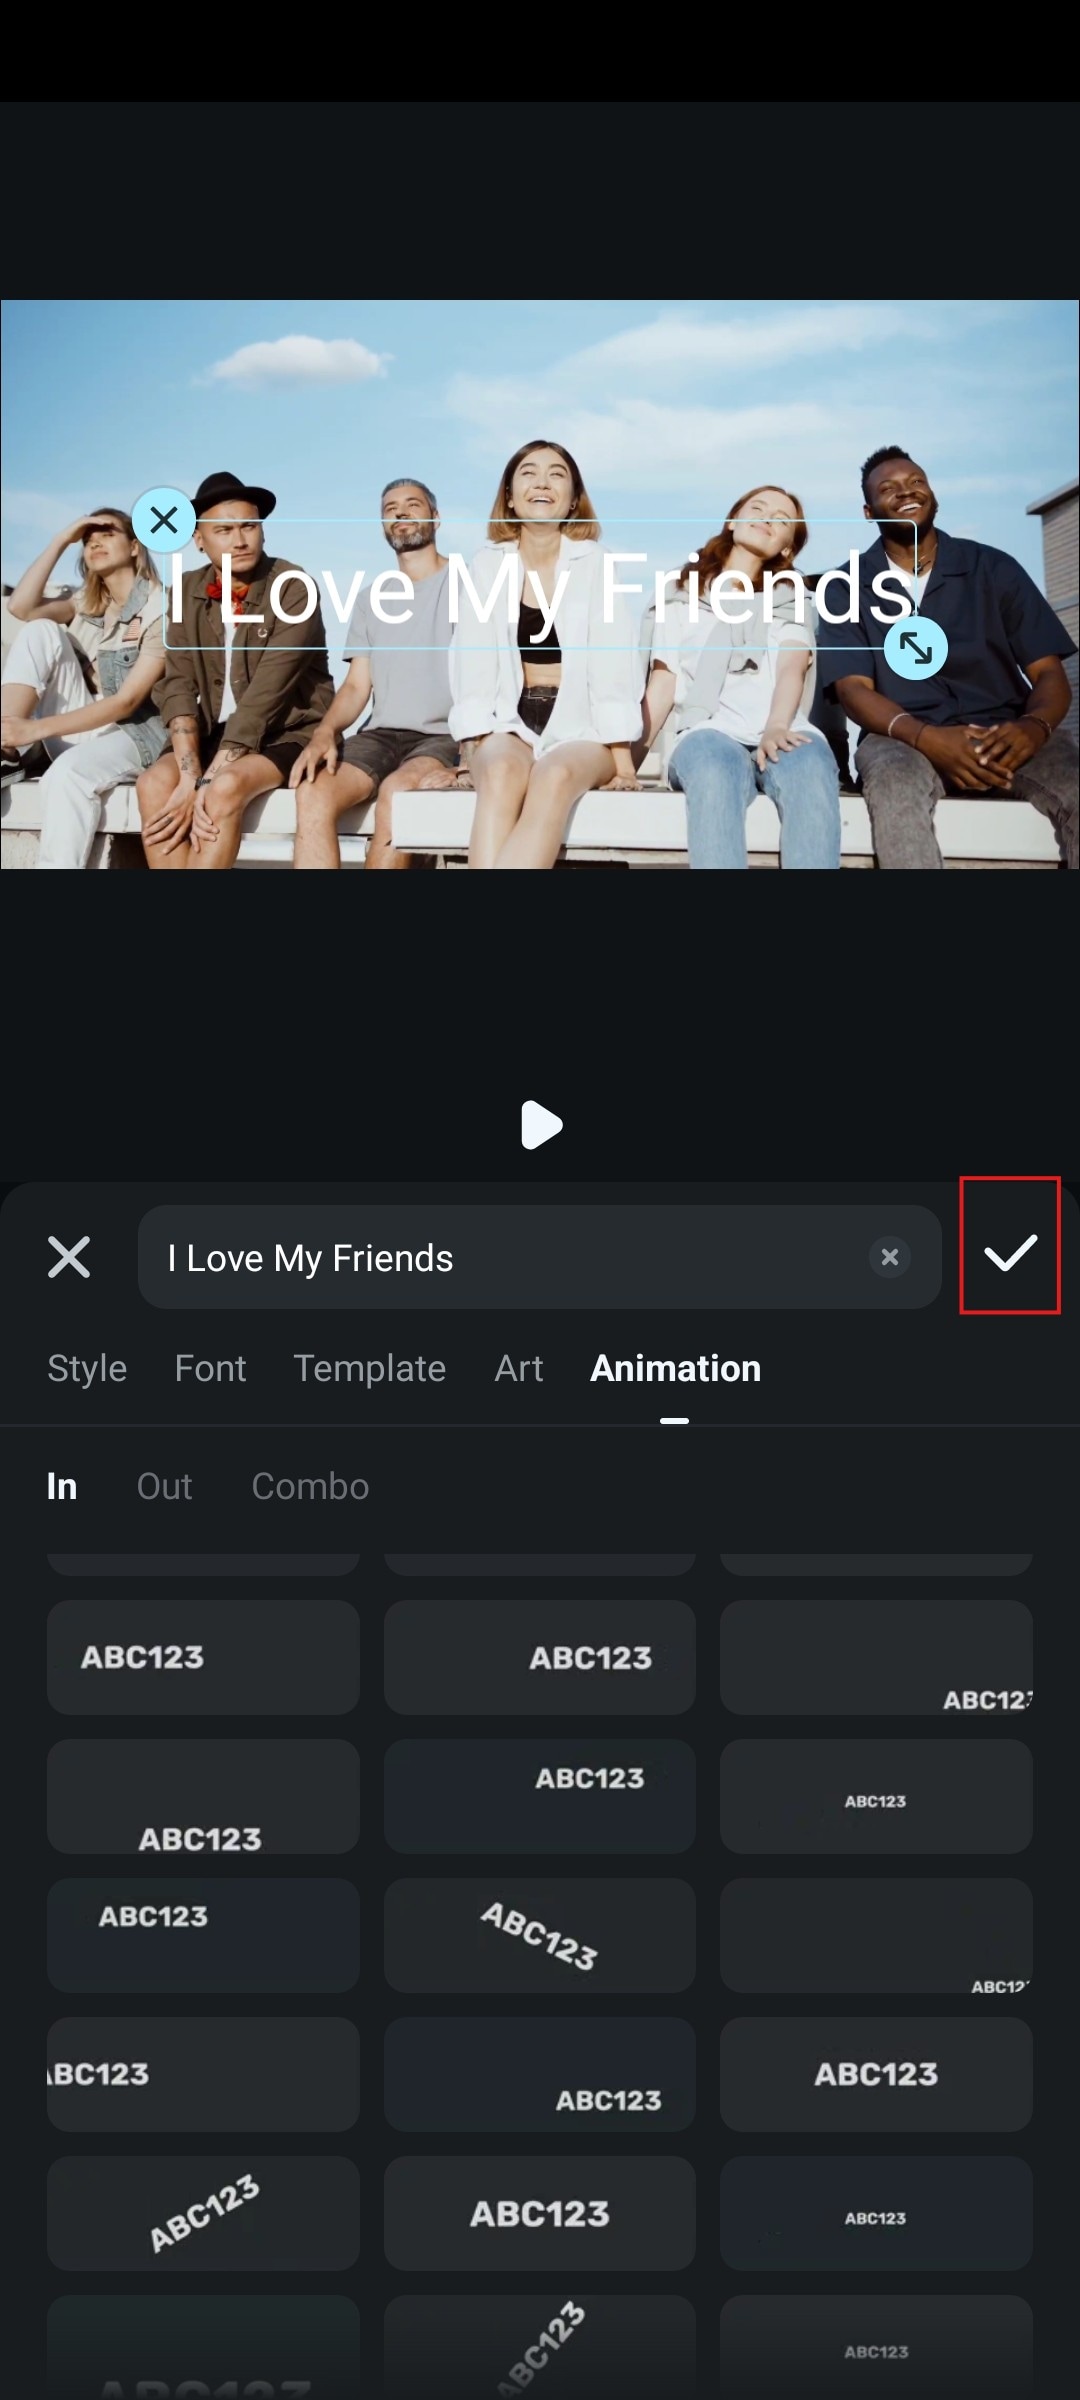
Step 4: Type the text you want, and in the Animation section, tap on Combo, and then select a falling text animation.
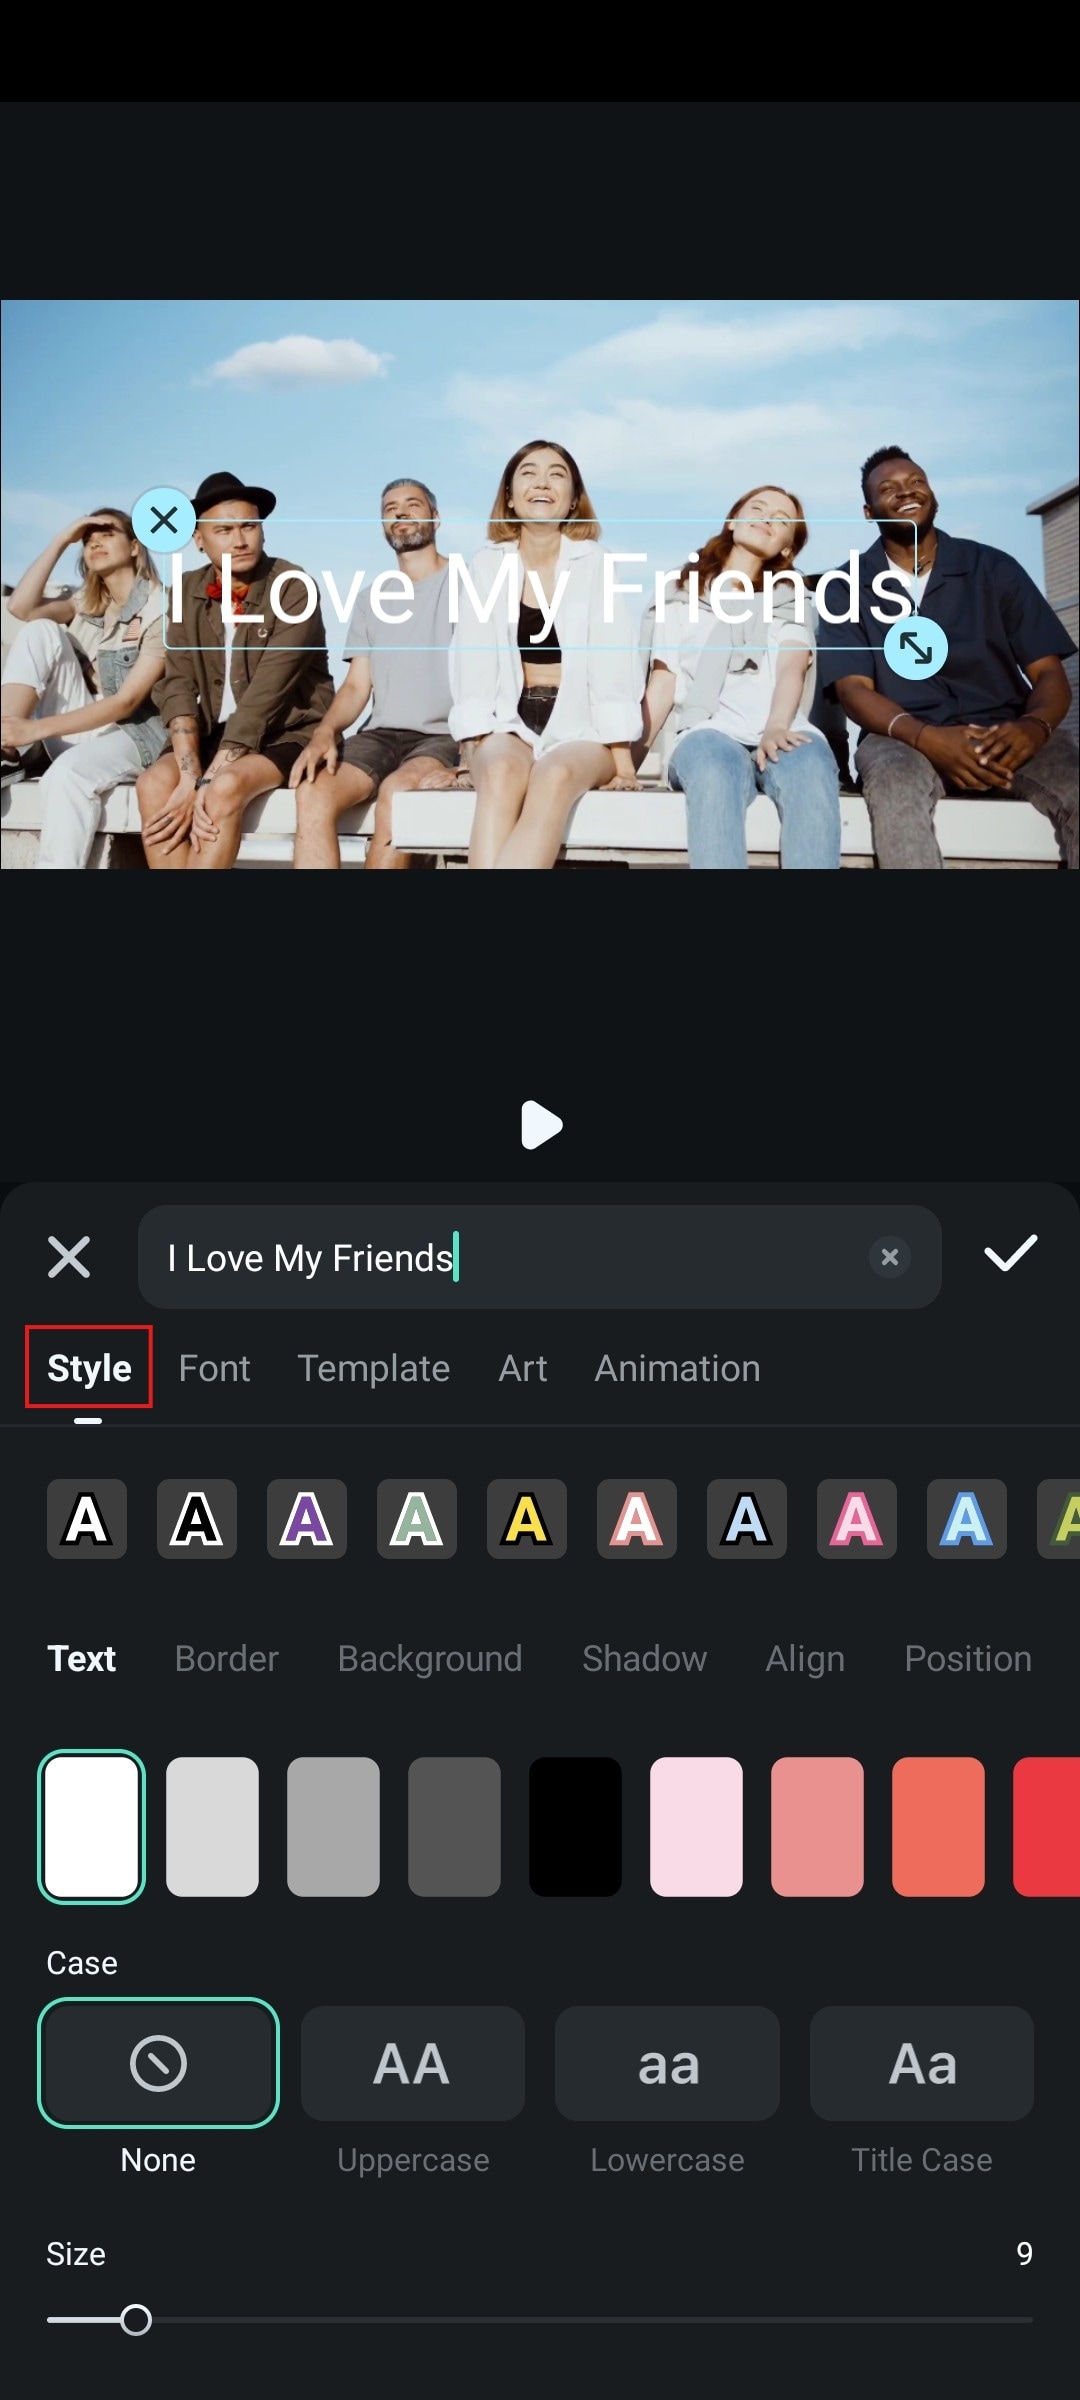
Step 5: You can now hop onto the Style section and stylize the letters in the text.
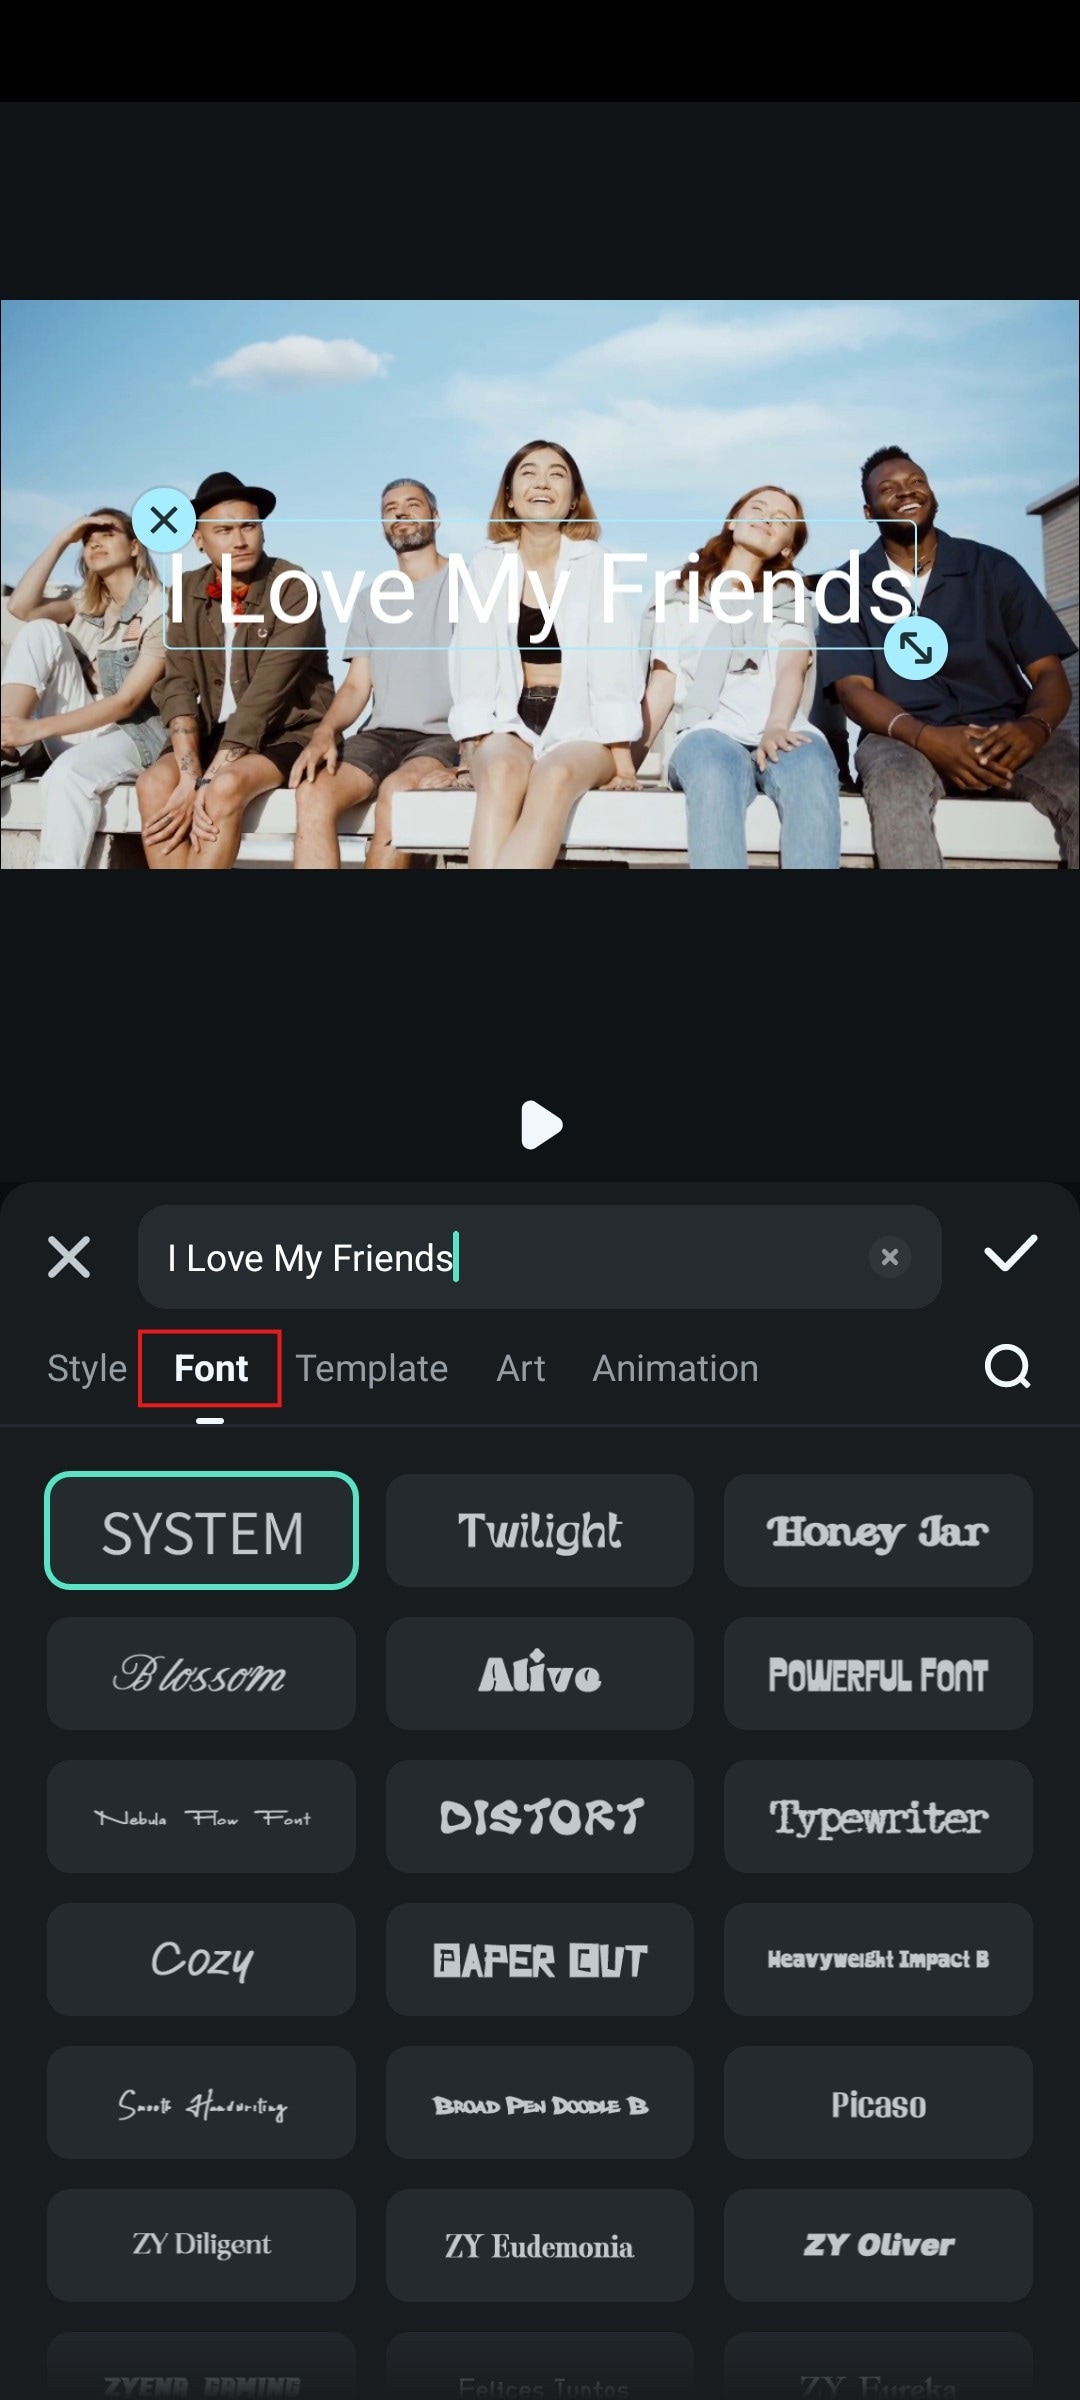
Step 6: In the Font section, you can select a font that looks good to you and fits your vision.
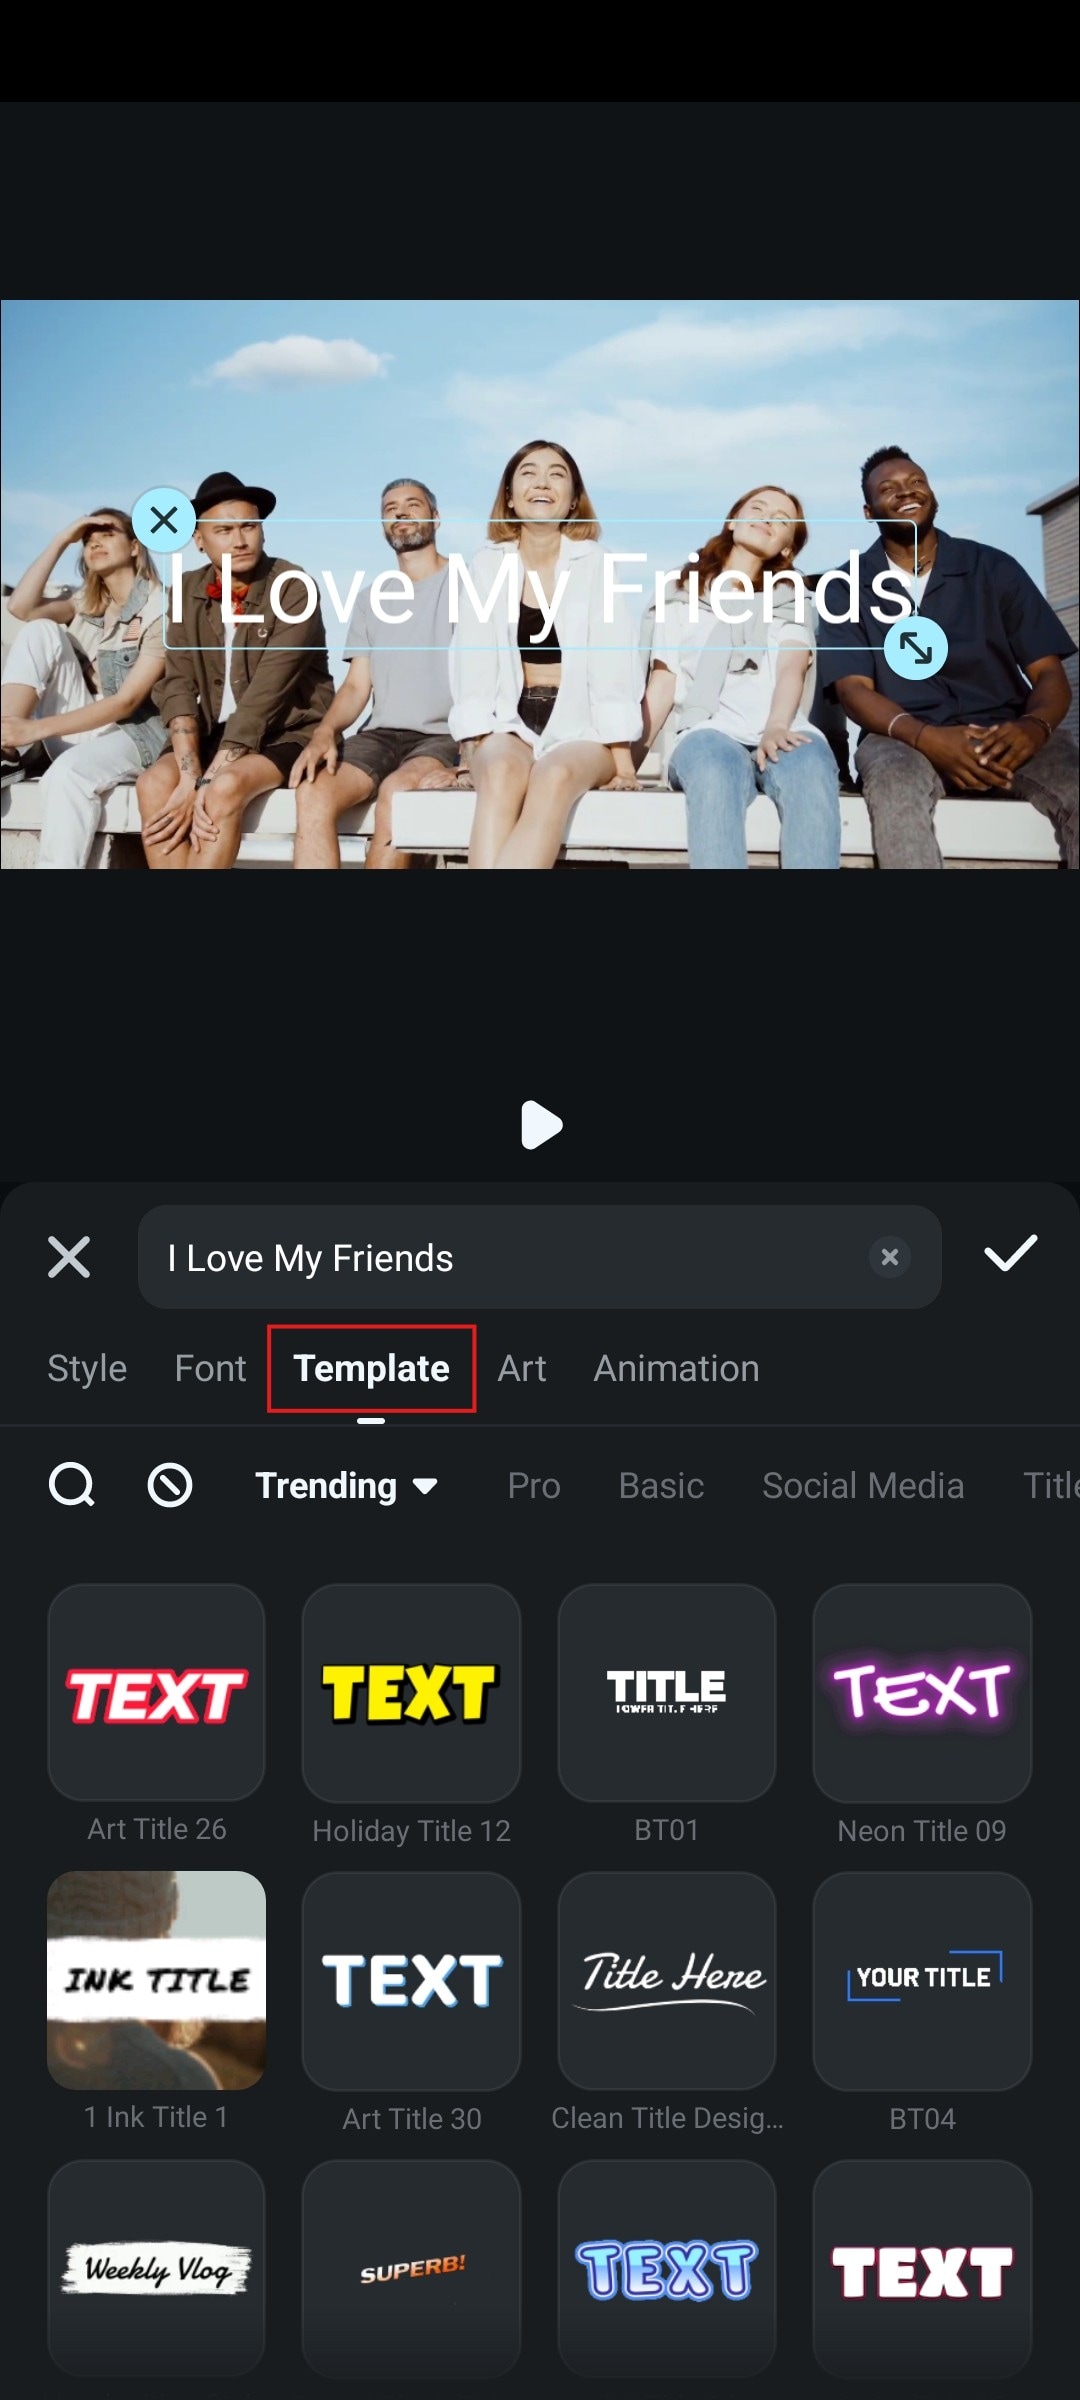
Step 6: Browse through a wide selection of templates in the Template section.
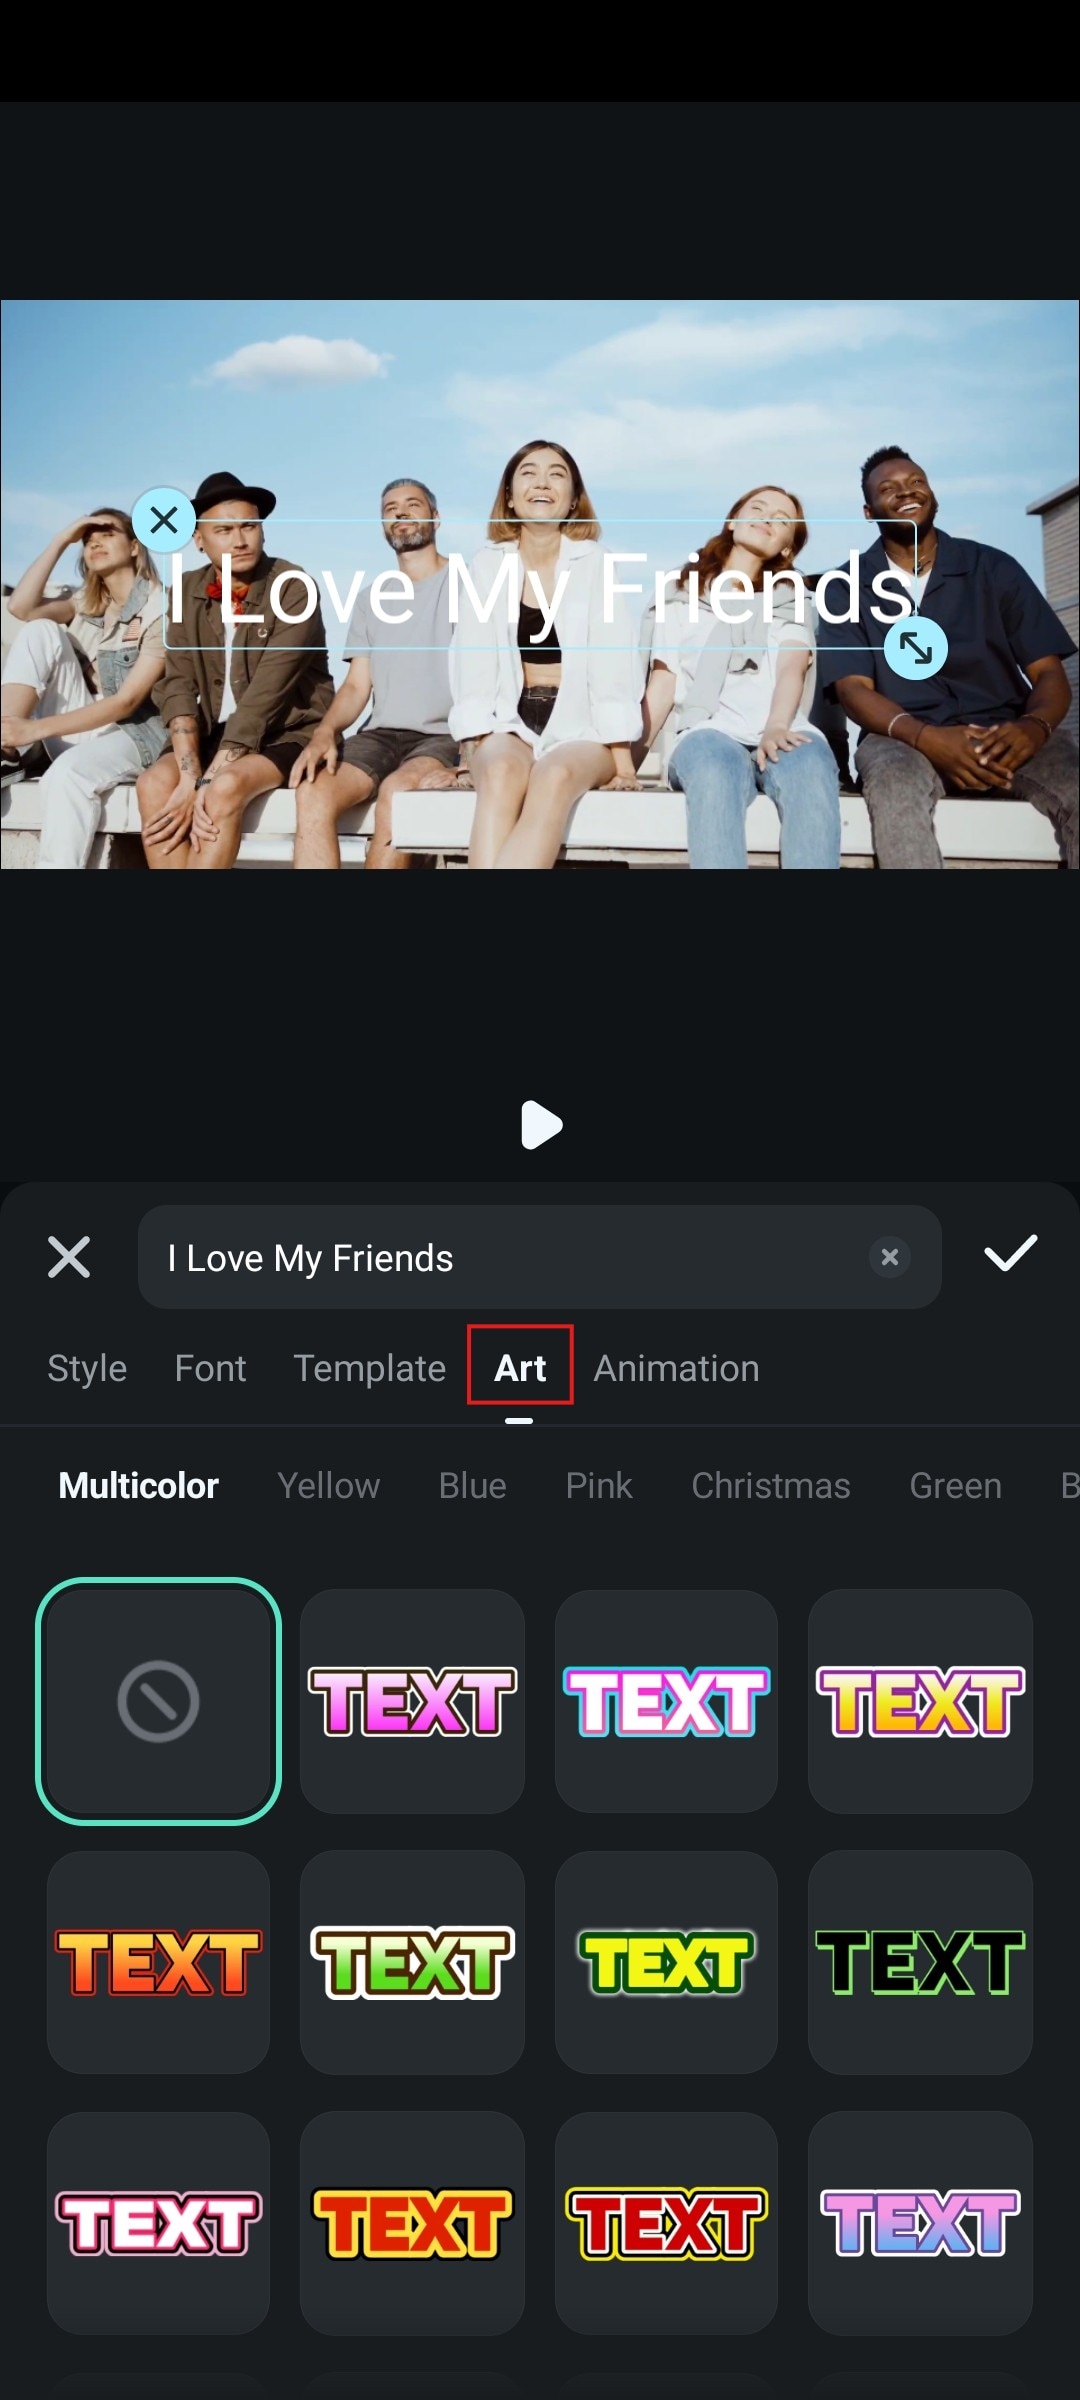
Step 7: If you want to explore some artistic options, you can check the Art section.
Step 9: When you are done editing, you can accept the changes.
And now, we can move forward with the desktop/laptop version.
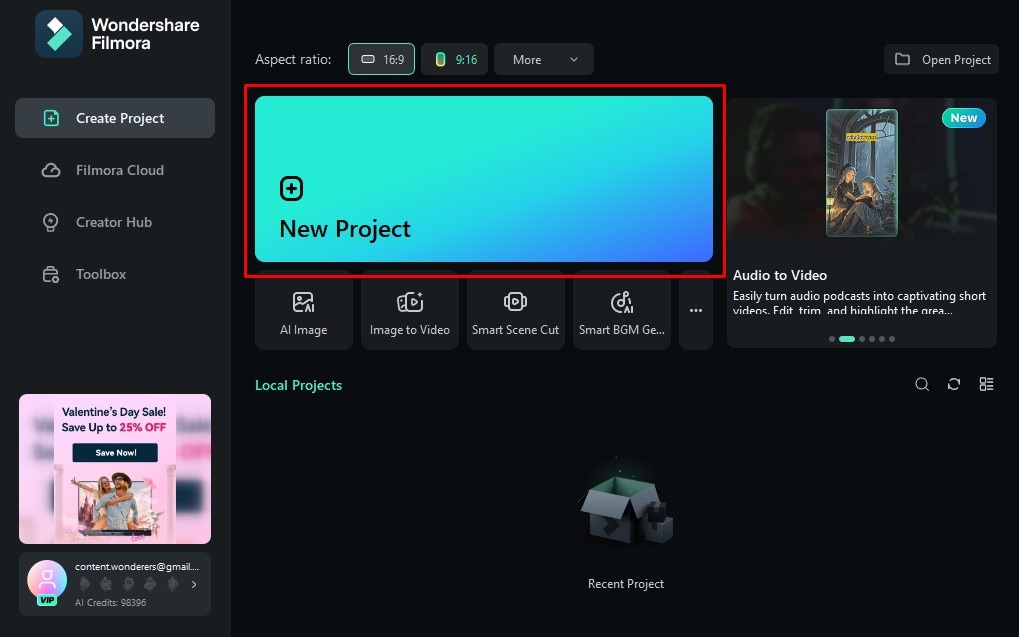
Step 1: Open Filmora and click on New Project.
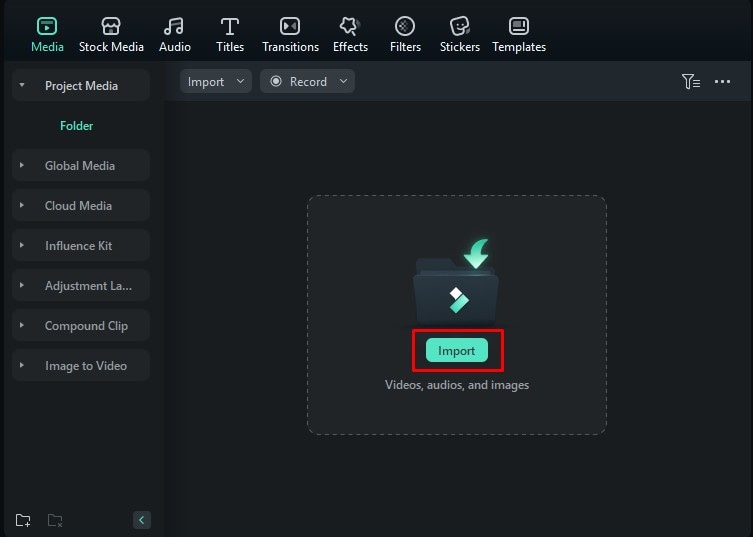
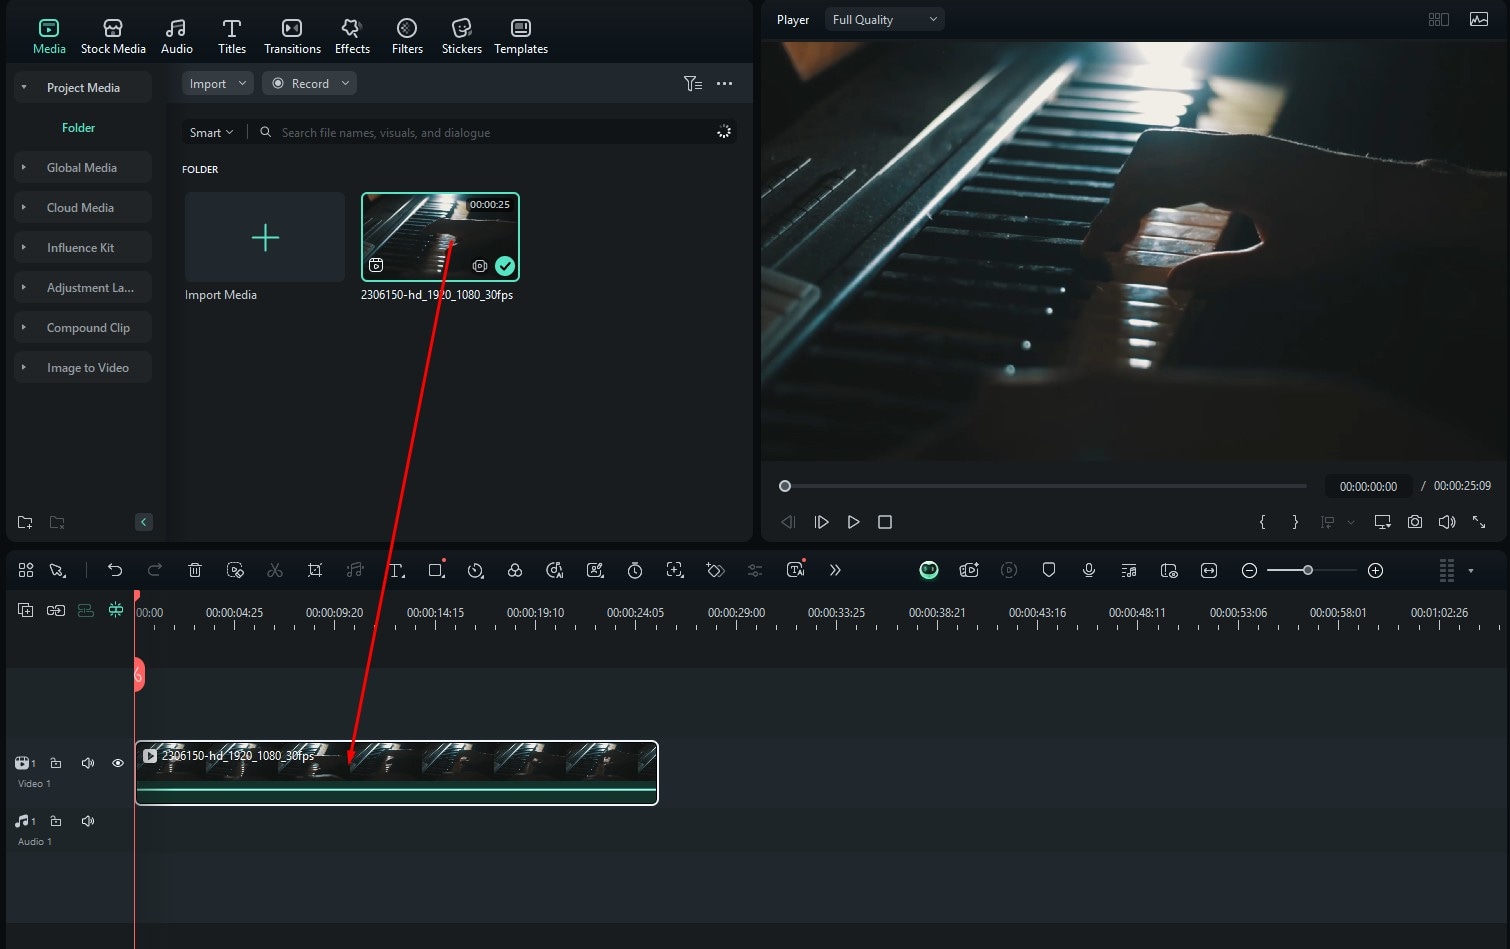
Step 2: Click on Import, and then add a video file to your project.
Step 3: Drag the video to the timeline.
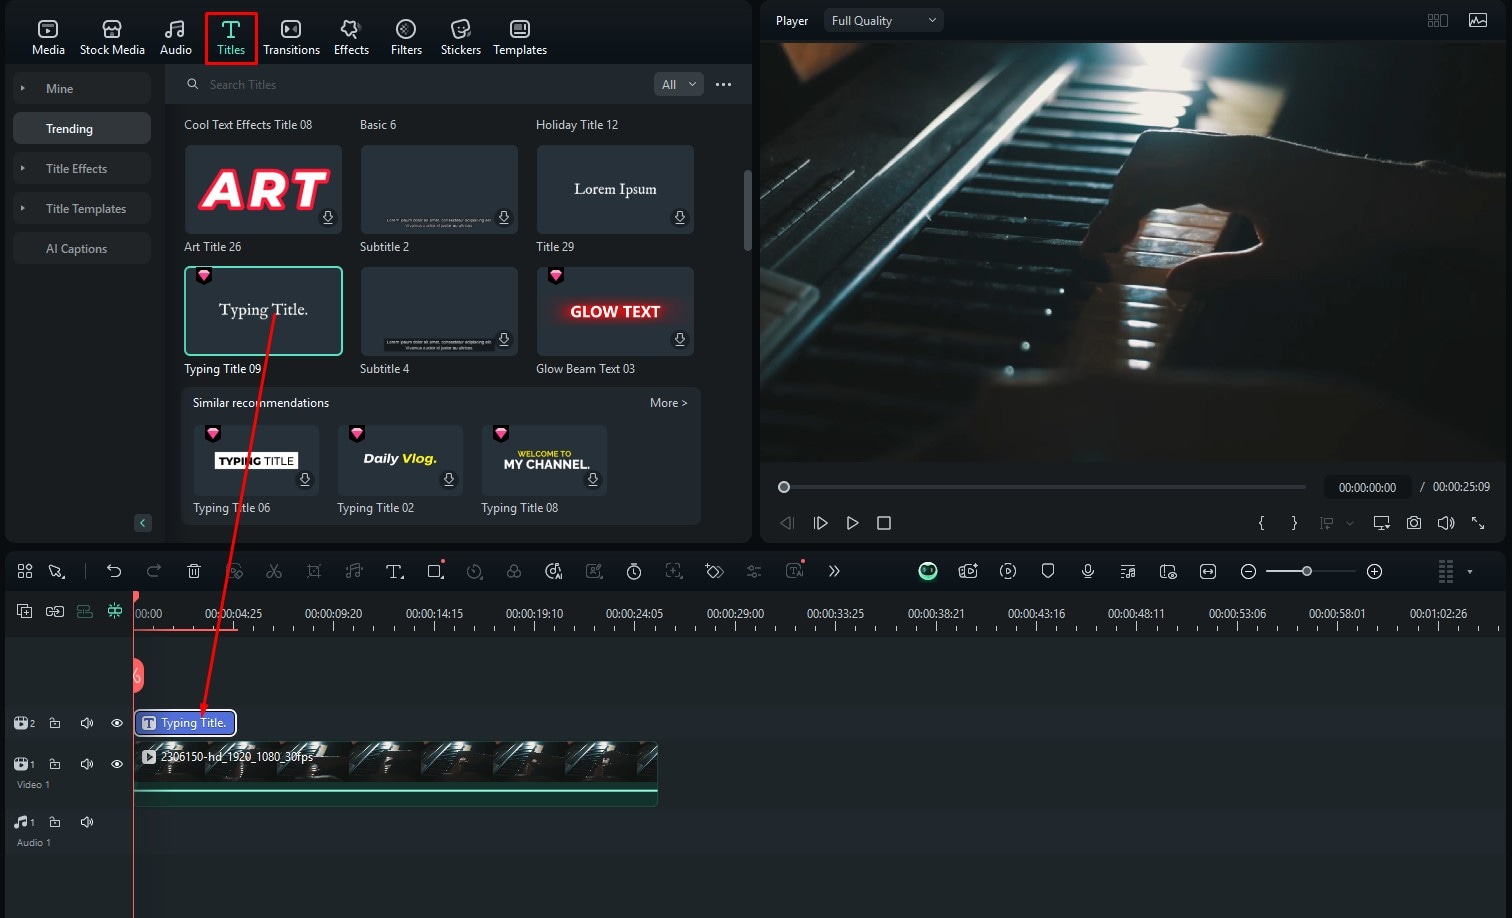
Step 4: Click on Titles in the top left, find something that looks good to you, and then drag it to the timeline above your video.
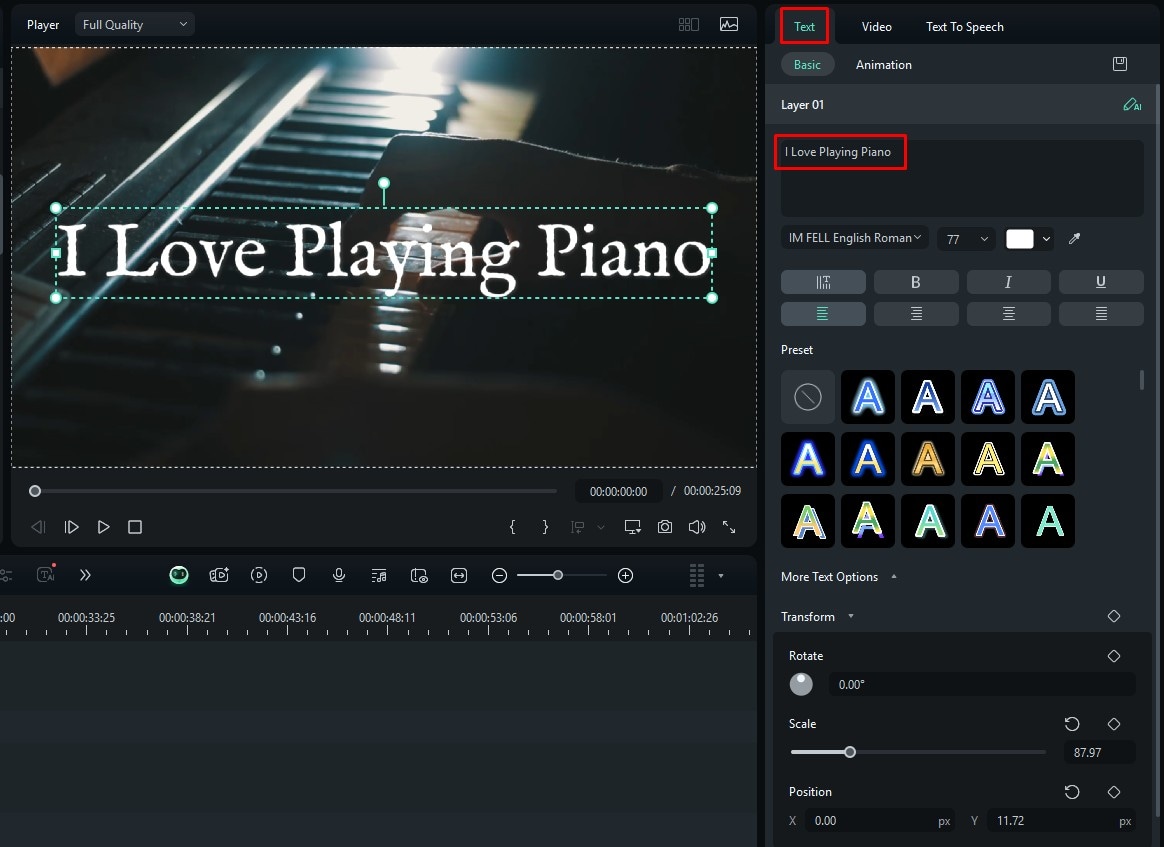
Step 5: Now, on the right, click on Text, and then type the text you want to appear in your video.
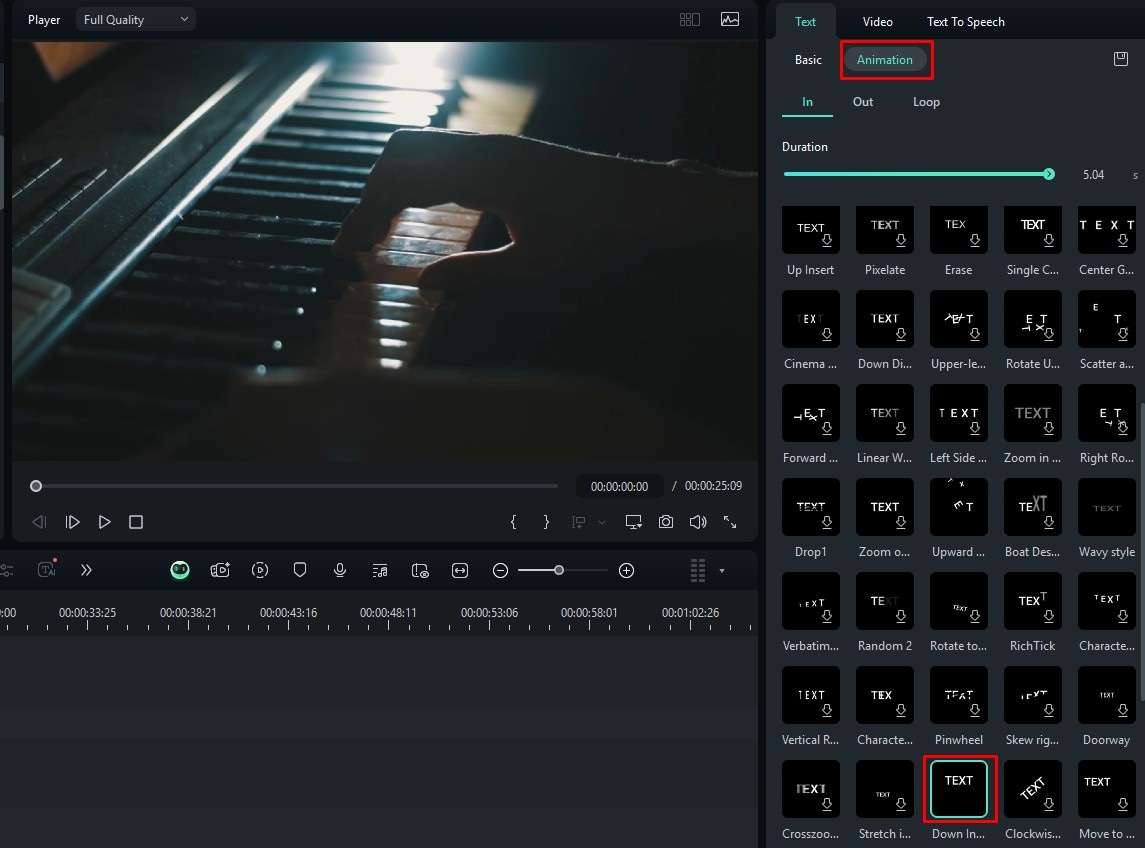
Step 6: Now, in the Animation section, select the Down Insert option, and presto — you have added the falling text animation to your laptop or desktop.
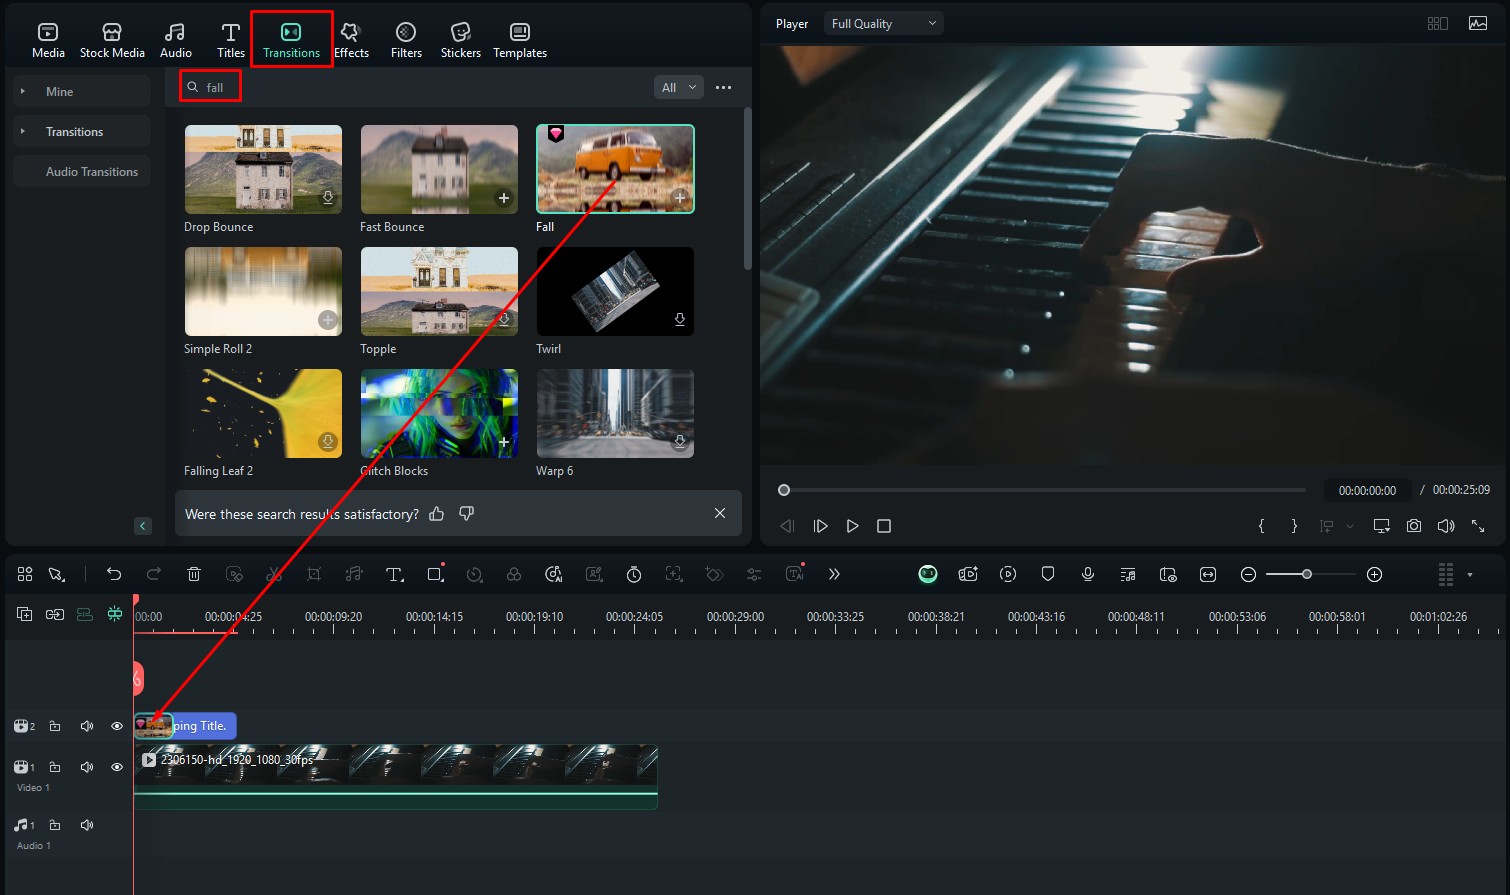
Step 7: Another option is to go to the Transitions section of the interface, search for fall, and then add the Fall transition effect at the beginning of the text item in the timeline.
You can explore other text animations and transitions as you continue to use Filmora and explore its features. We want to offer a helping hand on that journey. To that end, we have prepared a section that will talk about some of Filmora’s core features.
Expanding on Filmora’s Core Features
As you have already seen, Filmora is a tool that is simply packed with features. Listing them all would be very challenging. Therefore, we will focus on three core features and tell you a little bit about each of them.
The Templates Library is Very Diverse
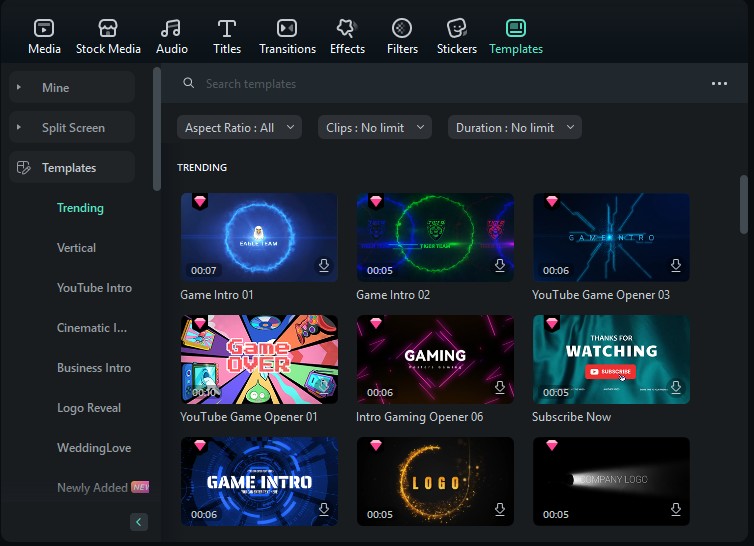
If you are a beginner, you should really explore Filmora’s template library. Here, you will find several ideas for your video, and instead of having to craft everything from the ground up, you can use a template and expand on it. If you are a pro, you can use these templates to extract a specific element and use it in a different project.
Explore a Huge Number of Video Effects
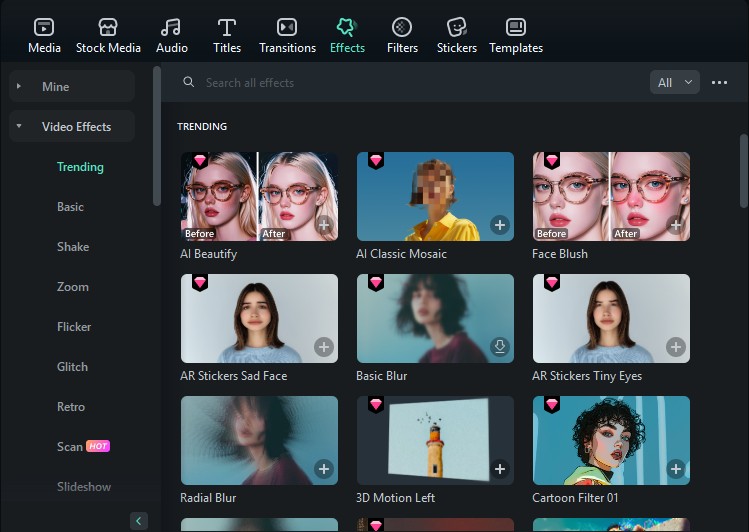
No matter what type of video you are making, be it a simple school project or a full-blown movie, you need access to a ready-to-use video effects library. That way, you can plan your recording process and count on these premade effects to help you achieve your goal. Just type whatever it is you are looking for in the search bar, and Filmora will give you good results.
Speed Up Your Editing Process with AI Tools
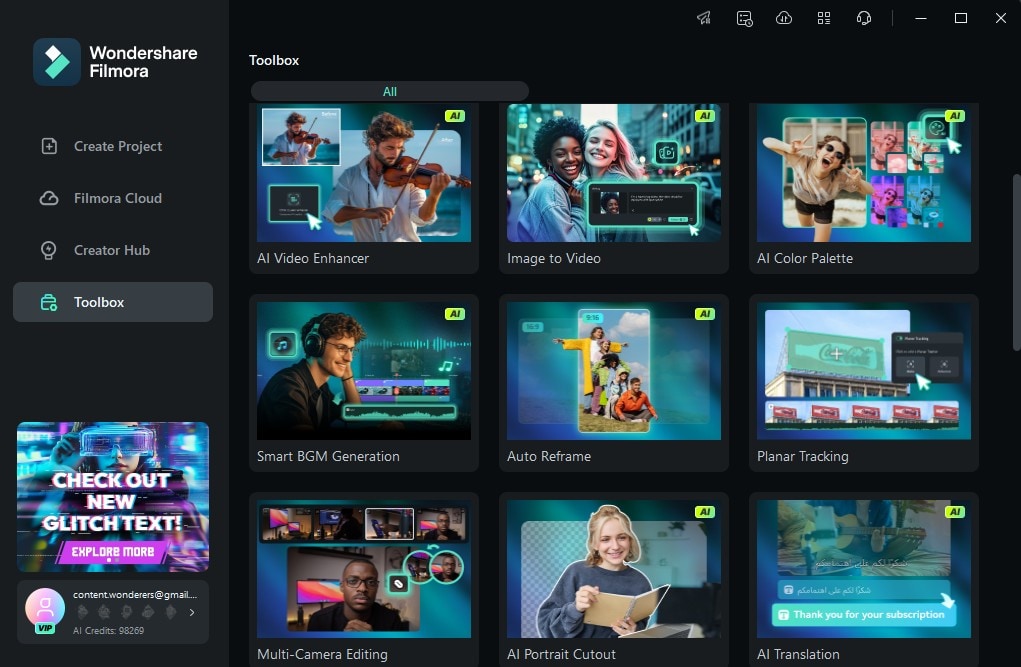
Some of Filmora’s most valuable features are actually located here, in the AI Toolbox. Here, you can find a feature called Image to Video, where you upload an image, use a prompt, and voila! The image is transformed into video footage. If you have a silent video, you can use the Smart BGM Generator to generate original music for your video. There are so many more AI tools to explore, and we don’t want to spoil more surprises that are in store for you.
You are now fully equipped to use Filmora to add the falling text animation. Of course, Filmora is not the only tool on the market that can achieve this, so we will finish with some honorable mentions.
3 Additional Tools to Add the Falling Text Animation
If you want to try out different tools and see how they fare against Filmora in the video editing realm, these three tools are some of Filmora’s top competitors.
Adobe After Effects
Adobe is a powerful company that has been around for decades. They offer serious tools for serious users. Adobe After Effects is packed with features, and you can certainly add the falling text animation using it. However, compared to Filmora, the interface is far less intuitive, and the tool has a steep learning curve if you want to become a professional
Final Cut Pro
Final Cut Pro is very similar to Filmora in the sense that it is also a powerful tool with several helpful features. Adding the falling text animation to your titles in Final Cut Pro is easy. The downside, however, is that this tool is only available for Apple device users, which leaves a significant portion of the market without the option to use it to improve their videos.
DaVinci Resolve
DaVinci Resolve is a video editing tool that is primarily geared toward film editing and post-production. Given that fact, since all movies need title sequences, it has several options for adding and animating titles in videos. Still, Filmora seems to be more intuitive and diverse in terms of easy options for less experienced users.
Conclusion
Well, there you go. You are now fully ready to add the falling text animation to your video. We firmly recommend using Filmora, but the other options you can see in this article are also worth your time. Create the best possible title sequence or end-credit video, or if you have something else in mind for the falling text animation, do not hesitate to experiment. The more you work with a particular software, the closer you’ll be to mastering it.
