
 100% Security Verified | No Subscription Required | No Malware

The green screen is quite popular nowadays. If you are an OBS user and want to record a green-screen video, you may be curious: "How do I use a green screen with OBS?" Frankly, the green screen for OBS setup can be quite intimidating, especially if you are new to the tool. Don't fret, though! Here, we've compiled a guide on setting up and using OBS green screen and editing green-screen videos.
In this article
What Is a Green Screen Used For?
If you're wondering what a green screen is, then it is simply a technique used to make background changes to videos and images. For example, you simply record a video or image on a solid green screen background or sometimes blue. Then, you can use a green screen editor to remove the green background and replace it with your desired background or effect without tedious editing.
It brings versatility because you can instantly change a footage background to match themes and activity. You can use it to create more immersive and engaging videos. Green screens also make it easier to shoot motion videos and put them in backgrounds that are difficult or even impossible to shoot in real life.
Before using OBS to record a green screen video, ensure you have the following equipment prepared: a solid green background, webcam or video camera, lighting, and OBS Studio.
How to Use OBS Green Screen for Livestream & Recording Videos?
Once you've physically set up the green screen, it's time to set up the video on the OBS software. As we know, OBS is a free, open-source screen recorder that works across Mac, Windows, and Linux. Here is how to use the OBS green screen to live stream and record videos:
- First, you need to set up your green screen behind your object at a suitable distance.
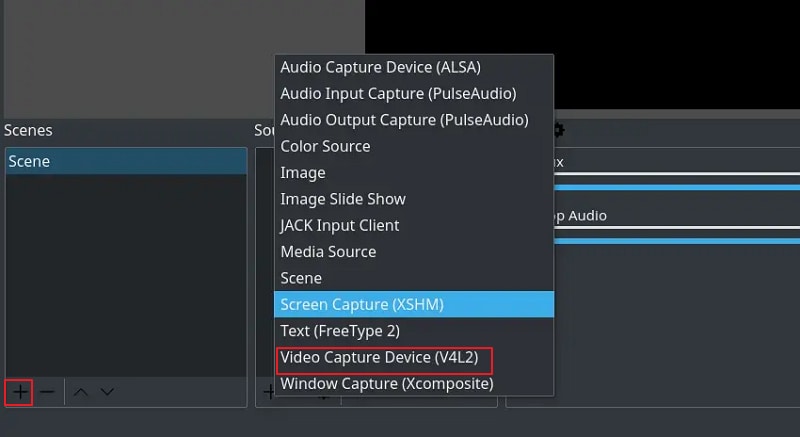
- Install OBS on your computer and open it. Go to the "Source" section and click the "+" icon. Select "Video Capture Device" in the subsequent menu, followed by "OK".
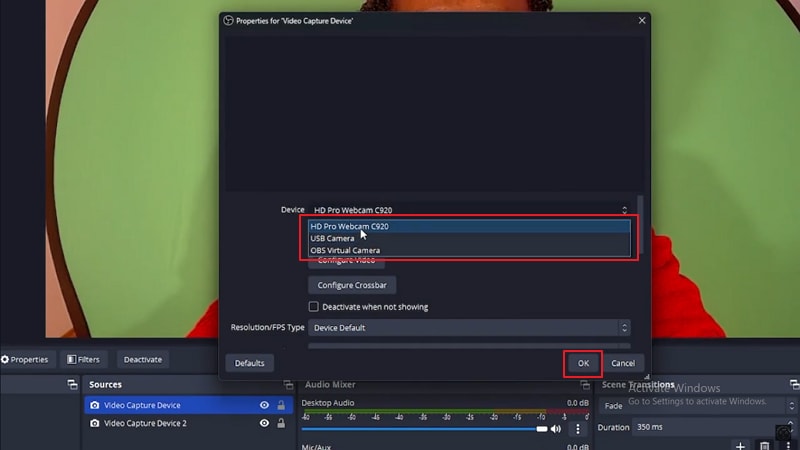
- Choose the desired recording source under the "Device" section, then click "OK". You can now select the footage in the background and drag the edges to have a clear screen.
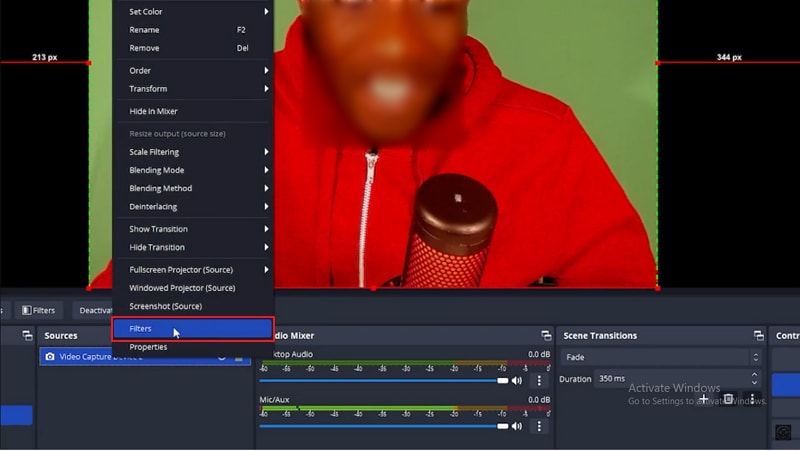
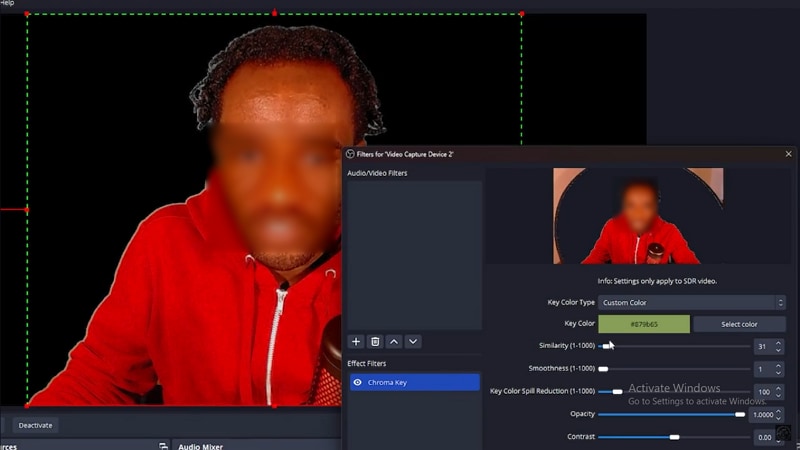
- Now, click on the "Video Capture Device" and then choose "Filters".
- In the "Filters" dialog box, click + > Chroma Key > OK. Disable the Chroma Key, then click on the "Key color type" drop-down icon and select "Custom Color." Choose "Select Color> Pick screen color" and click on a section of the green background color. Now, click "OK" and turn the chroma key on.
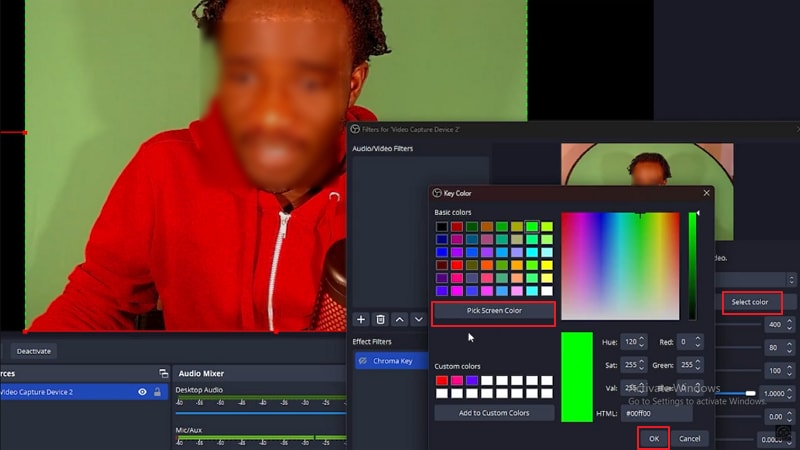
- Next, adjust the similarity and smoothness values towards the left until the green screen disappears and gives you a clear object.
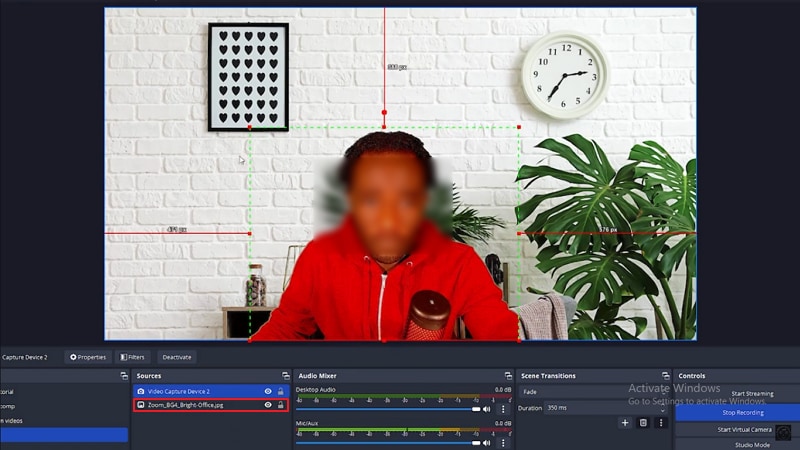
- You can now drop a new background into the source section, which will appear on the background. Lock the new background and move your object to any point on the background screen.
It's worth noting that the OBS chroma key is useful for green screen recording and streaming. However, it can be a bit technical and tedious to set it up, especially if you are doing professional work or need high-quality green screen videos faster. In this case, you can simply find a nice green-screen video editor like Wondershare Filmora to get the job done much faster!
The Best Video Editor for OBS Green Screen Videos
As a renowned video editor, Wondershare Filmora lets you edit green screen videos/images to generate high-quality projects of any type and size of the project. To remove the green screen in Filmora, you can use the chroma key to extract video objects in seconds. Or you can use the AI smart cutout to cut out the objects or persons from videos and images intelligently, which is more precise, then remove the original background like a green screen, blue, or any other background images with different colors, making it easier to change video or image background color. You can adjust various parameters, including offset, tolerance, edge feather, and edge thickness.
In addition to that, Filmora offers 100+ advanced video editing features such as generating background music with AI, removing background noise from videos, extracting audio from videos, converting speeches into texts, and more, and 2.9M+ assets such as background images, video effects, and filters to enhance your videos to the next level.
 secure download

How to Use Filmora to Edit a Green Screen Video?
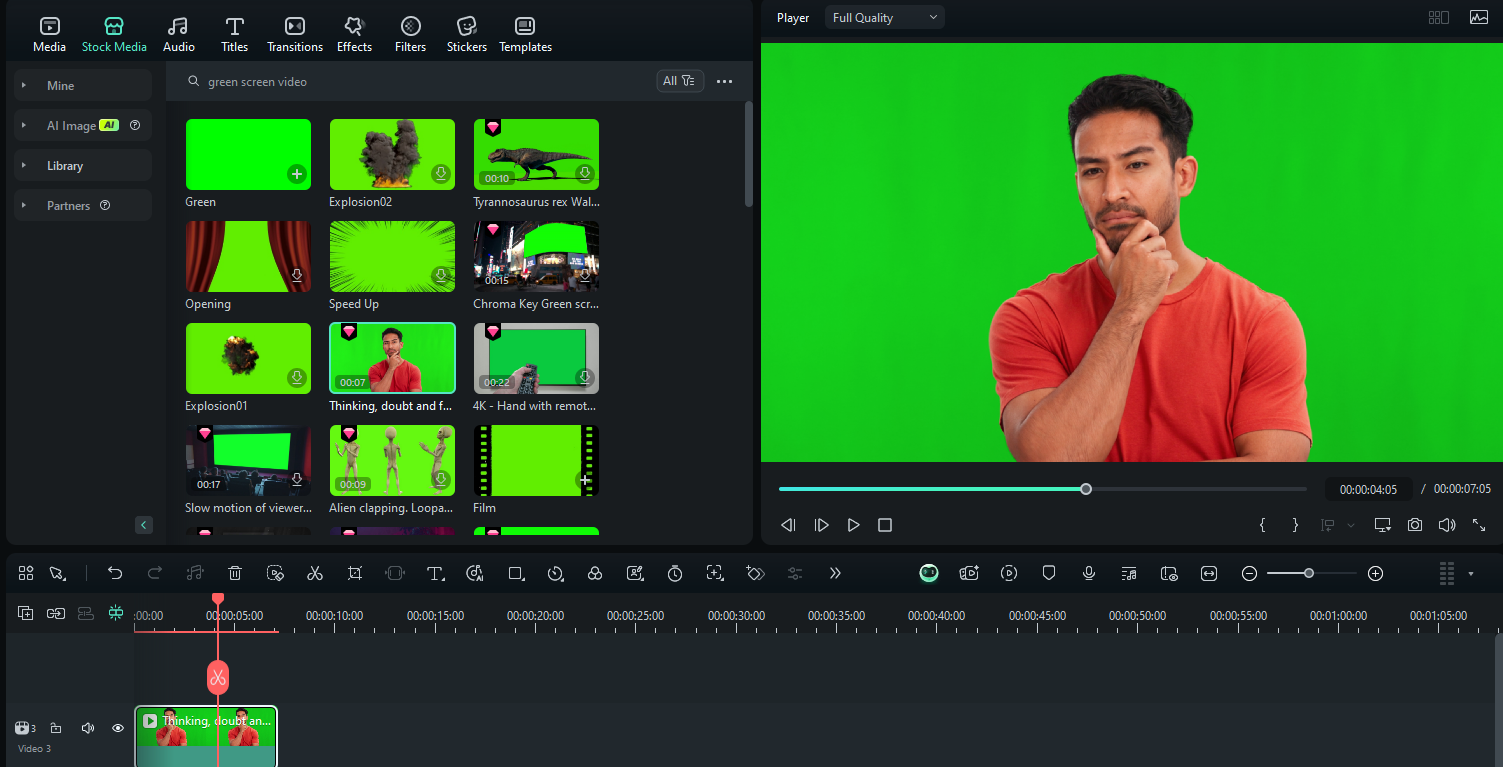
- Download and launch Filmora on your device, then head to New Project > Import Media to upload images or videos.
- Add the green screen video to the timeline.
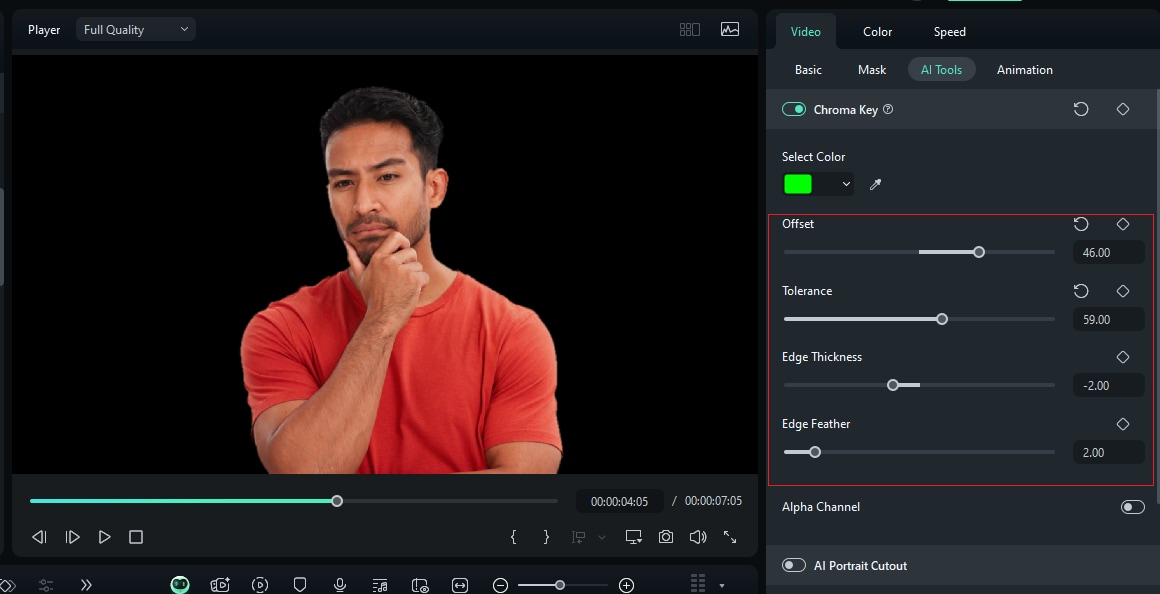
- Select the video > AI Tools > enable Chroma Key. Then, the green screen will be removed.
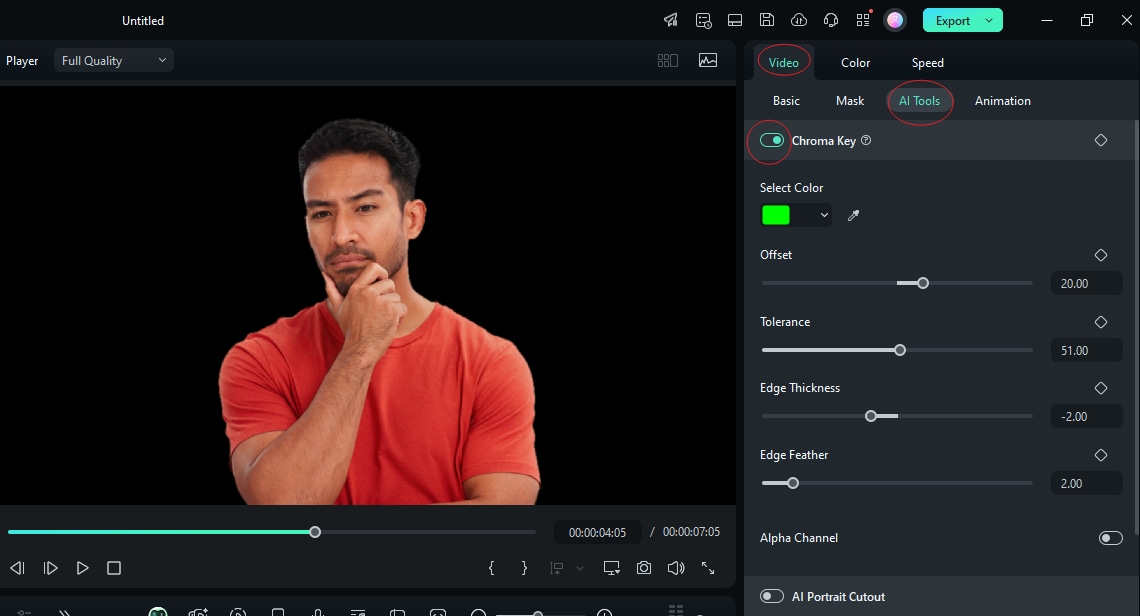
- You can adjust the Chroma key settings, such as offset, tolerance, edge feather, and edge thickness, based on your needs.
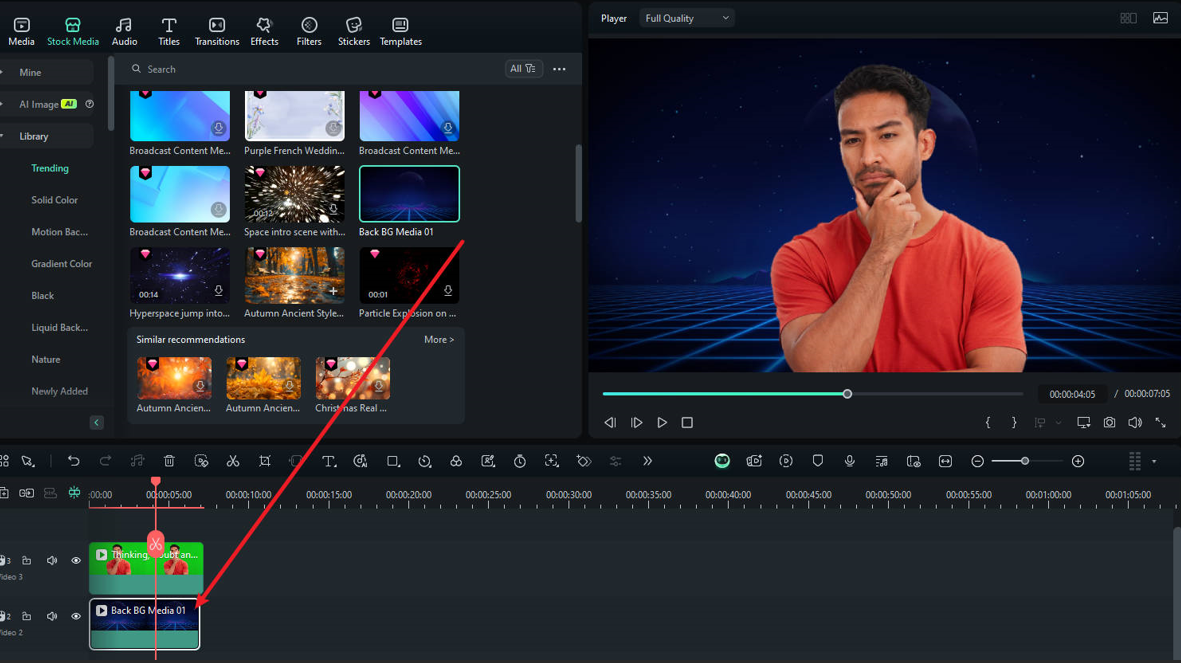
- Add a background image to the lower track, and you will get a video with a new background.
- Export the video and save it to your computer.
If you are also interested in editing a green screen video using an app, Filmora also allows you to do that.
- Download and install Filmora app on your mobile phone.
Filmora for Mobile Filmora for Mobile Filmora for Mobile Filmora for Mobile Filmora for Mobile
Edit Videos on Your Mobile Phone with 1-Click!

- • Powerful Brand New AI Features.
- • User-friendly video editing for beginners.
- • Full-featured video editing for professionals.
4,085,556 people have downloaded it

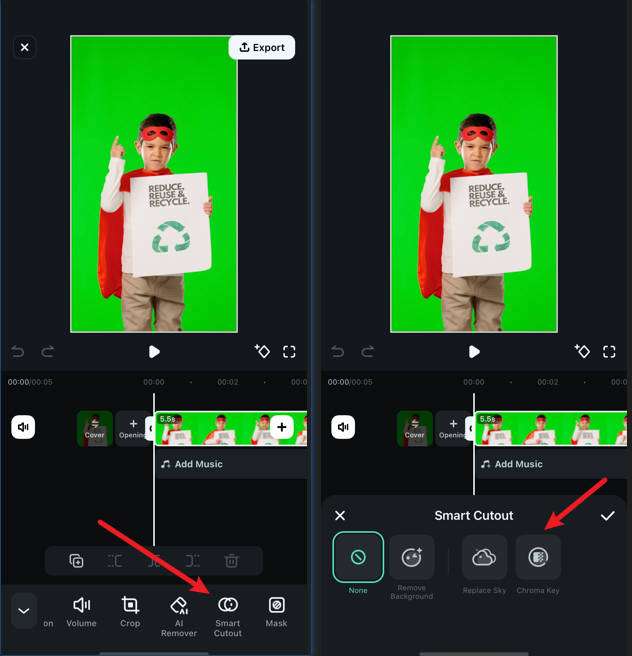
- Create a new project and upload the green screen video to the timeline.
- Select the video > find AI smart cutout > chroma key.
- Move the circle-like tool on the green screen background and adjust intensity, offset accordingly.
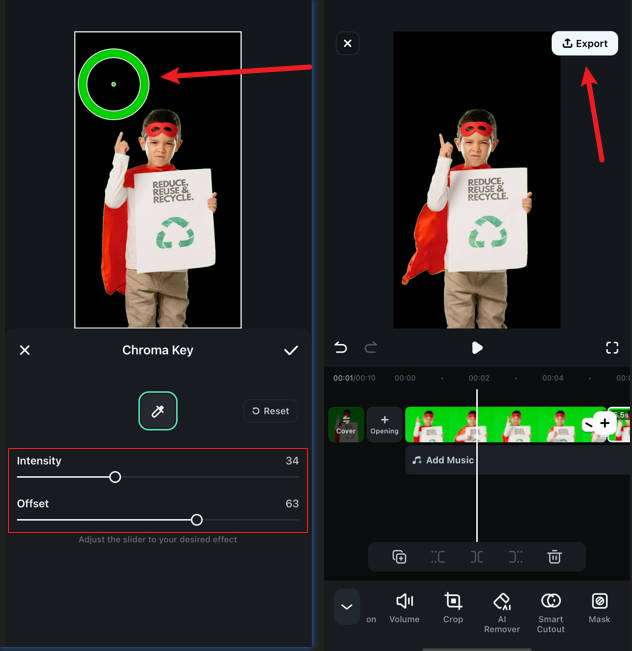
- Preview and export the video if you are satisfied. You can also make other edits on it.
Tips for Setting Up a Green Screen Video in OBS
Shooting on a green screen can save you time and resources as you set it up on OBS. So, the best place to start is to get your green screen recording right! Yes, you need the right accessories and a proper setup. Here are some of the tips to help you get the best out of the green screen.
- Make sure your green screen is smooth, evenly flat, and thoroughly lit.
- Light your screen first and your subject later.
- Use multiple high-quality lights to light your room and screen. Make sure the screen is sufficient, and that lighting is even around 40-50 percent luminance.
- Get at least two 1000-watt and two 500-watt lights to illuminate the screen and subject, respectively.
- Always try to shoot your footage in high resolution to give you sharper footage that gives the best quality green screen removal. Consider a webcam that can capture 1080p and up to 4k.
- Ensure there is much space between the subject and the green screen- approximately 10-15 feet. This will help increase the accuracy of mimicking the lighting on your new background while also preventing green tones from spilling off onto the edges of your subject.
Conclusion
That's it about how to set up and use the OBS green screen filter! You can set up and record green-screen videos for live streams or recordings. However, if you want to edit your green screen videos to create high-quality and attractive videos much faster, then you need a powerful green screen editor like Wondershare Filmora. Simply download and install Filmora on your device to transform how you edit green screen videos/images for any type of use case.
secure download 