


Capturing action with a 360 camera is an absolute blast, but finding out how to edit 360° camera footage properly is a total must if you want those clips to actually look good. After all, 360 cameras capture everything around you, giving you plenty of freedom to choose the angle and perspective later.
The thing is, learning to edit 360° video can feel quite different from editing a regular clip, especially when you’re new to it. That’s why this guide will walk you through how to edit 360° footage, from choosing the right view to turning it into a finished video.
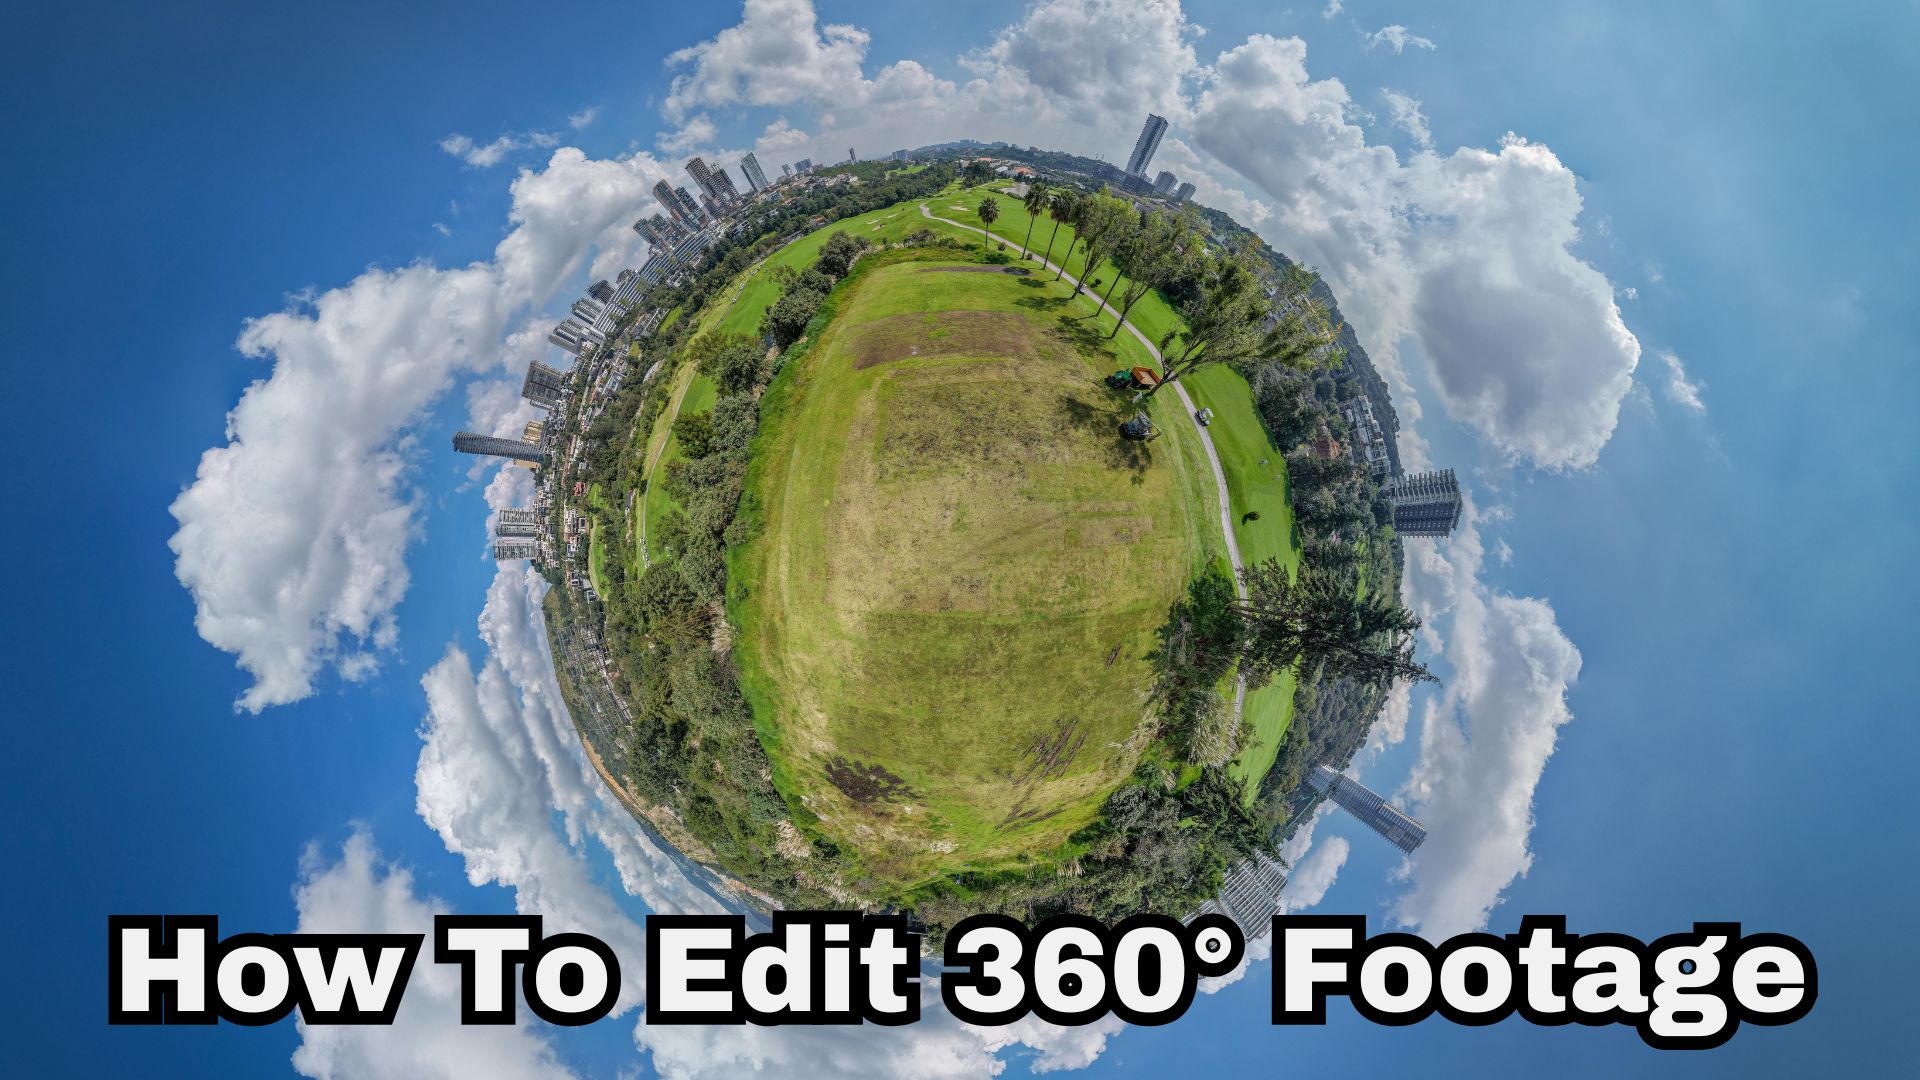
Part 1. What Makes Editing 360° Video Different?
If you’ve only edited videos from a phone or regular action camera before, 360 footage can feel a little strange at first. With a regular camera, the framing is basically locked in the moment you hit record. With a 360 camera, you essentially record a giant, spherical bubble of footage, leaving every directorial decision for later.
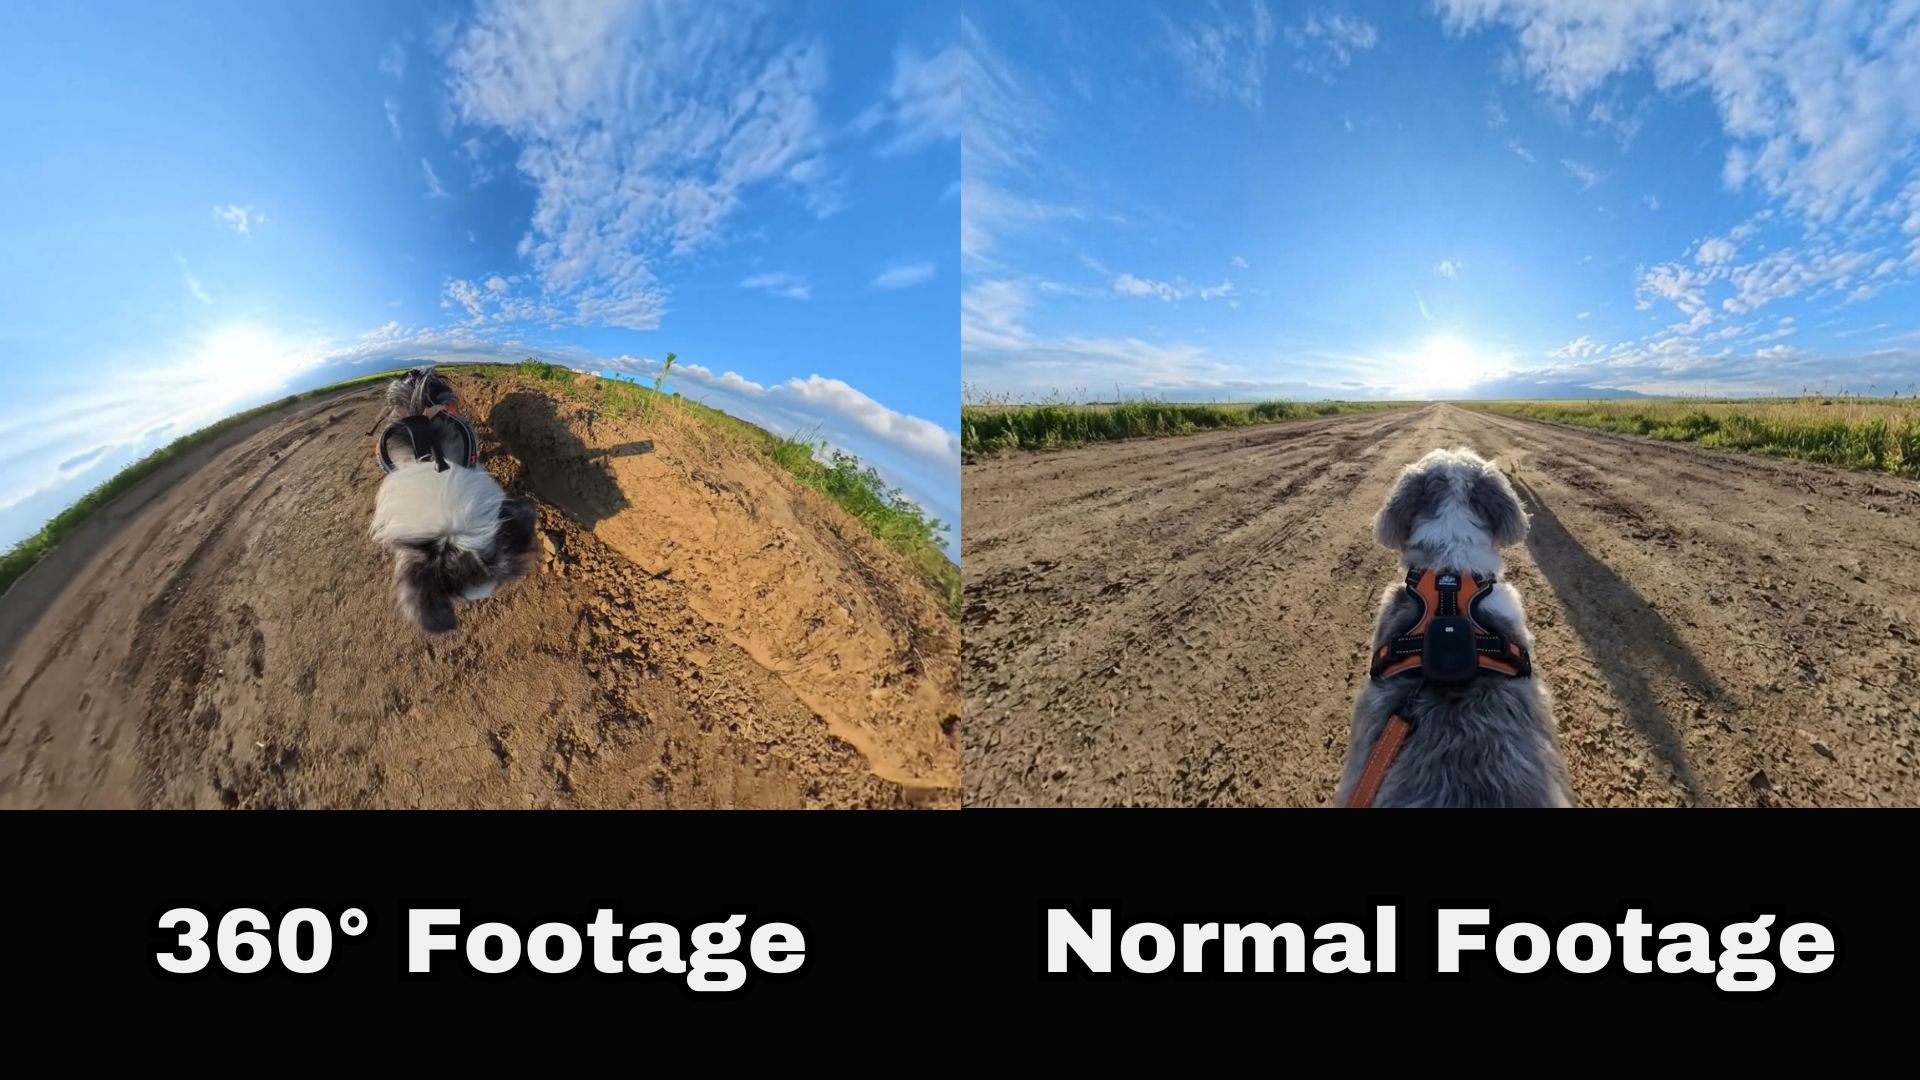
So, it's important to understand these differences when learning how to edit 360° videos:
- You Capture Everything at Once: Your camera records a complete sphere of your surroundings simultaneously, meaning you never miss a split-second moment happening behind your back.
- Reframing Takes Center Stage: Before you can treat the clip like a normal flat video, you have to pick the viewing angle and perspective you actually want to show.
- Camera Movements Happen in Post: Want a dramatic pan, a quick tilt, or a dizzying zoom? You build those dynamic movements on your computer using software keyframes long after the trip is over.
- Stitching Unites the Lenses: Depending on your gear, the dual hemispherical images from opposing lenses need to be seamlessly fused along their edges to hide the camera body.
- The Final Export Goes Flat: Unless you are building an interactive VR experience, your ultimate goal is taking that 360 bubble and flattening it into standard 16:9 widescreen or 9:16 vertical videos for social platforms.
Is GoPro 360 Footage Different From Other 360 Video?
Not all 360 camera files behave identically out of the box. Modern action cams like the Insta360 X series output single video files that modern editors ingest easily. However, if you are figuring out how to edit GoPro Fusion 360° video, you'll quickly notice a unique twist: the camera records onto two separate SD cards (Front and Back).
See this quick tutorial on YouTube by MicBergsma that guides you on how to edit GoPro 360° footage.
As you can see, to edit GoPro Fusion videos, you must run those twin files through stitching software first to merge them into a unified panoramic file. That stitching step in Fusion Studio is the one extra thing to do when learning how to edit GoPro Fusion footage.
See the table below to avoid confusion:
| Feature | Modern 360 Cams (Insta360, GoPro Max) | Legacy GoPro Fusion |
| Media Storage | Single MicroSD Card | Dual MicroSD Cards (Front + Back) |
| Initial File Processing | Automatically stitched or single-file import | Requires manual software stitching before editing |
| Editing Workflow | Direct import into your editor | Stitch first > Export MP4 > Import to editor |
Part 2. All-in-One Solution to Editing 360° Video: Wondershare Filmora
Traditionally, learning how to edit 360° video meant dealing with a clunky, multi-step headache. You had to load raw footage into a standalone utility app, reframe your angles, export massive temporary files, and finally drop those clips into your main editor to add music, titles, and color tweaks.
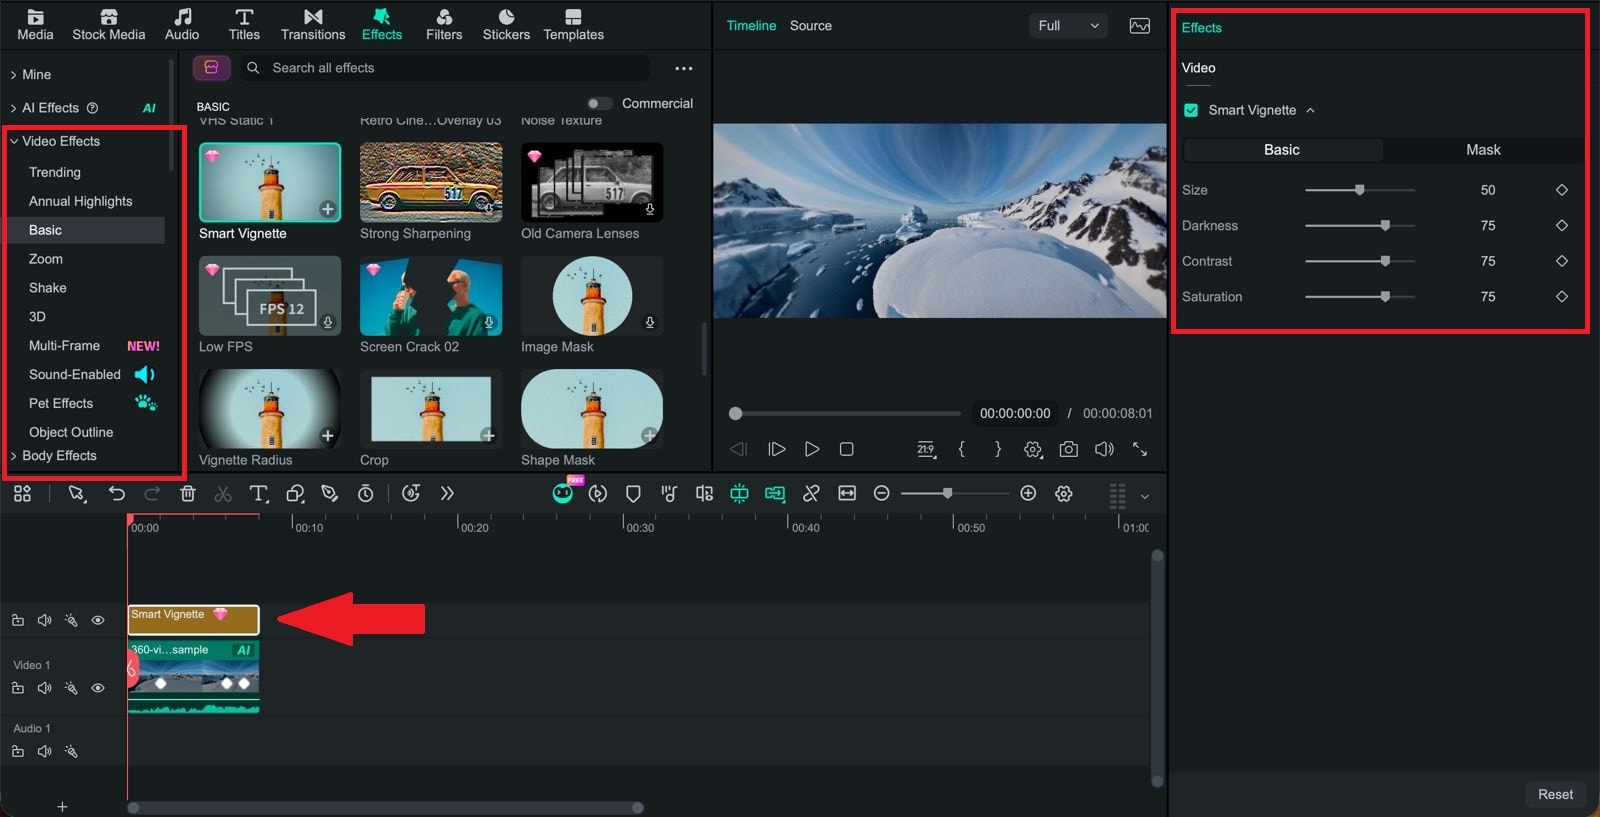
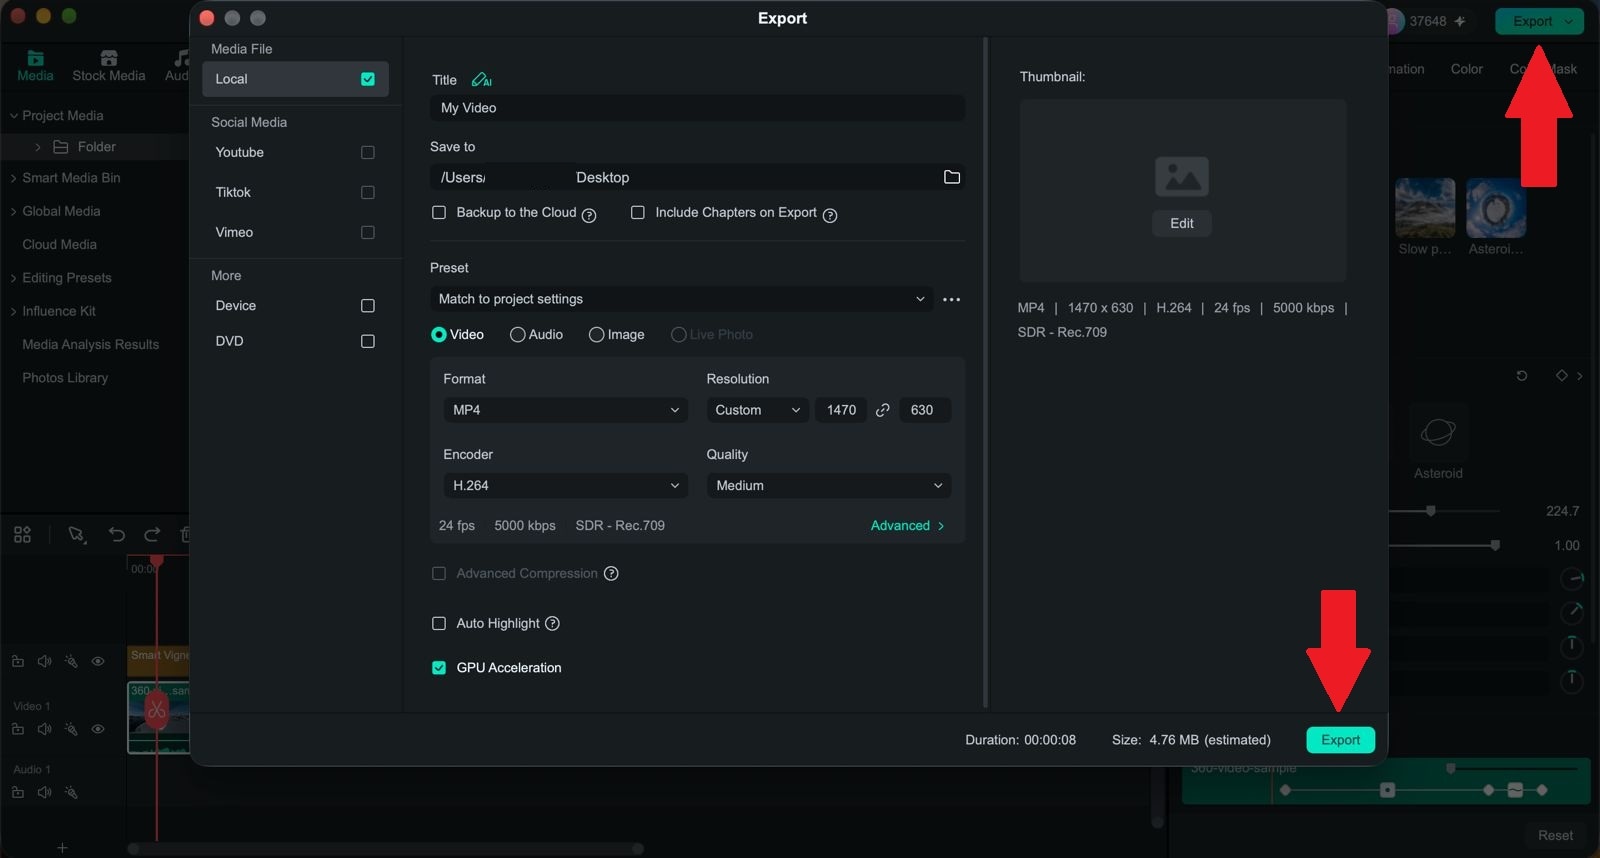
But don't worry, Wondershare Filmora completely eliminates that extra legwork by building native 360° Video Editing straight into its main timeline. Instead of bouncing between apps, you drag your raw 360° files directly into Filmora, reframe your shots visually, tweak the speeds, add cinematic effects, and render flat videos ready for TikTok or YouTube in one seamless space.
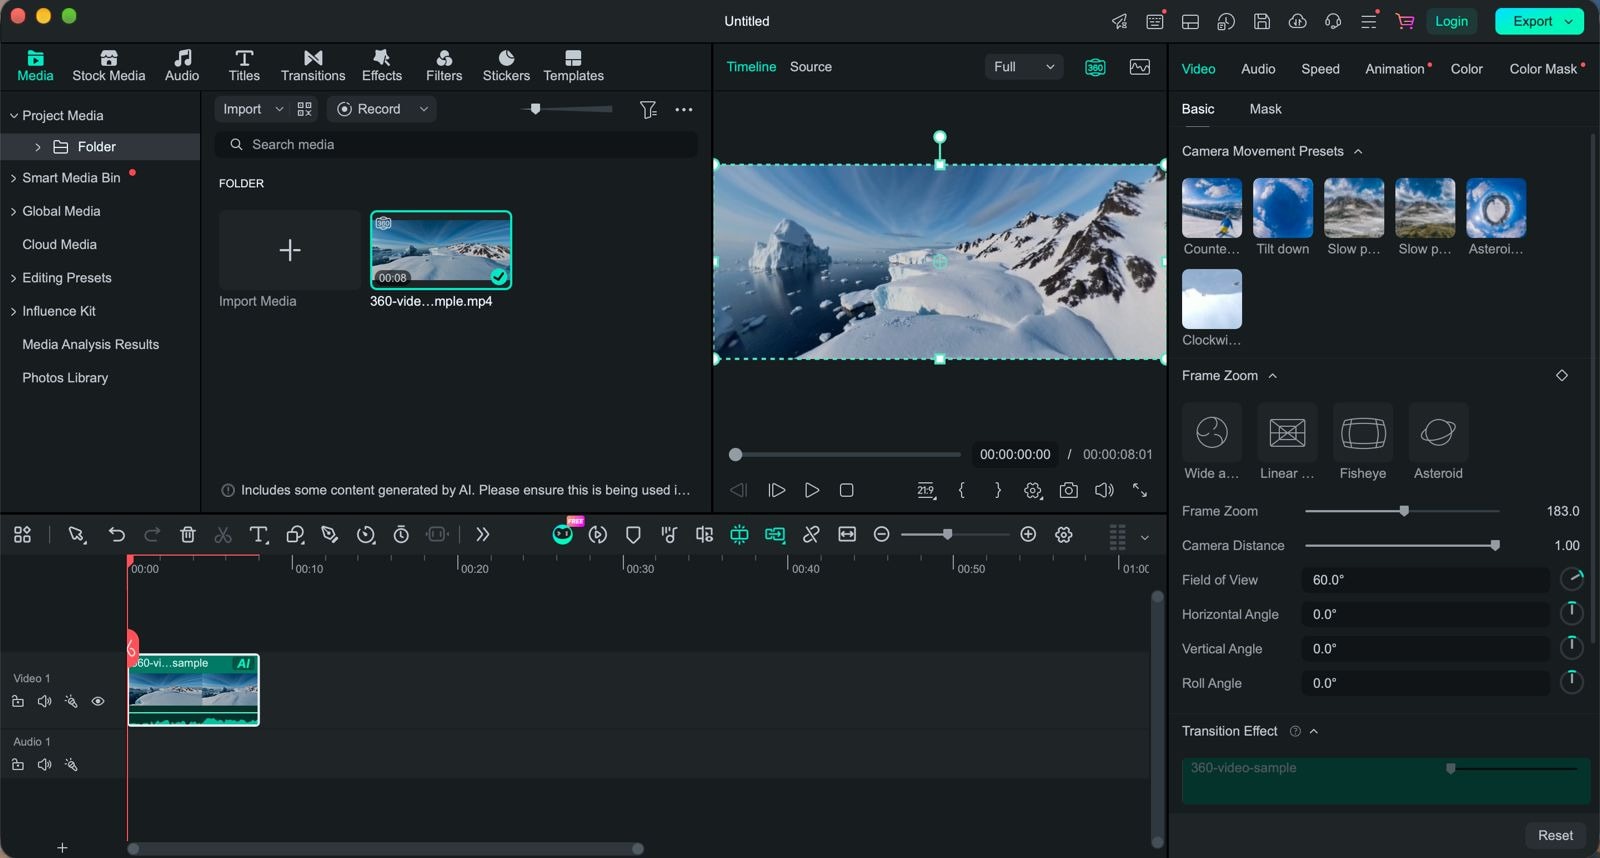
Why Choose Filmora for Your 360° Video Projects?
- Zero App Switching: Skip external utilities entirely. You can import, reframe, apply speed ramps, insert titles, and render without leaving your project timeline.
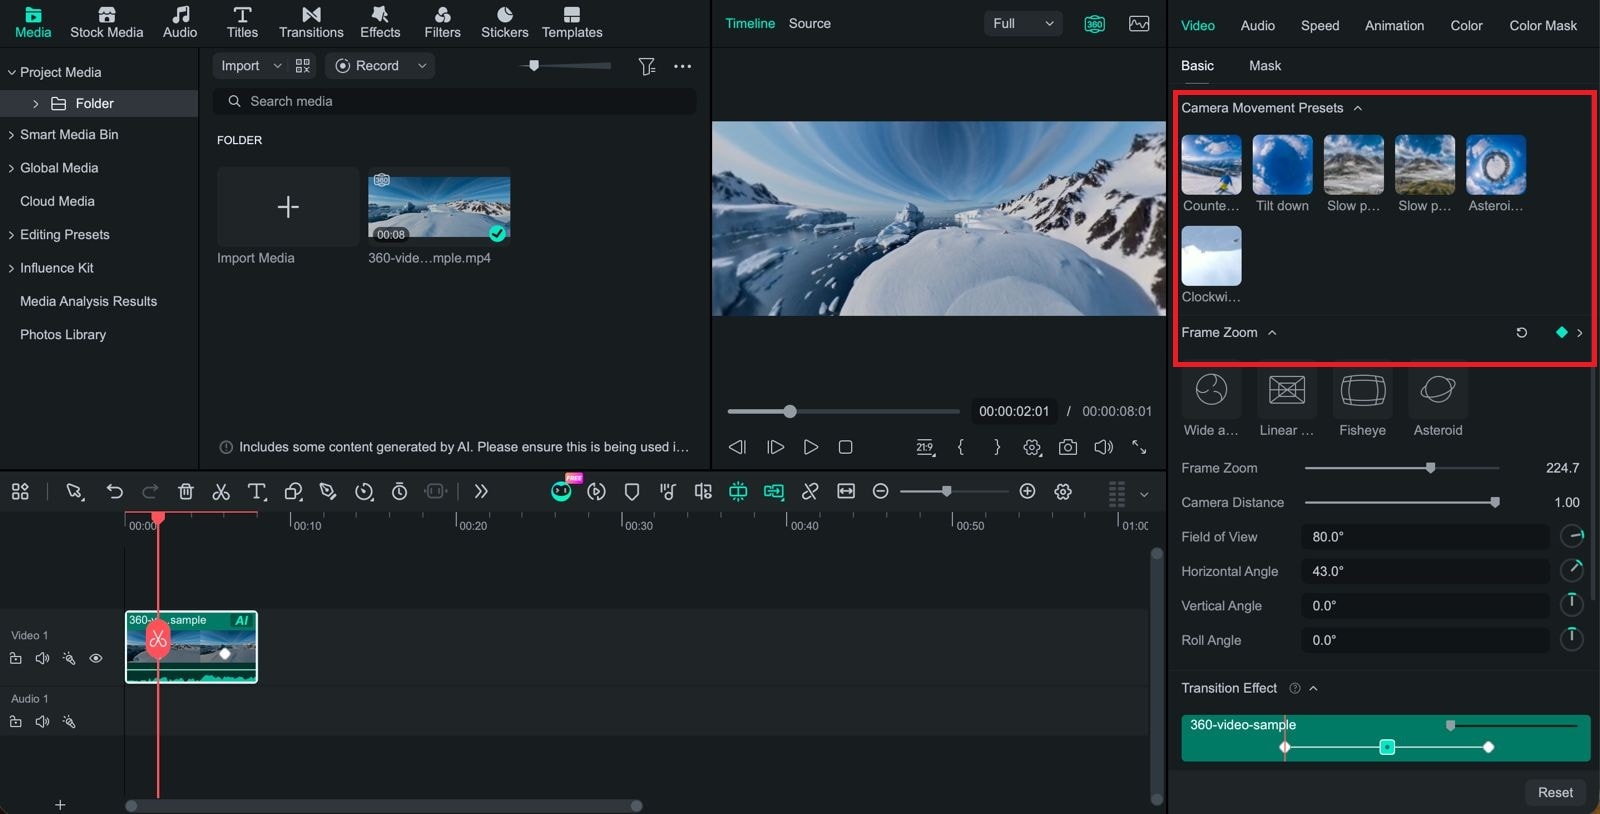
- Interactive Viewport Controls: Simply click and drag inside the preview player to adjust your pitch and yaw angles, or roll your mouse wheel to zoom the field of view in and out.
- One-Click Movement Presets: Instantly pull off complex, cinematic camera moves like Tiny Planet, Fisheye, Wide Angle, and Sky Flip templates, without calculating any of the distortion math yourself.
- Broad File Extension Support: Filmora directly recognizes standard .MP4 files, Insta360 .INSV files (on Windows via built-in SDK), and imported DJI .OSV conversions seamlessly.
Part 3. How to Edit 360° Video in Filmora: A Simple Step-by-Step Guide
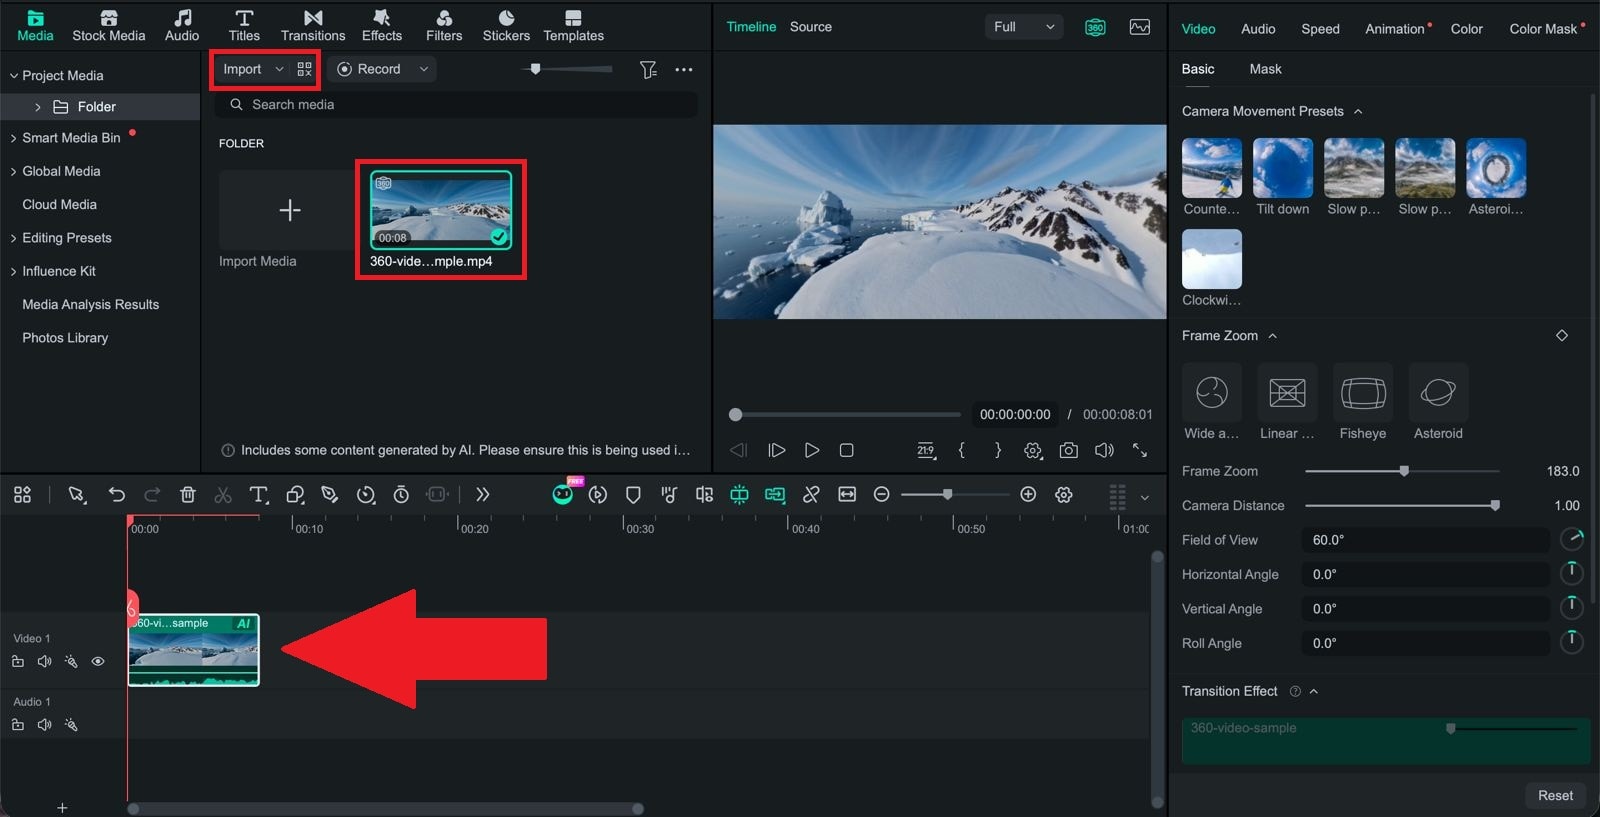
Now for the part you probably came here for. If you're wondering how to edit Insta360 footage, the basic process is much less intimidating with Filmora. You start with the footage, decide what the viewer should see, and then treat the reframed clip much like any other video on the timeline.
To see just how simple this workflow actually is, follow the guide below on how to edit 360° video in Filmora:
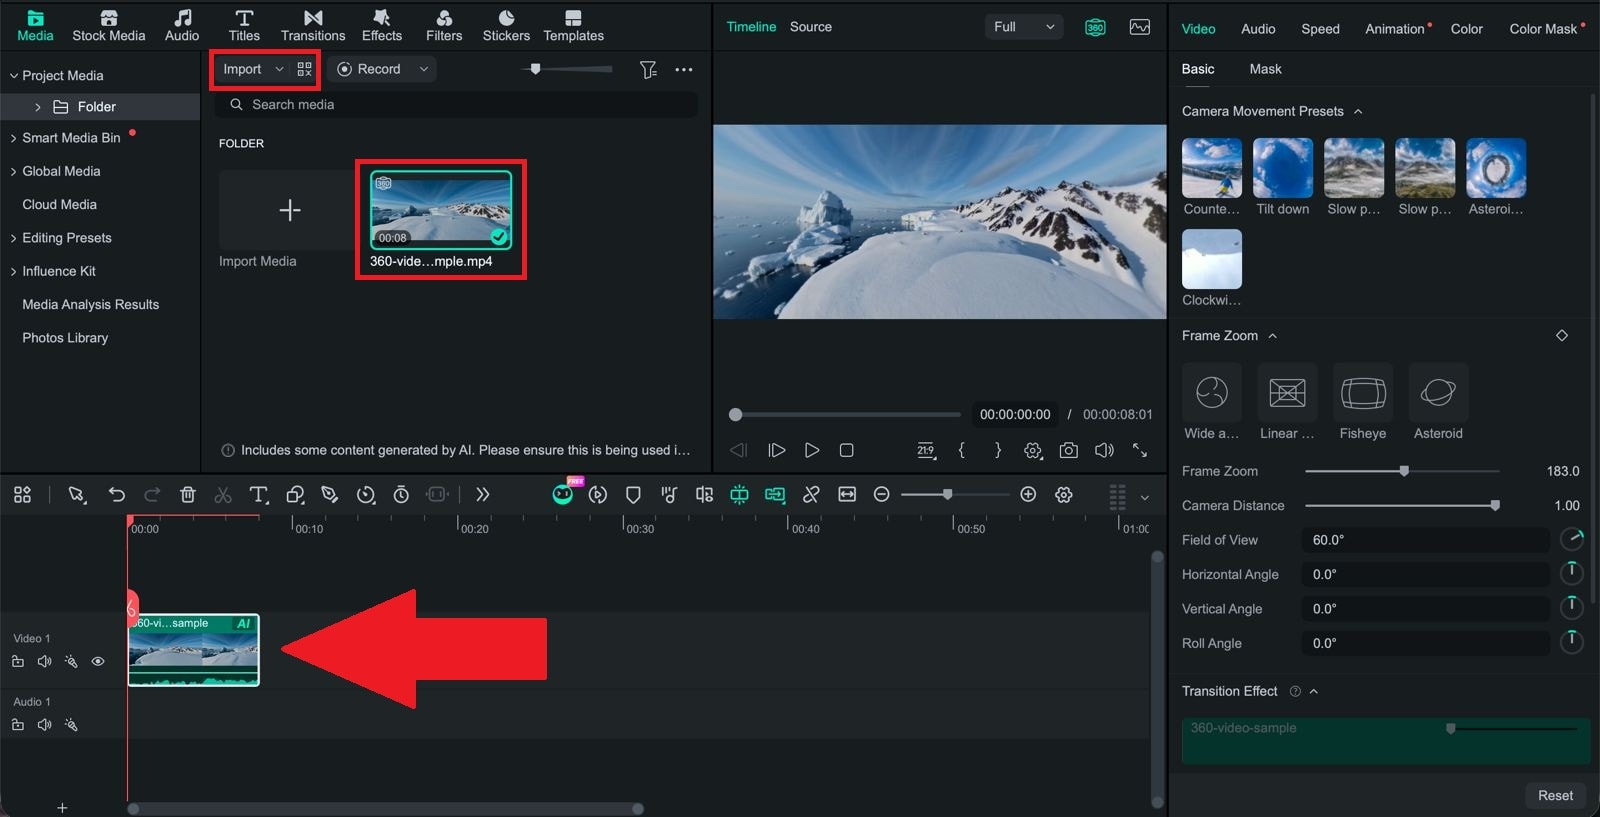
 Secure Download
Part 4. Pro Tips to Make Your 360° Videos Stand Out
Now that you know how to edit Insta360 videos on PC, the next step is to make them more interesting. After all, applying creative direction is what turns ordinary action clips into viral hits. Since 360° footage hands you so much freedom, editing can also be used to control pacing, movement, and overall visual style.
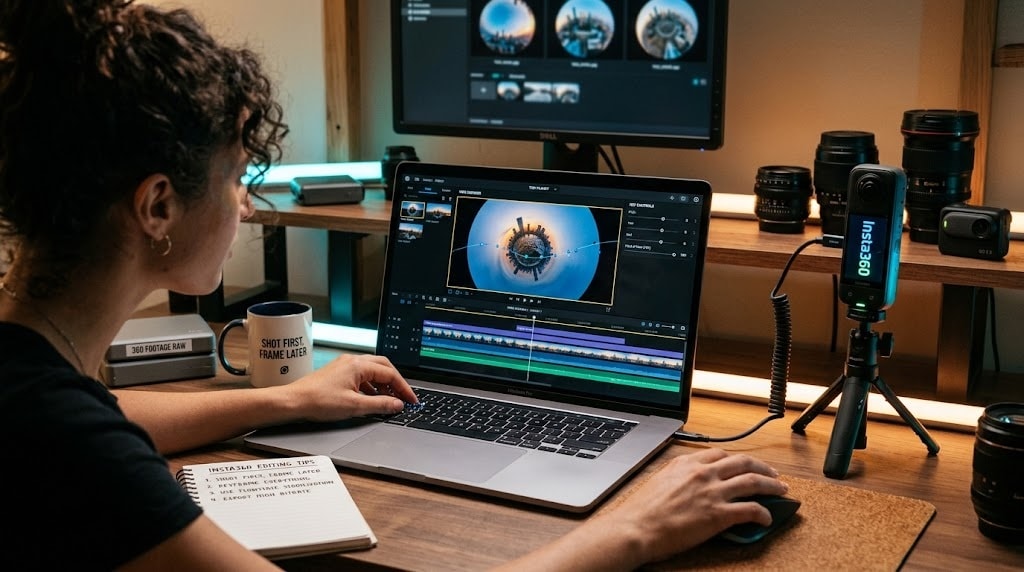
Feel free to follow these tips:
- Use Camera Movement to Guide the Viewer: A slow pan or orbit does more than look cinematic. It actively directs attention toward what matters in the scene, instead of leaving people to hunt for the subject on their own.
- Try Tiny Planet for an Eye-Catching Opening: That curved, miniature-world look makes a great hook for the first second or two of a video. It's a strong effect, though, so it tends to work best used sparingly rather than throughout an entire clip.
- Use Speed Changes to Add Energy: Pair aggressive camera turns with Filmora's speed ramping tools. For example, in cycling footage, you can slow down for the jump, then return to normal speed after it lands.
- Keep the Horizon Under Control: 360° footage can drift if the camera wasn't perfectly level during the shot. Adjusting the roll angle (horizon leveling) keeps your reframed shot from looking subtly, distractingly tilted.
- Combine 360 Shots With Regular Footage: Once your 360° clips are reframed into flat video, there's no reason to keep them separate from your normal footage. Cutting between the two on the same timeline adds variety and keeps the pacing from feeling one-note.
Conclusion
Learning how to edit 360° video is a little different from editing regular footage. But once you get comfortable with reframing, keyframed movement, and picking the right projection for the moment, the process starts to feel a lot less intimidating, whether your footage came from an Insta360, a GoPro, or something else entirely.
And if switching between your camera's app and a separate editor has been the most annoying part of the process, that's exactly what Wondershare Filmora's upcoming native 360° editing is built to fix. Reframing, movement presets, and your full regular editing toolkit all live on one timeline, so you can go from raw spherical footage to a finished video without ever leaving the app.
FAQs
-
Why does my 360° video look distorted after editing?
Extreme distortion usually happens when the Field of View (FOV) slider is pushed too high, creating an ultra-wide fisheye stretch along the edges. To achieve a clean, natural look, pull the FOV parameter down to a narrower setting or select a De-Distortion / Linear perspective preset in your editor's controls. -
Can I edit 360° video on a mid-range laptop, or do I need a high-end PC?
You can definitely edit 360° footage on modern mid-range laptops, provided you have at least 16 GB of RAM and a dedicated graphics processor (like an NVIDIA GTX 1660 or an Apple Silicon M-series chip). Where things get demanding is 8K footage or projects with a lot of layered effects. -
Can I combine regular GoPro clips and 360 Insta360 clips on the same timeline?
Yes. Once your 360° footage has been reframed into a flat 2D clip, it behaves just like any other piece of video, so it can sit on the same timeline as regular GoPro footage without issue. Just keep an eye on matching resolution and frame rate between clips so the cuts between them feel consistent.
