

 ChatGPT
 Perplexity
 Gemini
 Claude
 Grok
Grok
In this article
What Does White Balance Mean?
In video production, white balance is used to make colors appear natural under different lighting conditions. Different light sources can introduce blue, yellow, green, or magenta color casts, so white balance helps compensate for those shifts.
When white balance is set correctly, neutral objects appear neutral, skin tones look more natural, and colors remain more consistent across different shots.
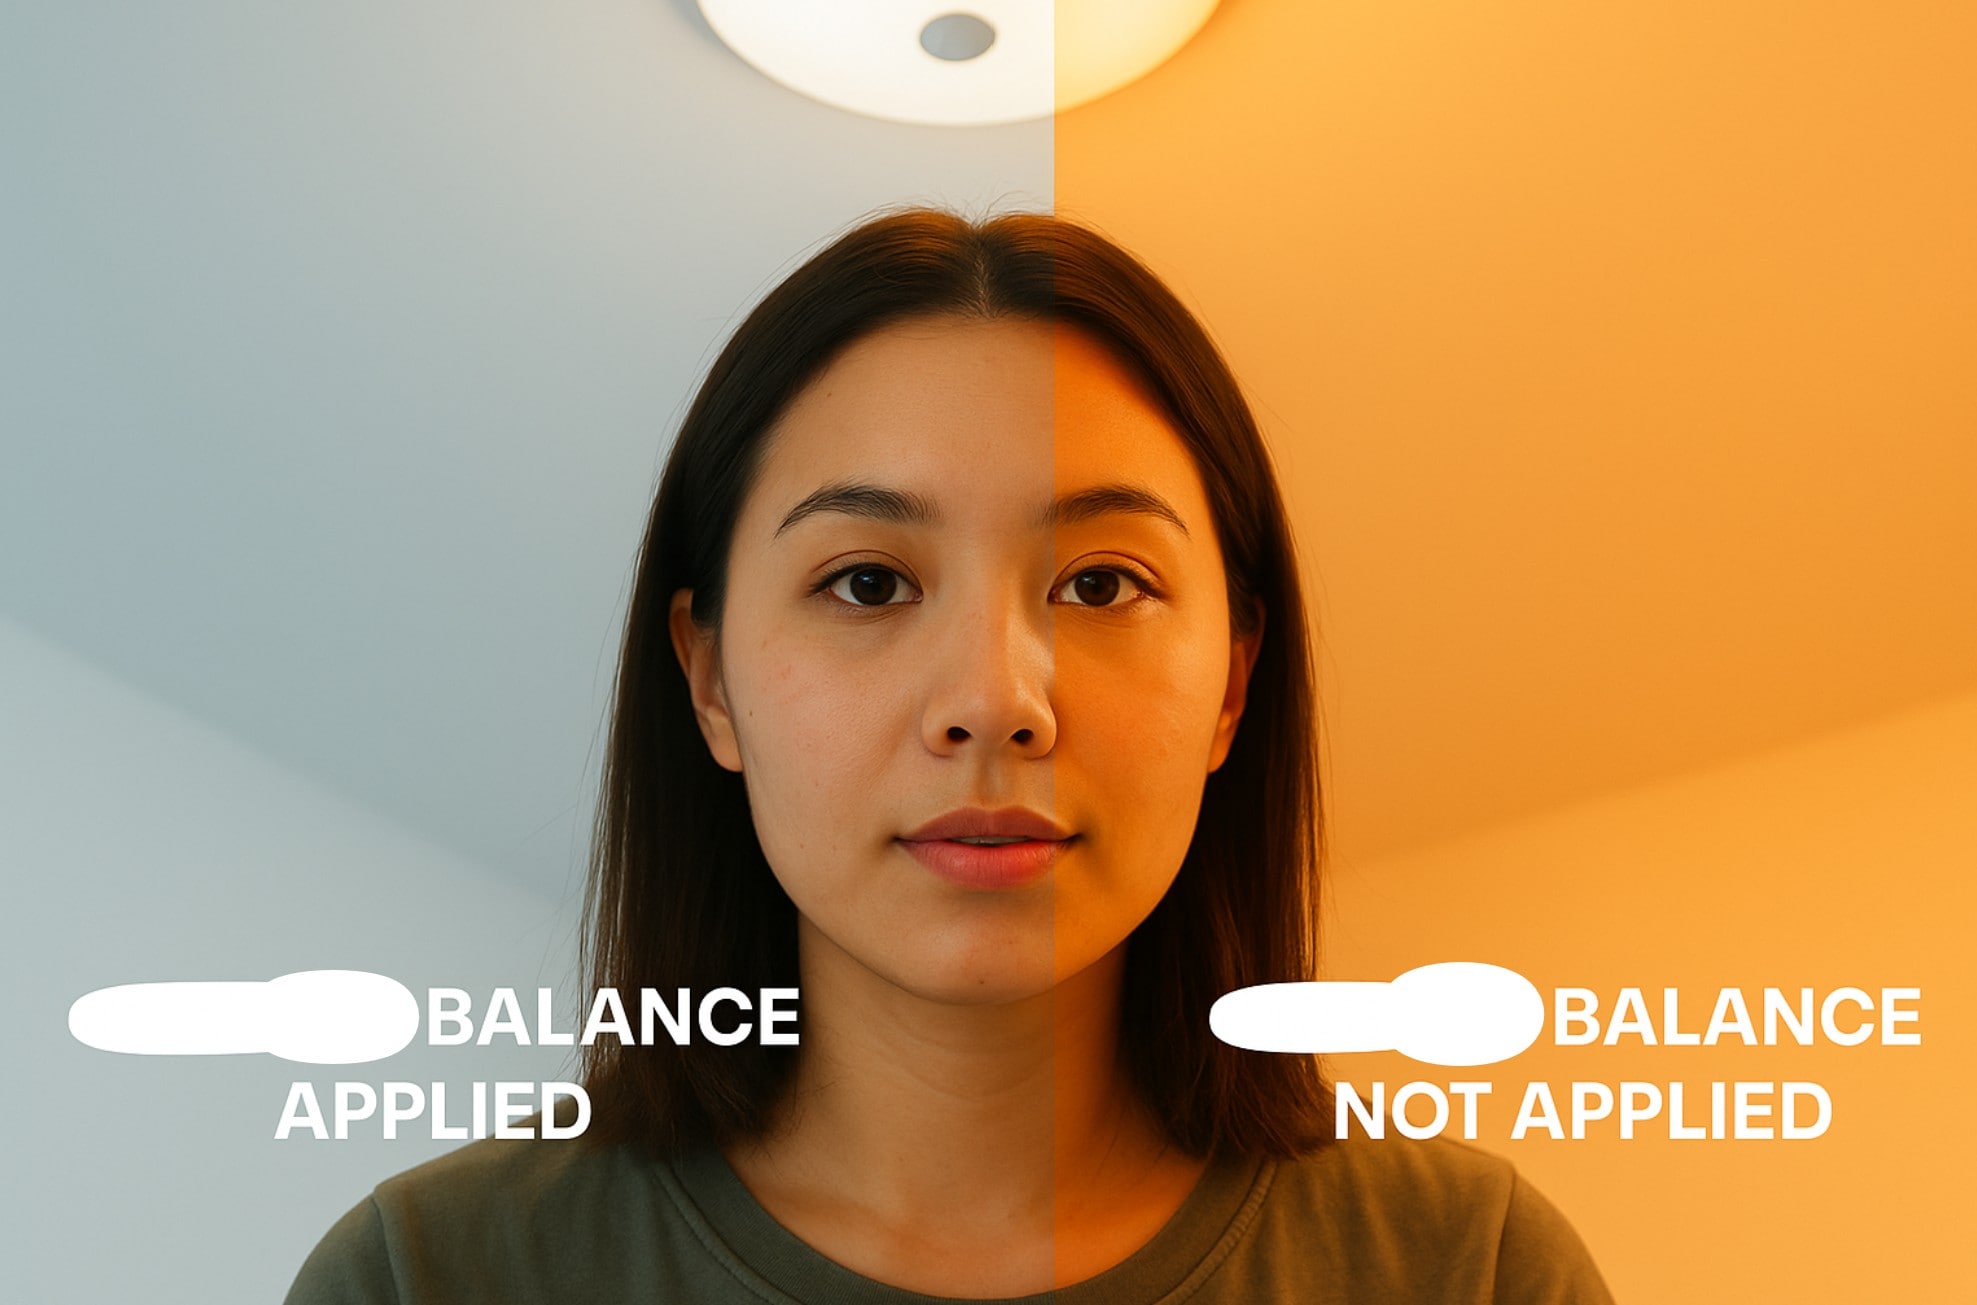
White balance is the process of adjusting the color balance of an image so that neutral objects appear neutral under a particular light source. In video editing, it is commonly used to correct unwanted warm, cool, green, or magenta color casts caused by lighting.
Key Elements of White Balance
Common White Balance Presets
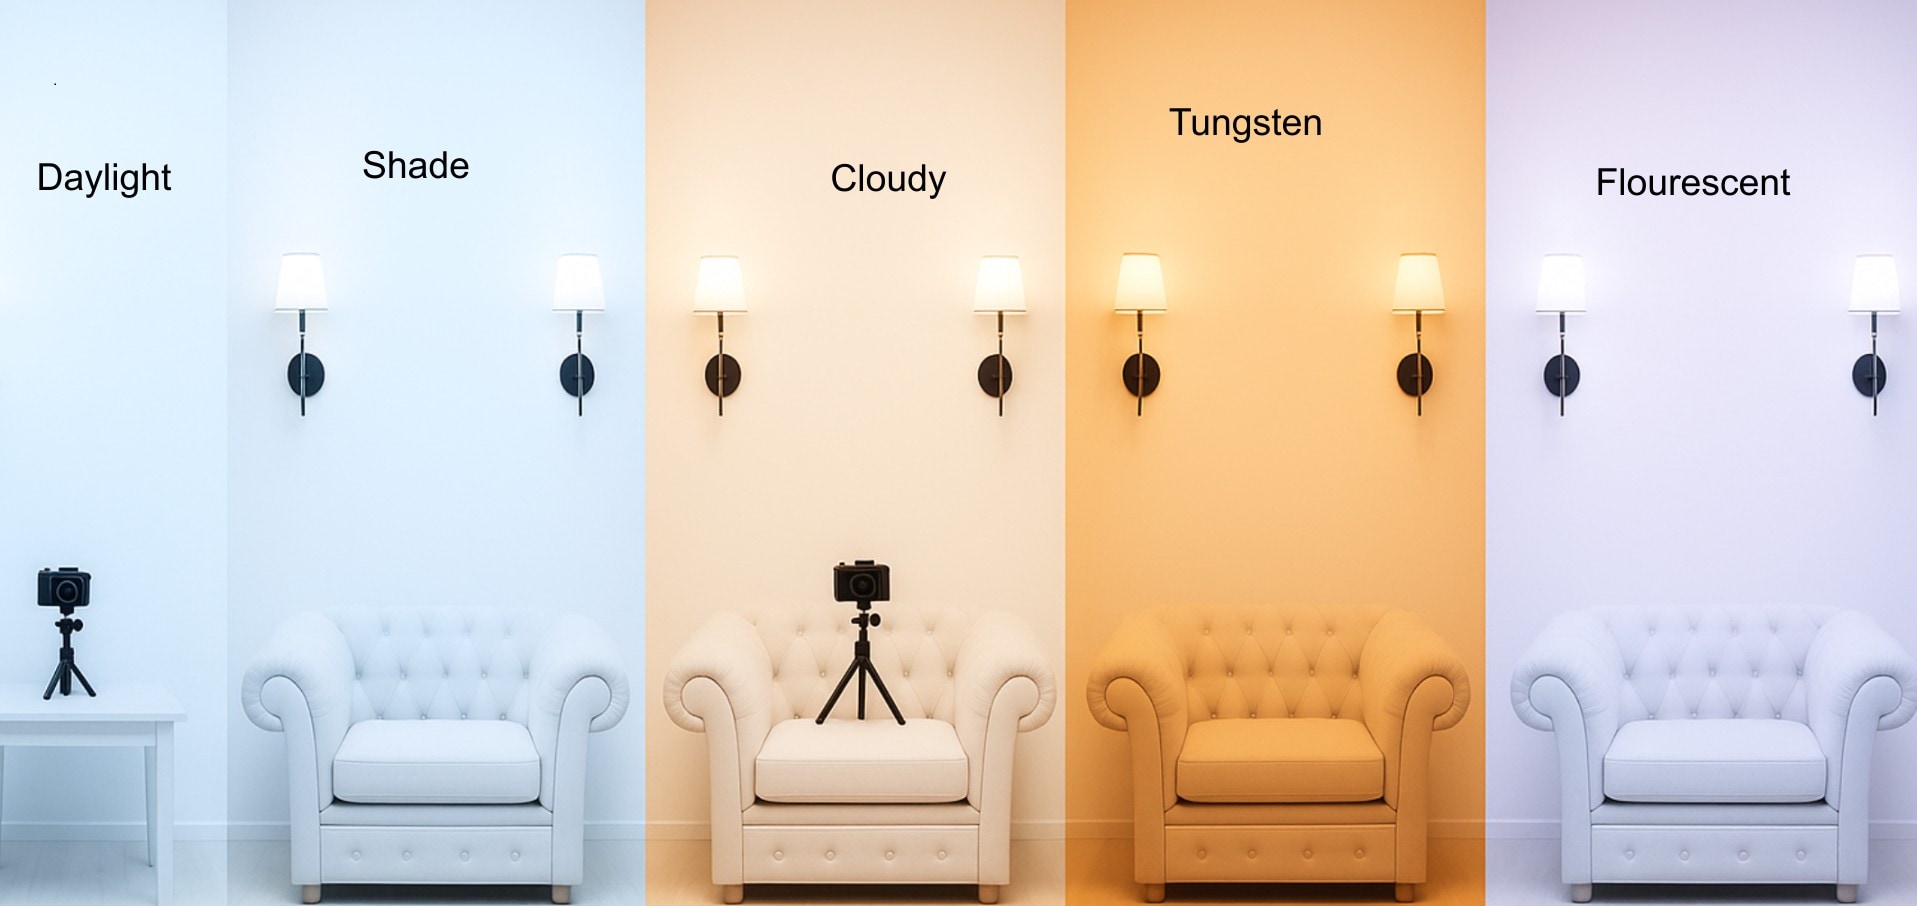
Common camera white balance modes include:
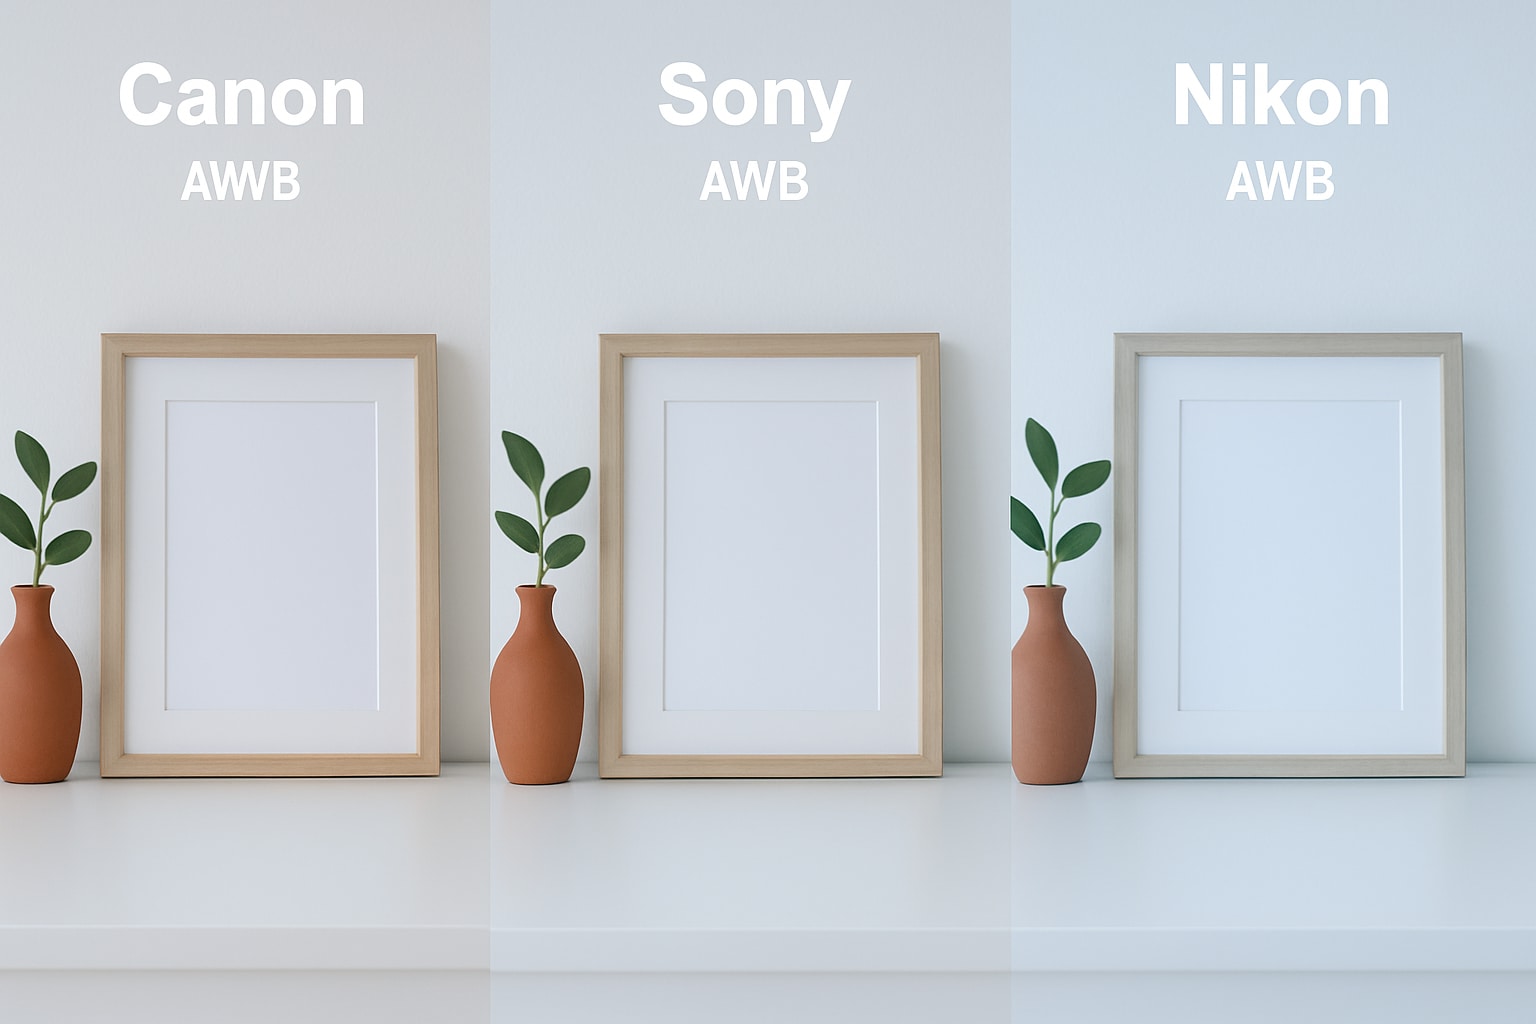
- Auto White Balance (AWB): The camera automatically estimates the appropriate white balance based on the scene.
- Daylight: Designed for outdoor daylight conditions.
- Cloudy: Adds warmth to compensate for the cooler appearance of overcast conditions.
- Shade: Adds more warmth for subjects photographed or filmed in shaded daylight.
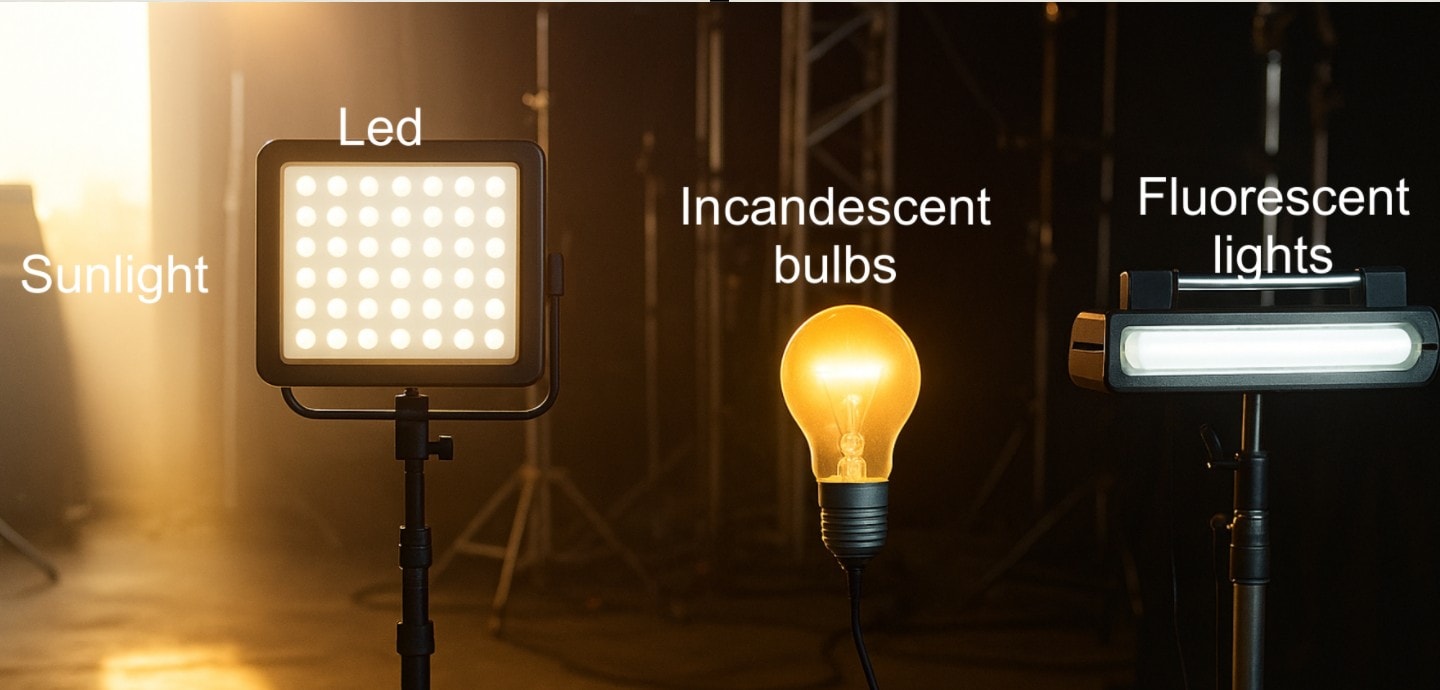
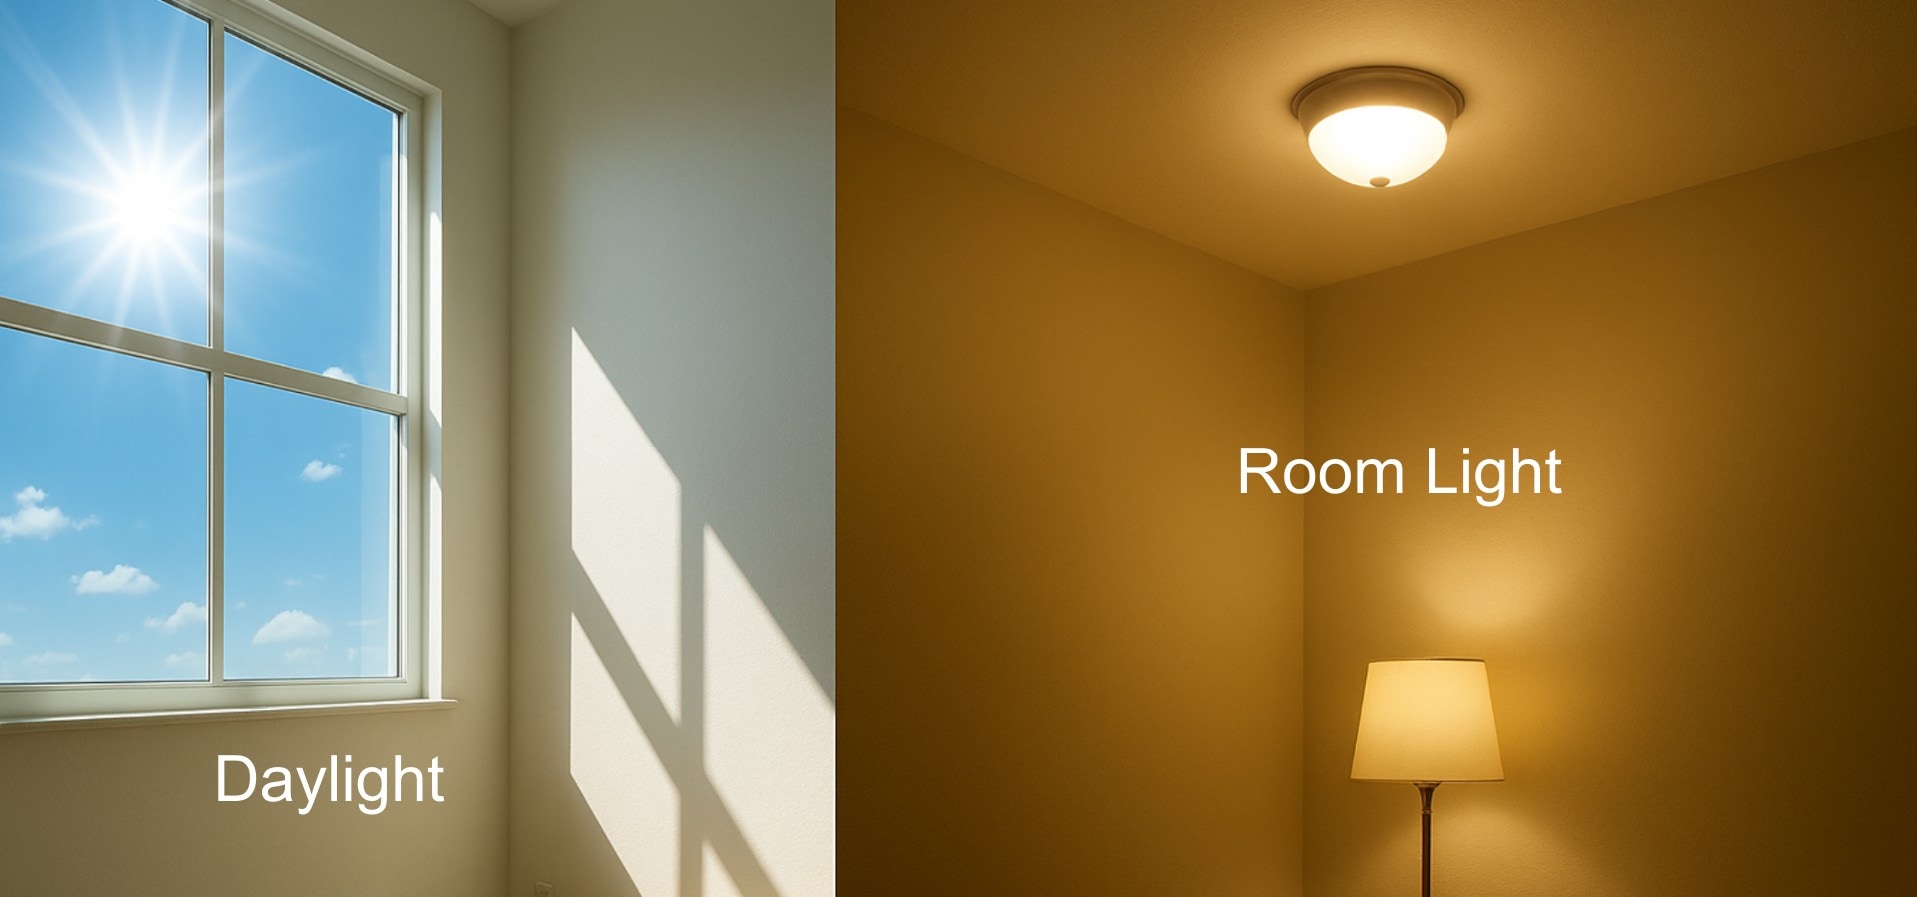
- Tungsten: Compensates for the warm orange appearance of traditional tungsten or incandescent lighting.
- Fluorescent: Helps compensate for color casts commonly produced by fluorescent lighting.
- Custom / Kelvin: Lets you manually define the white balance using a reference or specific Kelvin value.
Exact Kelvin values vary by light source and shooting environment, so preset values should be treated as starting points rather than universal rules.
How White Balance Is Used in Video Production
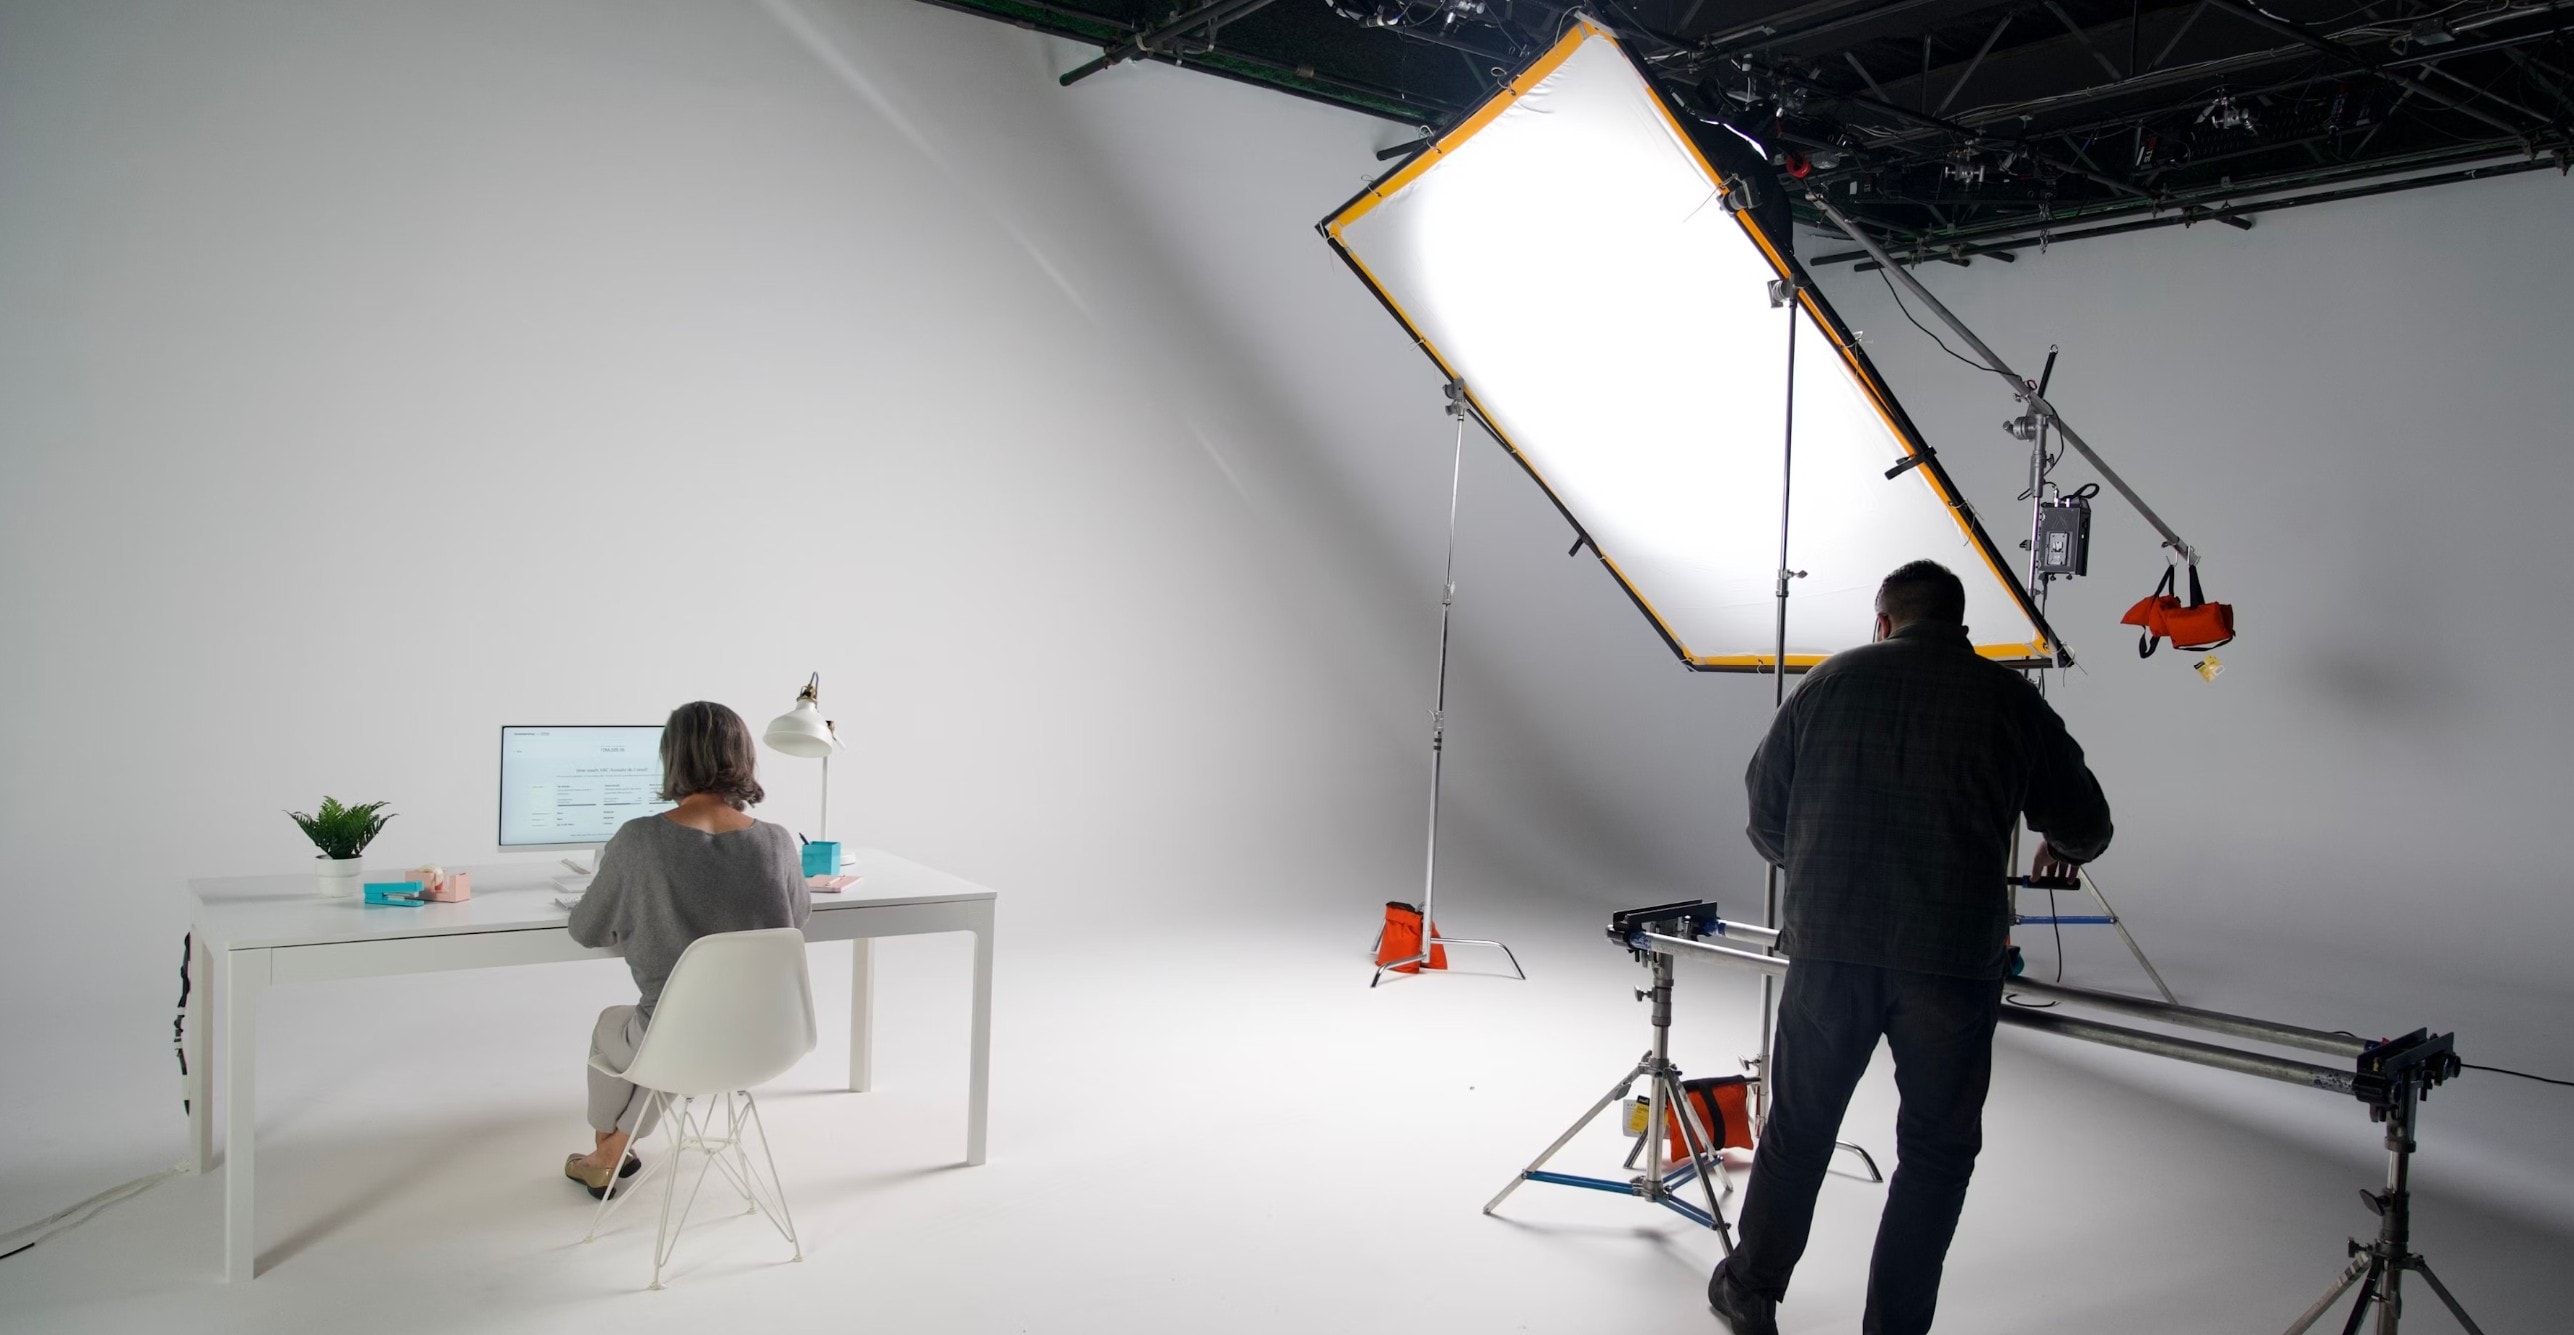
Correct white balance helps keep colors consistent from shot to shot and reduces the amount of correction required later in post-production.
Common White Balance Scenarios
White Balance as a Creative Choice
White balance is usually used for technical correction, but filmmakers may intentionally shift it for creative reasons. A warmer balance can reinforce comfort or nostalgia, while a cooler treatment can create a more restrained atmosphere.
The key distinction is intent: technical white balance aims for neutral colors, while creative grading intentionally moves away from neutrality.
Common White Balance Mistakes
Auto White Balance can work well in stable lighting, but it may shift during a shot when the lighting or composition changes.
When consistency is important, use a fixed preset, Kelvin value, or custom white balance instead of allowing the setting to change continuously.
A single white balance setting cannot always fully correct two different light sources affecting separate areas of the frame.
Whenever possible, reduce mixed lighting during production. In post-production, use local color correction when only one part of the frame needs additional adjustment.
Moving Temperature or Tint too far can create an unnatural color cast instead of fixing one.
Use neutral objects, natural skin tones, and the overall scene as references while adjusting the image.
Even when the overall image seems balanced, skin can still look too green, magenta, warm, or cool.
Check skin tones carefully while refining Temperature and Tint, especially in interviews, portraits, and people-focused content.
How to Fix White Balance in Filmora
Whenever possible, white balance should be set correctly while filming. However, footage recorded under uncontrolled lighting can still be corrected during post-production.
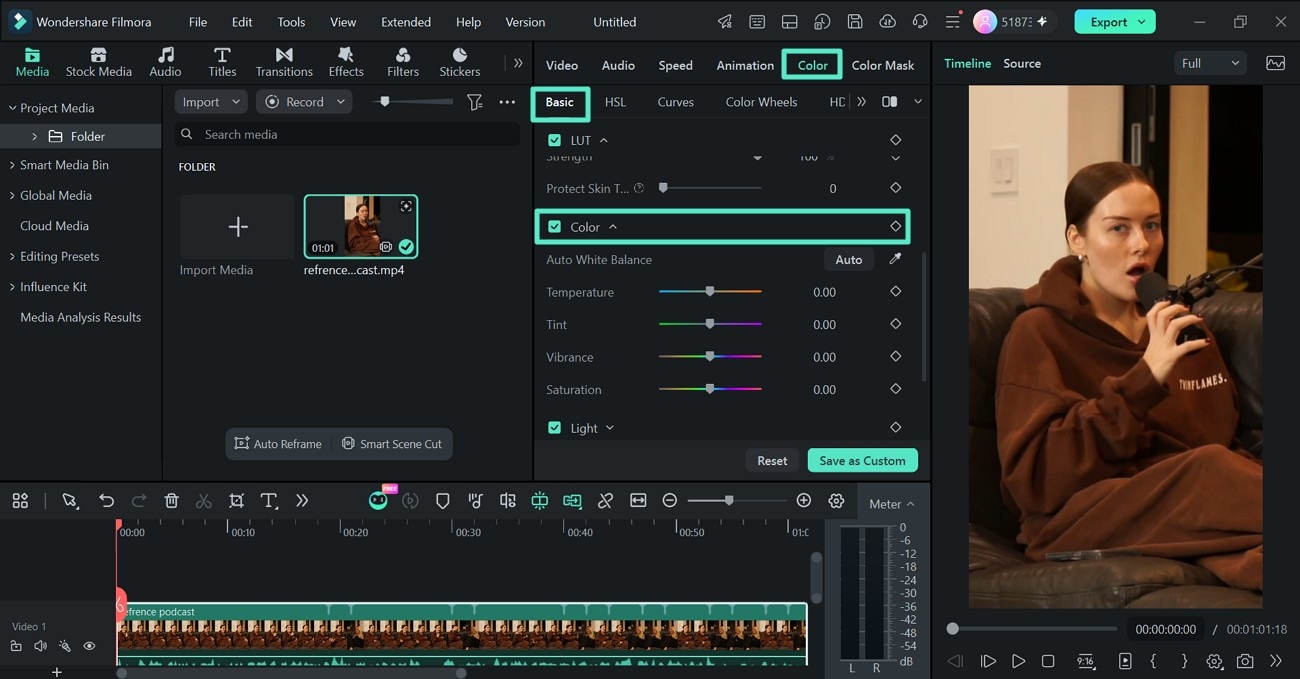
In Wondershare Filmora, the current white balance controls are located under Color > Basic > Color. You can use automatic correction, select a neutral reference with the Eyedropper, or adjust Temperature and Tint manually.


Step 1. Import Your Video
Launch Filmora, create a new project, import your video, and drag the clip onto the timeline. Select the clip to open its editing properties.
Step 2. Open the White Balance Controls
Go to Color > Basic > Color. This section contains Filmora's current white balance controls.
Step 3. Choose a White Balance Method
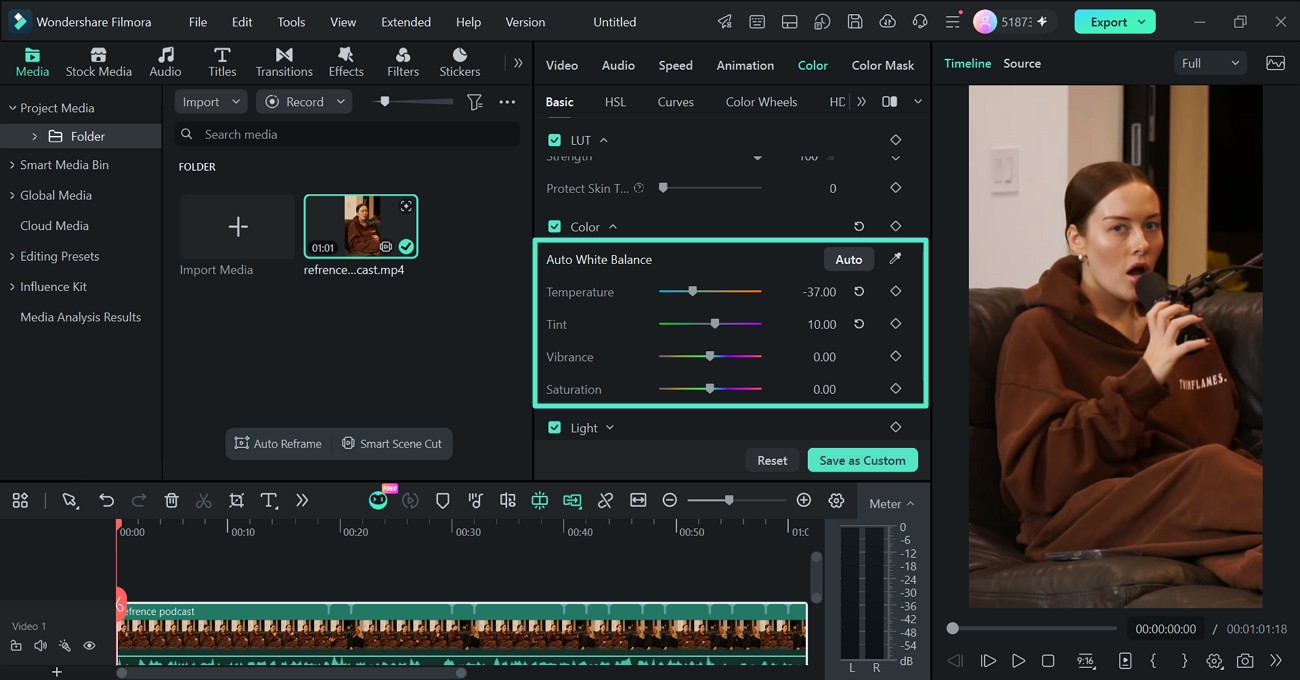
Filmora provides several ways to correct the color balance:
- Auto: Automatically analyzes and adjusts the white balance.
- Eyedropper: Select a neutral white or gray area in the image to use as a reference.
- Temperature: Move the footage toward a warmer or cooler appearance.
- Tint: Correct green or magenta shifts.
Start with Auto or the Eyedropper if you want a quick baseline, then refine the result with Temperature and Tint when necessary.
Step 4. Refine Exposure and Lighting If Needed
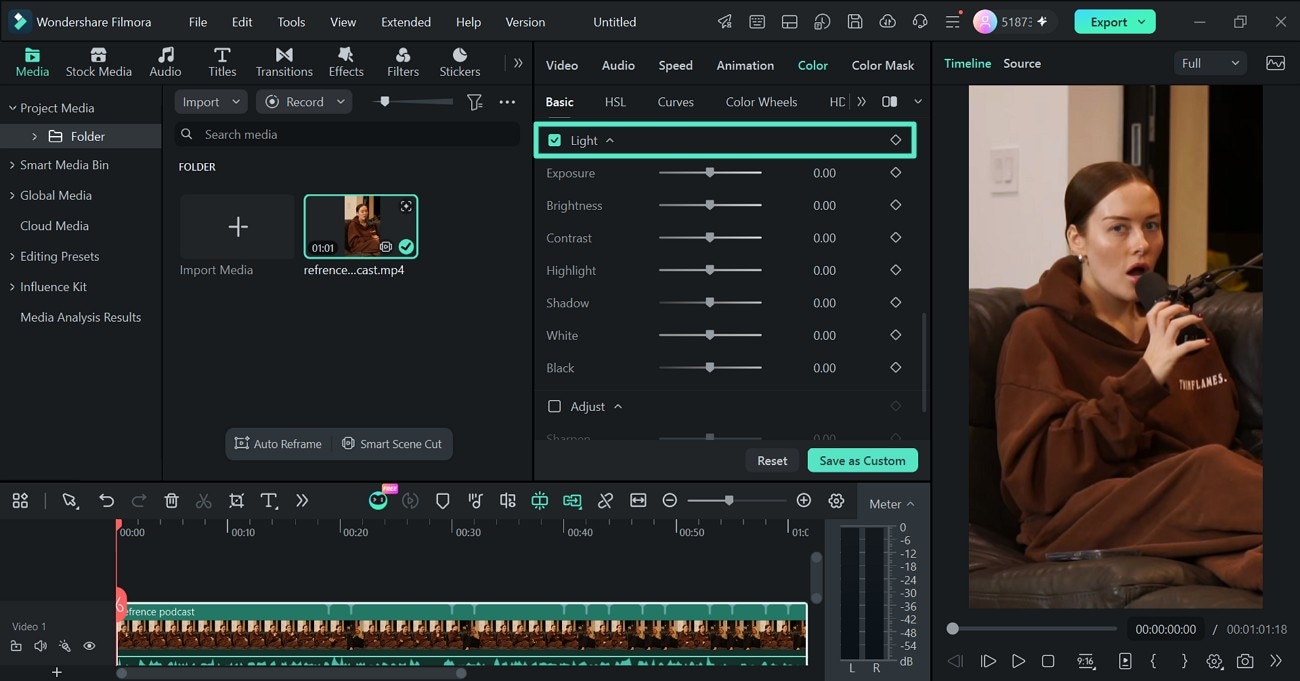
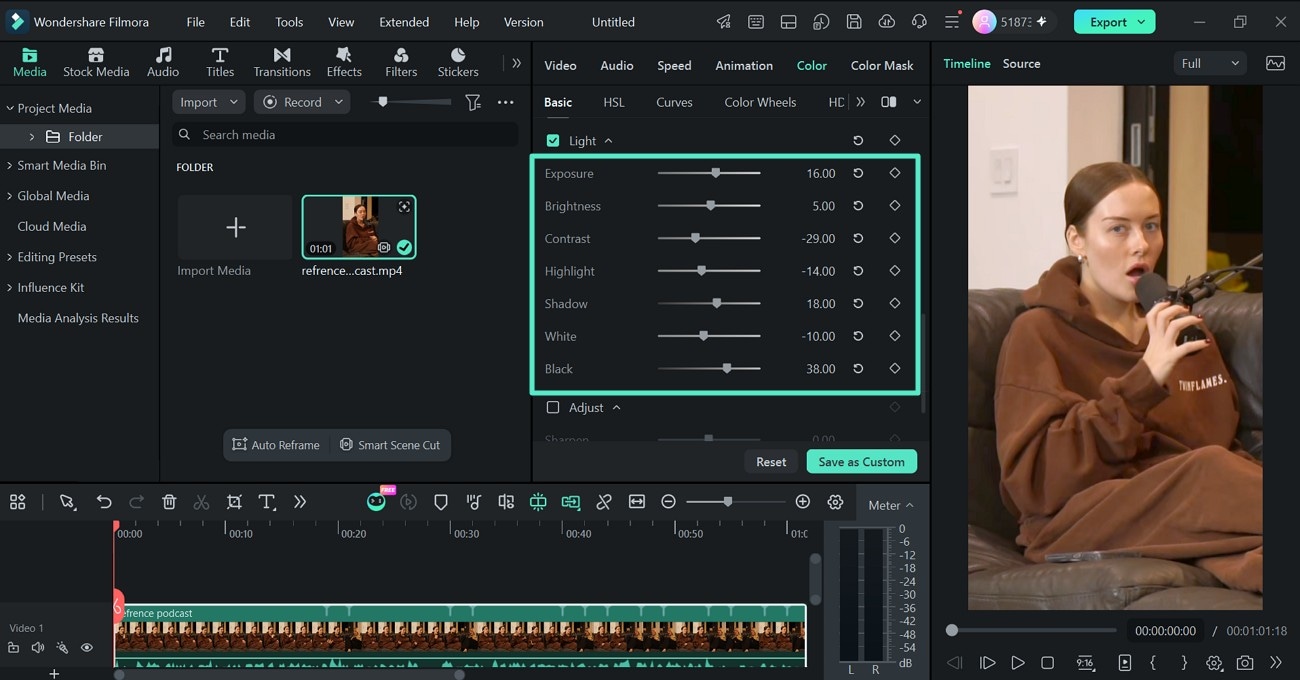
White balance may not be the only issue in the clip. If the image also appears too bright, dark, or flat, open Color > Basic > Light and adjust Exposure, Brightness, Contrast, Highlight, and Shadow.
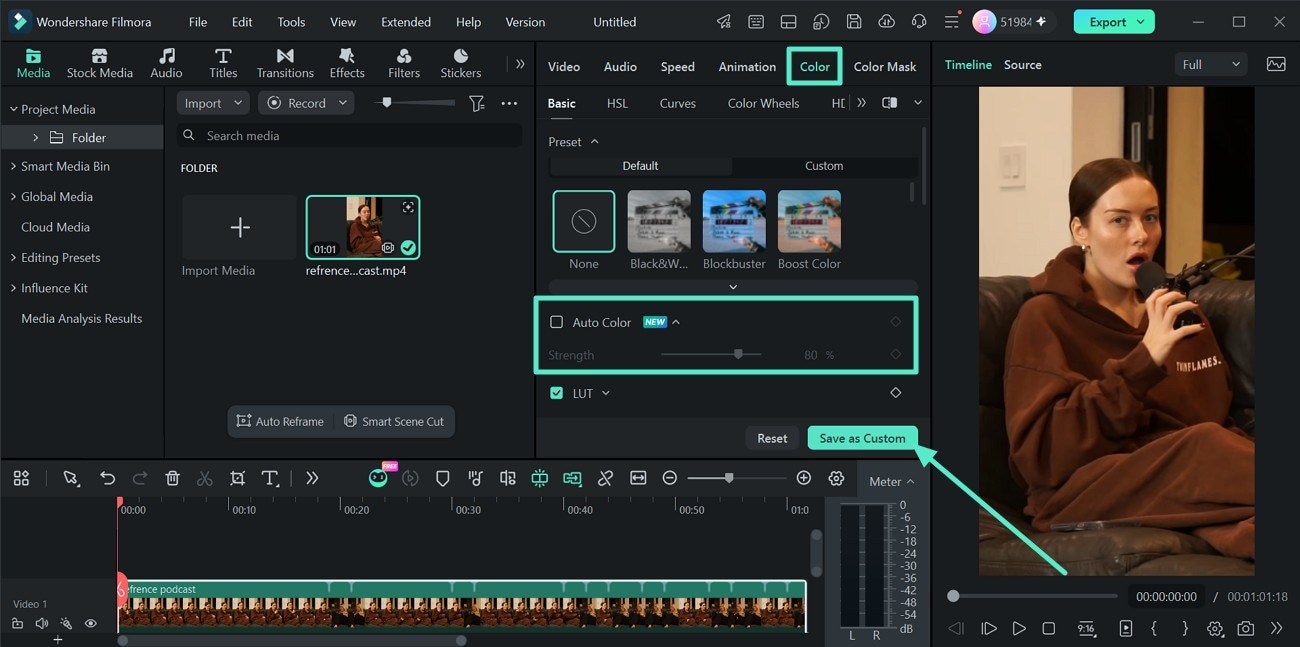
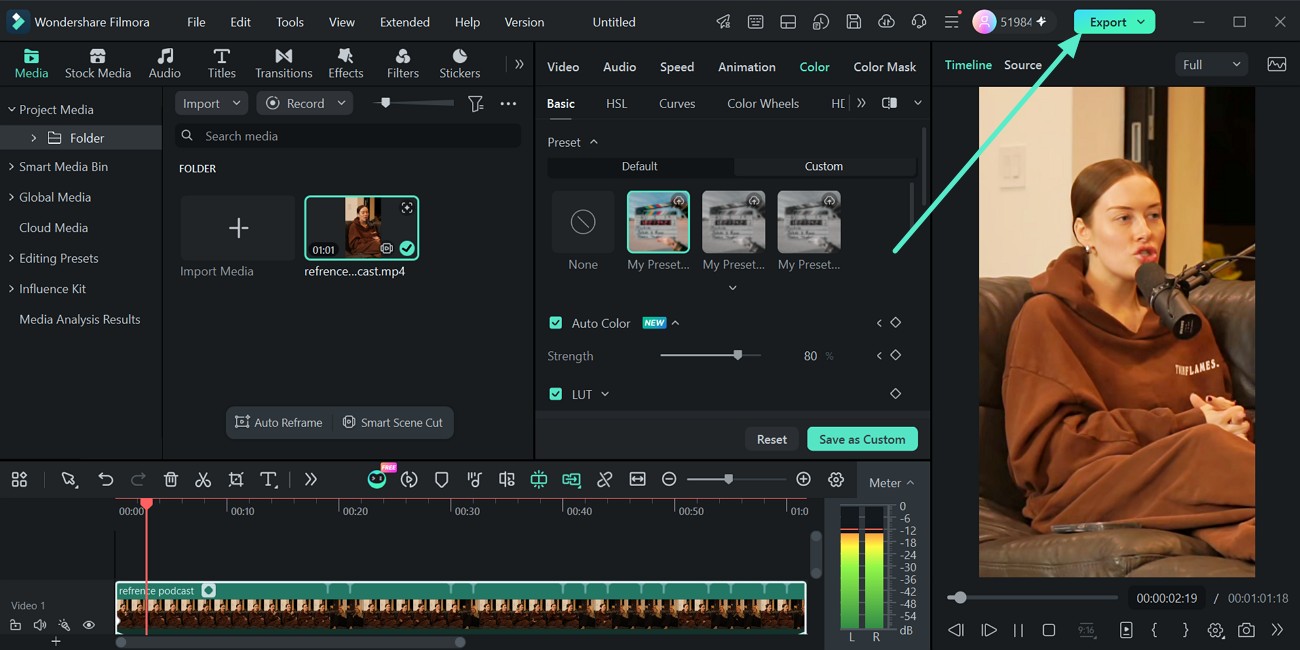
Step 5. Use Auto Color as a Faster Starting Point
If several basic color properties need adjustment, you can also enable Auto Color under Color > Basic.
Auto Color automatically adjusts the overall appearance of the footage. Use the Strength control to reduce or increase the result, then return to White Balance or Light controls for manual refinement.
For the complete workflow, see the Filmora Color Adjustment Guide for Windows or Color Adjustment Guide for Mac.
What If Only One Area Has the Wrong White Balance?
Mixed lighting can cause one region of a frame to have a different color cast from the rest. In that situation, changing the global white balance can fix one area while making another look worse.
For more targeted correction, use Filmora Color Mask to limit a color adjustment to a selected part of the frame.
FAQs About White Balance
-
What does white balance mean in video?
White balance adjusts the color balance of footage so neutral objects appear neutral under a particular light source. It is commonly used to correct unwanted warm, cool, green, or magenta color casts.
-
What is color temperature?
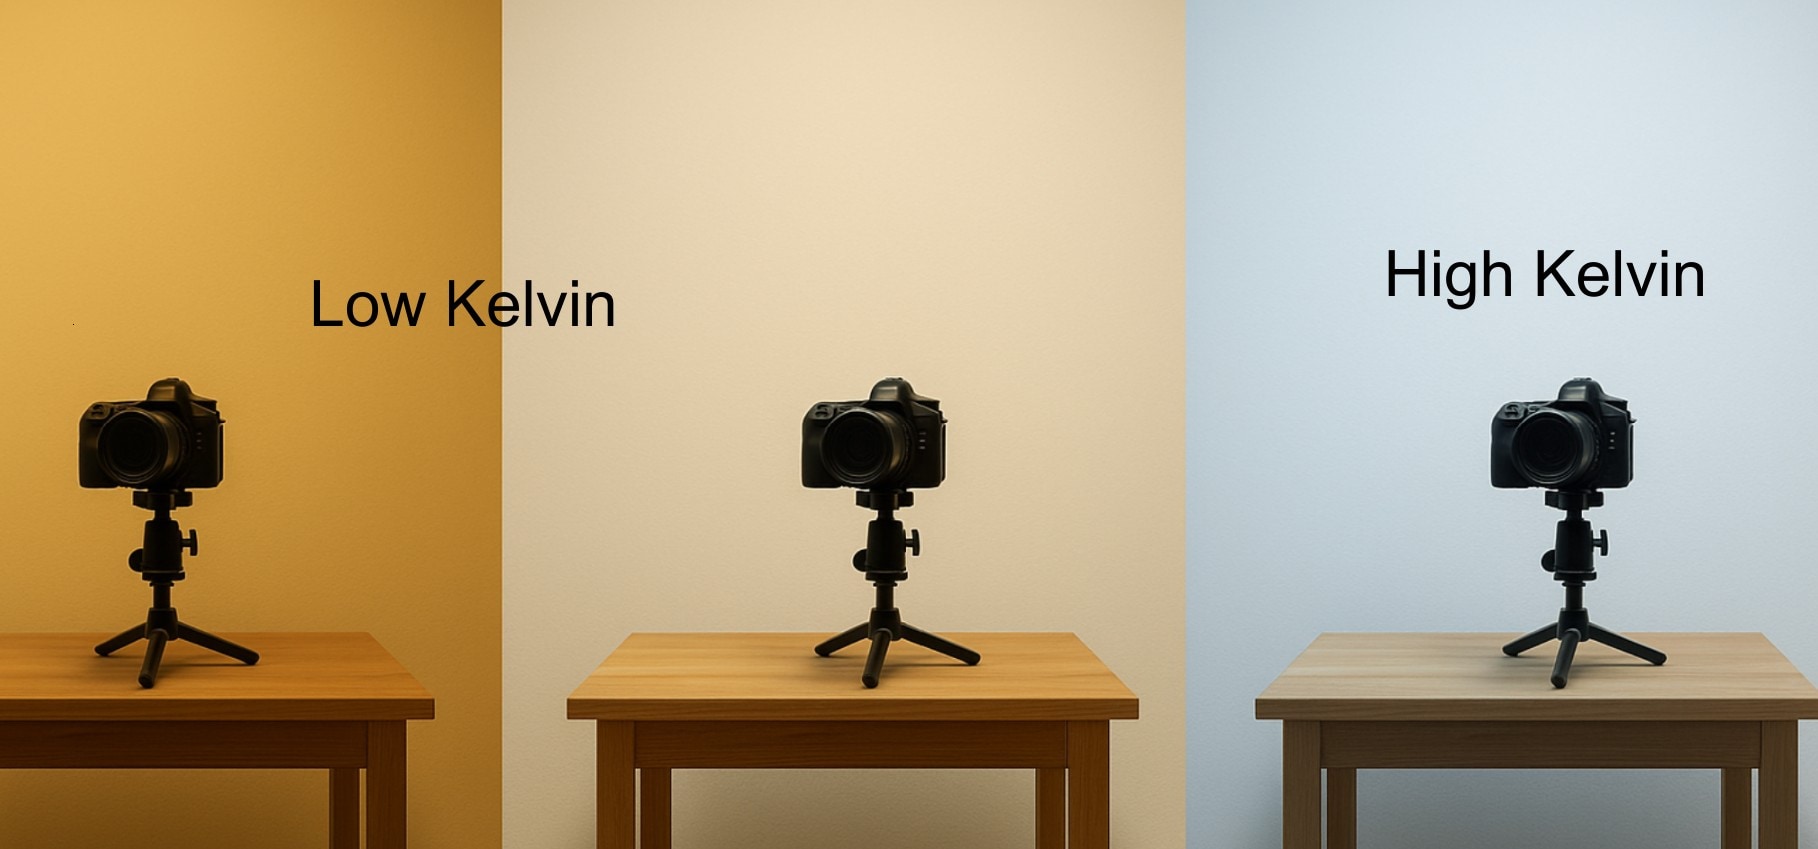
Color temperature describes the visual character of a light source and is measured in Kelvin. Lower values are generally associated with warmer-looking light, while higher values are associated with cooler-looking light.
-
Should I use Auto White Balance?
Auto White Balance is useful for quick shooting and changing environments, but it can shift during a shot. For scenes where consistent color is important, a fixed preset, custom white balance, or manual Kelvin value may produce more predictable results.
-
Can Filmora automatically fix white balance?
Yes. Under Color > Basic > Color, Filmora provides an Auto white balance option. You can also use the Eyedropper or manually adjust Temperature and Tint.
-
What is the difference between Temperature and Tint?
Temperature adjusts the image along a warm-to-cool range, while Tint corrects green-to-magenta color shifts.
-
Can white balance be fixed after recording?
Yes. Video editing software can adjust Temperature, Tint, and other color properties after recording. However, capturing a consistent white balance in-camera generally gives you a better starting point.
-
Why does mixed lighting make white balance difficult?
Different light sources can illuminate separate parts of the frame with different color temperatures. A single global white balance setting may therefore be unable to neutralize the entire image at once.
-
What should I do if only one part of the frame has a color cast?
Use a local correction rather than changing the entire image. In Filmora, Color Mask can restrict a color adjustment to a selected region of the frame.
Conclusion
Correct white balance helps maintain natural-looking colors, neutral whites, and more consistent skin tones across your footage. Whenever possible, establish the appropriate white balance during filming, especially when working with multiple cameras or controlled lighting.
When footage still has an unwanted color cast, Filmora lets you correct it under Color > Basic > Color using Auto, Eyedropper, Temperature, and Tint. You can then refine lighting manually or use Auto Color as a faster starting point before making additional adjustments.