

 TL;DR:
Picsart provides a fast, mobile-friendly solution for adding directional motion blur to still photos using customizable angle and distance sliders, but the specific Motion Blur tool requires a Pro subscription and relies on manual brushing to keep subjects sharp.
● The standard Motion Blur effect is restricted to Picsart Pro users, and because it functions as a 2D filter overlay, it lacks natural lens depth and may cause performance lag on older smartphones.
● Users must manually clean up the main subject using the in-app Brush tool to prevent a messy edit, as the AI masking can leave halos or rough outlines around the unblurred areas.
● Wondershare Filmora serves as the necessary alternative for video edits, offering timeline controls, motion tracking, and realistic motion blur for moving footage that Picsart cannot handle.
Ask AI for a summary
 ChatGPT
 Perplexity
 Gemini
 Claude
 Grok
Grok
A still photograph may look good, but if it illustrates the direction and speed of a moving subject, it works better. This is why many use the Picsart motion blur to create portraits, sports shots, car photos, dance edits, and more. Picsart makes it easy to get started with its blur tools, which allow quick edits. It enables a beginner to create a motion effect without getting involved in the complex editing process.
This guide reviews the motion blur effect in Picsart, shows how to apply it, and explains where it works best for creative photo edits.
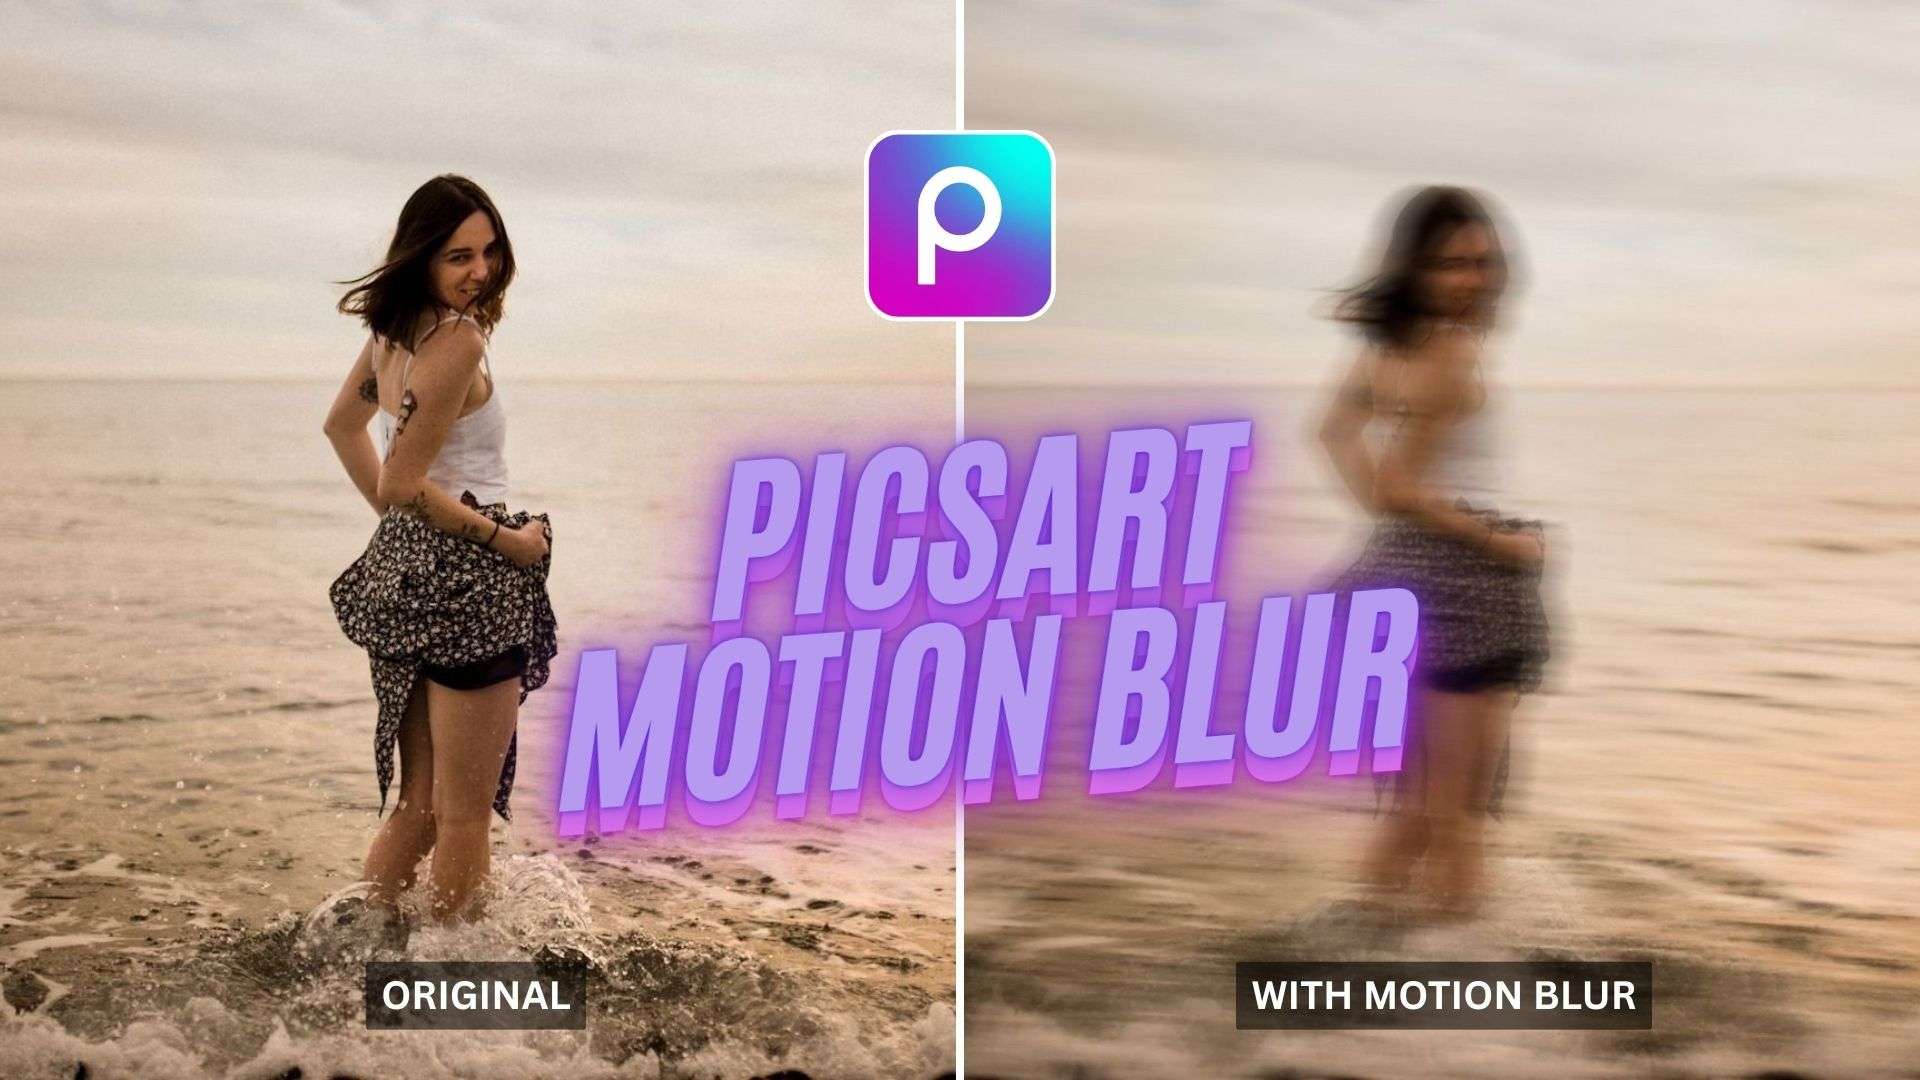
Part 1. What the Motion Blur Effect in Picsart Can Do
The Picsart motion blur effect changes how movement is rendered in a photo. Instead of keeping every part of the image sharp, it stretches selected areas into soft motion lines. These lines help guide the viewer's eye and make the subject feel more active. The effect works best when the blur supports the subject's natural path rather than covering the entire image.
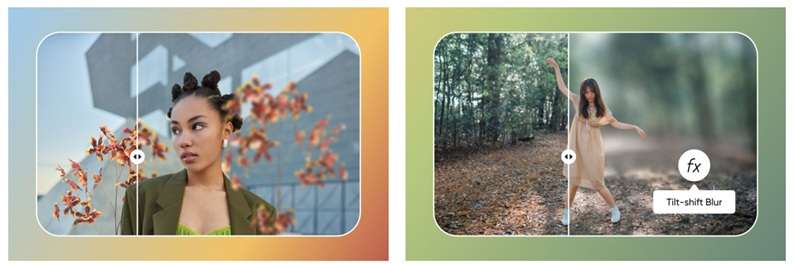
What the Motion Blur Effect Can Do
- Add a High-Speed Look: Picsart's motion blur effect can transform a picture into one from a long exposure. The motion is lengthened in one direction to make the subject appear faster.
- Follow the Subject's Path: You can change the blur angle to match the subject's movement. For example, a side blur can support horizontal motion, while a diagonal blur can make a jump or action pose look stronger.
- Control How Strong the Blur Looks: With Picsart, you can control the blur distance and how smoothly it integrates into the photo. This enables you to maintain the clarity of the image.
- Create Blurry Face-Style Edits: Creators also use Picsart motion blur to blur only the face while keeping other parts of the photo clearer. This creates a trendy artistic effect without changing the entire background.
Part 2. How to Do Motion Blur in Picsart
The next stage is to employ the effect properly if you are aware of what it may do to your picture. To apply the Picsart motion blur to your image, simply follow these instructions.
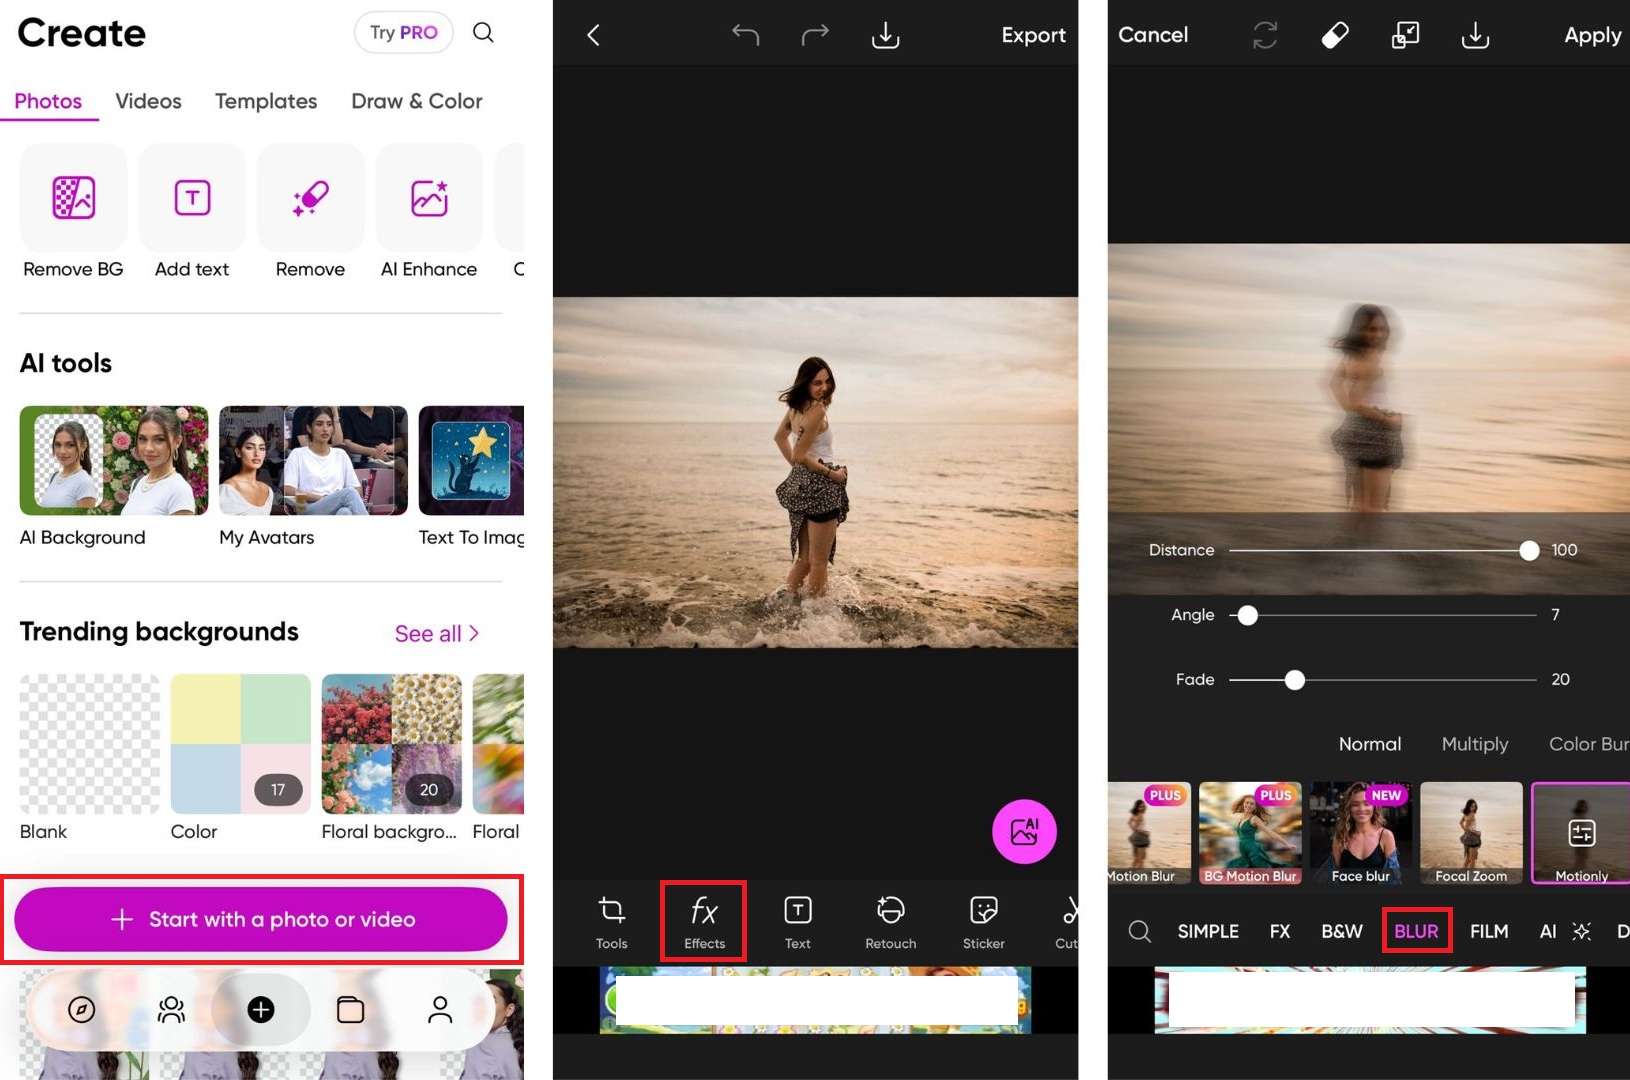
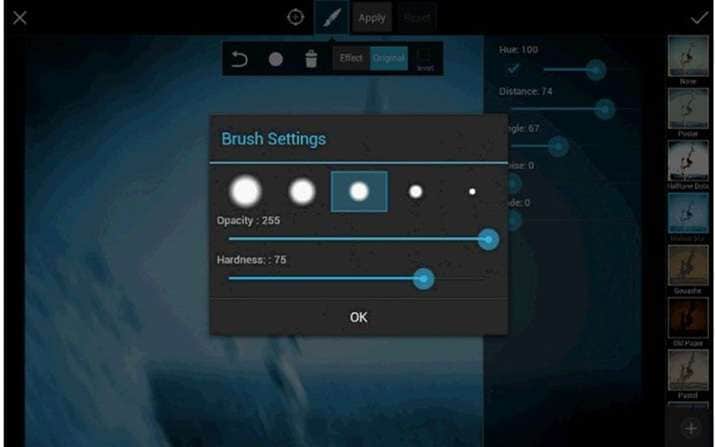
Part 3. Picsart Motion Blur Pros and Cons
The motion blur in Picsart is ideal for quick creative edits; however, it has its limitations. Before making it your go-to blur tool, it is worth knowing its strengths and weaknesses.
- Easy to Use on Mobile: The basic motion blur effect in Picsart's mobile app lets users create quick edits without a desktop setup.
- Good Control Over Movement: You can adjust the blur direction and trail length using sliders such as Angle and Distance. This helps match the blur with the subject's movement.
- Helps the Subject Stand Out: Through the use of the Erase tool or AI masks, users can erase the blur on the main subject, leaving the background streaked.
- Adds a Real Action Feel: The effect can copy the look of camera techniques like panning or slow shutter speed, giving still photos a more dynamic feel.
- Supports Creative Styling: Picsart also allows styling with fade controls and other blend modes like Multiply and Color Burn. These options can add a softness, dreaminess, or artistic style to the blur.
- Can Look Flat: The effect is still a 2D filter overlay. It may not show the same depth, lens behavior, or natural perspective as real in-camera motion blur.
- Needs Manual Cleanup: AI masking may not always catch the edges perfectly. You may need to brush around the subject by hand to avoid halos or rough outlines.
- Harder to Adjust Later: If you finalize the effect without using a separate layer or careful masking, changing the blur strength later can be difficult.
- May Slow Down Older Phones: When large image files or numerous blurring effects are present, the app may lag, especially on old smartphones.
- Free Version Can Interrupt Editing: Users on the free version may see full-screen ads that can break the editing flow when applying the Picsart motion blur.
Bonus: Easier and More Advanced Alternative for Motion Blur Editing
While Picsart does a great job for photo blur effect, it can feel restrictive when the edit requires smoother movement, better control, or a video-based result. Using Wondershare Filmora to create motion blur allows users to be a bit more flexible, yet without complicating the workflow.
Filmora is available on both mobile and desktop, covering different levels of editing needs. On mobile, applying motion blur is as simple as a single tap. On desktop, Filmora also offers a dedicated Motion Blur feature that adds a more realistic sense of speed and movement to your clips, with full control over the range, intensity, and direction of the effect.
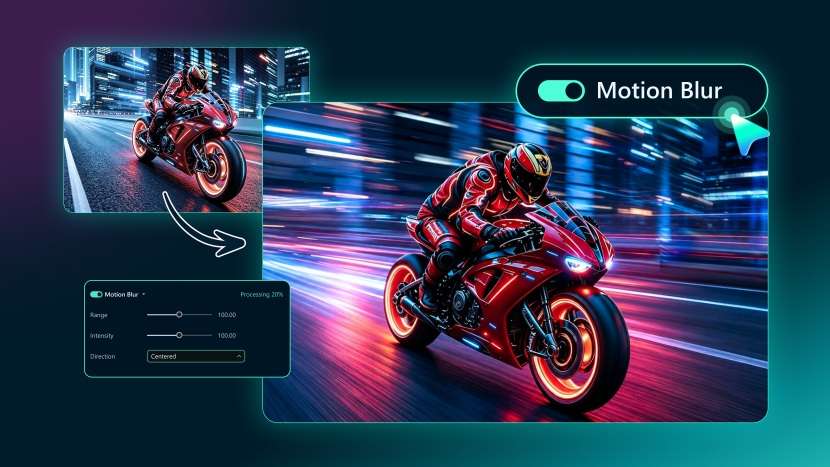
After applying motion blur in Filmora, you can make use of additional tools like trim, split, overlays, background removal, animation, filter, color adjustment, and more. Then, download the video and share it on social media directly.

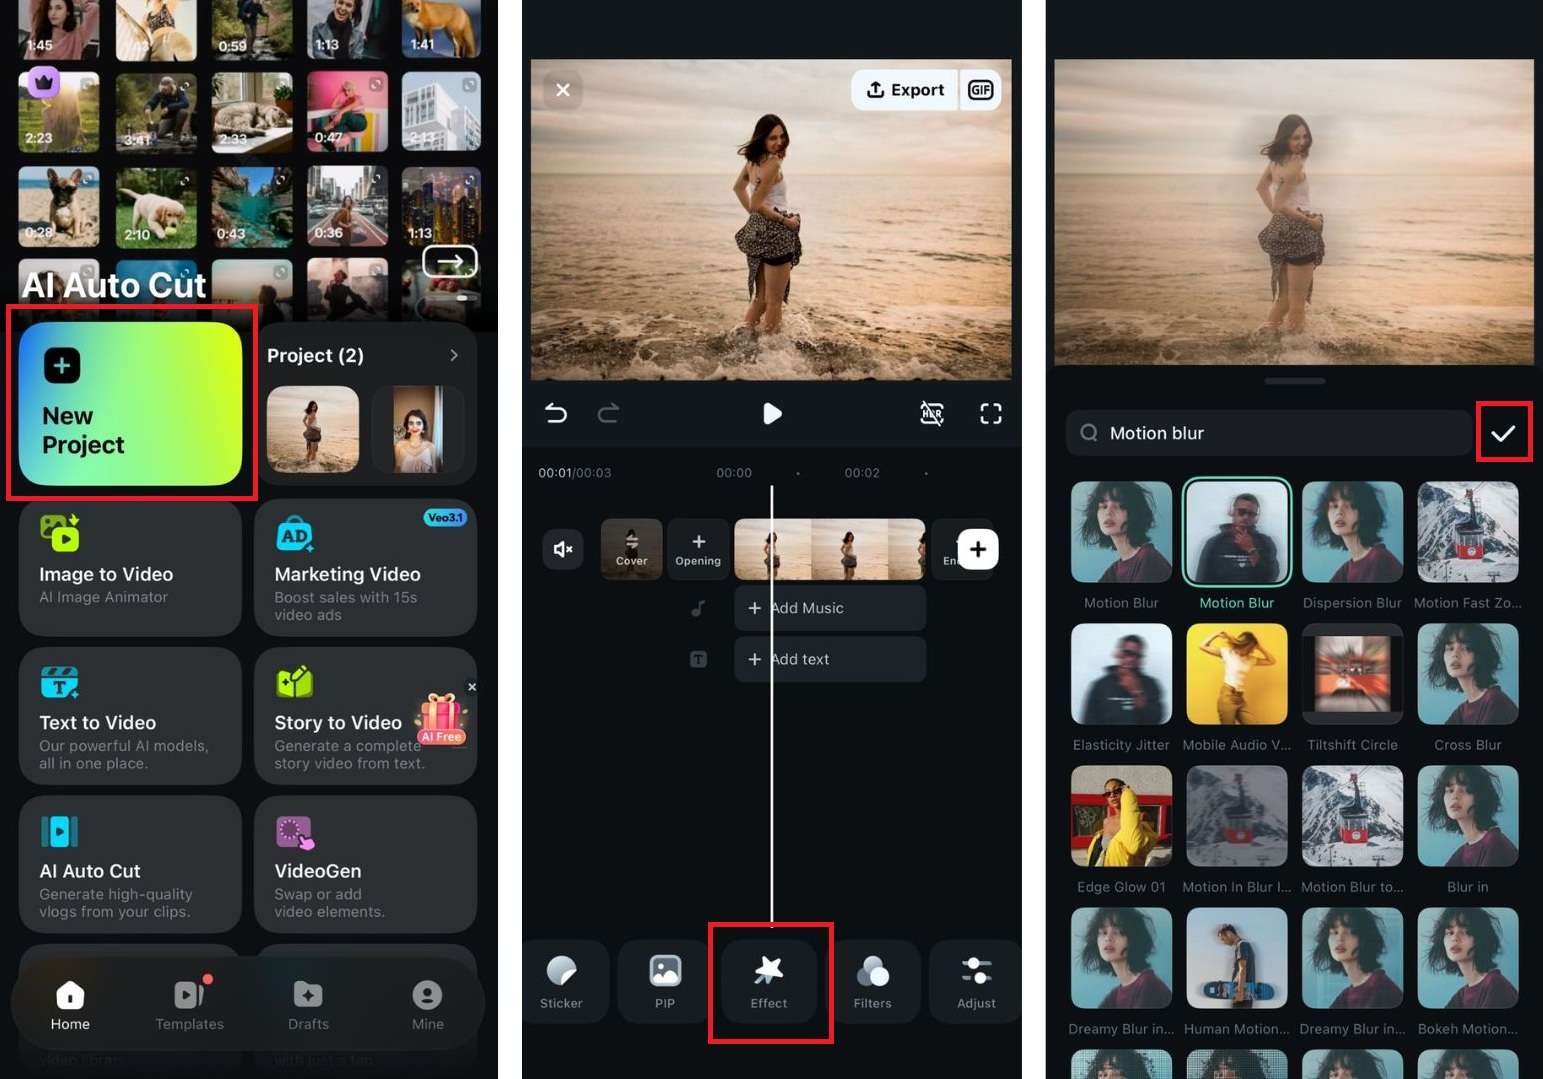
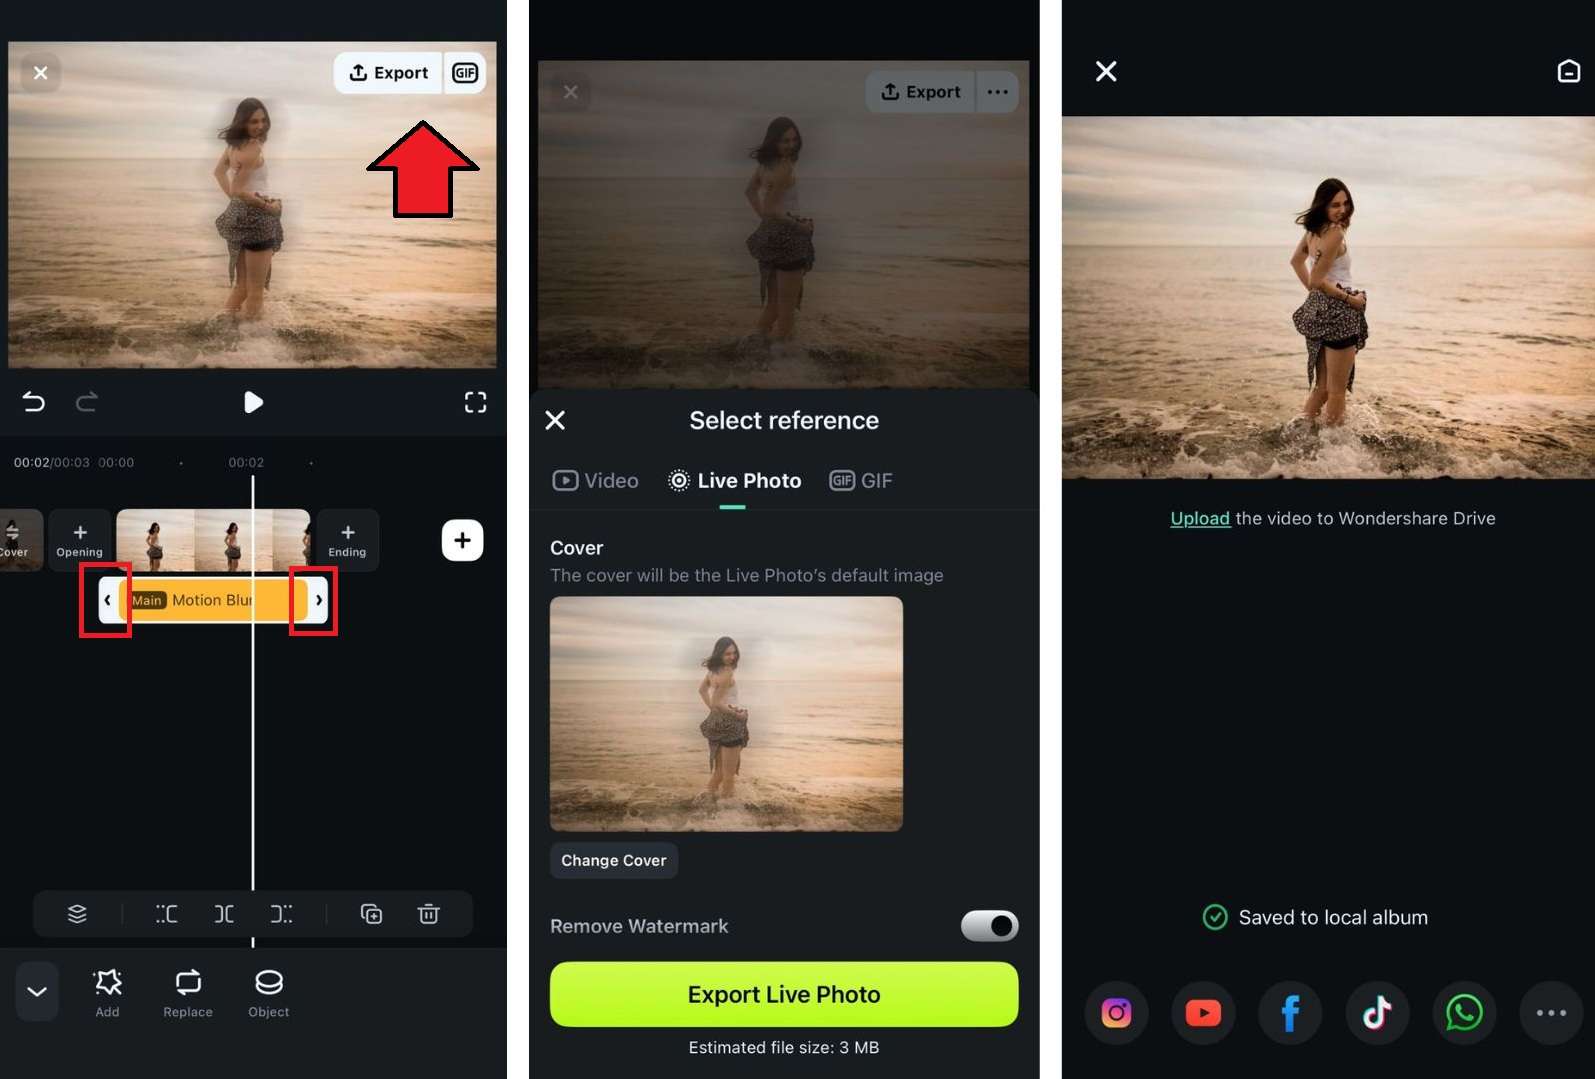
How to Add Motion Blur in Filmora APP
To apply motion blur in Filmora app, proceed as follows.
 Secure Download
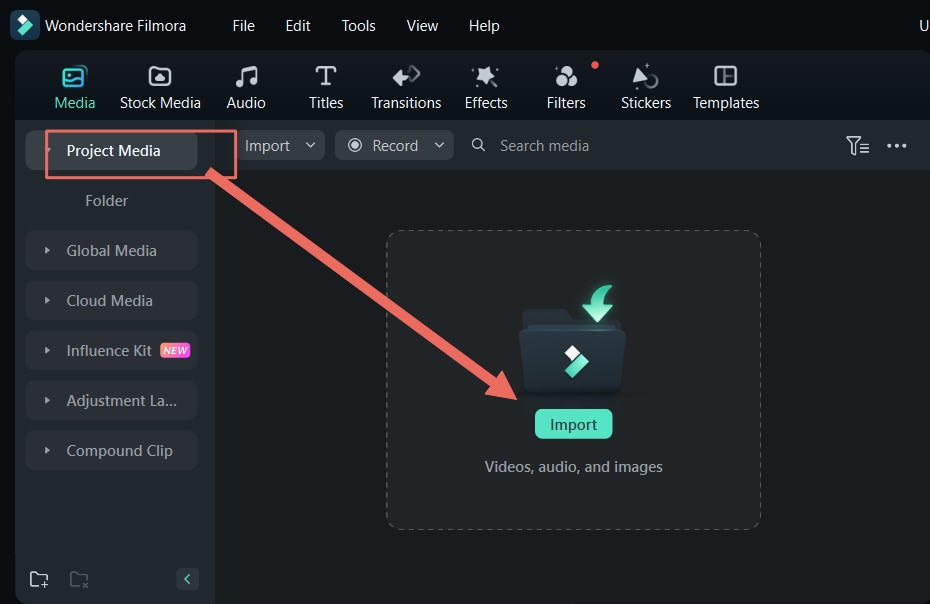
How to Add Motion Blur in Filmora Desktop
To apply motion blur in Filmora desktop, proceed as follows.
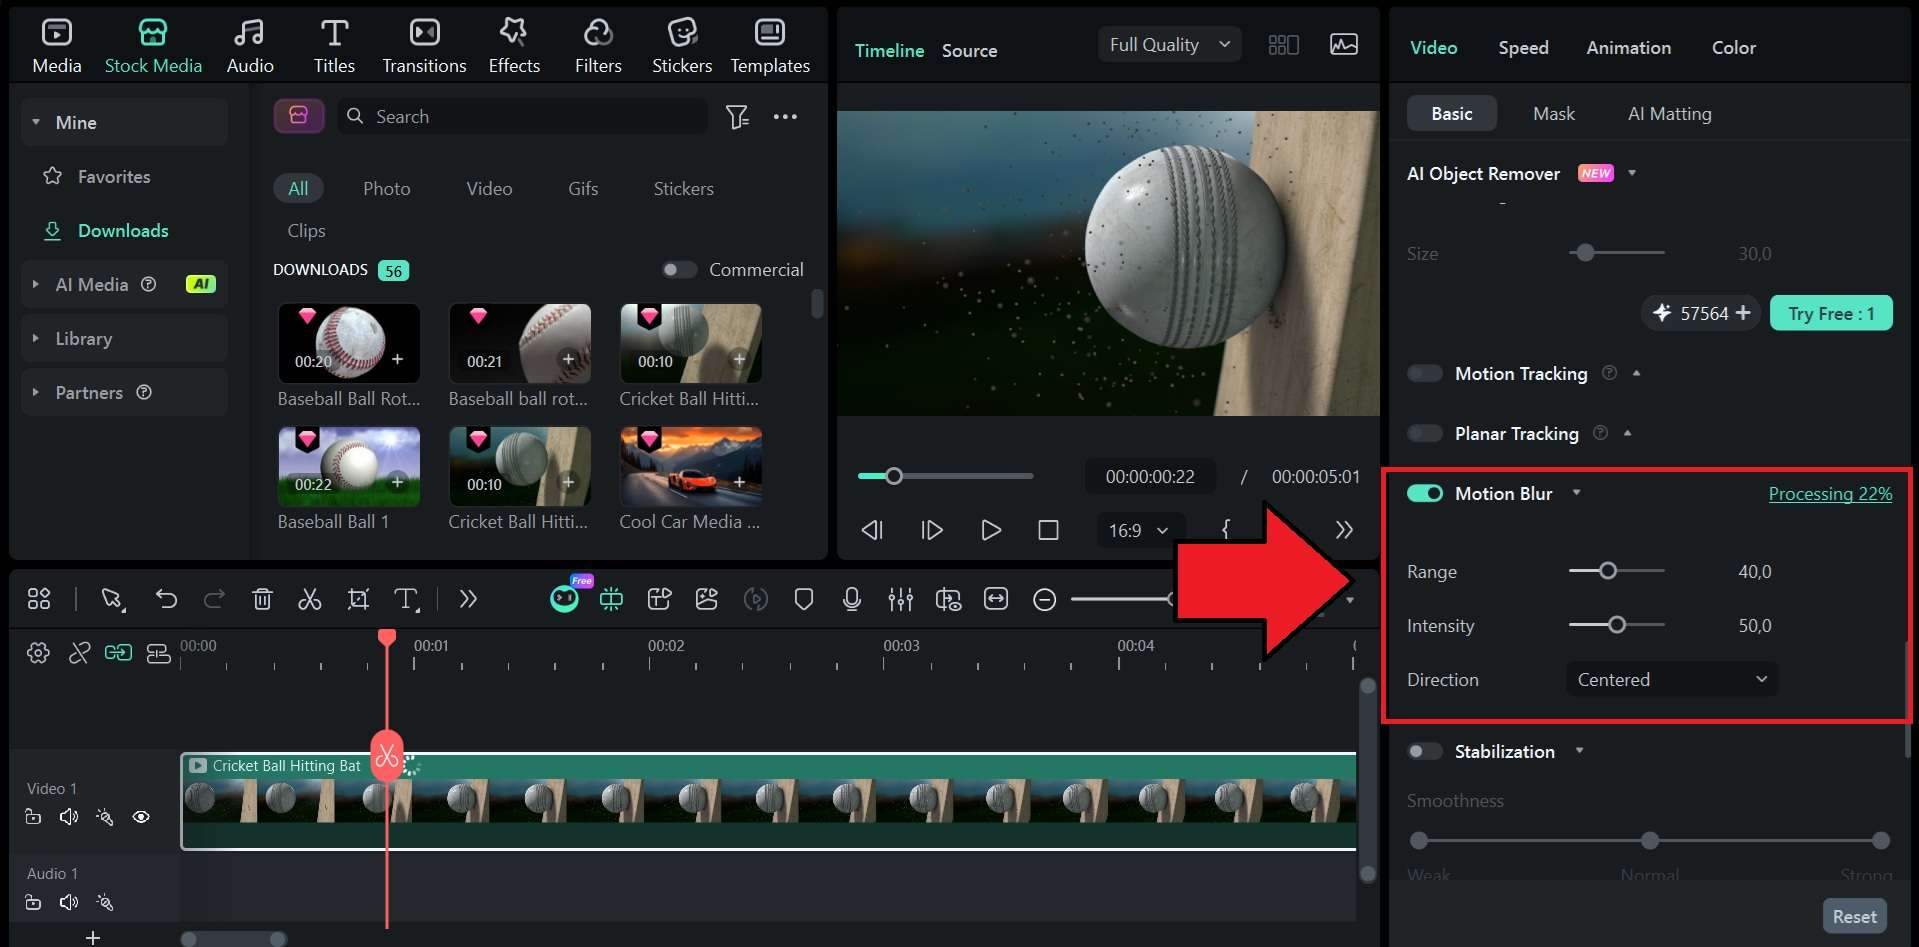
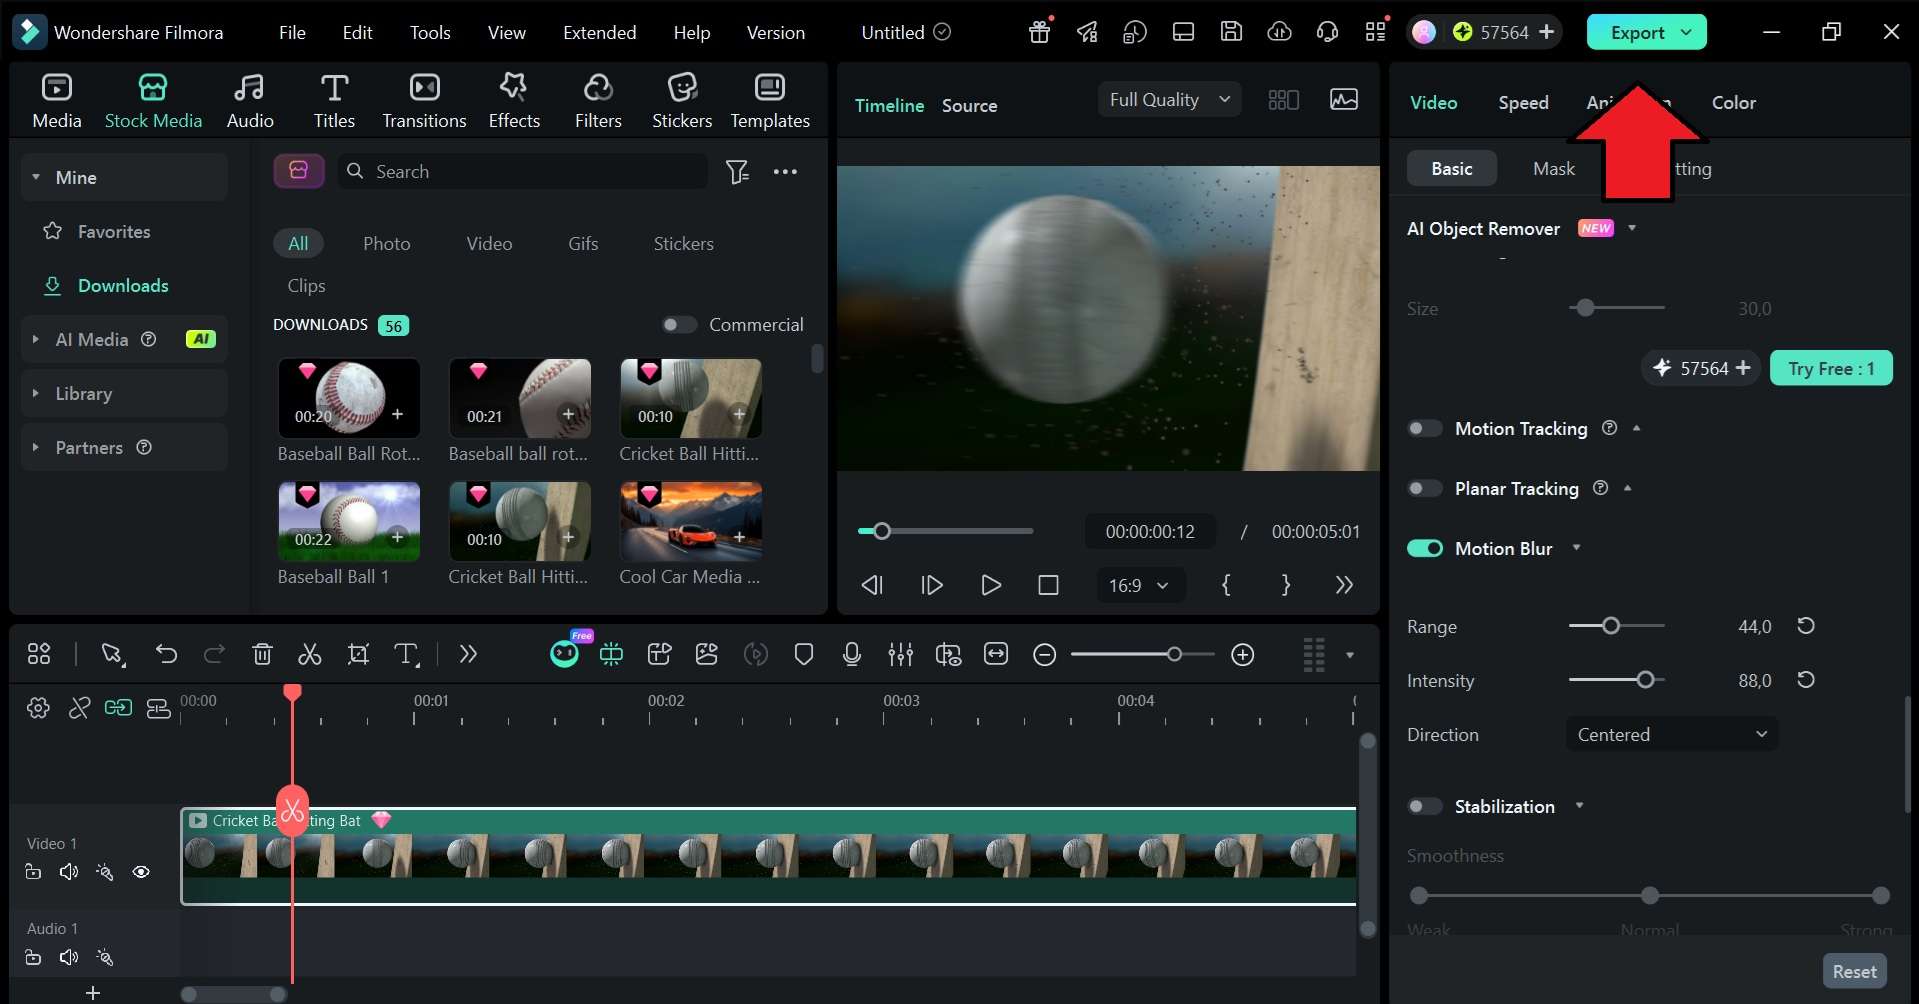 Secure Download
Conclusion
Picsart motion blur is a strong option for quick photo edits. It helps add speed, direction, and drama without forcing users into a complex editing workflow. For portraits, action shots, cars, dance photos, and social posts, Picsart gives enough control through blur direction, distance, fade, and brush-based cleanup. The best results come from using the effect lightly and keeping the subject sharp.
For video creators, Filmora is the stronger option. Picsart handles still-image blur well, while Filmora gives you timeline editing, motion tracking, transitions, and more control over moving footage. Its Motion Blur feature is particularly useful for keyframed animations, helping fast-moving videos, images, text, stickers, and other elements look smoother and more natural. So, use Picsart when you need a fast photo effect. Use Filmora when the blur needs to move, blend, or support a full video edit.
FAQs
-
1. Is the motion blur effect that Picsart offers free?
The standard Motion Blur effect in the Picsart app is only available for Pro users. However, you can still try other free blur effects in the app if you do not want to upgrade. -
2. Why does my motion blur edit look messy?
The blur may be too strong, the angle may not match the subject's movement, or the subject may not be cleaned with the brush tool. Keep the main subject sharp and blur only the areas that need movement. -
3. Can Picsart add motion blur to videos?
Picsart is more known for fast photo edits and visual creative tools. Filmora is better for video motion blur as it has timeline editing, effects, transitions, and motion tracking.
