
 100% Security Verified | No Subscription Required | No Malware


 ChatGPT
 Perplexity
 Gemini
 Claude
 Grok
Grok

Most social media content creators will be familiar with the name CapCut. It exploded on the scene a few years ago and is still one of the favorite editing tools, especially for short-form videos with lots of quick cuts and added effects.
Today, we’ll show you how to add CapCut transition effects to your videos in a step-by-step guide, but since there is another, more effective option, we will give you a bit of a bonus. That’s right! We’ll also cover how to apply these and several other effects in Filmora and why it’s a better choice.
In this article
How to Add Transitions in CapCut?
If you are going to make an engaging video, you need to keep your audience’s attention and offer plenty of exciting content in a short time, which means you’ll need a few quick cuts and the proper transitions between them.
CapCut has proven itself as a capable video editor in the last few years, and the process is relatively simple, as you’ll see in the following steps.
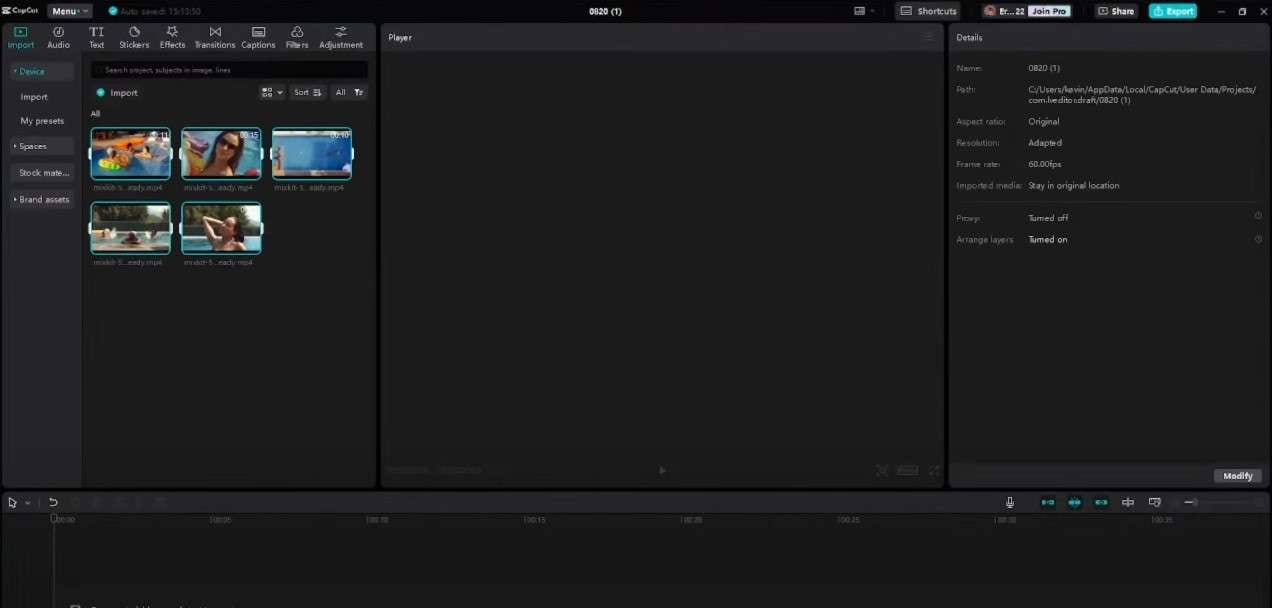
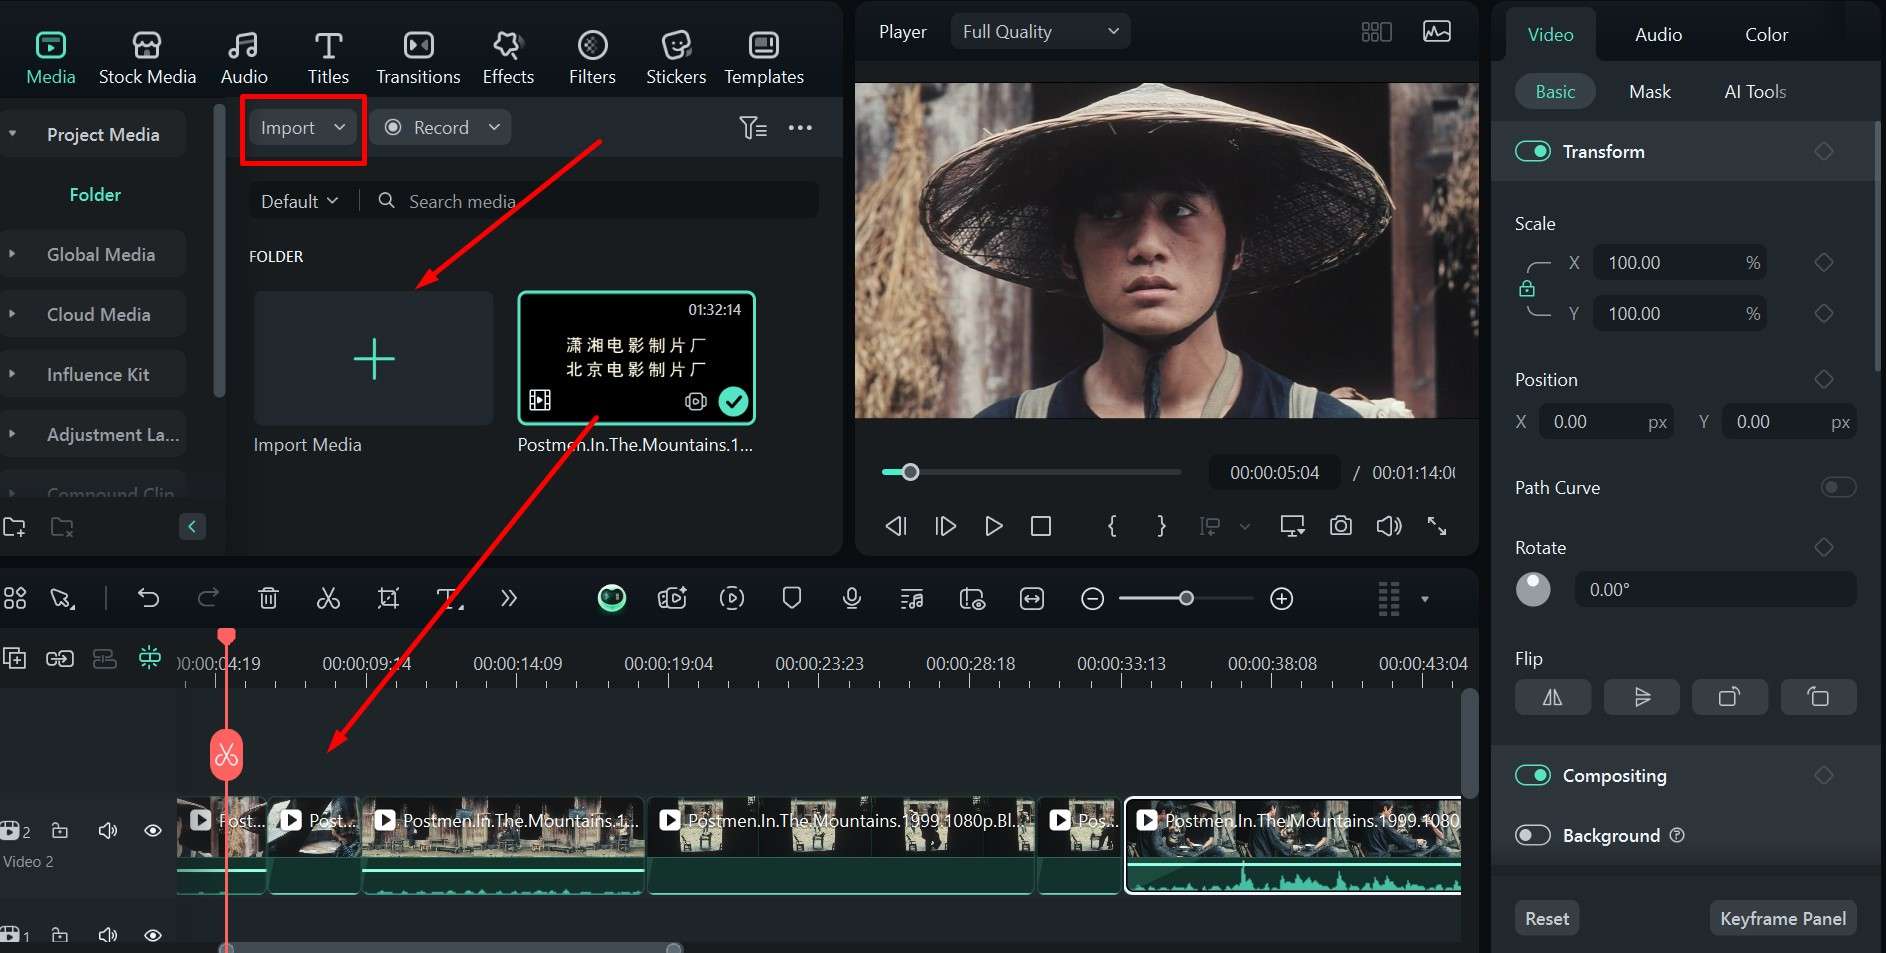
Step 1: Open the app, start a New Project, and Import the videos you want to edit.
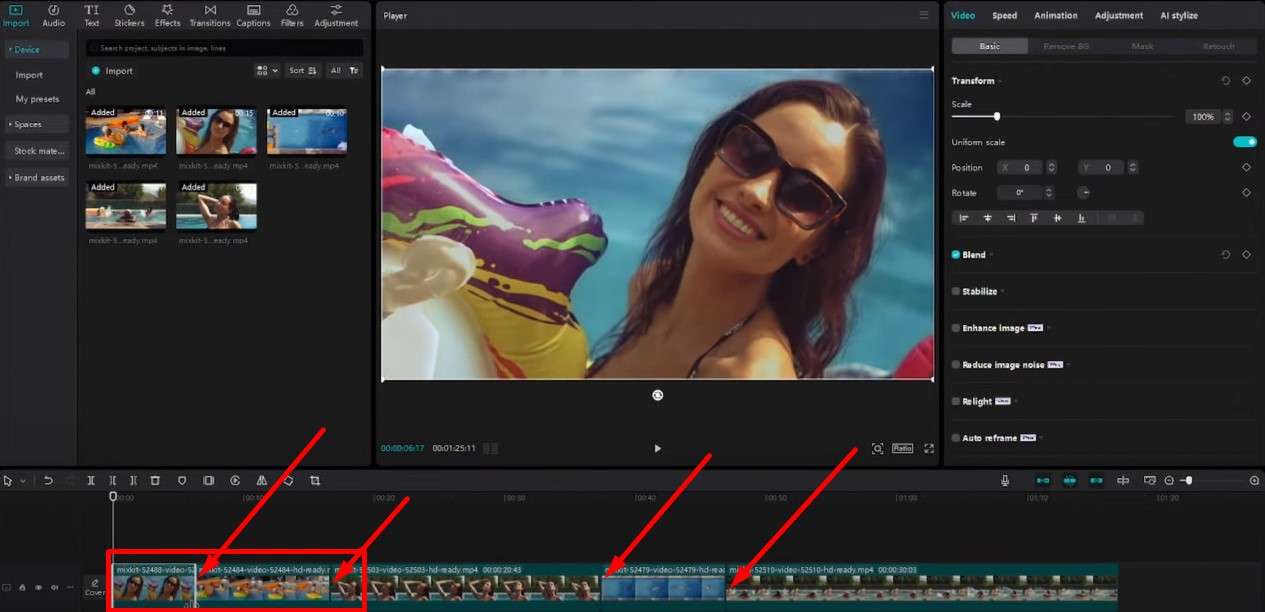
Step 2: Drag the clips down to the timeline and set them up in the order you want.
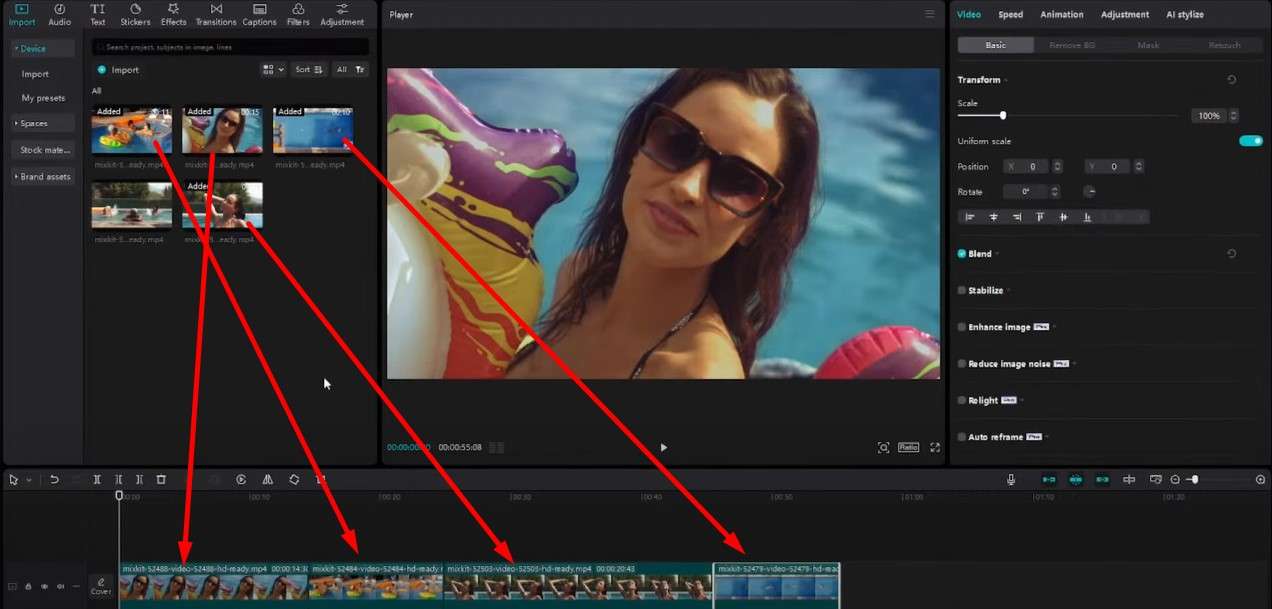
Step 3: You can move the edges of the clips to shorten or lengthen them and find the right moment where one should end and another should begin.
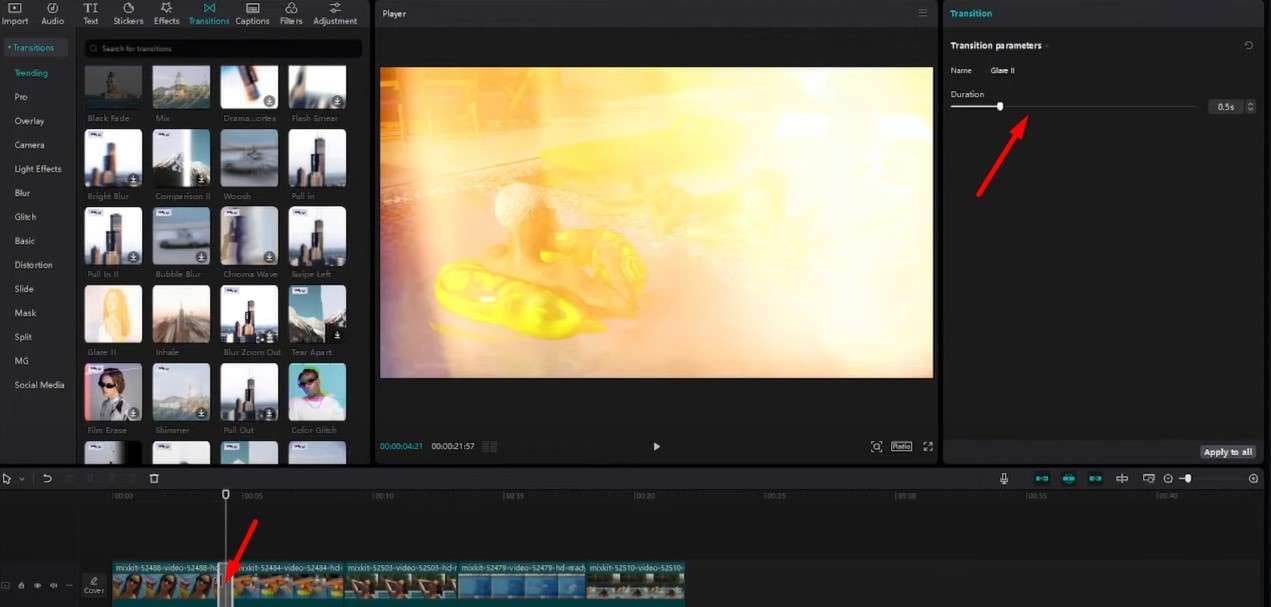
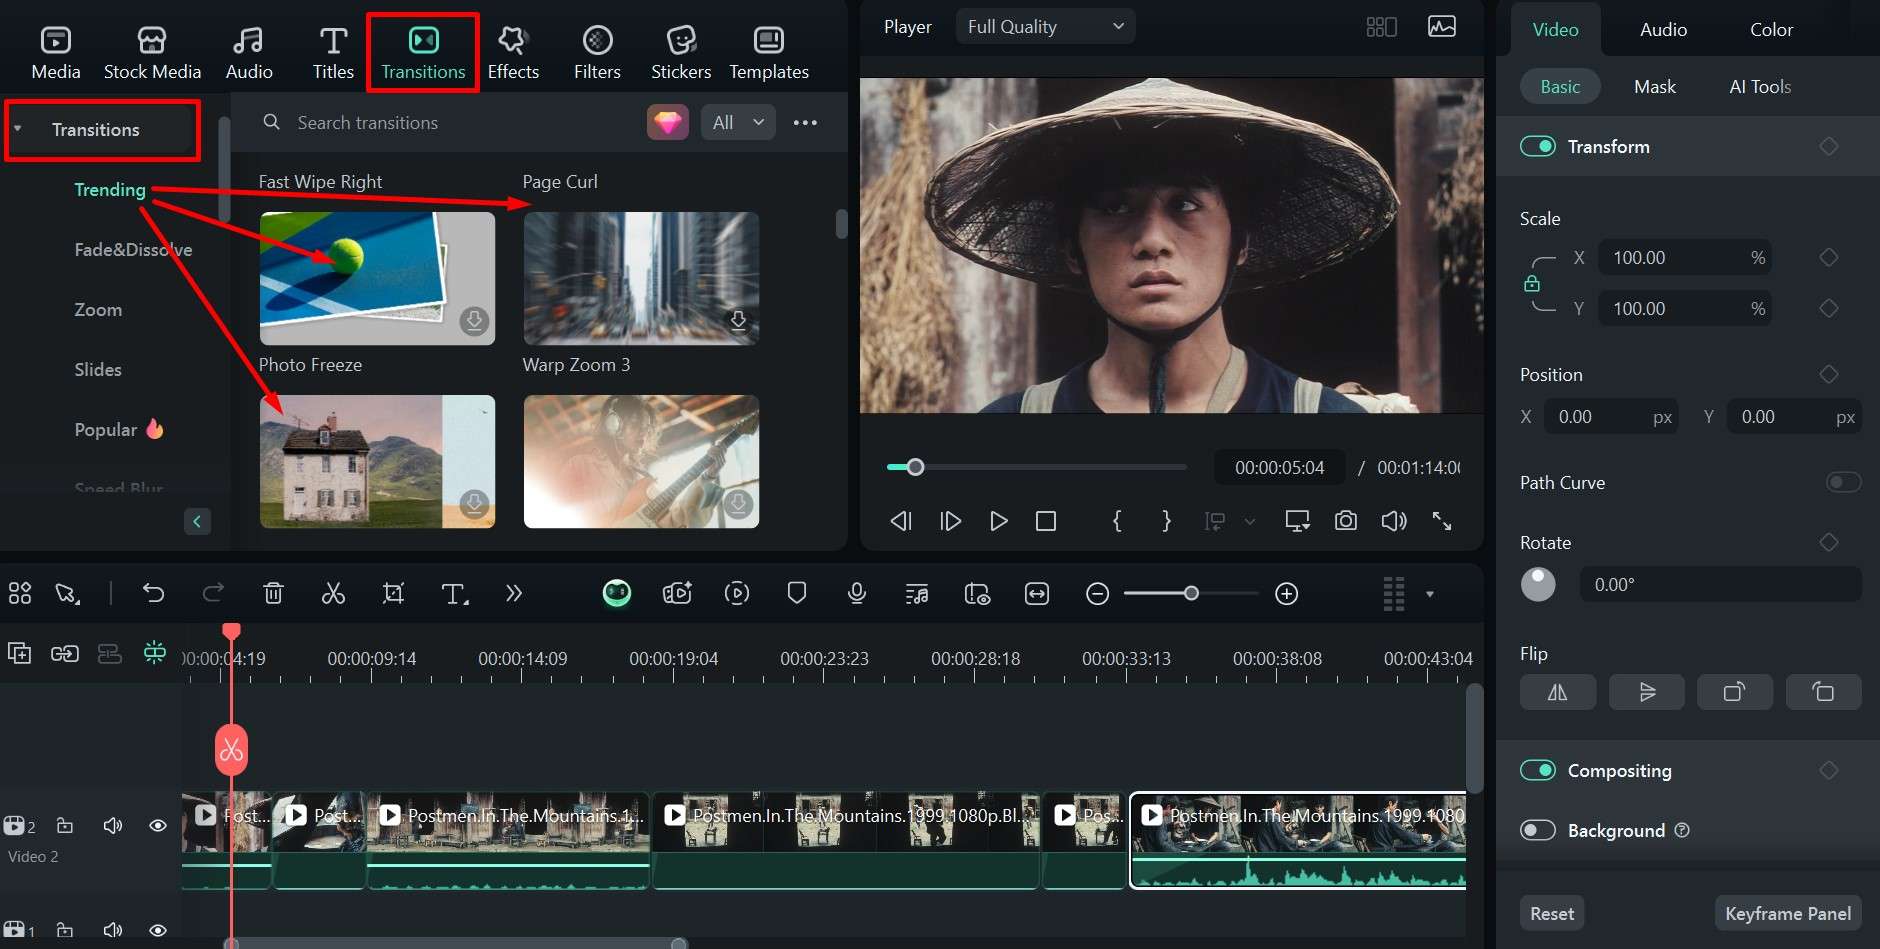
Step 4: Click on the Transitions tab. The menu on the left offers several different categories of transition effects, each with unique options.
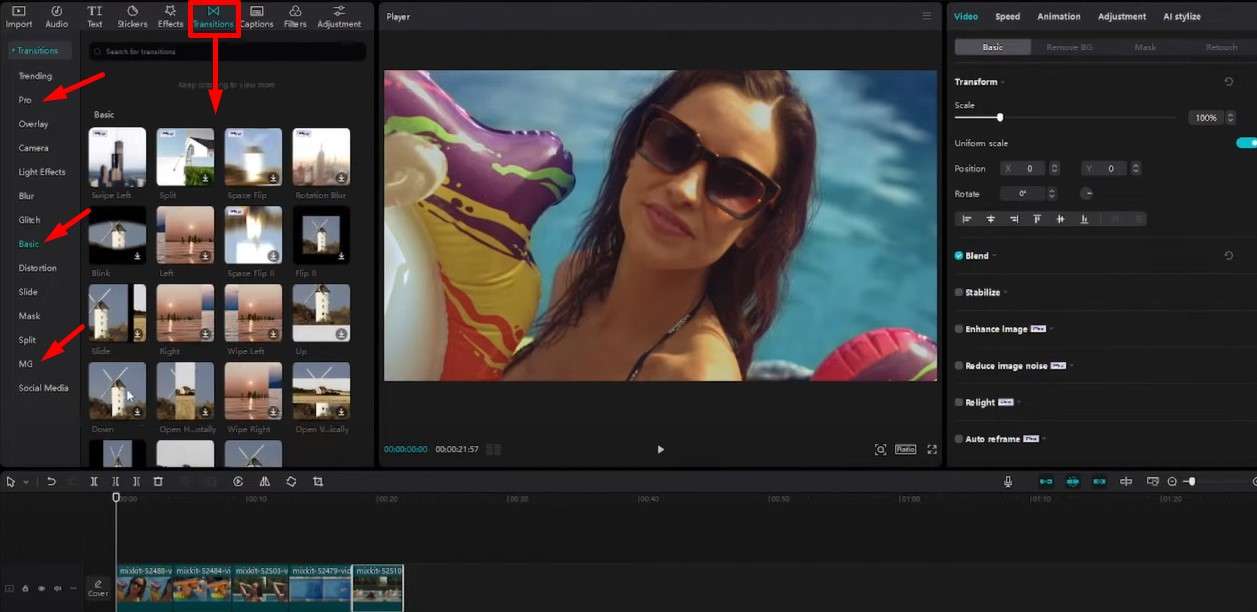
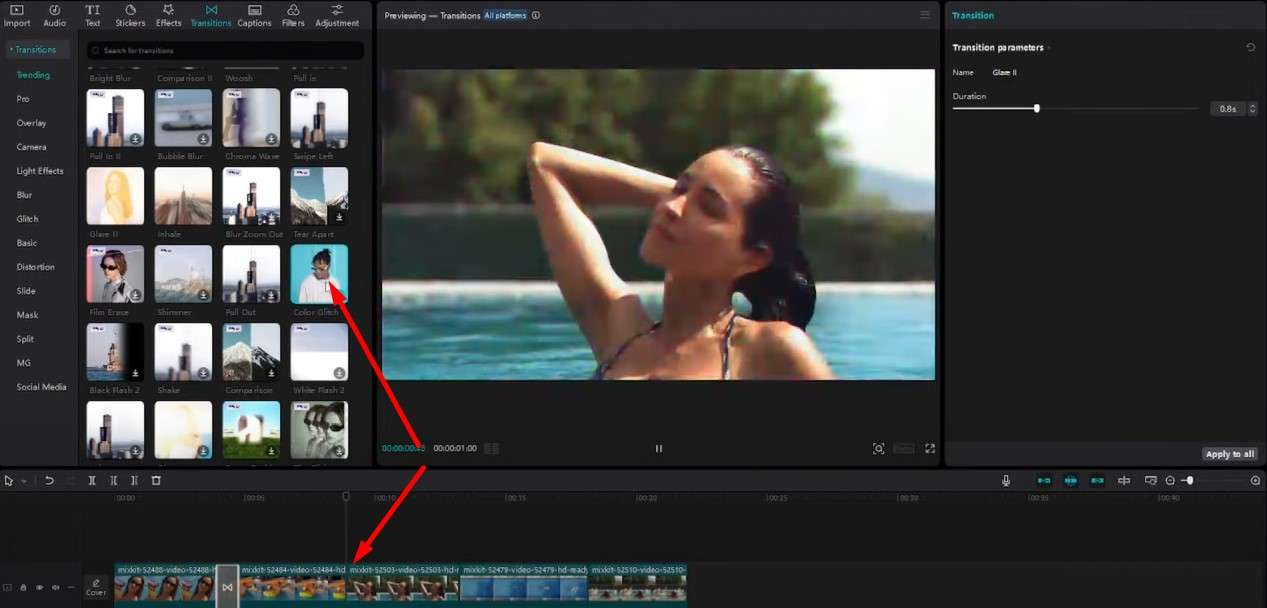
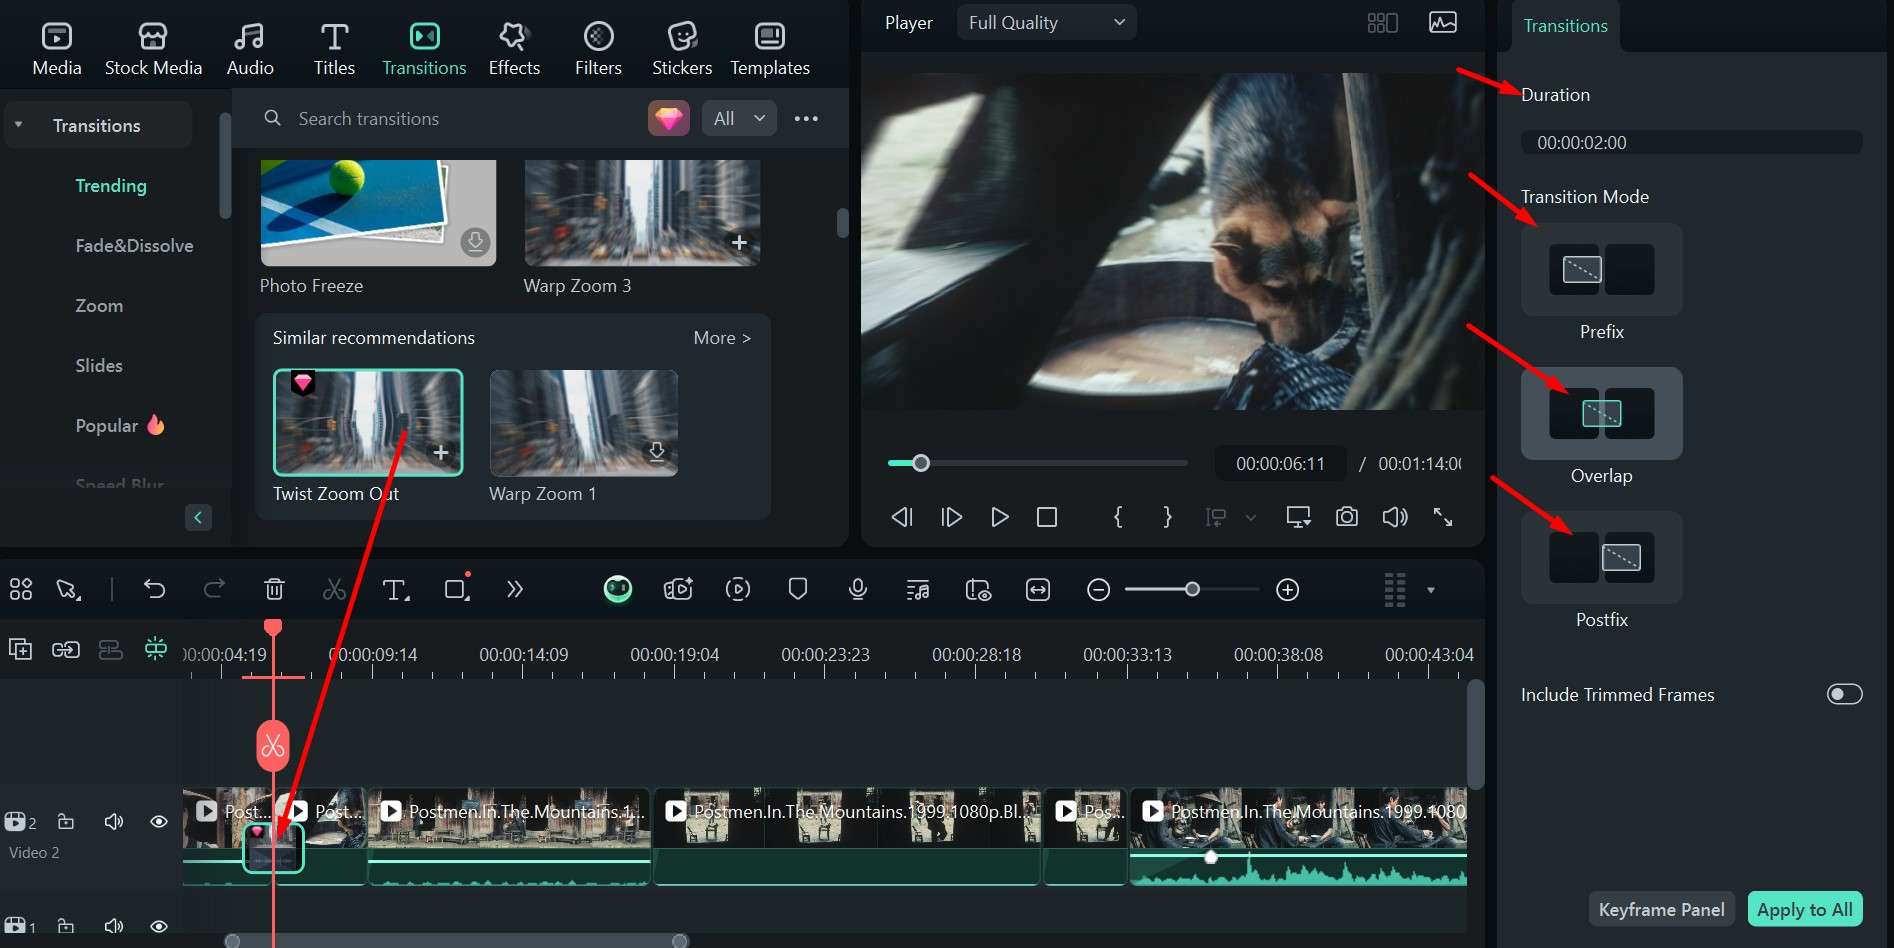
Step 5: When you find an effect you think would work well, move the playhead to the border of two clips and select it. You can play it to get a preview, switch between different ones, and set the duration.
Step 6: You can choose different effects for each transition and apply them as outlined in the previous step.
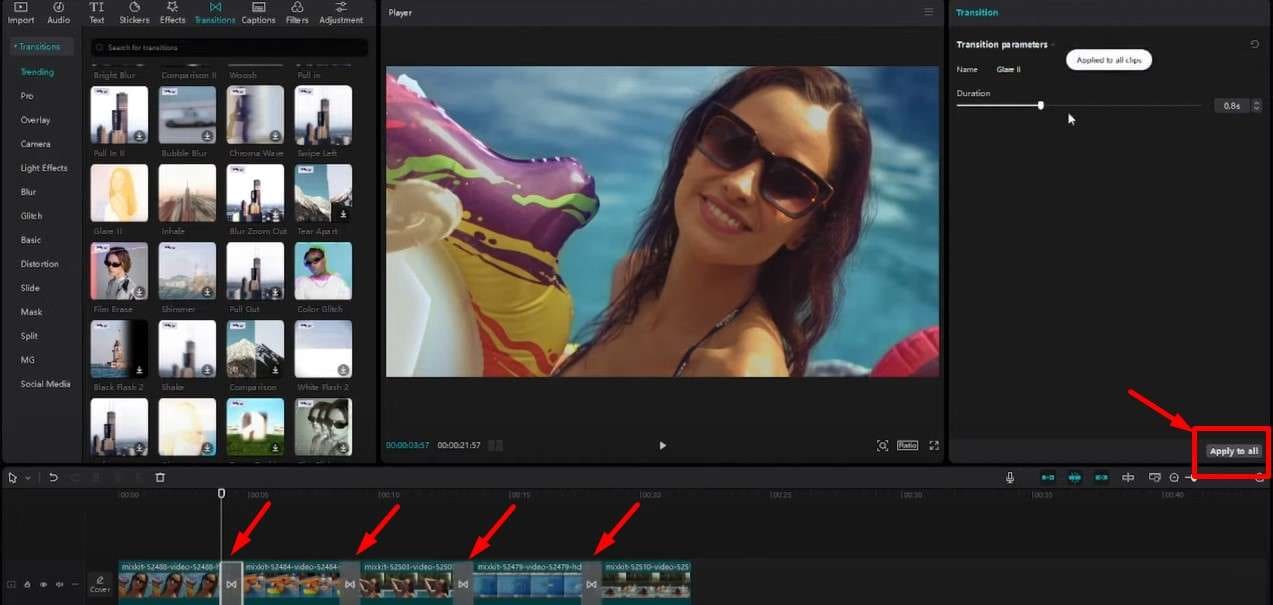
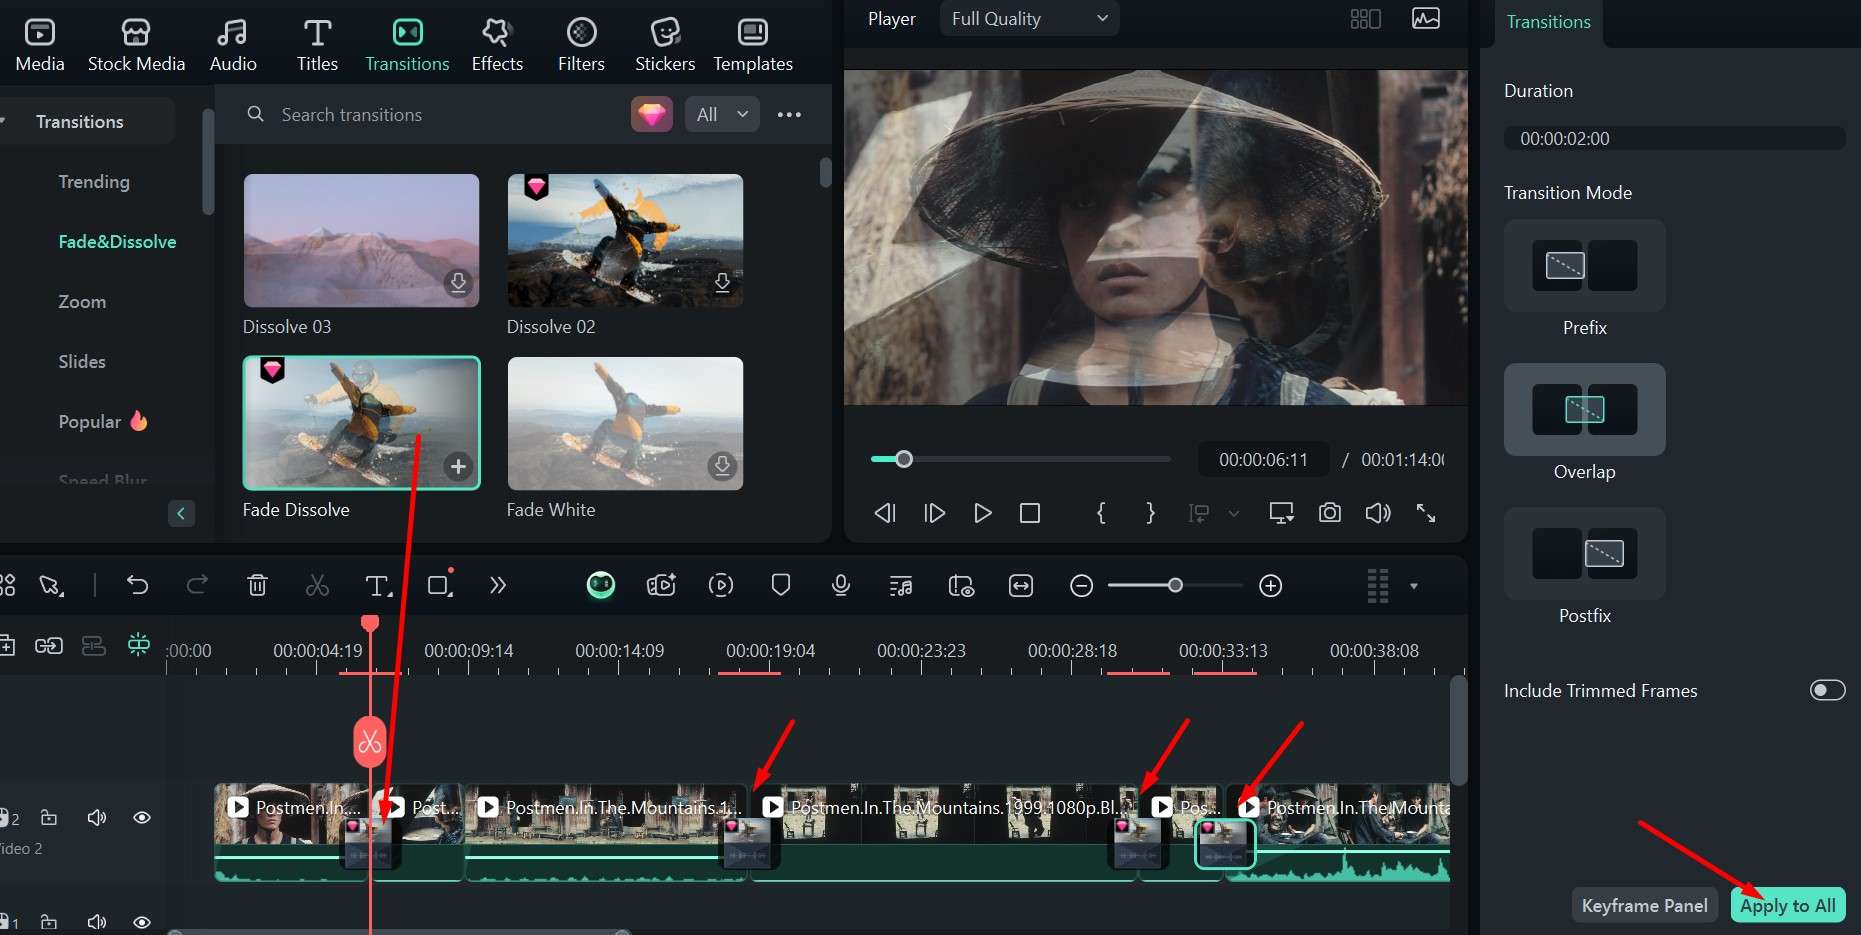
Step 7: If you are after consistency, you can click on a transition you are set on in the timeline and then click on Apply to all on the right side of the screen to add it to every edge between clips.
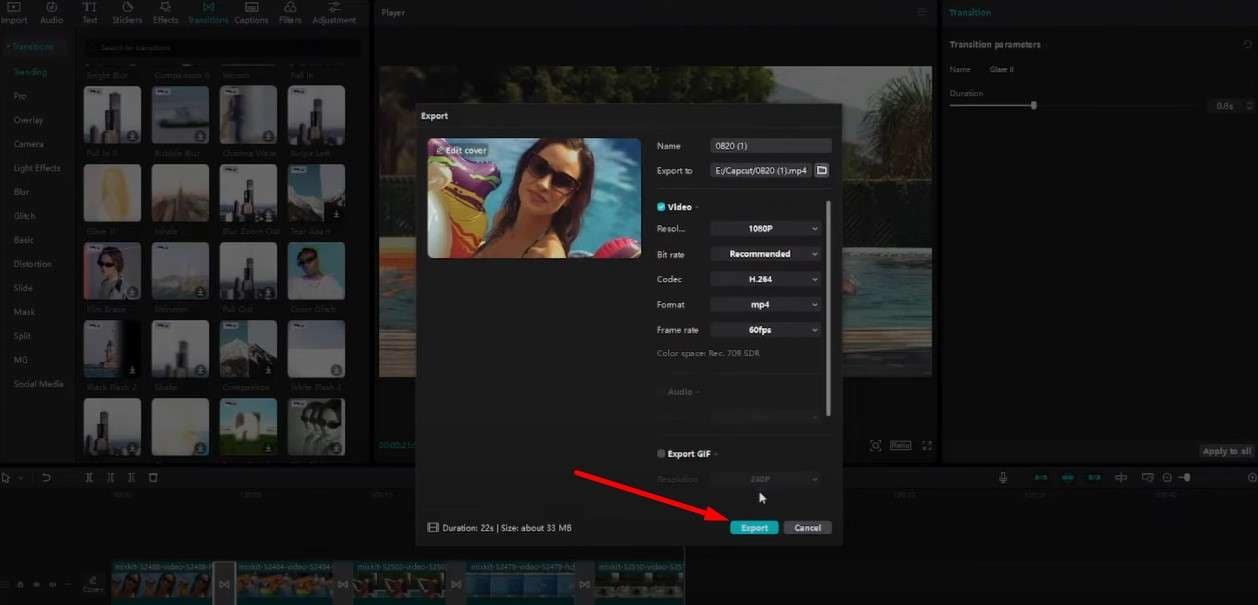
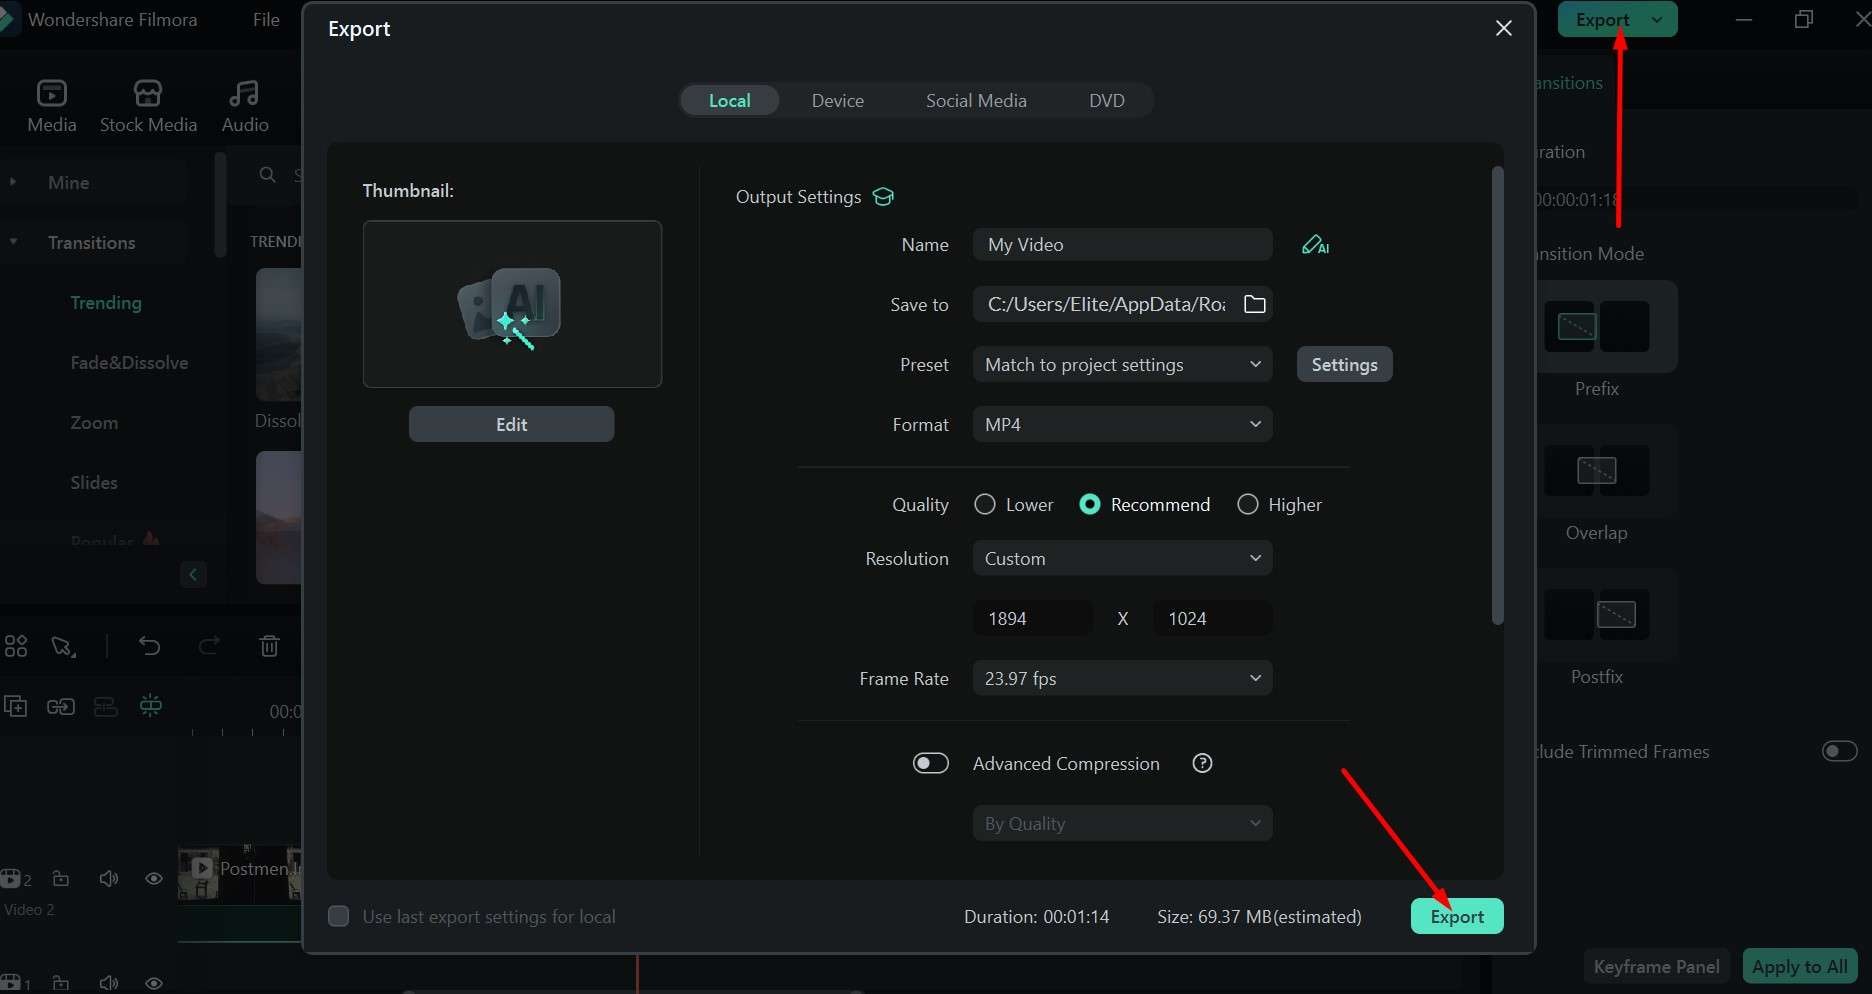
Step 8: When you are done, simply click Export in the upper right corner, choose the options you prefer, and confirm by clicking Export again in the pop-up window.
If we assume that you’ll probably be a bit overwhelmed the first time you try it out and that you’ll want to check out a lot of the effects, it will probably take 10–15 minutes to add the CapCut transition to your first 20-second video.
However, over time, you’ll find your favorites and get used to the process. You’ll be able to get things done in 5–10 minutes, even for longer-form content.
However, if you are looking for an incredibly user-friendly option with and a bunch of additional handy video-editing tools that only require you to click, drag-and-drop, and move a couple of sliders around, you should check out Wondershare Filmora.
How to Add Transition Effects in Filmora
This beginner-friendly software has an intuitive interface but also a lot of functionality that you’d expect from a professional video editing tool. It’s all about making the user’s life easier and providing exceptional production quality in just a few minutes of work.
We’ll show you just how quick and easy it is to get stunning clips using Filmora.
 secure download

Step 1: Open the app, import your clips, and put them on the timeline.
Step 2: Go to the Transitions tab, and on the left side, you will see a dropdown menu where you can choose from different categories like Fade&Dissolve or Popular, with lots of effects in each.
Step 3: Pick an effect that you like and drag it to the position between two clips – it will automatically stick in place. You can now choose the duration and optimize the look of the transition with the options on the right.
Step 4: You can also choose a transition and click the Apply to All button in the lower right corner to add it in between every clip.
Step 5: Once you’re satisfied with the results, you can click Export in the upper right, then choose your preferred options in the pop-up window and go to Export.
Now that you’ve made some cool transitions, you can move on to some of the other customization options that Filmora offers. Let’s have a look at some of the most effective ways to add more style and production value to your content.
Try Cool Title Animations to Make the Perfect Intro Sequence
You usually need something right at the beginning of the video to grab the viewer’s attention or to add some context to what’s about to happen on screen, and adding an animated title is the perfect way to do it. It’s also quite easy, especially if you’ve already loaded all the clips and added the transitions.
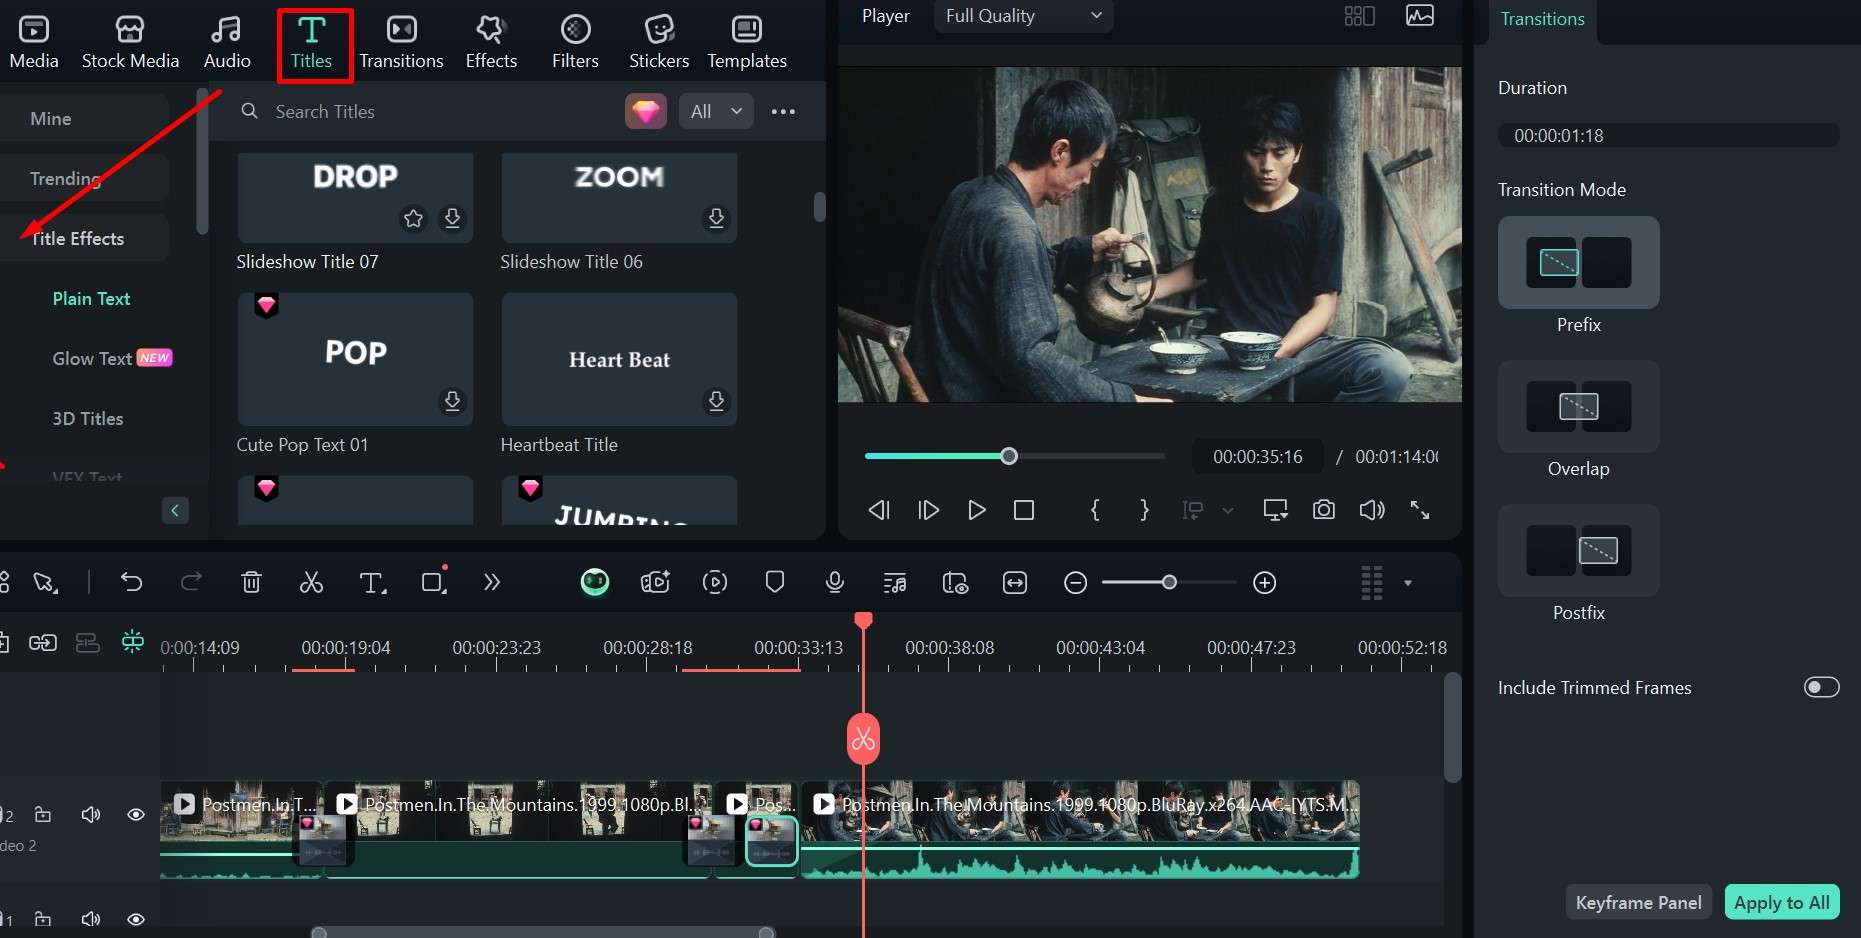
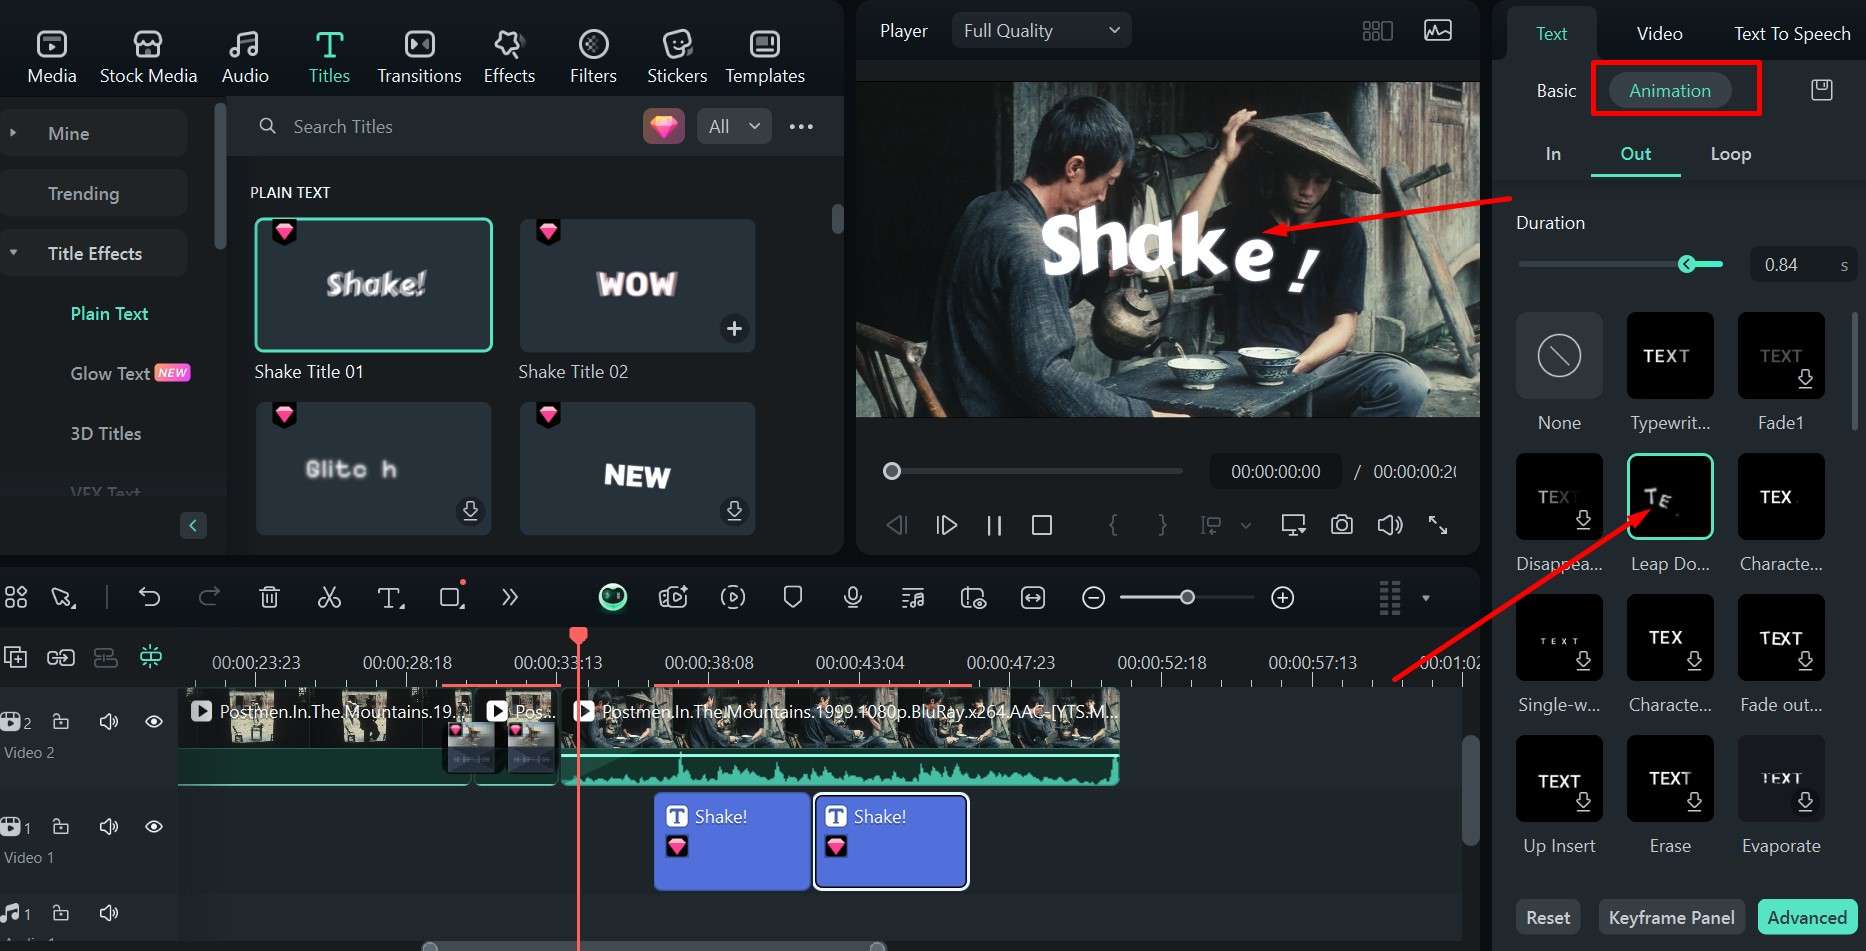
Step 1: Go to the Titles tab and click Title Effects to open a dropdown menu with lots of cool options.
secure download
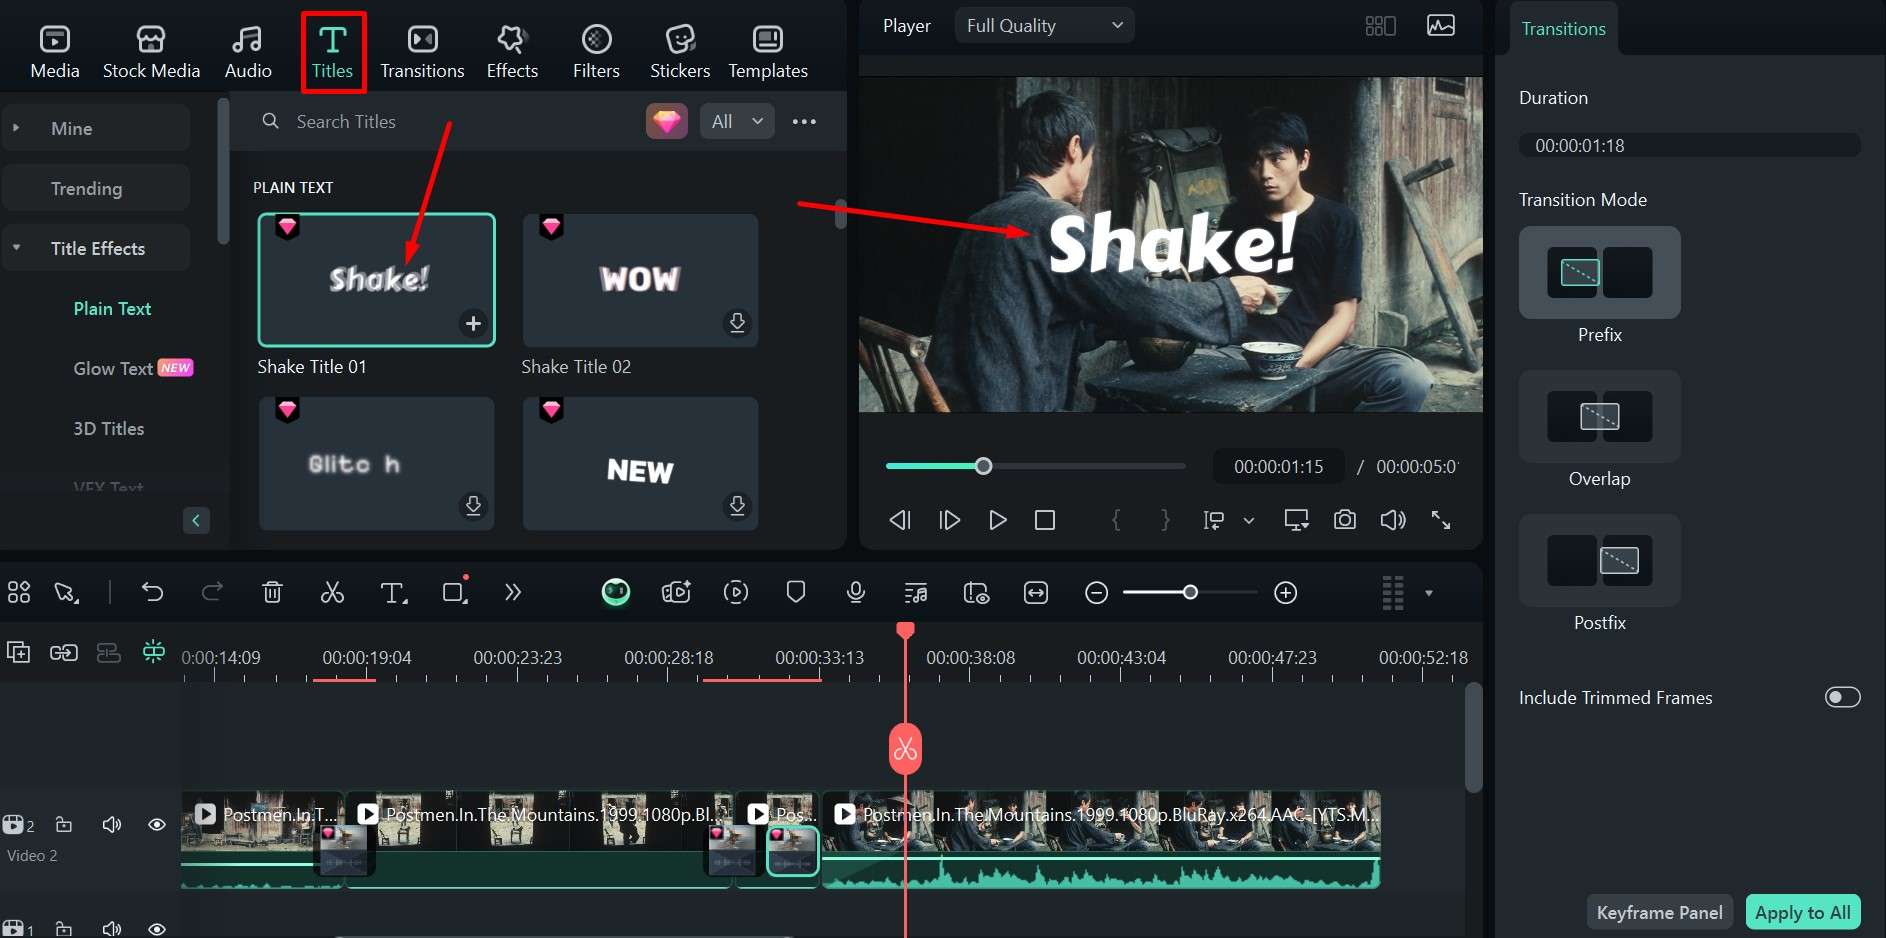
Step 2: Browse through to find a good title, and then just click on it to preview it on the right. If you like it, you can then click on the + button in the lower right corner of the card to add it to your timeline and then place it where you want.
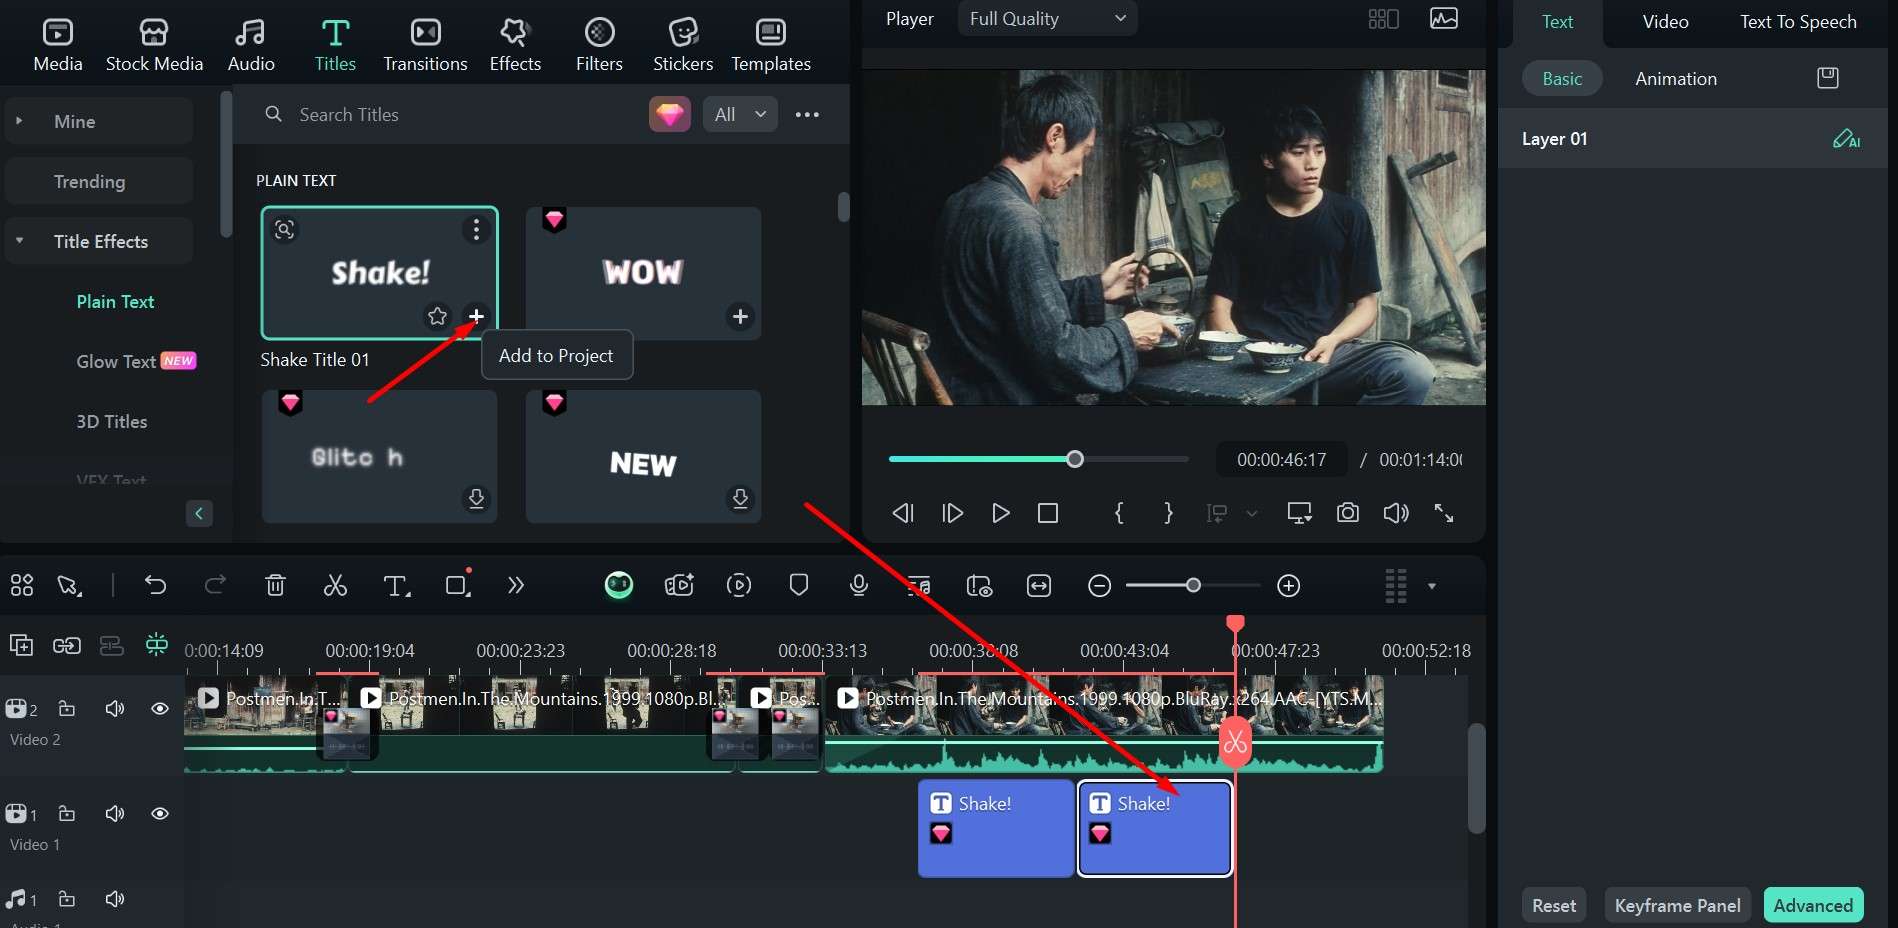
Step 3: You can click on Animation and pick an additional effect, either as a way for the letters to exit the screen or to create a loop, and then apply it to the original text animation. In this example, it’s Shake.
Step 4: Hit Export and confirm to save your project.
The fun doesn’t have to stop here, though, as there are even more options to try out, and it’s all only a click or two away.
Alter the Color Scheme of Your Video with Filters
This is another common but highly effective way to change the mood of your video. Filmora has a large selection of filters that are easy to apply and give you a lot more flexibility in the final edit. Just follow these simple steps to add another layer to your masterpiece.
Step 1: Click on the Filters tab and scroll down to find a category you like in the menu on the left side.
secure download
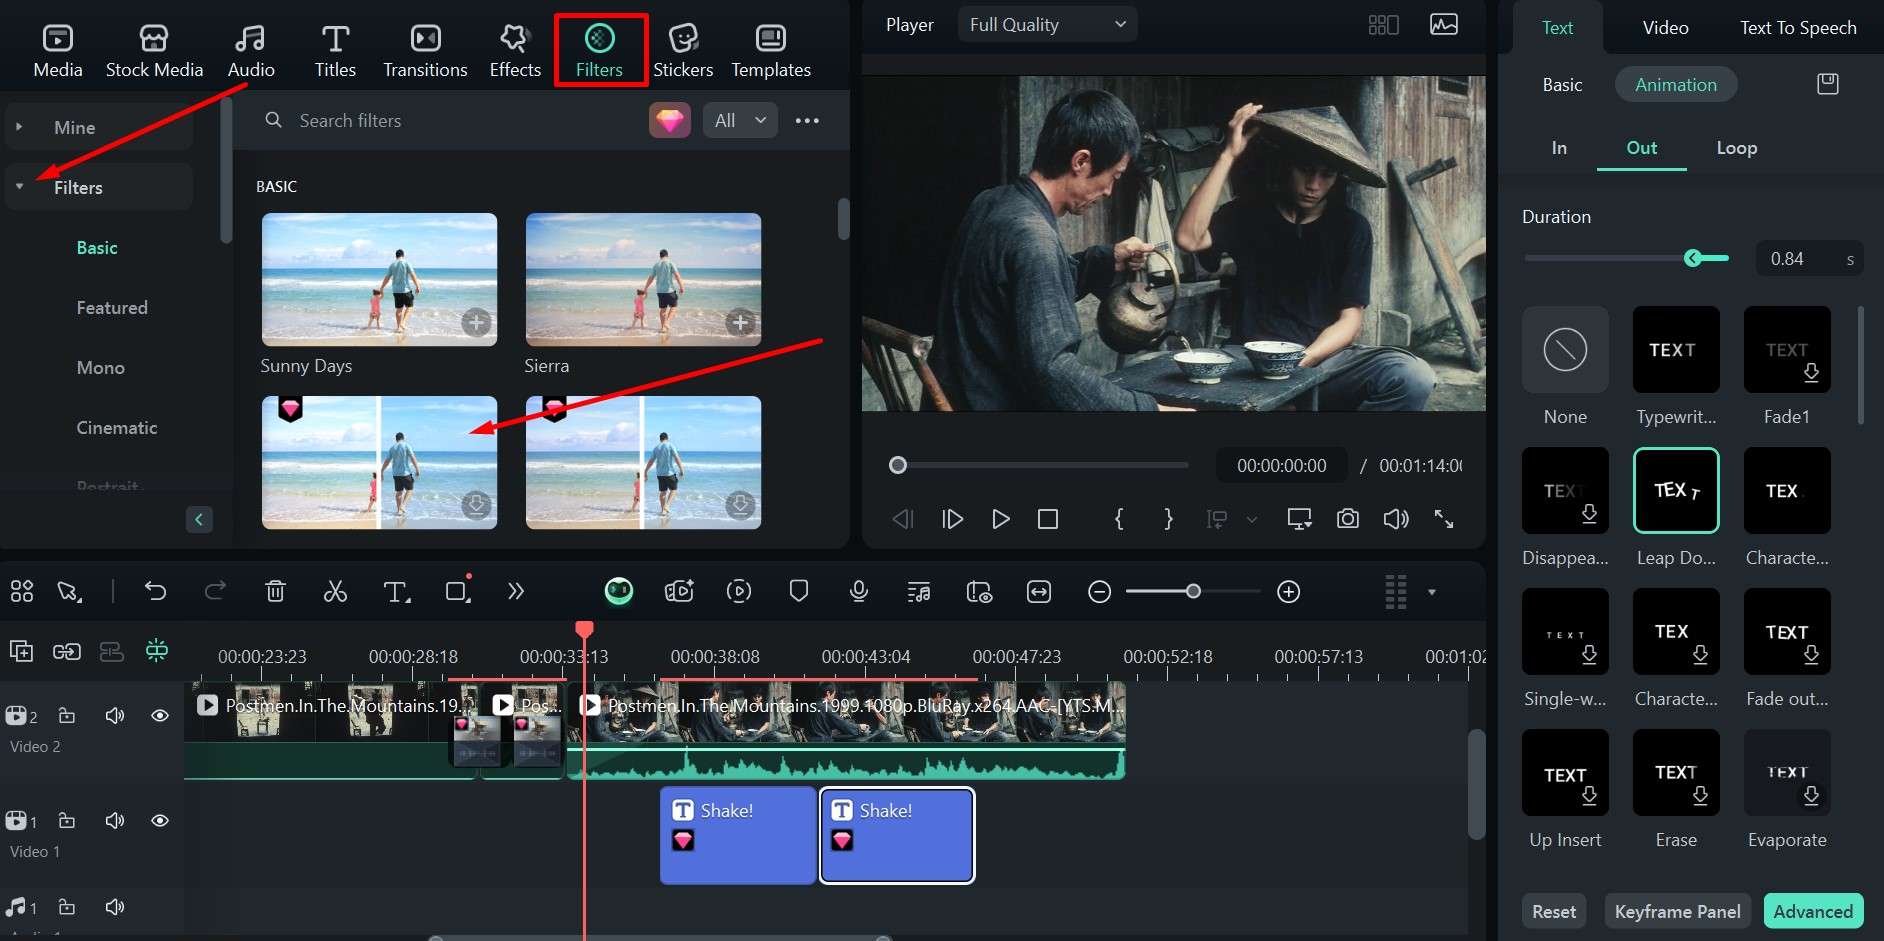
Step 2: The same drill as with the titles – click to preview, then hit the + button to add it to the project and move it around the timeline to find the best fit.
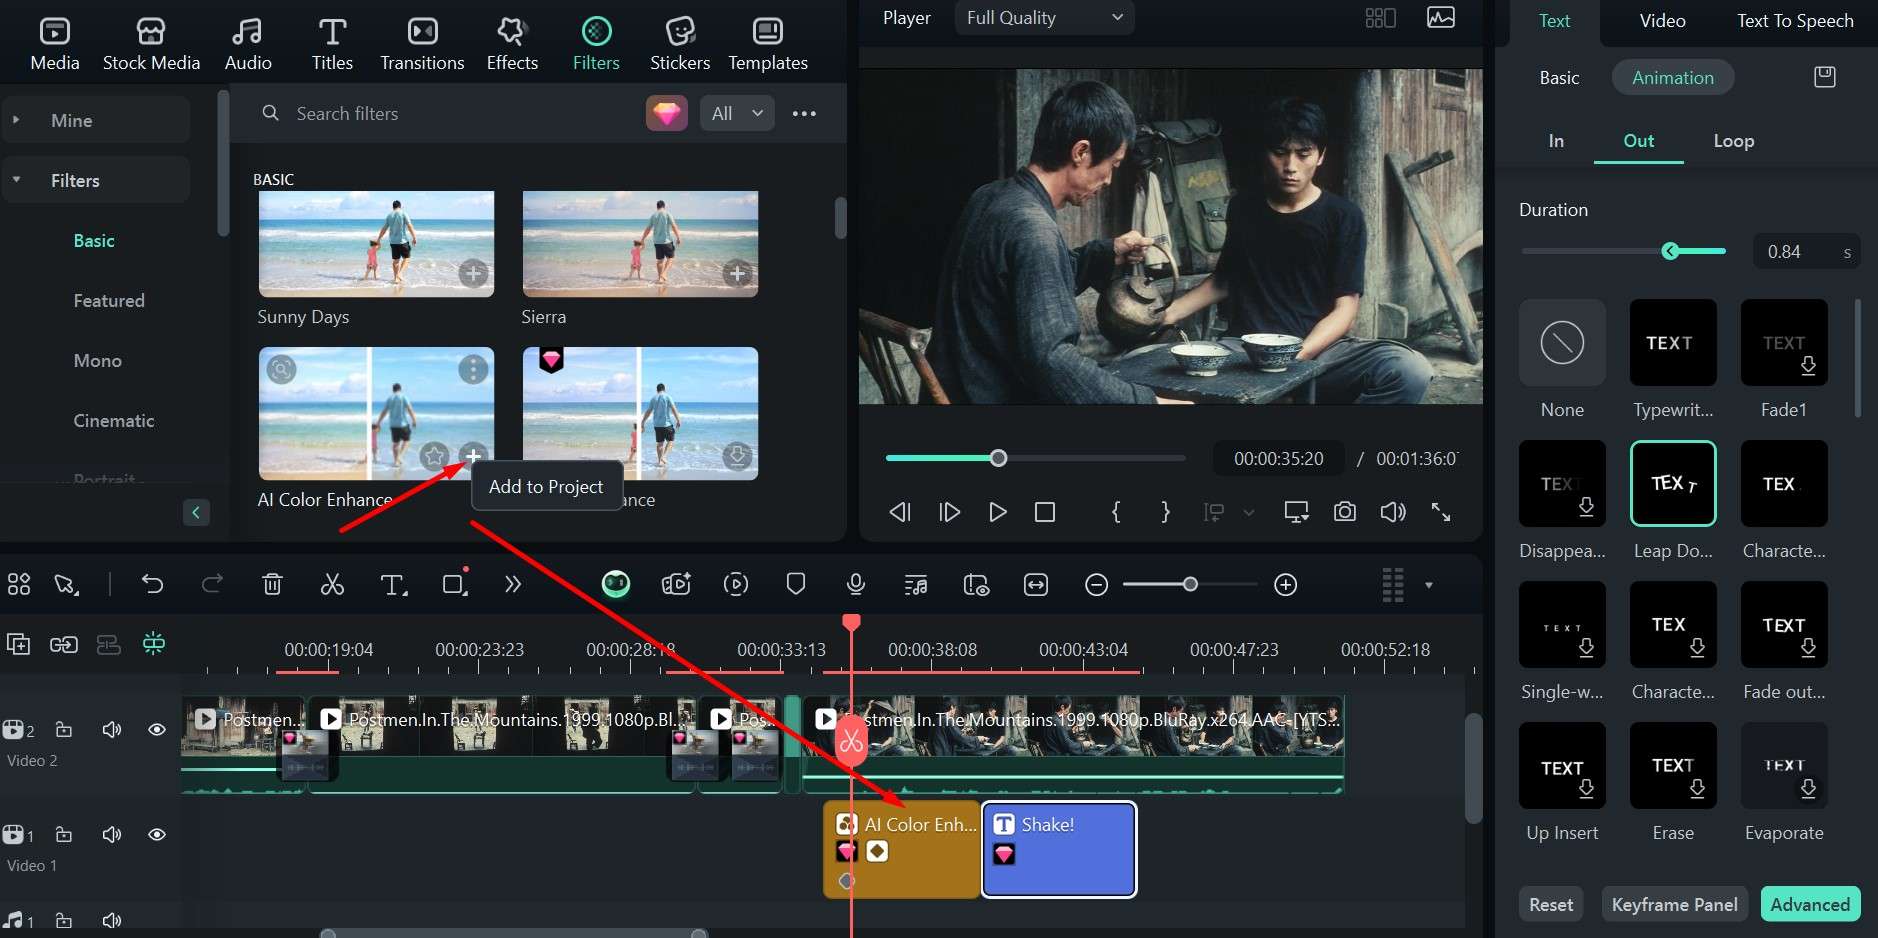
You can have different filters for different clips, for only a part of the clip, or stretch it out so it covers the whole video.
Most importantly, none of this will interfere with your other effects and transitions, though if you have several throughout the video, you’ll have to be careful not to overdo it. It’s all about finding the right balance and making the video really pop.
Transitions Between Videos using Filmora’s Mobile App
As an added bonus, FIlmora has both a desktop and mobile version. The app is available for iOS and Android users alike. It’s just as powerful as the desktop variation and can help you go from shooting a video on your phone to having it ready to post within minutes. Here’s how it works.
Step 1: As always, pick a few clips and load them into the app.
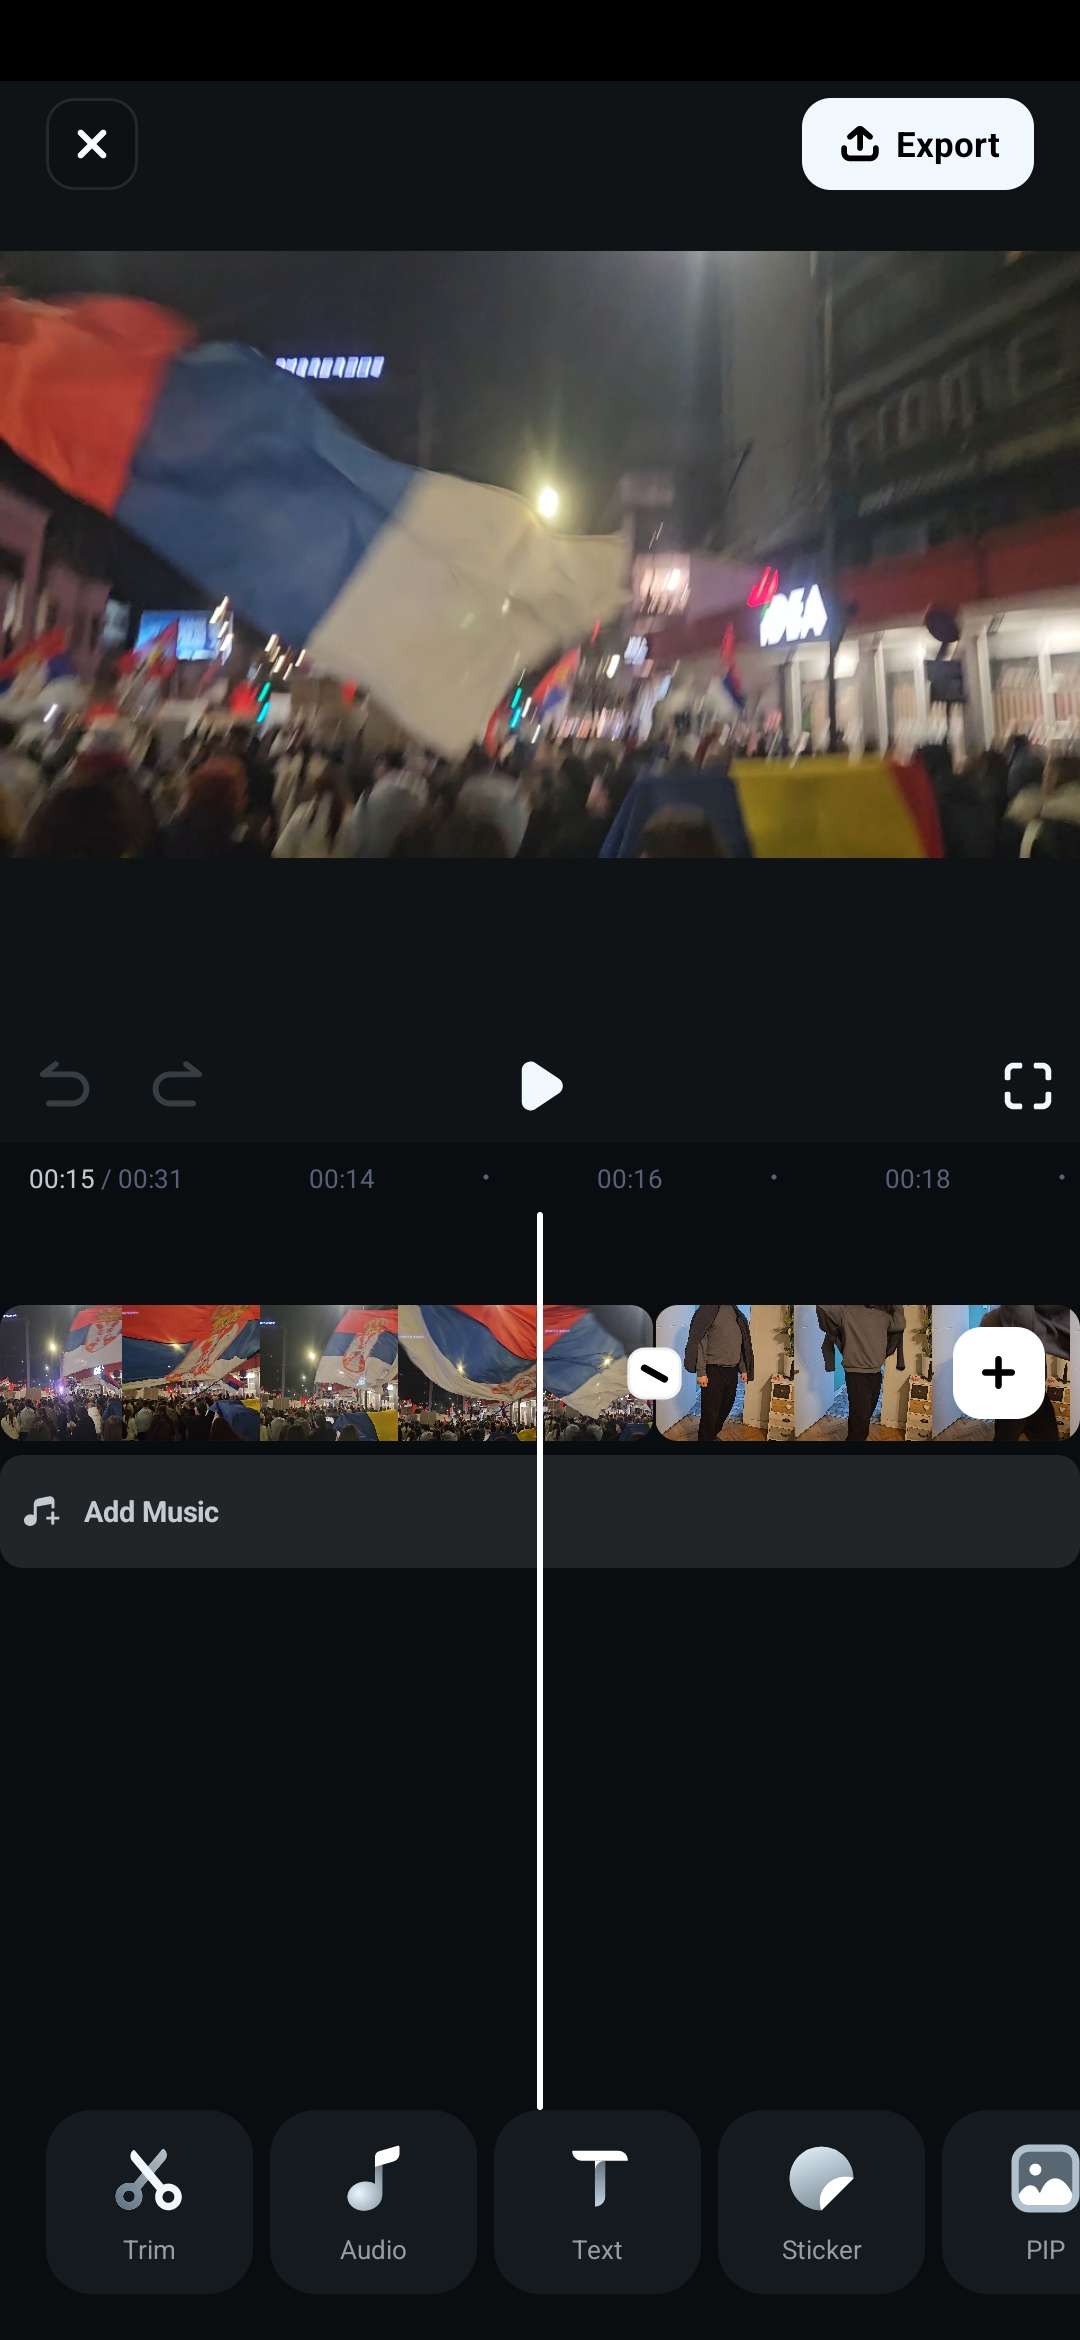
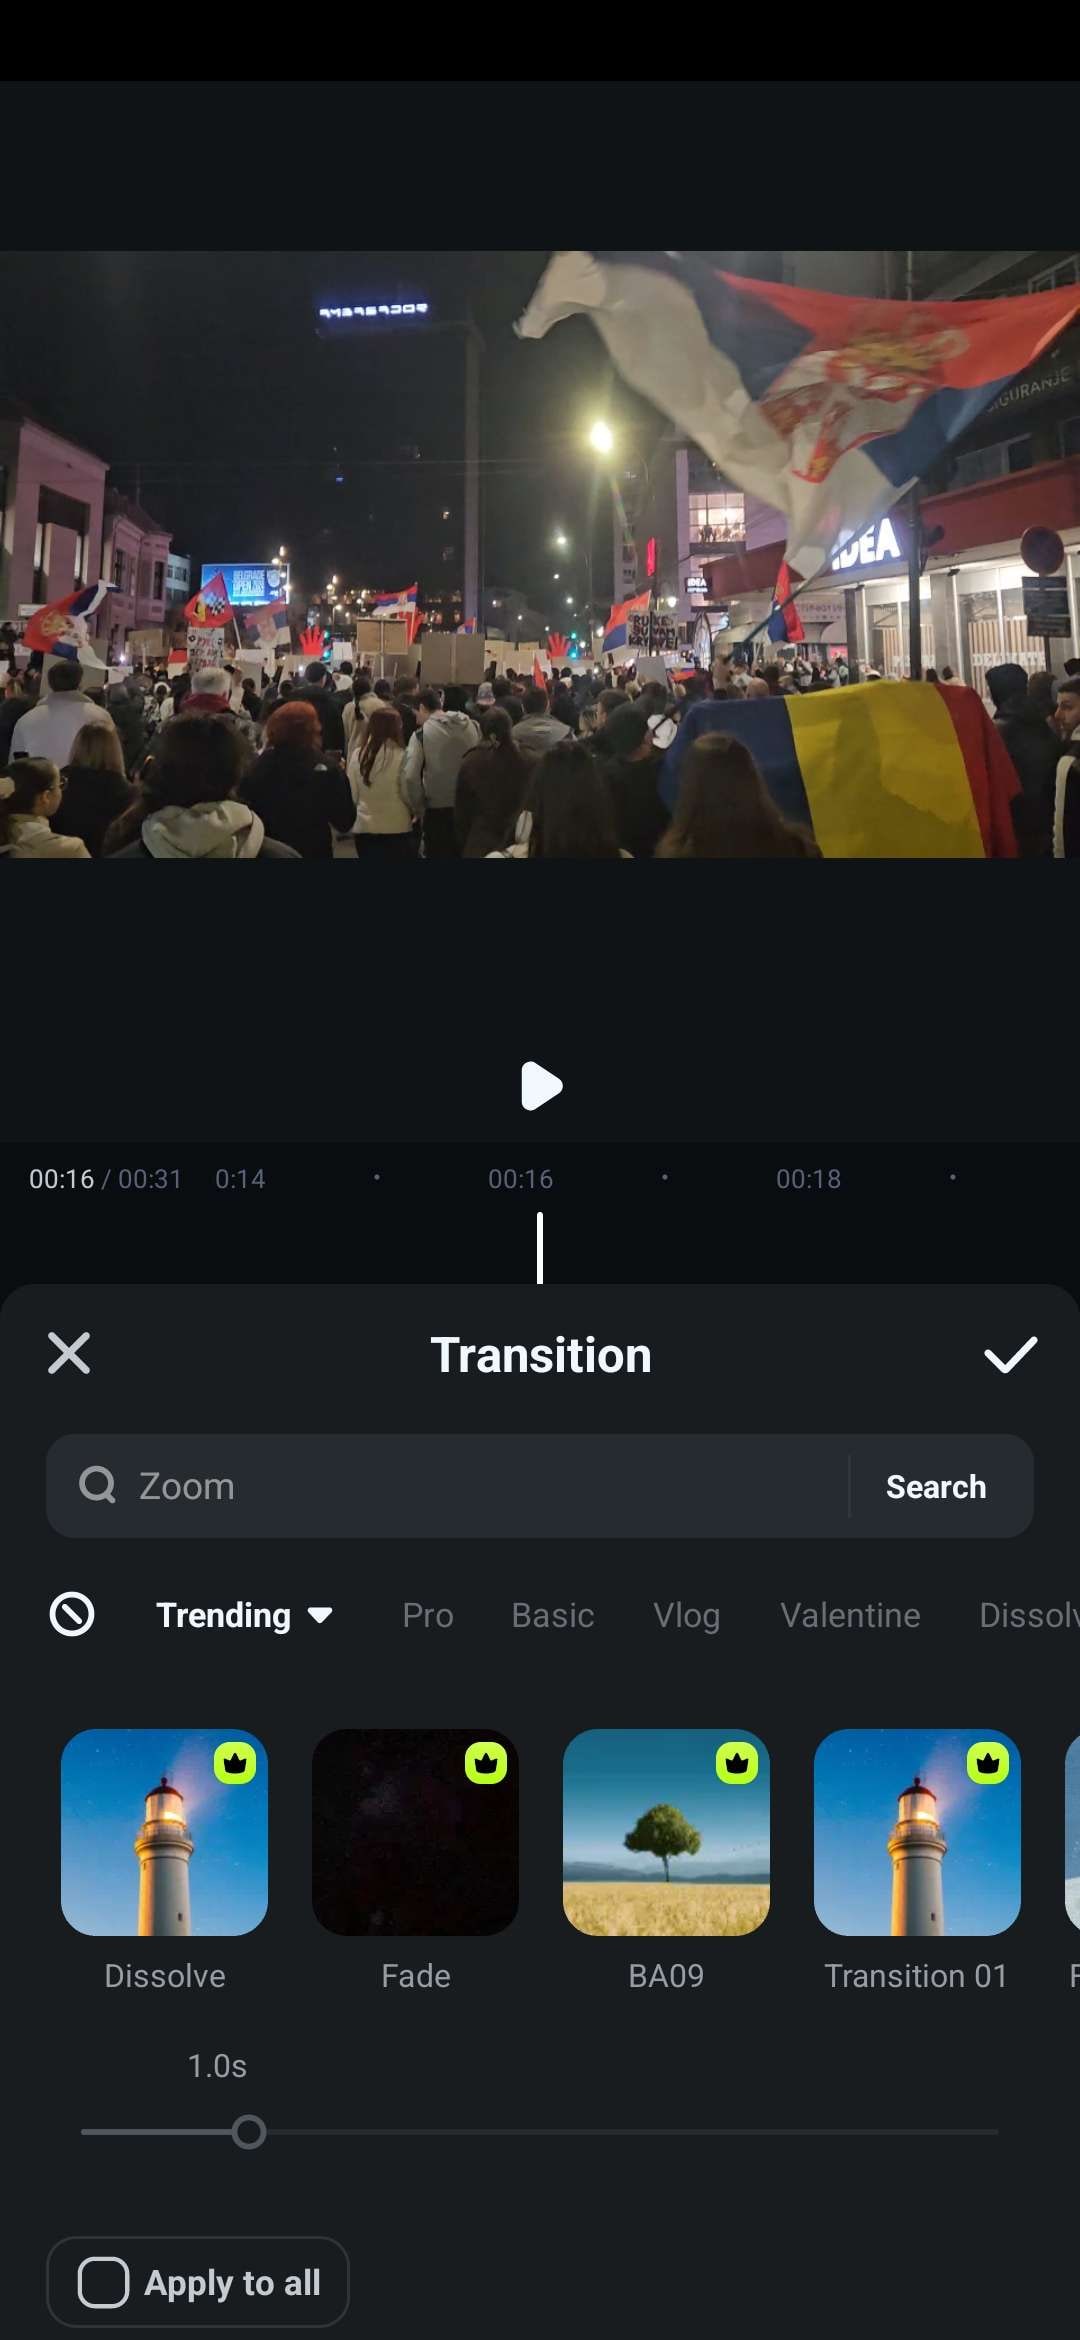
Step 2: At the edge of each clip, you’ll find an icon that looks like a slanted dash. Tap it to open up the Transition menu.
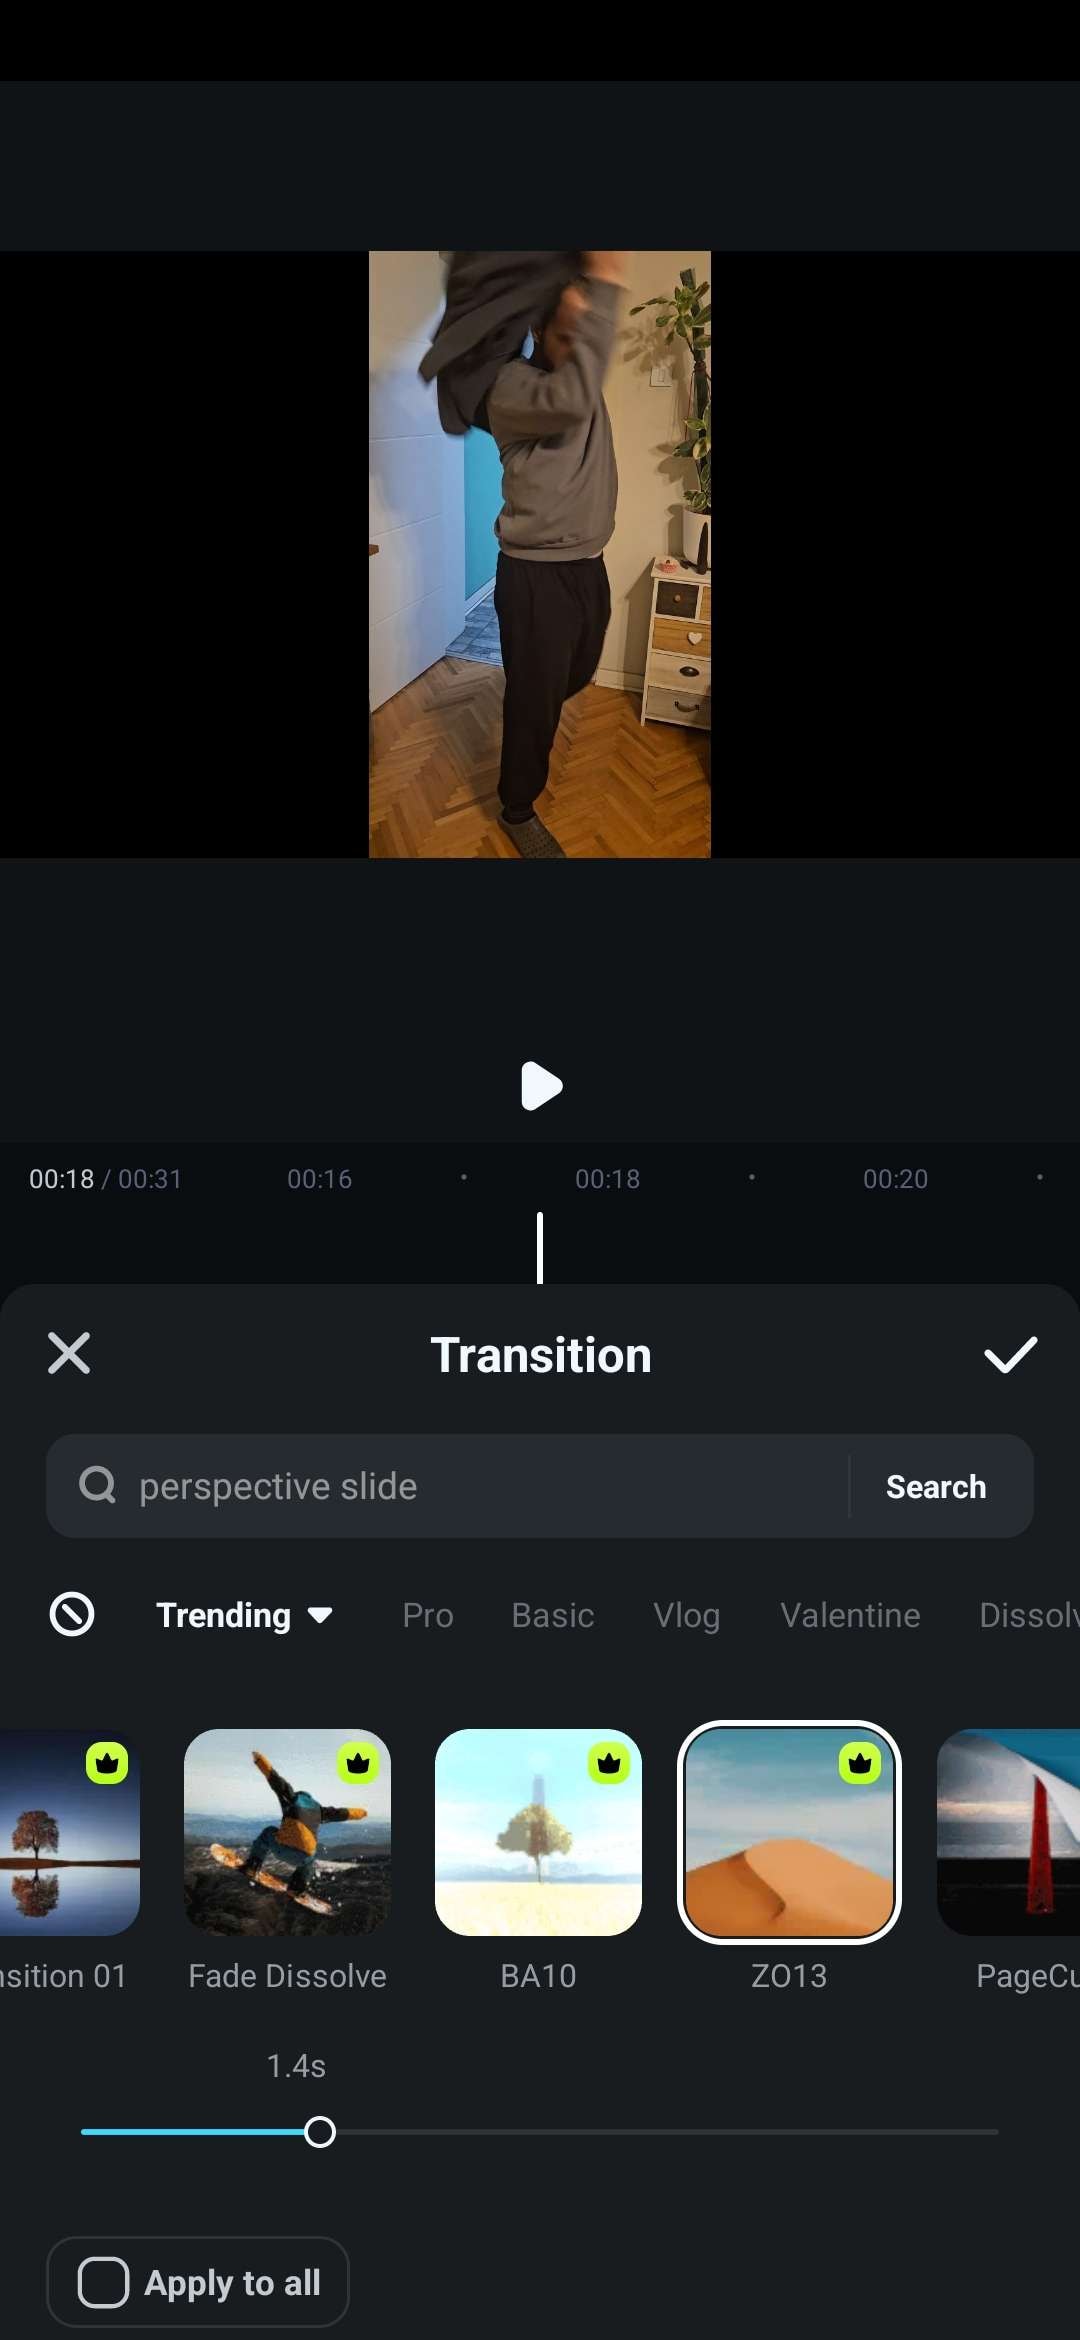
Step 3: Choose an effect that fits your video and move the slider to set the duration.
Step 4: You can also go to Effects and add some more flair to the video, together with the transitions.

Step 5: If you like how it turned out, tap Export to save the video to your phone.
Adding all sorts of effects and little finishing touches to your videos is even quicker on the Filmora mobile app, so you can have lots of fun and get better at editing really fast.
Conclusion
Everyone knows that you need to give your TikTok videos or Instagram reels a bit of extra flavor with great transitions between shots, set the mood with unique filters, and add a few other effects as well to spice things up.
However, while CapCut is still quite popular for video editing, it might be a bit too complicated for novice users. With Wondershare Filmora, on the other hand, you get tons of fun effects that you can just drag to the timeline and set up in seconds.
You also have various other features, including AI-powered tools, so it’s super easy to get started.
