
 100% Security Verified | No Subscription Required | No Malware

Most people couldn't wait to say goodbye to their VHS tapes and switch to higher-quality videos back in the day, but now that everything is super-polished in 4k or 8k, there's a certain nostalgia for the old medium.
Today, adding a VHS video effect can help set a specific mood or give your videos a unique style, which is why Wondershare Filmora offers several effects, transitions, and title cards in this retro style.
We will review all the options and explain how to apply the VHS video filter to add a bit of an old-school vibe to your next project.
In this article
How to Add a VHS Video Filter?
Filmora is a powerful video editing tool with an extensive library of transitions and effects so that you can find something useful for any project – music video, family photo collage, sports footage montage, or creative social media content.
 secure download

There are many options to make it look more like an old VHS video; you can apply the retro video effect and filter or directly choose a VHS-style video template to replace the materials with your footage. In addition to being a video VHS filter editor, Filmora can also apply those vintage filters to photos.
Here's how to add the retro VHS camera effect using Filmora on a PC or Mac.
Step 1: Open the app and start a New Project, then Import the video you need to edit and drag it to the Timeline.
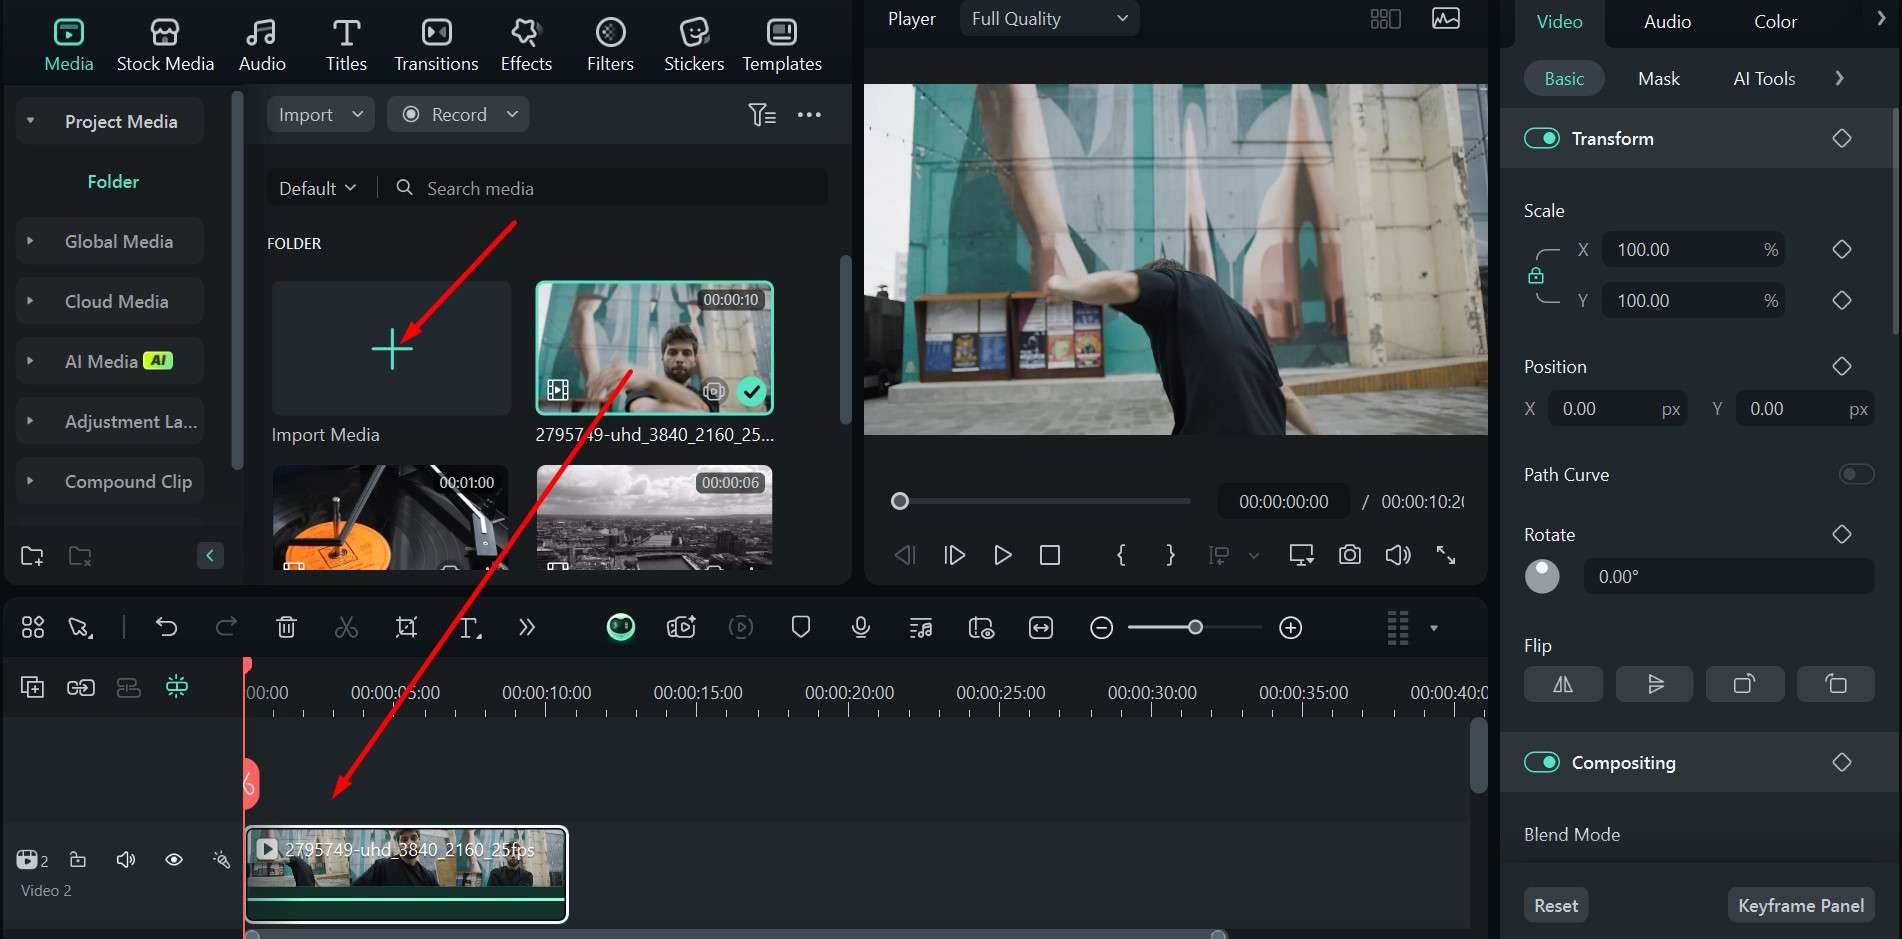
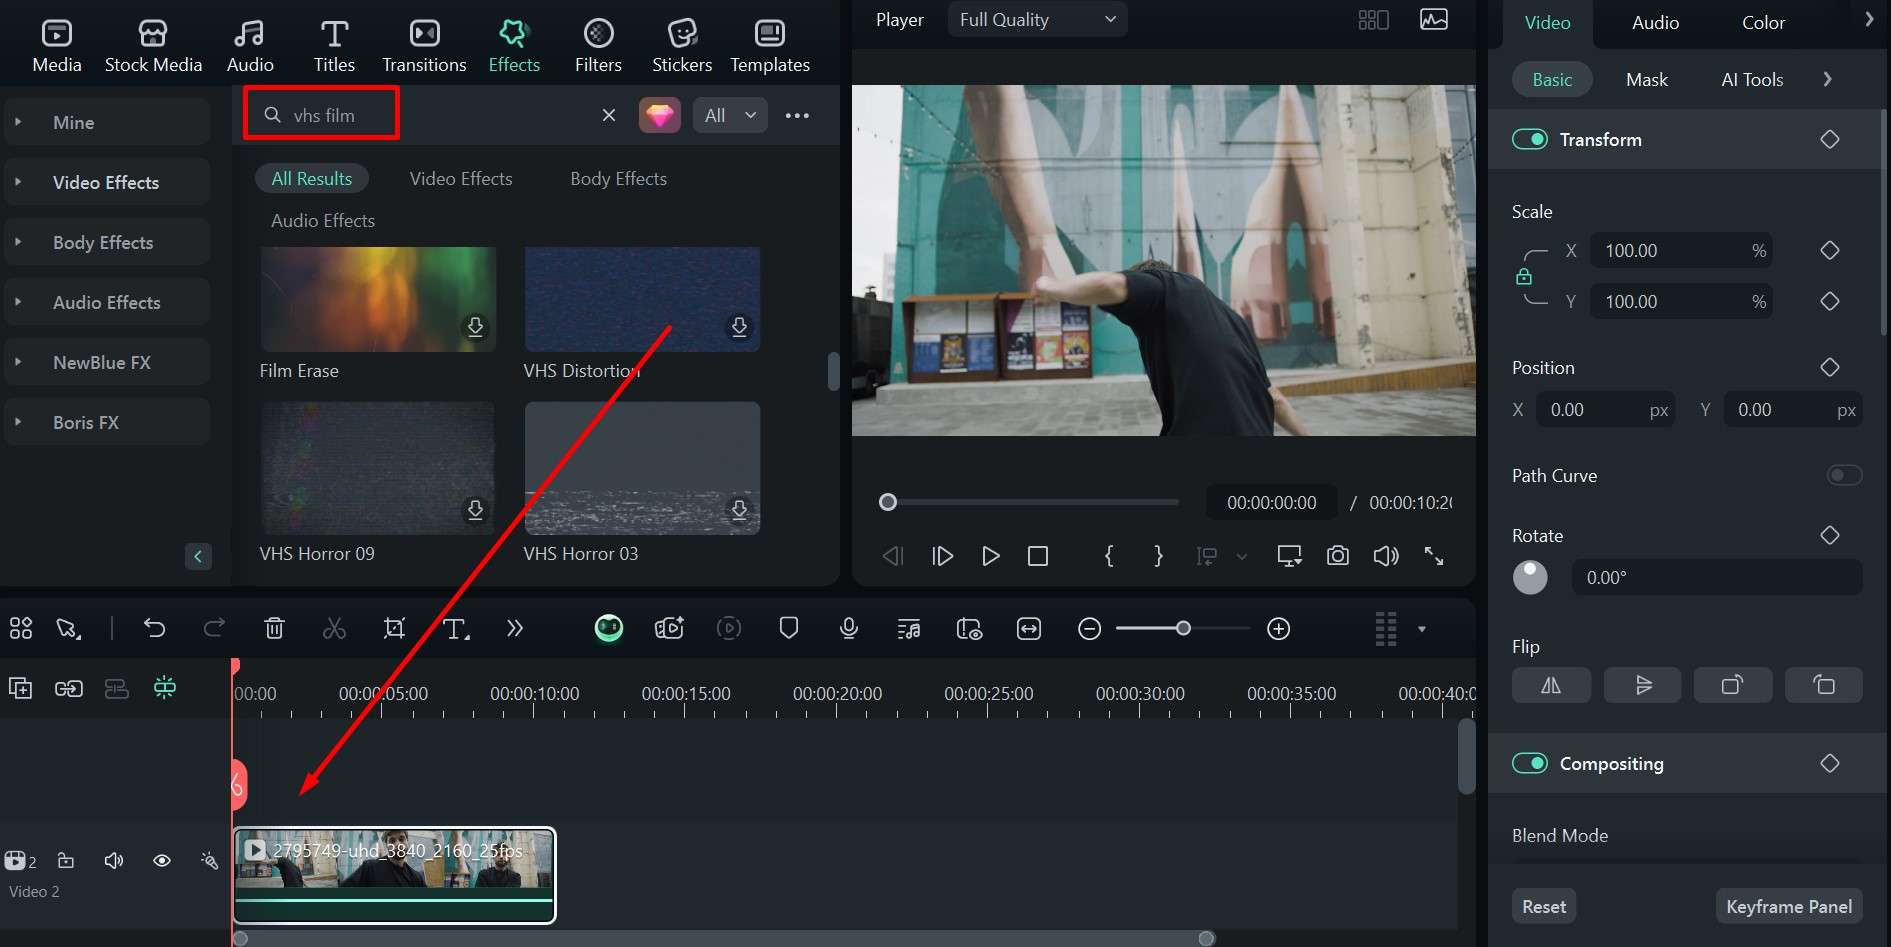
Step 2: Go to the Effect tab and type in VHS Film in the search bar. Choose your desired effect and drag it to the Timeline above the original video.
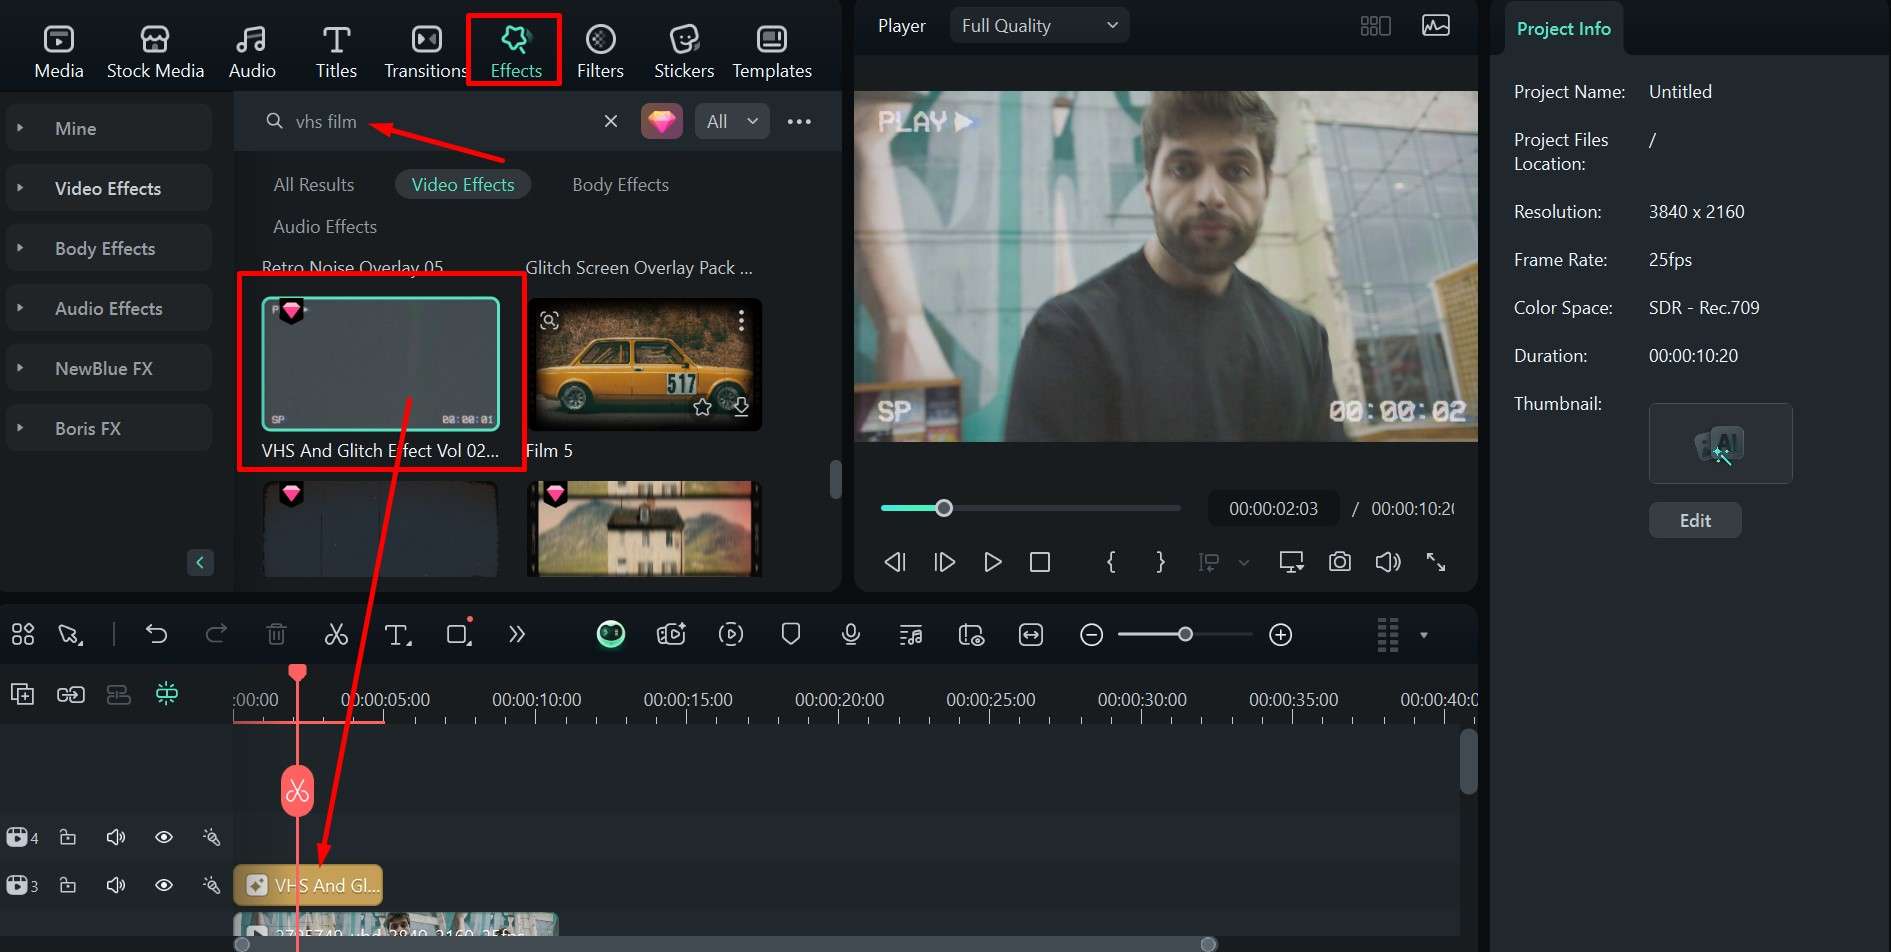
Step 3: Adjust the length to match the main video, and you're set.
If you'd prefer to edit videos directly on your phone, Filmora is also a great app to add a video VHS filter, available on both iOS and Android.
Filmora for Mobile Filmora for Mobile Filmora for Mobile Filmora for Mobile Filmora for Mobile
Edit Videos on Your Mobile Phone with 1-Click!
- • Powerful Brand New AI Features.
- • User-friendly video editing for beginners.
- • Full-featured video editing for professionals.


Step 1: Open the app, start a New Project, and load up any videos you'd like to edit.
Step 2: Tap on the Effects icon at the bottom of the screen.
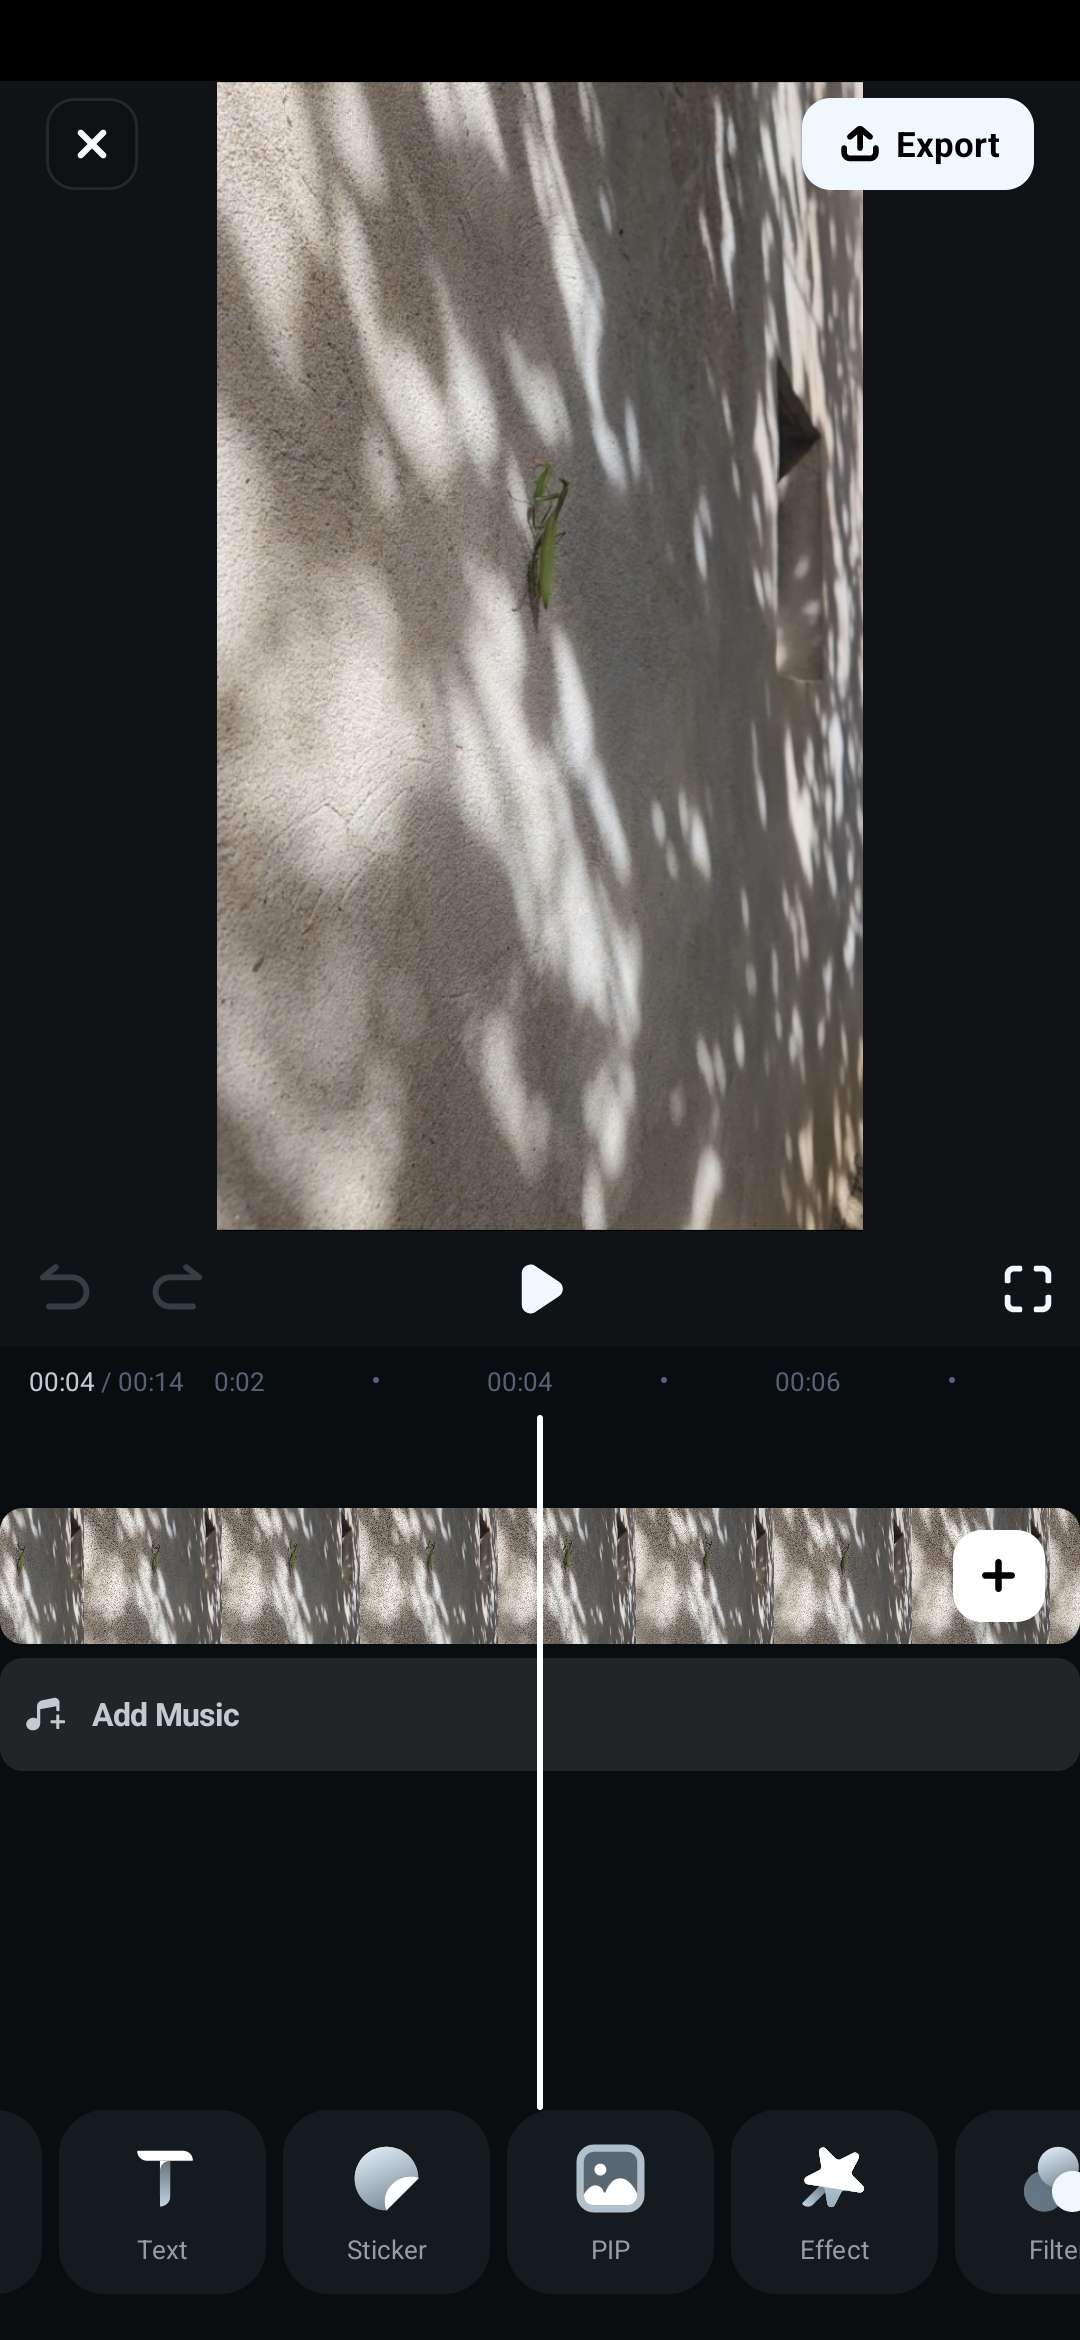
Step 3: Type VHS in the search bar and tap on the effect you want to apply to the video.
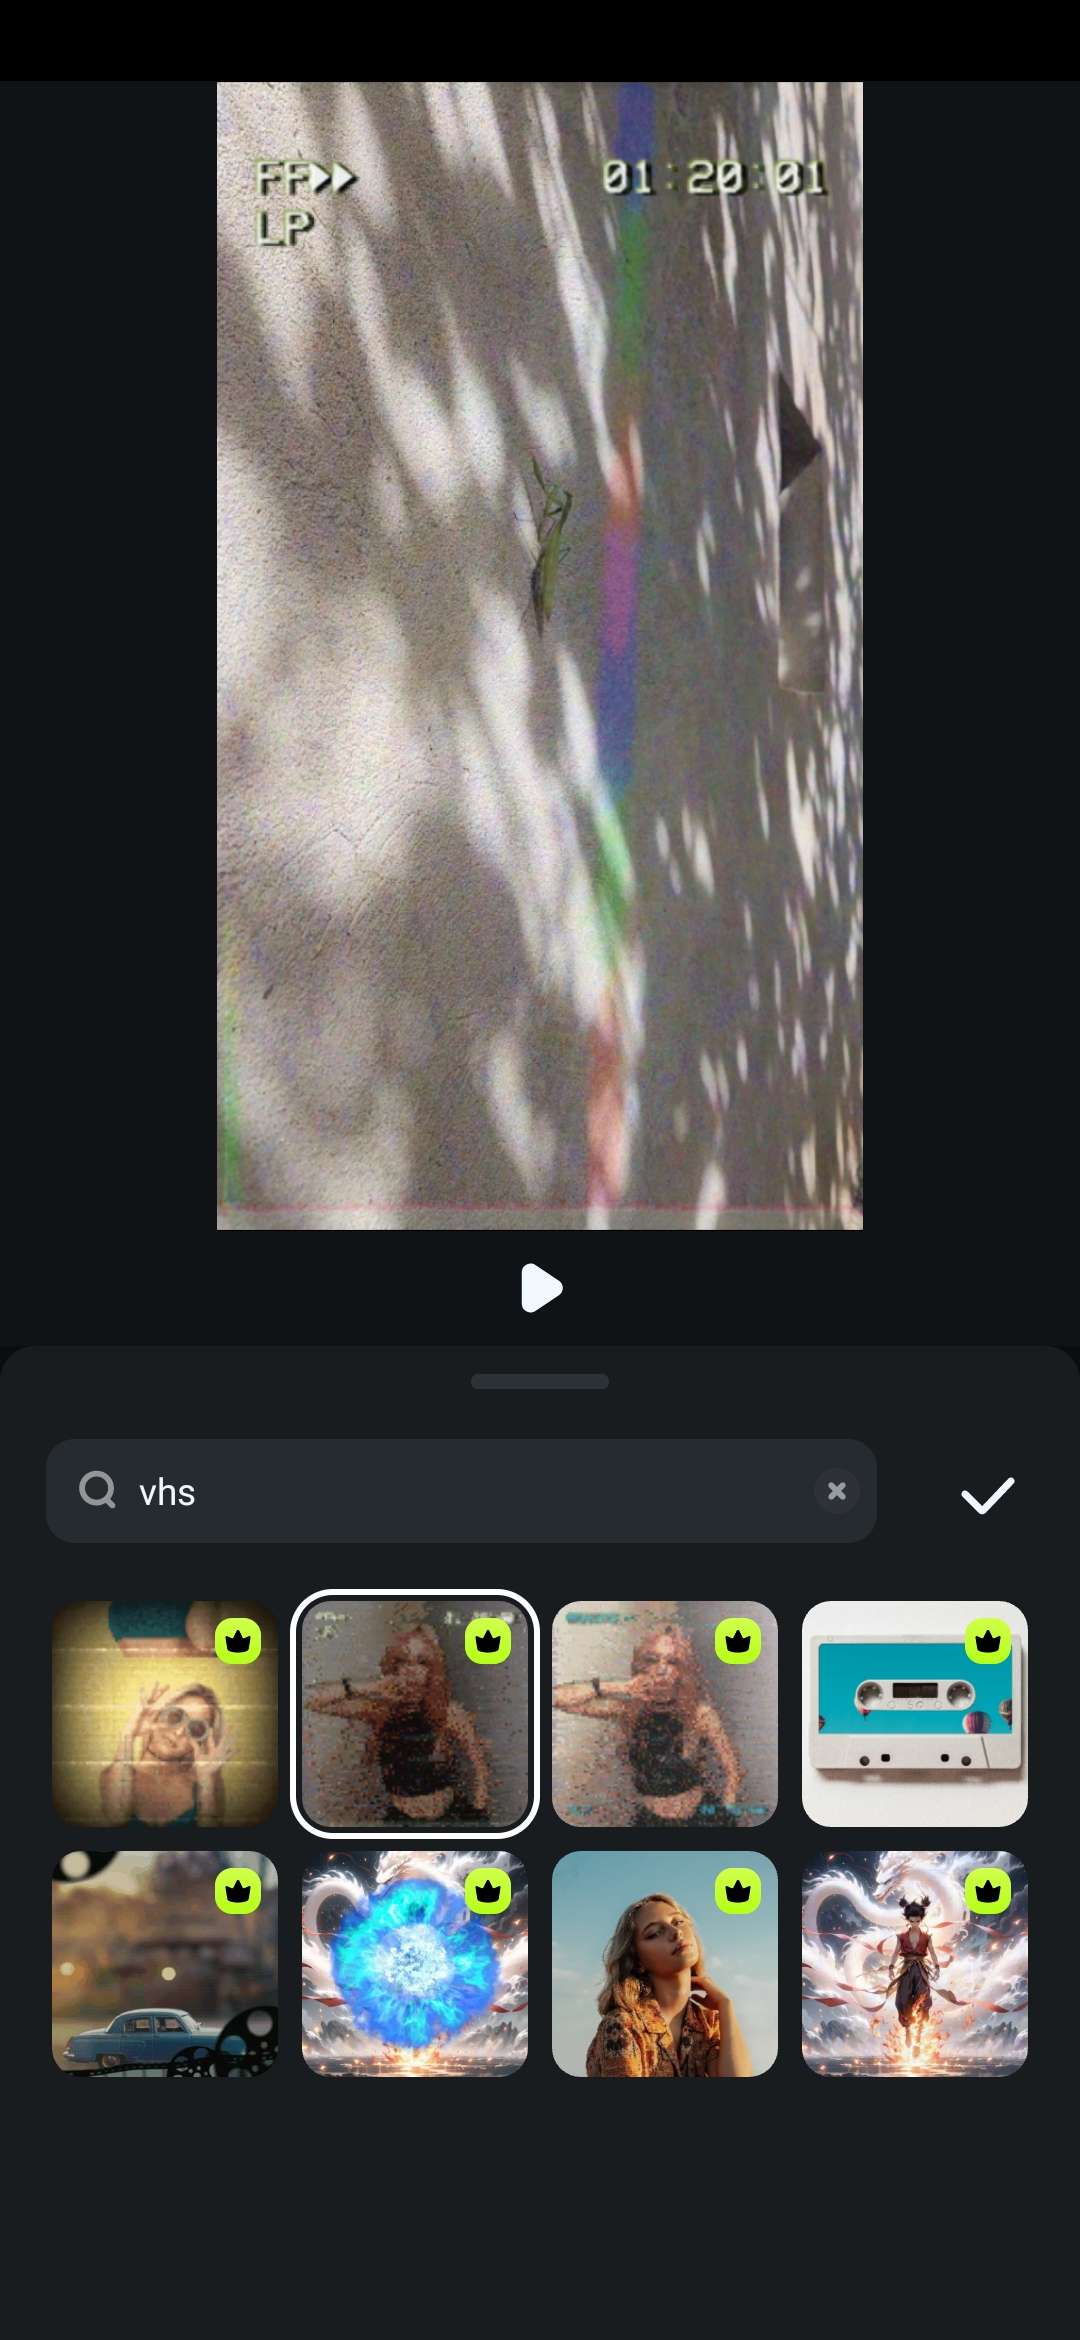
Step 4: Change the length of the effect to either match the whole video or to kick in at a certain point.
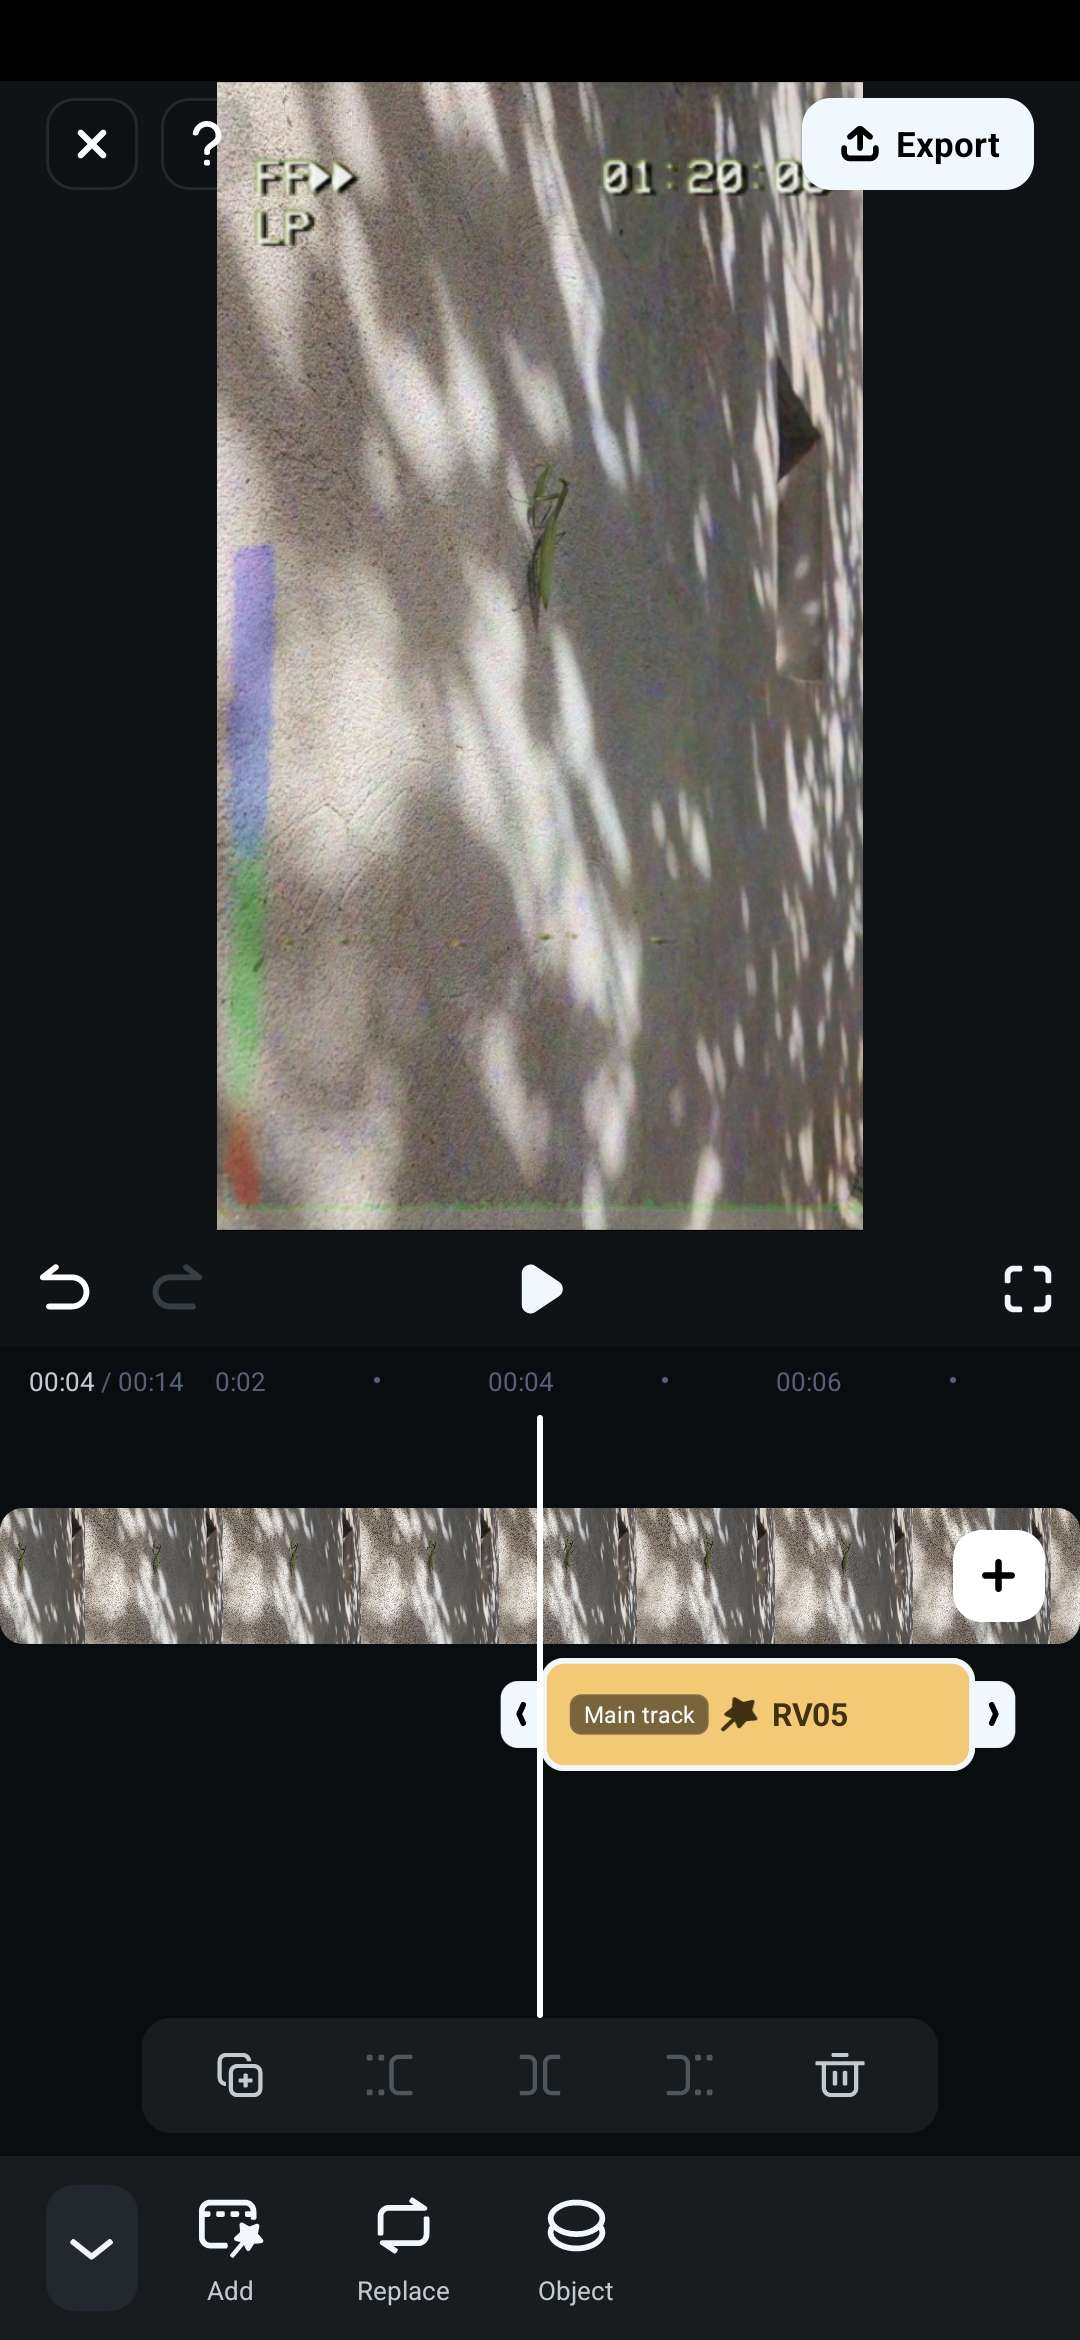
Step 5: Click Export to save your project.
The whole process is quick and easy, and you get a video that looks like it was shot on an old VHS handheld camera, but there are a couple of more cool effects and tricks you might want to try.
Achieve the Perfect VHS Camera Effect
If you are going for more of a low-quality, damaged video look, similar to a found footage scene in sci-fi and horror movies, you'll want to go for the VHS distortion effect. Here's how to set it up.
secure download Step 1: As before, type VHS film in the search bar in the Effects tab.
Step 2: Scroll down to find the VHS Distortion effect, drag it to the timeline, timeline the video, and set the duration by clicking on the edge and moving it left or right.
You'll now have a slightly creepier, distorted image look for your project. However, feel free to spice it up even further by adding transitions that look like the tape just glitched out for a moment because there is a break in the footage, or the tape is damaged.
Improve the VHS Video Effect with VHS Transitions
A good transition is what separates decent videos from great ones. While it will take a while for you to get that editing timing just right for different types of projects, you can still significantly improve your video with the proper transition.
You can even completely change the mood of the footage, especially with something like a glitch or censored transition. Here's how to apply these.
Step 1: Go to the Transitions tab, type VHS transitions into the search bar, and scroll down to find the effect that best suits your style.
Step 2: Click on your preferred transition and drag it down to the timeline timelining, where two separate clips meet. You can adjust the length of the transition.
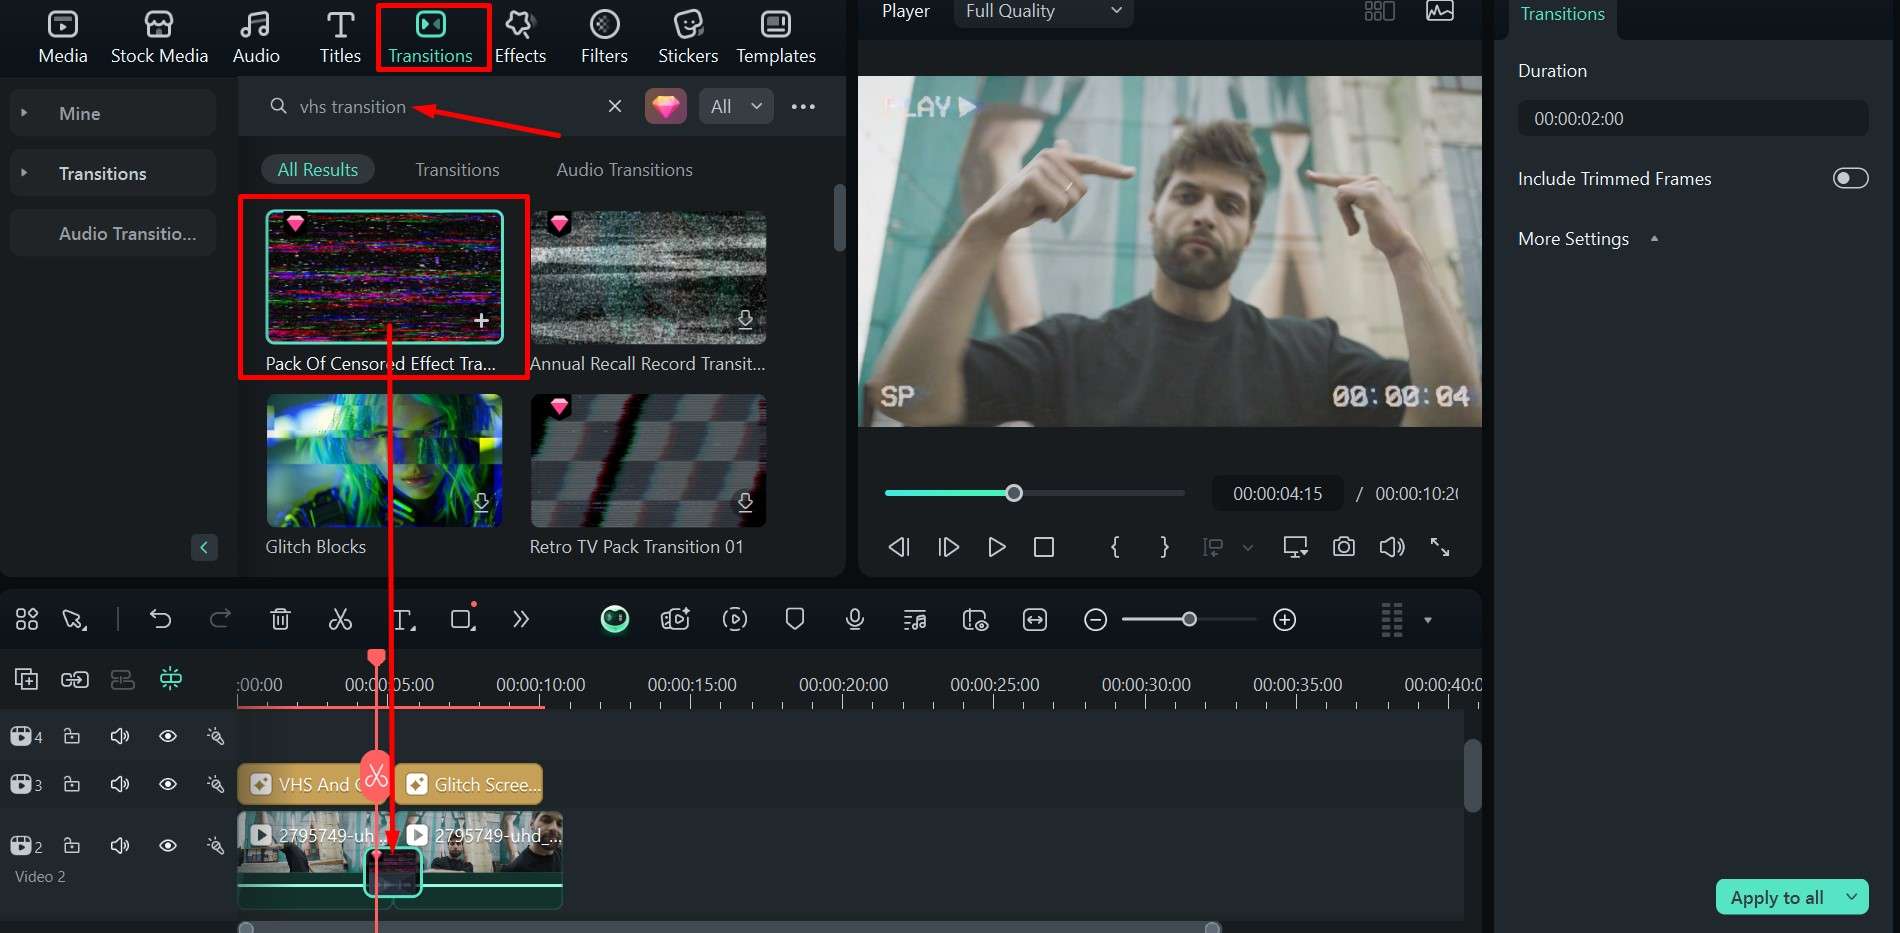
This will give you a bit of static or other type of glitch in between shots, so it looks like someone taped over the previous video with some new footage. It's a great way to combine quick cuts of stunts or action or add reaction shots – the possibilities are endless.
As the cherry on top, you can also add a title screen to introduce your video.
Enrich Your VHS Footage with VHS Titles
When you're going for that vintage aesthetic and adding a videotape effect, you might as well go all the way and start things off with a quick title shot with the name of the video or some slogan.
secure download You can do so in a couple of easy steps.
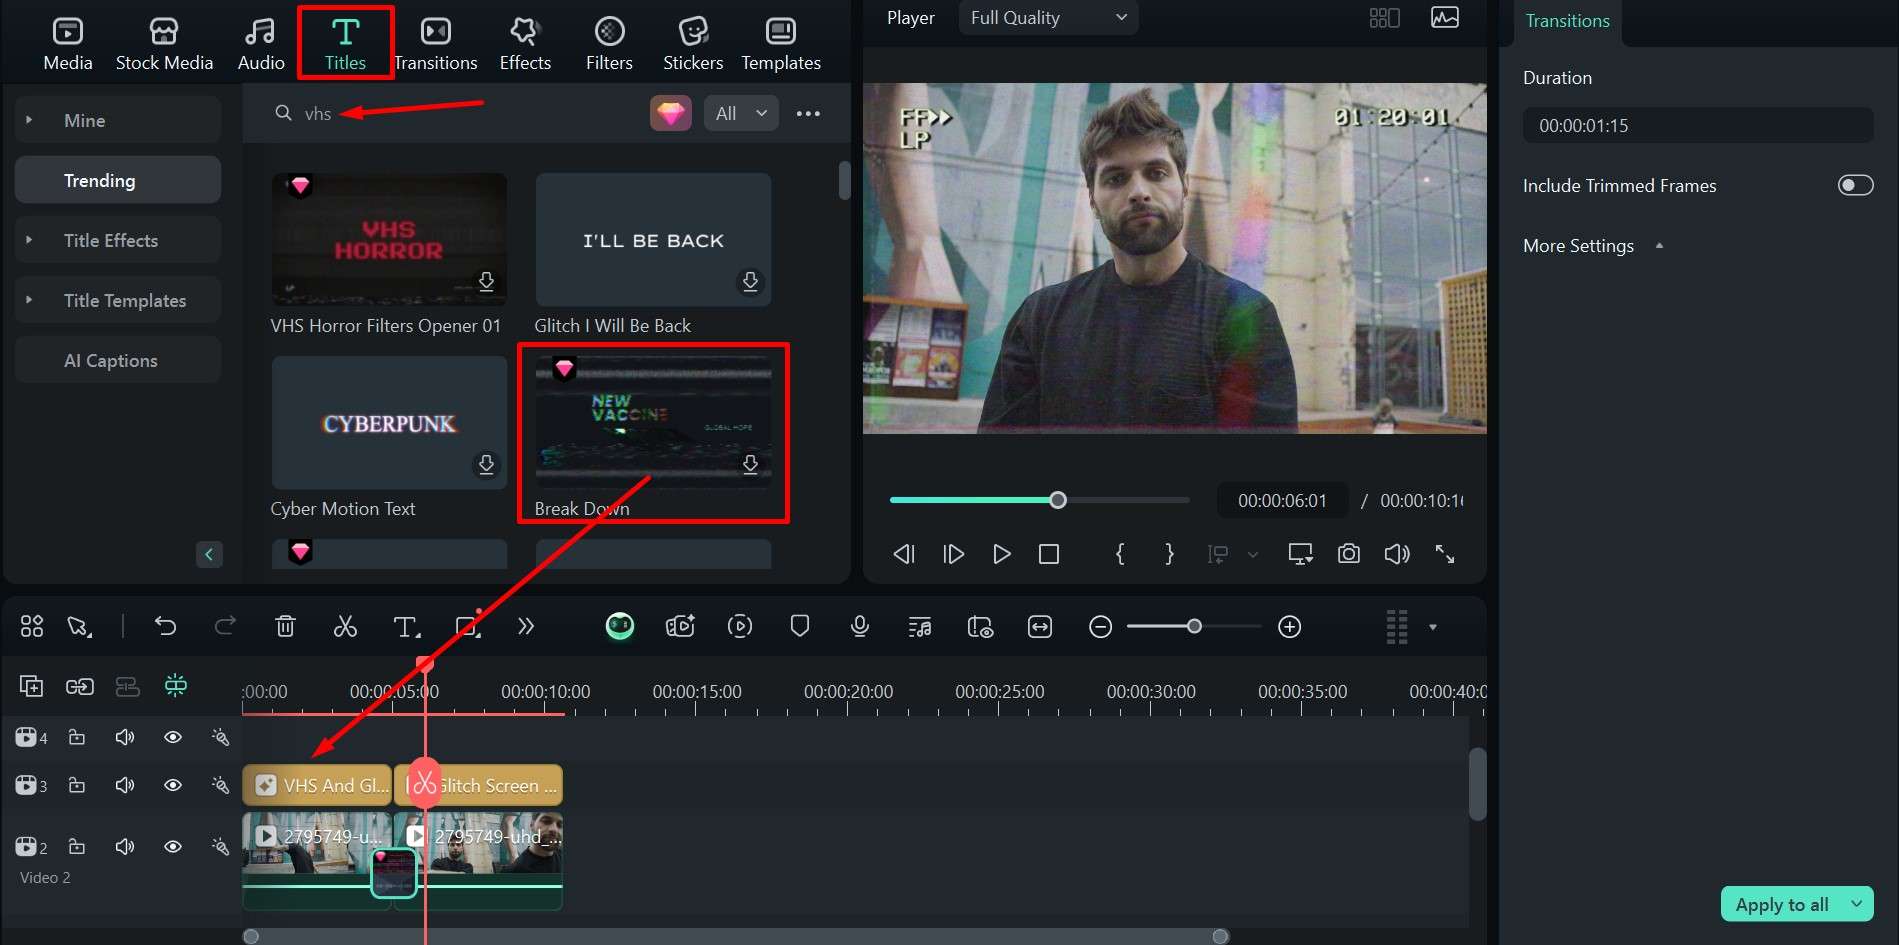
Step 1: Click on the Titles tab and type VHS in the search bar.
Step 2: Scroll down to find a good option like VHS Horror, Cyber Motion, or Breakdown, and drag it to the timeline timeline of the main video.
Your video will now have the perfect opening title to set the tone for what's to come. We just have one more option for you if you're in a bit of a rush.
Bonus: Make Videos with VHS Effects from Video Templates
Those who are just looking for an intro that's already well put together to match a certain style or mood perfectly and that they can just set and forget will be happy to hear that Filmora also offers various templates.
secure download You can just find one you like and apply it without having to go through any additional steps. Here's where you can find them and how to set them up.
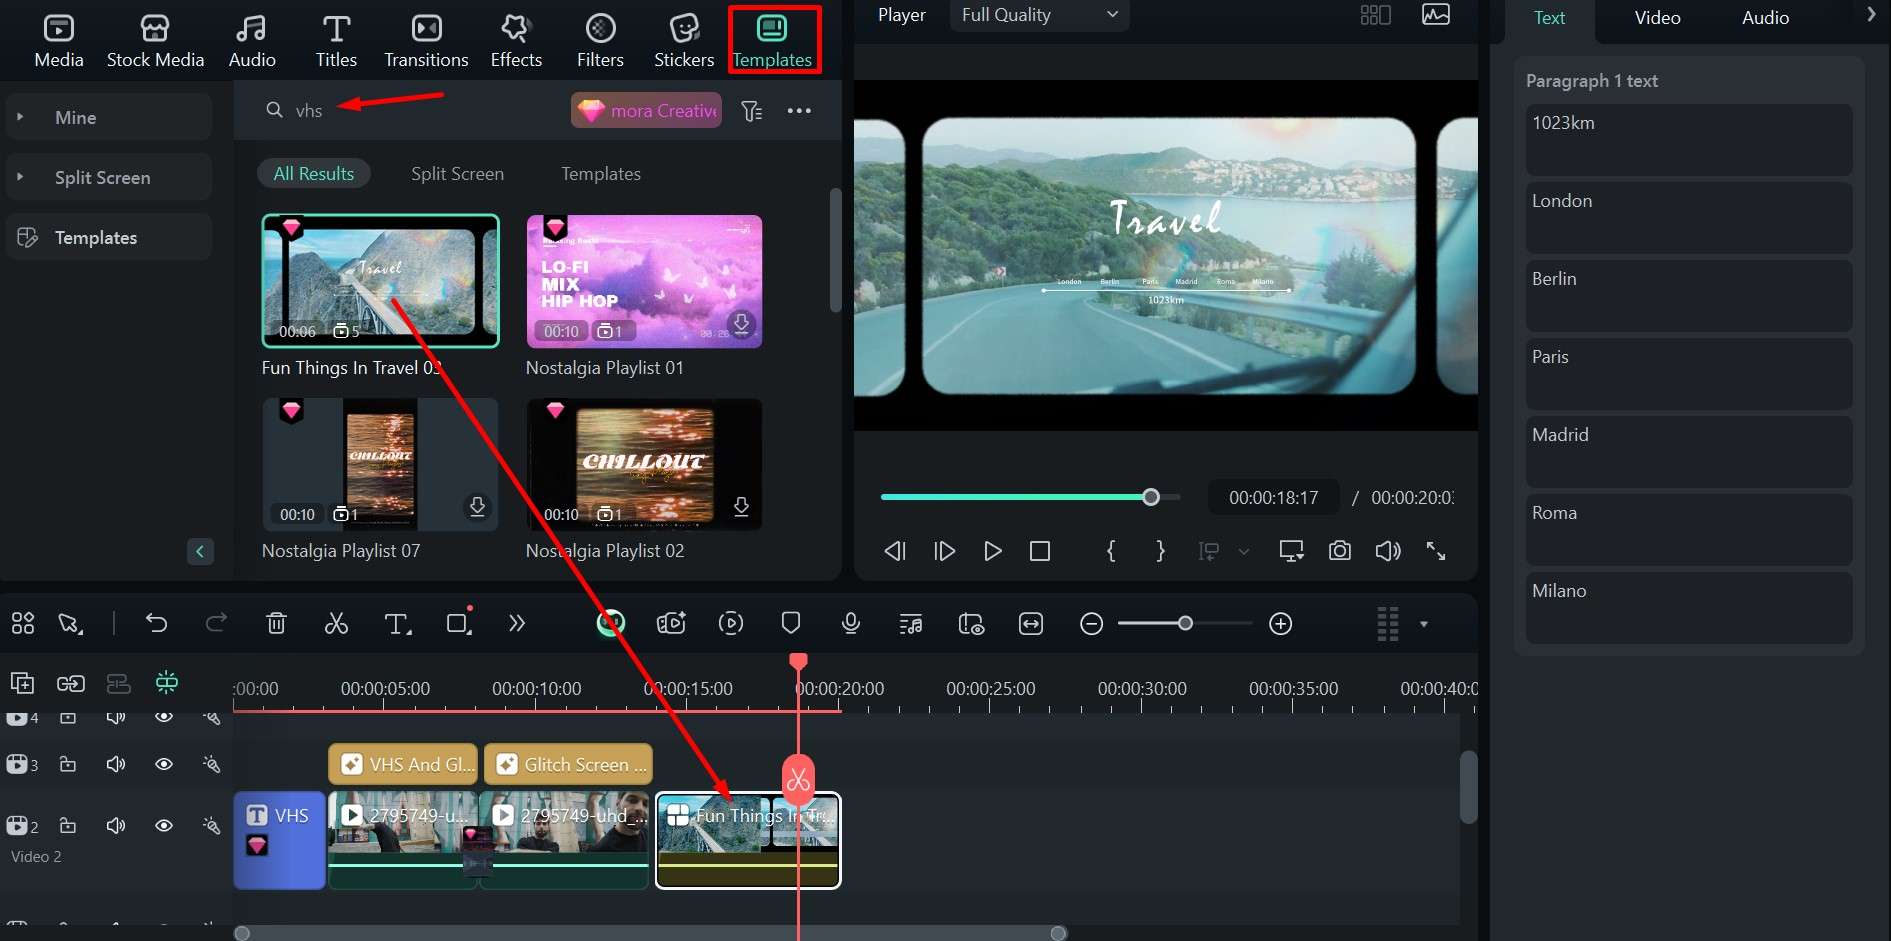
Step 1: Go to the Template tab, and in the search bar, type in VHS.
Step 2: Select a template that fits your project and drag it to the timeline.
If you prefer, you can also follow these steps to enhance the visuals of your video.
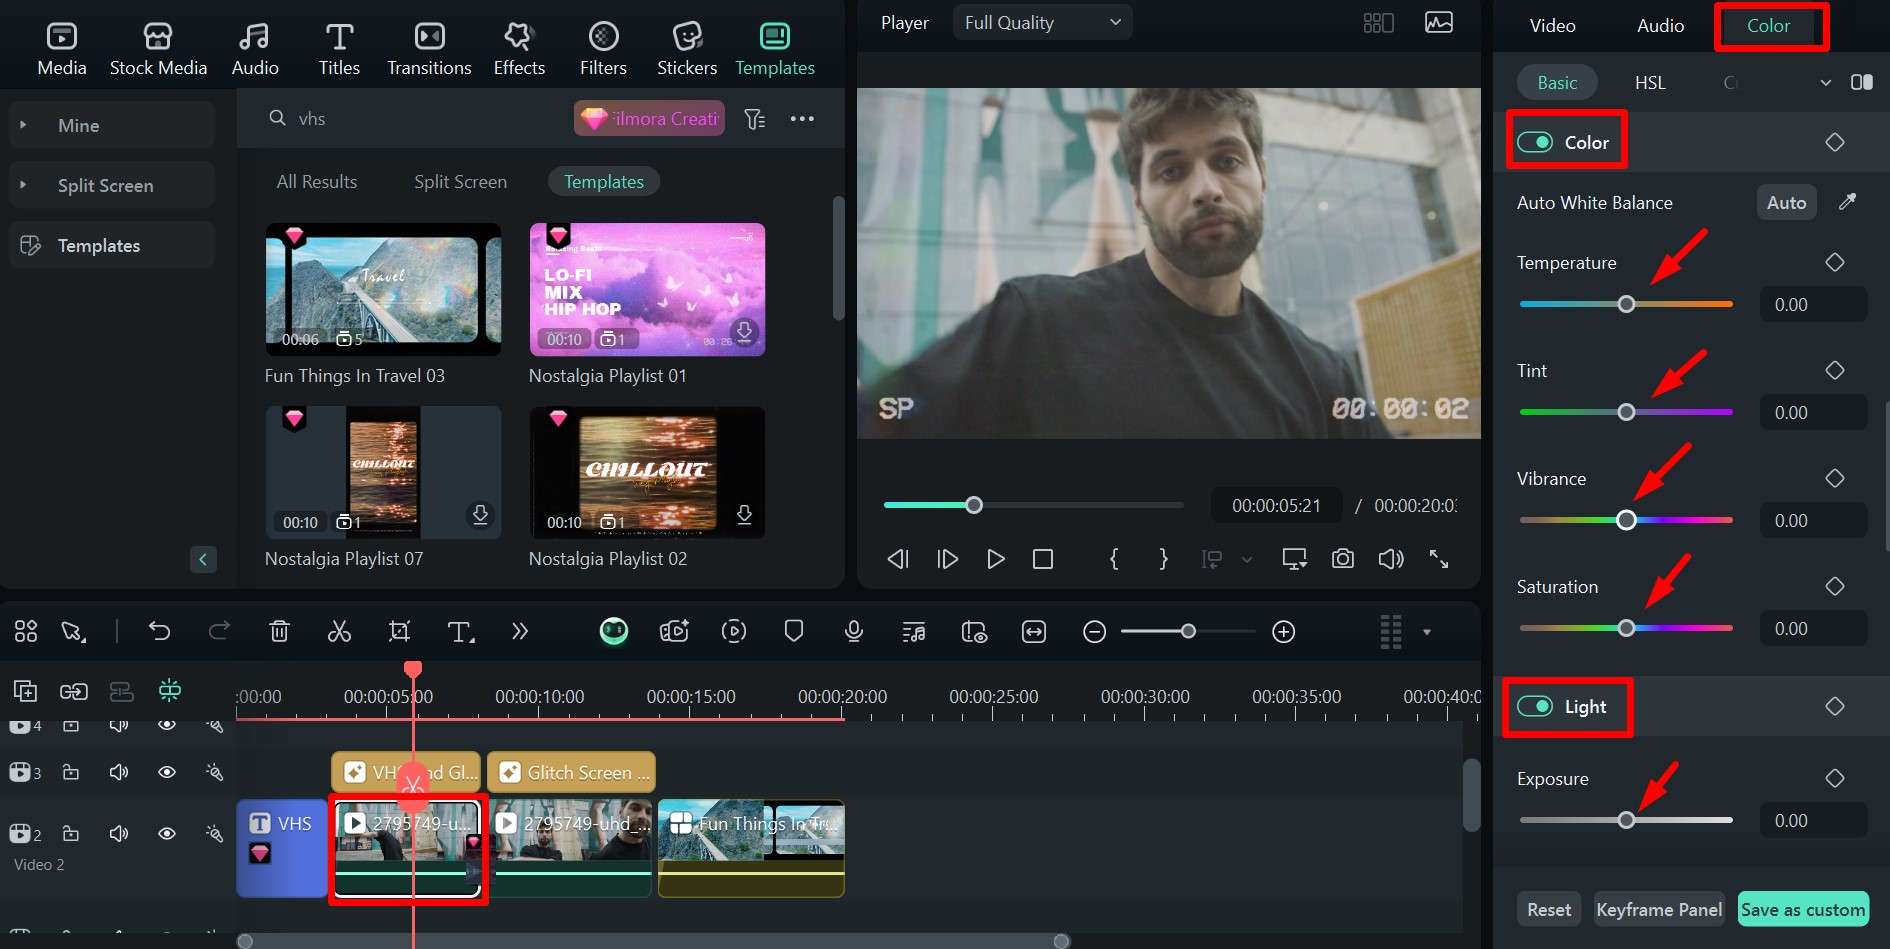
Step 3: Once you've added the VHS filter for videos and completed the other steps, select the clip and go to Color in the upper right.
Step 4: Enable the color and light settings and play around with the values to give your video a different look. There are also preset LUT options and AI Color Palettes.
Step 5: Once everything is to your liking, click Export, and in the pop-up window, choose the format, resolution, and save location, then click Export again.
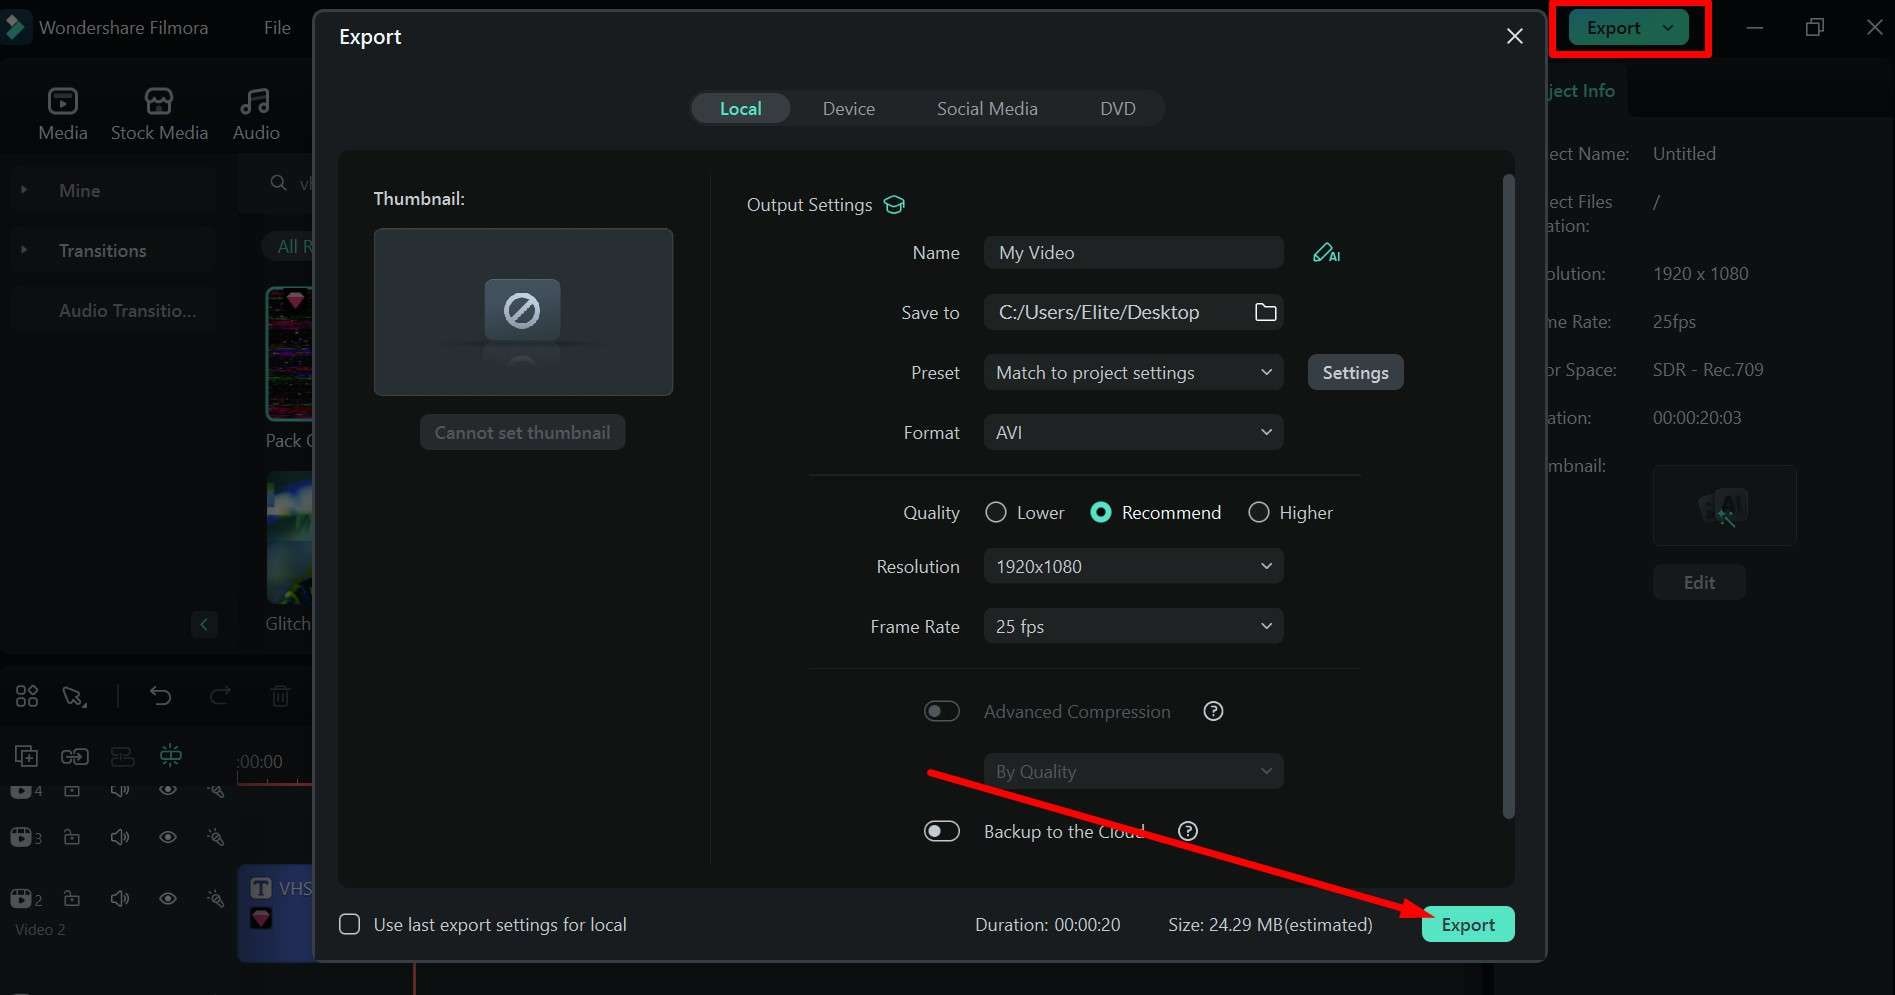
The project will now be added to the folder you've chosen and ready for viewing and sharing.
Conclusion
It doesn't matter if it's out of a sense of nostalgia, inspired by old home videos preserved through VHS-to-digital conversion, the creepiness factor of the found-footage style, or just a bit of artistic flair – adding a VHS overlay on video is a very popular effect these days.
Unlike some sites that let you add a VHS effect online, Wondershare Filmora can help you go the extra mile and create stunning transitions, add VHS title screens, and fine-tune these and other elements to get the perfect video.
Try it out for yourself, and see just how much flexibility and inventiveness you can have with this software and how much production value you can add even to seemingly simple videos.
secure download 