


 100% Security Verified | No Subscription Required | No Malware

Struggling with robotic, clunky animations? Mastering smooth keyframes in After Effects is the secret to professional motion graphics. Whether you're a beginner or looking to refine your Graph Editor skills, this guide covers everything from basic Easy Ease (F9) to advanced temporal interpolation.
But before we get to that part, let's learn more about keyframes, their relationship with animations, and how they can enhance different effects.
In this article

Why Use Smooth Keyframes in After Effects?

Smooth keyframes enable realistic animations and movement in video editing. They help create fluid and natural motion in several ways. First, keyframes can slow down the beginning of transitions and gradually accelerate motion. On the other hand, they can slow down motion at the end of transitions.
Editors can use Bezier curves to provide more flexible and complex control of the animation path and speed. The After Effects tool lets users adjust Bezier handles and fine-tune motion speed and path of keyframe transitions. With these customizations, natural acceleration and deceleration can be created. Smooth keyframes have advanced interpolation options that affect motion parameters.
After Effects features like Easy Ease allow you to adjust interpolation to smoothen the motion automatically. Smooth keyframes bring realism to animations because they mimic realistic physics. They can create seamless transitions between different sections and enhance visual appeal while giving more precise control over parameters for producing detailed animations.
How to Add a Keyframe in Adobe After Effects
In a nutshell, keyframes are the starting and ending points of a movement value within your video. It's easy to add keyframes in After Effects. Here are the steps for adding keyframes in After Effects:
Step 1: Launch After Effects and click New Project to start a new project.

Step 2: Adjust project settings like width, height, background color, and frame rate. When ready, click OK.

Step 3: Click on the Objects or Shape layer on the screen's bottom left side.

Step 4: Click the drop-down arrows to open all effects and motion graphics options. The stopwatch icons represent keyframes.

Step 5: Click on the Stopwatch icon next to the position. A diamond icon will appear on the project timeline.

Step 6: Select your object and shape, and move the play head to a different location. This will automatically create an additional keyframe.

5 Proven Workflows for After Effects Smooth Keyframes (Pro Techniques)
Keyframe interpolation allows you to change object transitions from one keyframe to another. You can configure temporal and spatial interpolation settings to create smooth animations with natural movement. Here are some of the crucial workflows you can use to get smooth keyframes in After Effects:
Tip 1: Use the Easy Ease In and Easy Ease Out features to speed up or slow down animations. To produce smooth results, use them both at the beginning or end of an animation. You can use it by right-clicking the keyframe, clicking the Easy Ease option, or pressing F9 on your keyboard.

Tip 2: Master the Graph Editor (Speed & Value Graphs). To achieve smooth keyframes in After Effects, you must manually adjust the influence handles in the Graph Editor. Pulling the Bezier handles increases the "Influence" percentage, creating that premium "pop" and "ease" look seen in professional motion graphics.

Adjust the speed and velocity of an animation to create smooth curves, resulting in naturally-flowing animations.

Tip 3: Use different interpolation methods, including hold, bezier, and linear.

For example, the linear method creates a straight line between two keyframes. On the other hand, the bezier interpolation method creates curved movements, resulting in smoother movements. The hold method freezes the value of an animation until the next keyframe. This method is a great option for creating static effects.

Tip 4: You can adjust Temporal and Spatial Interpolation in After Effects. Temporal Interpolation lets you adjust the timing between keyframes, while Spatial Interpolation determines the path between keyframes. By adjusting these settings, you can create smoother transitions and fine-tune motion. Simply right-click your keyframe and click Keyframe Interpolation to access these settings.

Tip 5: You can also add motion blur to animation to improve smoothness. Motion blur simulates the real-world effect of seeing quickly moving objects. You can enable motion blur by clicking on the icon located on the timeline pad.

Ideas & Tips for Dynamic After Effects Videos
Apart from using smooth keyframes, there are other ways you can create dynamic and visually appealing videos in After Effects. Here are some tips you should consider:
-
Always Use the Graph Editor
The Graph Editor is a powerful tool you should master for fine-tuning animation timing, moving, and deleting animations. It also has useful speed settings you can customize to create more natural animations.
-
Use Pre-compositions
Pre-compositions let you manage large projects and organize layers effectively. You can apply effects to several layers to create modular compositions, resulting in more visually appealing and realistic videos.
-
Add Motion Blur
Always enable motion blur when adding animations to add additional smoothness and realism. Make sure to adjust the shutter angle so you can customize the intensity of the effect to get the best possible results.
-
Use Color Grading
Color grading and correction tools let you create an appealing and consistent look for your videos. Use the Look-Up Tables to experiment and find the right color grading combinations for natural results.
-
Add Camera Movements
After Effects has many 3D camera tools that allow you to create dynamic camera movements, giving your animations a better perspective. By combining multiple camera movements using depth of field, you can create a more cinematic experience.
After Effects Alternative: Wondershare Filmora
Don't have time to master the complex Graph Editor? Wondershare Filmora offers a simplified Keyframe Panel that allows you to achieve professional-grade smoothness with just a few clicks. Perfect for creators who want speed without sacrificing quality.
After Effects is one of the best video editing tools available. However, as you might have noticed, it's not the most beginner-friendly platform. It's meant for professionals who have years of experience. But don't worry. Other alternatives allow you to create smooth keyframes without much effort.
Wondershare Filmora is a video editing and recording software with various templates and presets. It also has a Keyframe Graph Editor that lets you add, edit, and smoothen keyframes easily. Because of its powerful features, it can be used by professionals and beginners.
Here's how to use Filmora to create smooth keyframes and remove them if needed:
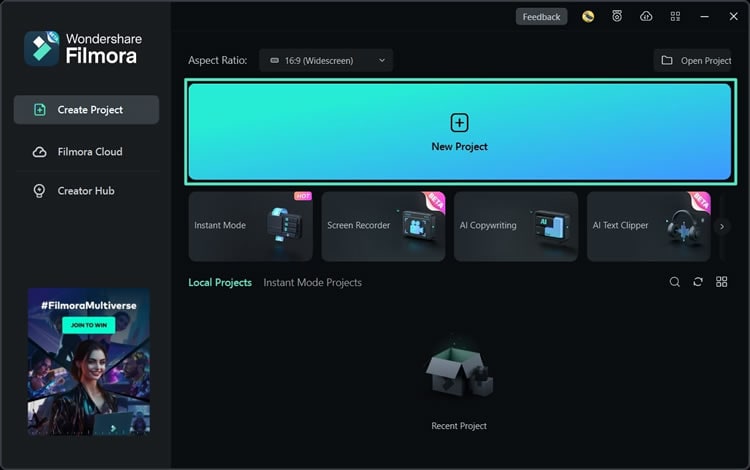
Step 1: Go to Filmora's website, download, and install the software. Launch the software and select New Project.
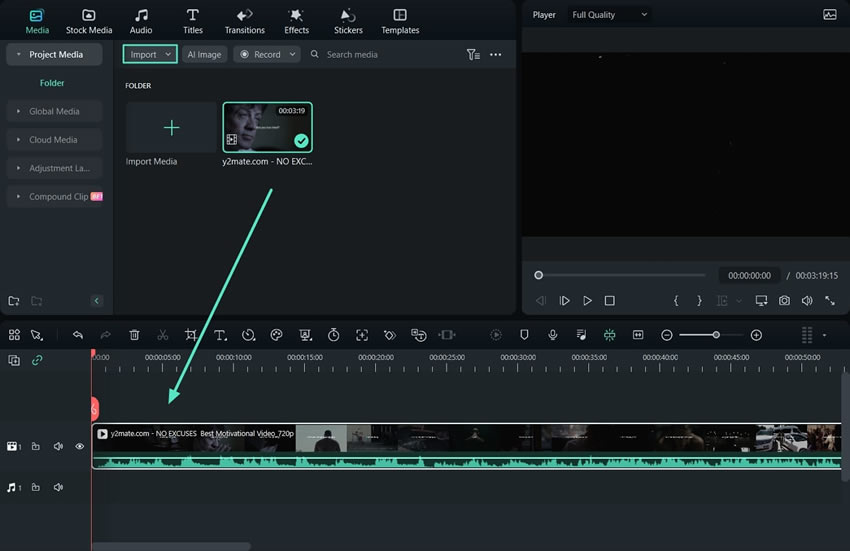
Step 2: Select Import Media, find the video you want to edit, and drag it on the timeline.
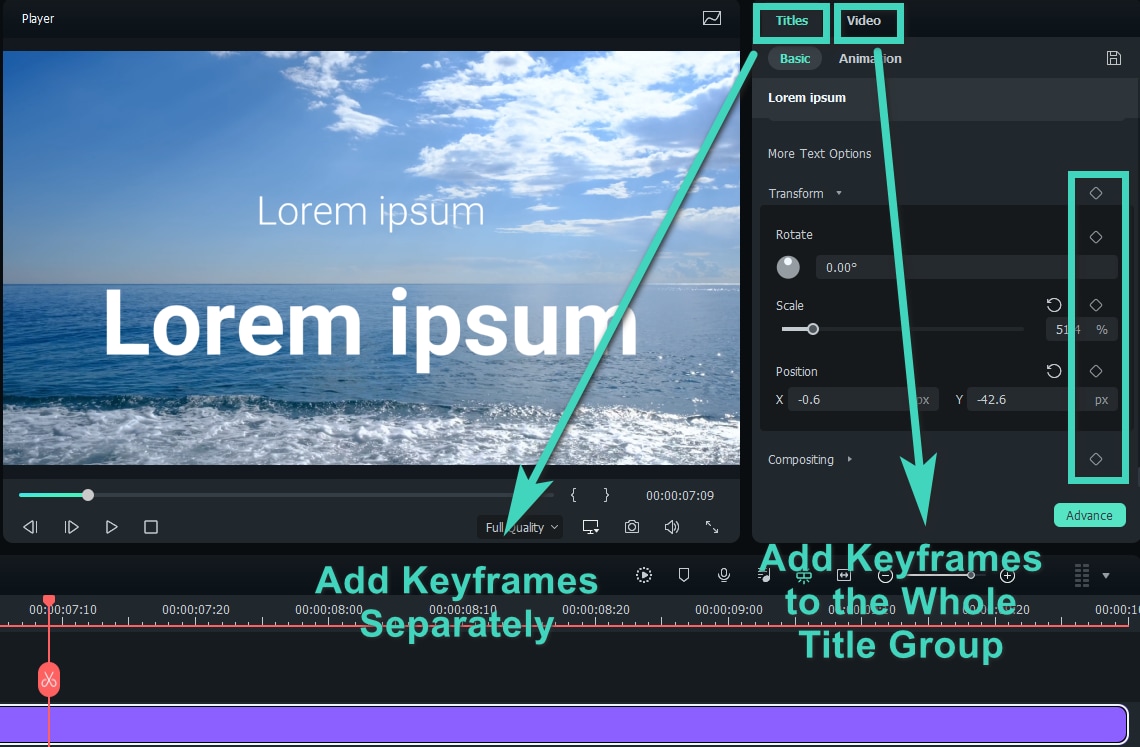
Step 3: Click on your video, select Video, and then Basic. Move the video progress indicator to where you want to add the keyframe. Click the keyframe icon next to the effect you want to add.

Step 4: Change keyframing settings to create smoother effects, adjust setting values, and apply new effects. You can use animation, auto-enhance, drop shadows, transform, etc.
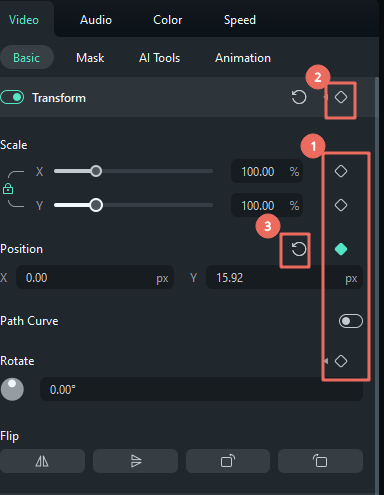
Step 5: Click the keyframe icon next to the parameters you've added to remove that keyframe (1). To remove all effects or animations, click the keyframe icon next to their name (2). To delete all keyframes in your video, click Reset (3).
Hot topics:
Conclusion
Adding keyframes isn't the hardest thing you can do in video editing. Many other video editing features and workflows require more time and effort. Don't be scared to try out new functions in your editing software to create more appealing content.
However, using simple and more user-friendly software like Filmora is always a good idea if you don't have experience with it. Take the time to try out these steps and customize keyframe effects to see how different changes affect the final outputs.
