


 100% Security Verified | No Subscription Required | No Malware


Color correction and color grading are two critical steps of the video editing process. They help content creators and professional video producers accomplish robust, bright, vivid colors on a screen.
This capability is critical to creating colorful, lifelike videos with colors as close to real life as possible.
Since they play such a vital role in post-production, color correction and color grading are paramount to producing natural-looking, shareable video content according to the modern standards of online streaming and social media platforms.
Today, we’ll discuss both post-production techniques to highlight their capabilities and key differences. In addition, we’ll give you the best software solution for taking your color correction and color grading skills to the next level.
In this article
Color Correction Explained
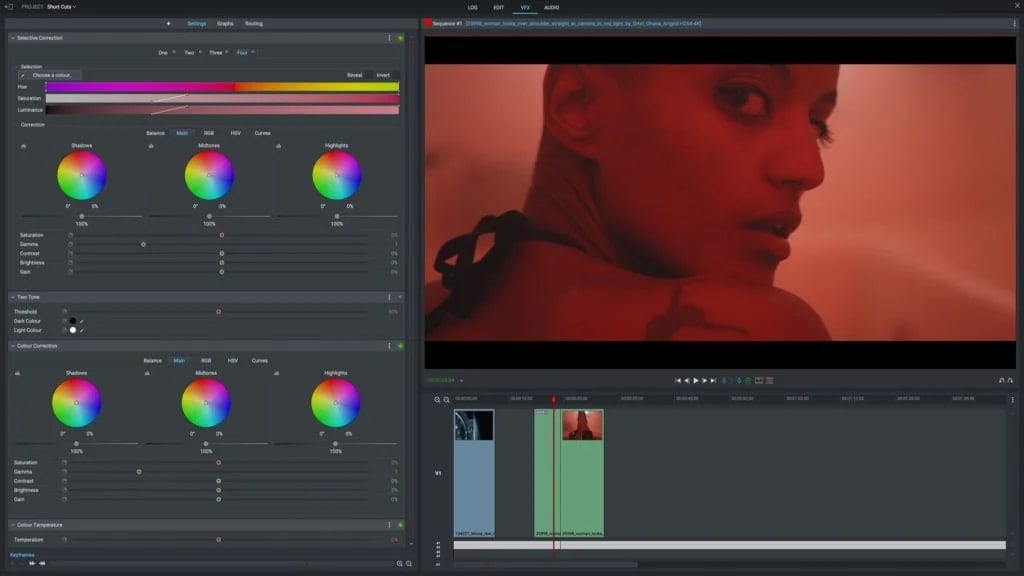
Color correction is a technical procedure for balancing colors throughout your video footage during the color editing process. It makes all the colors appear in harmony, allowing you to accomplish the proper temperature across all your videos.
As a result, your footage appears as close as possible to what you see with the naked human eye. Put simply, color correction helps you accomplish a consistent look by balancing colors to give your footage a more lifelike appearance.
Raw video footage almost always appears out of balance due to out-of-the-line color sequences and messed-up tones. With color correction, you can give your videos a more unified appearance by balancing all colors and bringing them closer to the neutral baseline.
Color correction is typically used to adjust color settings like white balance, contrast, exposure, etc. It comes in two forms – primary and secondary color correction. The former helps you make adjustments to the whole color spectrum, whereas the latter allows you to calibrate specific colors.
Here are the essential color correction steps:
- Determine the color profile
Match your video format with the right color profile to accomplish a balanced exposure throughout your footage.
- Saturation adjustment
Fix high exposure and balance the saturation to give your content a more natural appearance.
- Adjust the contrast
Color-correct the levels of light and dark colors in your video to make the visual image appear clearer, sharper, and more detailed.
- Tweak the white balance
Create a harmony of all colors in your video using the color curves to fix white balance maladjustments.
- Set individual color tones
Accomplishing balanced color tones gives your footage a more unfiltered, authentic, and realistic look.
Color Grading Explained
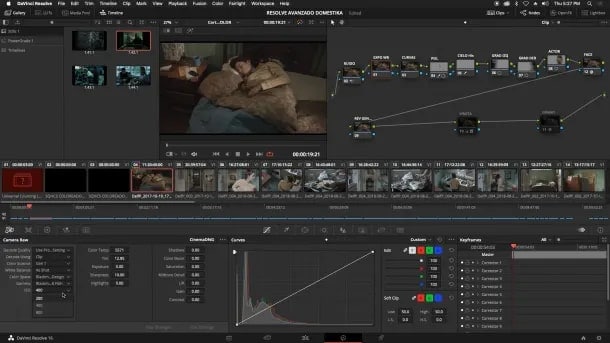
Color grading comes after color correction in the video editing and post-production process. It refers to the technical practice of finding the right balance between essential aesthetic elements of a color scheme in your footage.
Color grading helps you tweak the video’s visual settings, such as brightness, saturation, hue, and LUTs (lookup tables). It empowers you to set the tone, style, and mood of each sequence in your video by manipulating contrasts and colors to enhance storytelling and intensify the visual tone across your video.
Thanks to that, you can rely on color grading to develop your personal style and ensure you convey the desired feelings and emotions with your video content.
Here are the essential color grading steps to get you started:
- Correct the colors
Start your project by correcting the balance and colors in your footage to normalize the appearance of your video and make the colors appear as natural as possible.
- Match individual colors according to the scheme
Balance the contours and use LUTs to harmonize the individual colors to ensure they match the default color scheme.
- Create a unified look to potentiate emotions
The balance between color correction and color grading is integral to achieving a uniform, professional, and cinematic visual appearance across your video footage. Use color grading tools to ensure all colors match between all the shots, thus emphasizing the emotions you wish to convey with your video.
- Adjust chroma and hues
Finally, fine-tune chroma and hue settings to achieve a consistent look in each scene and enhance your footage beyond the expectations of your viewers.
Key Differences Between Color Correction and Color Grading
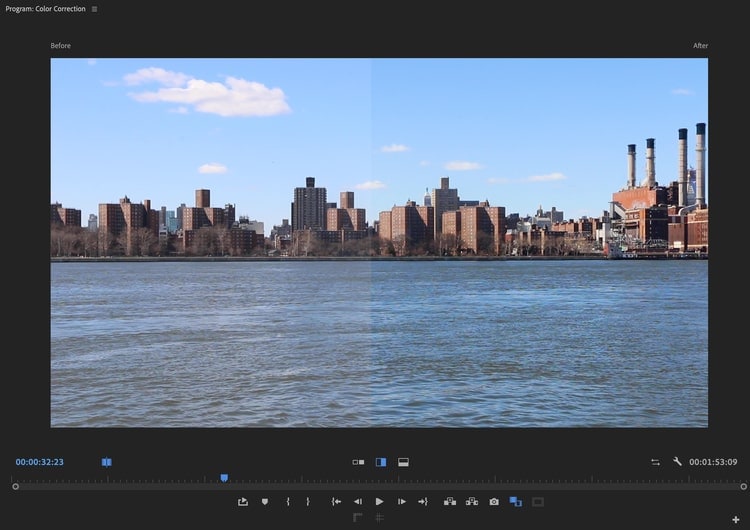
You may learn that the terms color grading and color correction are often used interchangeably. However, they play two very different roles in the video editing process. Both techniques represent two distinct video editing phases in the video post-production process.
Color correction is the technical process that comes first. It involves correcting color issues with raw video footage. The process allows you to balance tones and hues, giving you control of the “looks” of your footage.
Thanks to that, you can balance the colors between multiple video clips, giving a unified appearance to your footage. Since color correction lets you adjust settings like white balance, contrast, and exposure, it helps ensure that all colors are accurately and realistically represented across all your videos.
Color grading is the next step in post-production. It empowers you to set the overall style of the coloring of your video footage. Instead of altering the colors to give your videos a more realistic appearance, color grading infuses your footage with a personalized visual tone.
It helps convey your message by creating an emotional bond with the viewers. Though they appear to be the same thing, color correction, and color grading are two different approaches to adjusting the color scheme of your video footage.
Color correction is all about achieving balance by accomplishing technical perfection. Here’s how it differs from color grading:
- Restoring quality – color correction is paramount to content repurposing as it can help restore low-quality video.
- Matching natural (realistic) appearance – give your footage a lifelike look to create professionally-looking content with consistent and unique storytelling.
- Accomplishing technical precision – tweak color issues like undesired color artifacts, exposure, and color imbalances to deliver technically perfect video footage.
Color grading, on the other hand, is more about getting creative with the style and the tone of your footage. It helps you build your storytelling, allowing you to connect with your viewers and establish a meaningful bond through conveying emotions.
Here’s how it differs from color correction:
- Matching video aesthetics – develop your personal brand by giving your footage a visually appealing and consistent look.
- Enhancing narrative – consistency complements the shared video narrative, helping you highlight key moments and creating an emotional and visual relationship with the viewers.
- Complementing artistic creativity and expression – evoke emotions with the target audience using top-grade color styles, tints, and filters.
Learn More about Filmora Video Editor

The Importance of Color Grading and Color Correction

Color correction and color grading are vital color adjustments in filmmaking. They are a crucial part of the post-production process, allowing professional colorists and cinematographers to polish and perfect raw video footage according to modern industry standards and viewers’ preferences.
No matter how professional your equipment and lighting setup is when you record video footage, a camera can’t depict colors as naturally and accurately as the human eye. That’s why raw videos look slightly off from the natural-looking colors you perceive around you.
Though both techniques play a vital role in the movie industry, helping with storytelling and development, they serve different purposes. Because of that, they have valuable applications across a range of industries, such as digital marketing, content creation, film, gaming, music production, and more.
Color correction or just coloring helps set the mood for the story someone is trying to convey, while color grading helps set the tone to captivate the viewers and bring them on board with the shared narrative. Without these color adjustments, your video footage might appear unprofessional due to unrealistic and unbalanced colors.
Why Use Filmora for Color Correction and Color Grading

Wondershare Filmora is an AI-powered video editing software powerhouse packed with top-grade AI editing tools, including advanced color correction and color grading features.
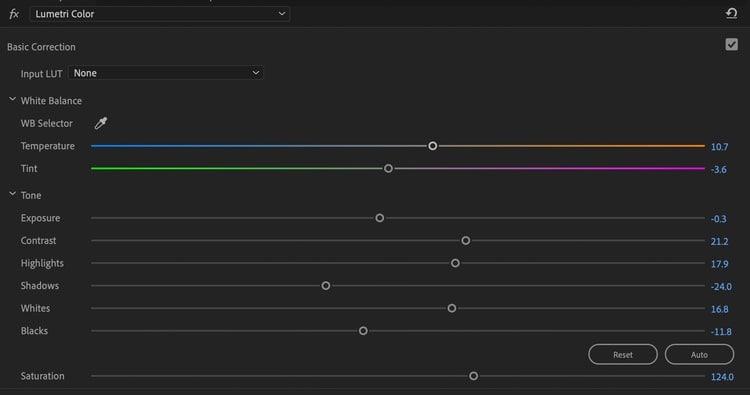
Filmora empowers you to color-correct and color-grade your content to perfection by adjusting an array of visual and coloring aspects of your footage, such as 3D LUTs, white balance, temperature, tint, contrast, saturation, and brightness.
Thanks to its intuitive user interface and transparent color tools, you can easily fix any color issues, correct footage imperfections, and polish your content to perfection. With Filmora, you can enhance your video footage beyond your expectations to transform your videos into more consistent, vibrant, naturally-looking, and appealing content for professional distribution.
Here’s a brief overview of how Filmora helps streamline the color correction and color grading process:
- Premade color settings and presets for adjusting color exposure and temperature give your footage a more detailed and enhanced cinematic look.
- Color correction preset categorization streamlines preset applications with a simple, user-friendly color correction tool.
- Advanced color correction with a preview option helps you track and view the changes you make in real time.
- Add color correction presets to the Favorite section for faster adding or removal of color adjustment presets with a few clicks.
- Fine-tune color settings by adjusting different parameters like Histogram, White Balance, and 3D LUT to ensure a balanced distribution of colors, proper temperature, and visual style across your videos.
- Make sophisticated customizations to different Color settings such as exposure, brightness, contrast, saturation, and vibrance.
- Optimize the light in a video by adjusting highlights, shadows, whites, and blacks.
- Adjust individual color ranges by experimenting with different HSL values to additionally fine-tune color settings like color brightness, saturation, etc.
Now, let’s see how to use Wondershare Filmora color correction/color grading software to turn your raw video footage into a cinematic masterpiece.
How to Do Color Correction in Filmora
Download and install Filmora on your computer, then follow the steps below to access and use the Color Correction tool in post-video creation.
- Launch Filmora on your computer and navigate to Create Project > New Project;

- Access the Media Library and import your video;
- Drag and drop the video into the timeline, then double-click it to open the Editor;

- Select the Color tab and navigate to the Basics menu;
- Adjust Contrast, Vibrance, Saturation, and White Balance;
- Move a LUT slider to apply your changes;

- Go to the Preset tab and select a pre-made LUT you wish to apply to your video;

- Toggle the Color Match switch to On, click View Comparison to match your video with a reference shot, and click OK.

Now, you can proceed to the color grading phase of your video editing process.
How to Do Color Grading in Filmora
Follow the steps below to perform color grading in Filmora:
- Navigate the Color section to HSL and Curves tabs to create the tone and style of your video aesthetics;
- Click the HSL tab to select the preferred color from the rainbow color palette;
- Adjust the Hue, Saturation, and Luminance settings for each color you select;
- Use the slider to fine-tune the colors or opt for applying a LUT value directly;

- Now go to the Colors tab, select the primary color for your video, and adjust the curves to balance your color scheme;

- Once you’re done, click Export;
- Select the preferred video format and a save path;
- Click Export to save your video.

Conclusion
This article shared some insights on color correction and color grading, highlighting their importance for creating perfectly polished, professionally-looking video content for online distribution.
We’ve reviewed the roles these color adjustments play in the video editing and post-production process. We also outlined their key differences to help you understand the subtle nuances between the two color editing techniques.
Color correction and color grading are two distinct yet intertwined technical procedures. Both are required to produce professional and balanced video footage. If you’re new to color editing, use a color correction/grading software tool like Wondershare Filmora to streamline the process and get familiar with making color adjustments with a few clicks.
Thanks to its intuitive and transparent user-friendly interface, you can easily transform raw, unprofessional footage into a unique and authentic masterpiece. Unleash your creativity and develop a personalized editing style using the Filmora AI-powered color correction/grading software powerhouse.
