
 100% Security Verified | No Subscription Required | No Malware


 ChatGPT
 Perplexity
 Gemini
 Claude
 Grok
Grok
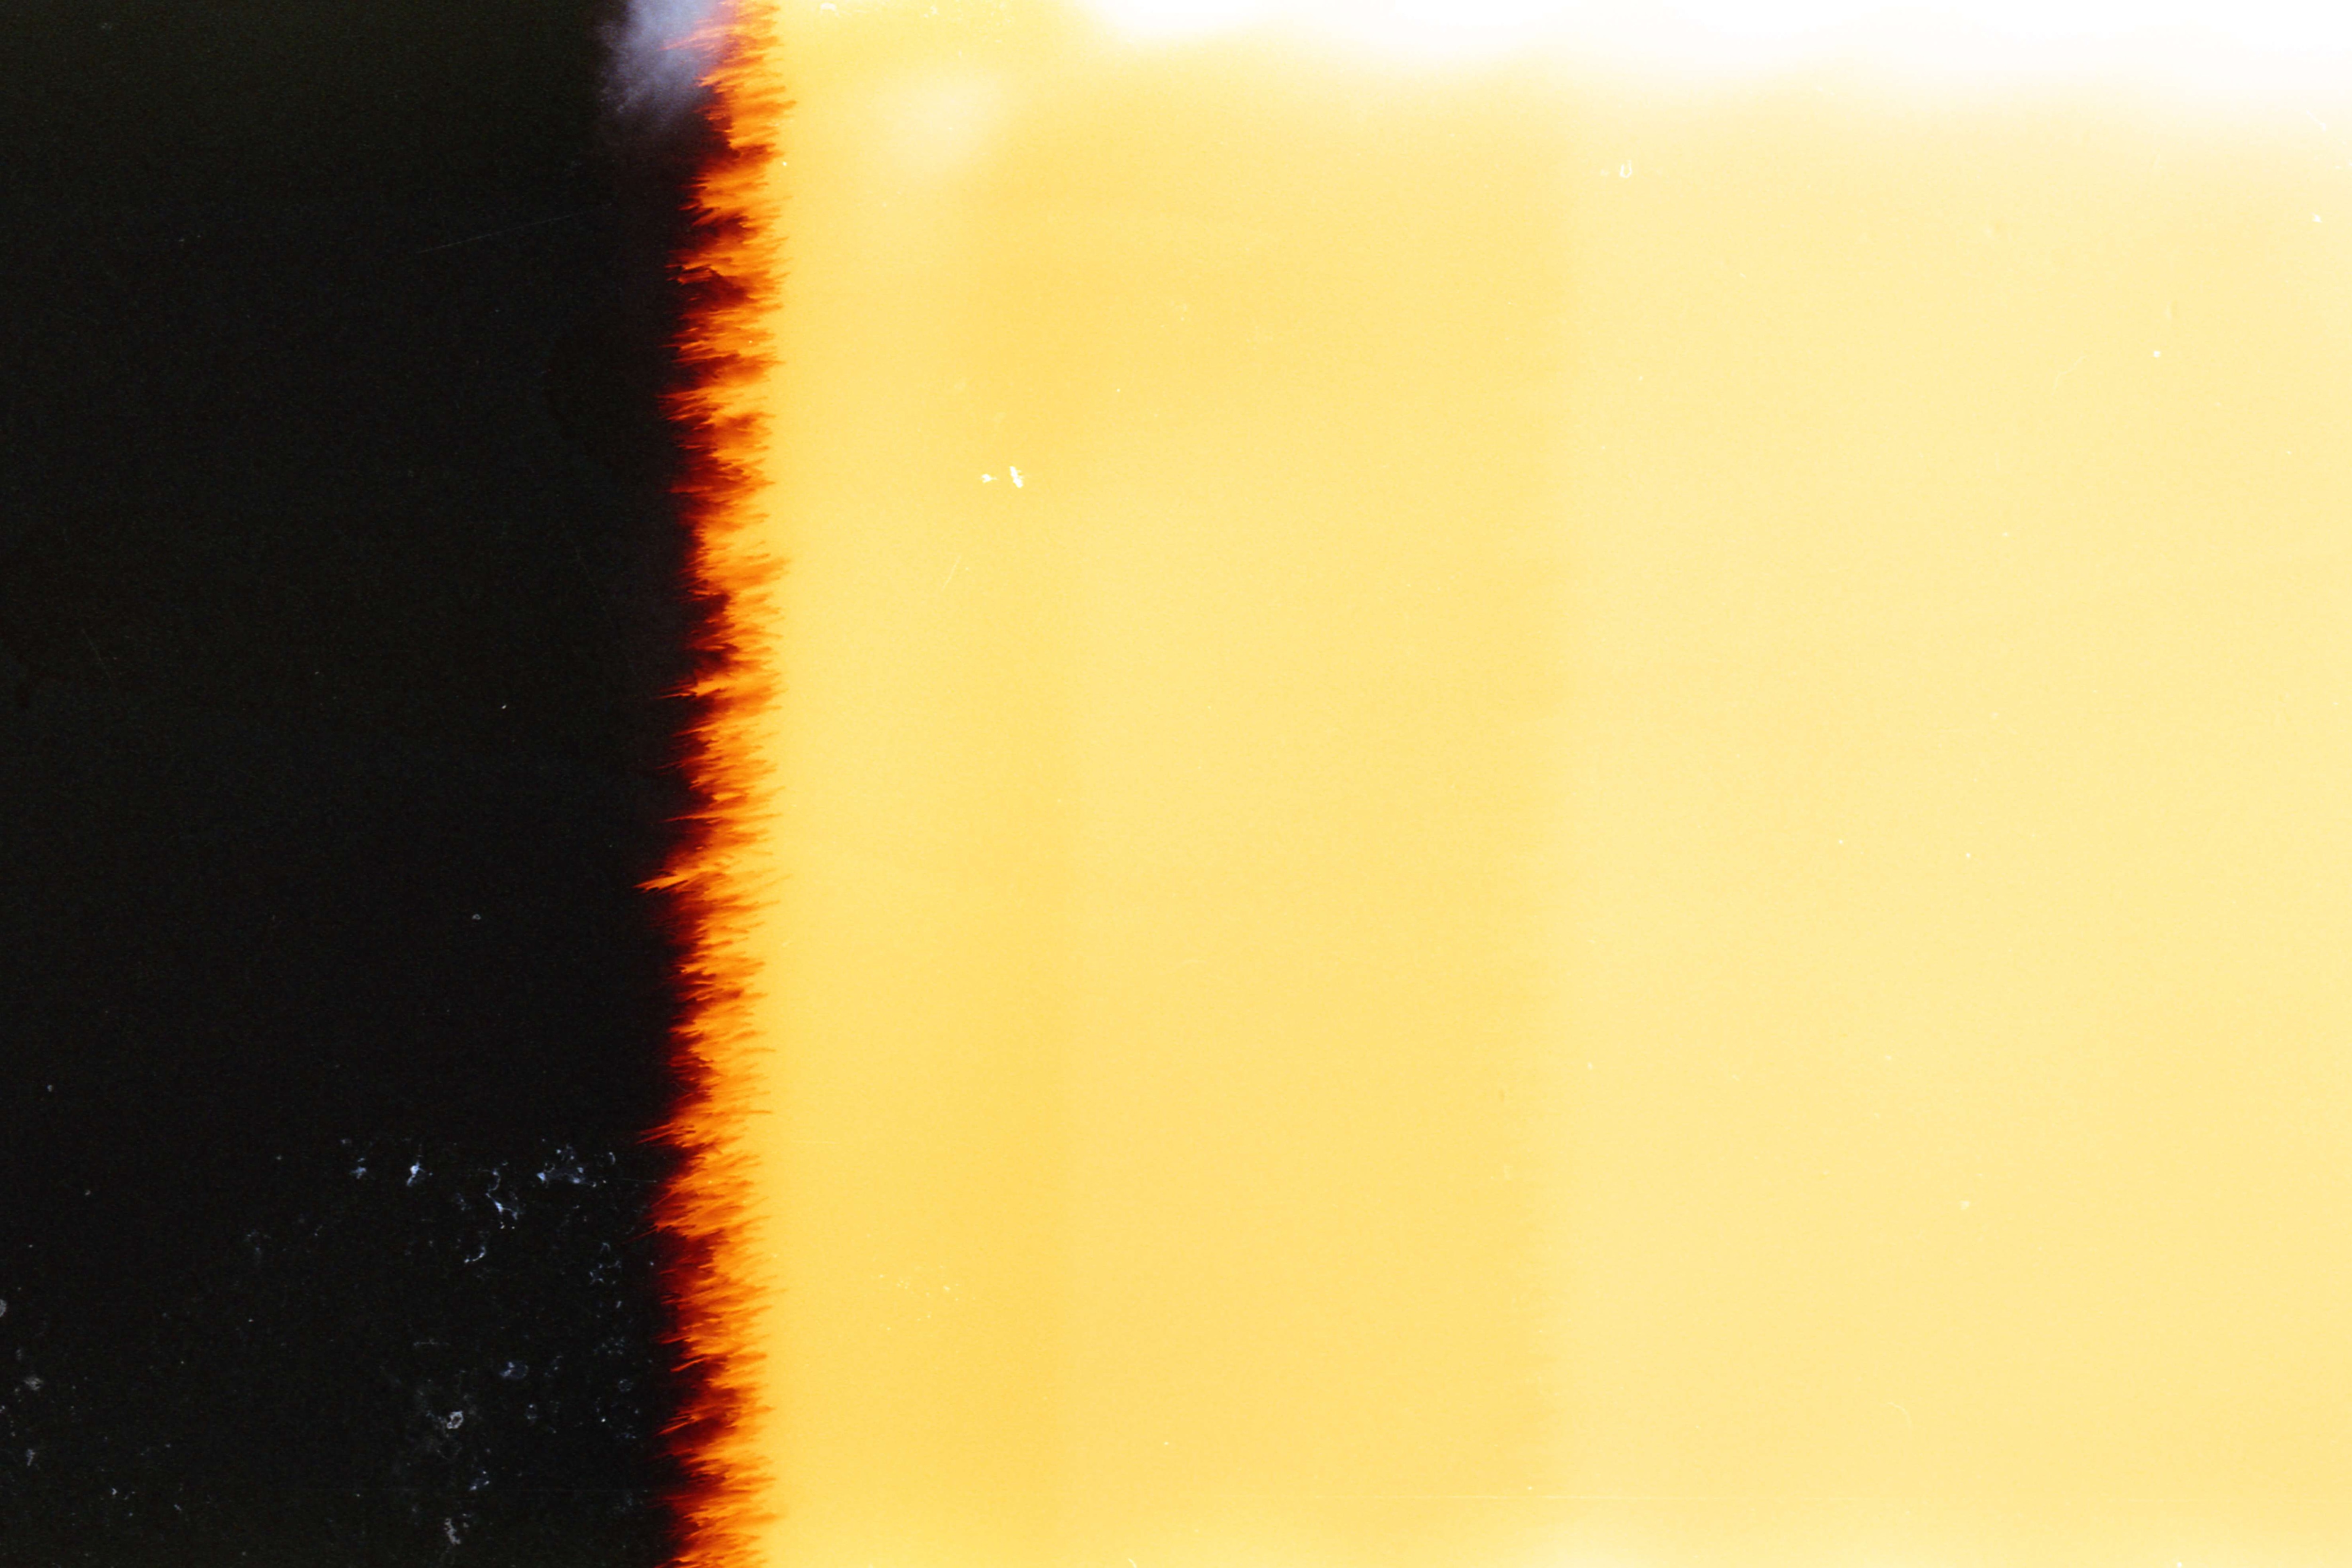
The film burn transition effect was invented a long time ago, in the early days of experimental filmmaking. Movie directors would record something, then play it on a white canvas, and record that canvas while burning the film track in their projectors. The result would be astonishing footage, especially for that era, when the film burns and gives off a mesmerizing effect.
At that time, this would mark the end of the movie, while today, filmmakers and video editors use it as a transition effect that leads viewers into a new scene in a cool way. Let’s move on and see some examples of this effect used in movies.
In this article
What are Some Popular Film Burn Effects in Movies?

Since it is so cool, it is no wonder that Hollywood film directors use it in their movies. Here are 3 examples of the film burn effect used in movies.
Fight Club
There is a scene in Fight Club where they explain cigarette burns as an industry term. The context of the scene is not decent to write about, but they use the film burn effect to add a 25th frame in the movie, explaining how this is a form of subliminal messaging.
Death Proof
In the movie Death Proof, there is a lap dance scene with Kurt Russel where the film burns transition effect can be seen at the end of the scene. This movie also has a constant movie flicker effect because it was intended to give off an old movie vibe, and they did that quite successfully.
Inglorious Bastards
Near the end of the final act of this Quentin Tarantino masterpiece, the lead female character actually burns the film while it is being played in the cinema, showing exactly how this effect came to be. The movie also shows the entire process of achieving this effect.
Since we are now aware of how effective and popular the film burn effect can be, let’s see how to use it in our own projects.
How to Add the Film Burn Transition in Premiere Pro
If you are someone who is familiar with the video editing industry, or even if you are only starting out, you have probably heard that Adobe’s Premiere Pro is an excellent video editing tool that is worth your time, money, and effort. And this is true. This tool offers everything you need and then some.
However, it can be very challenging for newcomers because the interface takes time to get used to. Nevertheless, sticking to the topic of this article, you will find that applying the film burn effect in Premiere Pro is not that challenging. Let’s see how to do it in this step-by-step guide.
Step 1: Follow this download link and download the free Film Burn Transition pack. When you are done, add those files to your project.
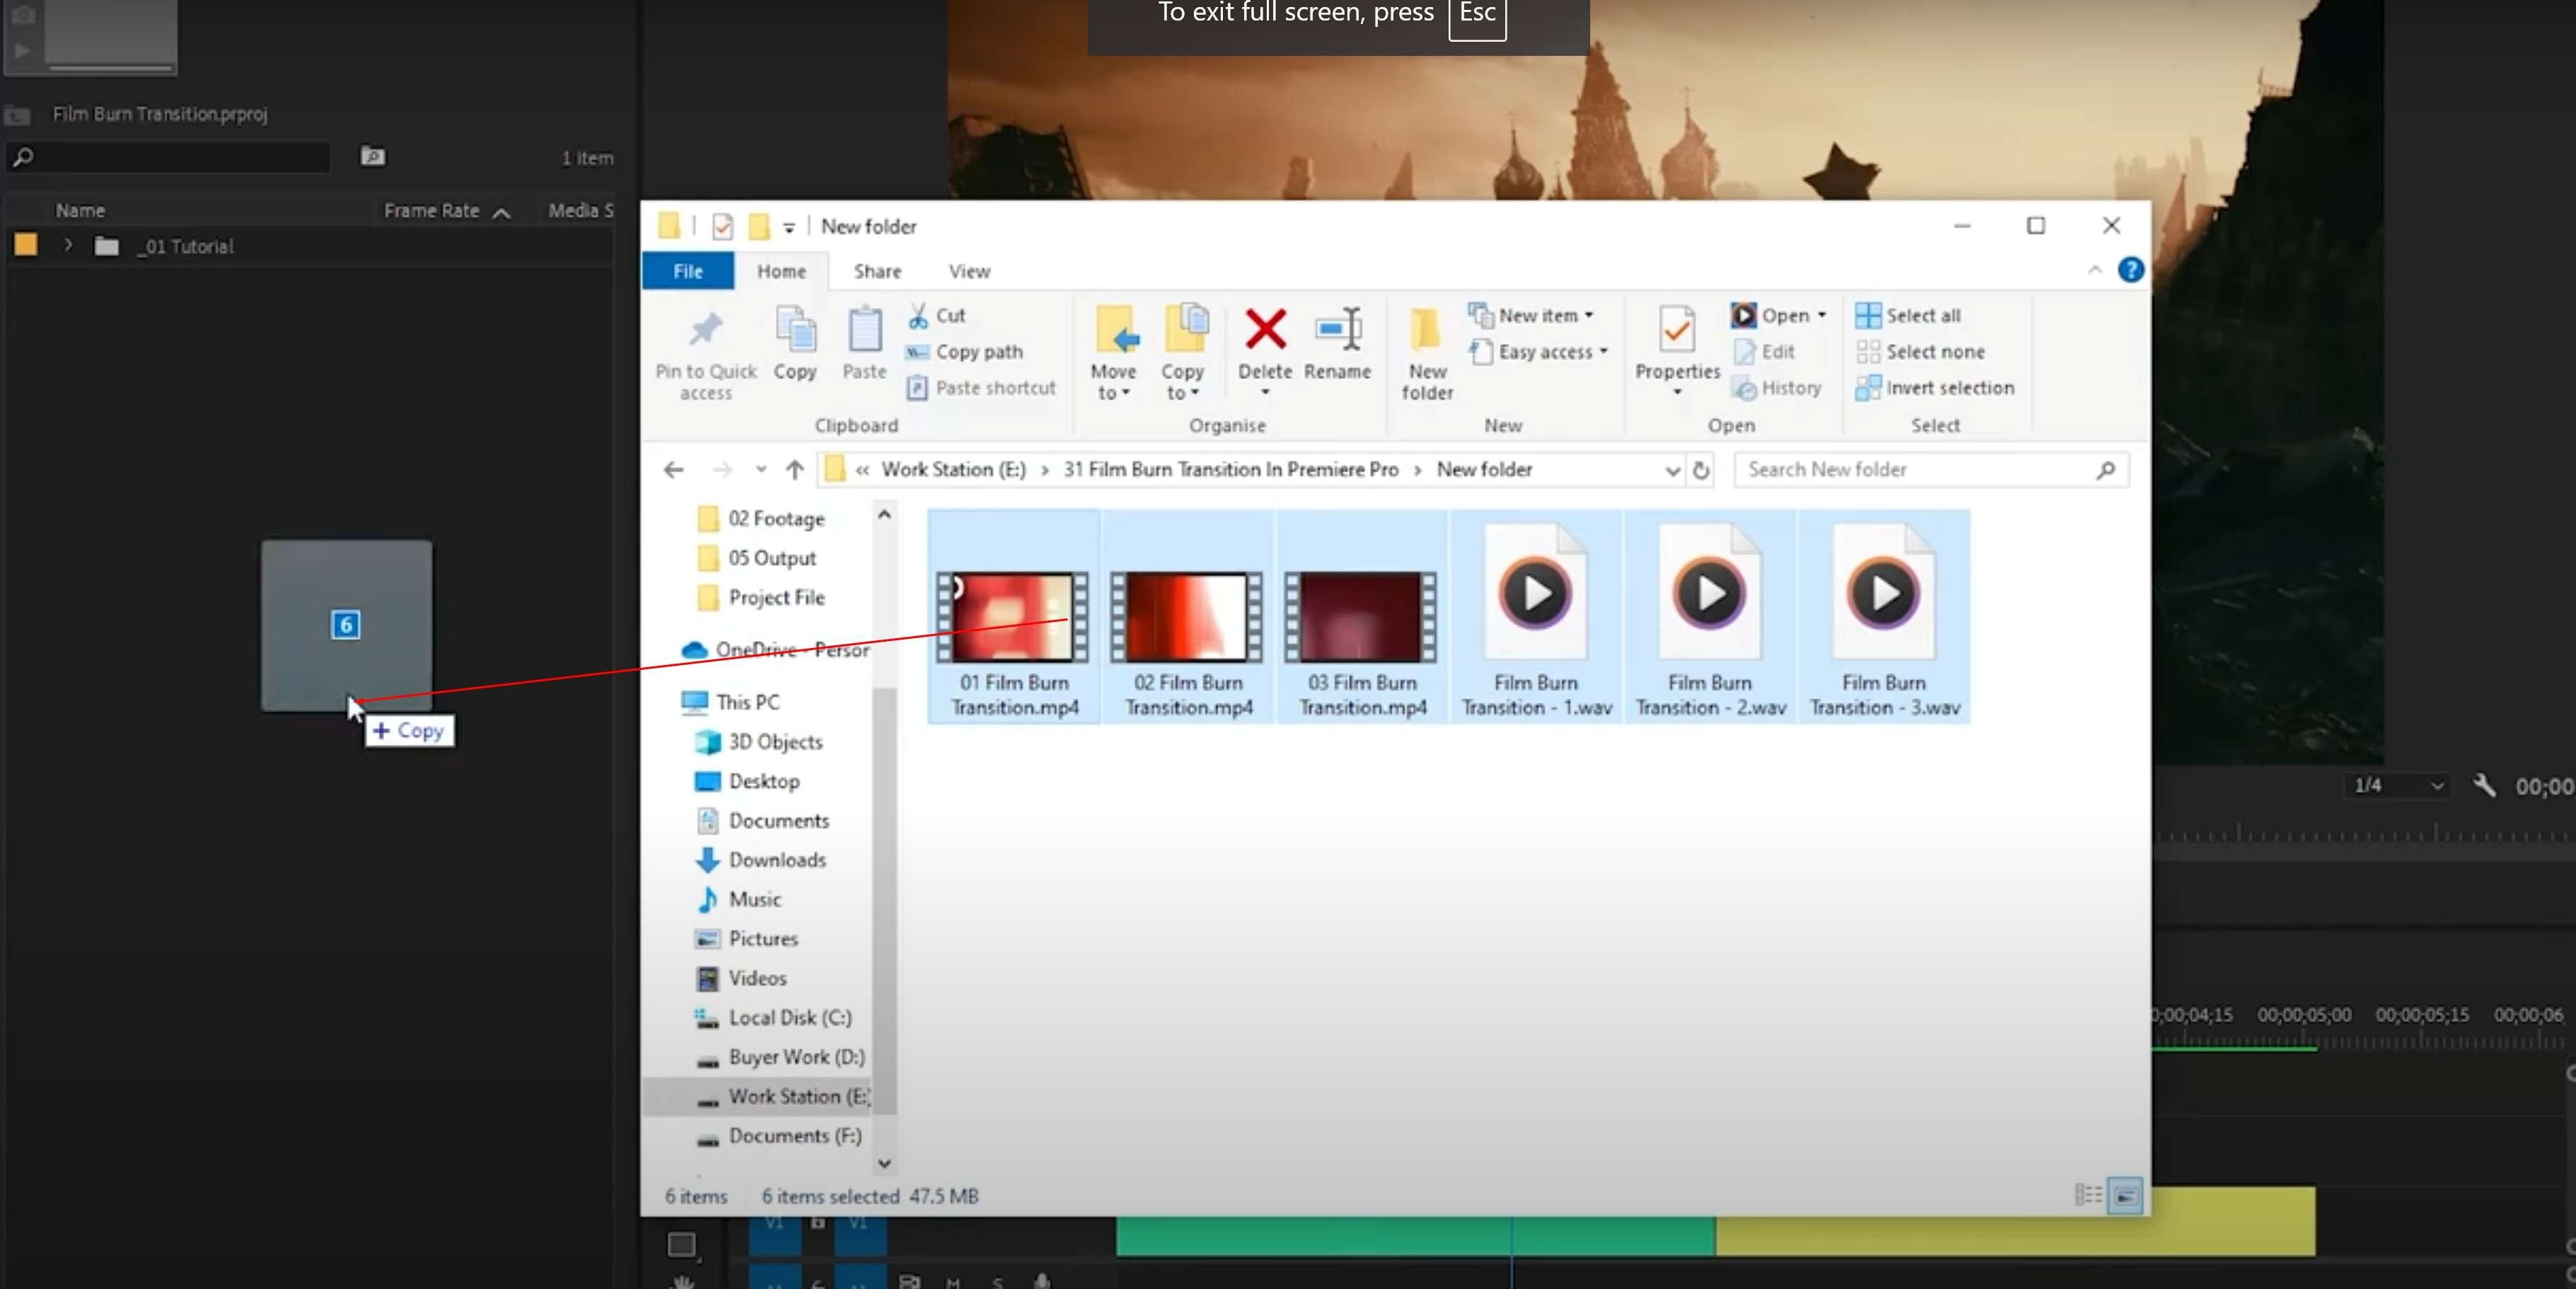
Step 2: Drag one of the assets to the timeline between the two clips or pics.
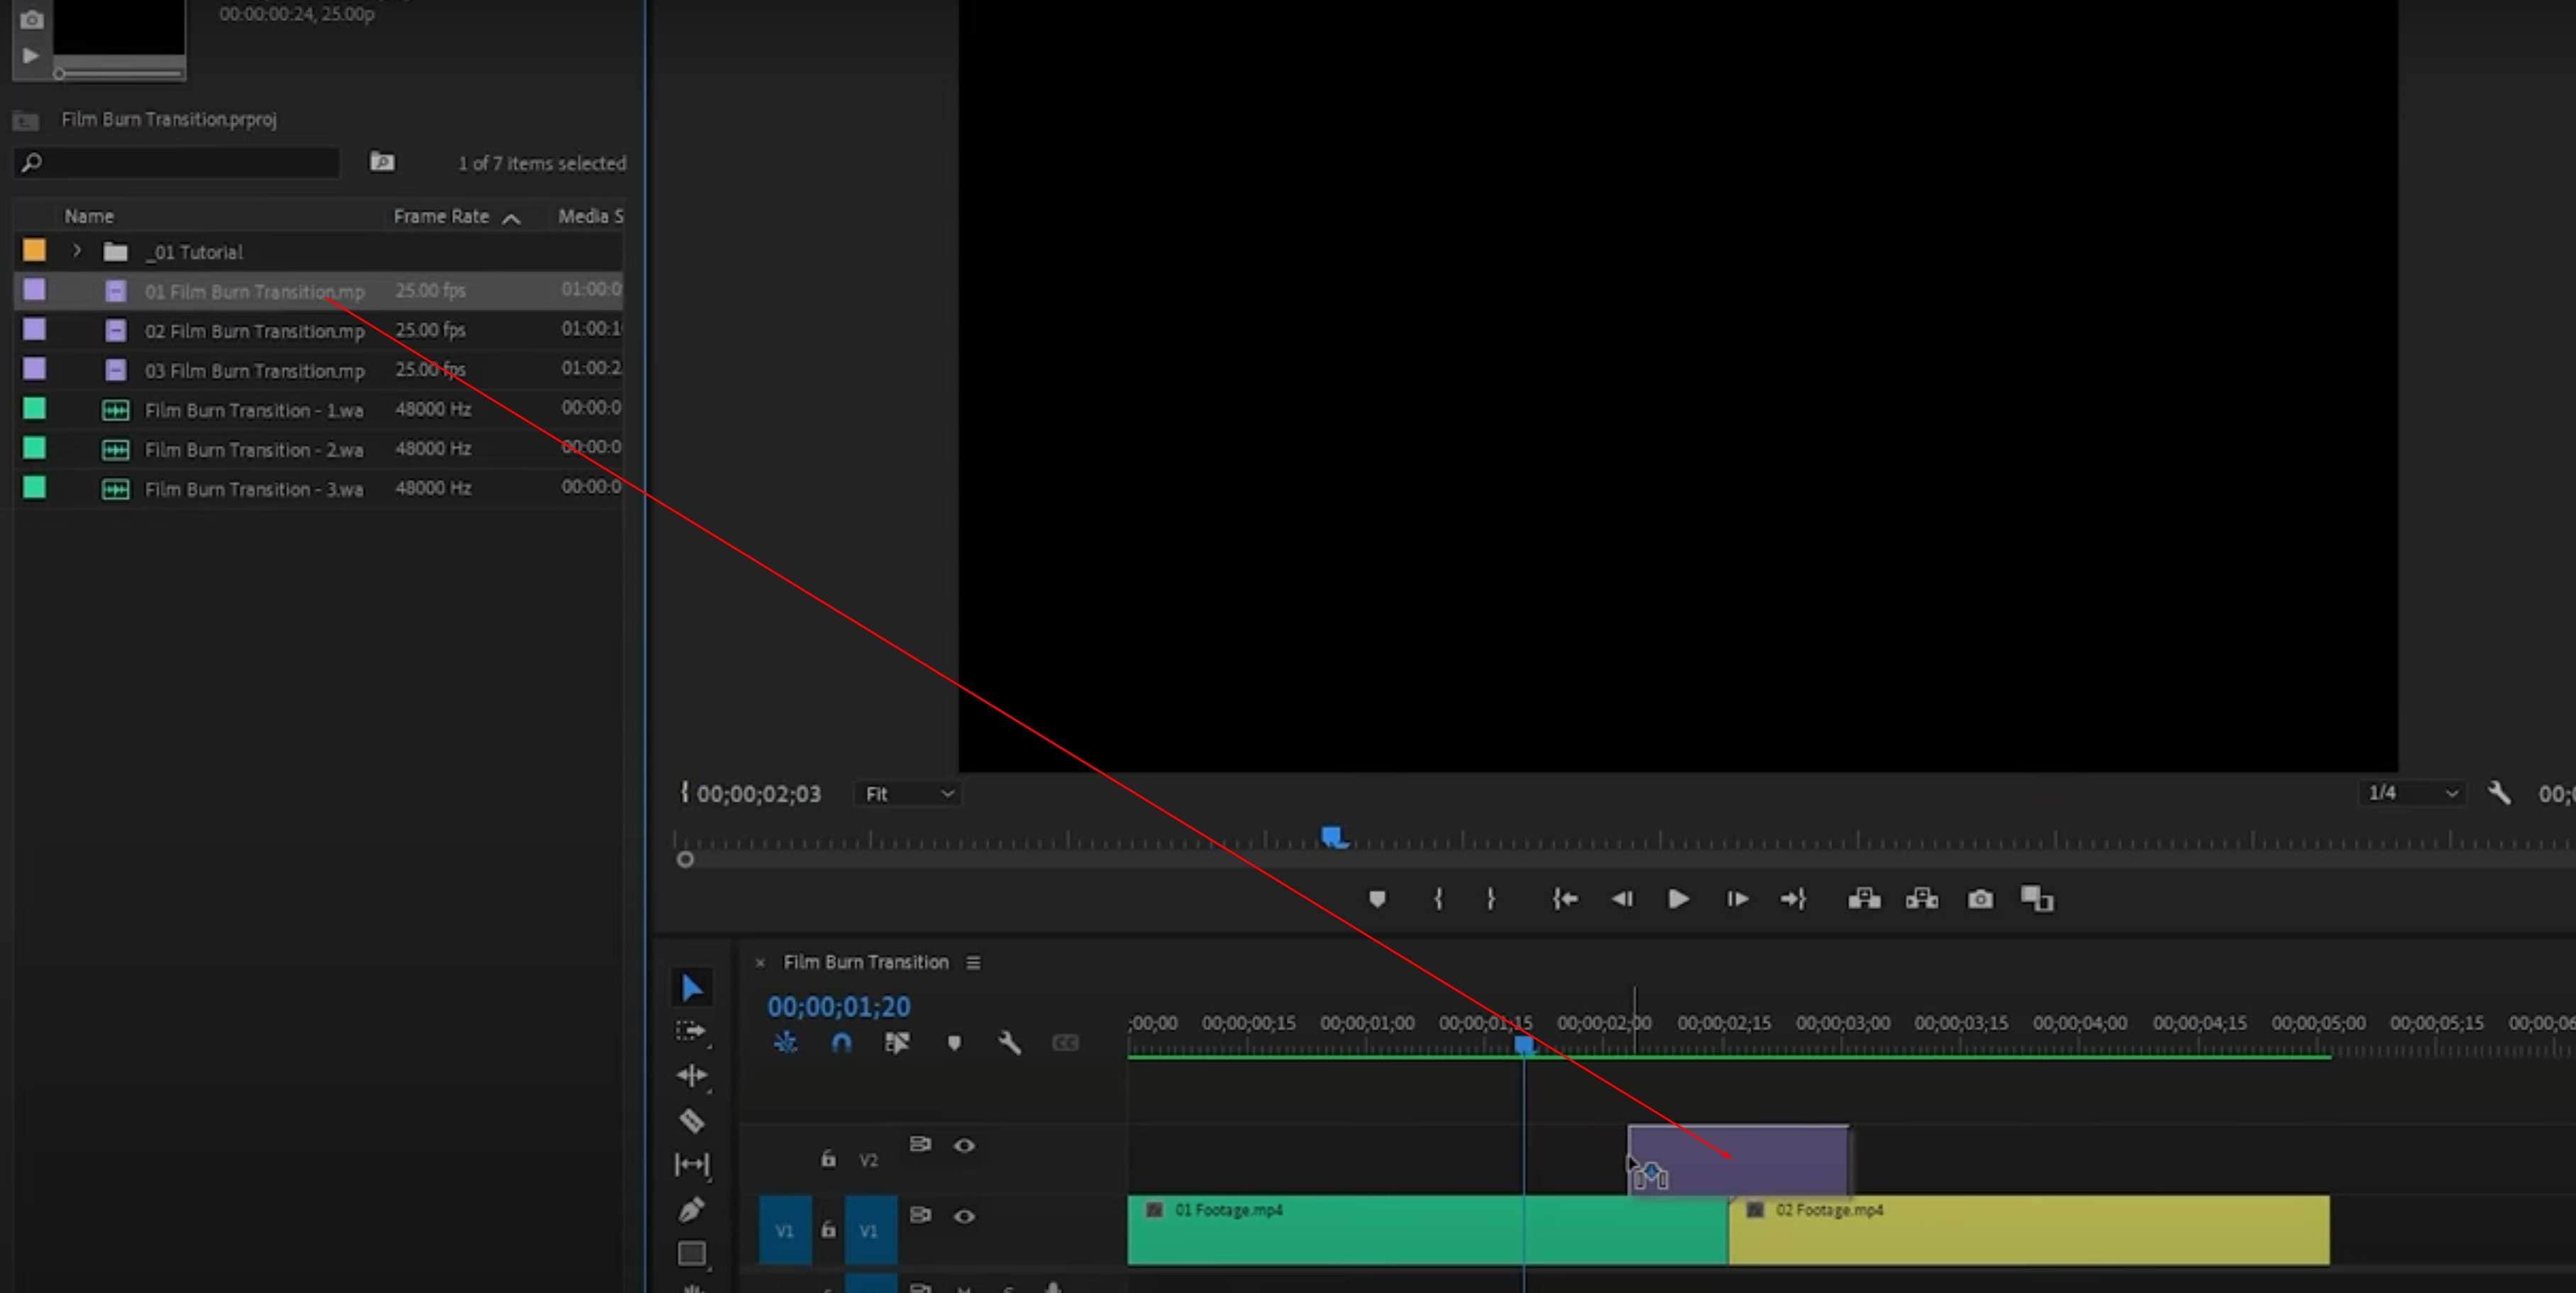
Step 3: Click on the added asset and go to Effect Controls on the top-left. Then, click on Opacity, and in the drop-down menu next to Blend Mode, select Screen.
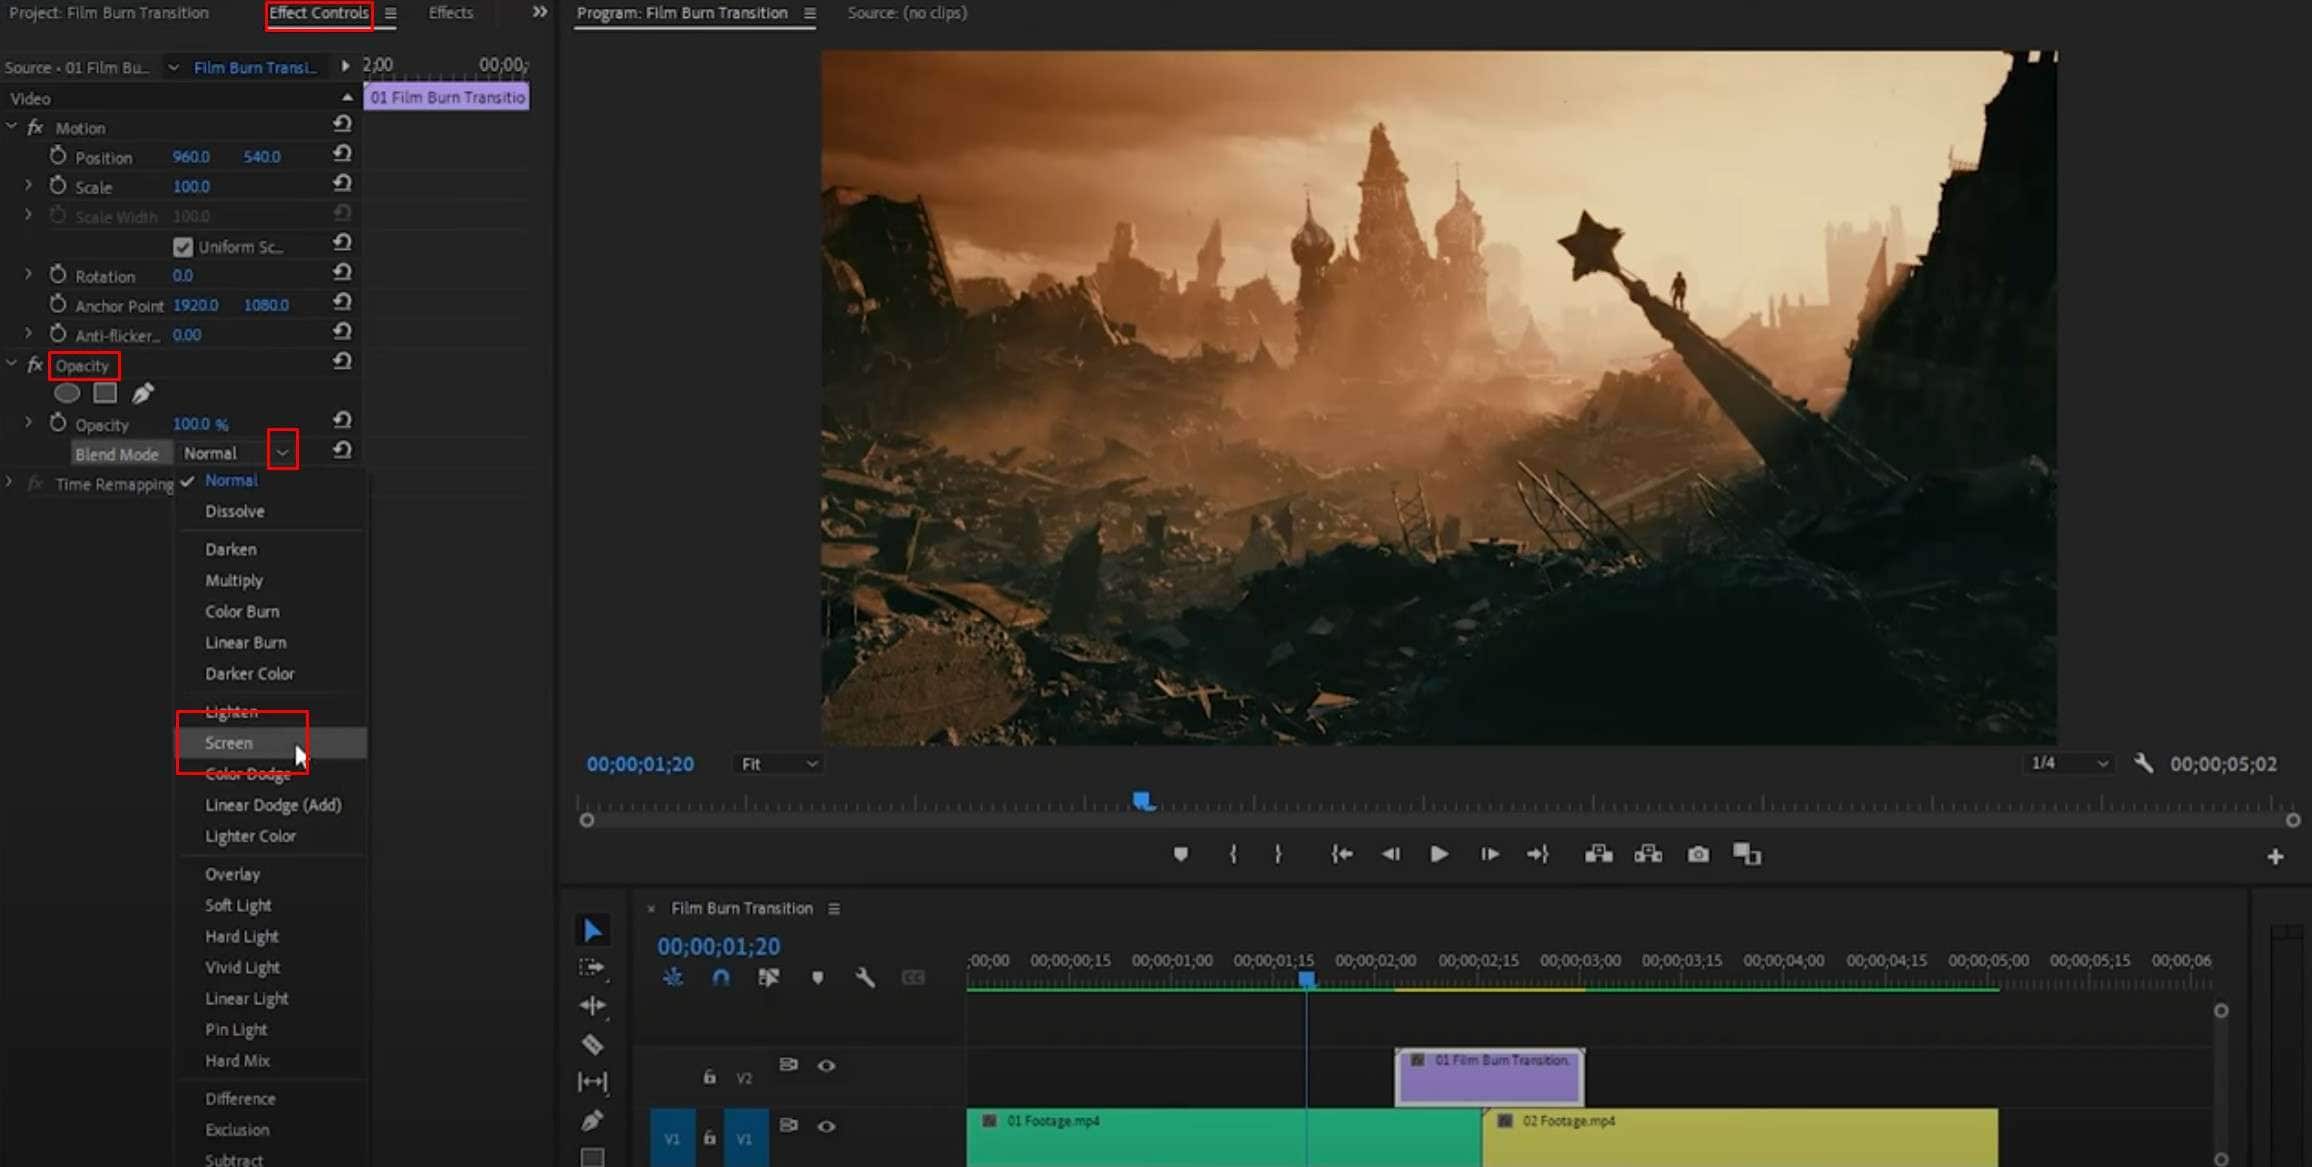
And there you have it. The only problem here is that, without the free assets provided by helpful contributors, doing this in Premiere Pro will be more difficult. That’s why we have an alternative option for you.
How to Add the Film Burn Effect in Filmora
 secure download

If you want a video editing tool that offers the film burns effect as soon as you open it, Filmora is a perfect choice. Filmora is actually a very powerful video editing tool that you can also use to manipulate images and audio files. The best part about it is that it has a very easy interface that anyone can instantly adapt to.
In addition to all this, the developers at Wondershare, the company that released Filmora, also included dozens of AI features that can speed up your video editing process.
Let’s see Filmora in action. Here’s how to apply the film burn effect in Filmora.
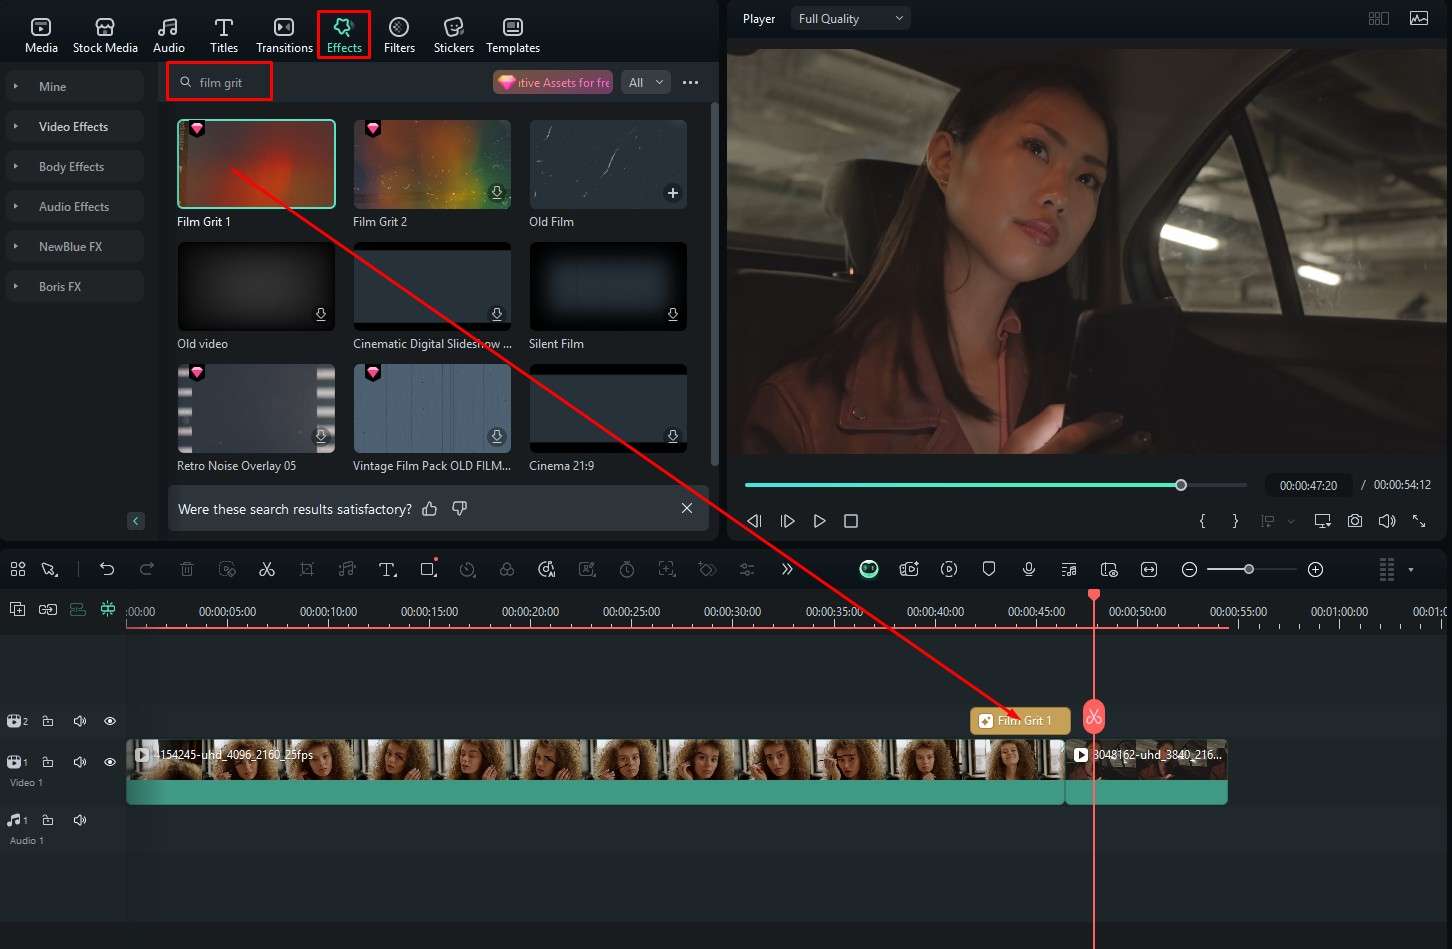
Step 1: In the Effects tab, find the search bar and type film grit. Select the Film Grit effect and drag it to the timeline above the end of the first video.
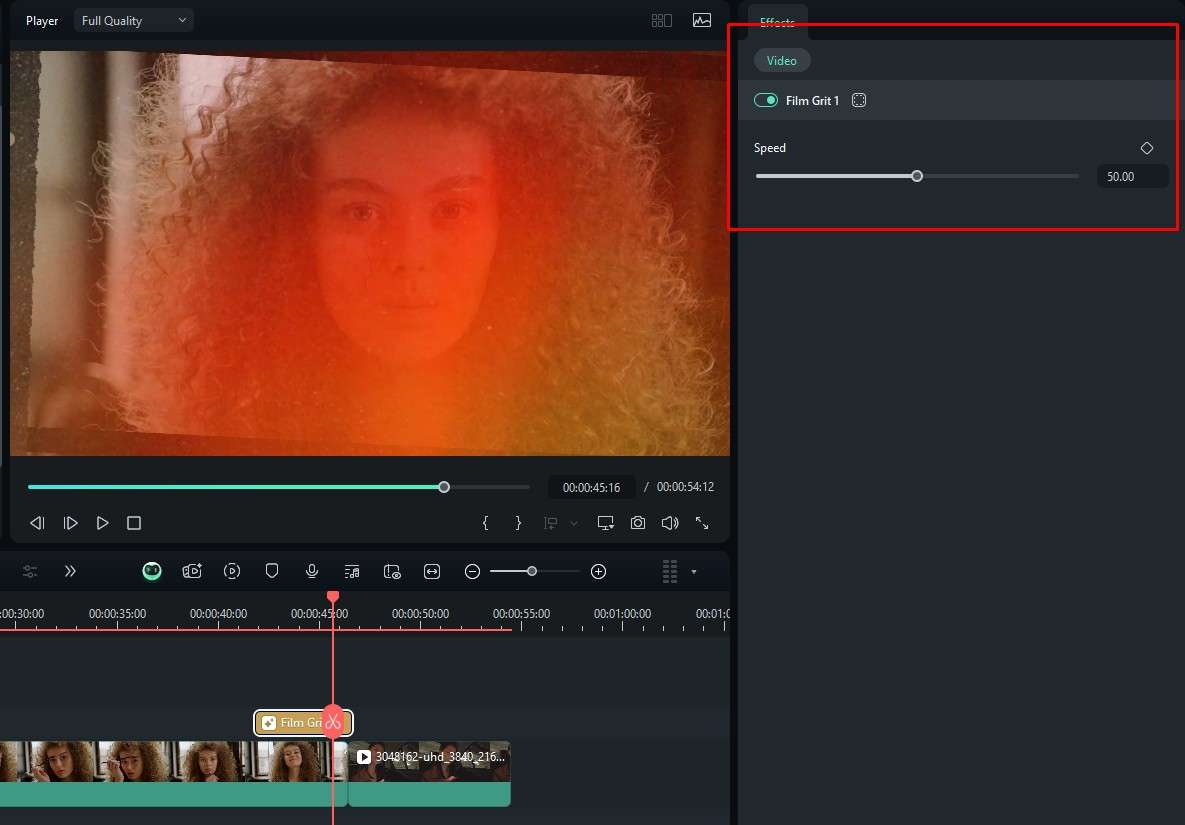
Step 2: Preview the result in the player and adjust the effect’s speed on the right.
Can you see now how easier it is to do this in Filmora? Of course, one could argue that adding effects is something rudimentary in all video editing tools, but even if you are using complex AI features to do creative things, Filmora is still intuitive and easy. Check the next section to see for yourself.
Improve Your Video with Filmora’s AI Toolset
Filmora has so many AI tools that listing them all here will lead to a very long text. That’s why we chose three of them to share with you. You can explore the rest at your leisure.
Generate videos from images in minutes
If you are working on a video, there are instances where you are lacking video footage, but you have images. Using AI to bring those images to life will help you create some new scenes and improve your video overall. For example, you can pick an image with two people, and Filmora can make them begin fighting. You can apply the film burn effect to add tension. Here’s how to do it.
secure download
Step 1: When you open Filmora, click on Toolbox in the welcome screen, and then click on Image to Video.
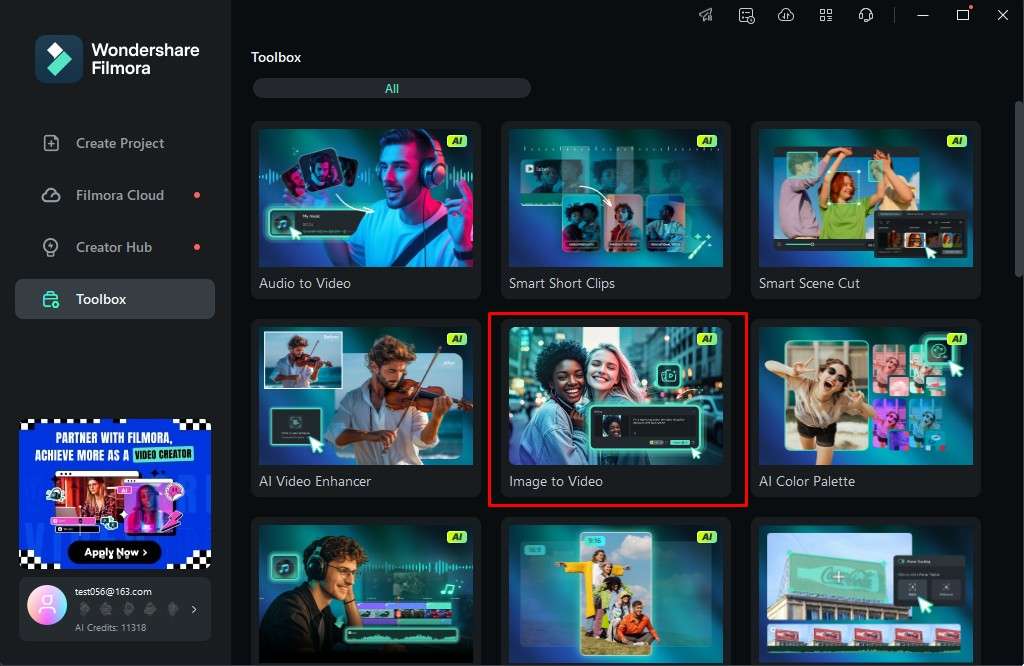
Step 2: This will open a new project, where you will be selected to pick from a set of presets or create your own prompt. For this tutorial, we will go with the AI Fight option.
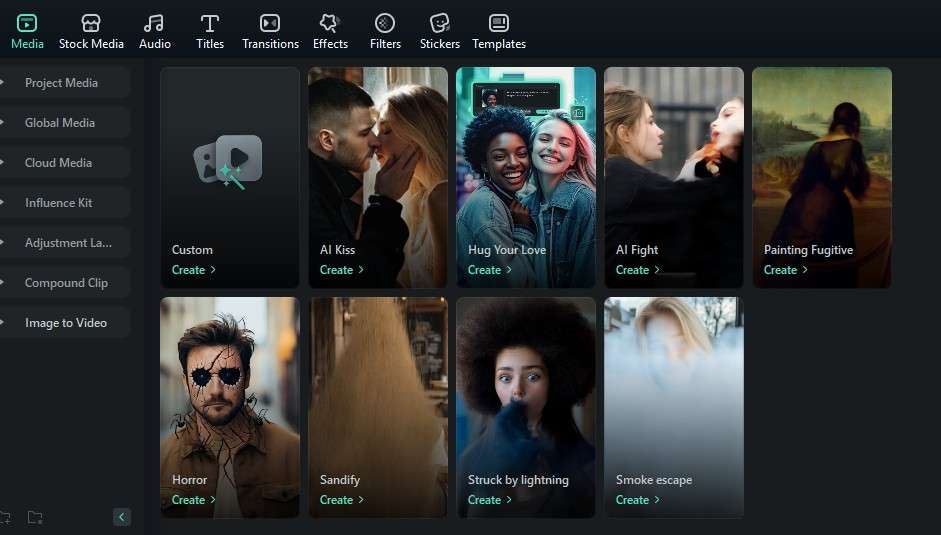
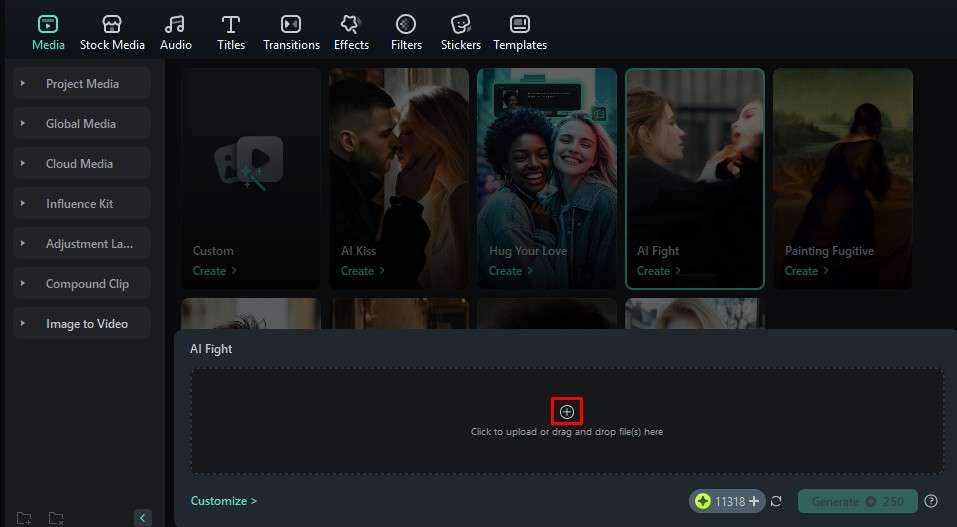
Step 3: Click the + icon and add an image. For the AI Fight option, it is advisable that the two people are clearly visible.
Step 4: When the image is selected, click on Generate.
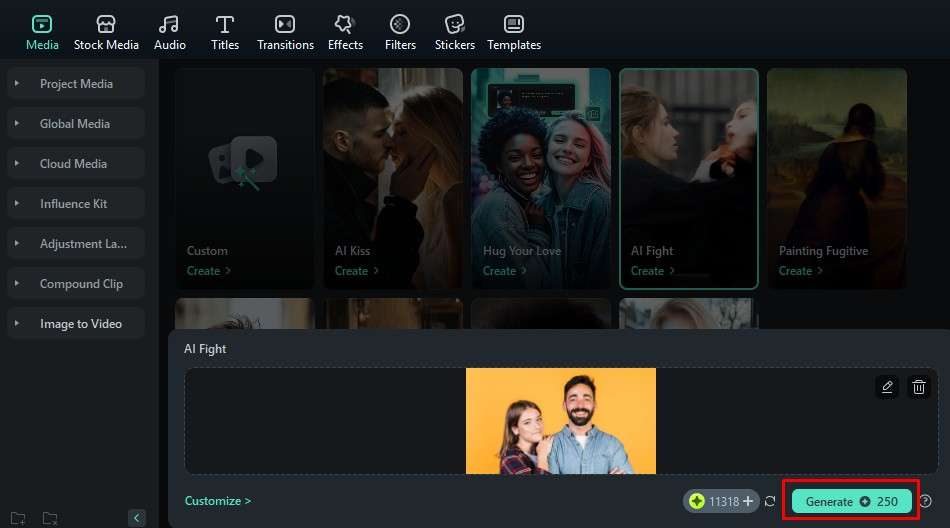
The AI will need a few minutes to process the request. After the job is done, you can preview your results.

Generate videos from text
Yes, you are reading that correctly. Filmora offers the option to type in a prompt, and the software will generate a video for you. Not only that, you will also get everything prepared as a new project so that you can tweak the results to your liking. Here’s what you need to do.
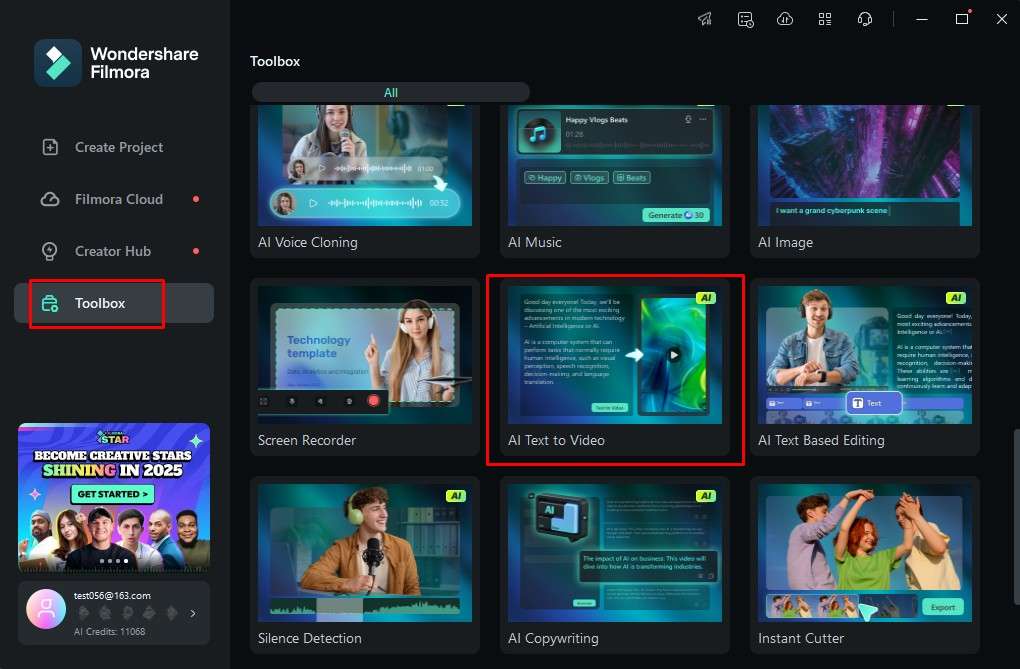
Step 1: From the same Toolbox section as before, now click on the AI Text to Video feature.
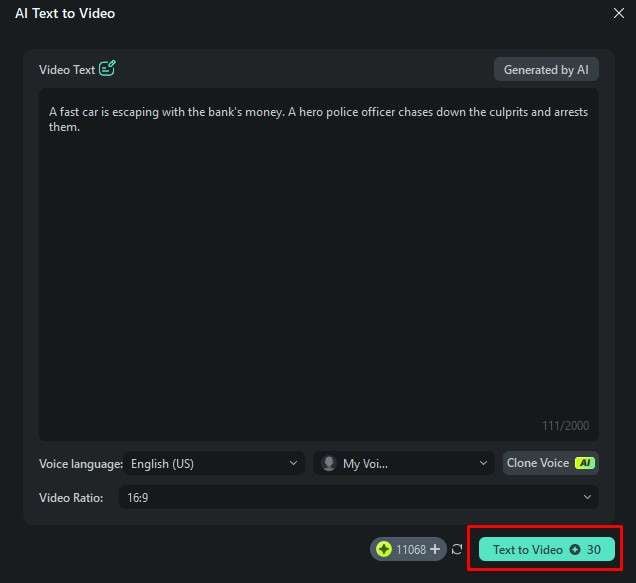
Step 2: Type your prompt and click on the Text to Video button.
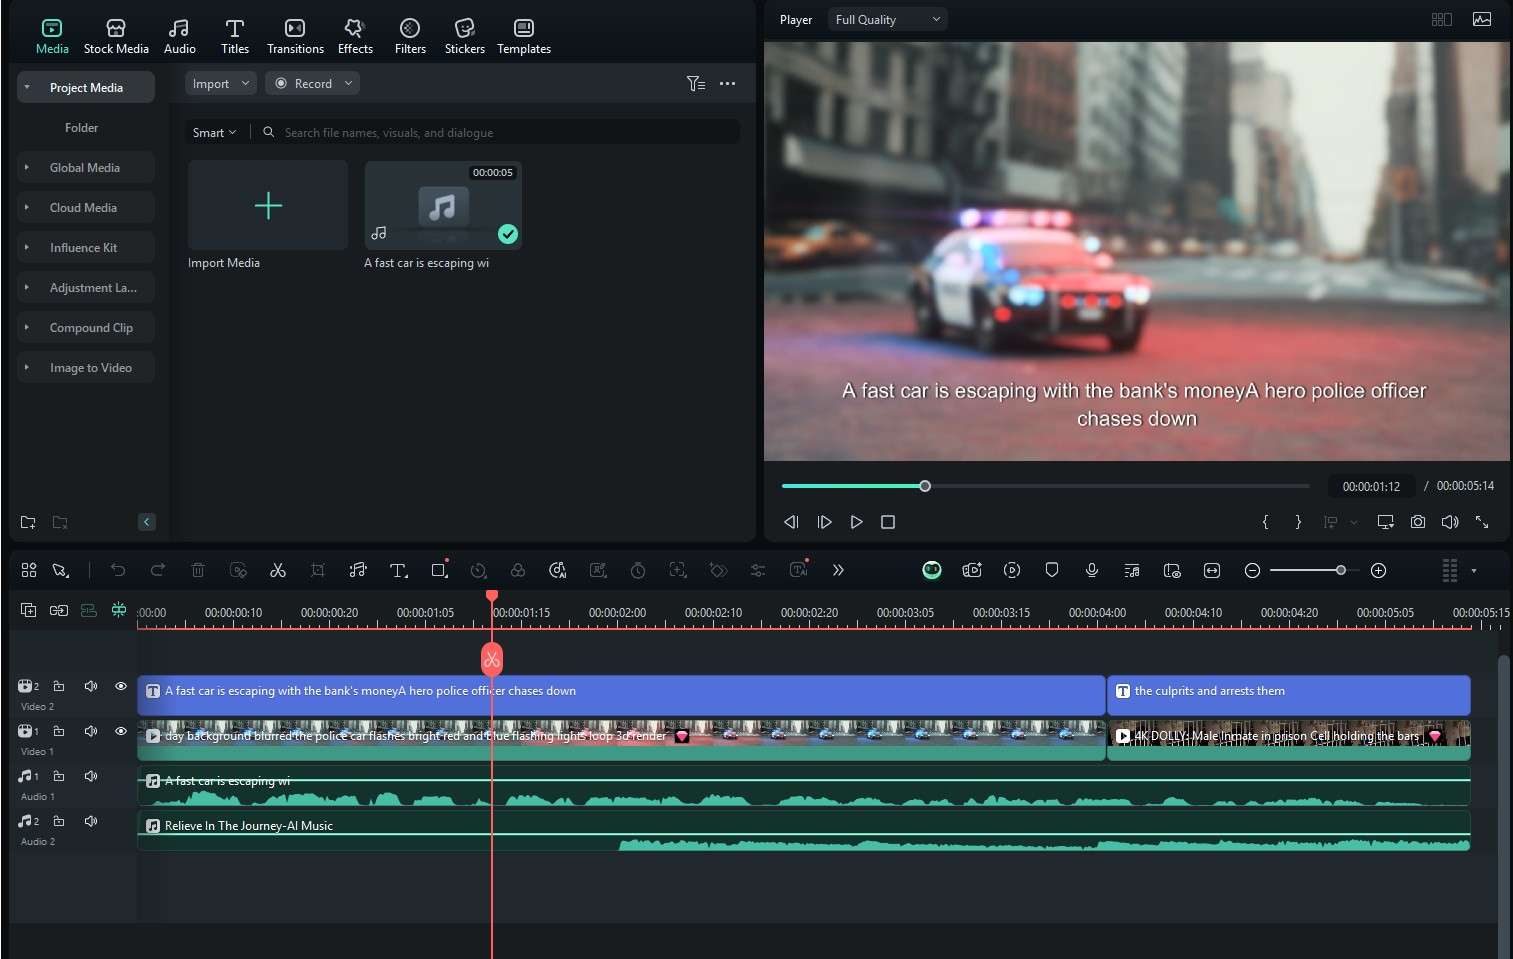
After a minute or so, a new project will open, and you can review and tweak the results.
Get royalty-free music for your video
Filmora also offers the AI Music feature where you can explain the type of music you want for your video, and Filmora will do its best to make that happen. Here’s how.
Step 1: From the Toolbox, click on AI Music.

Step 2: A new project will open, and you can click on Settings to adjust the tempo and duration of the song. You can also click on the + sign to add more information about the song's feel. When you are done, click on the Generate button.

Again, you will need to be a little bit patient, but your patience will pay off when you listen to the music.
Conclusion
In this text, we have learned about the film burn transition effect, we have seen how it is used in movies, how to apply it in Premiere Pro, and how to use the effect in Filmora. It is evident that Filmora is the better choice here, simply because it comes with the effect rather than having to download it from a third-party source. Premiere Pro is excellent, but Filmora is slowly climbing up the ranks, looking to surpass it.
