Are you struggling to attract audiences to your videos? If so, you may consider adding effects to them during your editing process. Most video editing software includes preset video effects to create and publish attractive videos quickly. For example, Final Cut Pro is a video editing software for Apple devices and includes lots of editing tools and video effects. Here is a detailed guide on how to apply the Final Cut Pro camera shake effect to your videos.
In this article
Part1: When Do You Need a Hand Shake Effect?

Adding effects to your videos is a great way to make them more impactful. However, you need to apply them correctly for them to be effective. The following information explores different aspects of the Final Cut Pro camera shake effect, including its definition, why video creators use it, and how best to apply it.
What are hand shake effects for?
Hand shake effects are video adjustments you apply to specific scenes that make the shot vibrate. Depending on the software you use, there are multiple variations of the effect. In addition, developers refer to it by different names. For example, Final Cut Pro users know it as the earthquake effect, which is a preset video effect in most versions of the software.
Typically, video creators use the Final Cut Pro camera shake effect to add energy to their videos. As such, their scenes are more dramatic and encourage you to pay more attention to the video. For example, you can apply the effect to indicate the arrival of the villain in your video. In addition, the effect will be more impactful if the villain is a giant.
You can also use the camera shake video effect for the following purposes:
- Break the monotony in a scene. Applying this scene after a long dialogue scene will give your audience a brief respite, allowing them to regain their focus.
- The camera shake effect can also be an effective tool to build your brand identity. Instead of applying it during the screenplay, you can use it in the end credits to introduce your logo to audiences. Furthermore, you can include a creative sound track for additional emphasis.
What kind of shots are best for such an effect?
The best shot to apply the camera shake effect are still shots. This is because they give you extra creative room with the scene since the subjects are facing the camera directly from a level angle. As such, you can customize unique motion patterns for each subject when applying the camera shake effect.
Is it better to hand shake when shooting or add the effects?
Although it may seem tempting to physically shake the camera when shooting, most filmmakers prefer to add the effect during editing. This is because shaking the camera during shooting may result in unusable shots in post-production. For example, shooting a car scene from a hand-held camera in the passenger seat often results in shaky footage. As such, video creators mount the camera on a tripod to capture still shots and then add the camera shake during post-production.
Part2: How to Add a hand shake effect with FCPX?
The following is a step-to-step guide on how to add a hand shake effect on Final Cut Pro X. However, you need to meet the following requirements for the process to work.
A licensed copy of Final Cut Pro X
The camera shake effect is only available with the full version of Final Cut Pro X. In addition, you will access all variations of the effect with the full version.
A compatible video file
Apple’s Final Cut Pro X is compatible with the following video file formats:
- QuickTime formats.
- Apple ProRes
- Apple Animation Codec
- XF-AVC
- Container files, such as3GP, AVI, and MP4.
Camera shake effect plugins
The video editing software comes with preset camera shake effects, which you can find in the Effects Browser. However, you can also download compatible plugins from established sources, such as the Camera Shake Effects pack from Motion Array.
Once you have everything in place, follow the below steps.
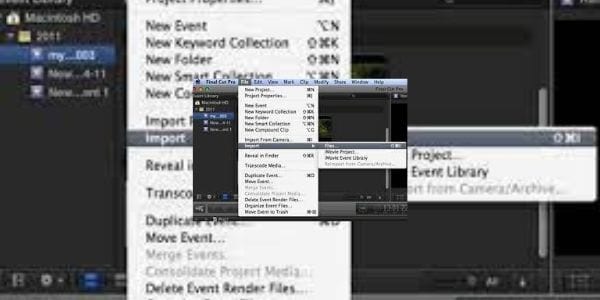
- Import your desired video clip to the Final Cut Pro X workspace. Your video will appear in the timeline section at the bottom of your workspace.
- Select the section where you want to add the camera shake effect. In addition, you need to set the in and out points from the timeline. For example, Mac users can set these points by pressing the Iand O keys, respectively.
- Then, select the Shakefrom the Effects browser and search for Hand Held.
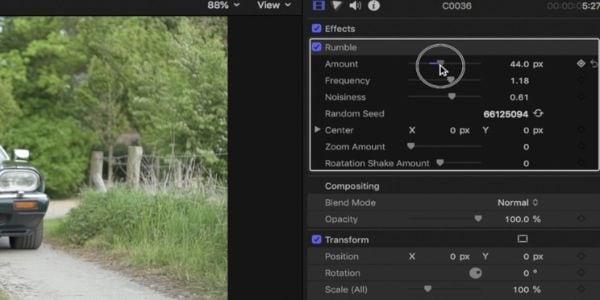
- Drag the effect over your selection to apply the effect.
- You can also make additional adjustments to your hand-held shake effect from the inspector panel.
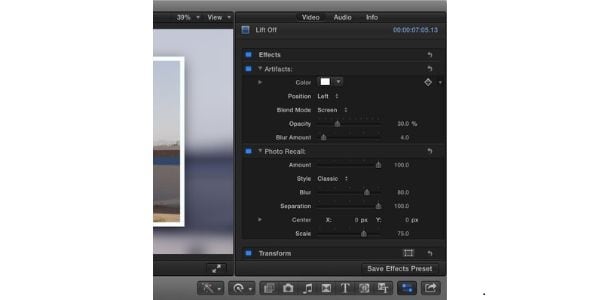
For example, you can prevent black borders from appearing with the effect by increasing the Scale attribute to 105%. Scroll to the bottom right section of your workspace to the Inspector Panel, and click on Scale to make the adjustment.
Part3: How to add hand shake effect in the simplest way?
If the above guide is too complicated for you, Wondershare Filmora offers you the simplest way to add the hand shake effect to your videos.

The program is a stand-alone video editor for Windows and macOS users. It comes with a variety of preset camera shaking effects, including
- Up-down shaking
- Extreme shaking
- Chaos shaking
- Sideways shaking
The above effects offer various shaking intensities and patterns to help you achieve your desired effect. In addition, you will need to purchase a license to access the different versions of the hand shake video effect. Once you have Wondershare Filmora running on your device, follow the below steps to add the hand shake effect to your videos.
1. Import your video
Click on the Import tab on your user interface and select Import Media Files. Then, drag and drop the files you want to edit to your timeline from the resulting window.
2. Applying Wondershare Filmora's hand shake effect
Click on the Effects tab from the user interface and then select Filters. Next, proceed to the Shake subcategory to view all available presets. Currently, the program has eight camera shake presets, which you can preview using the pop-up thumbnail on your workspace.
Once you identify your desired effect, drag and drop it over the video selection, you want to apply it. You can make further adjustments using the sliders on the effect’s sub menu. For example, you can vary the duration of the effect by adjusting the frequency and intensity sliders.
Finally, click on Ok to apply the hand shake effect to your video and save the changes.
3. Exporting your final project
Wondershare Filmora allows you to export your completed projects to external locations, such as external hard drives and cloud storage. In addition, you can directly upload your videos to YouTube and Vimeo from the workspace.
Here is how to export videos from Filmora:
- Click on the Exporttab from the program’s main menu.
- Identify your file destination from the options on the Export The latest version of Filmora allows file exports to your local storage, YouTube, Vimeo, and DVD.
- Select your file format from the left menu and click Exporton the bottom right corner to finalize the process. Some of the available file formats include MP4, WMV, and FLV.
Kindly note that the above guide is for the latest version of Wondershare Filmora. As such, confirm that you have the latest edition before using it. Alternatively, you can download the latest version for free from the Filmora website.
FAQs
1. What are the minimum system requirements to run Film Cut Pro X?
According to Apple, your device needs to have the below minimum system requirements.
- 4 gigabytes of RAM. However, running the program on a device with 8 GB RAM allows you to work with 4K videos and perform 360-degree video editing seamlessly.
- A dedicated graphics processing unit with at least 1 GB of VRAM.
- About 4.5 GB of storage space for Final Cut Pro’s system files.
- An active internet connection to enable access to online customer support and additional features.
- You will also need a Blu-ray recorder to export videos directly to DVDs.
- Finally, your device should be running macOS 11.5.1 or later.
2. Can you import custom hand shake effects to Final Cut Pro?
Yes, you can import custom hand shake effects to your licensed version of Final Cut Pro. However, always install custom plugins from verifiable sites to prevent the installation of malicious software such as spyware. Some of the sites to consider consist of Motion Array, Studio Binder, and FCPX Free. For example, you can check out these 10 free plugins for Final Cut Pro from Filmora.


 100% Security Verified | No Subscription Required | No Malware

