


 100% Security Verified | No Subscription Required | No Malware

New modern color grading software allows you to do point-and-click color grading right in your browser. Color changes are as easy and intuitive as painting or sketching.
You can choose from many different look presets and movie emulations based on Hollywood movies plus real-time previews of your favorite LUTs with this software.
In this article
Part 1. What is Cinematic Color Grading?
The cinematic look is all the rage these days and aims to mimic images captured on real film rather than digitally created. To achieve this effect, film directors use various means from lighting to cinematic color gradation. The latter is a powerful tool for bringing a cool or warm tone to a video and providing smooth color transitions to fall on an image that doesn't look too real but feels emotional.
This kind of post-production processing, which produces beautiful results when used by color magicians, requires a deep understanding of colors and their effect on our psyche and even physiology. It's not enough to watch a color grading video and use a LUT to get where you want. You should at the very least have an understanding of:
- Color wheel
- Color quality
- Color harmony and discord
- Warm and cool colors
- Color context
Part 2. Tips to make cinematic color grading
Here are three helpful tips to create cinematic-looking images in DaVinci Resolve.
In my 10-year career as a colorist, I've worked on every type of content imaginable: short, long, commercial, educational, episodic—you name it. And while each of these formats requires its approach, the one constant that spans them all is the client's desire for a cinematic look.
Virtually all of us aspire to more cinematic color, but we often come up short—in part because the term itself has become too broad to effectively target. To focus on the goal, I like to think of "cinematic" as "an image whose key visual properties are consistent with those of printed film."
The print film was the primary medium through which we consumed cinematic images for the first century of filmmaking and is therefore at the very heart of cinematic aesthetics. In this video, I'll show you my top three secrets to achieving this aesthetic quickly and consistently in Davinci Resolve.
Tips1: Create Color Density
The first secret to film color is to create color density. Another key aesthetic property of film images is that colors can be either highly saturated or highly luminescent but cannot be both.
We can mimic this visual characteristic by identifying strongly saturated colors in our image and using the Hue vs. Lum to reduce their brightness. This simple technique is especially effective on pure primary colors (red, green, and blue).
Tips2: Separation Beats Saturation
The second secret to film color is prioritizing separation over saturation. When you feel like an image lacks overall color or pop, it's all too easy to reach for the saturation knob, but that's not a very cinematic solution.
Instead, try using split toning—pushing cool colors into shadows and warm colors into highlights—to increase tonal separation and add depth to an image. This characteristic is present in virtually every film print and is deeply evocative when applied correctly.
Tips3: Strong Contrast is Your Friend
The third secret of film colors is a strong contrast. This is not always easy, as a higher contrast look inherently requires more precision with exposure placement. Too often we pump up some contrast, end up with an image that looks blown out or too crisp, and then immediately back away from editing.
However, if you stick with high contrast long enough to improve your exposure, you'll get a very different result and be well on your way to a more cinematic image.
Part 3. How to add color cinematic grading by using Filmora?
New modern color grading software allows you to do point-and-click color grading right in your browser. Color changes are as easy and intuitive as painting or sketching.
You can choose from many different look presets and movie emulations based on Hollywood movies plus real-time previews of your favorite LUTs with this software.
Wondershare Filmora is an option if you want to easily change the colors of your projects. You may just double-click the media after dragging it onto the editing timeline to change the contrast, saturation, brightness, and hue.
Despite its speed, it also allows you to merge, edit audio, divide, rotate, and apply as many cool video effects as you like.
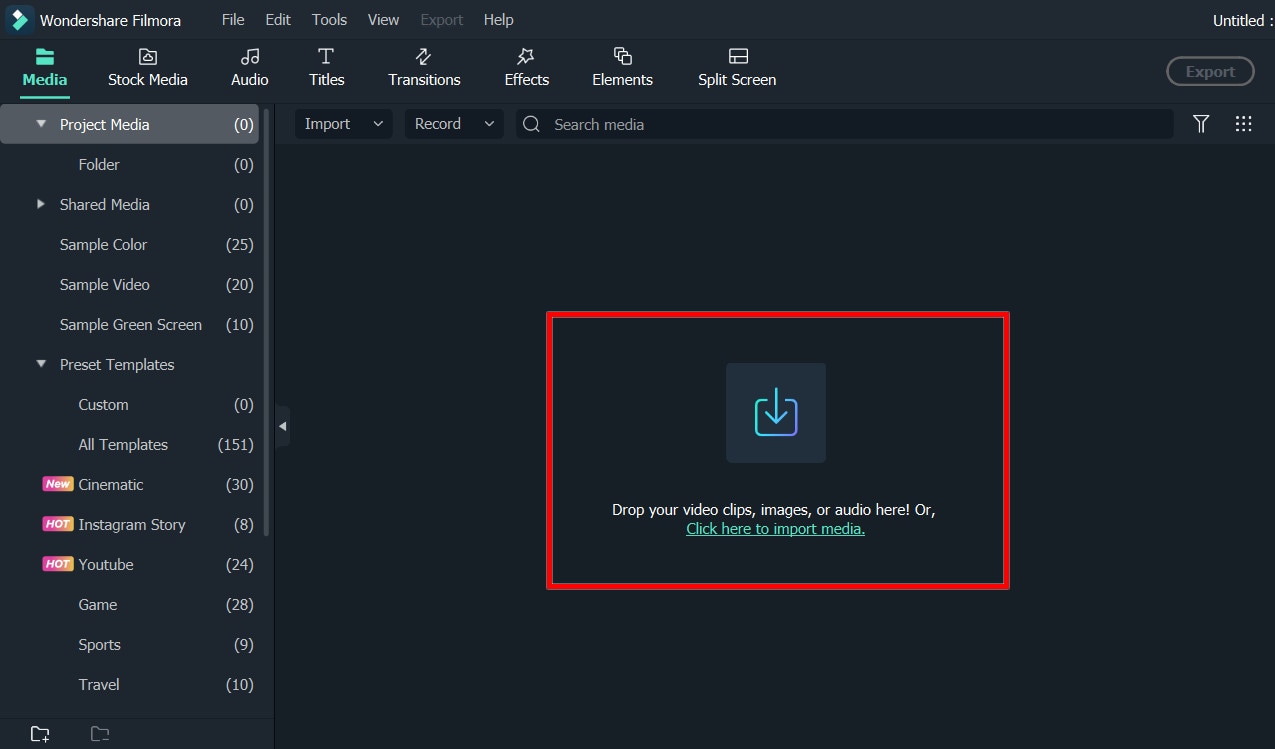
Step1Add the media
After installing Wondershare Filmora, click the New Project and Import button to easily find and load your videos.
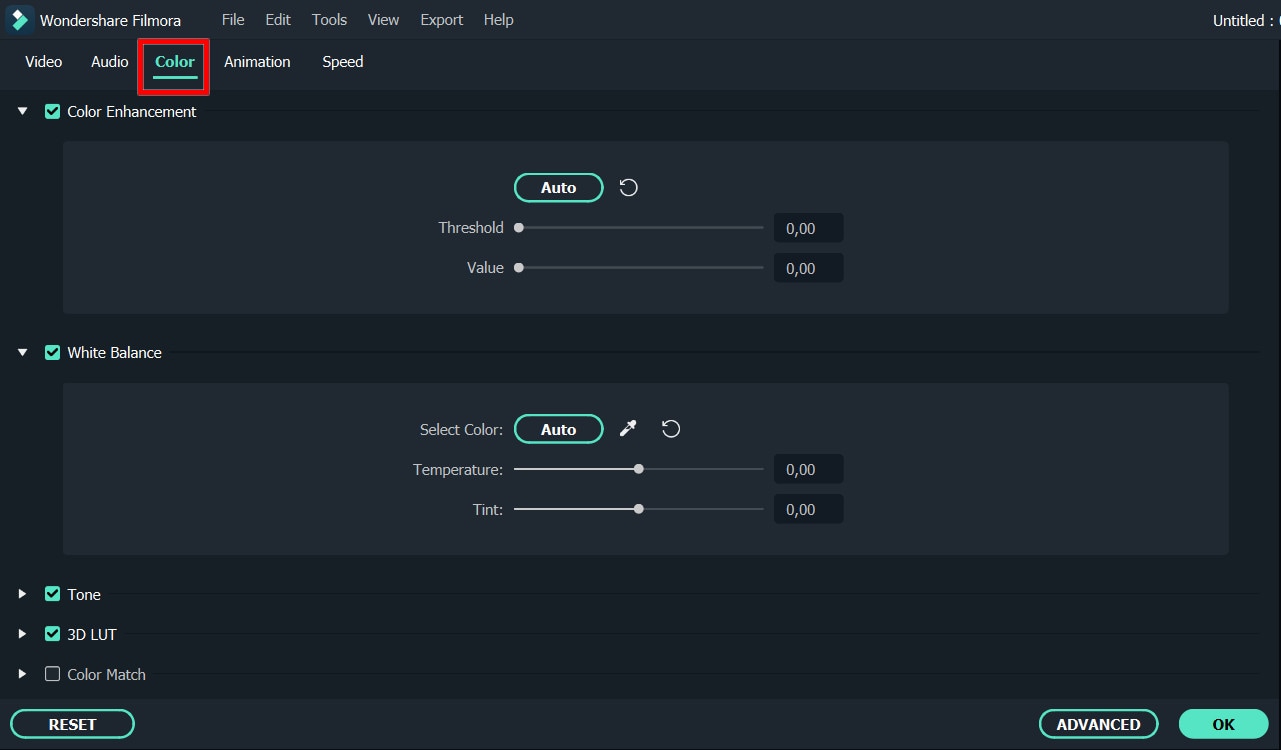
Step2Correct the color [Basic and Advanced]
In the timeline, double-click the video editing window. Select the "Color" panel and make adjustments.
- Contrast: By adjusting this setting, you can control the brightness and color in different parts of the image.
- Saturation: This setting highlights the gray part of the video to a shade. You can adjust it to make the colors of the entire video image appear more saturated or more subdued.
- Brightness: You can change this setting to adjust the overall darkness and lightness of your project.
- Hue: Hue is generally the lightness of a color. Let's say that when red is saturated with white, it creates a shade of pink.
- 3D LUT: 3D lookup tables provide your media with Hollywood movie color sets like the 007 series, Batman, Harry Porter, etc.
Hover over the indicator to adjust the color correction settings. Then left click on it and move the slider. The corresponding value stabilizes after releasing the mouse button.
With Filmora, you also have access to advanced color correction. Click the Advanced Color Tuning icon to enter the appropriate window where you can fine-tune the color or use preset templates.
The Preferences tab has a variety of templates, including Movie, Normal, 3D LUT, and Vignette. In the Edit tab, you can adjust color temperature, white balance, hue, 3D LUT, color, HSL, light, vignette, etc.
Step3Preview and save the new video
When you are satisfied with your creation, click "Export". Then click the Settings button and save the new videos in different formats in the Format tab. You can also export the video directly to Vimeo or YouTube or burn it to DVD for better preservation.
Filmora's color correction tools will make your videos look natural, more attractive, more vibrant, consistent, and professional.
Color Correction Presets
Color correction presets help your video achieve an enhanced cinematic look. Adjust gives you control over fine-tuning the colors in your shots. You can make various adjustments such as color temperature and exposure.
In the “Effects > LUT” tab, you'll see an extensive selection of preset color settings. These include Vignettes, Movie Looks Like Old Movies, and Cinematic 3D LUT effects such as Harry Potter, Game of Thrones, House of Cards, and Mission Impossible.
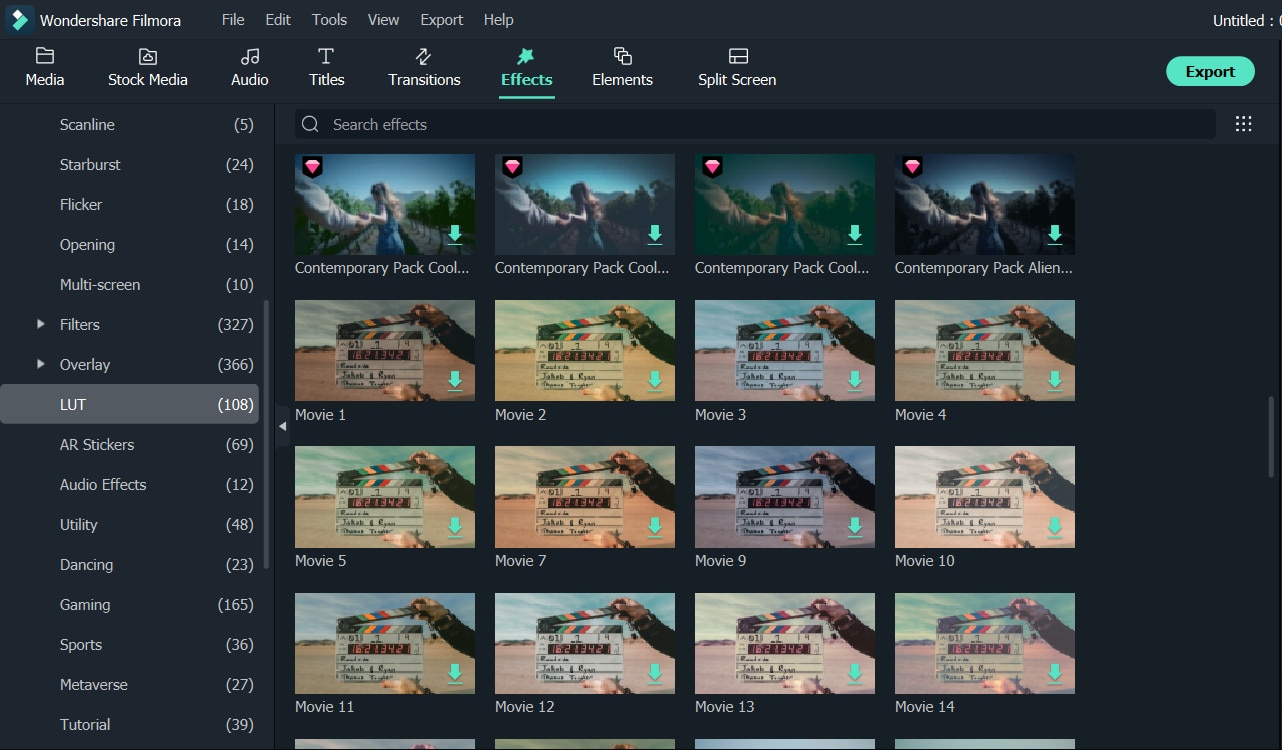
Filmora's Color Correction Advanced Tool also categorizes your presets. Click on All Presents to see six categories: Favorites, Custom, 3D Lut, Common, Film, and Vignette.
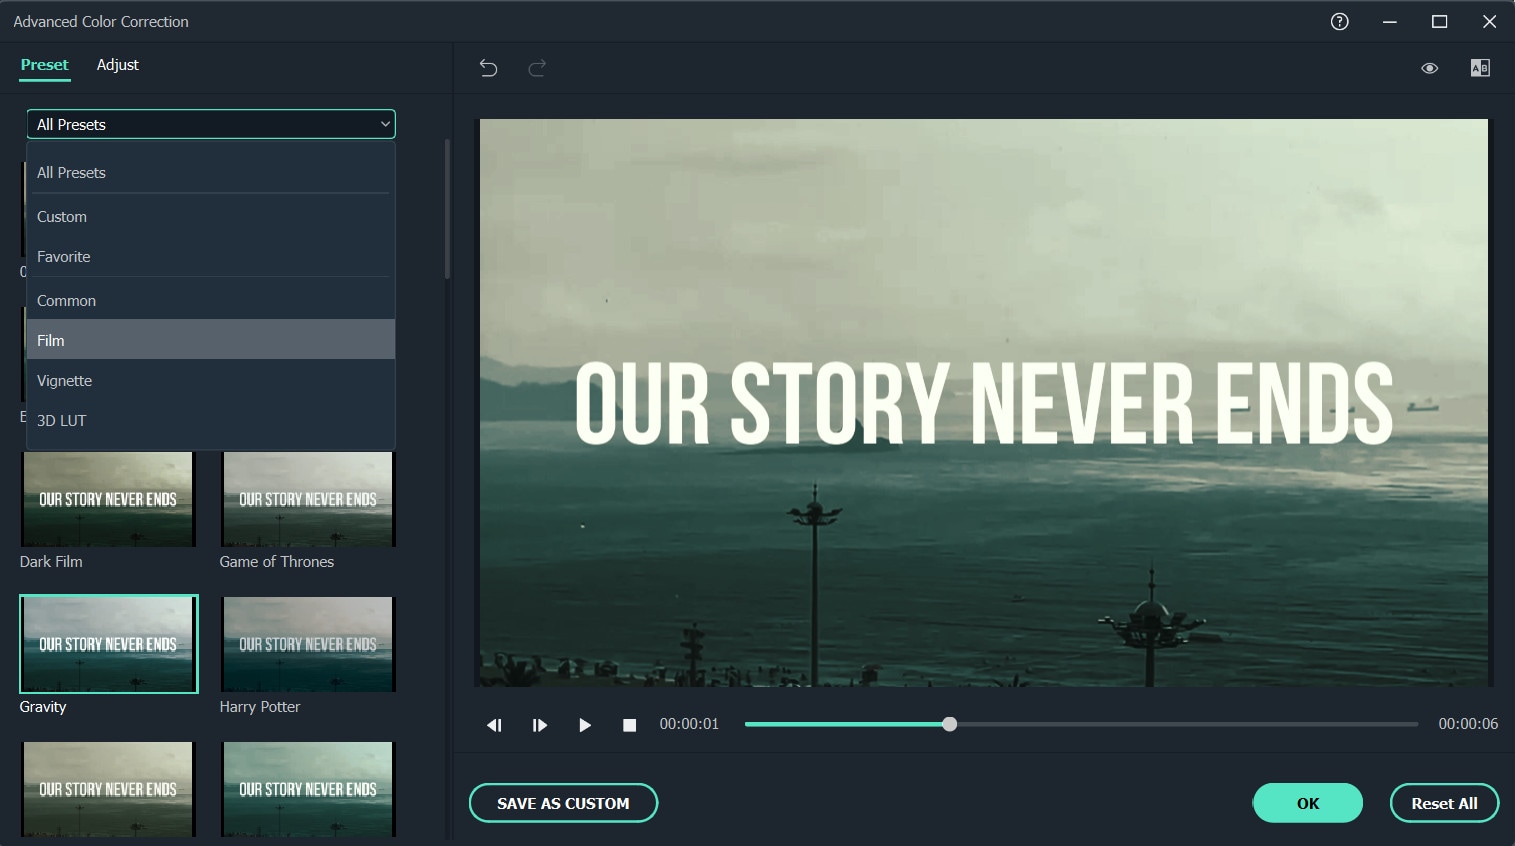
Double-click a preset to apply it to your video. You can see how it looks in the Advanced Color Correction preview window. If you are satisfied with the results, click OK.
Conclusion
Above are the steps to give your video a cinematic look using Wondershare Filmora, hope this helps if you are wondering how to do it. As we can see above, using Filmora video editor will make you more creative in making videos with a suitable emotional tone.
