
 100% Security Verified | No Subscription Required | No Malware

Ever wondered how some videos feel so smooth and professional, while others seem a little... clunky? The secret often lies in video editing with transitions. Transitions do more than just connect clips—they guide viewers, create flow, and set the mood for your story.
But if you’re new to editing, you might not know where to start or which video editors with transitions are best. Lucky for you, we’ll break down everything you need to know about editing transitions, from choosing the right tools to creating seamless effects that bring your videos to life.
In this article
Part 1. Choosing the Right Video Editor with Transitions for Your Project
Mastering transitions in video editing starts with choosing the right video editor. After all, there are so many video editors with transitions out there, so it’s important to find one that matches your skill level and project needs.
If you're a beginner, you don’t want a program that feels too complicated. But if you’re ready to get creative, you’ll want software that offers plenty of video effects transitions without overwhelming you. Thankfully, you don’t have to stress about finding the perfect one—Filmora has everything you need.

 secure download

Below, we’ll break down how Filmora helps you create smooth, eye-catching transitions effortlessly.
Perfect for Beginners and Pros
Filmora’s interface is super easy to navigate, making it a great choice for beginners. But don’t worry if you’re more experienced—it also comes with advanced tools, so pros can experiment and take their edits to the next level.

Extensive Transition Options
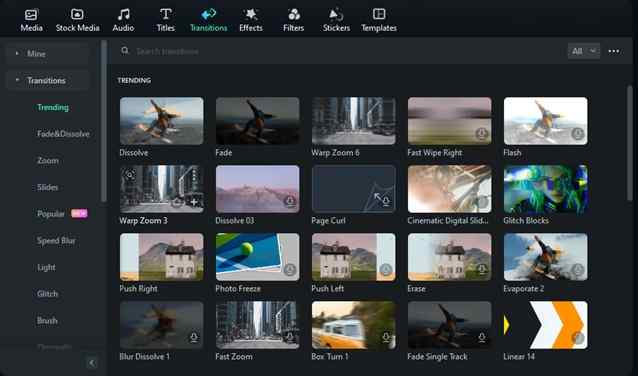
Filmora’s built-in media library is packed with a wide variety of editing transitions in different styles, so you can find the perfect fit for any type of video.
Easy Customization
You can tweak the duration, change the position, and refine the details however you like—giving you full creative control without any hassle.

More Than Just Transitions
Filmora also comes packed with royalty-free music, title text, video effects, filters, and fun elements like stickers to make your transitions smoother and make your edits even more creative and dynamic.

All-in-One Editing Toolkit
Once you’ve added your video effect transitions, you can use Filmora’s full suite of editing tools to trim, rearrange, and polish your video until it’s perfect.
Accessible and Affordable
Filmora works on Windows, macOS, and even mobile phones (Android & iPhone). Plus, it offers flexible pricing plans and even a free trial, so you can test it out before committing.

As you can see, with all these benefits, Filmora makes creating pro-level transitions easy, fun, and totally doable—no matter your experience level!
But if you’re still not completely convinced that it’s the best video editor with transitions, let’s take a look at some of the most popular video effect transitions in Filmora. Getting familiar with these will give you a better understanding of what they offer when it comes to video editing with transitions.
The Most Popular Transitions in Filmora
Filmora has tons of cool video effect transitions, but some stand out as fan favorites. Here are a few of the most used transitions and what they do:
secure download
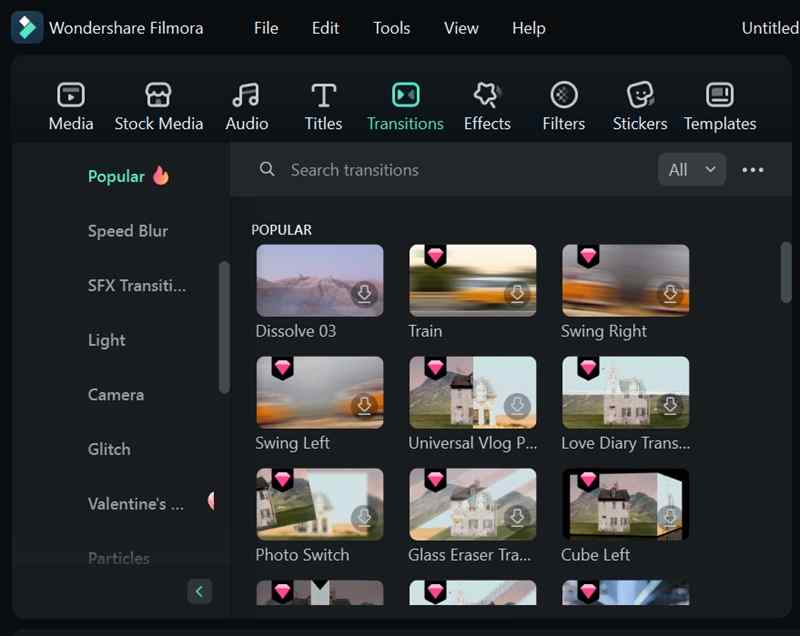
- Dissolve: Creates a smooth fade between clips, making one scene naturally blend into the next.
- Train: Adds a fast, blurry motion effect moving from left to right.
- Swing Right: Swings the next clip into view from the right, adding a playful and energetic feel.
- Photo Switch: Quickly swaps one image for another with a sleek, modern effect.
- Flash Zoom In: Zooms into the next clip with a bright flash effect, great for action-packed or high-energy scenes.
Part 2. Step-by-Step Guide to Adding Transitions in Your Video with Filmora
Now that you know why Filmora is the perfect video editor for transitions, it’s time to put it into action! Below, we’ve put together a simple step-by-step guide to help you apply video effect transitions with ease in Filmora. Just follow it and start making your videos look smooth and professional!
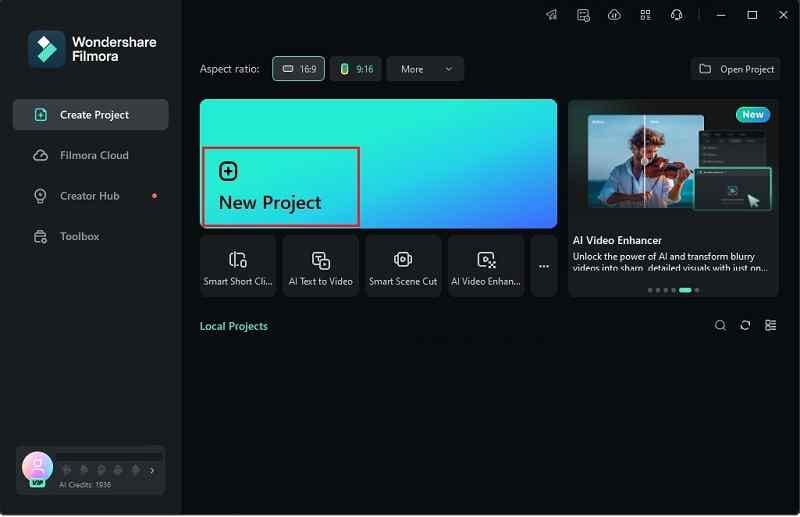
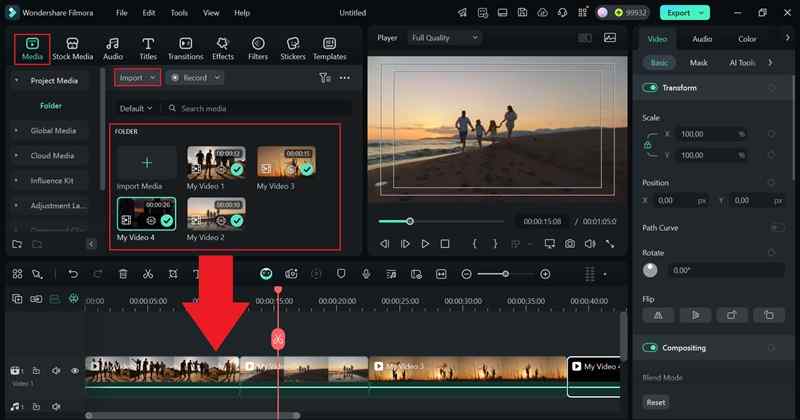
Step 1. Launch Filmora and upload your videos
Before you begin, make sure you’ve got the latest version of Filmora installed on your computer. Once it’s ready to go, open Filmora and hit "New Project" to jump straight into the editing timeline.
secure download
Now, go to the "Media" tab and click "Import" to add your video clips. Once they’re in, just drag and drop them onto the timeline and arrange them however you want!
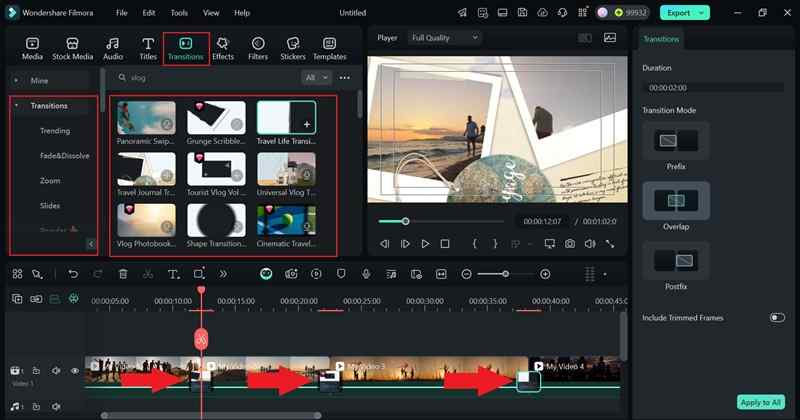
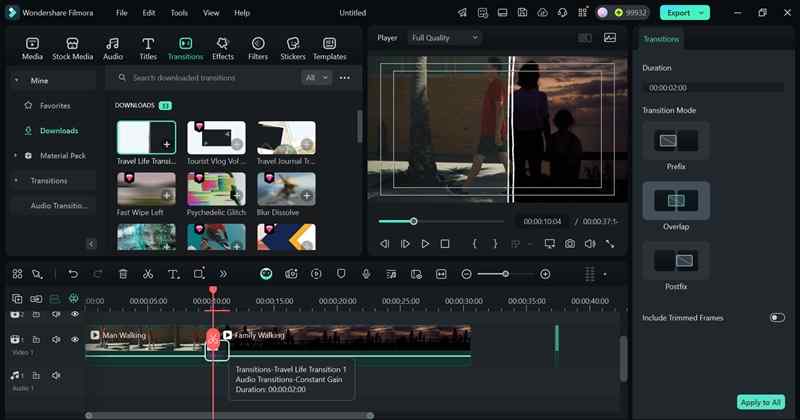
Step 2. Apply transitions to the video
By default, your clips will play back-to-back without any transitions. To add some, head over to the "Transitions" tab, where you’ll see different categories on the left panel. Scroll through the options and just drag your favorite transition between two clips to apply it. Since this video is about a family vacation, try using vlog or travel-themed transitions to match the vibe!
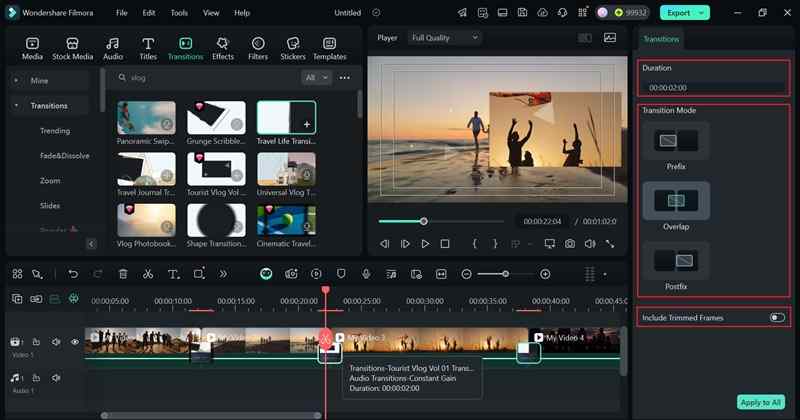
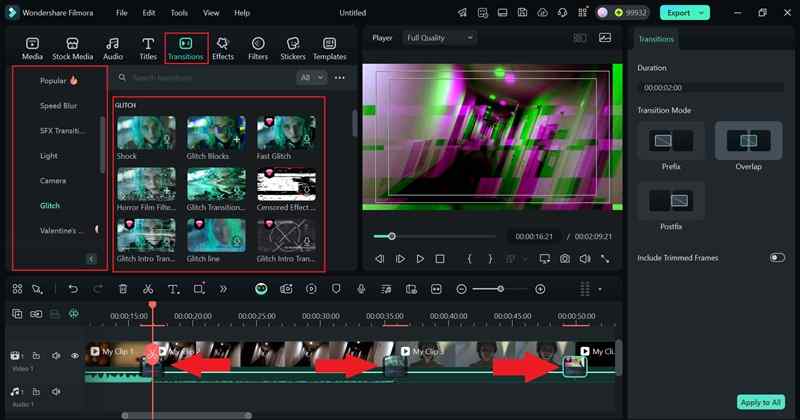
Step 3. Adjust the transition effect
Next, click on the transition to tweak its "Duration" and "Transition Mode" in the settings panel on the right. If your clip is too short, Filmora might automatically trim some frames to make the transition fit. If you want to avoid that, just double-click the transition in the timeline and uncheck "Include Trimmed Frames".
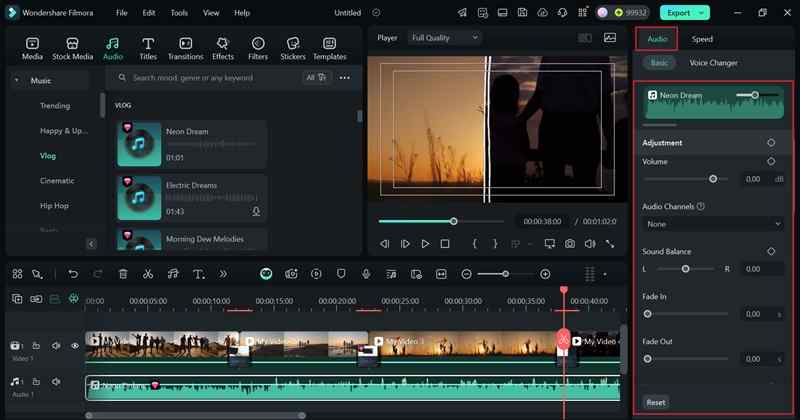
Step 4. Add music
Now that you’ve added all your transitions, it’s time to bring your video to life with some music! Luckily, Filmora has a built-in music library, so you don’t have to search elsewhere.
Just head over to the "Audio" tab, click on "Music", and check out the "Vlog" category. Hit play to preview the tracks, and once you find the perfect one, drag it onto the timeline right below your video.
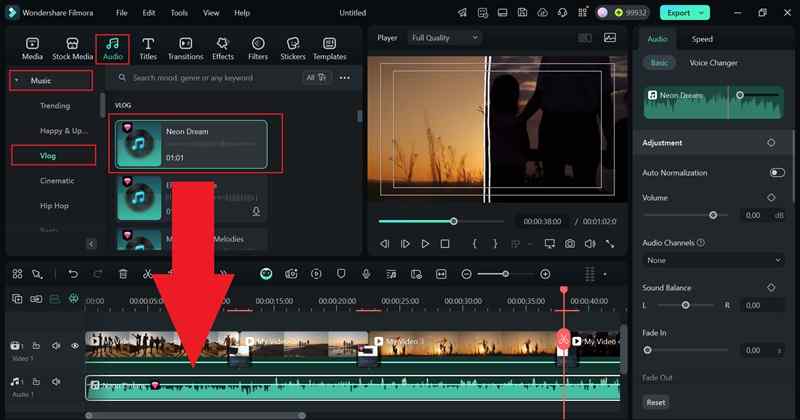
Don’t forget to adjust the volume and tweak other audio settings in the panel on the right to make everything sound just right!
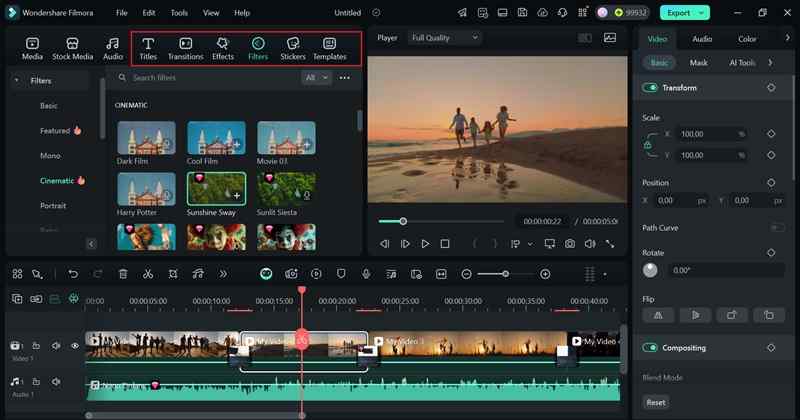
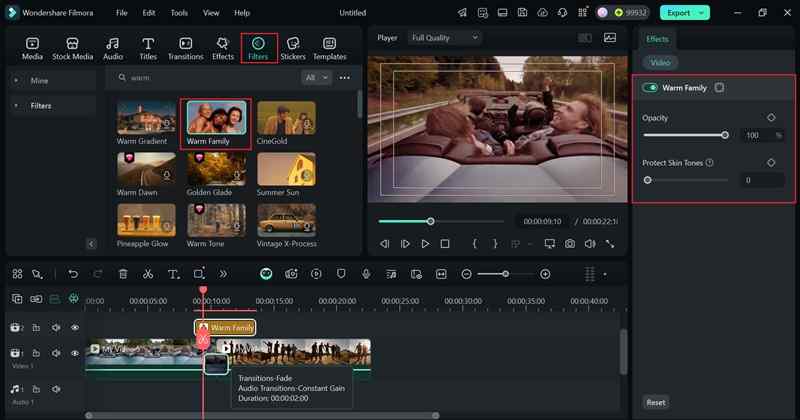
Step 5. Enhance your video
Take your time playing around with Filmora’s features to make sure your video looks and sounds exactly how you want. You can add filters, stickers, and text from the built-in library or explore cool advanced tools like AI Color Palette and Text-to-Speech to level up your edits even more!
Step 6. Save your video
Once you’re happy with your edits, click "Export" in the top-right corner. If you want to save it to your device, choose "Local", but if you’re sharing it online, go to "Social Media" and pick your platform.
Before you finalize, double-check the title, description, format, and resolution to make sure everything looks perfect. Then, hit Export, and you're all set!

Part 3. Advanced Techniques for Transition Mastery
As you can see, adding transitions in Filmora makes video editing both easy and fun! Now that you’ve mastered the basics of video editing with transitions, it’s time to step up your game and make your transitions even more impressive. Instead of just dragging and dropping effects, you can customize and combine them in creative ways to give your videos a more unique feel.
Here are some advanced techniques you can try in Filmora to make your editing transitions smoother, more dynamic, and visually stunning:
Customizing Keyframes
Instead of using preset video effect transitions, you can manually animate transitions with keyframes for a more fluid and natural effect. For example, you can create a zoom-in transition by gradually increasing the scale of your clip over time.

Layering Effects
Combine transitions with motion blur, color grading, or light leaks to add depth and cinematic flair. For example, pairing a fade transition with a warm color filter can create a dreamy, nostalgic feel.
Match Cuts
This technique makes editing transitions feel seamless by matching similar shapes or movements between two clips. For example, transitioning from a full moon to a close-up of an eye creates a smooth and artistic effect.

Masking Transitions
Create a clever reveal effect by using masks to blend one clip into the next. For instance, you can have a person walk past the camera, and as they move, the next scene is revealed behind them.
Syncing Transitions with Sound Effects
Instead of just relying on visuals, the right sound can enhance the flow and impact of your transitions. For example, if you’re making a horror video, you can use glitch sounds or eerie effects from Filmora’s library to match your video effect transitions. This makes the switch between clips feel seamless and more intense!
Conclusion
Bad editing transitions can make your video feel choppy and awkward, totally ruining the flow between clips. So, this guide tries to help you master video editing with transitions and take your edits to the next level using one of the best video editors with transitions out there—Wondershare Filmora.
Filmora comes packed with tons of built-in creative transitions, making it super easy (and fun!) to add smooth video effect transitions to your videos. Plus, you can customize them however you like and even explore a huge selection of filters, effects, and advanced features.
By experimenting with these features, you’ll go beyond basic editing transitions and start creating edits that feel polished, professional, and visually captivating. So, get creative and start mixing things up in Filmora!
