
 100% Security Verified | No Subscription Required | No Malware

Time-lapse videos turn ordinary moments into captivating visual stories. From documenting construction progress to showcasing plant growth or creating travel vlogs, this creative format compresses time into visually satisfying sequences. Traditionally, creating time-lapse content required specialized equipment and editing skills.
But now, you can make time-lapse videos online quickly, easily, and for free. From casual creators to content professionals, smart online tools empower anyone to turn clips or photos into smooth, fast-paced sequences. In this guide, you'll learn how to create time-lapse videos from videos or photo sets, and even how to turn static images into motion-filled time-lapse clips with just one click using AI-powered methods.
In this article
Part 1. What Actually Makes a Great Time-Lapse?
Not every time-lapse video creates the same impact. The magic lies in smoothness, consistency, and purpose. Great time-lapse clips have intentional pacing and an engaging subject, such as weather changes, cityscapes, or time-sensitive projects.
- Sunrise Timelapse

- Day to Night

- Painting Timelapse

Here are time-lapse examples of weather and cityscapes, created in Filmora.
Some of the key factors include:
- Frame rate and motion consistency. These determine how natural and fluid the movement appears.
- While simply speeding up a video is a shortcut, real-time-lapse involves interval-based shooting or combining a sequence of images. The goal is to capture visual change with natural rhythm.
- Before choosing a tool, consider your source material and the type of time-lapse outcome you're aiming for: a quick speed-up or a high-control cinematic flow.
💡 Tip: If you want to create a time-lapse video online, many tools allow you to turn videos or photos into a smooth time-lapse directly from your browser, without installing software. These online time-lapse makers are perfect for quick edits or sharing clips on social media.
Part 2. Online Timelapse Maker to Create Timelapse Videos
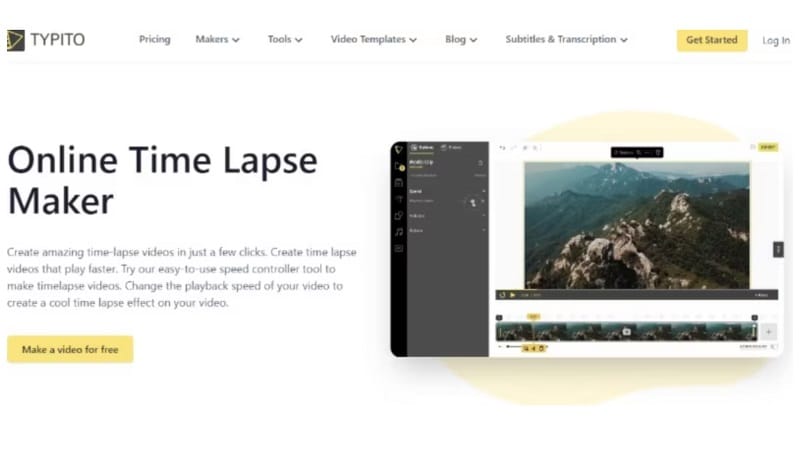
Typito is one of the simplest tools for creating time-lapses free online. You can add a time-lapse effect to your videos with almost no effort. The platform's layout is simple, and the workflow is guided step by step.
You start by picking your video source and choosing a format for export. Typito supports popular formats like MP4, MOV, and AVI. Once your file is uploaded, the tool asks how you want your video to behave, whether to loop it or not. After that, you move into editing.
How to Create a Time-lapse Video Online
Step 1: Sign Up and Start a New Project
Go to Typito's website, sign up, and click on "Create Video." The editor will load automatically. Wait a few seconds until the timeline and tools are ready.
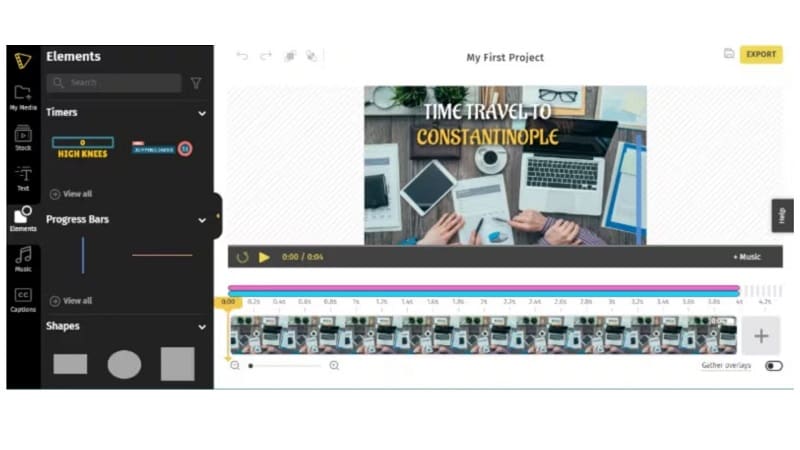
Step 2: Add Your Content and Customize
Import your video or photo files. Then, drag and drop them onto the timeline. You can also add titles, icons, and music. Typito simplifies the editing process so you can build your time-lapse video online for free without needing any advanced knowledge.
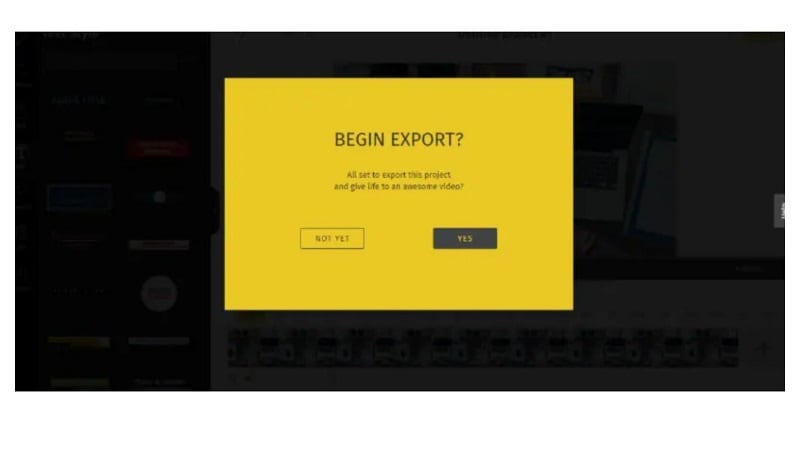
Step 3: Export and Re-Edit Anytime
Once you're happy with the final result, export the video. A big advantage of Typito is that you can reedit your project at any time. If you want to change the text or media later, simply open the saved version and apply the updates. This makes it flexible for ongoing projects.
While Typito is a simple and convenient option, there are several other online time-lapse makers that offer different features and flexibility. Here's a quick overview of some alternatives you might find useful:
Kapwing
- Highlights: Supports video and photo sequences, offers templates and basic filters.
- Pros: Cloud-based, multi-format export, supports looping.
- Cons: Free version has export limits, longer videos take time to render.
VEED.IO
- Highlights: Online editor with time-lapse feature, high-resolution export.
- Pros: Clean UI, some AI tools for enhancement.
- Cons: Limited free exports, fewer transitions.
Clideo
- Highlights: Quick conversion, supports MP4 and image sequences.
- Pros: No installation, fast conversion.
- Cons: Free exports include watermark, limited editing options.
Limitations of Online Time-lapse Tools
While online time-lapse makers are convenient and accessible, they share some common limitations:
- ❌ Limited speed control - Few tools allow custom speed curves or precise ramping.
- ❌ Photo sequence adjustments - Control over image duration in time-lapse sequences is often restricted.
- ❌ Lack of AI automation - Most free online tools don't offer AI-assisted enhancements.
- ❌ Watermarks on free plans - Free exports usually include a watermark.
- ❌ Longer export times - High-resolution or lengthy videos can take a while to render.
- ❌ Fewer transitions and effects - Compared to professional desktop editors, online tools provide limited visual effects and transitions.
💡 Tip: For more advanced control, smoother results, and additional editing features, desktop or mobile editors can complement online tools.
Part 3. Smarter Ways to Create Time-Lapse Videos
Online time-lapse makers like Typito can be limiting, as they often restrict video resolution, editing flexibility, and export options, especially in free versions. You might not get access to advanced tools like keyframing, speed ramping, or customizable frame intervals.
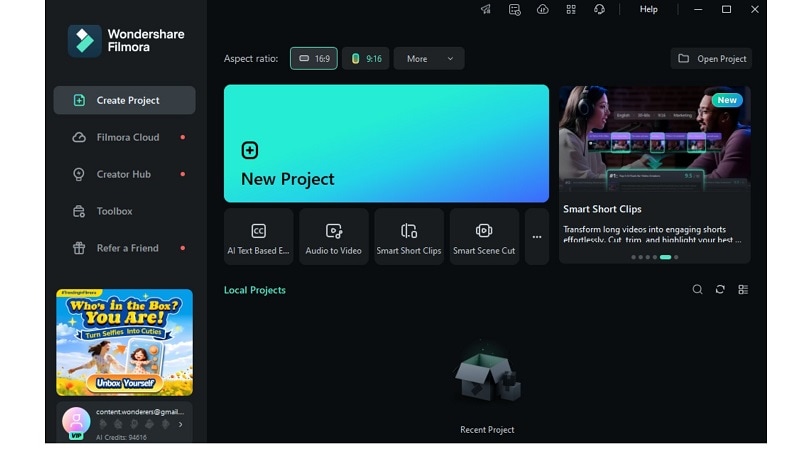
If you're looking for more creative control, desktop editors like Wondershare Filmora offer a smarter solution. With its easy-to-use tools, you can make time-lapse videos by adjusting speed, adding smooth transitions, or using photos to build your video. You can also apply AI effects to boost visual impact with just a few clicks.


Filmora lets you turn simple footage into something cinematic quickly, beautifully, and often for free. It's a great time-lapse creator for both new users and experienced editors.
Features of Filmora to Make Time-Lapse Videos
Here's what makes Filmora the best time-lapse creator for all users:
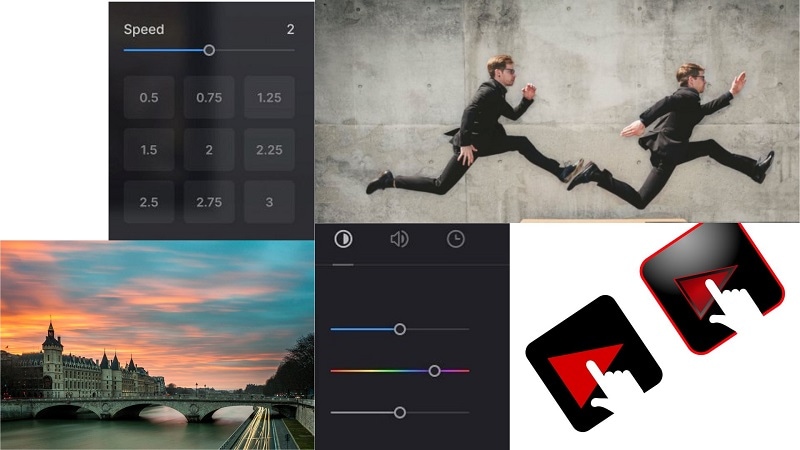
- Speed Control: Adjust clip speed up to 100x
- Speed Ramping: Add dynamic speed changes with customizable curves
- Image Sequence Support: Turn photo sets into video with set durations
- AI Image-to-Video (Scenery Templates): Auto-create clips from stills
- Instant Preview & Export: Real-time preview of your time-lapse result before exporting
Now let's walk through each method, progressing from the simplest to the most powerful, and match each to the right scenario.
Step-by-Step Guide: Creating Time-Lapse Videos with Filmora
Filmora supports multiple time-lapse creation methods, each suited for different skill levels and creative needs. The methods below progress from basic to advanced, so whether you're looking for quick results or precision editing, there's a workflow designed for you.
 secure download
 Method 1: Manually Speed Up a Video (Quick and Simple)
Best for: Beginners or anyone who wants to quickly convert a regular video into a time-lapse. This method involves turning a lengthy video into a time-lapse using the video speed adjustment tool. It's ideal for vloggers, event recorders, or those documenting long activities.
Step 1Install and Open Filmora
Visit the official Filmora website. Download the most recent version. From there, open the installer and complete the setup process. Once installed, open the software.
Step 2Import Your Video to the Timeline
Make sure you're in Full Feature Mode. Click Import to upload your video or photo files. Then, drag your selected video onto the timeline.
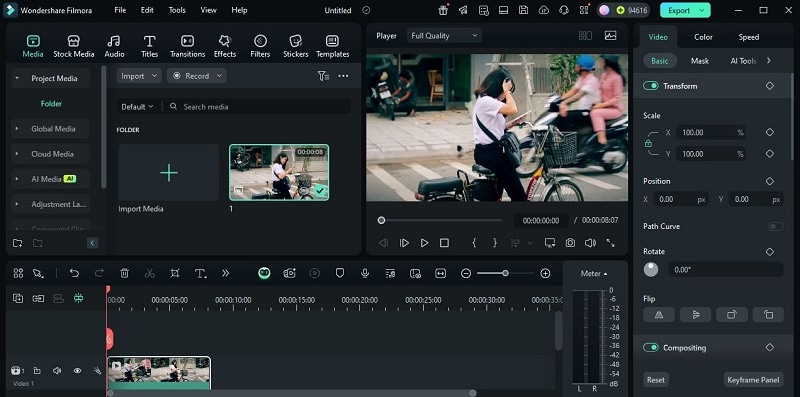
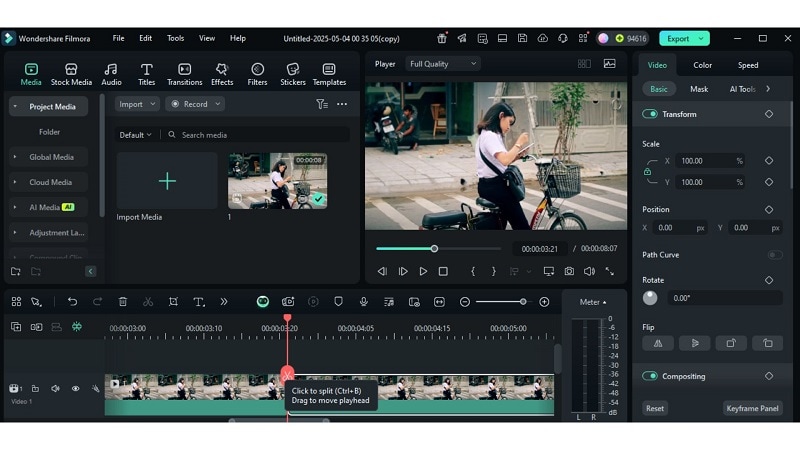
Step 3Split and Arrange Your Clip
To cut, place the slider where you want it to be, then click the Split Button. You can repeat this to divide the clip into several segments for better pacing.
Step 4Adjust Speed to Create Time-Lapse
To modify, double-click the clip. Next, in the pop-up panel, go to the Speed option. If you want to increase playback, move the speed slider to the right. You can speed it up to 100 times during slow motion of 0.01 times.
Step 5Render and Export Your Time-Lapse Video
Click the Render icon to preview your final video. When ready, hit Export, choose a format, and save your time-lapse video in high resolution up to 4K quality.
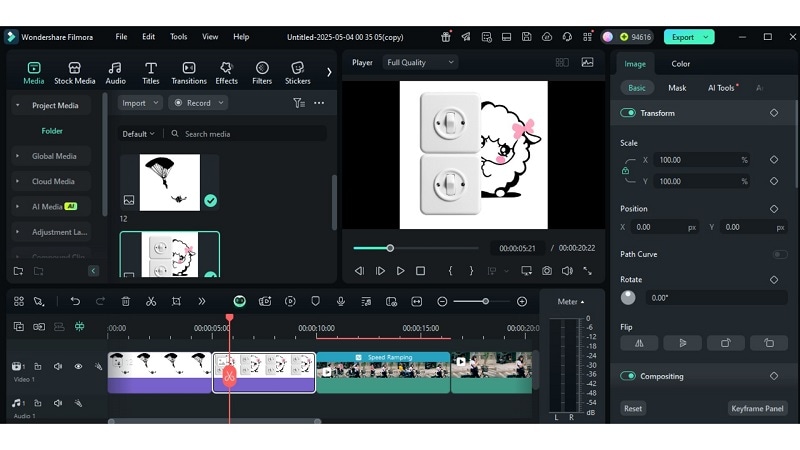
Method 2: Use Speed Ramping for Dynamic Timing
Speed ramping allows for creating more dynamic speed changes, so it's not always sped up. There are times when you can slow it down to highlight dramatic points or transitions.
Best for: Intermediate users or content creators looking to emphasize specific moments with variable pacing. This method is perfect for showcasing sports highlights, tracking fitness progress, and telling cinematic stories.
Step 1Start a New Project and Import Media
Launch Filmora and click the '+' con to begin a new project. Once inside the editor, click Import to upload your video. Then, drag the clip to the timeline.
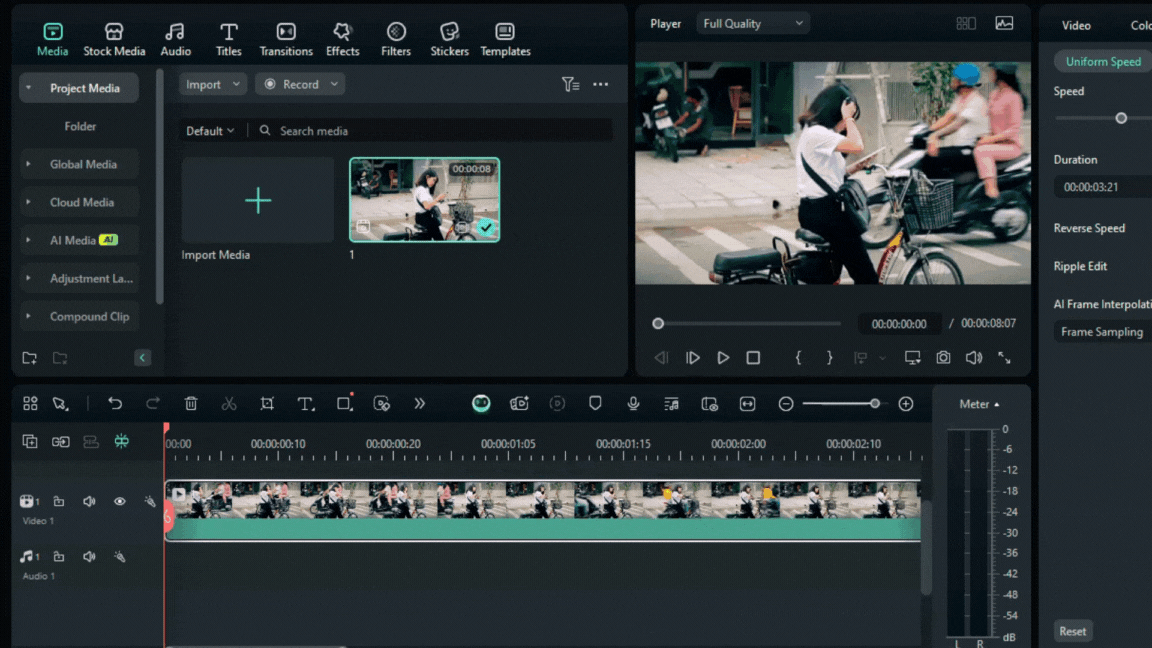
Step 2Open the Speed Settings
Click on your video in the timeline, then go to the Speed tab. Here, you'll see two options: Uniform Speed and Speed Ramping. Choose Speed Ramping for variable speed control.
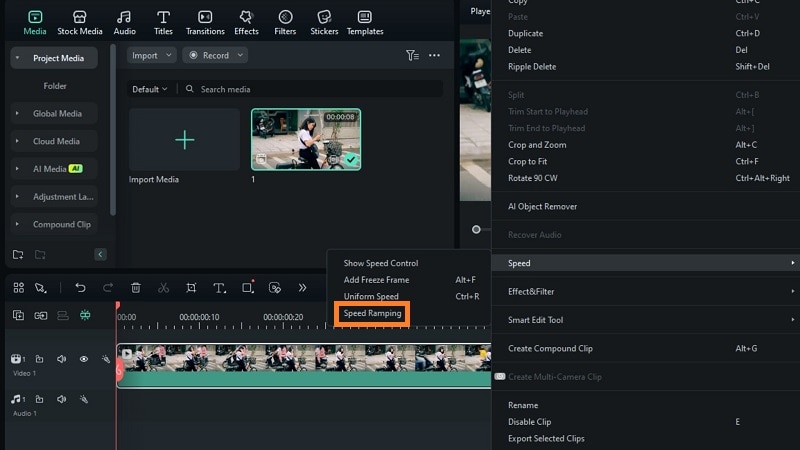
Step 3Apply a Preset Curve
When the speed ramping panel opens, you'll see several preset options (e.g., Montage, Jump Cut, Hero Moment). Choose one that fits your story. Filmora will automatically apply that curve to your clip.

Step 4Customize Your Speed Curve (Optional)
If none of the presets fit, click Customize. This opens the manual editor. You can now drag the keyframe points on the curve to control speed at different moments.
Step 5Fine-Tune Keyframes for Smoother Transitions
To increase speed, drag the keyframe above the baseline. To slow it down, pull the keyframe below the line. Keep it on the baseline for constant speed. This lets you highlight moments with fast or slow motion, ideal for crafting a dynamic timelapse video.

Method 3: Turn a Series of Photos into a Time-Lapse

This method is almost similar to method 1. But instead of using a video, we are using a photo sequence.
Best for: Users who captured still images at intervals (e.g., nature time-lapse, painting progress, construction updates). This workflow is ideal for DSLR shooters and users who want to create time-lapse videos from photos with full control.
Step 1Import Your Photos in Order
Open Filmora and start a new project. Click Import and upload all your images. These photos should show different moments in sequence. Be sure they are named or sorted correctly so they appear in the right order. Drag them all to the timeline.
Step 2Set the Speed for Time-Lapse Effect
Select all the images on the timeline. Right-click and choose Duration. Set each image to show for a short time (e.g., 0.2–0.5 seconds). This speeds up playback and creates the smooth flow of a time-lapse video.

Step 3Enhance and Export Your Video
Add creative touches like transitions, stickers, or filters to make the video engaging. Once done, click Export. Pick your format, resolution (up to 4K), and save your final project.
Method 4: Creating Time-lapse Video from a Photo (AI Image to Video)
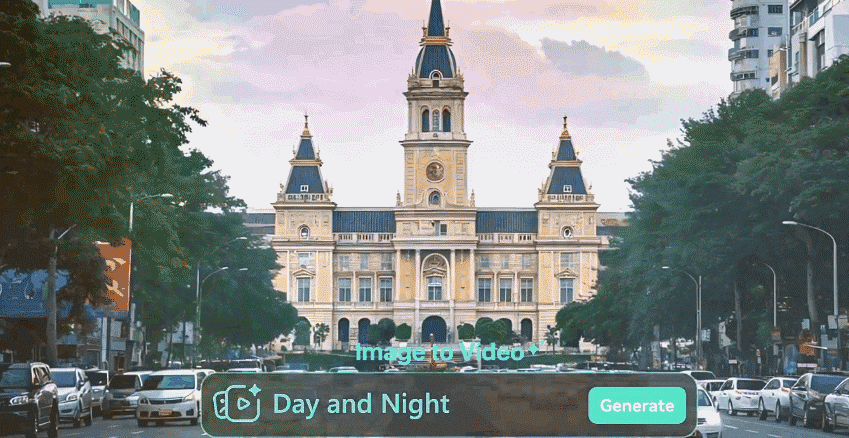
Best for: Busy users or beginners who want fast, visually appealing results without deep editing.
Step 1Open AI Image-to-Video Tool
Launch Filmora and go to the AI Image-to-Video feature from the main screen. This tool lets you quickly make time-lapse using smart effects.
Step 2Upload One or More Images
Click Import to upload your image or a group of images. You can use a single photo for a focused shot or several to build a more engaging, animated sequence.
Step 3Let AI Build Your Time-Lapse
Go to Image to Video > Scenery in the Properties panel. Pick a preset animation or type a prompt (e.g., "sunrise to sunset city view"). The AI will apply motion effects to match your input. Once processed, you'll get a smooth timelapse video, no manual editing needed.

This method helps you turn static photos into time-lapse clips with cinematic effects, ideal for product showcases, social media posts, and event recaps.
 secure download
 Part 4. Time-Lapse Creation Tips for Beginners
Creating a smooth time-lapse isn't just about speeding up a video. You also need careful planning and attention to detail. If you're new to time-lapse videos, these simple tips can help you avoid common mistakes and get better results right from the start.
- Keep the Camera Stable: Use tripods or mounts to avoid shaky footage.
- Maintain Lighting Consistency: Use manual exposure settings if shooting photos.
- Shoot in High Resolution: Gives more room to crop or reframe.
- Don't Over-Speed: Too fast = viewer confusion; aim for balance.
- Use Background Music: It boosts viewer engagement and gives rhythm to your video.
Conclusion
Creating a time-lapse no longer demands complex gear or editing experience. You've explored key techniques, from simple speed adjustments to AI-powered tools that animate stills.
We compared lightweight options like Typito and dove into the advanced features available in Filmora. It stands out for its blend of simplicity, depth, and creative control. Whether using video or images, you can now make time time-lapse online that feels polished and purposeful. And if you're aiming to create time time-lapse video from photos with minimal effort, Filmora's smart tools offer a seamless path.
Let your moments move faster, smoother, and more beautifully than ever.
