
 100% Security Verified | No Subscription Required | No Malware
In this article
S‑Log footage often appears flat and muted when it exits the camera. They need a color grade to reveal depth and tone. This guide will show you how to edit a log video in Wondershare Filmora. Learn how to adjust contrast, exposure, white balance, and add LUTs for cinematic style.
Browse the article where you’ll also find sources of free S-Log footage and creative LUT effects to boost your editing workflow. Keep reading!
Part 1. What is S-Log Footage and Why Does It Look Flat
S‑Log and S‑Log3 are special recording modes used in cameras like the Sony A7 and FX, Panasonic GH, Nikon Z, and Canon C series. These log modes capture a wide range of light and dark zones, more than regular video formats.
The cost is that the picture looks gray, washed out, and low contrast. It also has little color saturation. This look seems unappealing, but it gives you editing space.
If you want to use S‑Log footage in your work, download Wondershare Filmora. It gives you a clear path to color correct S‑Log, even if you lack color grading experience.
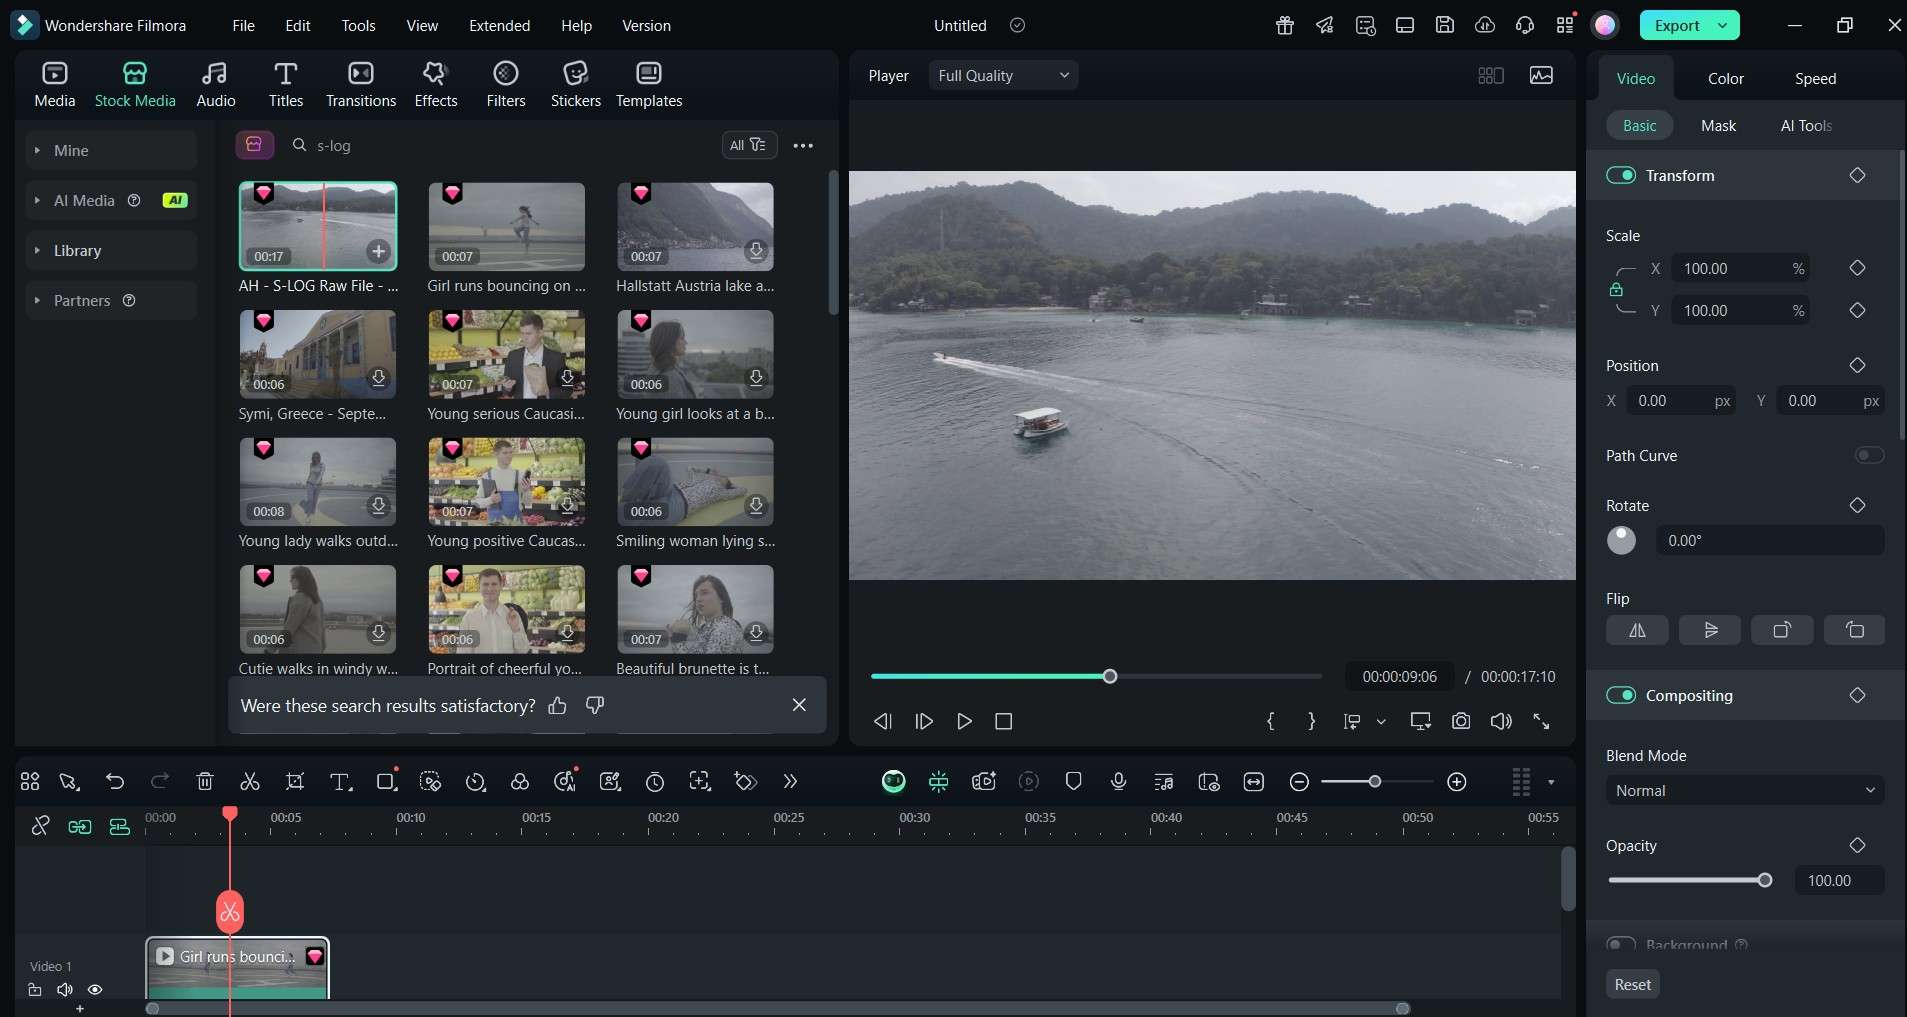
Here's a sample clip of a girl running and bouncing on top of a rooftop helipad. This footage was taken from Filmora’s built-in stock media and is still in its original S‑Log form. Notice how flat and gray the clip appears before any editing; this is the starting point for color correction.
Powerful AI video editor for all creators


When you shoot with S‑Log, the image is like a blank canvas. You get room to bring back detail in highlights and shadows. You can push colors around without losing quality. This is very helpful for creative video work.
You can match clips from different cameras by grading them similarly. You can tune the picture to match different moods and scenes. Many pros use S‑Log for projects such as weddings, travel films, music videos, and short dramas.
The wide dynamic range helps in tough lighting situations, like indoor HDR scenes. After grading, your footage can look cinematic. You can shape colors and tone to match your vision.
Part 2. Where To Download Free and Royalty-Free S-Log3 Footage
Practicing color grading on real S‑Log footage helps you understand how this video format works. But getting your hands on good S‑Log clips can be tricky. Luckily, there are free and royalty-free sources you can explore, and one of them is already inside Filmora.
Filmora Stock Media
Filmora has a built-in stock library with high-quality video clips, including S‑Log and flat-profile footage. You can search directly from the Filmora interface. Look for clips labeled “flat,” “log,” or “cinematic.” These are perfect for learning how to color grade and test LUTs. Since it’s inside the editor, you don’t have to leave the app or worry about licensing.
Related Templates For You to Try


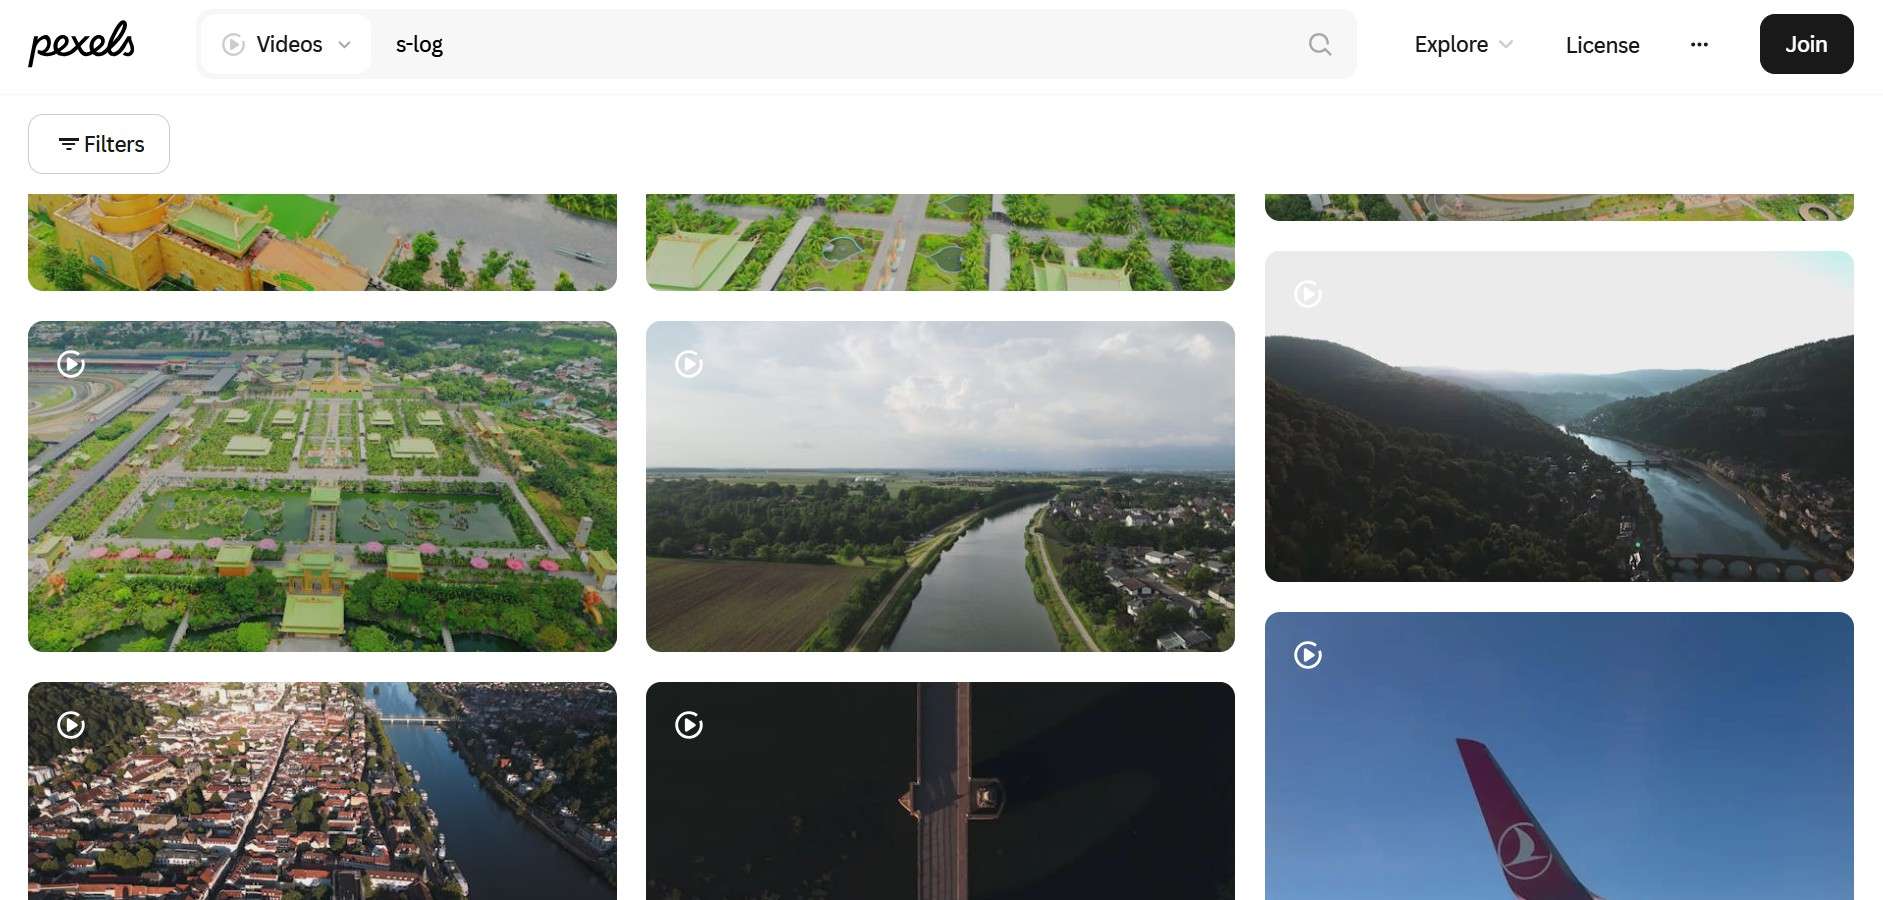
Pexels Videos
Pexels is a well-known free stock site with lots of artistic videos. Search for terms like “S‑Log,” “flat color,” or “cinematic raw.” While not all videos are true S‑Log, some have a similar washed-out style that still lets you practice. All videos on Pexels are free to download and use.
Mixkit
Mixkit offers free videos that are easy to search and download. You won’t find a “log” tag directly, but you can explore cinematic or raw-looking clips. These often give you flat lighting and muted colors, which are great for testing color correction workflows.

YouTube Channels
Some creators on YouTube share free S‑Log footage for editing practice. One example is the “Color Grading Central” channel. Look for videos with download links in the description. These clips often show nature, people, or city scenes shot in log. Just make sure to follow the creator’s usage rules.
Freepik Videos
Freepik now offers free stock video clips along with its photos and graphics. You can search for flat, cinematic, or washed-out footage that mimics S‑Log style. Their library includes people, landscapes, and abstract visuals. Many clips are free to use with optional credit, and you can filter for commercial use to stay on the safe side.

When trying new color grading techniques, working with royalty-free S‑Log3 videos helps you learn safely. Most of these platforms don’t require credit, but always double-check their license terms.
Part 3. How To Edit S-Log Footage in Wondershare Filmora
Editing S-Log videos in Filmora is practical and clear. Filmora makes advanced steps easy for beginners. The guide below walks through grading and polishing an S‑Log clip.
Step 1: Import the Footage
Download and install Filmora on your computer. Launch it and log in or create a new Wondershare account. Make a new project. Drag your S‑Log clip into the media library or go to Stock Media and search for S-Log clips that you like.
Powerful AI video editor for all creators
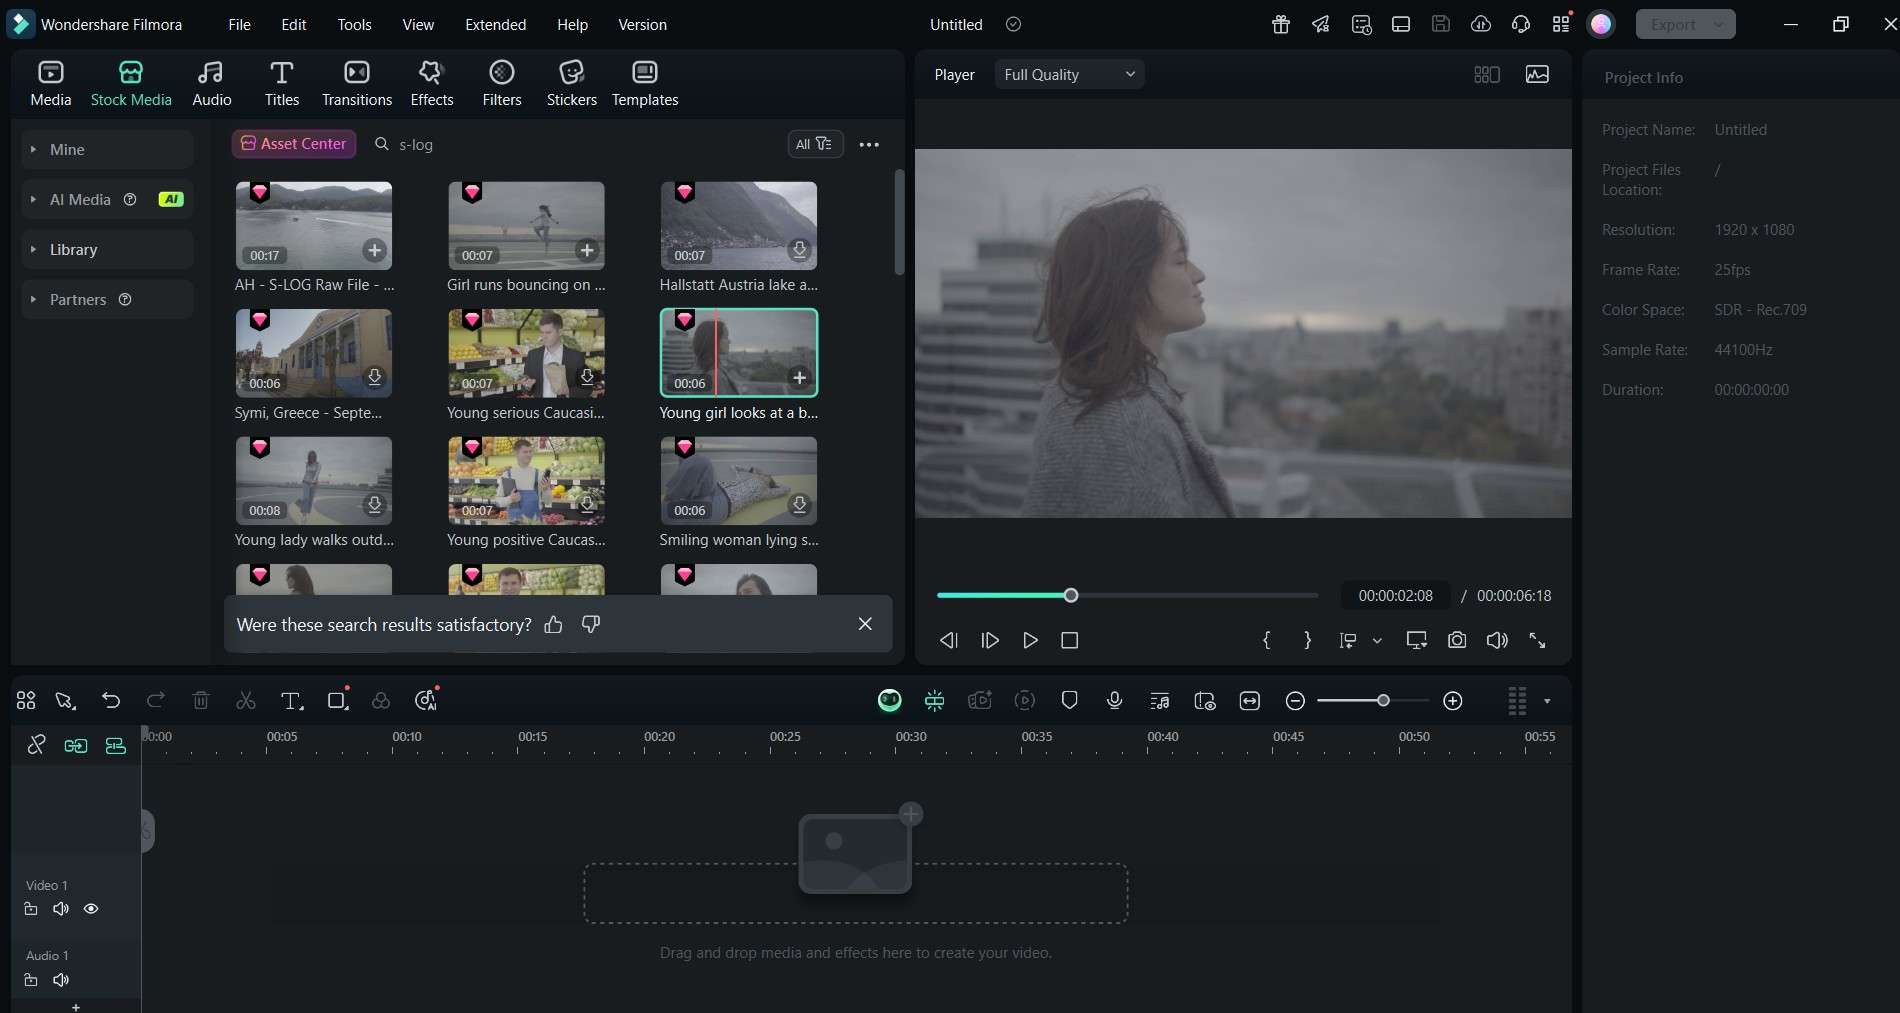
Drag it onto the timeline. Use the S-Log footage below, found in Filmora’s Stock Media, as our base.
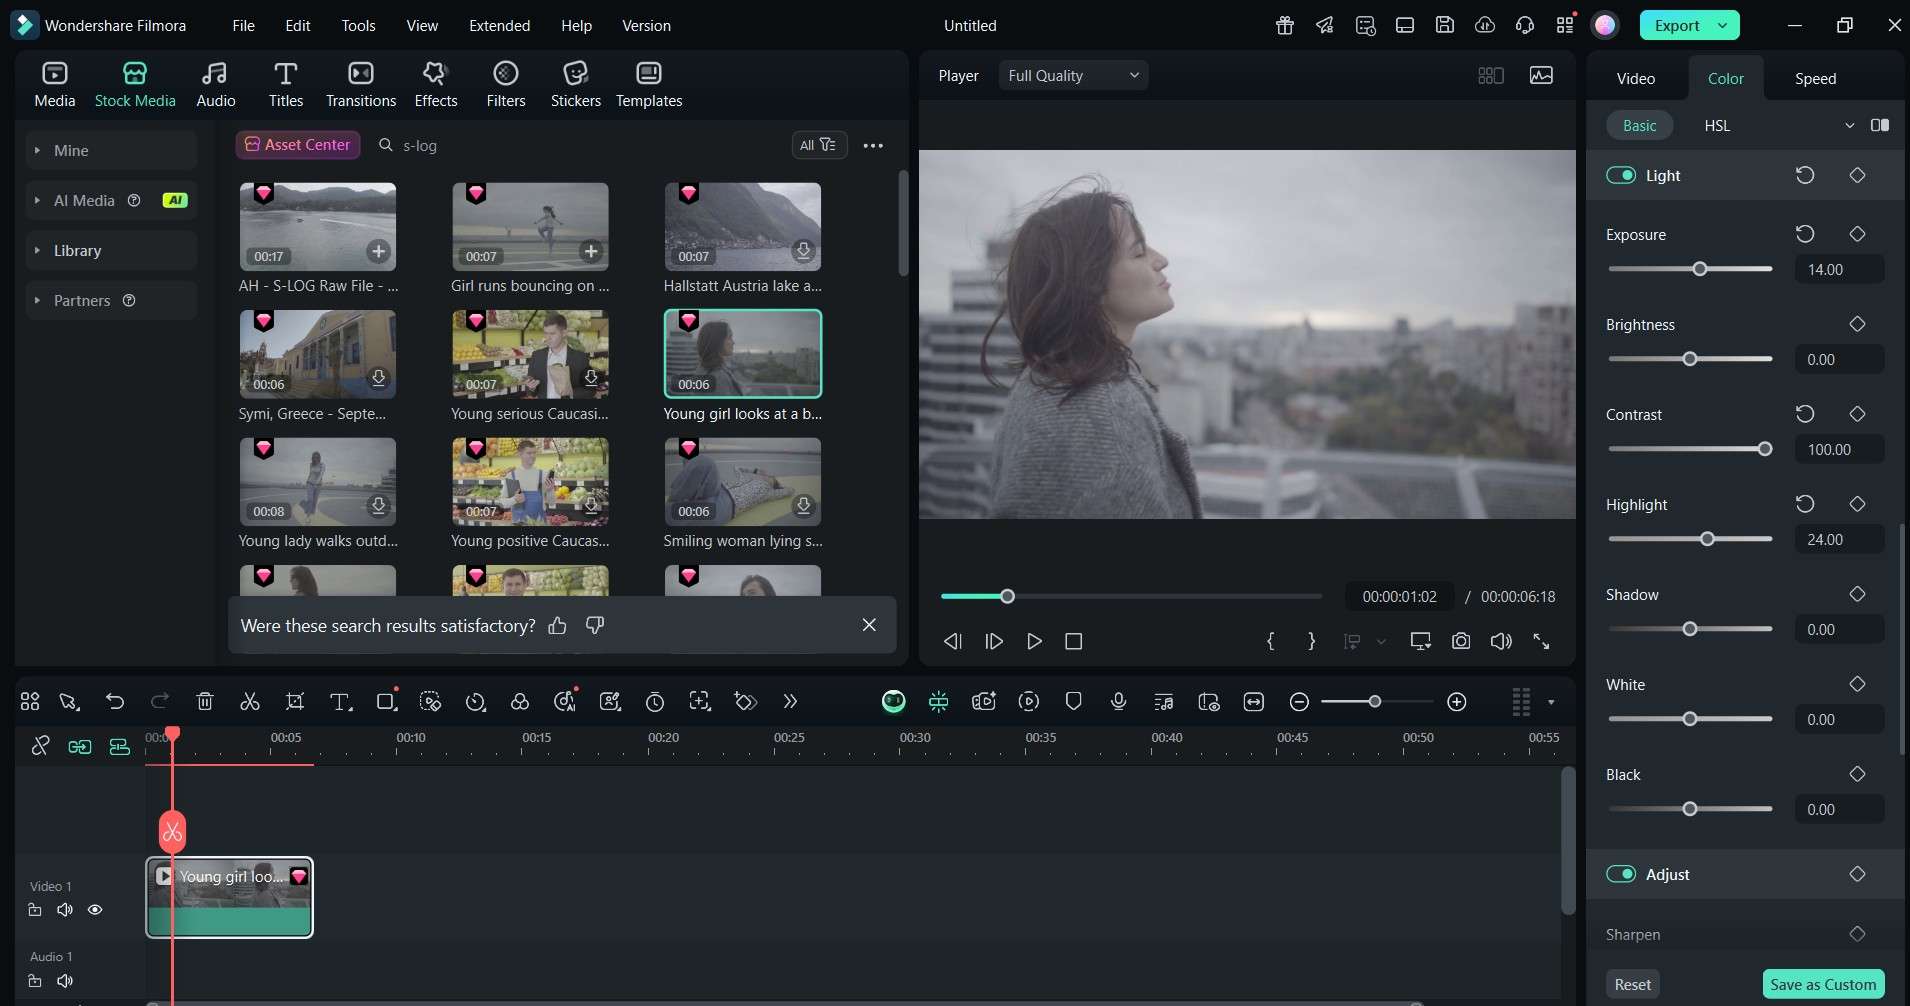
Step 2: Fix Exposure and Contrast
Double-click your clip to open the Color panel on the right side. For basic adjustments, use sliders and scopes.
- Increase Exposure to brighten midtones. Slide until the image stops feeling flat.
- Raise the Contrast slider to deepen the darks. As contrast grows, your image gains more pop.
- Watch the scope tools to avoid losing detail in bright or dark zones.
Step 3: Correct White Balance
S‑Log can make the color look off because of low saturation. In the Color area, warm the Temperature to fix orange or blue casts. Move the Tint slider to lessen green or magenta haze. Aim for natural skin tones or realistic colors in nature scenes.
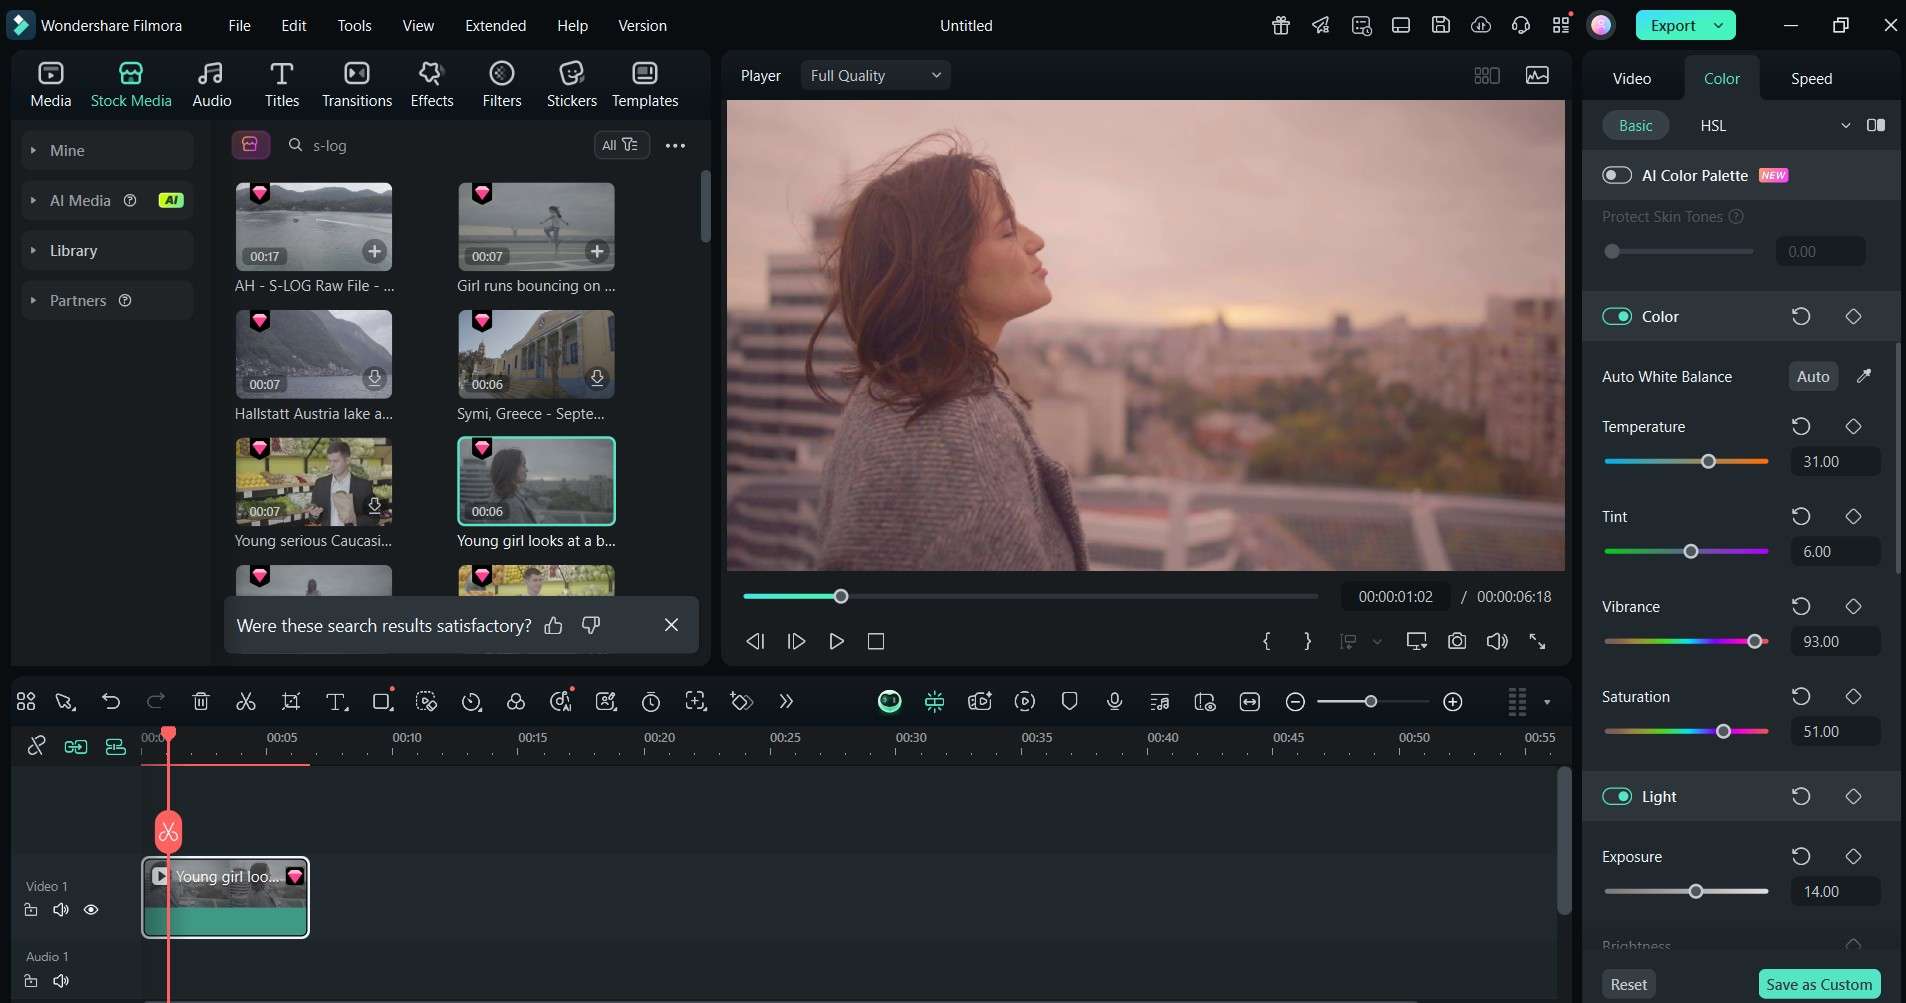
Step 4: Raise the Saturation slider to restore vibrancy. Adjust Vibrance to emphasize mid-tones without overpowering skin tones.
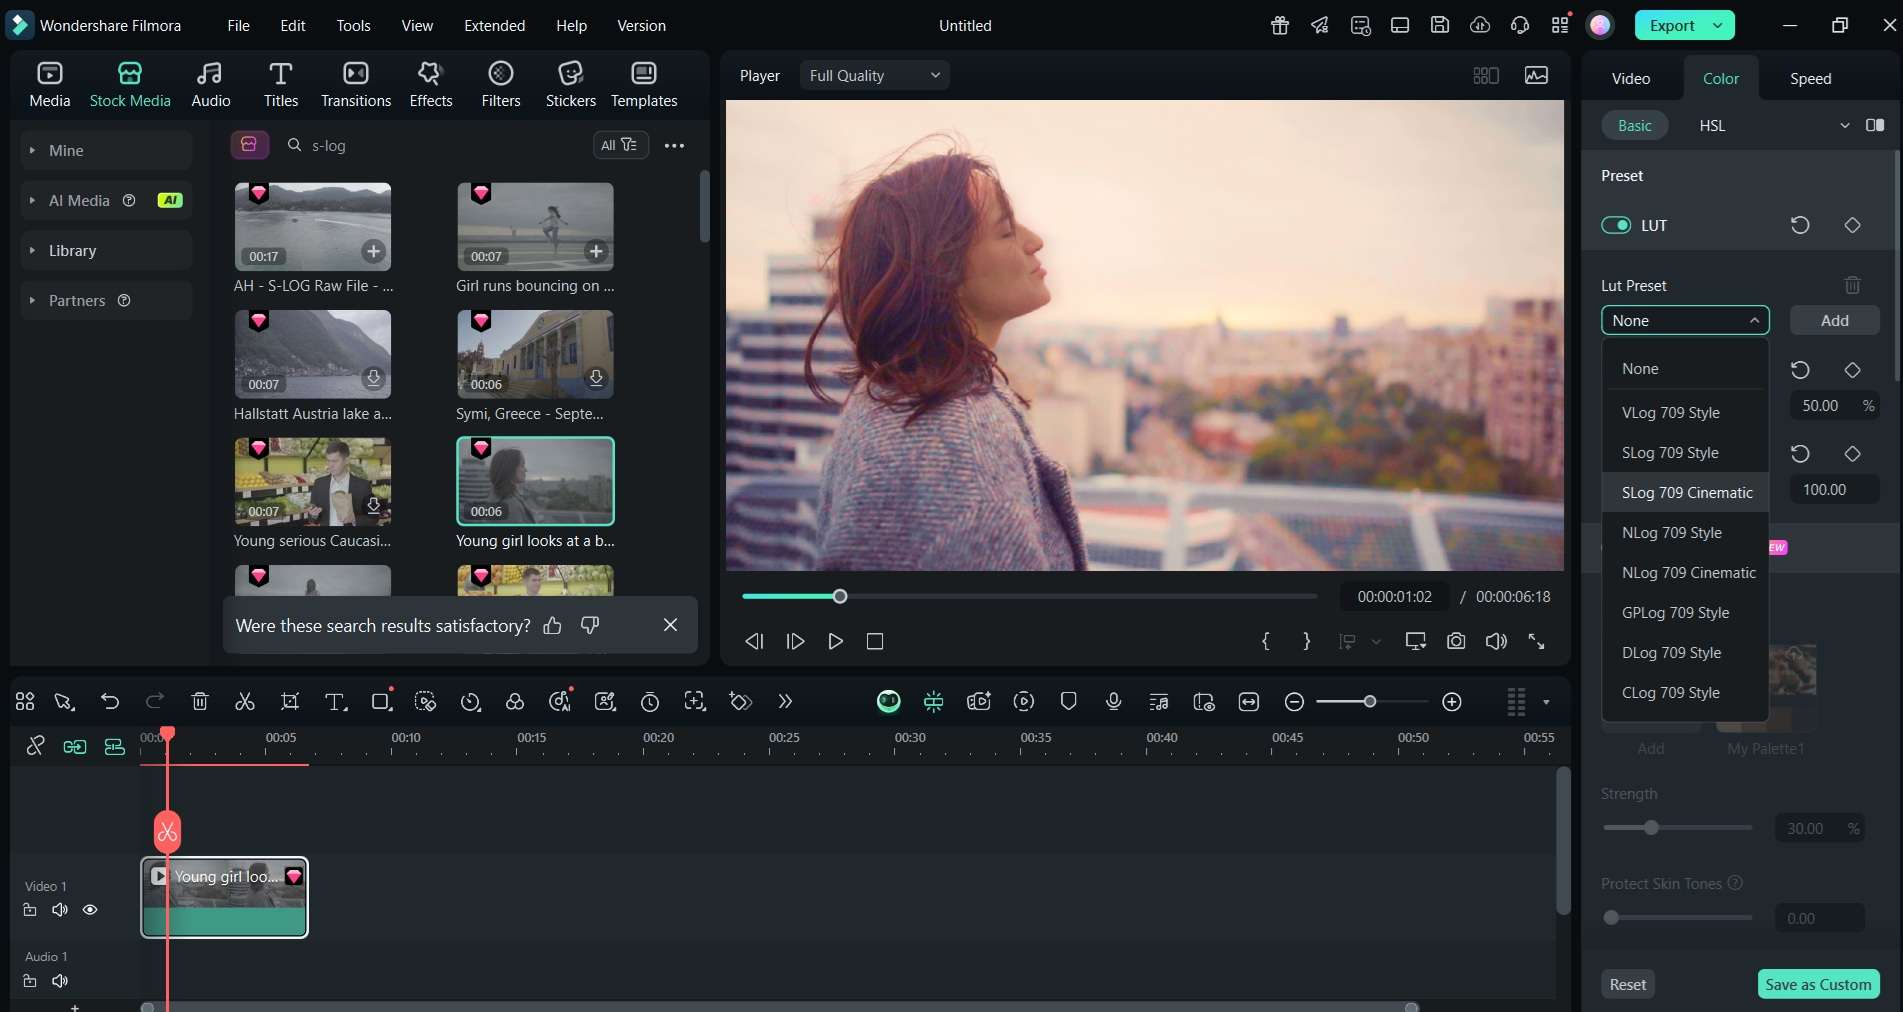
Step 5: Apply LUTs to boost style under the LUT tab. You can choose cinematic look, teal‑orange, or vintage options. Use the Strength control to adjust how strong the LUT looks. Start low and raise it slowly.
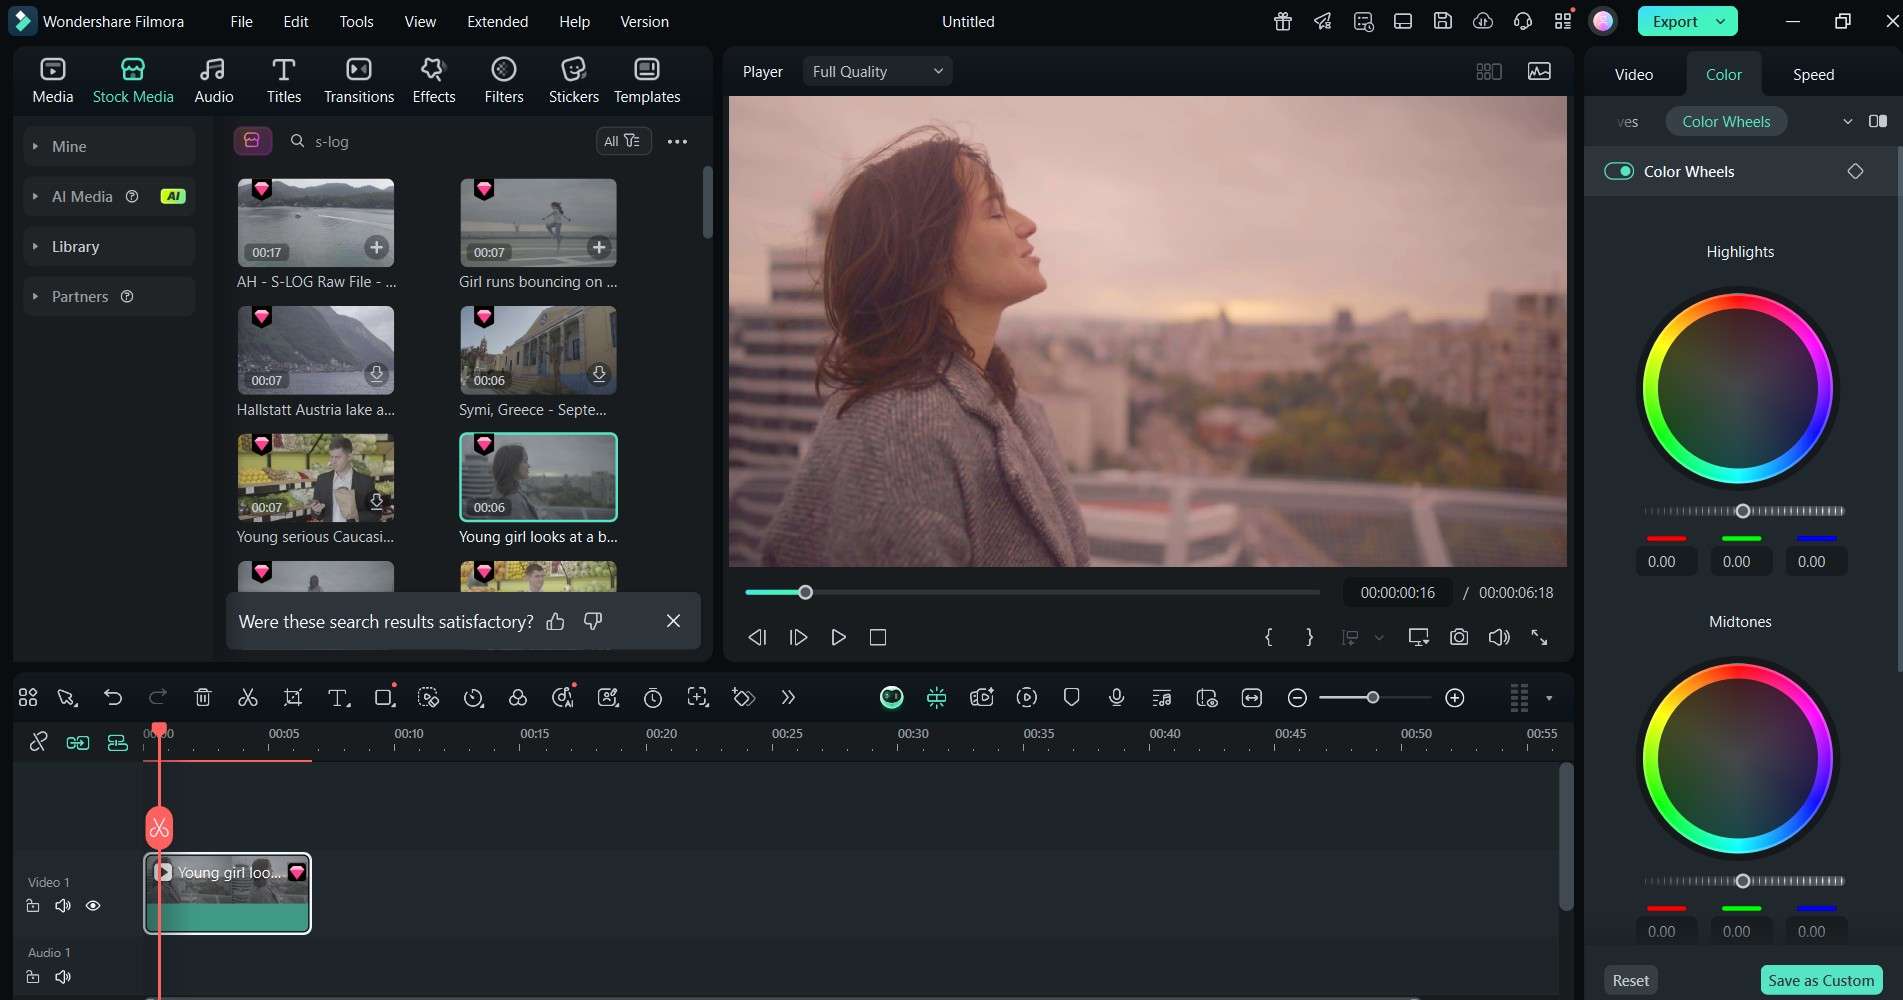
Step 6: Use Curves and Color Wheels
Open the advanced options for more control. Curves fine-tune brightness in shadows, mid-tones, and highlights. Color Wheels let you adjust color balance in each range. Pull mid-tone green toward magenta or move highlight blues toward yellow. This gives precise control over look and mood.
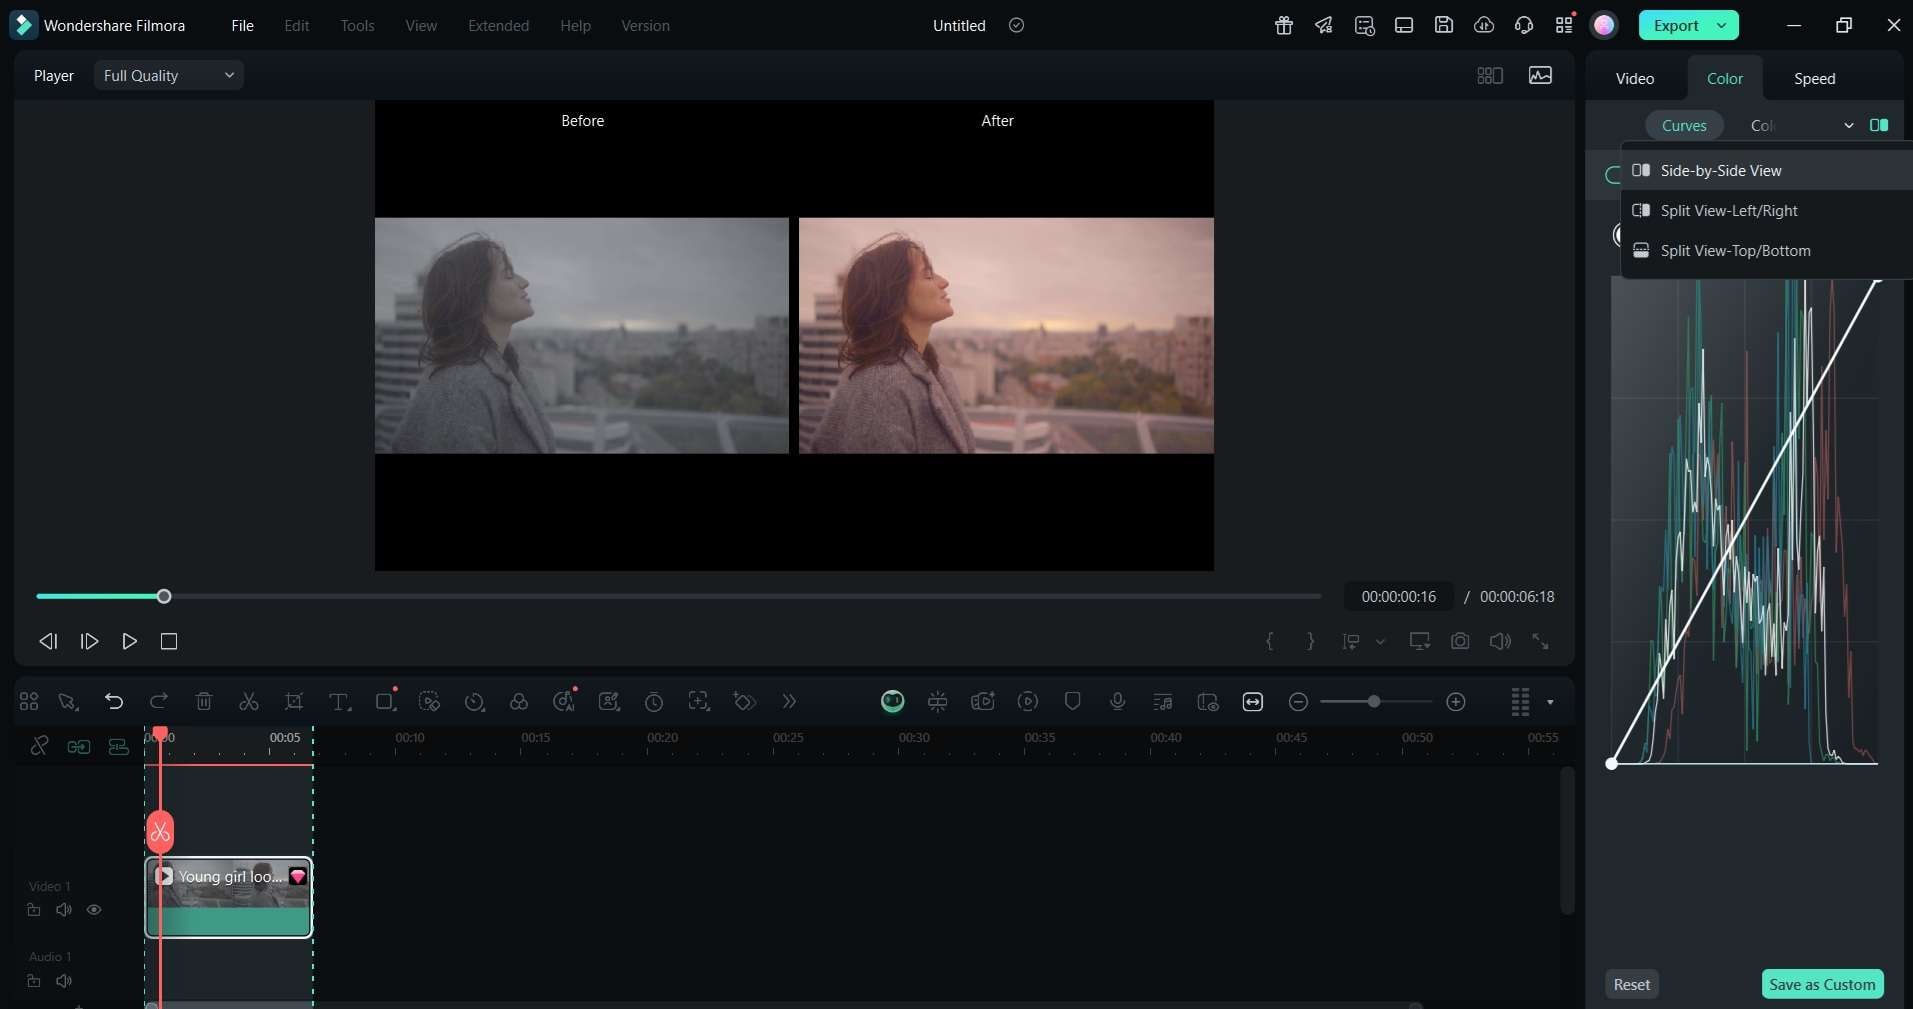
Step 7: Check Before and After
Tap the split-screen view to compare the original and graded versions. You can also click the Eye icon to see whether the grade is on or off. This helps you see what changed and where to keep fine-tuning.
Step 9: Export a Test Clip or GIF
Make a short export using MP4 or GIF format. Rewatch it to confirm that the colors, contrast, and tone look correct across devices.
Filmora gives newcomers clearer control than many advanced tools. You can do real grading without a steep learning curve.
Part 4. Top LUTs and Color Styles to Use on S-Log Footage
LUTs allow you to quickly apply creative or cinematic looks to your clips. Use them with care for the best results.
1. Cinematic LUTs
These bring greenish shadows and orange skin tones for a movie feel. They work across travel, narrative, and commercial content.
2. Teal & Orange LUTs
This classic look cools shadows toward teal and warms highlights. It is great for action, portraits, and lifestyle videos.
3. Vintage LUTs
These have faded tones, low saturation, and warm contrast. They are perfect for nostalgia or retro edits.
4. Film Emulation LUTs
These are similar to film stock like Kodak or Fuji. They add grain and rich tones for a creative, old-school look.
5. Moody LUTs
These reduce color and raise contrast. They create a dramatic tone, perfect for short films or dark theme edits.
Where to find LUTs:
- Filmora offers its own LUT packs.
- Online libraries and creators share royalty-free LUTs for download.
- Sites like Lutify.me, RocketStock, and PremiumBeat offer free options.
To load a LUT in Filmora:
- Go to the Color panel, then to the LUT tab.
- Click Import to add a new LUT file.
- Choose the LUT and adjust the Strength slider.
Show LUT Effects with GIFs
Use split-screen GIFs to compare looks:
- Original clip next to cinematic LUT.
- Same clip with teal & orange.
- Side by side of vintage vs film emulation.
Keep your grades subtle. Heavy grading can hide highlight detail or make skin tones look fake.
Conclusion
Editing S‑Log footage gives you full creative control over your look. Flat footage holds detail in bright and dark areas, making it ready for grading. Filmora makes this process easy and clean. You can fix exposure, adjust color, apply LUTs, and match clips with one tool.
Use free S Log footage and practice LUTs to see what looks good. Filmora helps you shape cinematic colors without complex tools. The result is a video that looks polished, expressive, and professional.

