
 100% Security Verified | No Subscription Required | No Malware


 ChatGPT
 Perplexity
 Gemini
 Claude
 Grok
Grok

Adobe’s Premiere Pro is a video editing powerhouse. It is packed with options and features, and people use it to work on everything from simple video editing to professional movie-making tasks. Of course, this means that Premiere Pro is not that easy to master, and several customers testify to its steep learning curve.
The topic of this article is the Ken Burns effect and how to use it in Premiere Pro. We will say a few interesting facts about the effect itself, explain how to apply it in Premiere Pro, and we will also give you a much easier alternative.
Stick around until the end.
For a detailed guide, please scroll down the page.
In this article
What is the Ken Burns Effect?
If you have ever watched a documentary movie or series, you have certainly seen the Ken Burns effect in action. Instead of showing a still image on the screen, directors opt to zoom into the image and pan the camera slowly across the image or slowly zoom in or out. This makes the footage much more exciting to watch.
Imagine watching a war documentary and you see a still image on the screen. You listen to the narrator, but you notice that you are losing focus because the still image is simply not that interesting to watch for extended periods. If the director makes the scene dynamic by applying the Ken Burns effect, then it becomes more interesting.
Now that we know what this effect is, let’s see how to create it in Premiere Pro.
A Step-by-Step Guide on Applying the Ken Burns Effect in Premiere Pro

To begin this tutorial, we will assume that you have Premiere Pro installed on your desktop or laptop. We will also assume that you have opened the program, created a new project, imported the image where you want to apply the effect, and added it to the timeline. After you have done that, follow these steps to add the Ken Burns effect to your image.
Step 1: Click on the image in the timeline. Locate the "Effect Controls" section in the program. Adjust the values of the Position, Scale, and Rotation of the camera.

Step 2: Click on the frame in the timeline where you want the Ken Burns effect to begin. Ensure the playhead is positioned at that exact point. Then, in the same window, click on "Scale."
You have now successfully added the first keyframe. Then, find the frame that marks the end of the effect, and here, you need to increase the Scale value. This will make the image zoom in slowly.

Yes, we know Step 2 was a long step, but as we mentioned, Premiere Pro is not an easy program, and you have to expect some hiccups until you find your way around it. You can continue experimenting with the position, scale, and rotation values and changing keyframes until you find something that you like.
Step 3: When you have adjusted the parameters to your liking, you can save the preset to avoid having to go through all this again. Just right-click on Motion in Effect Controls and click on Save Preset.

If the steps above seem a bit too complicated, and if you tried to follow them but didn’t manage to get the desired result, don’t worry. It happens to the best of us. Perhaps Premiere Pro is simply too complicated for you. Well, we have a solution.
Check Filmora out and see what we mean.
Powerful AI video editor for all creators


Apply the Ken Burns Effect in Filmora - An Easy-to-Learn Alternative

When Filmora entered the market, people were surprised, to say the least. Here, we have a software solution that has all the important features you would find in legacy video editing software, an abundance of other features, and is easy to use and master.
Filmora is much easier to use than Premiere Pro, and we will exemplify this claim by showing how to apply the Ken Burns effect in Filmora.
Before you begin, you need to download and install Filmora on your desktop or laptop device. When the installation process is complete, you can open the program. We will guide you every step of the way.
 secure download
 Step 1: Click on New Project, and wait half a second for Filmora to open up.

Step 2: Focus on the upper-left side of the screen and notice the Media section. Here, click on Import. Then select the image (or video) you want to edit, and add it to your project.

Step 3: Drag the image from the Media tab to the timeline.

Step 4: Right-click on the image (or video) in the timeline, and click on Crop and Zoom.

Step 5: A new window will appear. Here, simply click on Pan & Zoom, then click on the Start frame (green box) and adjust the starting position of the camera, and then click on End (red box) to adjust the end frame. When you are done, click on the Play button to preview the result.

And there you have it. You have successfully applied the Ken Burns effect to a still image without Premiere Pro. We feel that Filmora is clearly easier to understand. While we were working with numbers in Premiere Pro, we just had to use our mouse and intuitively set everything up.
If you are satisfied with the effect, click the green Apply button to accept the changes. You can see the button in the low-right corner of the screenshot above.
If you are having fun, you can try and explore some AI features developed by the team at Wondershare. Check out the following section to find out more.
Explore Filmora’s Extensive Catalog of AI Features to Enhance Your Video
Filmora is filled with AI features that are very helpful and streamline the video and image editing workflow by a big margin. Here, we will talk about three AI features that we think you’ll love, but there is a lot more where that came from.
Let’s see them in action.
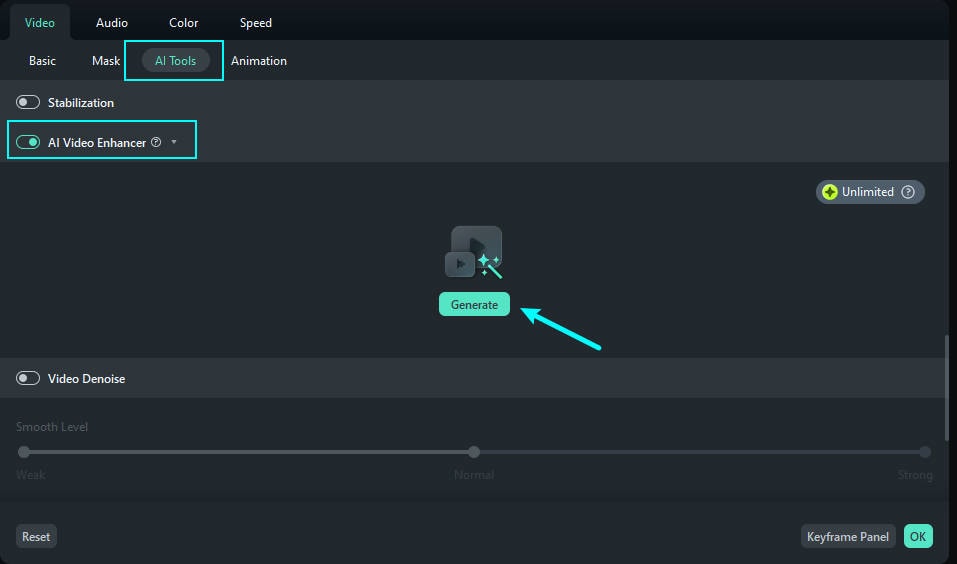
AI Video Enhancer
This feature represents a very easy way to improve the quality of your video file in less than a few minutes. Please note that it only works on video files.
When you click on the video in the timeline, look at the right of the screen to find the AI tools section. Then, simply activate the AI Video Enhancer and click on Generate. Wait a few moments and, presto, your video has a better resolution, better colors, and is overall enhanced in every way. Check the screenshot.
Since you can apply the Ken Burns effect on video files as well in Filmora, then the AI Video Enhancer will certainly be of service.
Smart Short Clips
Let’s assume that you are making a documentary. You have used Filmora to create the entire documentary. You recorded interviews, added the Ken Burns effect to several images and videos, and you have the entire video ready. Now, you want to crop it up into smaller chunks and use those short clips as promo material.
With FIlmora, you can do it in a few clicks. Check out the tutorial.
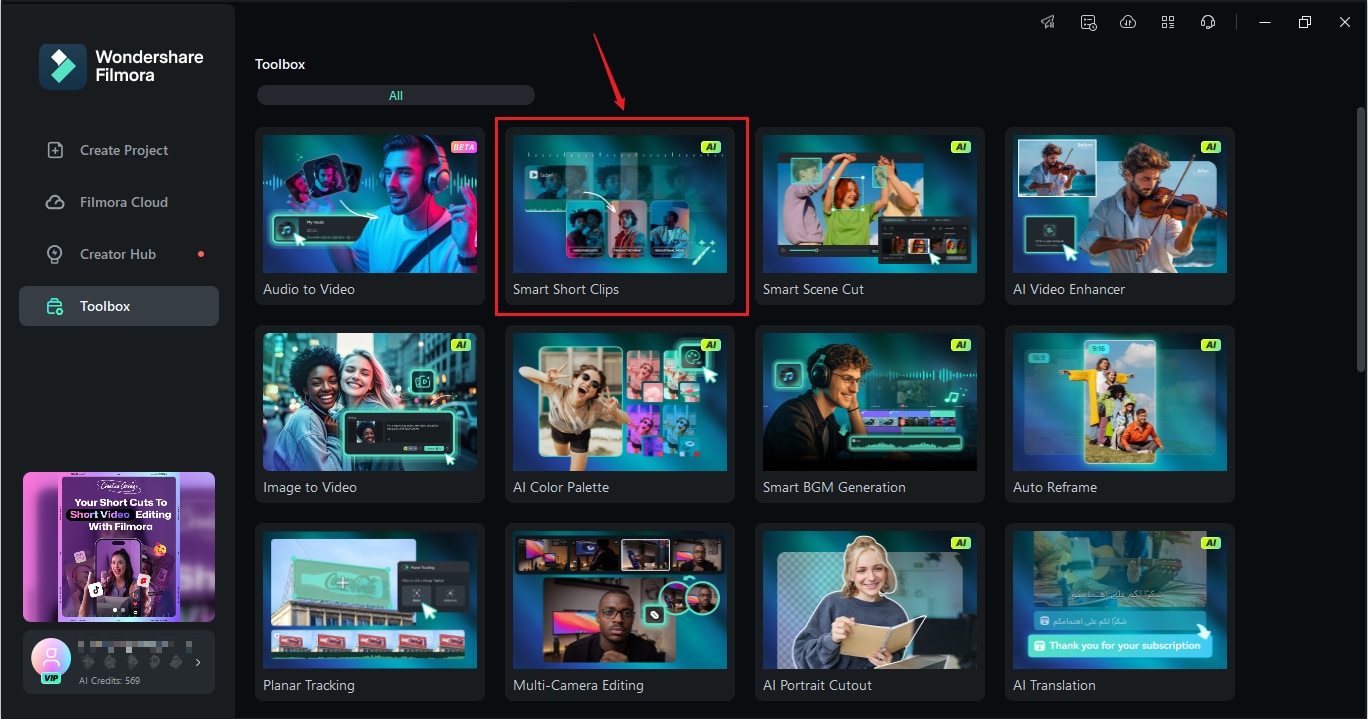
Step 1: As soon as you open Filmora, click on Toolbox and find the Smart Short Clips feature.
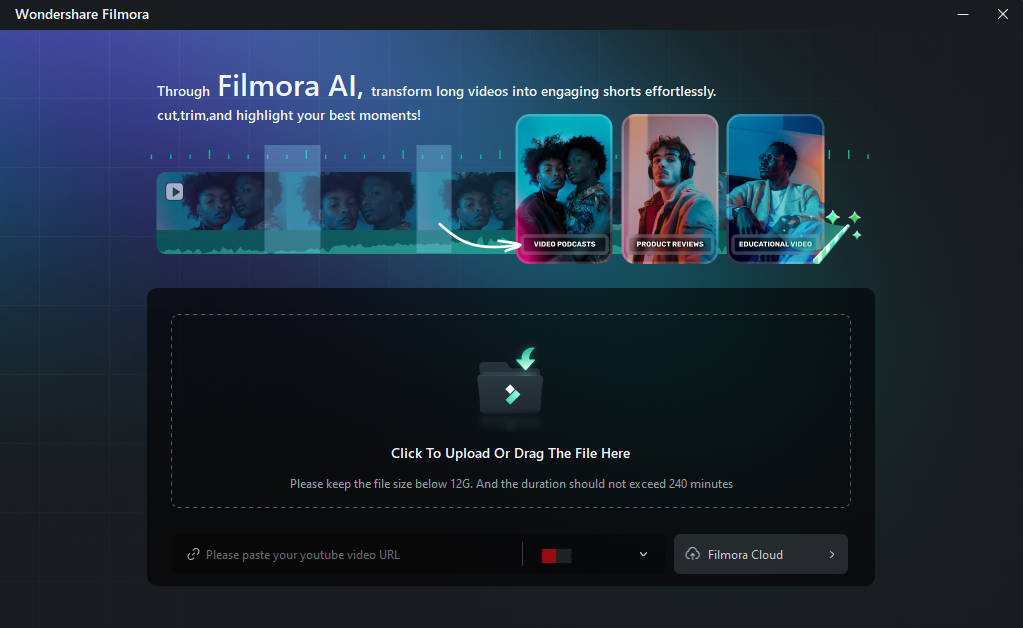
Step 2: You will see a new window where you can upload your documentary video file.
Step 3: Select the Language of your video, and specify the Duration of the output short clips. You can even select a Theme (if applicable).
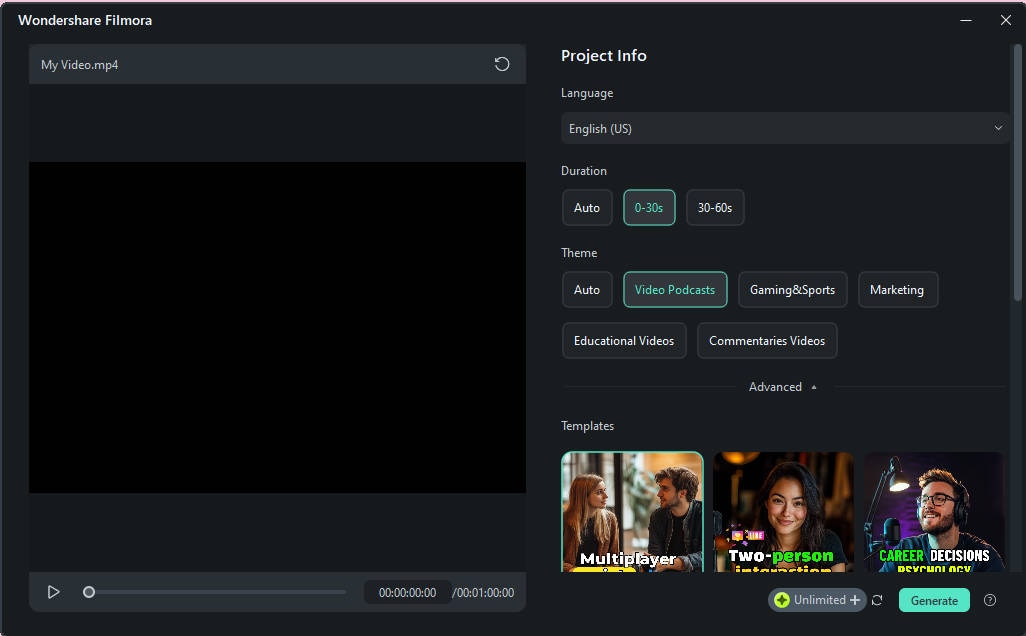
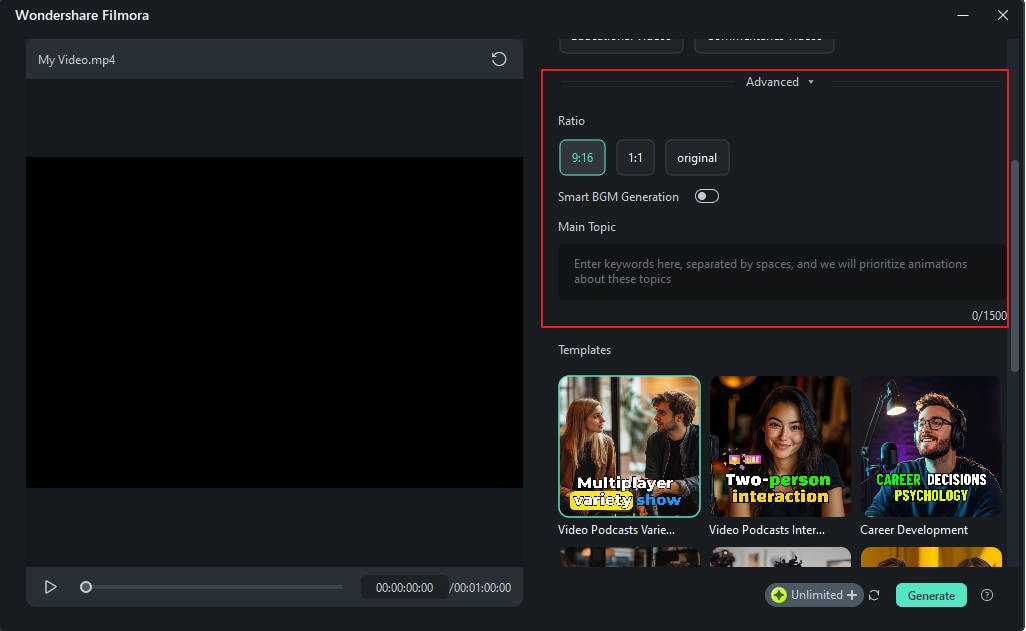
Step 4: You can also explore the Advanced settings t o set the Aspect Ratio of the output short clips. You can also use the Smart BGM Generator if you want the AI to add background music to your short clips. Finally, you can set the main topic to help the AI identify important moments.
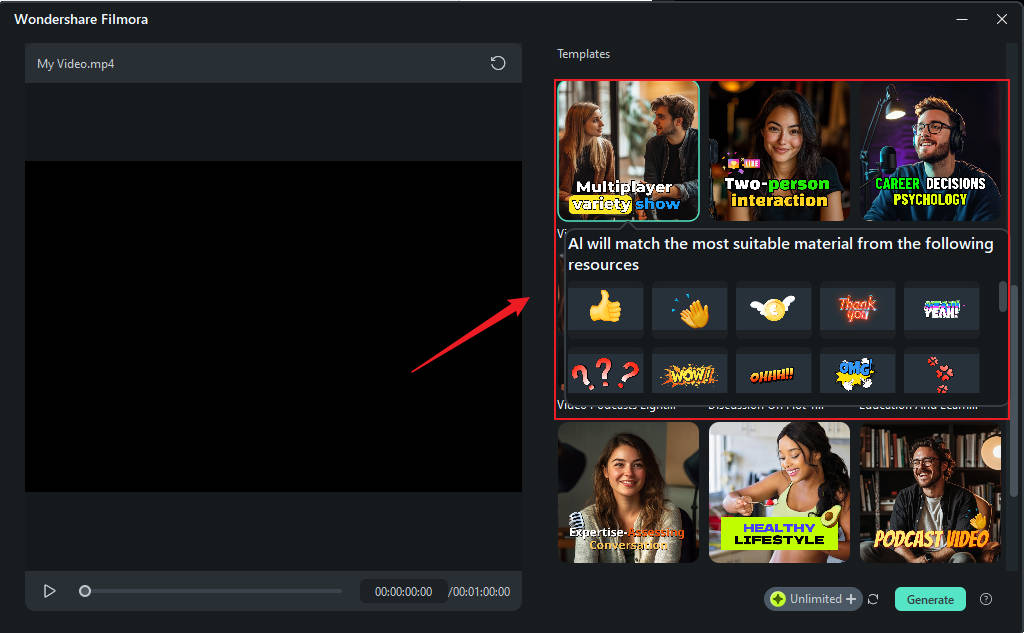
Step 5: You can also explore some Templates. When you find something that you like, select it, and click on the green Generate button below. Then, wait a few moments for the AI to do its work.
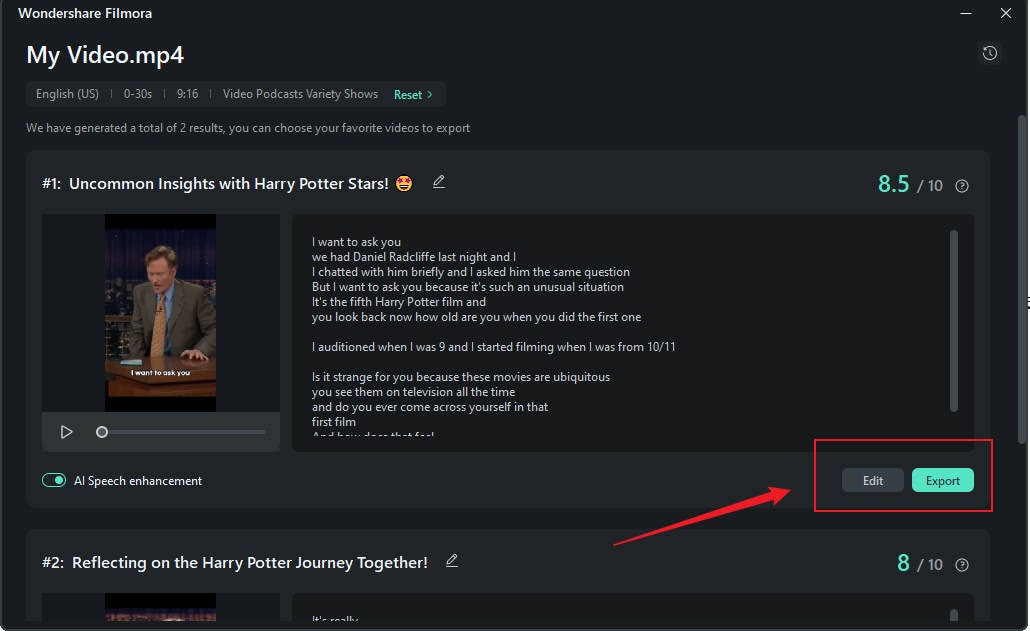
Step 6: Explore the short clips generated by AI, find the ones you like, and click on Export to save them.
And there you have it. If you wanted to do this step by step with another tool, it would take a lot longer. Here, with Filmora, you can do it simply and quickly.
AI Text-Based Editing
Imagine that you have a documentary video and that you are able to edit it based on the words uttered in the video. That sounds magical, right? Well, that’s exactly what AI Text-Based Editing does.
Here’s how you can use it.
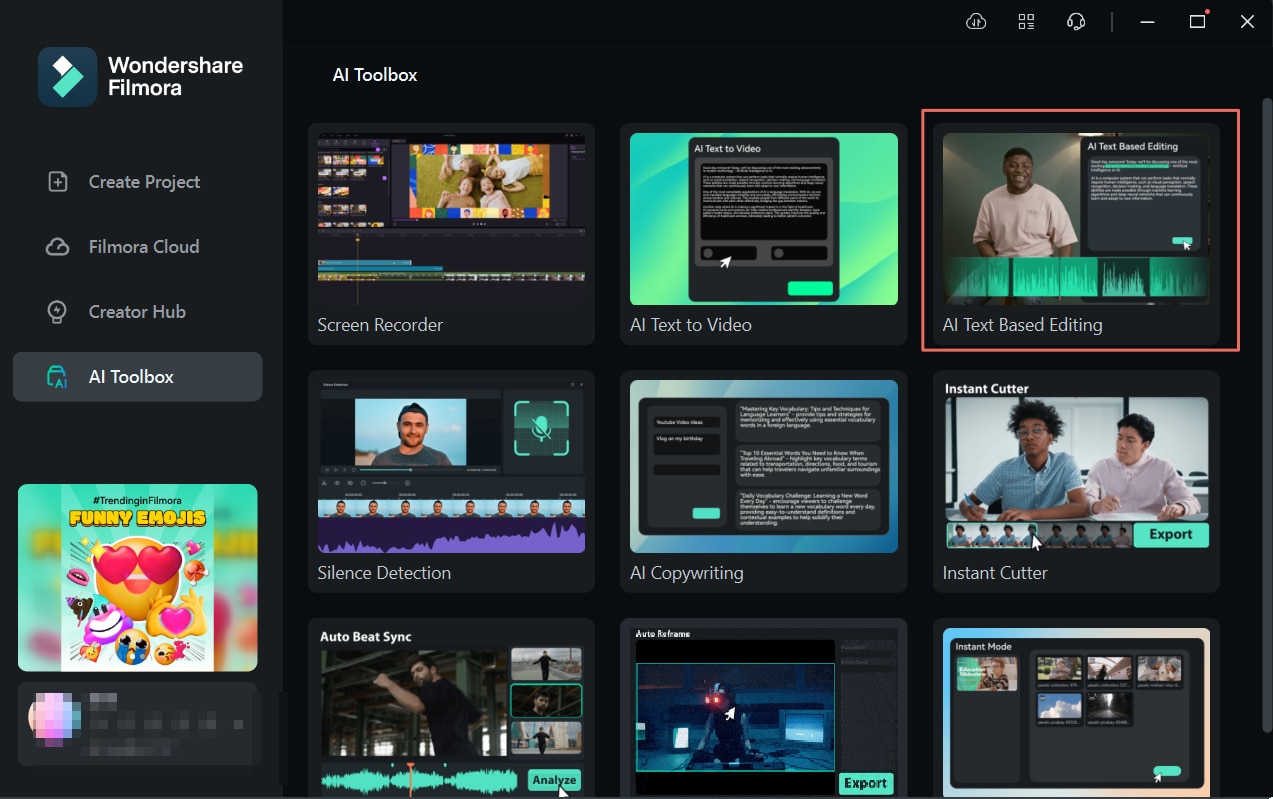
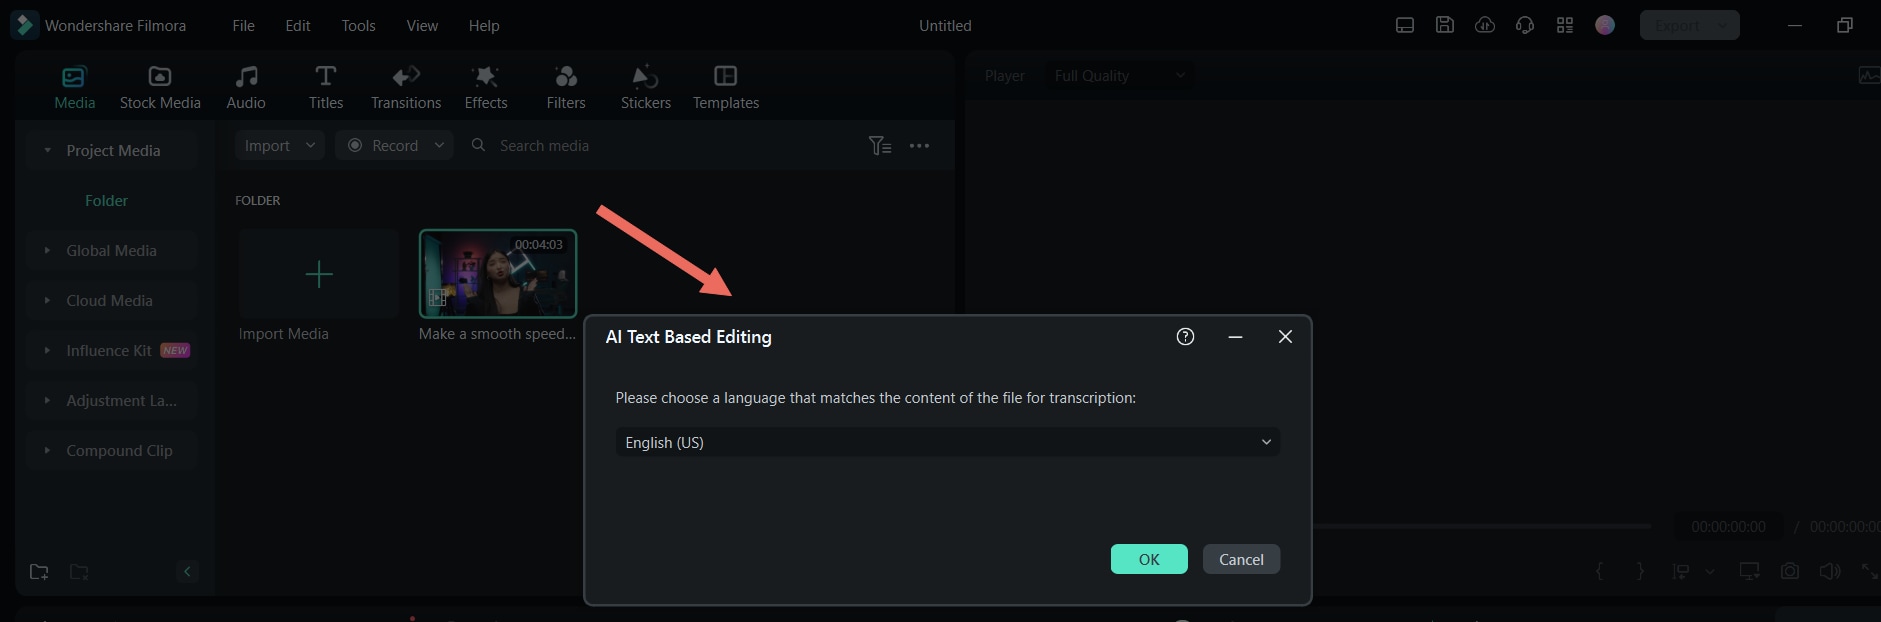
Step 1: Just like with Smart Short Clips, you can find this AI feature in the Toolbox.
Step 2: You will be prompted to upload a video file, and then to select the language of your video.
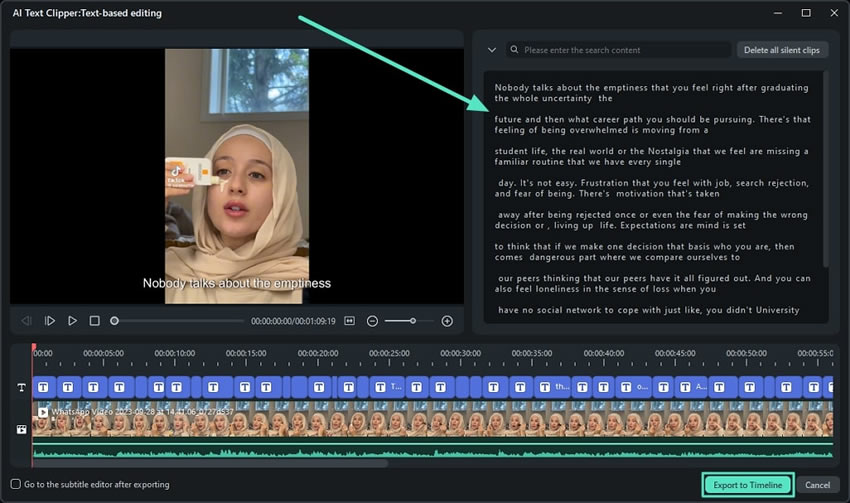
Step 3: Let the AI do its work for a little bit. Then, you will be greeted with a window where you can delete portions of the video by deleting portions of the text. This is excellent to help your workflow. When you are done editing the text, you can click on Export to Timeline. You can then continue your editing journey there.
With Filmroa by your side, you can begin your journey toward becoming a documentary filmmaker if something like that interests you. Since you are learning about the Ken Burns effect, we assume that it interests you at least a little bit.
Conclusion
Learning about an effect in video production is one thing, but learning how to use it properly is something different, and more complex. You need a tool with features that speed up the process. You don’t want to waste time exploring the interface and going back and forth. You want an intuitive tool that will guide you through the process, just like Filmora.
