Learn How to Make Your Characters Interactive in Unity Animation Rigging
An easy yet powerful editor
Numerous effects to choose from
Detailed tutorials provided by the official channel
Animation is one such aspect that is formed from the integration of several varied factors and processes. One of the most vital ones is the process of rigging. Thus, we will be discussing Unity character rigging as Unity is one of the most efficient platforms for animation.
Additionally, we will introduce you to one of the best tools you can use to edit videos and nurture the creative skills you carry in yourself. So, without any further delay, let us start our discussion.
In this article
Part 1 What is Unity Rigging?
To understand what Unity rigging is, we must start our discussion first by discussing rigging in animation. In animation, rigging is the process in which your animation characters are separated into two parts. One is the mesh-like structure of the characters. And the other is the skeletal structure given to the characters.
You integrate bones and joints and join them accordingly in the characters present in your animation. It is similar to the presence of the human skeletal system. Moreover, just like the skeletal system in humans helps in the movements of the different parts of the body, the bone and joint structure through rigging also enables the characters in animation to move.
Therefore, we can say that rigging is the process by which you can enable your characters’ in animation to move and show different facial expressions, etc. So, it is obvious that without the process of rigging, the animation is impossible, which makes rigging one of the most crucial aspects of animation.
Now that we know what rigging in animation is, we will be discussing what is animation rigging in Unity. Unity technologies have developed a cross-platform gaming engine called ‘Unity’. And this platform also offers the ones interested in animation to learn animation rigging.
The Unity platform offers robust and effective tools for animation rigging. And these tools assist the animators to create real-time rigs in Unity. Most commonly, the set of tools in Unity for rigging is used on the characters. But, if one likes, they can also use the tools on ani Game Object that includes animations and skeletons.
Therefore, when you utilise the platform of Unity or the toolsets of Unity to perform rigging in animation, it can be referred to as unity rigging. It is one of the most powerful and renowned platforms for animation, creating the finest and most professional animation creations.
Part 2 Is It Better to Rig in Unity or Blender?
Another platform that can ideally assist you in animation is Blender. A common question arises as to whether one should choose blender rigging over Unity or vice versa. We have laid down the following table to compare the different features of Blender with that of Unity.
Unity |
Blender |
|
| About | It is a game engine that enables you in creating human-machine interfaces, AR simulations, customize splash screens, etc. | It is a computer graphics software that is open source and is mainly used for creating 3D models. |
| Types Supported | Supports 3D | |
| Best Purpose | Ideal for film, architecture, automotive, transportation, and other industries | Ideal for animation and design that assists in VFX, simulation, organizations of all sizes with rendering, modeling, and video editing. |
There are many features that Blender lacks, but Unity includes. The features included in Unity but are absent in Blender are as follows.
● Drawing
● Games
● In-Game Analytics
● Multi-player Gaming Network
● Player Management
● Virtual Reality
● IT Asset Management
● Prototype Creation
Therefore, it is preferred to opt for Unity rigging than Blender rigging, as Blender lacks a considerable number of features.
Part 3 How To Use Animation Rigging In Unity
Now, we will be introducing you to the different steps that will help you in unity rig animation. The following list includes the steps in the sequence that, when you deploy, will help you rig in the platform of Unity.
Step 1Installation
The first step is to install the "animation rigging package" of Unity. You will get the animation rigging package in the "Package Manager". You will be able to avail of this animation package in Unity 2019.1 and above.
This package offers you a library that consists of rig constraints. And this library of rig constraints enables you to create procedural motion during the runtime. And the general term used for this is called "runtime rigging".
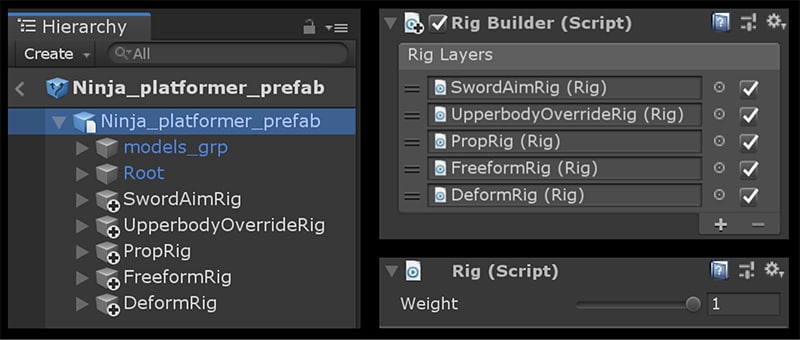
The "Asset's Animator Root" consist of the "Rig Builder Component", which is the source where the rigs are accumulated. The rigs here are the constraints put together in groups. With these steps you will be able to create Unity humanoid rig that will make your animation creations look the finest, most realistic and most professional.
Step 2Rig Builder set-up
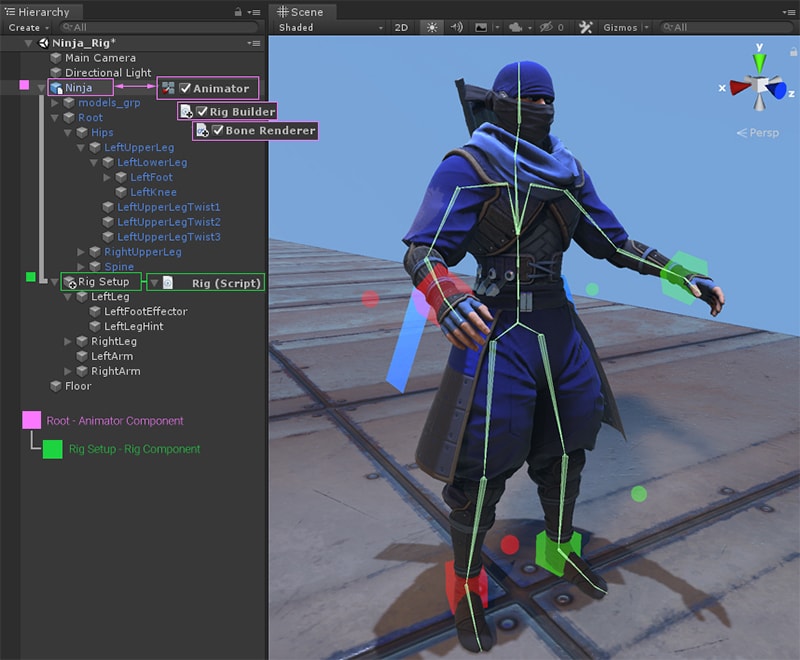
After installing the unity animation rigging package, the next step is to set up the rig builder. You will have to use the "Animator component" in this step. Using the "Animator component", integrate the "Rig Builder component" with the "GameObject". Generally, in the hierarchy of rig, it is the topmost "Transform".
Then, you will have to make a new child GameObject. To which, you will have to integrate the "Rig component". After this step, you need to access the "Animator root", where you will find the "Rig Builder component". In the "Rig Builder component", you need to assign the "Rig to the Rig Layers" list.
It will complete the task of creating the most basic rig. The further steps will help you install the required behaviours in the character or characters.
Step 3Bone Rendering
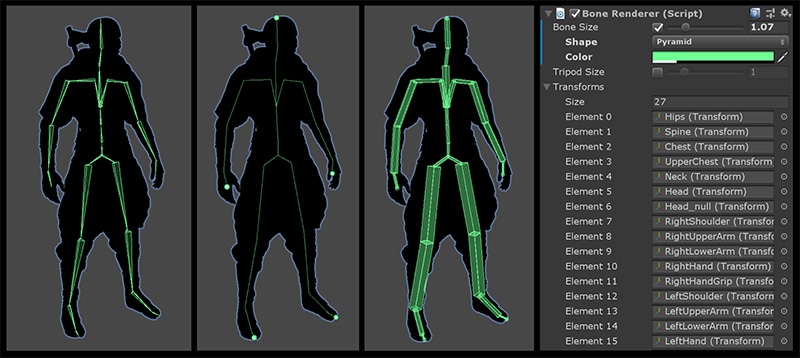
Whether it is unity rigging or 3D, bone rendering is the most crucial step to enable your animation characters to gain movement. The "Unity Editor" will help you interact and work with the character's skeleton in the "Scene view."
You can add "Transform" lists and then display them in various visual styles with the help of the "Bone Renderer: component. It enables you to integrate numerous "Bone Renderer" components, each of them having its unique style of display. As a result, gameplay debugging, rig setup, keyframing, and other artist workflows are facilitated.
Step 4Adding Rig Effectors
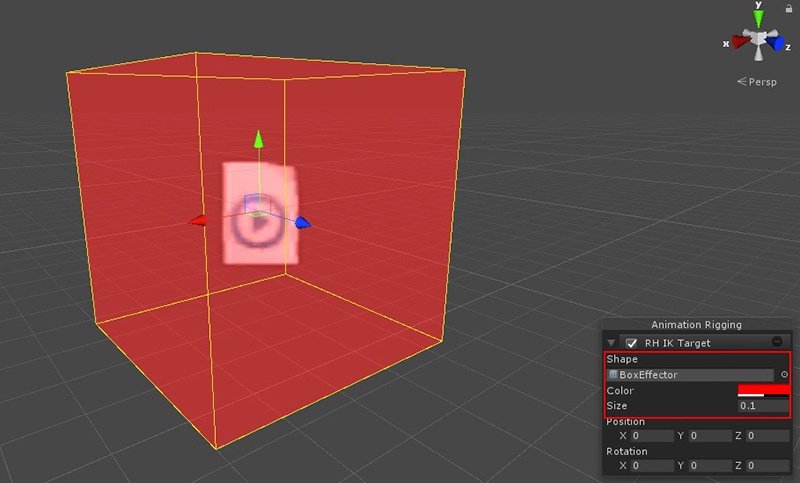
This step enables one to add Gizmos to Transforms, facilitating selection and visualisation. The "Effector" are invisible during "Game View", and this step enhances the quality of the character animation.
Step 5Managing the Rig Constraints
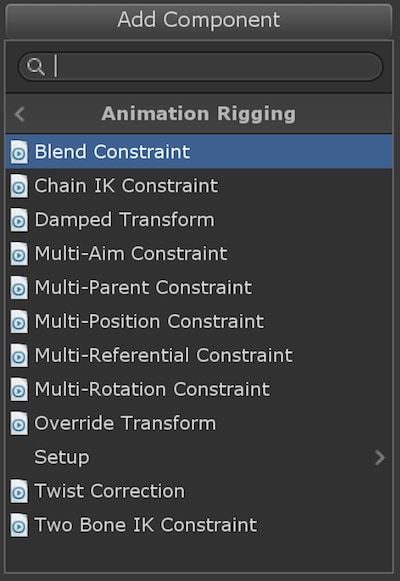
Your characters gain "runtime animation" through the rig constraints, and thus, these are the building blocks facilitating assembling the rigs. The rigs are combined in multiple and varied ways to obtain the desired motions and movements in the characters.
Step 6Working with the Two Bone IK Constraint
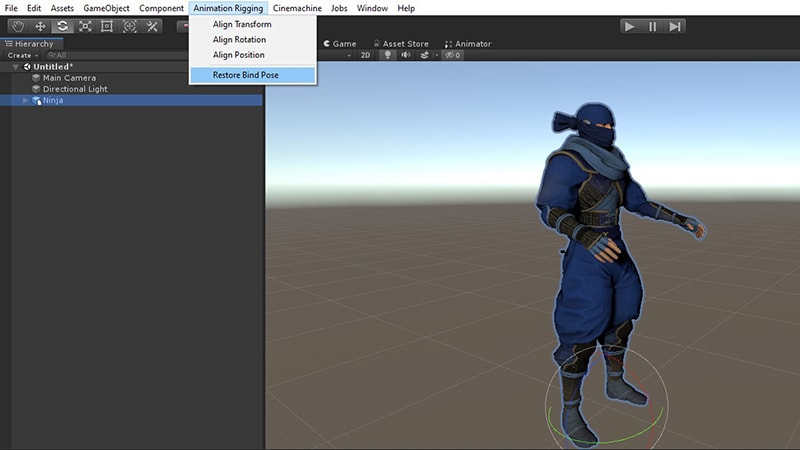
The first step here is to rest your character to the "Bind Pose." you can do so by opting for the "Menu Bar" and selecting the "Animation Rigging" option. You will find the "Bind Pose" option there, and you will have to click on it.
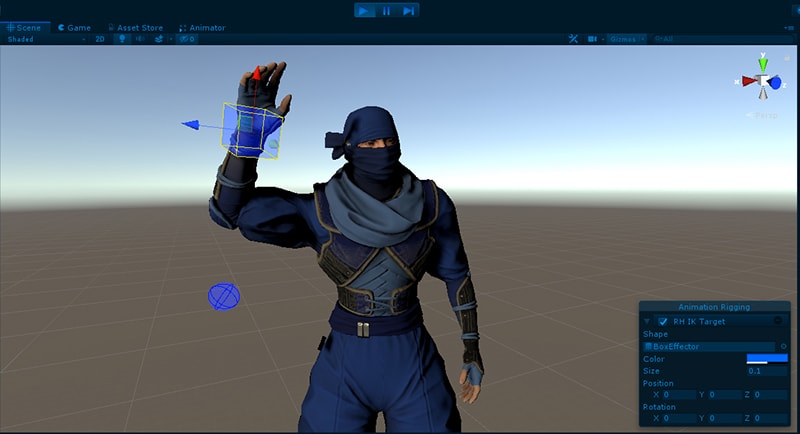
Then add a child GameObject below "Character Rig". Then add a new child GameObject below "Right Arm IK". Integrate two new child GameObjects beneath the "Right Arm Ik" by naming the first and the second one "RH IK Target" and "RH IK Hint", respectively.
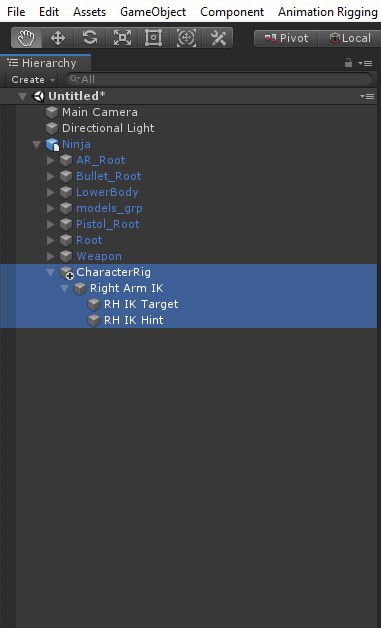
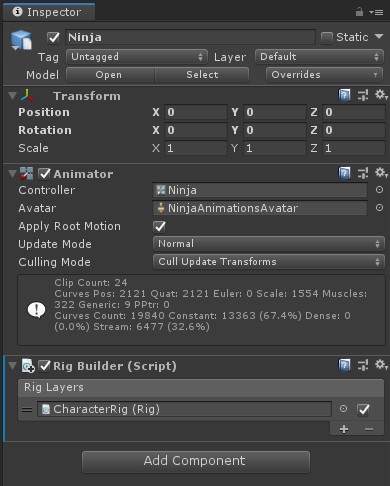
Integrate the "Rig Builder Component" with the "Animator root GameObject". Then proceed with selecting the "CharecterRig GameObject" and integrating a "Rig Component". Select "Two Bone IK Contrainst" to the "Right Arm IK."
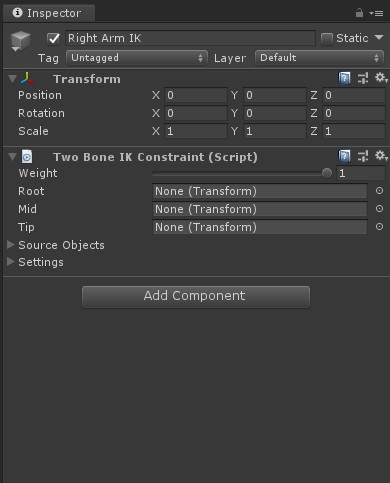
Then, incorporate a "Box Effector" to the RH IK Target. Integrate a "Ball Effector" to the "RH IK Hint".
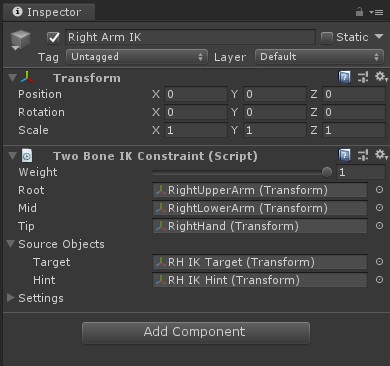
Then select the "RH IK Hint" and "Right Elbow". Select "Animation Rigging>align Transform". Move away from the "Ball Effector". Select the "Right Arm IK GameObject" and integrate the required bones. Integrate the Character Rig GameObkect with Rig Layer list by selecting the option of "Ninja". Then press "Play" and see your creation come to life.
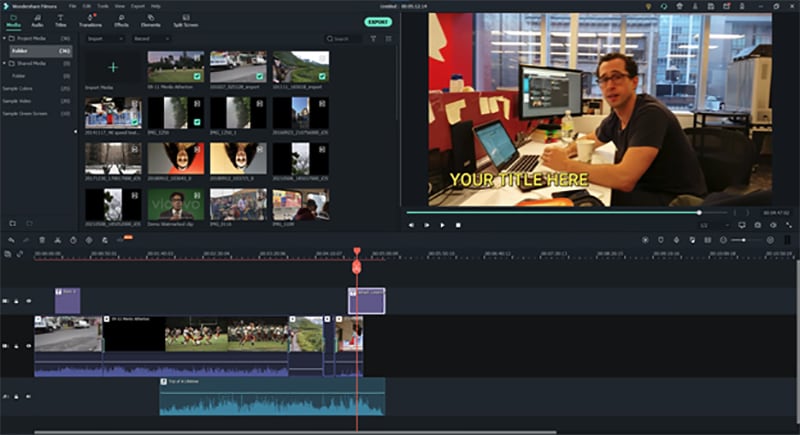
Now, you might as well want to showcase your creativity in editing and video making. For that, we have the best tool for you- FILMORA. This is the finest video editing tool with the most proficient features included in the following list.
● Over 8effects for editing videos
● Keyboard shortcut, audio ducking colour, colour match
● You can also change the speed of the videos
● Every professional-level video editing tool that you need is included in Wondershare Filmora Video Editor
The features are innumerable and so can not be possibly listed differently. So, you can readily try out this tool yourself, and if you do not want to purchase in the first instance, you can easily avail of its free trial. Although, we can guarantee that after using its free trial, you would definitely want to use every avail feature of the tool!
For Win 7 or later (64-bit)
For macOS 10.12 or later
● Key Takeaways from This Episode →
● A short introduction to the process of rigging, with which we proceeded on describing and understanding what unity rigging is. We also stated how important it is in the sphere of animation.
● Next, we compared rigging in Blender and Unity. After comparing the different factors, we decided that it is optimum to choose Unity for character rigging because of the lack of features in Blender.
● Lastly, we introduced you to the best video editing tool that will equally assist you in nurturing your creativity, video editing, and animation skills.


 100% Security Verified | No Subscription Required | No Malware

