
Suppose you've decided to start recording and sharing videos on social media platforms, or you've already started and want to learn how to add professional touches to your videos. In that case, you're in the right spot, as this guide will teach you how to do iMovie video overlays.
Whether you want to add some B-roll footage to add creative depth to your video or reference a previous video you've uploaded, overlaying videos in iMovie is a fantastic way to do that.
This editing technique lets you merge multiple media elements, so let's learn how to add pictures over video in iMovie or combine multiple videos with overlays.
In this article
Part 1: iMovie Video Overlay Options
Apple's built-in, beginner-friendly video editing tool, iMovie, is a fantastic app for understanding video overlays and starting your editing journey. There are four main ways to overlay videos in iMovie, so let's break down these options and learn what they are and what they're used for:
Cutaway

One of the most common techniques in visual storytelling involves using iMovie's Cutaway option, which helps editors move from one scene to another. Cutaway lets you overlay one clip on top of another, creating a movie that "cuts away" from the primary clip and shows the secondary one, hence the name.
It's worth noting that the audio will continue from the primary clip, making this option ideal for combining multiple clips and creating smooth transitions for your video projects.
Green/Blue Screen

Whether you've recorded a video with a green or a blue screen, iMovie's fantastic Chroma Key tool is excellent at replacing your footage's background. This type of iMovie video overlay is ideal for creating special effects and changing your video subject's background while maintaining focus on the subject.
It essentially adds a secondary clip with its green or blue-screen parts removed, overlaying it on top of your primary clip in iMovie's Timeline.
Split Screen

If you want to show multiple clips side-by-side, then a split screen type of iMovie video overlay is the way to go. This overlay lets you showcase two or more videos simultaneously, making it ideal for comparisons, multiple perspective shots, and parallel actions you want to show the audience.
By default, iMovie's split-screen video overlay creates two equally sized videos that appear next to each other. However, you can customize this screen division to match your project ideas perfectly.
Picture in Picture

Lastly, there's the Picture in Picture, or PIP mode for short, which lets you add an image over video in iMovie or a secondary, smaller-sized clip that shows on top of your primary clip.
This type of iMovie video overlay is most commonly used for reaction videos and tutorials. Still, you can use it in other situations where you want to show multiple elements while keeping the primary subject focused, with your imagination being the only restricting factor.
Part 2: How to Create Overlay Videos in iMovie on Mac
Now that we know the types of iMovie video overlays, we can show you how to create overlay videos or add a picture over video in iMovie on Mac. Here's what you'll need to do:
Step 1: Launch iMovie on your Mac and create a new project.
Step 2: Import the videos and images you want to create iMovie video overlays with or open a folder where these media files are stored.
Step 3: Drag and drop the primary clip onto the Timeline.

Step 4: Drag the image or video you want to use as an overlay and drop it on top of the primary clip in the Timeline.

Step 5: Tap the Overlay button above the Preview panel and select the iMovie video overlay type.

Of course, you can also choose other iMovie overlay types and adjust the duration of the image overlay by dragging the sides of the image in the Timeline to make the transition longer or shorter. However, if you add a secondary clip to create an iMovie video overlay, you can't adjust the transition's duration.
Part 3: How to Create Overlay Videos in iMovie on iPad/iPhone
After a decade of being only a Mac video editor, iMovie made it to iPhones and iPads in the early 2010s. This mobile version of Apple's beginner-friendly video editing tool has all the bells and whistles of its older desktop-based cousin, so you can also overlay videos in iMovie on iOS and iPadOS. Here's how:
Step 1: Open the iMovie app on your iPad or iPhone and start a new movie project.

Step 2: Tap the Video or Photos option, select a clip or image to use as the primary element, and tap the Create Movie option.
Step 3: Once inside the editor, tap the Plus icon to add the secondary clip or overlay a photo on a video in iMovie for iPhone/iPad.

Step 4: Select a video, tap the Three Dots button, and choose the type of iMovie video overlay you want to use.

You can then move the PIP overlay around, adjust the Split-Screen overlay screen division, adjust the length of a Cutaway overlay if you've used an image, and more.
Part 4: Better iMovie Alternative for Overlaying Videos (Including AI Tools)
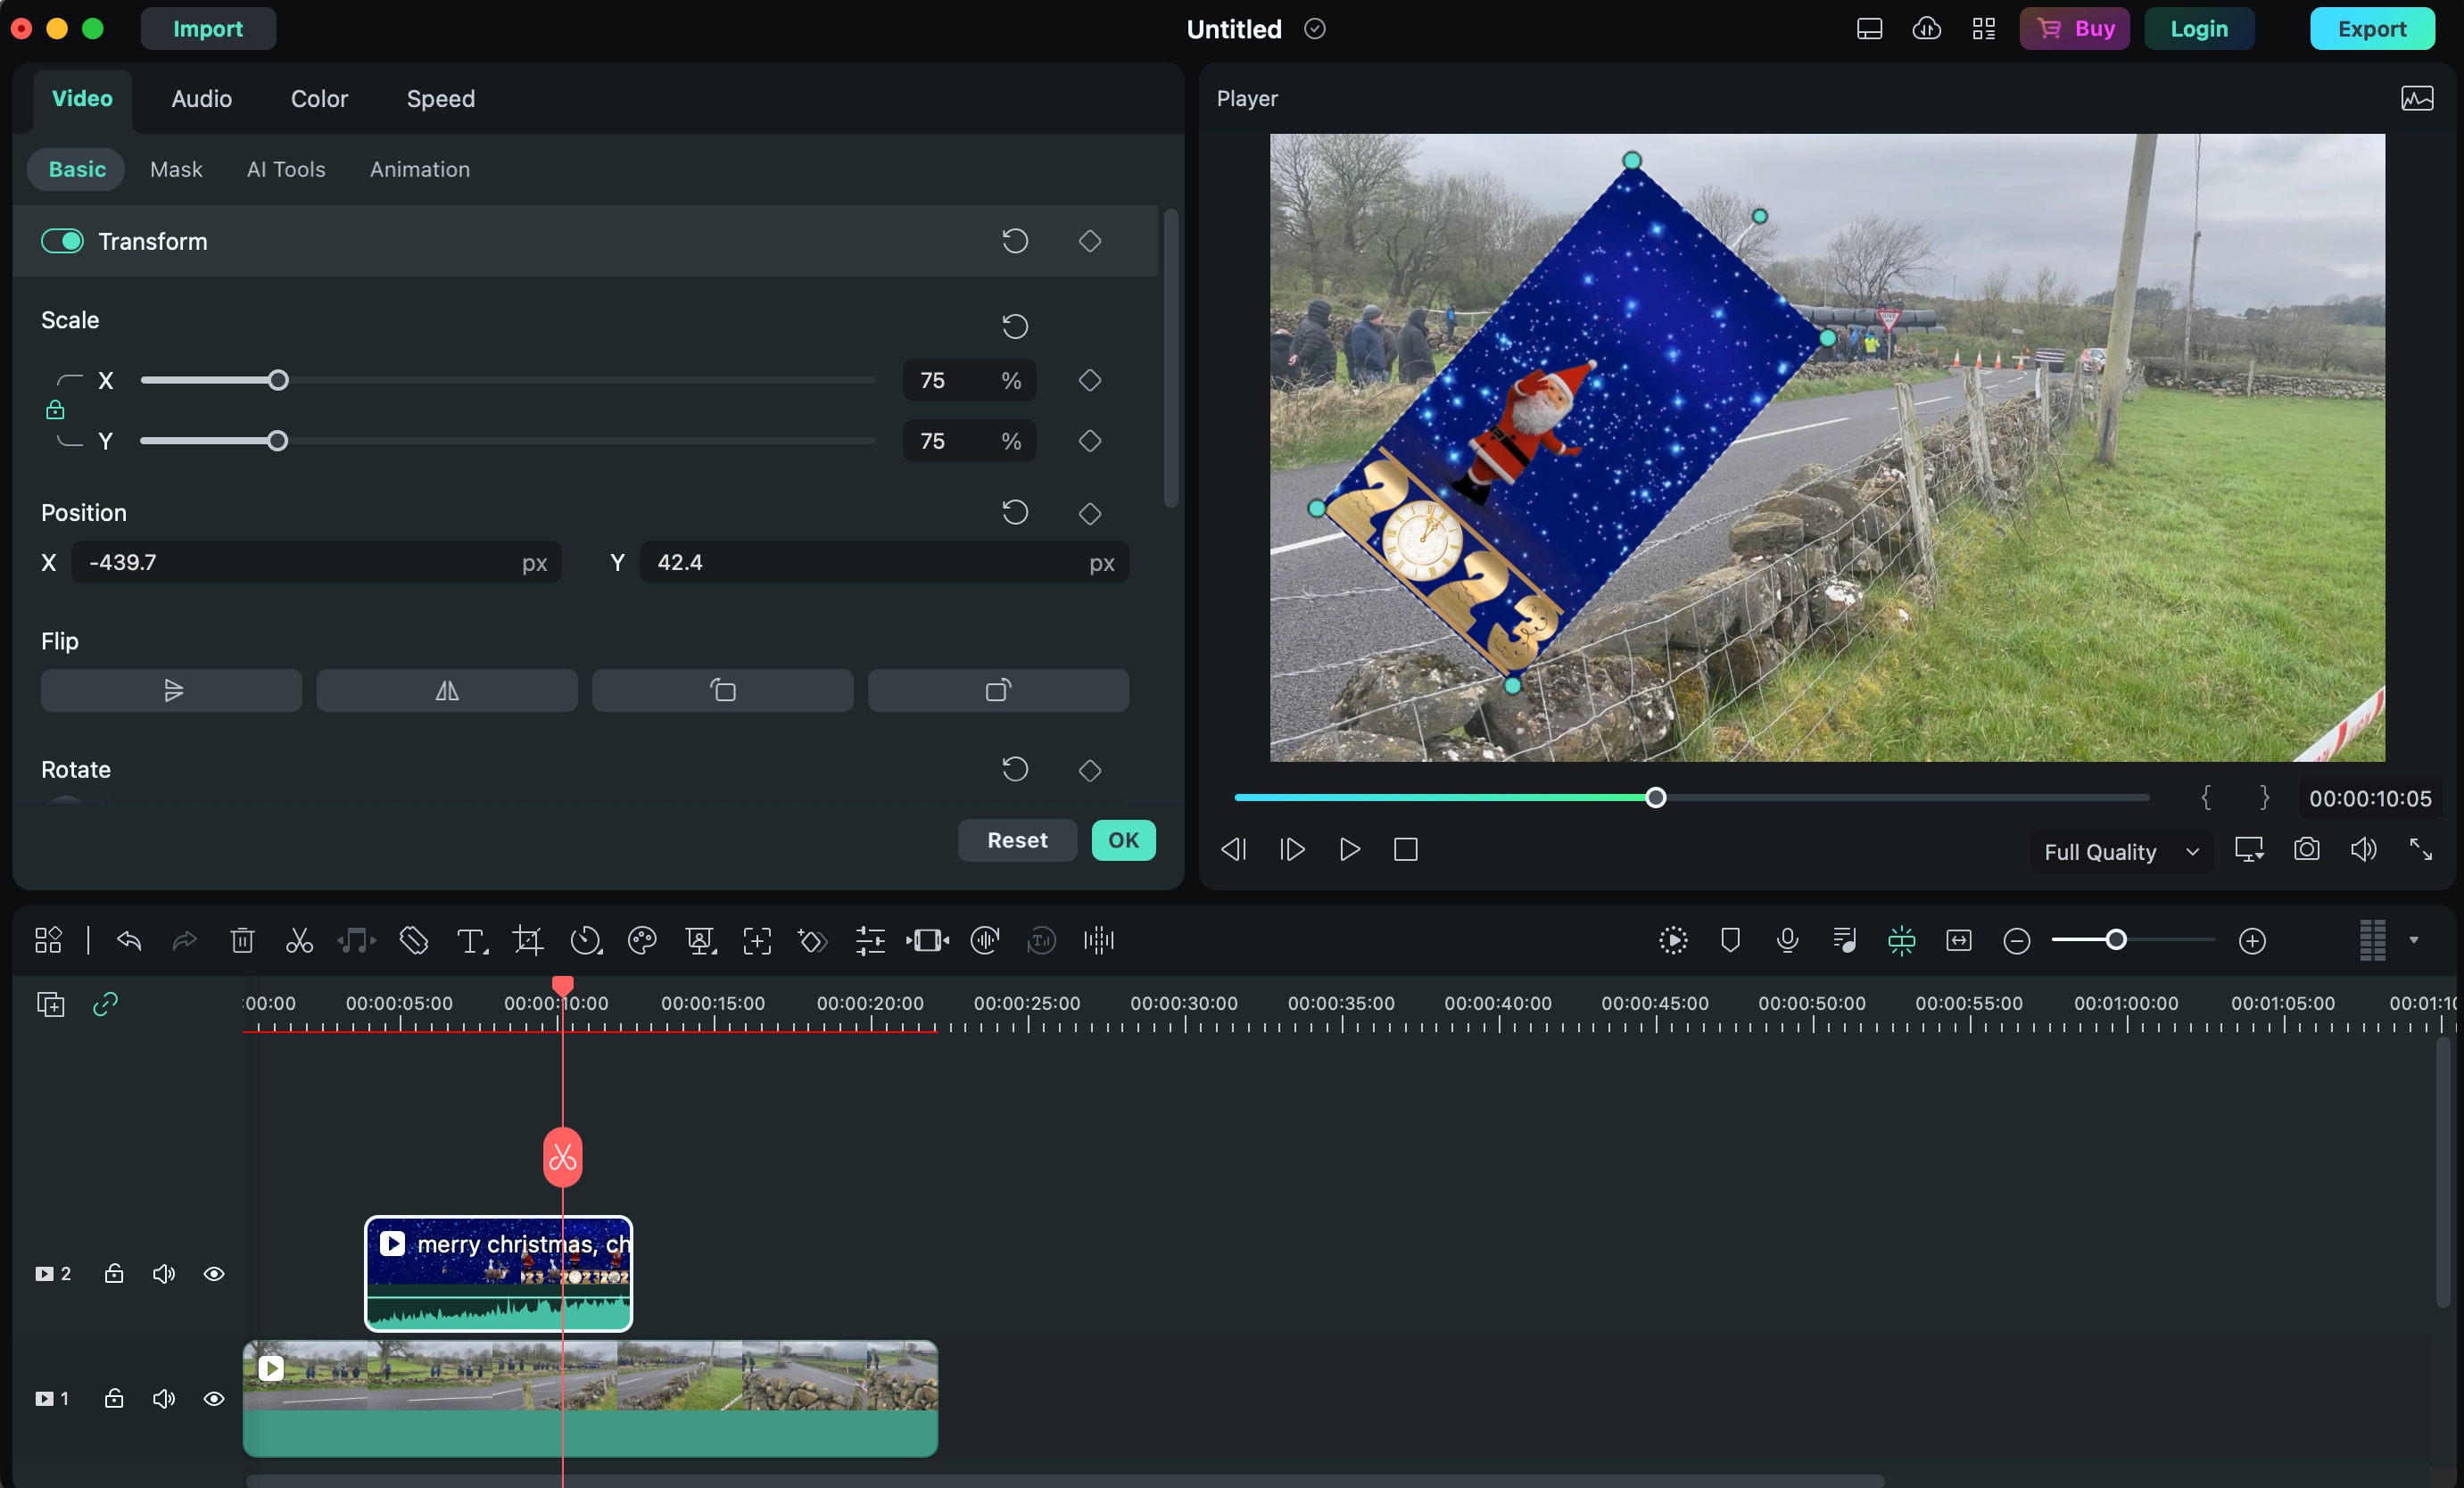
While iMovie is a decent Mac video editing tool for beginners, it only offers the most essential editing and overlay features, with all the professional tools locked away behind a $300 price tag for Final Cut Pro. As a result, many iMovie users are looking for more robust alternatives for overlaying videos.
Fortunately, that's where Filmora comes in, as this feature-rich cross-platform video editor provides significantly better video overlaying tools in an equally beginner-friendly and intuitive user interface.
From dedicated and more powerful overlay options like PIP, Split Screen, and Green Screen clips to effects, filters, transitions, and captions for a more appealing video to powerful fade-in and fade-out options for Cutaway-like transitions to stock media ready to be imported into your project, Filmora is undoubtedly a more robust alternative to iMovie.
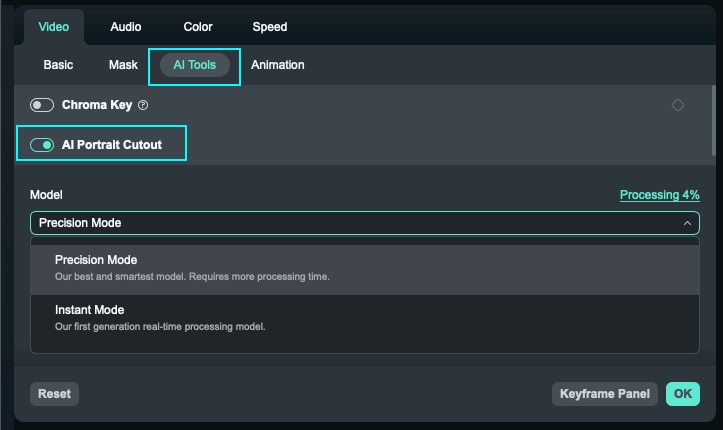
As a bonus, its AI Portrait Cutout makes green-screen-like transitions effortless. You can seamlessly create such effects, even if your clips or pictures weren't made with a green screen background. The AI Portrait Cutout perfectly cuts out people from videos or images every time, allowing you to put them on top of the video or photo you want to overlay.
How to Overlay Videos in Filmora
Despite packing a heavy punch regarding features, advanced overlaying options, fantastic fading options, and AI-powered tools, Filmora still has an intuitive and user-friendly interface for seamless video overlay processes. Such a process looks something like this:
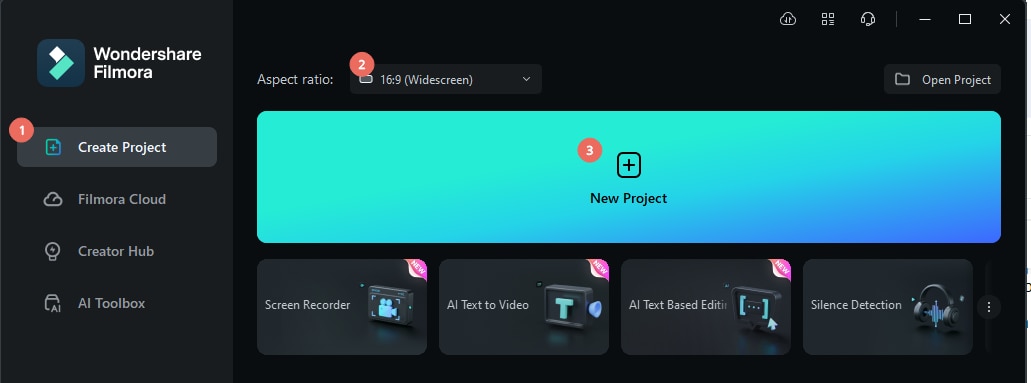
Step 1: Launch Filmora on your device and tap the New Project button on the startup screen.
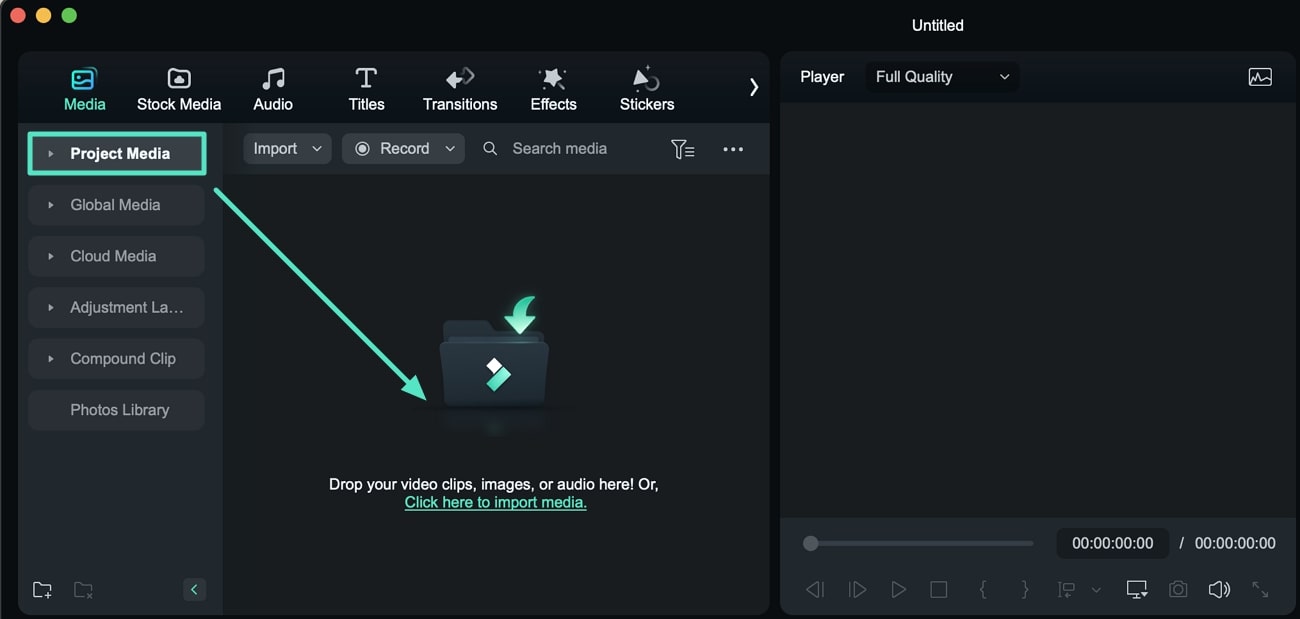
Step 2: Import the videos and images you want to overlay.
Step 3: Drag and drop the primary video from the Import section into the Timeline. Then, drag the media file you want to use as an overlay and add it as a different track in the Timeline.
Step 4: For a simple PIP overlay, tap the secondary element in the Timeline to select it and customize its size in the Preview panel. You can also explore other options in the Editing panel, such as Transform and Compositing.

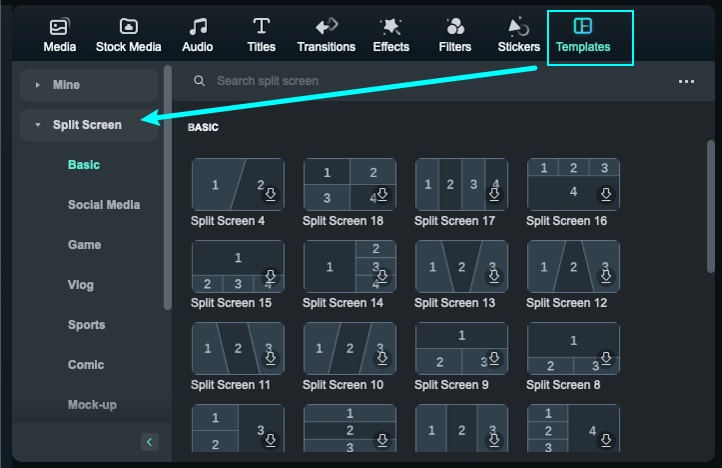
Step 5: If you'd like to add a split screen overlay, open the Templates tab at the top, select the Split Screen option on the side, and choose the type of overlay you want.
Step 6: Filmora's Chroma Key feature works flawlessly for green screen clips and perfectly creates video overlays with such media files. You can find it in the Editing panel by navigating to Video > AI Tools > Chroma Key.
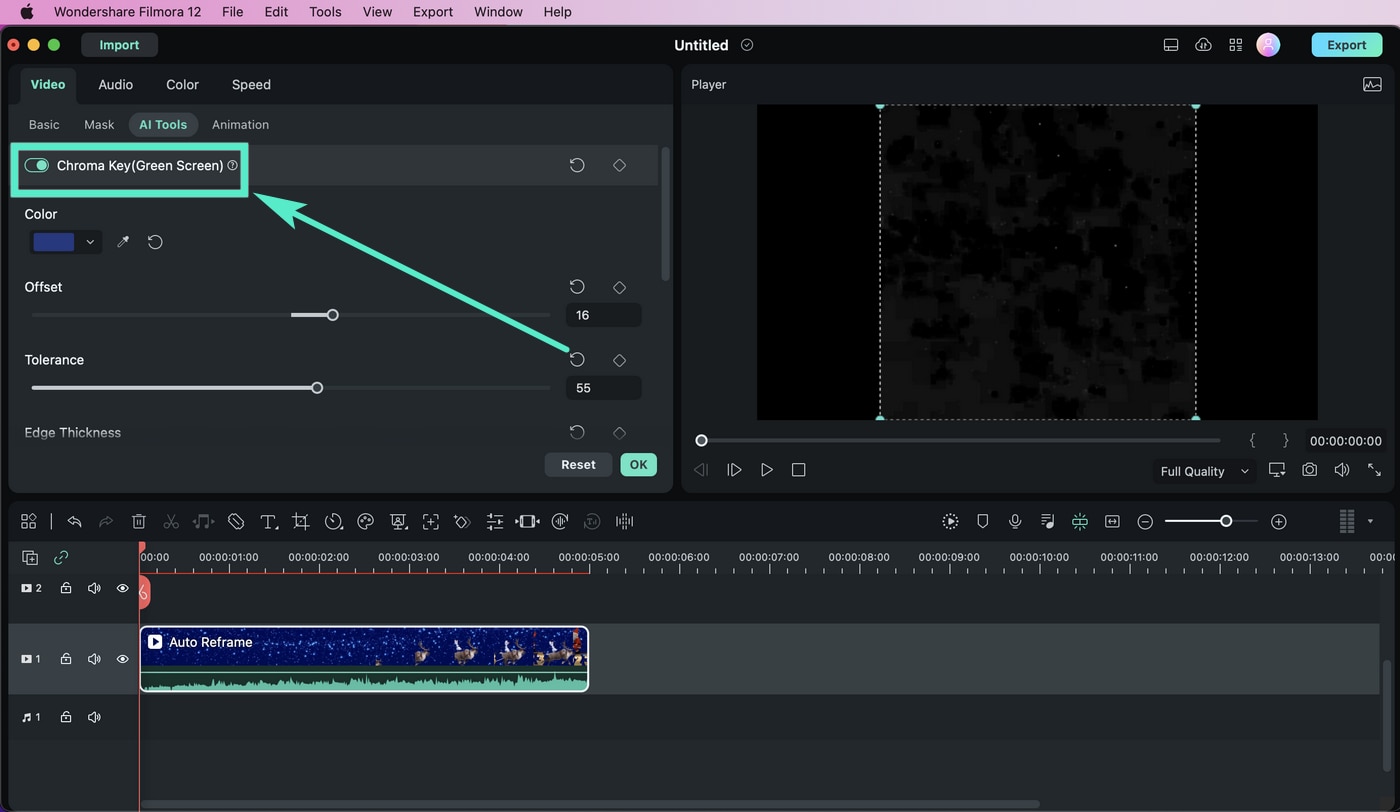
Step 7: Alternatively, you can use Filmora's AI Portrait Cutout tool found in Video > AI Tools in the Editing panel. This powerful feature will remove your image or video's background, even if it wasn't made with a green screen, making it perfect for cutting people out and adding them as overlays.
As you can see, Filmora's overlaying features are vastly superior to those of iMovie, making Filmora the better choice for editors new to video overlays and professionals who want to speed up their overlaying processes with AI tools.
Conclusion
Video overlays are a fantastic way to show off your creativity and make your videos more professional by adding B-roll footage, referencing previous clips, creating videos that show parallel actions, and more.
Suppose you're using Apple's built-in iMovie to overlay videos. In that case, you can make four types of overlays: Cutaway effects, green/blue screen overlays, split screen clips, and picture-in-picture videos.
For those looking for a more robust video editor with more powerful features, Filmora is the perfect alternative to iMovie. Its massive library of transitions, effects, and filters includes numerous split-screen templates, while PIP mode overlays are much more customizable.
Filmora's fade-in and fade-out tools can also help you create better transitions than iMovie's Cutaway overlay. At the same time, the app's AI Portrait Cutout makes green screen overlays a piece of cake, and it's possible even if the overlay clips and images weren‘t created with a green screen.


 100% Security Verified | No Subscription Required | No Malware

