
 100% Security Verified | No Subscription Required | No Malware


 ChatGPT
 Perplexity
 Gemini
 Claude
 Grok
Grok
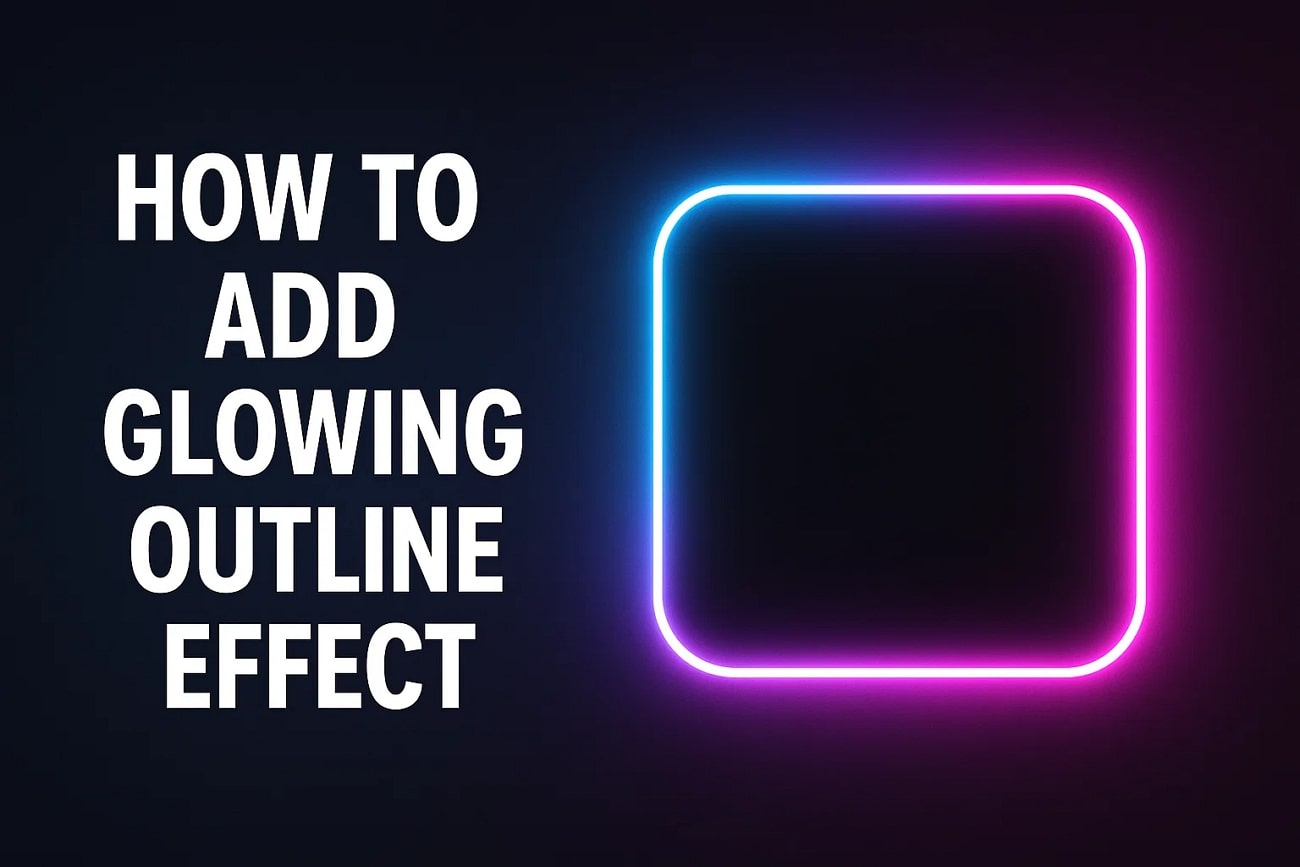
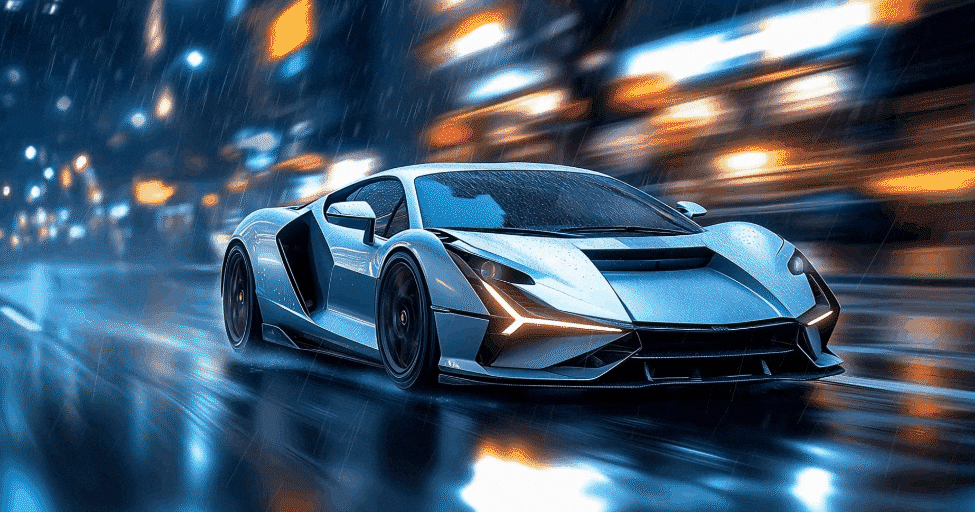
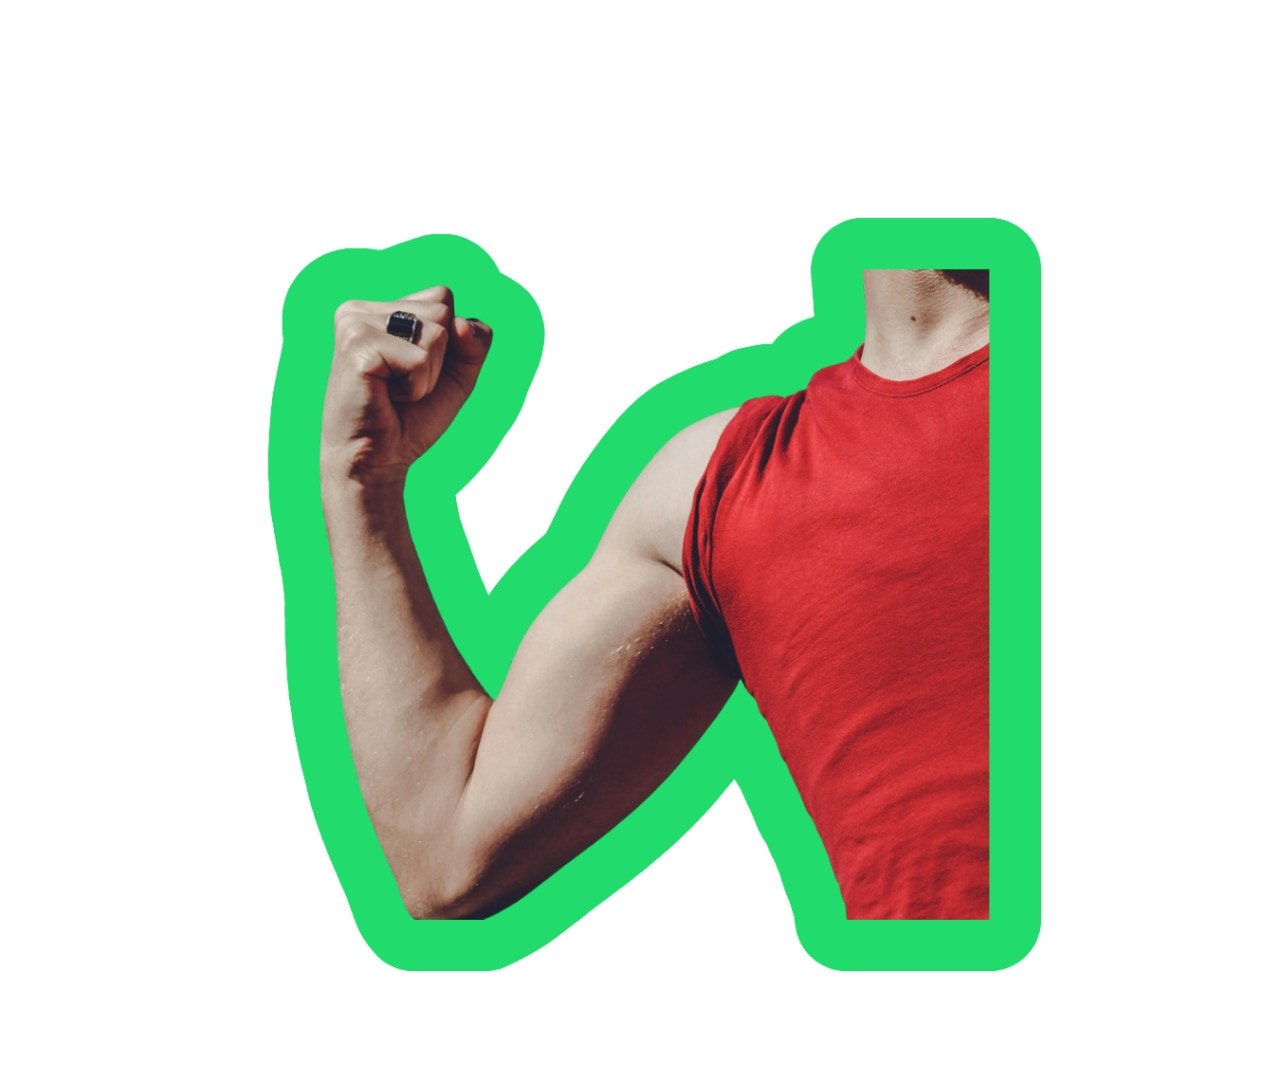
Add a glow outline. This simple yet powerful effect creates a bright, luminous edge around your subject—instantly drawing the eye and adding a sleek, modern edge to any image. It's the secret weapon behind high-performing YouTube thumbnails, conversion-driving product ads, and viral social media graphics. Creators and marketers alike use glow outlines to spotlight what matters most, transforming ordinary photos into attention-grabbing designs with a futuristic vibe.
The best part? You don't need professional design skills. This guide breaks down 2 methods to help you create this trending effect quickly and effortlessly.
In this article
Part 1. How to Add a Glowing Outline to Images Using Canva
Canva is a free, web-based design tool that makes creating professional-looking graphics easy, even for beginners. With its intuitive interface and built-in effects, you can add a glowing outline to images without needing Photoshop or After Effects.
When and Why to Use This Effect
- Purpose: Highlight a person, product, or object to make it stand out.
- Platform: Ideal for YouTube, Instagram, TikTok, and other social media visuals.
- Style: Works well for neon, cyber, or modern aesthetics to give your content a luminous, eye-catching look.
- Best For: Beginners, content creators, and anyone looking to enhance images quickly without advanced design skills.
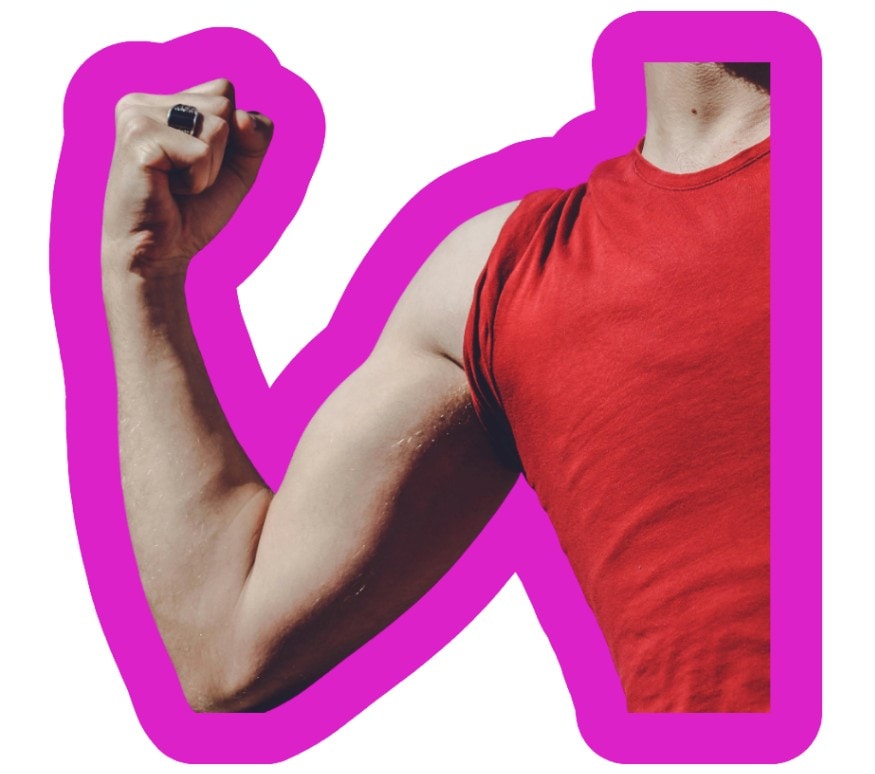
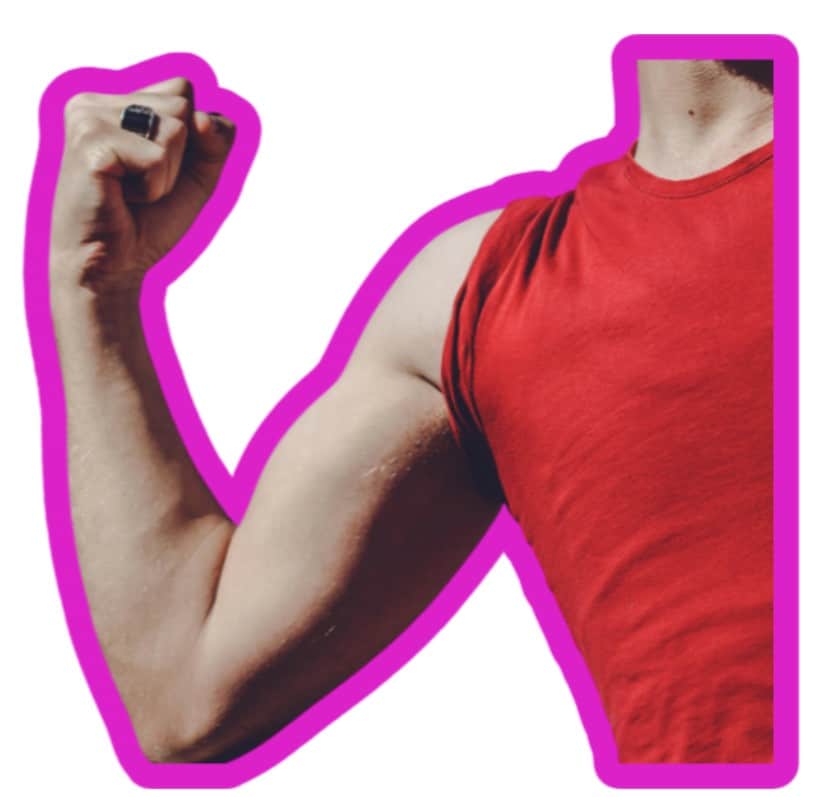
A Complete Walkthrough Guide on Adding a Glowy Picture Effect Outline Using Canva
This website offers a simple method of making your images shiny. Follow these instructions to learn how to add a glowing outline effect on Canva:
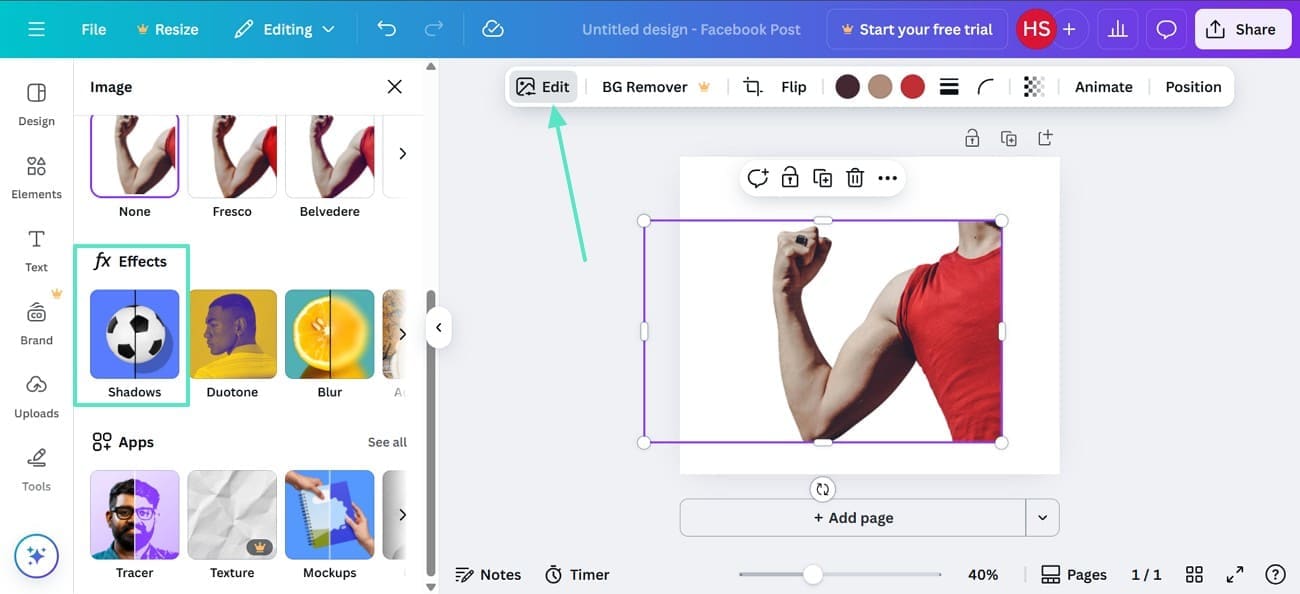
Step 1Start Adding Effects in Canva
- Once you have uploaded an image to Canva, select the "Edit" button from the floating toolbar.
- Enter the "Effects" section and click the "Shadows" tab.
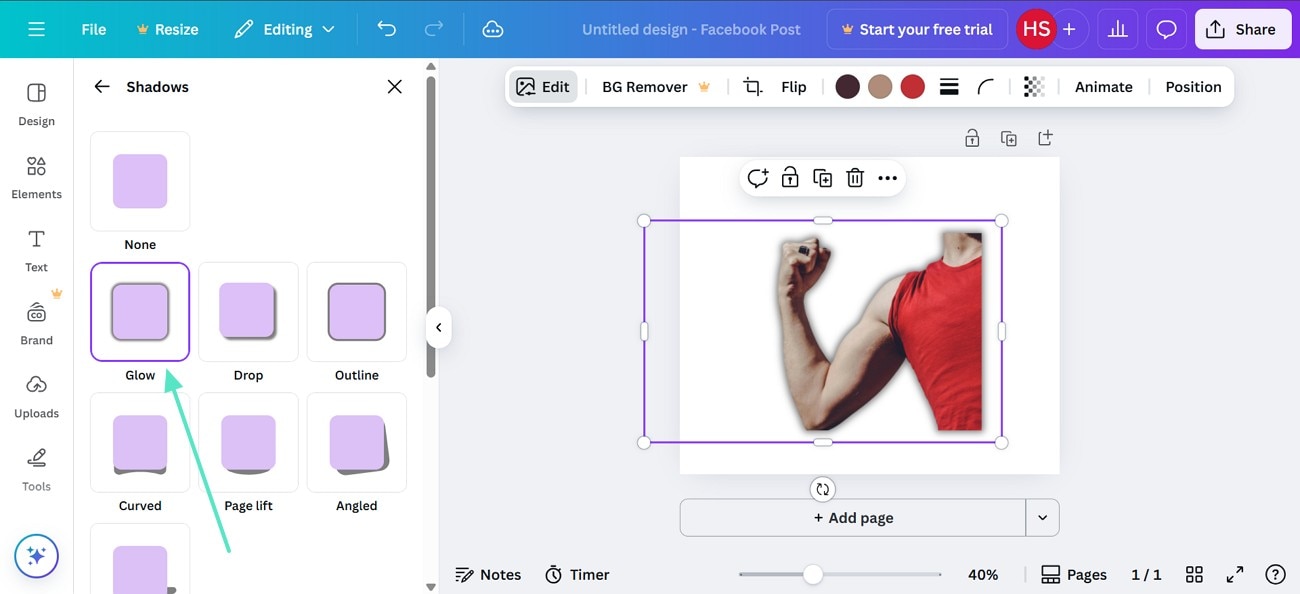
Step 2Go For Glowing Outline Canva
- In the "Shadows" menu, pick the "Glow" effect and move to the next step.
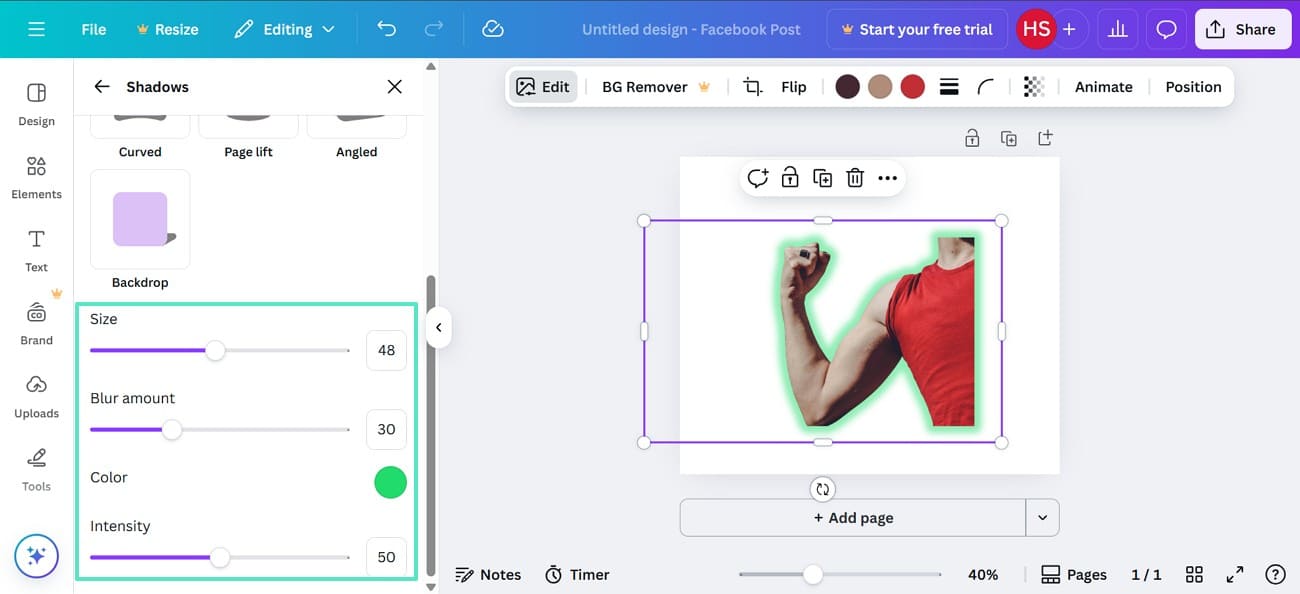
Step 3Adjust Glowy Effect in Canva
- Once the effect is selected, scroll down and customize it.
- Adjust the "Size", "Blur Amount", "Color," and "Intensity" of the picture for personalized visuals.
Pro Tips for Best Results
- For sharper neon outlines, increase Size and Intensity while keeping Blur moderate.
- Choose a glow color that contrasts with the background to make the subject pop.
- Combine glowing outlines with Canva's Text Effects or Stickers for enhanced visual impact.
- Free Canva accounts can achieve this effect, but a Pro account unlocks additional glow presets and colors.
Part 2. How to Add a Glowing Outline Effect in Filmora — A Better Choice for Videos
Why Choose Filmora for Glowing Outline Effects
While Canva is great for quick image editing, Wondershare Filmora gives you full creative control when working with motion, lighting, and cinematic detail. It's designed for creators who want more than static effects — offering real-time glow animation and precise adjustments.


Here's why Filmora is an excellent choice:
- Precise Control: Filmora allows detailed adjustments to neon outline effect intensity, color, and blur for perfect visual balance.
- Animated Effects: Apply outlines that move dynamically with your subjects, ideal for music videos, vlogs, and social media reels.
- Advanced Blending Options: It offers multiple blend modes to make the glow appear more natural and seamlessly integrated.
- Professional Quality: Produces high-resolution, cinematic results suitable for YouTube, ads, or short films.
- Real-Time Preview: Lets you instantly see how the neon effect interacts with lighting and movement in your clip.
Best for: Video editors, professional content creators, and anyone producing motion-based visuals.
Two Ways to Create a Glowing Outline in Filmora
Filmora provides two easy methods for adding glow outlines.
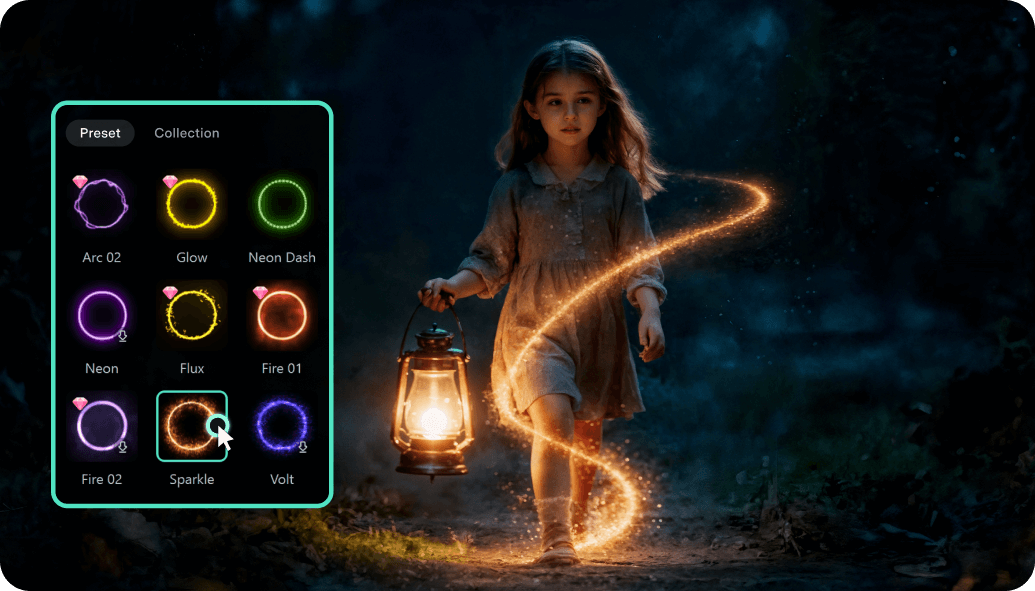
- Method 1: Using the Pen Tool — Best for moving objects or characters.
- Method 2: Using Masks and Glow Effects — Great for static objects, logos, or shaped visuals.
Each approach delivers clean, glowing visuals — choose one based on your project's needs.
 secure download
 Method 1. Using the Pen Tool and Trim Path
The newest version of Filmora introduces a cool Pen Tool that lets you create shapes over elements in the video. These shapes will, then, help you track the motion of that element throughout the video. Once you have outlined the desired object, you can customize the glow by entering your preferred color, thickness, and opacity.
The following steps feature a detailed guide on using the Pen Tool for making an outline effect:
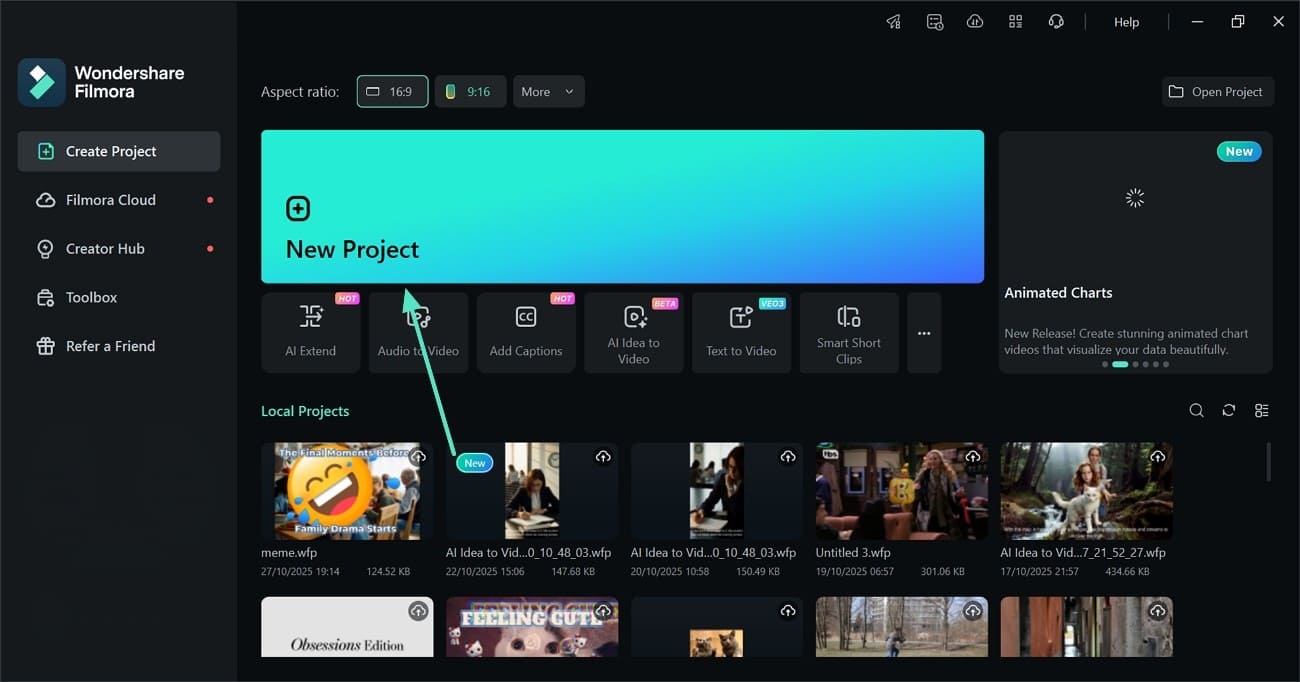
Step 1Enter the New Project
- To start, select the "New Project" button and enter the editing interface.
- Here, click the "Import" button to fetch a video from your device.
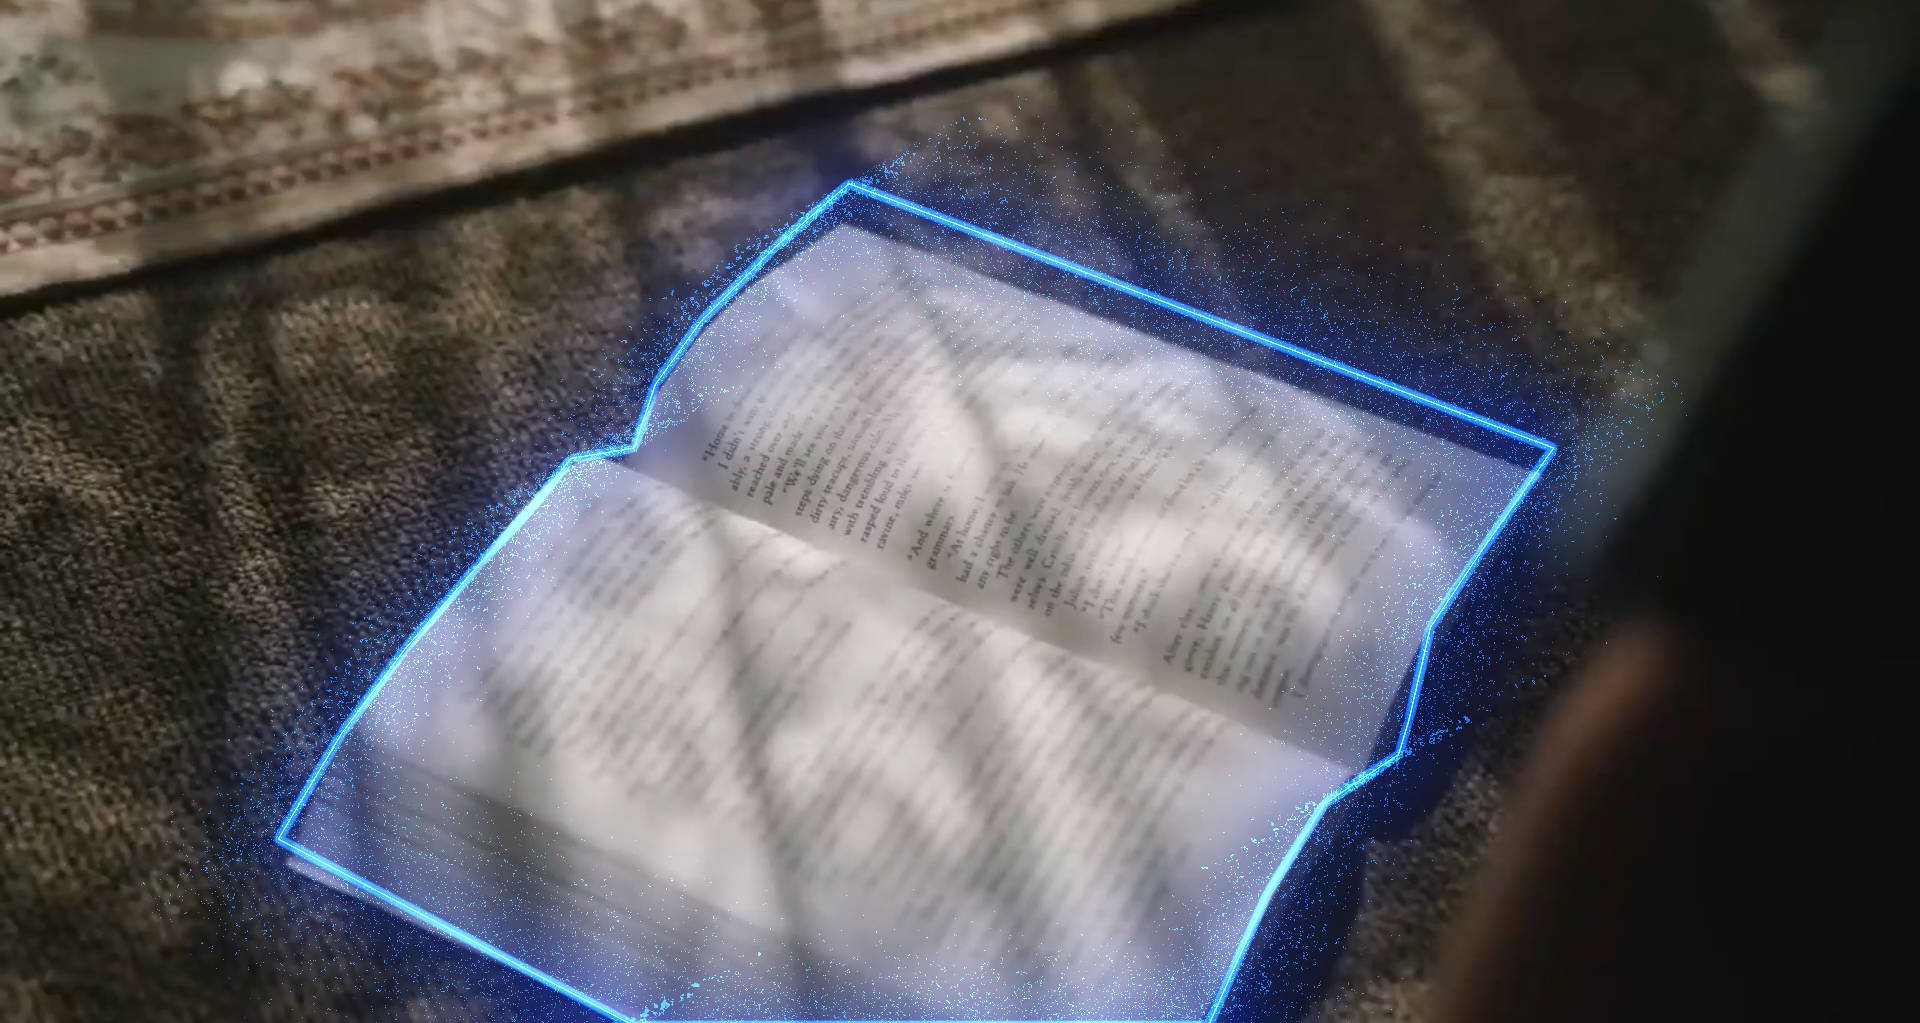
Step 2Select the Pen Tool and Draw an Outline
- From the "Drawing Tools" menu at the bottom left of the page, select the "Pen Tool."
- Using this tool, create a custom outline over the desired element in the footage.
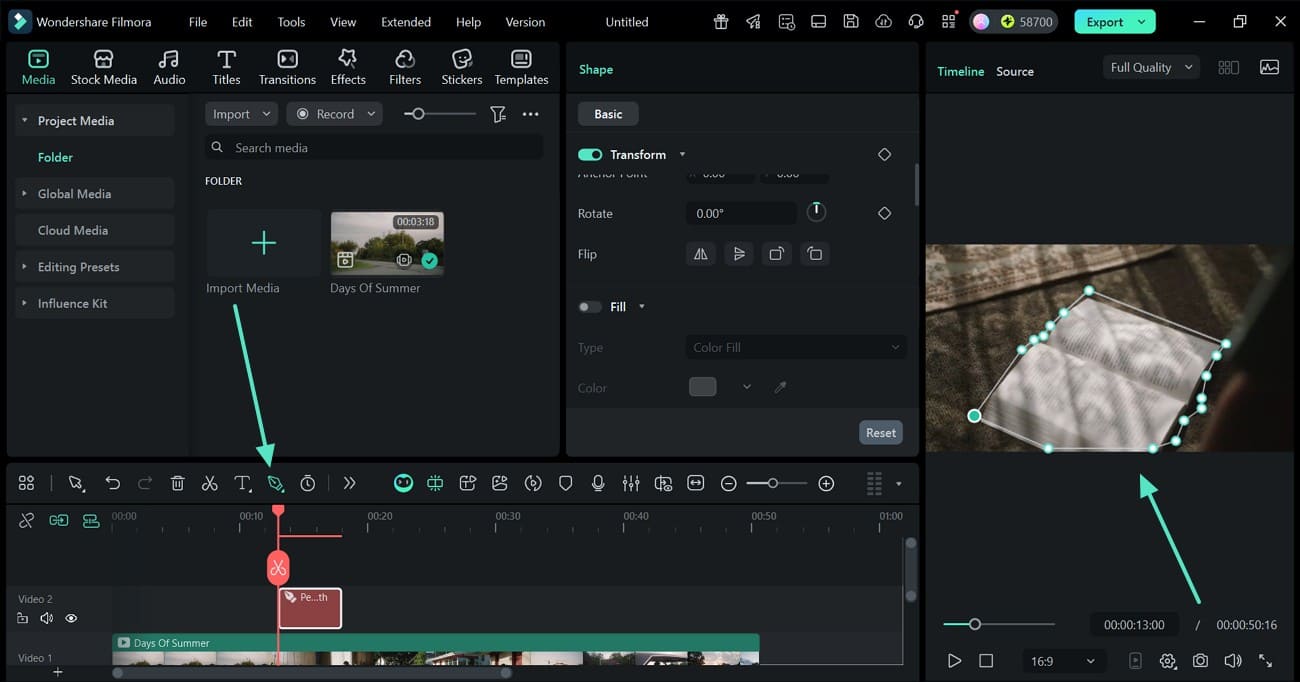
Step 3Customize the Outline
- Enter the "Basic" panel and enable the "Stroke" toggle to select a neon color preset.

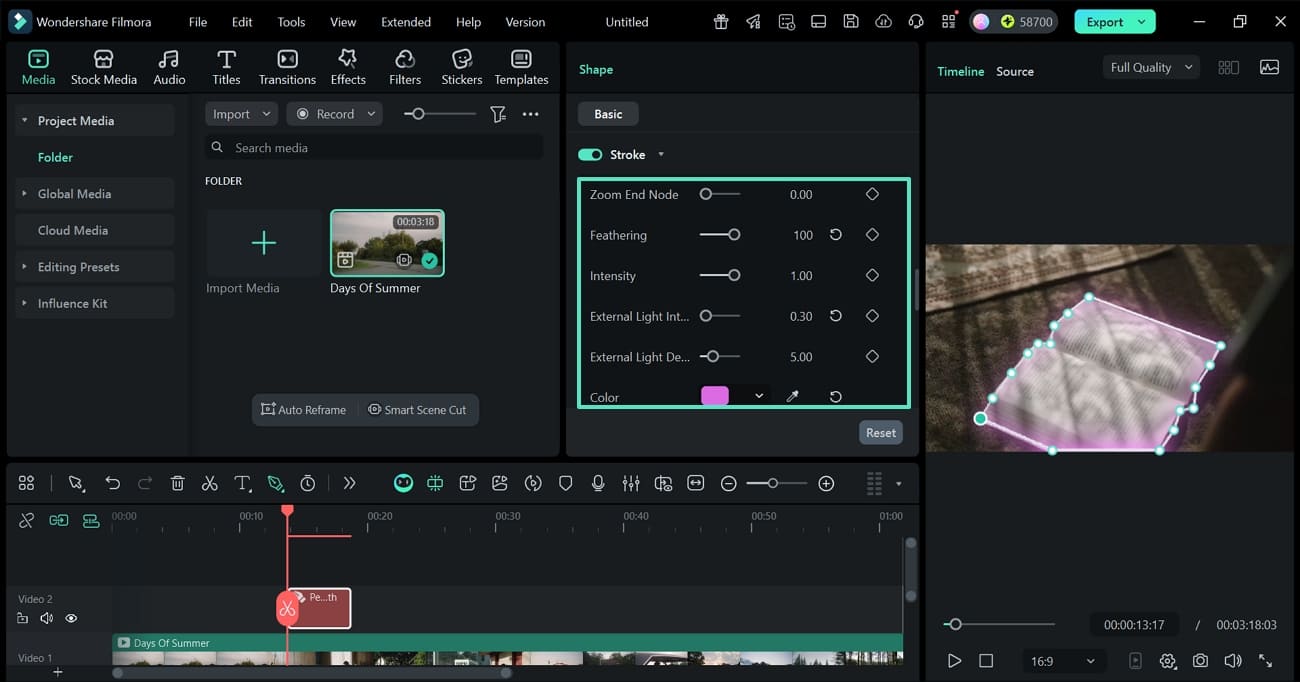
Step 4Customize the Glow Effect As Needed
- Scroll down the "Stroke" panel to change the appearance of the outline.
- Here, you can adjust the "Feathering" effect to change the blurriness of the line.
- Now, expand the "Color" menu to change the pigment of the glowing effect.
Method 2. Using Quick Mask and Glow Features
If you want a different approach to adding neon outline effects to the objects in your footage, the masking technique is the right choice. This technique allows users to use a preset shape for masking objects. They can also draw a custom shape around the desired element in the footage. The following instructions should be followed for drawing outlines in videos by masking:
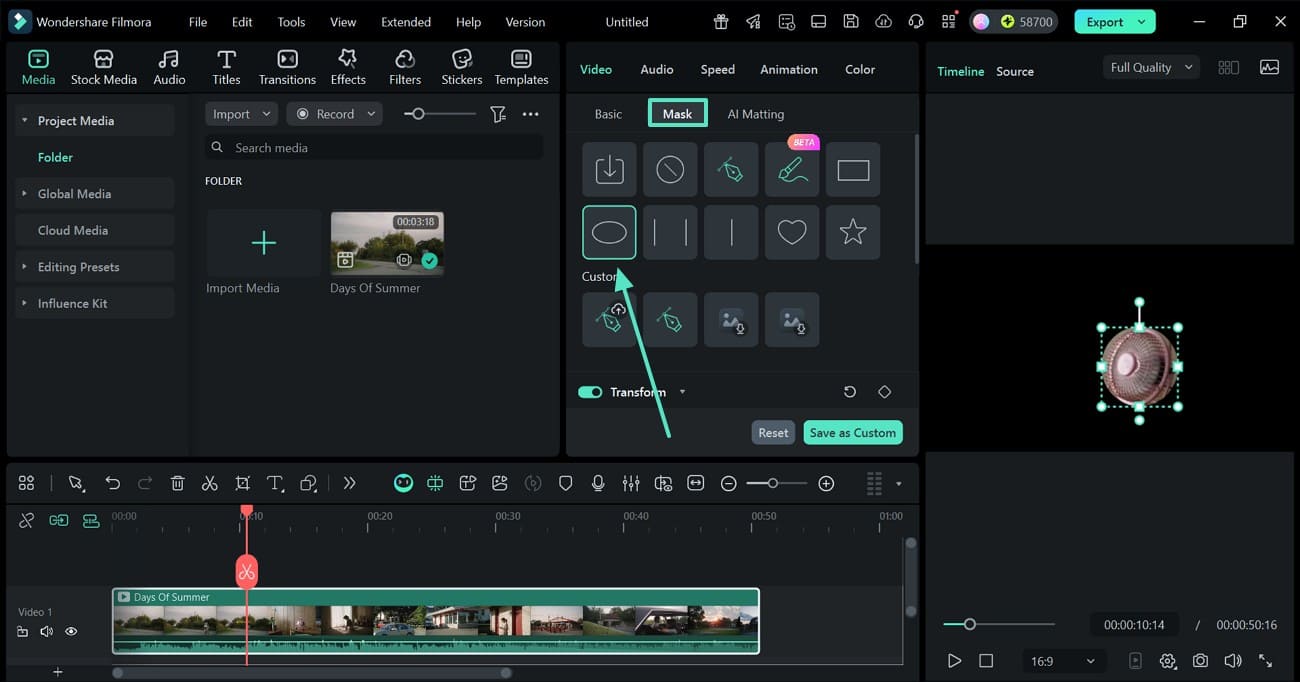
Step 1Mask the Desired Object
- To begin with, enter the "Mask" section and select the masking shape of your choice.
- Now, adjust the mask shape by dragging its edges.
- Scroll down the panel and set the blur amount and other specifications of the effect.
Step 2Use the Color Correction Features to Add the Neon Effect
- To give the mask a neon effect, enter the "Color" panel from the right.
- In the "Basic" section, enable the "Color" toggle and apply the desired color changes.

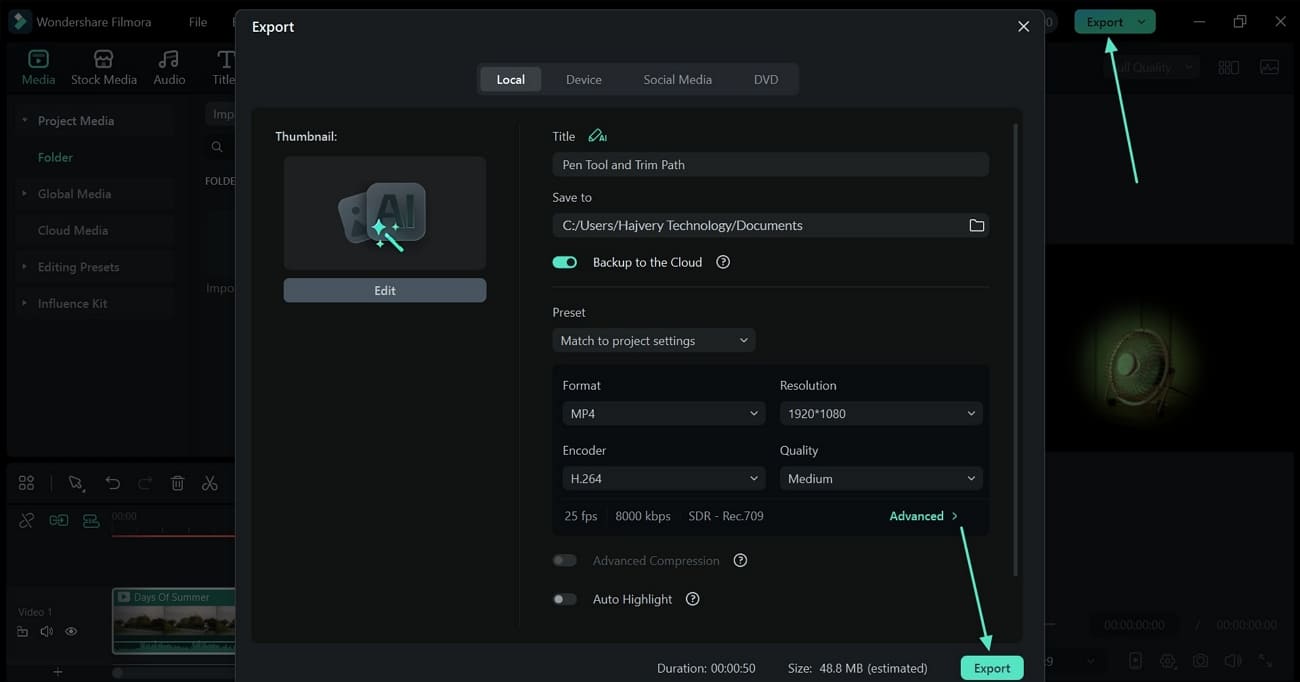
Step 3Export the Masked Video to Your Device
- Once the video is ready, select the "Export" button on the top right of the screen.
- Enter the video settings and click the "Export" button to save the file.
Part 3. Common Mistakes When Learning How to Add a Glowing Outline Effect
Before adding a neon outline effect to the objects of your video, you must avoid the most common mistakes. The following part explains the mistakes made during this process and their corresponding fixes:
Mistake 1. Over-Glowing
Applying an excessively strong glow makes subjects look unnatural or washed out. It can distract viewers and reduce focus on key elements.
How to Fix: Keep the glow opacity at a moderate level (around 40–60%) and preview it under different brightness settings to ensure visual balance and clarity.
Mistake 2. Color Clash
Using glow colors that don't harmonize with the video's background or theme creates visual clutter. This often happens when bright neon tones overlap with clashing hues.
How to Fix: Choose complementary colors that enhance your video's overall color palette. For instance, cool-toned glows (blue or cyan) work best on dark backgrounds, while warmer hues (orange or pink) suit brighter footage.
Mistake 3. Ignoring Layer Blending Modes
Forgetting to adjust blending modes can make glows appear flat or harsh against footage. The result is an unrealistic, sticker-like outline.
How to Fix: Experiment with blend modes such as Screen, Overlay, or Add. These modes help the glow interact more naturally with the video's lighting and depth, creating a smoother and more cinematic look.
Mistake 4. Static Glow in Dynamic Videos
Keeping a fixed glow while the subject moves breaks visual consistency and realism. The glow may lag behind or fail to follow the motion.
How to Fix: Use Motion Tracking or keyframes to sync the glowing outline with the subject's movement. This ensures the glow follows naturally and enhances the motion rather than distracting from it.
Mistake 5. Inconsistent Lighting Logic
Adding glow that doesn't match the video's light direction or intensity confuses the viewer's eye. It disrupts the depth and realism of the image, impacting the viewing experience.
How to Fix: Match the glow's brightness and angle to the main light source in your footage. This keeps the lighting logic coherent and maintains a believable 3D space.
Conclusion
Conclusively, adding a glow outline to the objects of a video or an image creates a dynamic impact. This article explored using an online facility for doing this job. After discovering the downsides of a browser-based platform, we suggested Filmora. This tool offers advanced functionality for outlining elements with a glow in your desired color. You can use multiple methods of adding a boundary for the objects in your visuals.
secure download 