
 100% Security Verified | No Subscription Required | No Malware


 ChatGPT
 Perplexity
 Gemini
 Claude
 Grok
Grok
Want to make a video square for social media but worried about cropping out key details? The 1:1 square video format is perfect for mobile feeds, but getting it right can be tricky. This comprehensive guide will show you exactly how to crop video to square and reframe it perfectly using Filmora on desktop and mobile. Discover simple step-by-step instructions to create professional square videos that stand out and boost engagement.
In this article
Part 1: How to Crop Video to Square Using Filmora
The square ratio video (1:1) is not just an aesthetic choice; it's strategic. It takes up more screen space on mobile feeds compared to landscape formats, drawing more attention without alienating desktop viewers. It's also more versatile than vertical, offering consistent performance across platforms.
Popular platforms supporting or prioritising the square video format include:
- Instagram (Feed posts, IGTV)
- Facebook (Feed, Ads)
- X (formerly Twitter)
- YouTube (on mobile view and Shorts)
These platforms automatically adjust square videos to fit viewer screens without awkward borders or trimming, making them an ideal choice for both organic and paid campaigns.

Best Practices for Square Video Framing
Framing a square video takes intention. The equal height and width leave little room for error, so every element counts.
- Keep Subjects centred: Unlike widescreen, square videos look best with the subject placed dead center. It keeps the viewer focused.
- Use Safe Margins: Leave space around text or logos. Platforms may crop corners or add icons, so avoid edge clutter.
- Shoot in High Resolution: You'll likely crop video square or reframe. You have the freedom to edit in either 1080p or 4K without sacrificing quality.
- Plan for Motion: If your subject moves, use auto reframe to keep them centred dynamically.
- Platform-Ready Visuals: Some platforms autoplay videos without sound, use strong visuals to grab attention.
- Always Preview: Before exporting, check how your square video looks on different platforms. Small tweaks = better engagement.
Part 2: How to Make a Square Video on Desktop
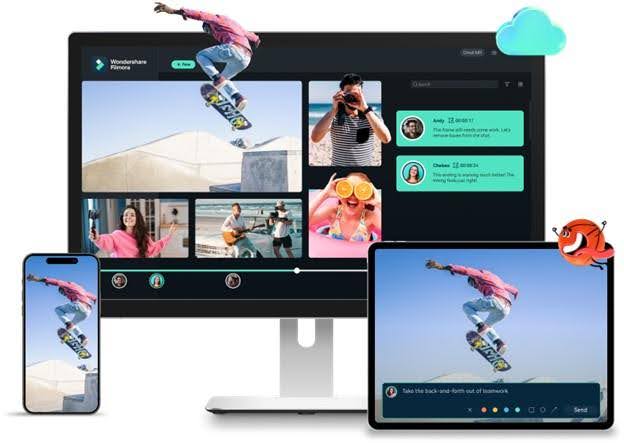
Creating a square video on a desktop gives you more control. Adjusting dimensions or cropping images is now much more precise. It's the most optimal choice if the goal is to maintain quality.
Programs such as Wondershare Filmora make everything seamless. You can adjust the square video size, track movement, and keep your subject centred. It also lets you export in the 1:1 format without extra plugins.
 secure download

Here are three easy ways to make your video square using Filmora's desktop version.
- Using the Cropping Tool
- Using the Auto Reframe
- Changing the Aspect Ratio
How to Make a Square Video by Cropping
One simple way to make a square video is by cropping it directly. Here's how to do it using Filmora on desktop:
Step 1: Add Your Video
Import your video into Filmora. You can start altering it by dragging it to the timeline.
secure download
Step 2: Crop to 1:1 Ratio
Click on the video in the timeline. After that, pick the Crop and Zoom tool that's up there on the timeline. A new window will open. From the ratio options, choose 1:1. Clck Apply.

Step 3: Export Your Video
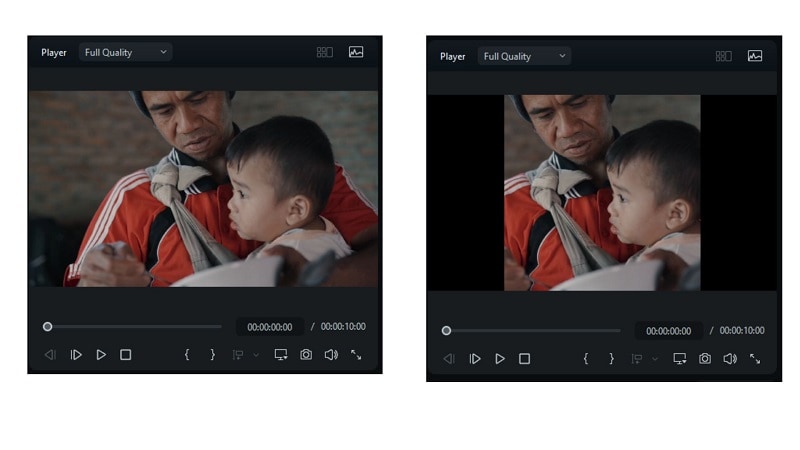
Click Export at the top. Choose the Local tab, pick a format, and click Settings if you want to adjust quality. When ready, click Export again to save your new square video.
Take a look at the results before and after adjustments.
How to Make a Video Square Without Cropping (Auto Reframe)
Filmora features Auto Reframe that helps you create a square video while keeping your subject in focus without manual cropping. Here's how to use it:
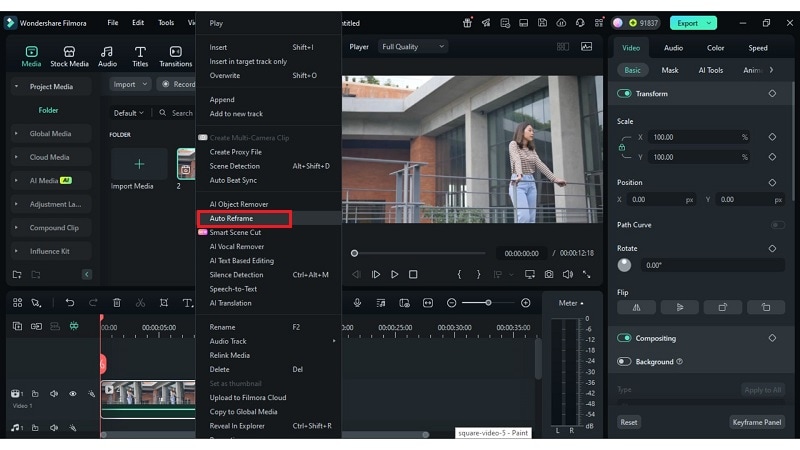
Step 1: Access the Auto Reframe Feature
Right-click the video in the media panel. Select Auto Reframe from the menu.
secure download
Step 2: Pick the Aspect Ratio
Choose 1:1 Square from the list. The tool will begin reframing your video right away. In the display window, you can preview the result.
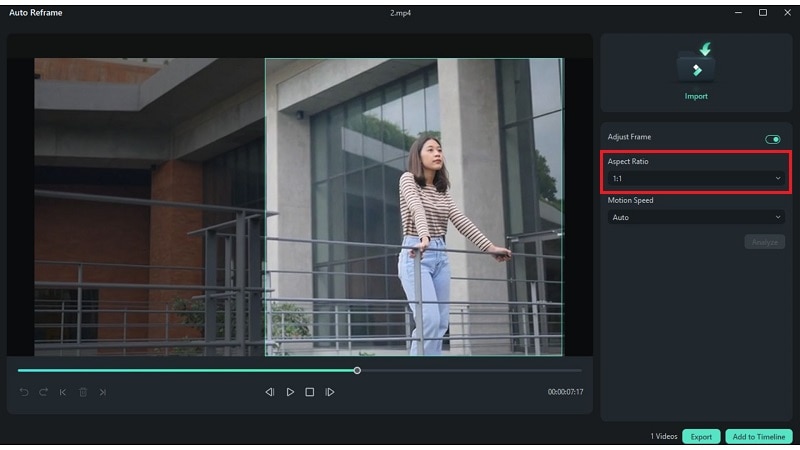
Turn on Adjust Frame to move the box manually. Drag it to focus on the part you want. When done, click Add to Timeline if you wish to edit it further. Or, click Export to save your square video.
How to Change the Aspect Ratio to Make a Video Square
Changing the project's aspect ratio is a fast way to create a square video without cropping anything. It gives you full control from the start. Follow these steps:
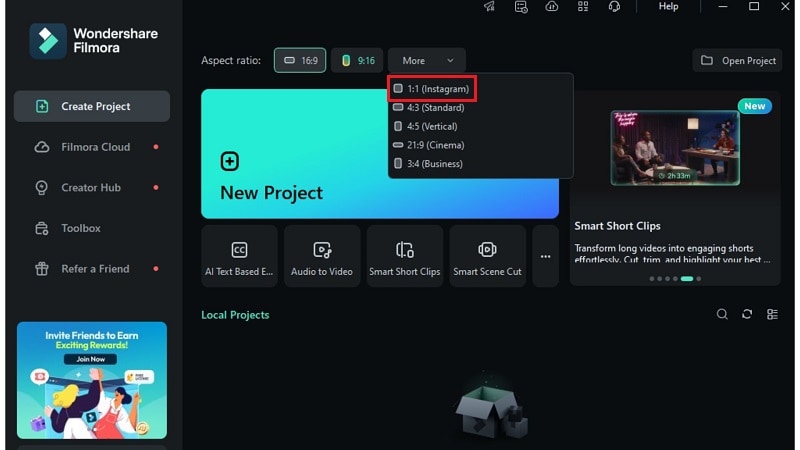
Step 1: Start a New Project in a Square Format
On Filmora's start screen, you can select the square ratio video (1:1) before starting a new project.
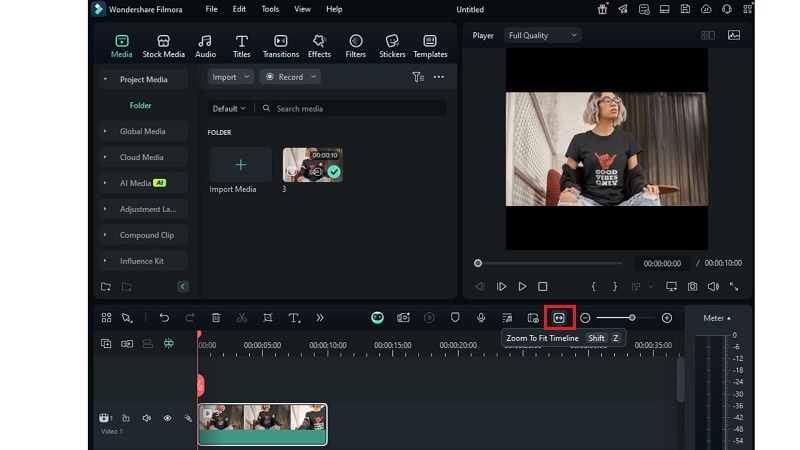
Step 2: Modify the Video to Fit Within the Square Borders
After that, import your video and add it to the timeline. The square frame may not be completely filled if your video was recorded in a different format, for example, 16:9. You can:
- Zoom in to fill the frame,
- Or add blurred background or borders for balance.
Part 3: How to Make a Video Square on Mobile
Editing on the go? You can also make a video square on mobile using the Filmora app:
- Using the crop tool
- Changing the video aspect ratio or format
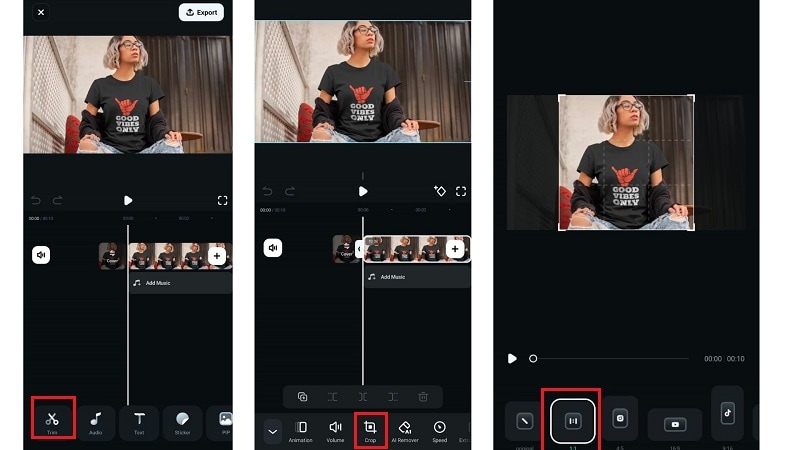
How to Crop a Video to Square
- Launch the Filmora mobile app and import your video.
- Tap on the video clip, then select Trim > Crop.
- You'll see several aspect ratios. Tap 1:1 to switch to the square video size.
- Drag the crop box to center your subject. Make sure nothing important gets cut off.
- Tap Done to save the crop and return to your main edit screen.
How to Change Video Aspect Ratio to Square
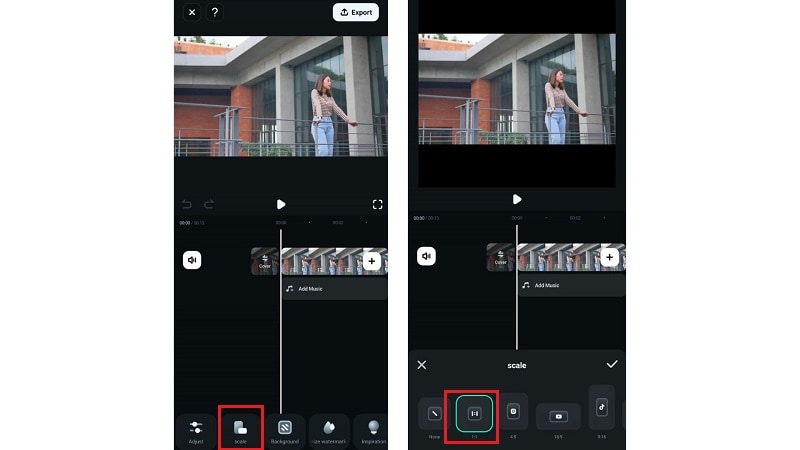
- Tap on the Formator Canvas button in the toolbar after importing your video
- Choose 1:1 from the aspect ratio presets to turn your timeline into a square.
- Resize or reposition the video to center it within the square frame. You can also add a background if needed.
- Add effects, music, or text as needed. Then export your finished square video.
Part 4: Shooting Your Video in a Square Format
You can edit to get the perfect square video. Most smartphones allow you to shoot and crop directly within the gallery or Camera. Here's a step-by-step guide:
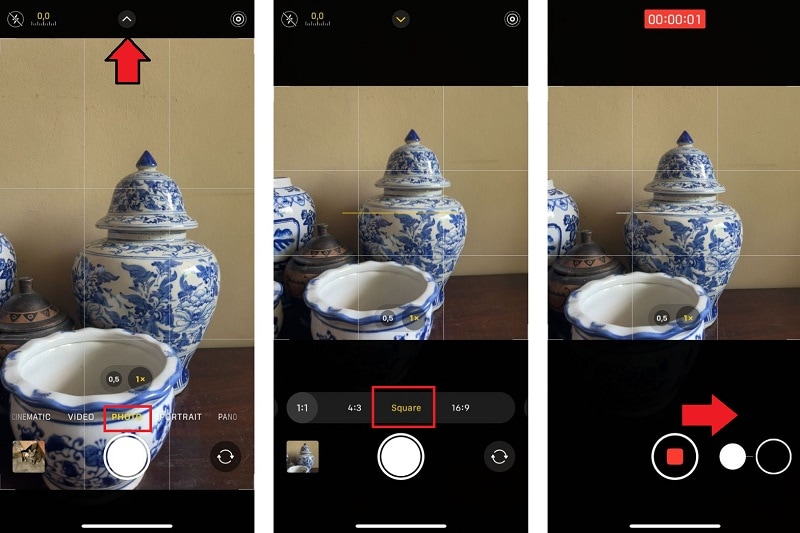
For iPhone Devices:
- Open the Cameraapp and switch to Photo
- Tap the arrow (^) at the top, then select the 4:3 icon and change it to Square (1:1).
- Long-press the shutter button to start recording video in square frame size. Release to stop.
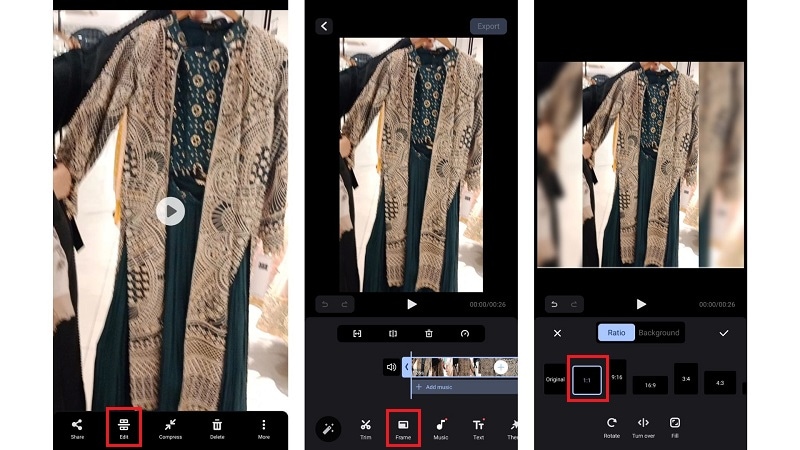
For Android Devices:
- Launch your phone's default camera. Capture the video as you normally would. Try to keep your subject centred in the frame.
- Go to your gallery or camera roll and select the video you just recorded. Click the Edit button to begin making changes.
- Look for a Frame or Crop tool, usually shown with a square icon. From the list of ratios, select 1:1 to turn the video into a square format. Tap Done or Save.
Your video will now be saved in the square video size, ready to post.
Conclusion
A well-framed square video is more than a format; it's a strategy. From adjusting aspect ratios to using auto reframe, the right steps make the process smooth. You've now seen how to edit on desktop, on mobile, and even how to shoot in square mode.
Filmora supports every stage, offering easy tools for cropping, resizing, and motion tracking. No need to crop video square manually and risk losing key content. With the right method and a smart workflow, you can turn ordinary clips into scroll-stopping square content that fits every screen and every feed.
secure download
